Why Are My Textures Stretched? 4 Easy Fixes
TL;DR
- Stretched textures in Blender are almost always a UV mapping problem.
- The fastest diagnosis: enable the Stretch overlay in the UV Editor — red areas indicate high stretch.
- Most common fix: apply scale with Ctrl+A before unwrapping.
- Best-quality fix: place seams manually along natural borders, then Unwrap.
- Tripo AI models export with UV maps and PBR textures already baked in.
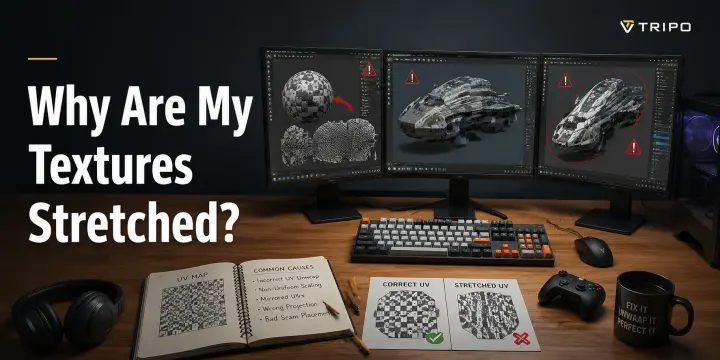
Have you ever applied a perfectly good texture to your model, only to see it turn into a stretched, warped, or smeared mess? You add a brick wall texture, and instead of clean bricks, the pattern gets pulled into long distorted lines across the surface. Textures stretch when the UV map doesn't match the shape of your mesh. In most cases, the problem comes from incorrect UV mapping rather than the texture itself. This guide explains the four main causes of texture stretching, how to identify problem areas using Blender’s UV Editor, and four practical fixes ranked by different use cases. We’ll go from understanding the root causes to choosing the right repair method, so you can quickly find the solution that fits your workflow.
What Causes Texture Stretching? (4 Root Causes)
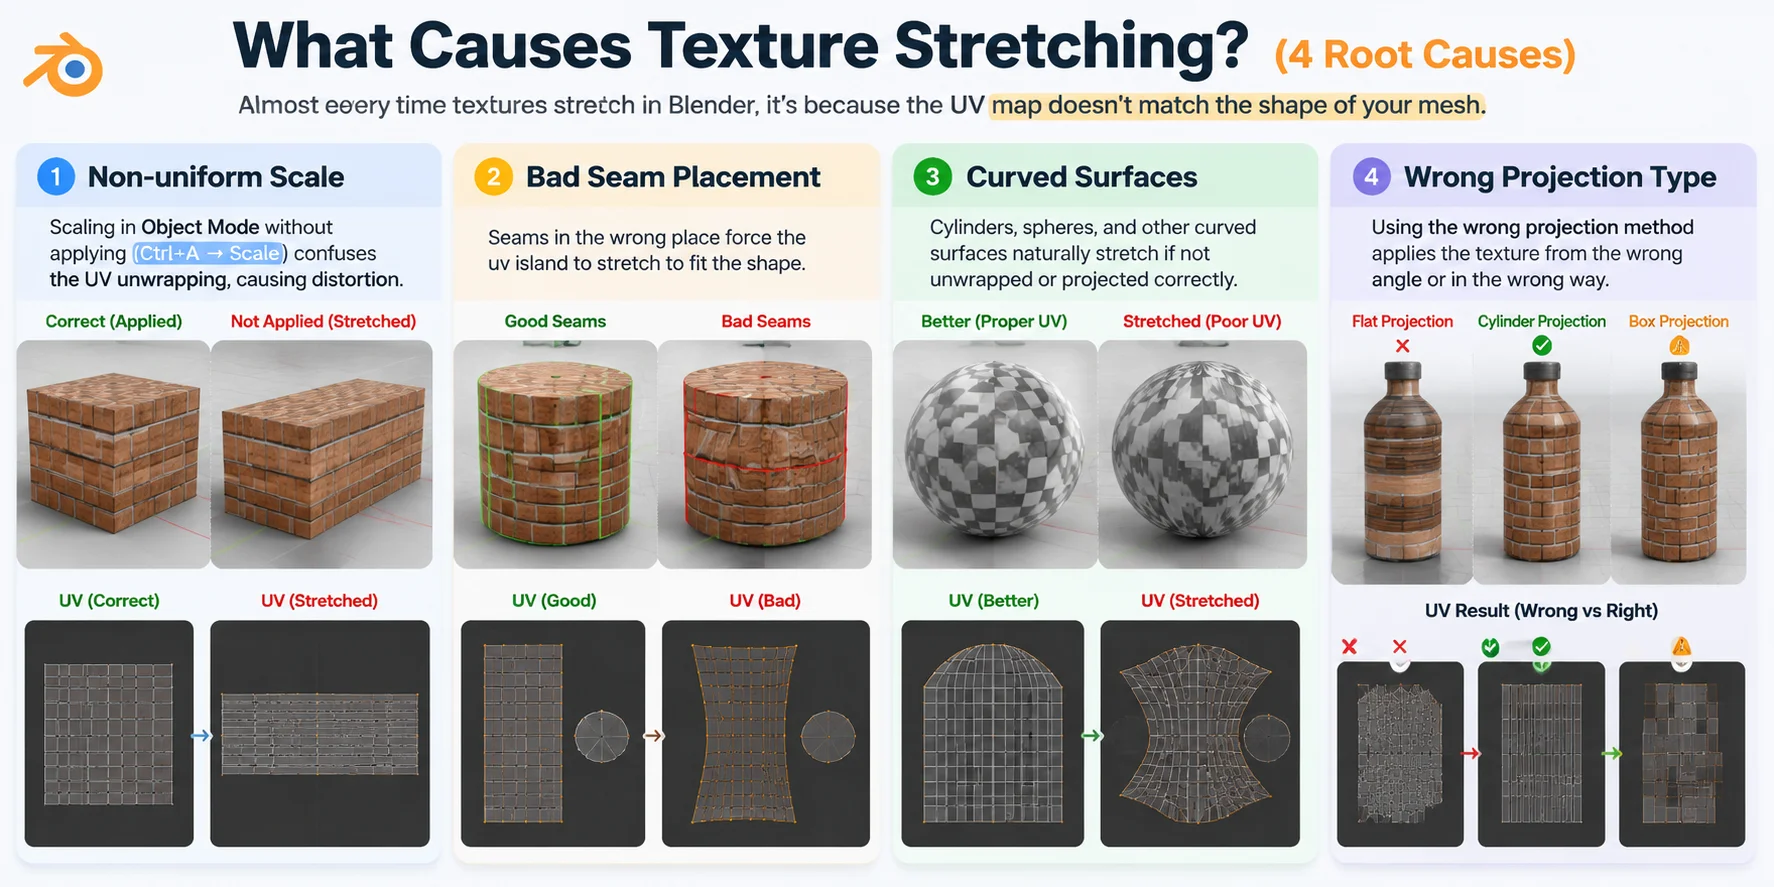
Cause 1 — Non-uniform Scale
One of the most common reasons for texture stretching is scaling a mesh in Object Mode without applying the scale. Blender’s UV tools read the original mesh dimensions, not the visible size changes, which causes incorrect UV proportions. For example, if you flatten a sphere by scaling it wider or thinner but don’t apply the scale, the UV layout may unwrap into a distorted rectangle instead of matching the new shape.
Cause 2 — Bad Seam Placement
UV seams act like cuts that allow Blender to unfold a 3D surface into a 2D image. When seams are placed in the wrong areas, the UV islands have to stretch to fit the shape. For example, cutting a seam through the middle of a curved helmet surface forces that area to flatten unnaturally, causing the texture pattern to pull and warp.
Cause 3 — Curved Surfaces
Curved objects are naturally difficult to unwrap because a 3D surface cannot be perfectly flattened without some distortion. This is the same reason a world map stretches near the poles. For example, a texture wrapped around a cylinder or sphere will often become compressed or elongated if the UV layout does not properly account for the curved shape.
Cause 4 — Wrong Projection Type
The projection method must match the shape of the object. Using the wrong type can create immediate distortion because the texture is being placed from an unsuitable angle. For example, applying Flat Projection to a round bottle or Box Projection to an organic character mesh can cause textures to stretch, overlap, or appear uneven across the surface.
How to Diagnose UV Stretch in Blender
Before fixing texture stretching, you need to find exactly where the distortion happens. Blender has a built-in UV Stretch visualization that many beginners overlook. It highlights problem areas directly on your mesh, making it much easier to identify whether the issue comes from your UV layout.
Follow these steps to check UV stretch:
- Select your mesh and enter Edit Mode Click the object you want to inspect, then press Tab to switch from Object Mode to Edit Mode. UV Stretch only works when you are editing the mesh itself.
- Select all faces Press A to select the entire mesh. If only part of the model is selected, Blender will only display stretch information for those faces.
- Open the UV Editor Switch to the UV Editing workspace at the top of Blender, or split your current layout and change one panel to the UV Editor. You should now see both the 3D mesh and its UV layout.
- Enable UV Stretch visualization In the UV Editor header, click the Overlays dropdown (the arrow next to the two-circle icon), then enable Stretch. Blender will immediately apply a color overlay showing where UV distortion occurs.
- Read the Stretch Colors
The color display tells you how severe the problem is:
- Blue = Low or no stretch: The UV layout matches the 3D surface well, and textures should appear correctly.
- Green = Moderate stretch: Some distortion exists, but it may be acceptable depending on the material and viewing distance.
- Red = High stretch: The UVs are heavily distorted, and textures will likely appear warped, pulled, or compressed in these areas.
You can also switch between two stretch measurement modes:
- Area Stretch: Shows whether UV islands maintain the correct surface proportions. It is useful for detecting scaling differences.
- Angle Stretch: Shows whether the UV edges are being twisted or sheared, which often happens on curved or complex surfaces.
Pro tip: In Blender 3.x and newer versions, you can also check stretch directly in the 3D Viewport by enabling Overlay → UV Stretch. This lets you see problem areas directly on the model without switching back and forth between editors.
Once you find the red areas, you know exactly where the texture will break. In the next section, we’ll cover four methods to eliminate UV stretch and choose the right fix for your workflow.
Fix Method 1 — Apply Scale Before Unwrapping
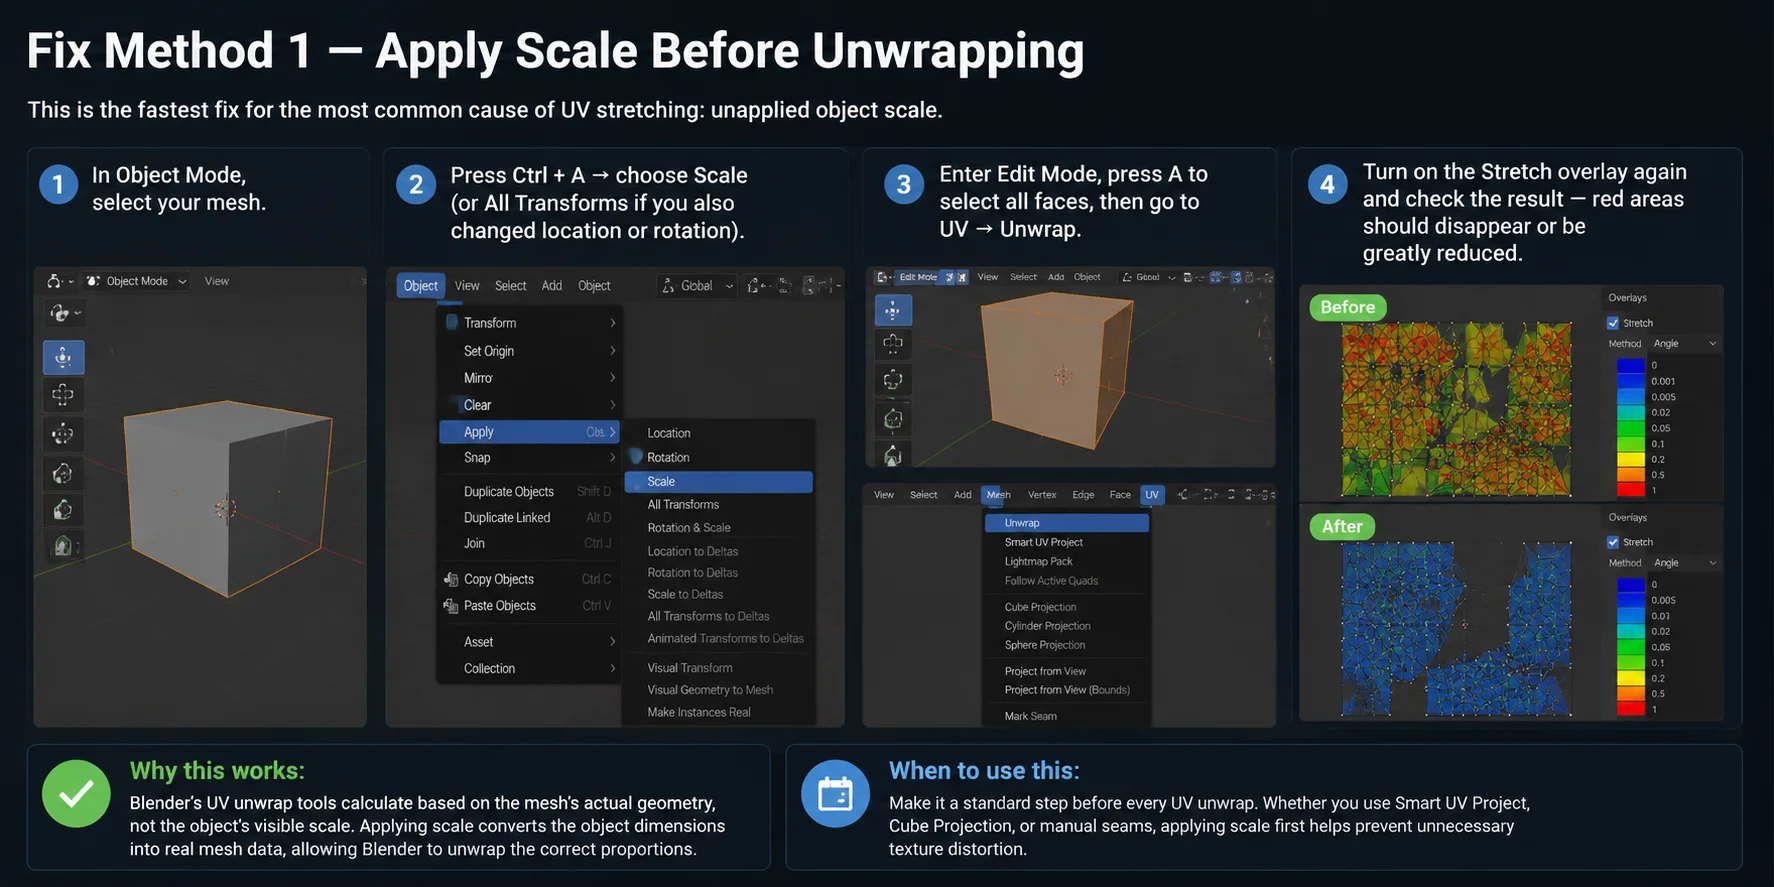
This is the fastest fix for the most common cause of UV stretching: unapplied object scale.
- In Object Mode, select your mesh.
- Press Ctrl + A → choose Scale (or All Transforms if you also changed location or rotation).
- Enter Edit Mode, press A to select all faces, then go to UV → Unwrap.
- Turn on the Stretch overlay again and check the result — red areas should disappear or be greatly reduced.
Why this works: Blender’s UV unwrap tools calculate based on the mesh’s actual geometry, not the object’s visible scale. Applying scale converts the object dimensions into real mesh data, allowing Blender to unwrap the correct proportions.
When to use this: Make it a standard step before every UV unwrap. Whether you use Smart UV Project, Cube Projection, or manual seams, applying scale first helps prevent unnecessary texture distortion.
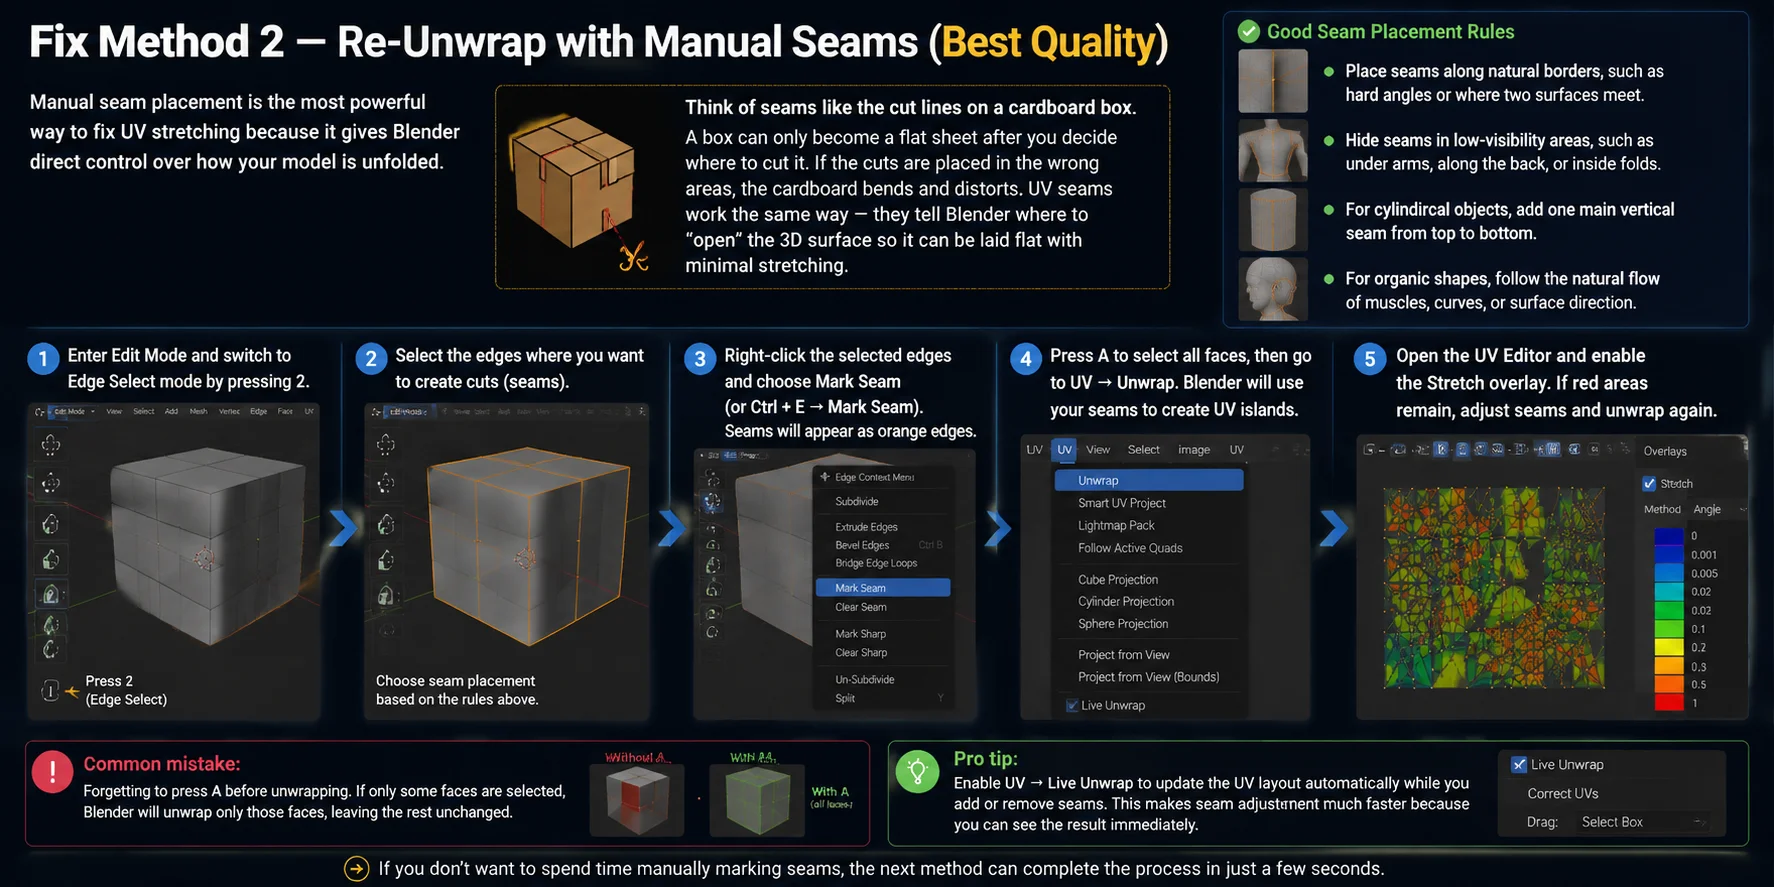
Fix Method 2 — Re-Unwrap with Manual Seams (Best Quality)
Manual seam placement is the most powerful way to fix UV stretching because it gives Blender direct control over how your model is unfolded.
Think of seams like the cut lines on a cardboard box. A box can only become a flat sheet after you decide where to cut it. If the cuts are placed in the wrong areas, the cardboard bends and distorts. UV seams work the same way — they tell Blender where to “open” the 3D surface so it can be laid flat with minimal stretching.
- Enter Edit Mode and switch to Edge Select mode by pressing 2.
- Select the edges where you want to create cuts. Good seam placement follows these rules:Place seams along natural borders, such as hard angles or where two surfaces meet.Hide seams in low-visibility areas, such as under arms, along the back, or inside folds.For cylindrical objects, add one main vertical seam from top to bottom.For organic shapes, follow the natural flow of muscles, curves, or surface direction.
- Right-click the selected edges and choose Mark Seam (or press Ctrl + E → Mark Seam). Marked seams will appear as orange edges.
- Press A to select all faces, then go to UV → Unwrap. Blender will use your seams to create UV islands.
- Open the UV Editor and enable the Stretch overlay. If red areas remain, adjust your seam placement and unwrap again.
Common mistake: Forgetting to press A before unwrapping. If only some faces are selected, Blender will unwrap only those faces, leaving the rest unchanged.
Pro tip: Enable UV → Live Unwrap to update the UV layout automatically while you add or remove seams. This makes seam adjustment much faster because you can see the result immediately.
If you don’t want to spend time manually marking seams, the next method can complete the process in just a few seconds.
Fix Method 3 — Smart UV Project (Quick Fix for Hard-Surface)
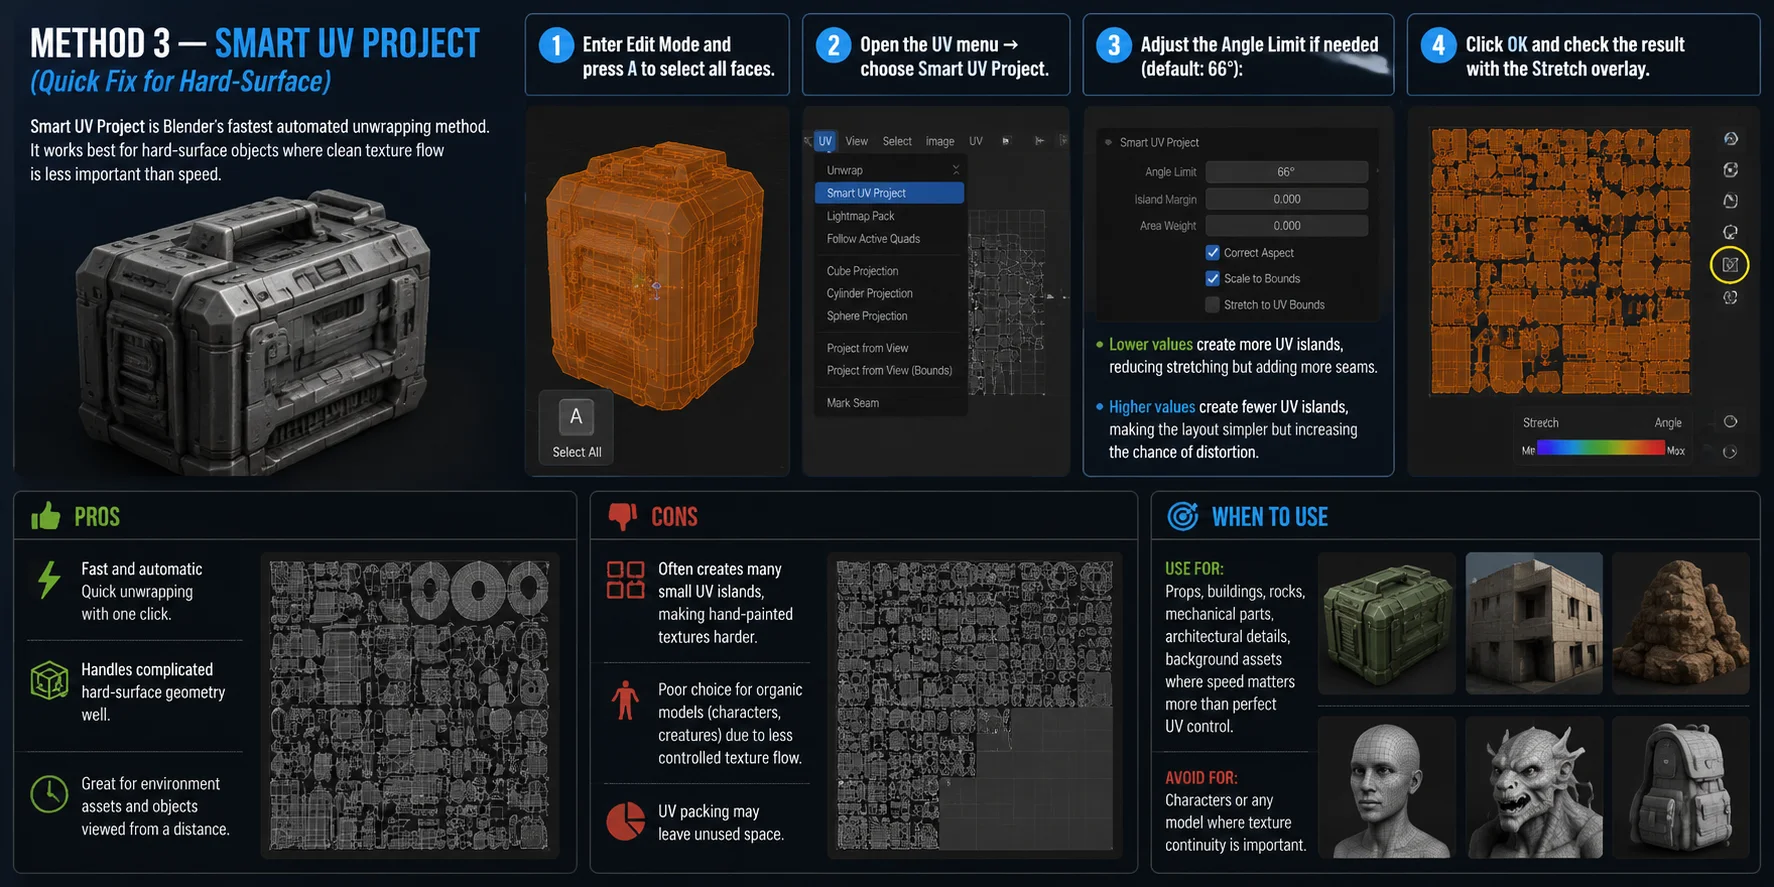
Smart UV Project is Blender’s fastest automated unwrapping method. It works best for hard-surface objects where clean texture flow is less important than speed.
- Enter Edit Mode and press A to select all faces.
- Open the UV menu → choose Smart UV Project.
- Adjust the Angle Limit if needed (default: 66°):Lower values create more UV islands, reducing stretching but adding more seams.Higher values create fewer UV islands, making the layout simpler but increasing the chance of distortion.
- Click OK and check the result with the Stretch overlay.
Pros: Smart UV Project is fast, automatic, and handles complicated hard-surface geometry well. It is a good choice for environment assets, mechanical parts, architectural details, and objects viewed from a distance.
Cons: It often creates many small UV islands, which makes hand-painted textures harder. It is also a poor choice for organic models like characters or creatures because texture direction and surface flow are less controlled. UV packing may also leave unused space.
When to use: Use it for props, buildings, rocks, and background assets where speed matters more than perfect UV control. Avoid it for characters or any model where texture continuity is important.
Fix Method 4 — Fix Texture Tiling with the Mapping Node
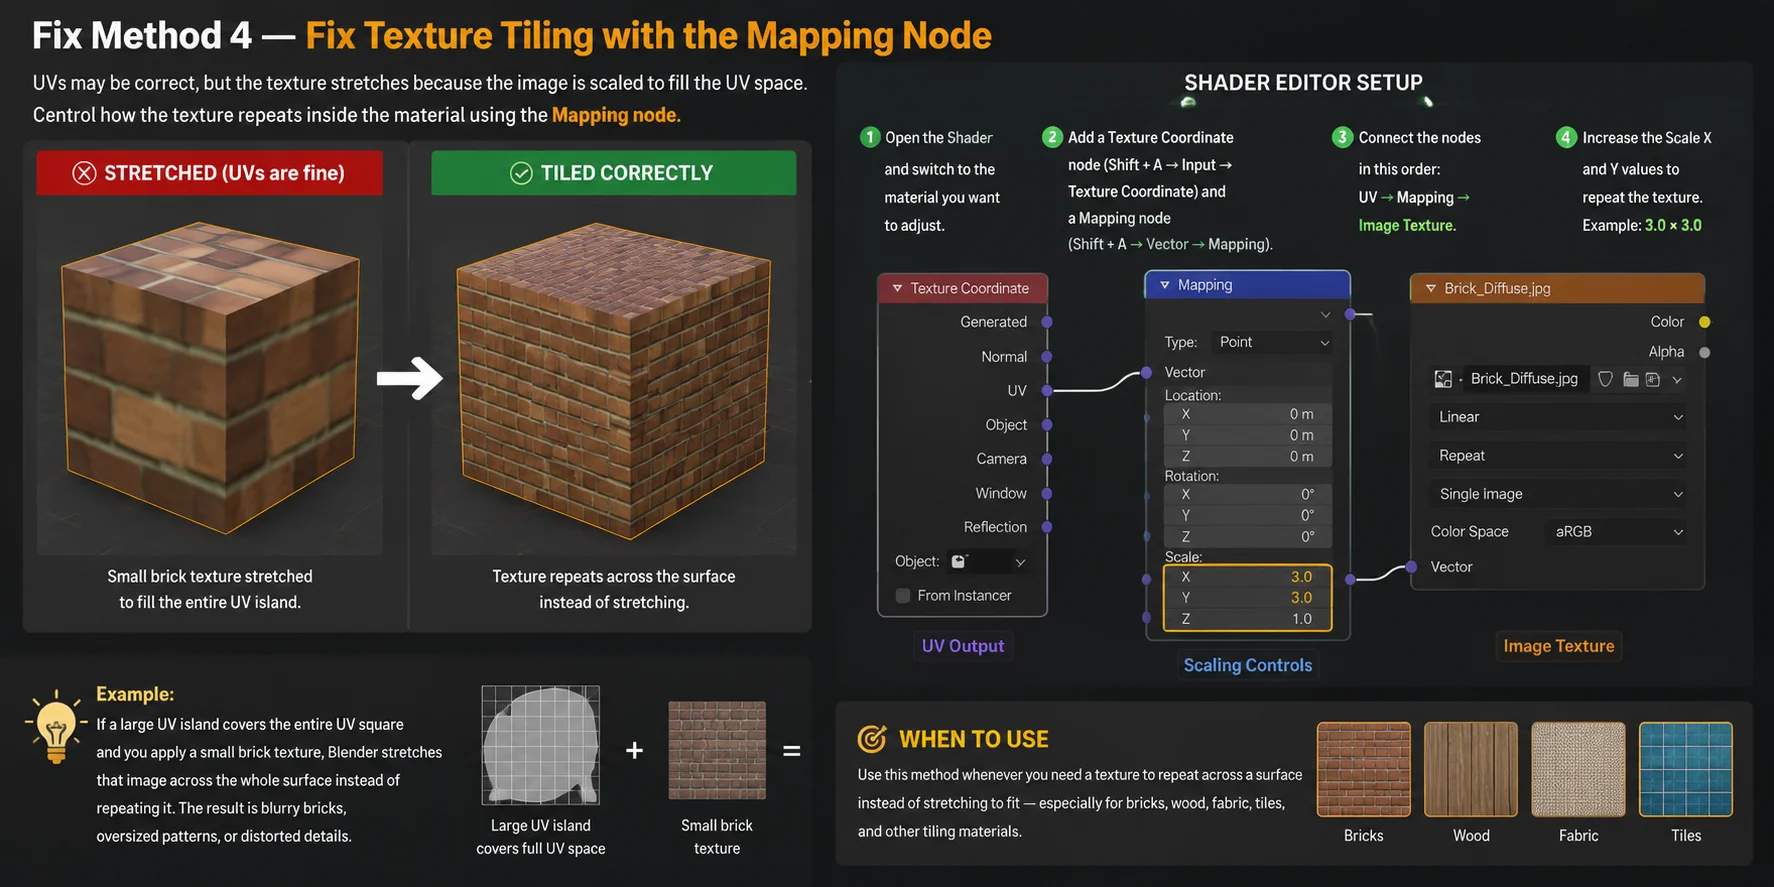
Sometimes the UV layout is not the problem. Your UVs may be perfectly correct, but the texture still looks stretched because the shader is scaling the image to fill the UV space. In this case, fixing seams or re-unwrapping will not help — you need to control how the texture repeats inside the material.
For example, if a large UV island covers the entire UV square and you apply a small brick texture, Blender stretches that image across the whole surface instead of repeating it. The result is blurry bricks, oversized patterns, or distorted details.
Shader Editor Fix:
- Open the Shader Editor and switch to the material you want to adjust.
- Add a Texture Coordinate node: Shift + A → Input → Texture Coordinate Then add a Mapping node: Shift + A → Vector → Mapping
- Connect the nodes in this order: Texture Coordinate (UV output) → Mapping (Vector input) → Image Texture (Vector input)
- In the Mapping node, increase the Scale X and Y values to repeat the texture. For example, setting Scale to 3.0 × 3.0 makes the texture tile three times across the UV space.
When to use: Use this method whenever you need a texture to repeat across a surface instead of stretching to fit — especially for bricks, wood, fabric, tiles, and other tiling materials.
Skip UV Work Entirely — Start with a Model That Already Has Clean UVs
If you are spending more time fixing UV problems than actually creating, there is often a deeper reason: you started with a mesh that was never properly UV-mapped in the first place.
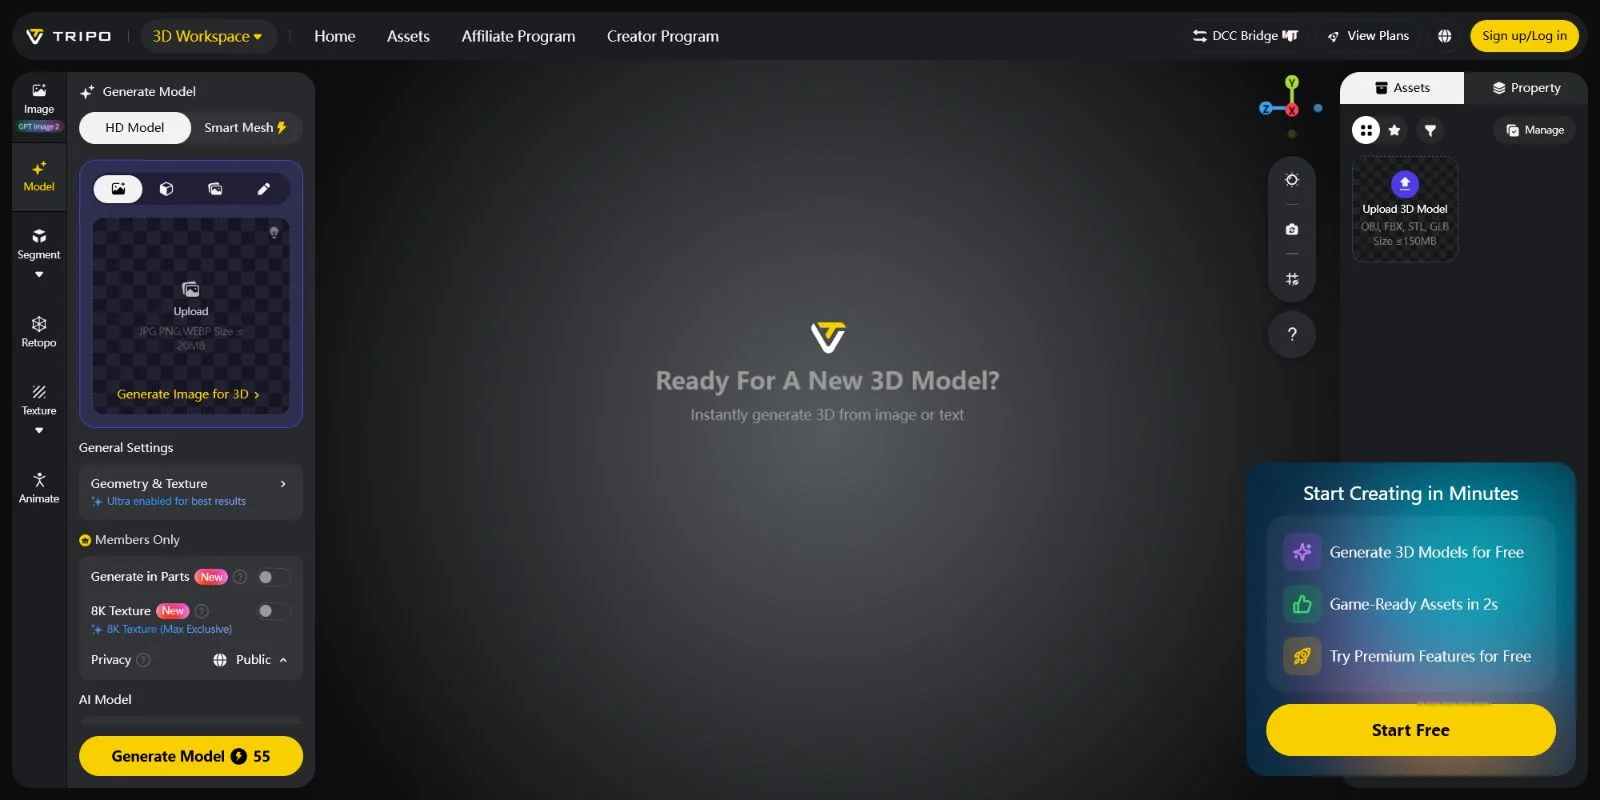
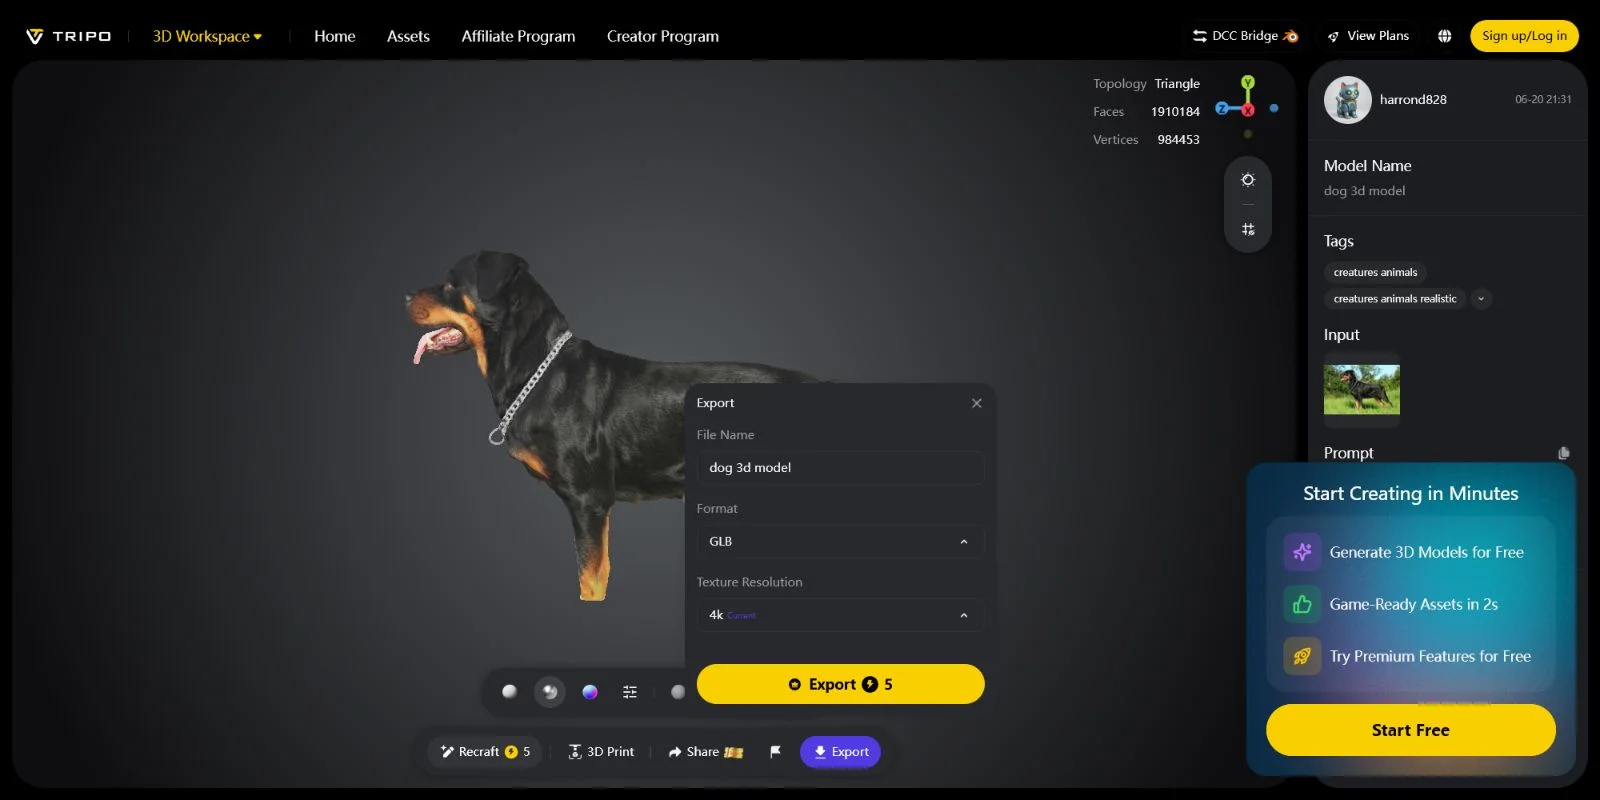
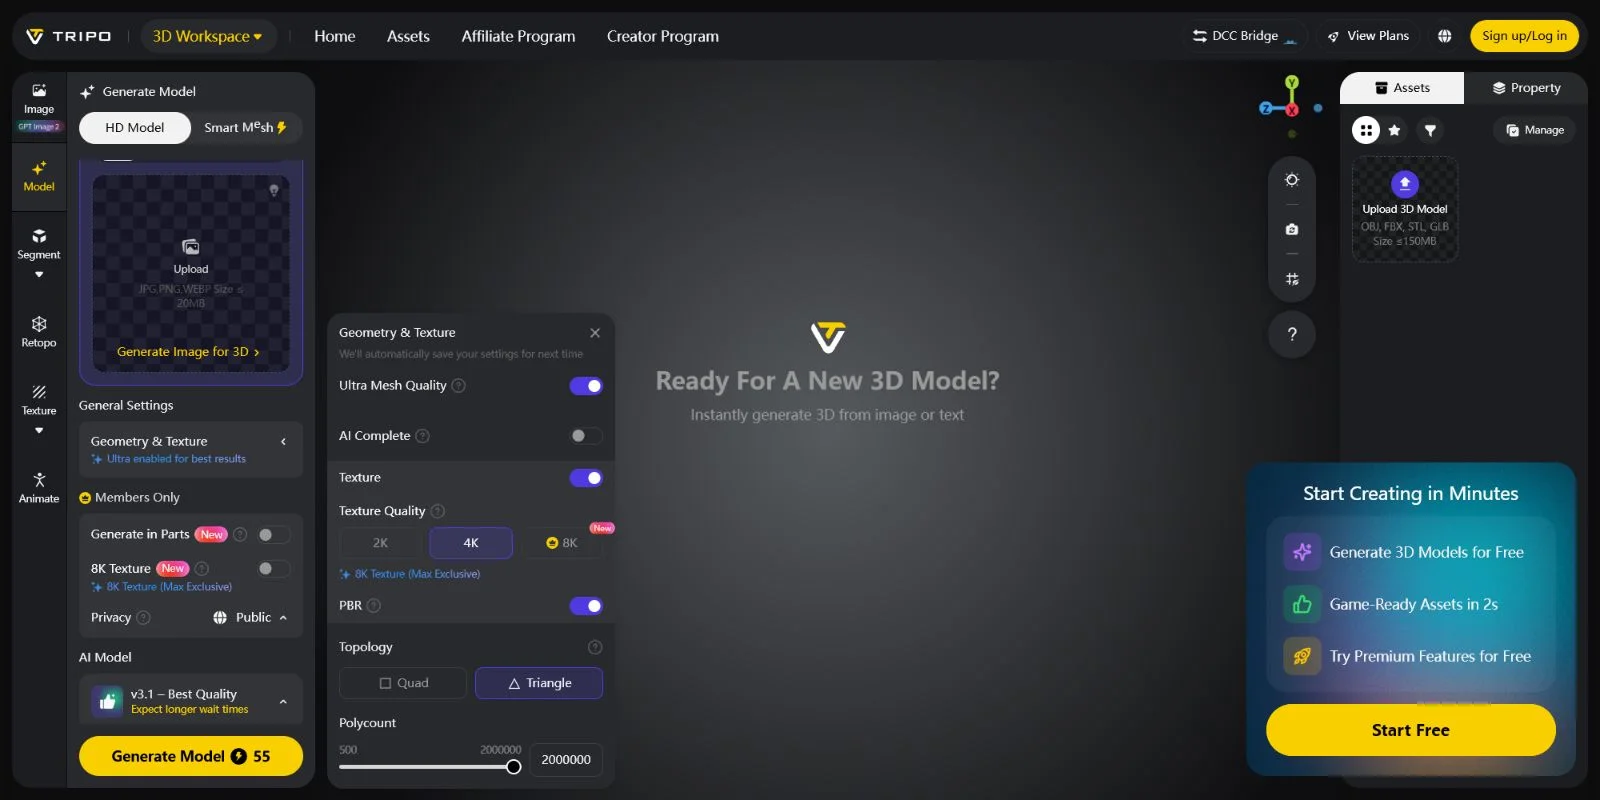
Instead of repairing stretched textures after the fact, another workflow option is to begin with a model that already includes clean UVs. Tripo AI generates 3D models with UV maps and baked PBR textures, so when you export the model as GLB or FBX and bring it into Blender, materials can display correctly without manual unwrapping.
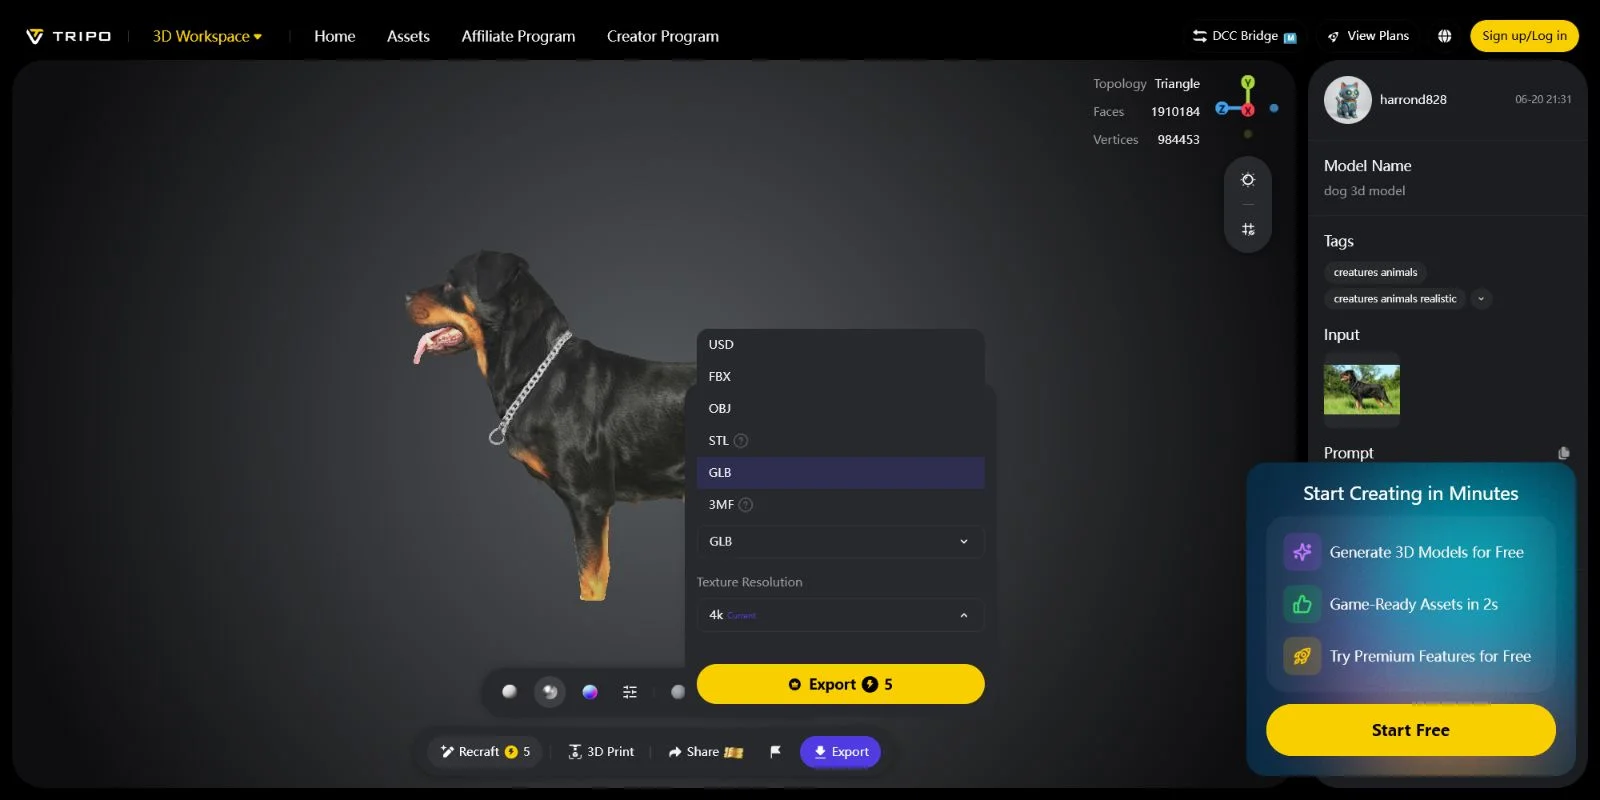
A practical workflow is to use Tripo AI for the base asset, then make any custom edits, sculpting, or style changes in Blender. You start with a textured, UV-ready model instead of an empty mesh that requires setup from scratch.
For Blender users, the Tripo DCC Bridge provides a streamlined one-click import workflow: https://www.tripo3d.ai/blog/tripo-dcc-bridge-for-blender
If UV cleanup is slowing down your creative process, starting with a UV-ready model can be a more efficient approach. You can try it free — details at the end of this article.
Frequently Asked Questions
How do I fix stretched textures in Blender?
The fastest fix is to apply your object's scale before unwrapping: in Object Mode, press Ctrl+A and choose Scale, then re-unwrap. For a higher-quality result, place UV seams manually along natural edges, mark them (Ctrl+E → Mark Seam), then run Unwrap. Use the Stretch overlay in the UV Editor (Overlays → Stretch) to verify the result shows mostly blue.
Why do my UV maps look stretched?
UV maps look stretched when the unwrapper can't flatten the mesh geometry without distortion — usually because the object's scale hasn't been applied, seams are placed badly, or the mesh has highly curved surfaces with too few cuts. Open the UV Editor, enable the Stretch overlay, and look for red areas — those are where the distortion is worst.
How do I stop textures from stretching?
The most reliable way to stop texture stretching is to use manual seam placement combined with Unwrap — this gives Blender the most information about how to flatten your mesh cleanly. For curved surfaces, add more seams to break up the geometry into smaller, more manageable UV islands. Applying scale (Ctrl+A) before unwrapping is a prerequisite.
What causes texture stretching in 3D models?
Texture stretching is caused by a mismatch between the 3D mesh surface and its flattened UV representation. The four main causes are: unapplied scale (the most common), poorly placed UV seams, curved geometry without enough cuts, and using the wrong projection type for the mesh shape. Each cause has a direct fix, and they're often found in combination.
What is the difference between Smart UV Project and manual Unwrap?
Smart UV Project is automated — Blender analyzes face angles and cuts the mesh wherever it sees a sharp enough angle, producing many small islands quickly. Manual Unwrap gives you control over exactly where the seams go, producing fewer, larger islands with better texture continuity. Smart UV Project works well for hard-surface props that won't be texture-painted; manual Unwrap is better for characters, organic shapes, and any surface where texture flow matters.
How do I check for UV stretch in Blender?
In Edit Mode with your mesh selected, open the UV Editor and click the Overlays dropdown in its header. Enable "Stretch" — the mesh will be color-coded from blue (no stretch) to red (high stretch). Check both "Area" and "Angle" modes: Area reveals proportional scaling errors; Angle reveals shearing distortion. Red areas are where you need more seams or a different unwrap method.
How do I make a texture tile instead of stretch?
Add a Mapping node and a Texture Coordinate node in the Shader Editor. Connect Texture Coordinate (UV) → Mapping → Image Texture, then increase the Scale X and Y values in the Mapping node. A Scale value of 3.0 repeats the texture 3 times across the UV space, giving you a tiling effect without touching the UV layout.
Why do curved surfaces always look stretched even after unwrapping?
Curved surfaces are geometrically harder to flatten than flat ones — flattening a sphere always introduces some distortion, just like a map of the Earth does. The solution is to add more seams that break the curved surface into smaller sections, reducing the amount each section must be distorted to lie flat. Using Cylinder or Sphere projection for the appropriate shapes also helps.
Does texture stretching affect 3D printing?
Texture stretching is a rendering issue and doesn't affect the 3D geometry itself, so it won't cause problems with 3D printing — slicers read mesh geometry, not UV maps or textures. However, if you're printing a model with color (e.g., on a multi-material printer), stretched textures will appear distorted on the print surface. Fix the UVs before exporting to your slicer if color accuracy matters.
Can I avoid UV unwrapping altogether?
Yes, with procedural textures you can skip UV maps entirely — Blender's Noise, Wave, and Musgrave nodes generate textures based on 3D coordinates, not UV space. For image-based textures, you can also use Texture Coordinate → Object output to project the texture through the object's local space, though this won't give you precise control. Alternatively, starting with an AI-generated model from Tripo AI gives you a mesh that already has UV maps baked in, removing the need to unwrap from scratch.
Conclusion
In summary, stretched textures are usually a UV mapping issue with clear and fixable causes, not a problem with the texture file itself. The next time you encounter texture distortion, apply scale, place seams carefully, and use the Stretch Overlay to identify problem areas quickly. For creators who want to spend less time troubleshooting UV issues and more time building, Tripo AI provides a faster workflow with models that already include UV maps and PBR textures.
Try Tripo AI Studio — generate a UV-mapped 3D model in seconds **View **Tripo AI Pricing