AI Lithophane Generator: What It Does and How to Print
TL;DR
- A lithophane generator turns a photo into a 3D relief by converting grayscale values into thickness.
- AI improves the source image with upscaling, denoising, and background removal, but does not create the relief geometry.
- For clear prints, use 0.08–0.12 mm layer height, 0.6–3.2 mm thickness, vertical printing, and white PLA.
A lithophane generator converts a photo into a 3D-printable relief by mapping image brightness to material thickness: dark pixels become thick walls that block light, bright pixels become thin walls that glow. An AI lithophane generator adds AI on the image side — upscaling, denoising, background removal — while the geometry itself stays deterministic math.
The top result for "lithophane generator" isn't a tool at all. It's a Reddit thread where someone writes: "I just found out about lithophanes, and wanted to try it out. Do you guys have recommendations for what the best lithophane generator is..." This guide explains how lithophane generators work, where AI improves the workflow, and the specific 3D printing settings you need to create clear, detailed photos that glow when backlit.
What Is a Lithophane Generator (and Where AI Fits)
A lithophane is a thin 3D relief that reveals an image when light passes through it. Originally made from porcelain in the 19th century, lithophanes can now be created easily with an FDM 3D printer.
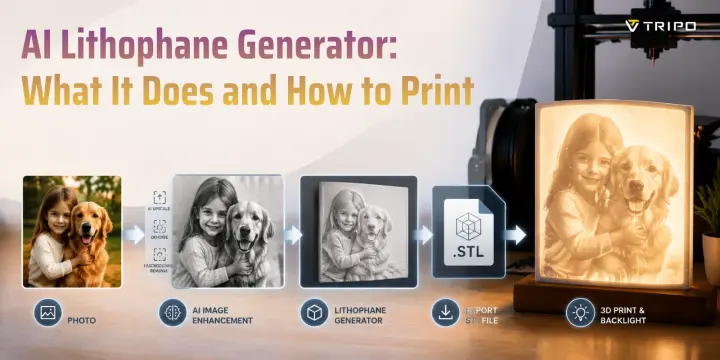
A modern lithophane generator online converts an image into a heightmap relief. It reads each pixel’s grayscale value (0–255) and changes it into a thickness value. Dark areas become thicker, and bright areas become thinner.
The result is a grayscale to STL workflow that creates a printable lithophane STL file.
This process is not an AI-generated mesh. It is a deterministic calculation. The same image with the same settings will always create the same 3D shape.
So, what does an AI lithophane maker actually do? AI helps before the conversion step. It can improve low-resolution photos, remove noise, clean backgrounds, and increase contrast. The relief generation itself works without AI.
Grayscale to STL Conversion: How Lithophane Depth Is Created
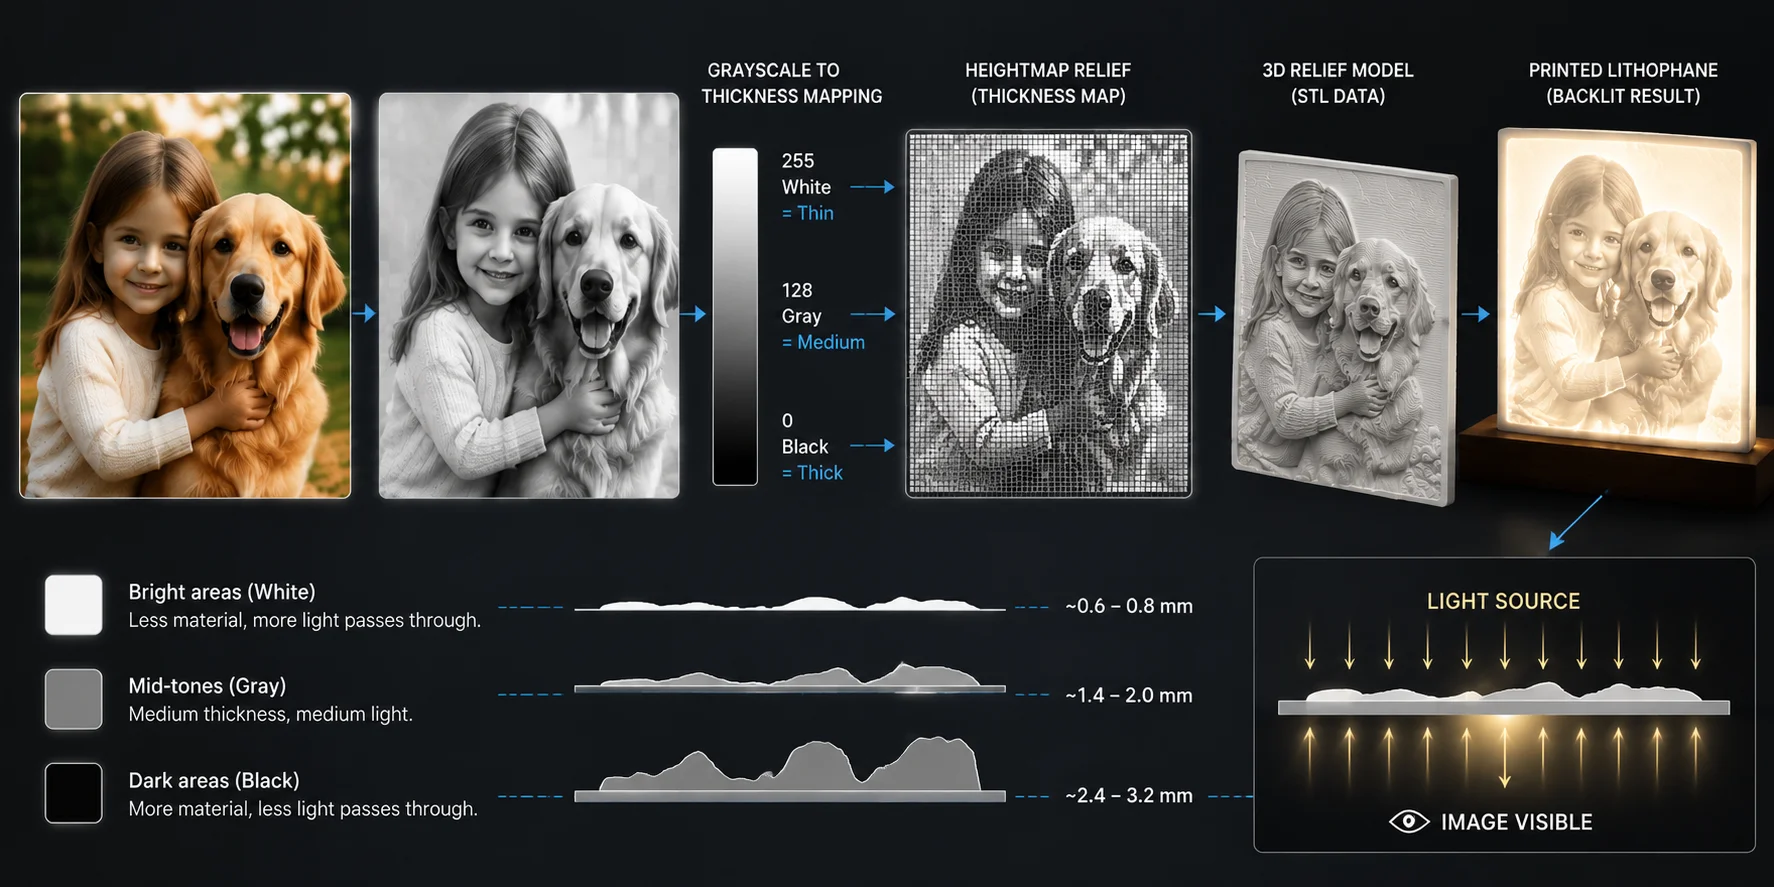
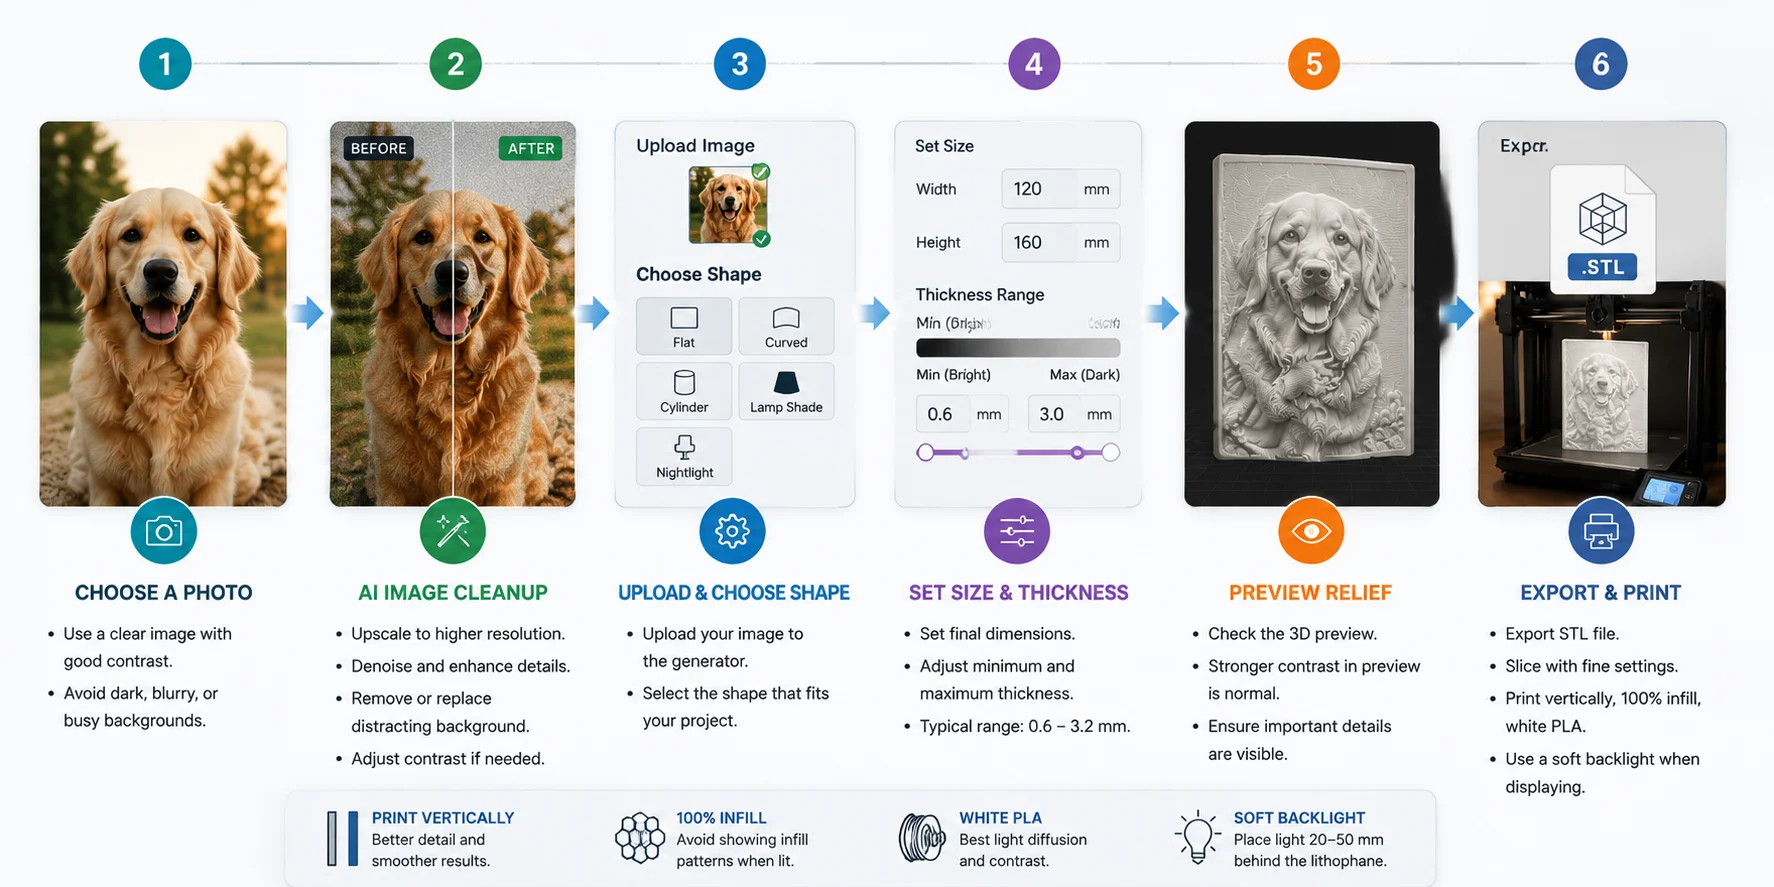
How to Create a Lithophane From a Photo, Step by Step
Creating a lithophane from a photo is a simple workflow: prepare the image, convert it into a relief, adjust the print settings, and export the STL file. Follow these steps to get a cleaner result.
Pick a photo that survives the conversion
Start with a photo that has high contrast, a clear subject, and a clean background. Portraits, pets, and close-up objects usually work well because their shapes create stronger depth changes.
Avoid common problem images, such as backlit portraits where the face is hidden in shadow or dark night photos with little visible detail. A lithophane generator can only convert the information already present in the image.
Prep the image (this is the AI part)
This is the main step where AI improves the workflow.
Before uploading your image, use AI tools to:
- Upscale the photo until the shorter side reaches around 1,500 pixels or higher
- Remove camera noise and compression artifacts
- Remove distracting backgrounds
- Slightly improve mid-tone contrast
The goal is not to create a new image, but to give the lithophane generator cleaner grayscale information to convert into depth.
Load it into a lithophane generator
Upload your prepared image into a lithophane generator and choose the shape that matches your project:
- Flat — best for framed photos
- Curved — useful for decorative panels
- Cylinder — popular for lamp designs
- Lamp shade — creates wraparound lighting effects
- Nightlight — designed for compact illuminated prints
Different shapes change how the light spreads through the final print.
Set physical size and thickness
Define the final print dimensions first, then adjust the minimum and maximum thickness values.
The size determines the overall scale, while thickness controls how much light passes through each area. The specific thickness range depends on your filament, printer, and lighting setup, but most projects start with a thin bright area and a thicker dark area.
You will fine-tune these values based on the preview and the final lighting effect.
Check the 3D preview against a backlight assumption
Do not judge the preview like a normal photo. A good lithophane preview often looks more dramatic, with stronger black-and-white contrast.
This is expected because backlighting reduces contrast when light passes through the material. If the preview looks slightly “too strong,” the final print may actually look balanced when illuminated.
Export STL and slice it
Export your lithophane STL file and prepare it in your slicer.
For better results:
- Print the lithophane vertically
- Use a fine layer height
- Set infill to 100%
- Use a light-colored filament such as white PLA
These settings help preserve smooth grayscale transitions and prevent unwanted patterns from appearing behind the image.
Working the other direction — building a 3D object rather than a relief? Try it in Tripo AI Studio →.
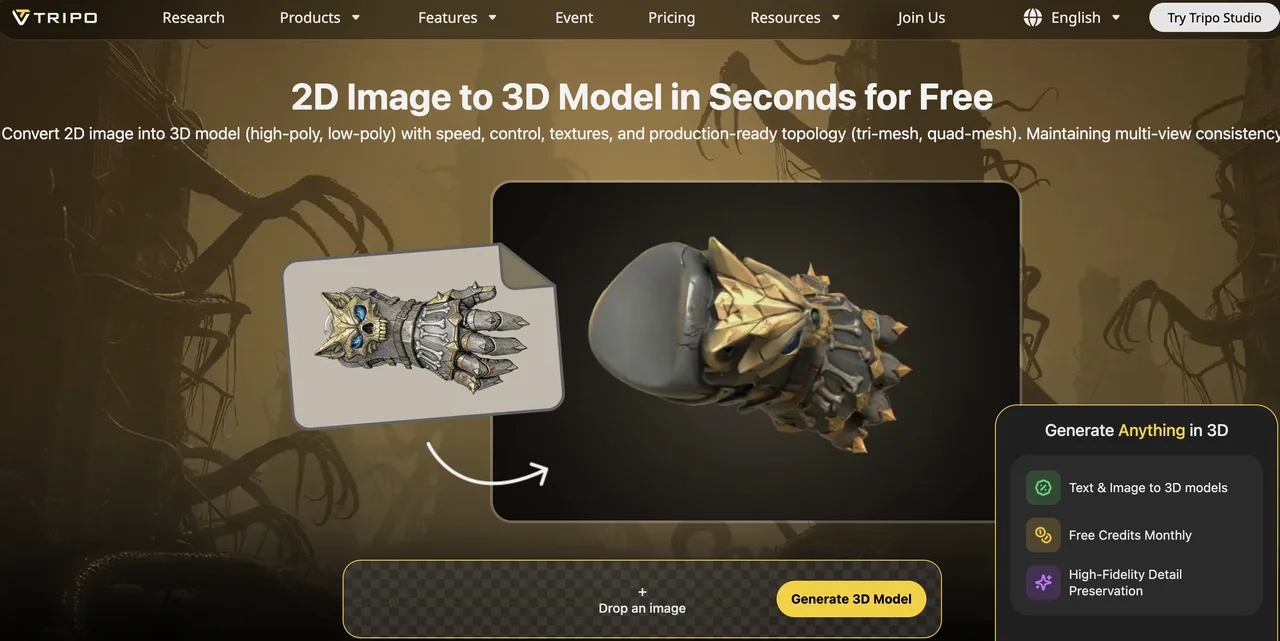
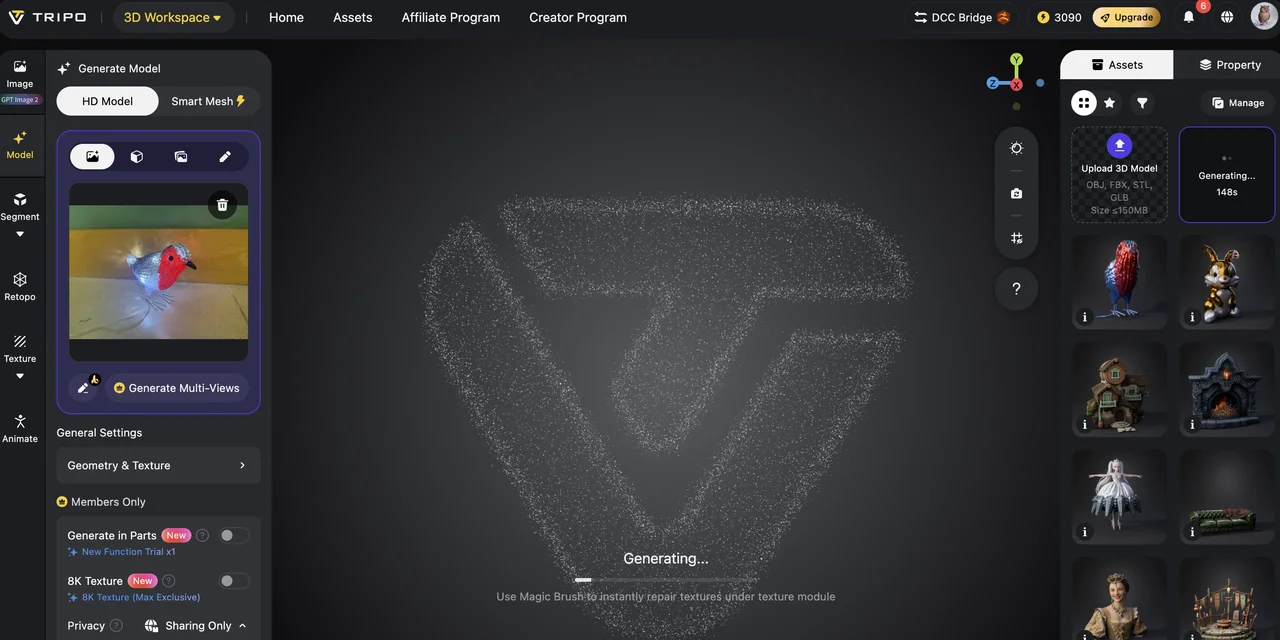
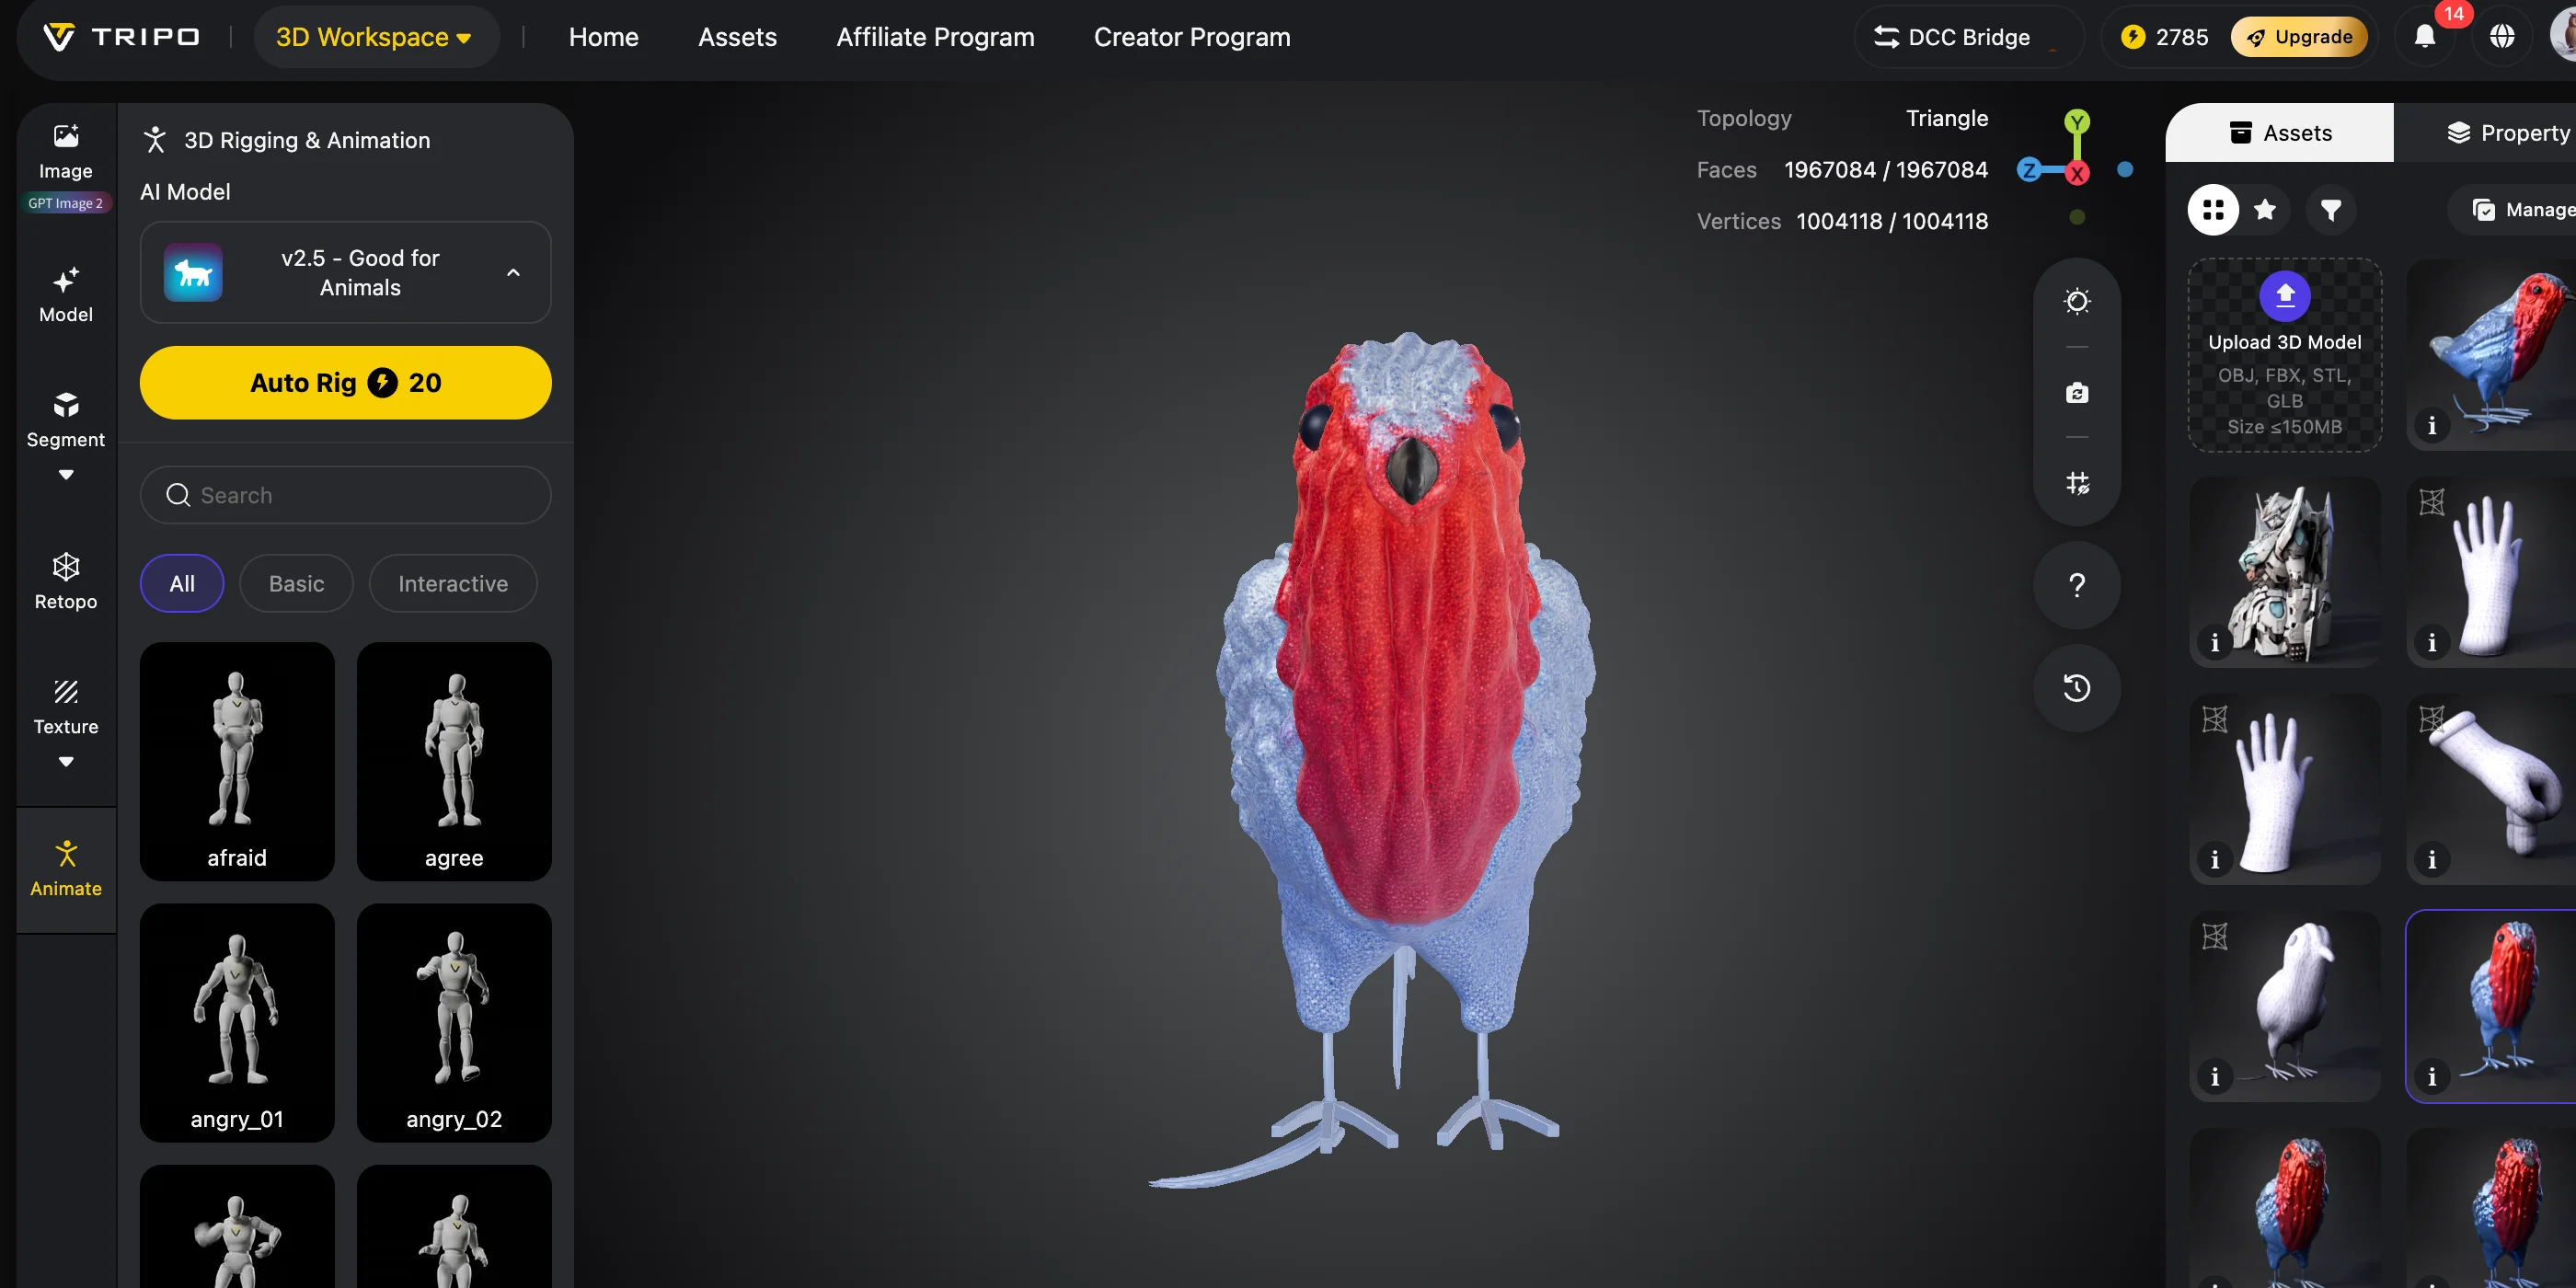
Image to Lithophane Creation Process
Print Settings That Actually Work: Layer Height, Thickness, Orientation
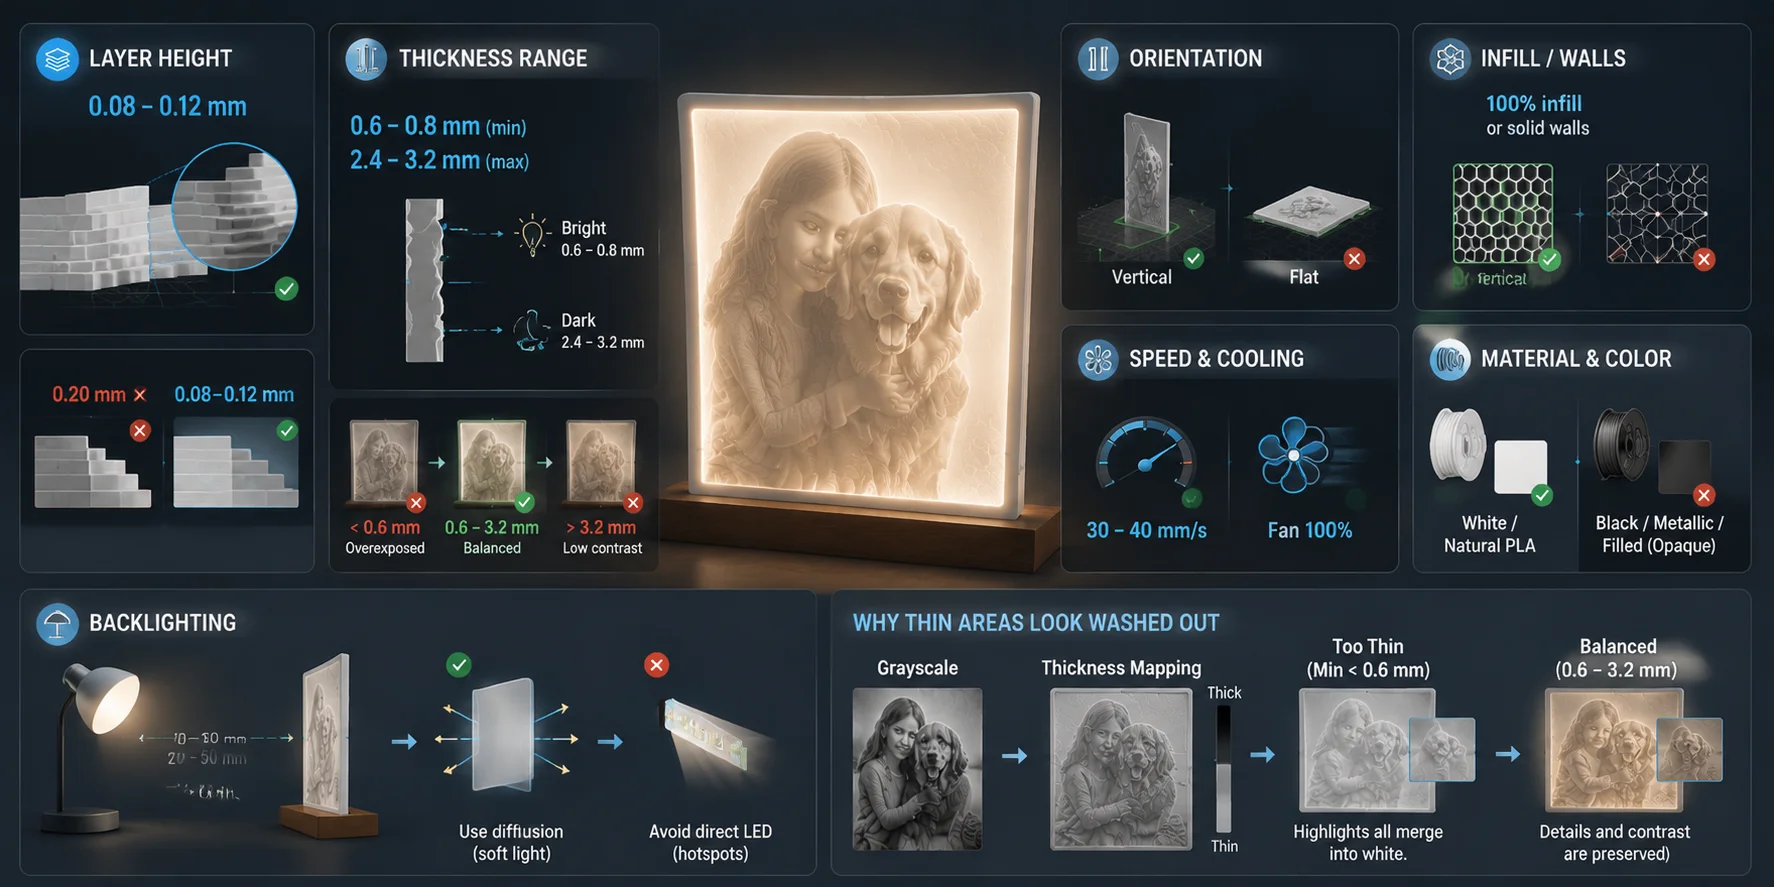
Small changes in print settings can completely change the final lithophane quality. A good lithophane STL file depends on more than the generator settings — your layer height, thickness, printing direction, and lighting setup all affect how clearly the image appears.
| Setting | Recommended Value | Why It Matters |
|---|---|---|
| Layer height | 0.08–0.12 mm | Creates smoother grayscale transitions and finer image details |
| Thickness range | 0.6–0.8 mm (bright areas) → 2.4–3.2 mm (dark areas) | Controls light transmission and image contrast |
| Orientation | Vertical printing | Keeps layer lines away from image details |
| Infill / walls | 100% infill or solid walls | Prevents infill patterns from appearing through the print |
| Print speed | 30–40 mm/s | Helps thin sections cool and preserve details |
| Cooling | Fan at full speed | Improves thin-wall consistency |
| Material | White or natural PLA | Provides the most balanced light diffusion |
| Backlighting | 20–50 mm behind the print with diffusion | Creates even illumination without hotspots |
Layer Height
Use a layer height of 0.08–0.12 mm for the best results. A standard 0.2 mm layer height usually creates visible steps on the surface, making faces, textures, and smooth grayscale transitions look rough.
A thinner layer height allows the printer to create more gradual depth changes, which is especially important because a lithophane image depends on tiny thickness differences.
Thickness Range
Thickness controls how much light passes through each part of the lithophane.
A reliable starting range is:
- Minimum thickness: 0.6–0.8 mm for bright areas
- Maximum thickness: 2.4–3.2 mm for dark areas
If the minimum thickness drops below 0.6 mm, bright areas can let through too much light. Highlights become overexposed, and facial details or textures may disappear.
If the maximum thickness goes above 3.2 mm, dark areas may block almost all light. Instead of creating deeper shadows, the image can lose contrast and look flatter.
Orientation
Print your lithophane vertically, with the relief surface standing upright.
This orientation places layer lines horizontally, which reduces interference with important image details. Printing flat can cause layer lines to overlap with the relief pattern and may also create unwanted top-surface textures.
Vertical printing also makes the light travel through the thickness changes more naturally, producing a clearer backlit image.
Infill and Walls
Use 100% infill or make the model completely solid.
A hollow lithophane can reveal internal infill patterns when light passes through it. Those patterns appear as unwanted lines or grids behind the image.
If your slicer allows it, setting the wall thickness higher than the maximum lithophane thickness can also create a solid result.
Speed and Cooling
Set your print speed around 30–40 mm/s and keep the cooling fan running at full speed.
Lithophanes contain many thin sections that need to solidify quickly. Printing too fast can cause soft edges, uneven surfaces, and loss of fine details.
Material and Color
White PLA is the most reliable filament choice because it spreads light evenly and creates strong contrast.
Natural PLA also works well. Avoid black, metallic, or heavily filled filaments because they block too much light.
Semi-transparent white PETG can work, but it usually creates softer contrast because light spreads more through the material.
Backlighting
Lighting quality directly affects the final image.
Place the light source around 20–50 mm behind the lithophane and use a diffuser, such as a frosted sheet or lamp cover, to spread the light evenly.
Do not place a bare LED directly against the back of the print. A point light source creates bright spots and uneven illumination that can hide image details.
Recommended Lithophane 3D Printing Settings: Layer Height, Thickness, and Lighting Guide
Orientation and Lighting
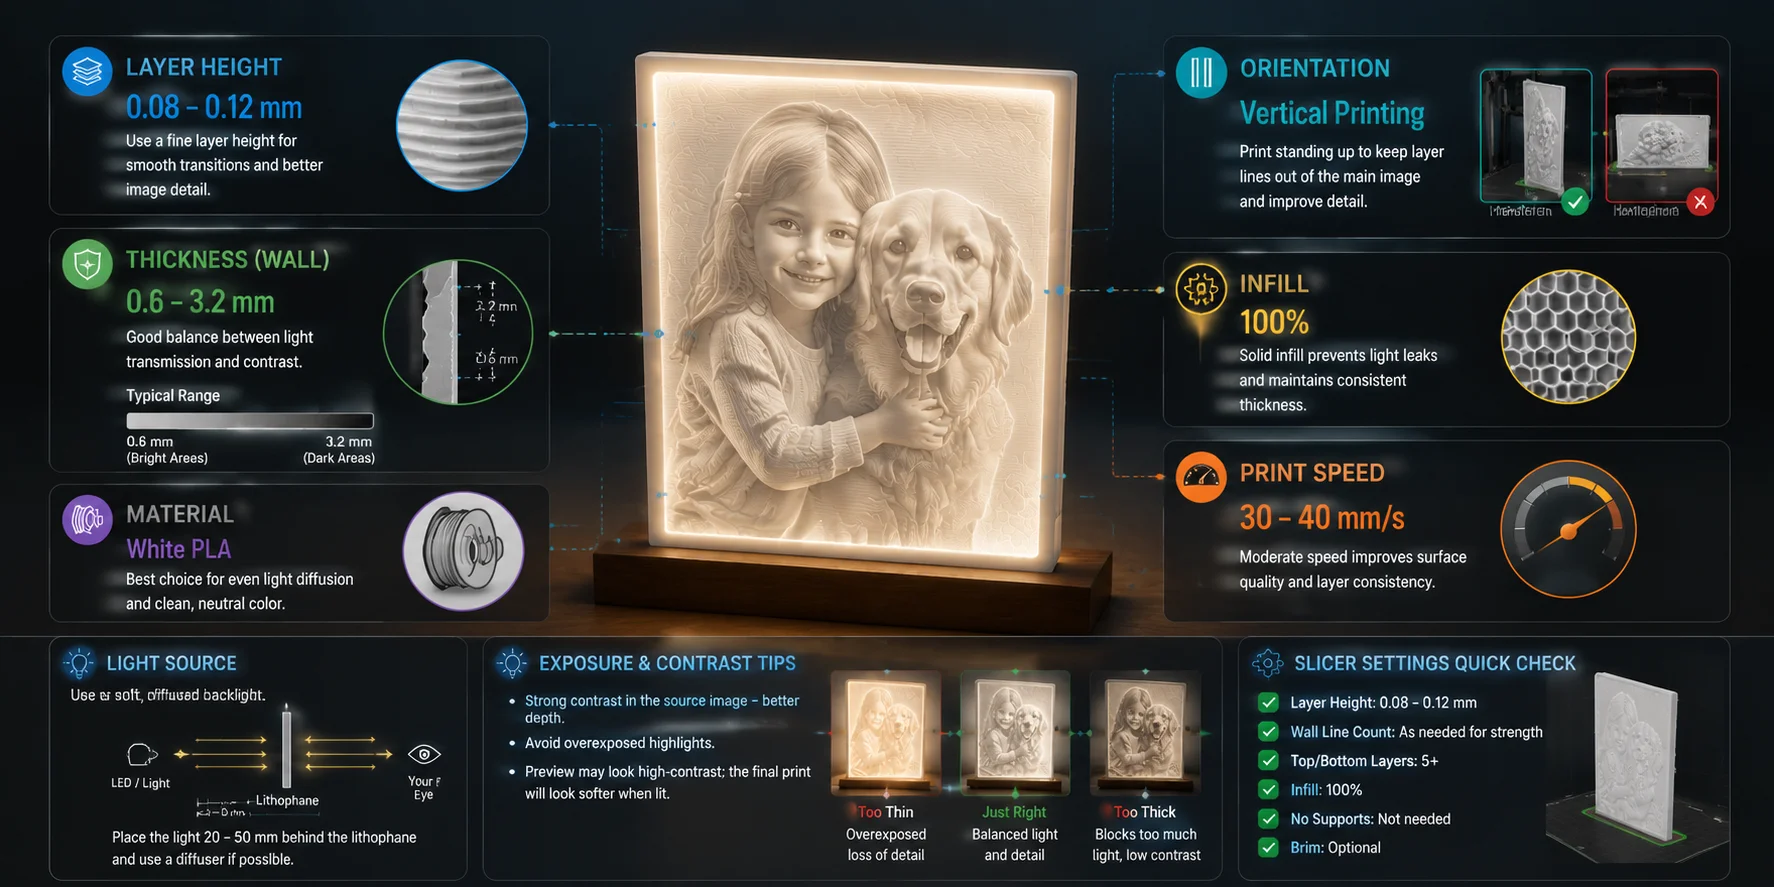
Vertical printing works best because layer lines interfere less with the image.
For lighting, use a soft backlight. Place the light around 20–50 mm behind the print and avoid direct LED points that create bright spots.
Recommended Lithophane Print Settings for FDM 3D Printing
Why AI Won't Fix a Bad Source Image (and What It Will Fix)
AI can improve a lithophane workflow, but it cannot create image information that does not exist. It can increase resolution, remove noise, and clean the image, but it cannot recover missing details from a completely dark area. For example, if a face is hidden in pure black shadow, AI upscaling will only create a larger, smoother black area — it will not add real depth information for the lithophane.
AI is most useful in three situations:
- Low-resolution or old photos Old family photos often have blurry edges and limited detail. AI upscaling can increase resolution and make important edges, such as faces, hair, and object outlines, cleaner before the image is converted into a heightmap relief.
- Noisy phone photos, especially night images Mobile night photos often contain grain and compression noise. During lithophane conversion, those random pixels can become unwanted surface variations. AI denoising removes this noise so the generator focuses on meaningful shapes instead of printing digital artifacts.
- Photos with distracting backgrounds A busy background can create unwanted depth changes because every grayscale difference becomes part of the relief. AI background removal helps isolate the main subject, making the silhouette clearer and the final lithophane easier to recognize.
However, AI-generated images are not always better for lithophanes. Many AI artworks contain large areas of flat color or smooth gradients. These areas create little thickness variation, so the printed result may look like a blank panel instead of a detailed relief. If you use AI-generated images, ask for strong lighting, clear shadows, and visible depth changes.
If your source is a flat AI illustration rather than a photo, the workflow is different. Our notes on turning an image into a 3D model cover the opposite approach — creating solid geometry instead of a light-based relief.
Framing, Lamps, and Other Ways to Mount a Lithophane
A lithophane is only the glowing relief panel itself. The way you mount it changes how the final product looks and how you use it.
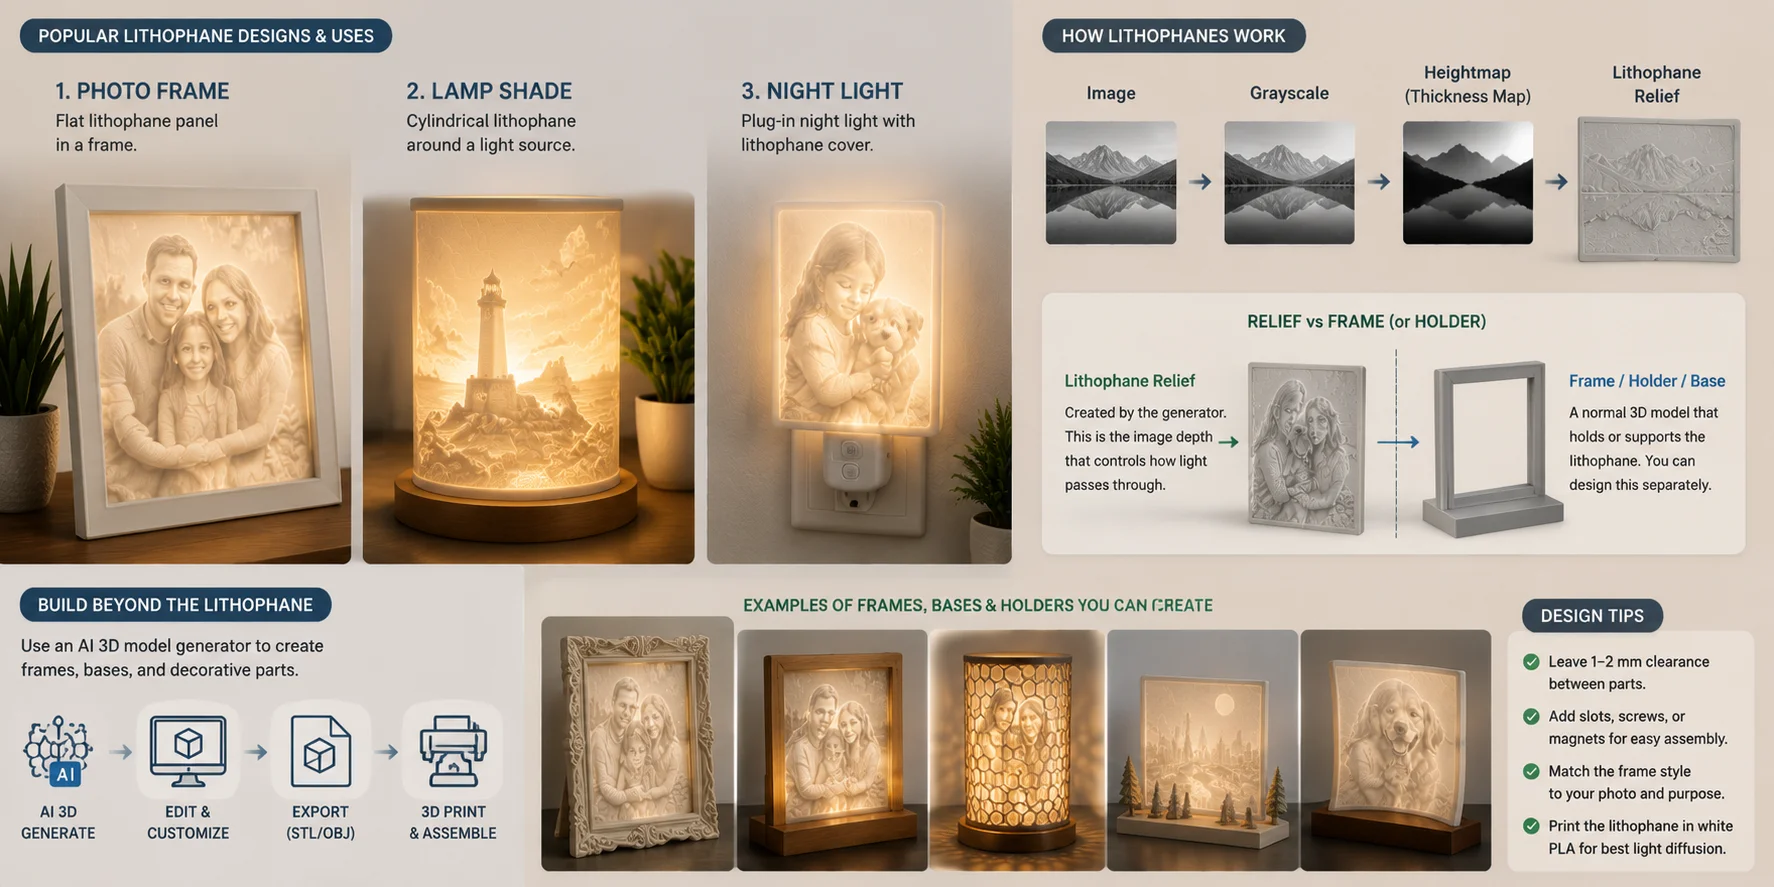
A flat lithophane panel is the simplest option: place the printed relief inside a frame with a backlight behind it, similar to a photo display. A cylindrical lithophane wraps around a light source and works well for lamps or decorative shades. A nightlight lithophane uses a small plug-in housing to turn a personal photo into a functional light.
The relief itself and the surrounding parts are different things. The lithophane image must come from a grayscale-to-heightmap process, where brightness becomes thickness. The frame, stand, lamp base, or decorative holder is just a normal 3D model. The relief itself has to come from a heightmap, but the stand around it is just a normal model — an AI 3D model generator can turn a text prompt into a base or frame you print alongside it, exporting STL or 3MF for your slicer.
For example, you can generate a custom wooden-style photo frame or a themed lamp base, then combine it with your lithophane panel during assembly. Keep around 1–2 mm of air gap between the frame and the relief to prevent fitting issues caused by heat expansion or slight print variations.
Popular Lithophane Designs and Uses
Frequently Asked Questions
What is a lithophane generator?
A lithophane generator converts an image into a 3D relief by changing grayscale values into different thickness levels.
Is an AI lithophane generator really using AI?
AI usually improves the source image. The actual relief conversion is based on mathematical height mapping.
How do I make a lithophane STL file online?
Upload an image, adjust thickness and size settings, preview the model, and export the STL file.
Do I need a paid lithophane generator?
Free tools can handle most personal projects. Paid tools often add more shapes and advanced controls.
What layer height is best for lithophanes?
Use around 0.08–0.12 mm for better image detail.
How thick should a lithophane be?
Most prints work well between 0.6 and 3.2 mm.
Should I print a lithophane flat or vertical?
Vertical printing usually gives clearer results.
What filament color works best?
White PLA provides the most consistent light diffusion.
Why does my lithophane look washed out?
The bright areas may be too thin, causing too much light to pass through.
Is a lithophane generator the same as an AI 3D model generator?
No. Lithophane generators create relief images, while AI 3D model generators create full 3D meshes.
Conclusion
A lithophane generator uses a simple idea: convert grayscale values into thickness and let light reveal the image. AI helps clean and improve your photo, but print quality depends on the right thickness, layer height, and orientation.
Ready to create supporting 3D parts for your project? Start with Tripo AI Studio. Compare plans with Tripo AI Pricing.