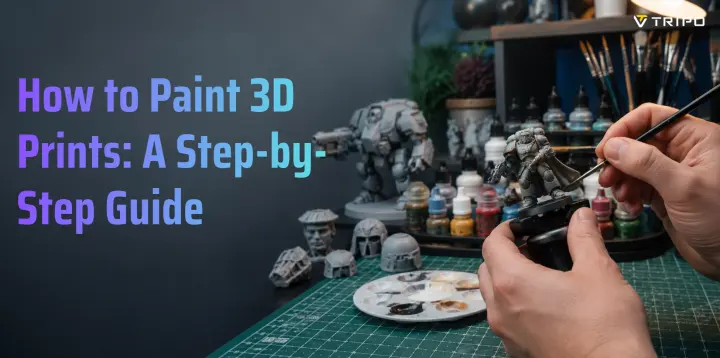
How to Paint 3D Prints: A Step-by-Step Guide
- Sand, clean, prime, paint, then seal your 3D print.
- Acrylic paint is the best default choice for most prints.
- Resin needs washing and curing before any paint touches it.
- Thin coats protect details better than one thick coat.
- A clean model design makes painting easier from the start.
You can paint 3D prints using acrylic paints, spray paint, or an airbrush. Sand the surface to remove layer lines, apply a primer coat, then paint in thin layers. Seal the final piece with a matte, satin, or gloss varnish to protect your work.
A freshly printed part straight off the build plate has layer lines, support marks, a slightly rough texture, or a flat plastic look. With the right prep and paint, that same part can pass for a hand-crafted sculpture, tabletop miniature, cosplay prop, or professional prototype. This guide walks you through every stage: surface preparation, priming, choosing paint, applying it cleanly, and sealing the final finish. Whether you are working with PLA, resin, or PETG, the process is simple once you know the order.
What You Need Before You Start Painting
Before you open a paint bottle, gather your tools. Painting fails most often because people rush prep, touch wet primer, or miss the right sandpaper or varnish.
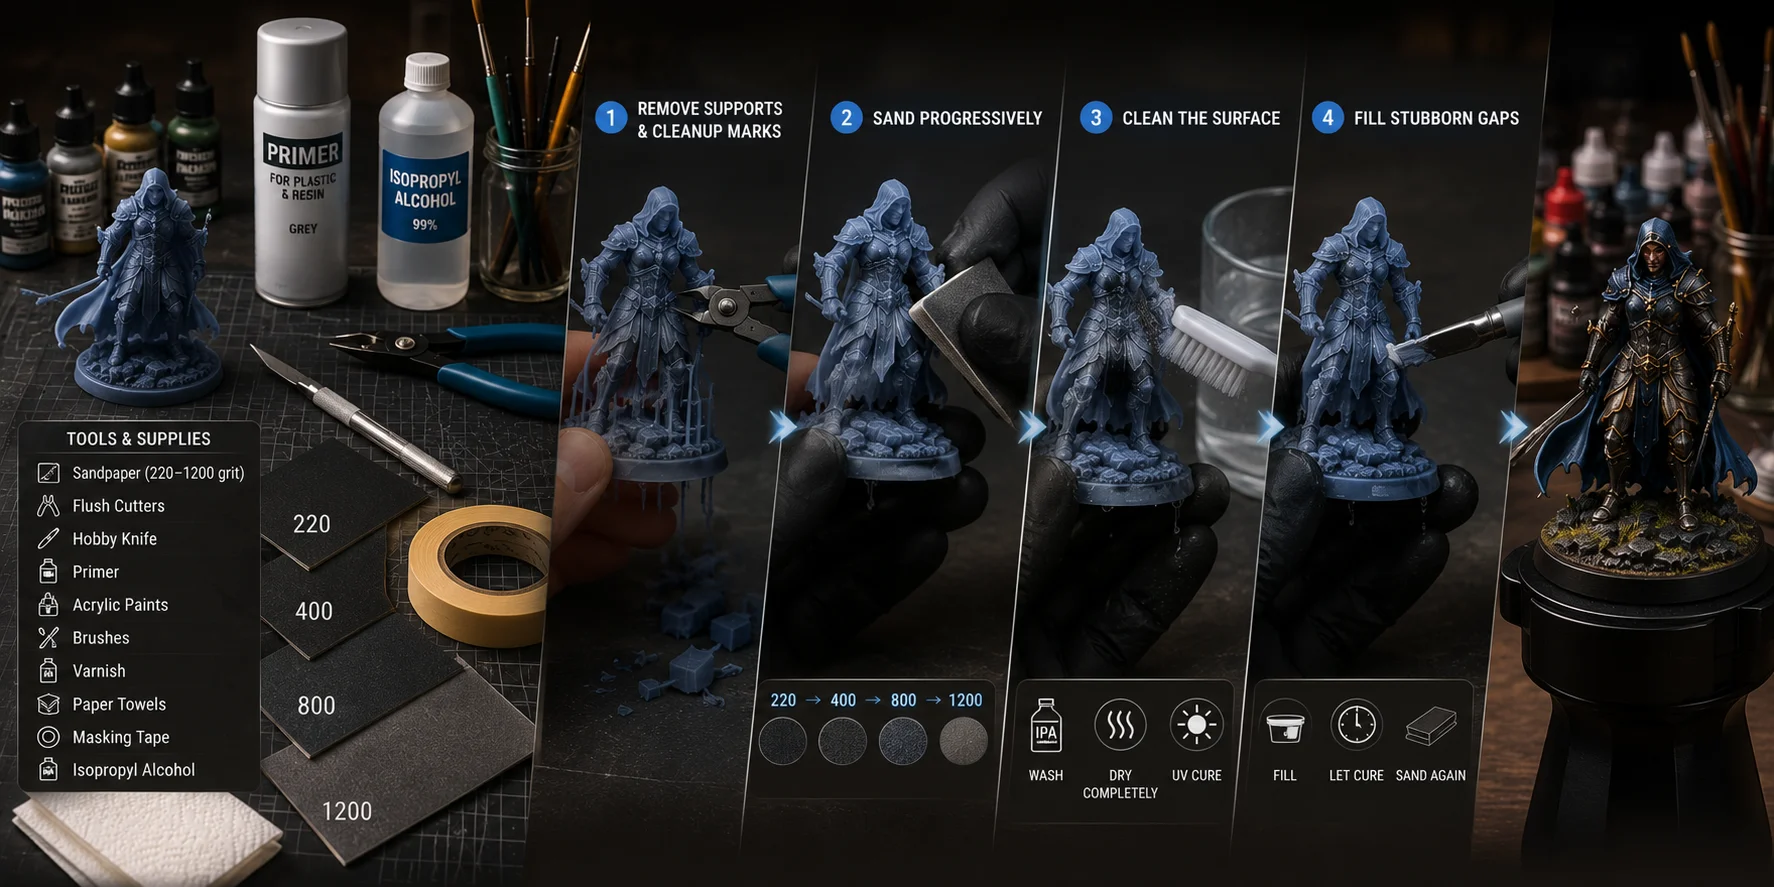
You will need sandpaper in 220–400 grit for rough cleanup and 800–1200 grit for smoothing, plus flush cutters, a hobby knife, primer, acrylic paints, brushes, optional spray paint or airbrush, varnish, paper towels, masking tape, and isopropyl alcohol for resin prints.
PLA usually needs sanding and a surface wipe before priming. Resin prints must be fully washed, dried, and UV-cured before painting. Any uncured resin residue can stop primer from bonding and may irritate your skin.
How to Prepare Your 3D Print for Painting
Good paint starts with good surface prep. Paint does not hide bad geometry; it often makes layer lines and support marks more visible.
Step 1: Remove supports and clean up marks. Use flush cutters to remove supports, then trim small nubs with a hobby knife. Do not twist supports off aggressively, especially on resin miniatures, because you can tear away fine details.
Step 2 — Sand progressively. Start with 220-grit sandpaper to knock down large layer lines or support scars. Move to 400-grit for smoothing, then finish with 800–1200 wet/dry paper if you want a display-quality surface. Sand in small circular motions and avoid pressing so hard that you flatten details.
Step 3 — Clean the surface. For PLA, wipe dust away with a damp cloth and let the part dry. For resin, wash the part in IPA or your chosen wash solution, let it dry completely, then run a final UV cure. Primer will not stick well to resin residue.
Step 4 — Fill stubborn gaps. If layer lines are deep, use spot filler putty, filler primer, or an epoxy coating. Let the filler cure fully, then sand again.
Can you paint without sanding? Technically, yes. But layer lines, blobs, and support scars will show through. For display pieces, sanding is worth the extra 20–30 minutes.
How to Prime 3D Prints (And Why You Shouldn't Skip It)
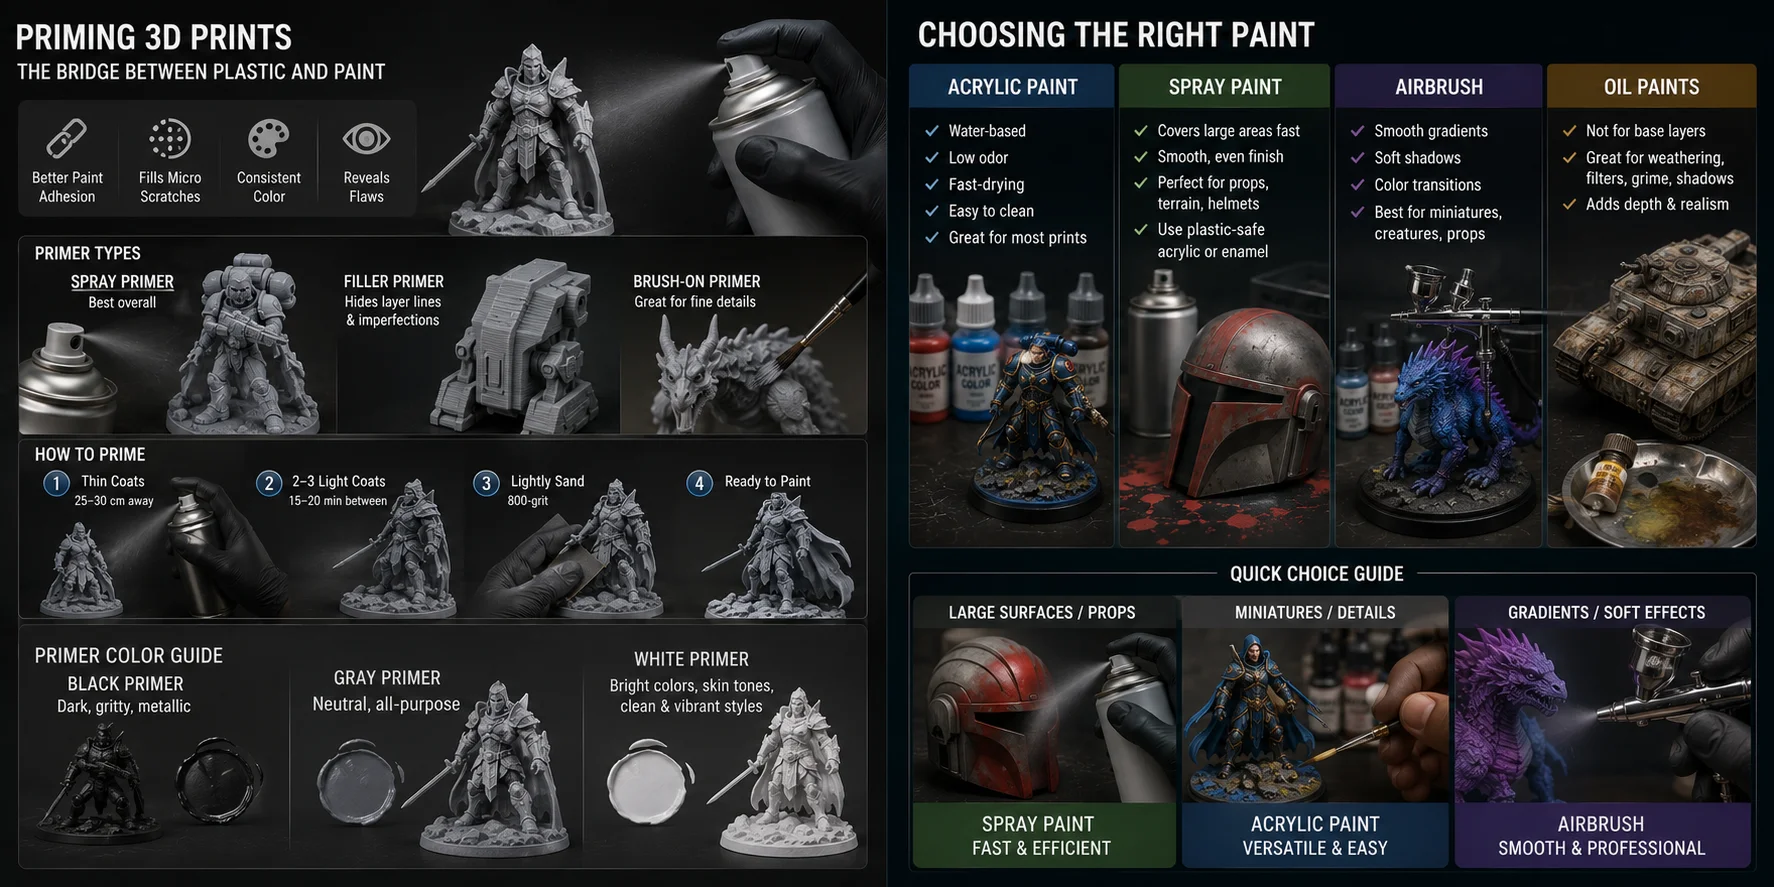
Primer is the bridge between plastic and paint. It fills micro-scratches, gives the surface a consistent color, and helps paint grip. Without primer, acrylic paint may bead, scratch, or cover unevenly.
For most 3D prints, gray spray primer is the safest default. It shows surface flaws clearly and works with both light and dark paint schemes. Filler primer is better for rough FDM prints because it helps hide layer lines. Brush-on primer is useful for small detailed models where spray primer might clog fine features.
Apply primer in thin coats. Hold the spray can about 25–30 cm from the model and move past the part instead of spraying directly into one spot. Use two or three thin coats rather than one heavy coat. Let each coat dry for about 15–20 minutes, then lightly sand with 800-grit paper if you want a smoother finish.
Primer color matters. Use black primer for dark, gritty, or metallic schemes. Use white primer for bright colors, skin tones, yellow, red, and clean cartoon styles. Use gray when you want a neutral starting point.
Skipping primer saves time, but it usually costs quality and durability.
Choosing the Right Paint for 3D Prints
Acrylic paint is the best choice for most hobbyists. It is water-based, low odor, fast-drying, easy to clean, and works well over primer on PLA, PETG, and resin. Tabletop painters often use hobby acrylics, while larger props can use craft or artist acrylics.
Spray paint is useful for large surfaces, cosplay props, terrain, helmets, and base coats. It covers quickly and gives a smooth finish when applied in thin passes. Use plastic-safe acrylic or enamel spray paint. Be careful with hot lacquer sprays on PLA because aggressive solvents can soften or damage the surface.
An airbrush is the upgrade path for smooth gradients, soft shadows, color transitions, and even base coats. It is excellent for miniatures, creatures, props, product mockups, and helmets. Airbrush paint usually needs thinning to a milk-like consistency so it sprays smoothly.
Oil paints are not normally used as the base layer. They are better for weathering, filters, grime, and shadows over an acrylic base. A small amount of oil paint thinned into a wash can create realistic dirt and depth.
Quick choice: acrylics are the default, spray paint is fastest for large areas, and airbrush gives the cleanest gradients.
Step-by-Step: How to Paint Your 3D Print
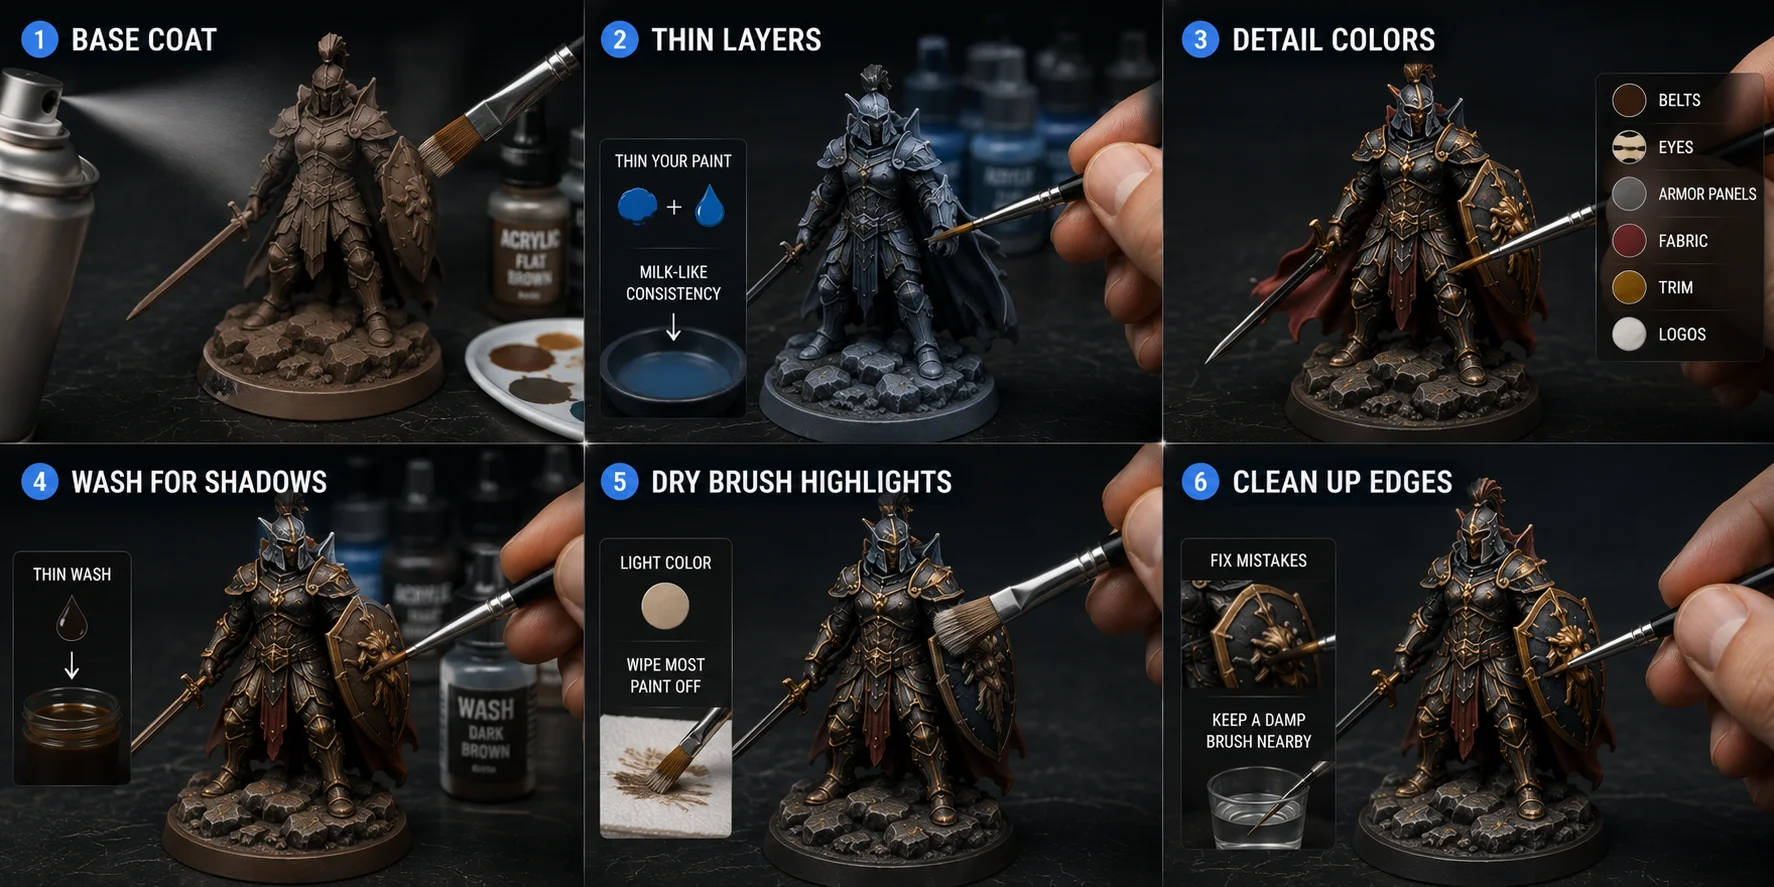
Step 1 — Apply a base coat. Start with one main color across the model. Use a flat brush, spray paint, or airbrush. The base coat gives every later detail a clean foundation.
Step 2 — Paint in thin layers. Thin acrylic paint with a few drops of water or acrylic medium. Aim for a smooth, milk-like flow. Apply two or three thin coats instead of one thick coat. Thick paint hides tiny details, especially on resin miniatures.
Step 3 — Add detail colors. Switch to a smaller brush for belts, eyes, armor panels, fabric, logos, trim, or product details. Work from larger color zones to smaller ones. Dark colors often work well first, with lighter highlights layered later.
Step 4 — Use washes for shadows. A wash is very thin paint that flows into recesses. Apply it over textured areas such as armor, fur, cloth folds, rock, wood, or mechanical parts. It creates fast depth and makes details easier to see.
Step 5 — Dry brush raised details. Dip a stiff brush into a lighter color, wipe most paint off on a paper towel, then lightly drag it across raised surfaces. Dry brushing highlights edges, scratches, wrinkles, and texture. It is especially useful for terrain, stone, metal, bones, and miniatures.
Step 6 — Clean up edges. Use a small brush to fix mistakes. Keep a damp brush nearby to soften fresh acrylic before it dries. Do not worry if the first pass looks rough. Most painted models improve after highlights, shadows, and varnish.
The key is patience. Thin layers look weak at first, but they build into a cleaner finish than heavy paint.
Painting PLA vs. Resin 3D Prints — Key Differences
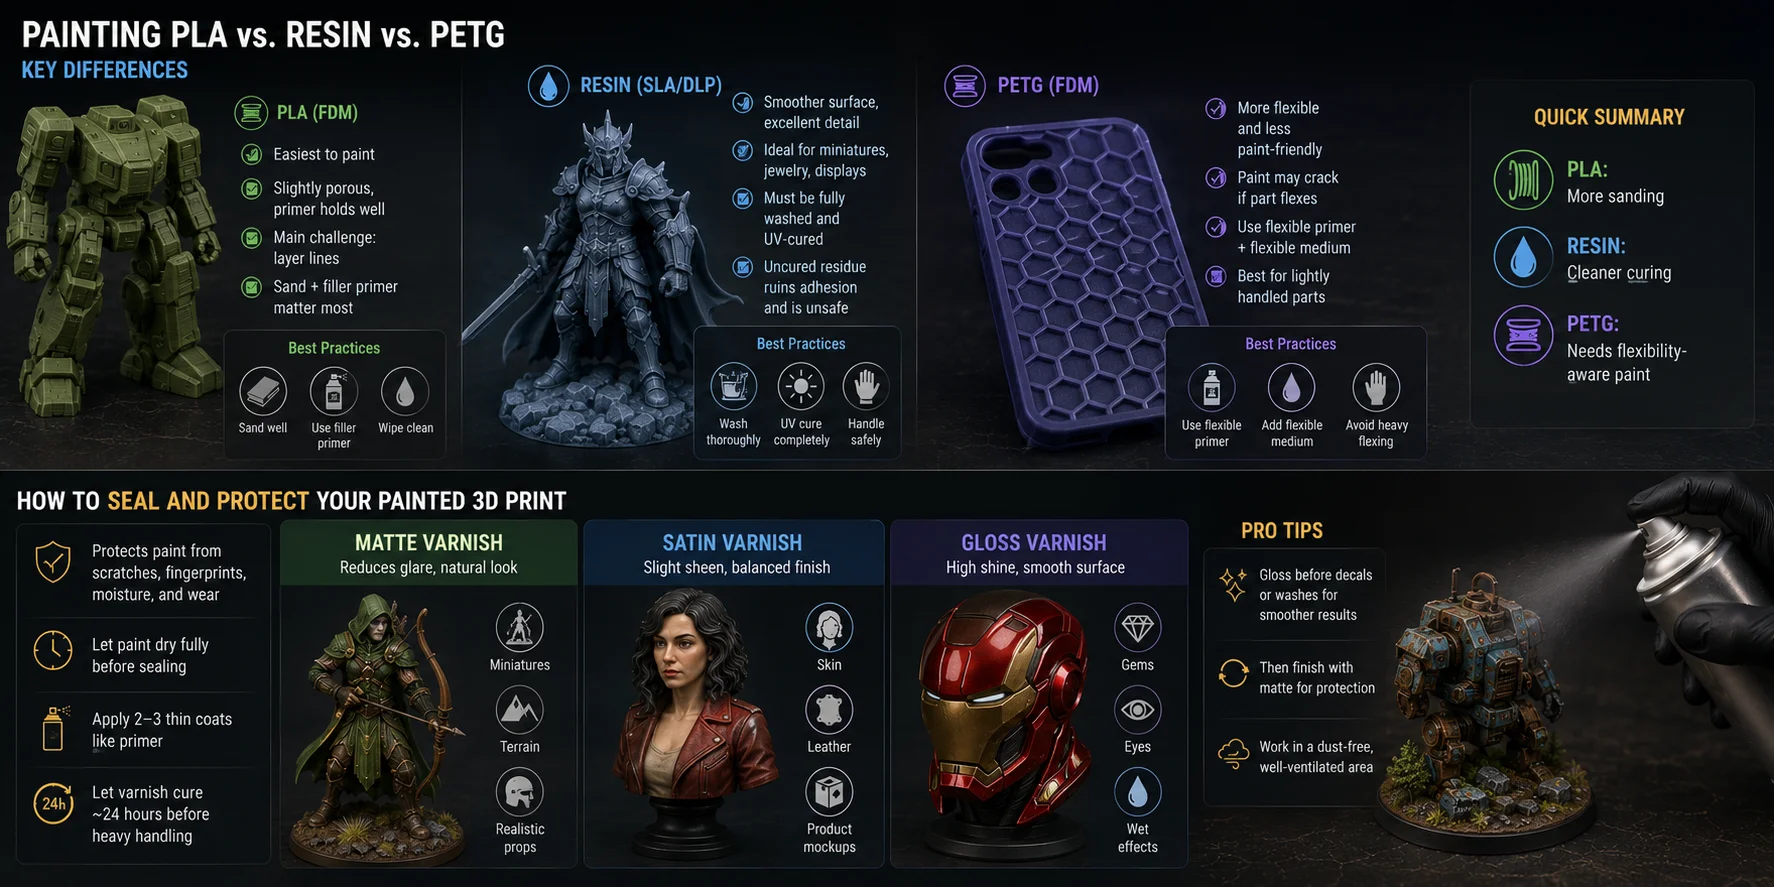
PLA is the easiest material to paint. It is slightly porous, holds primer well, and only needs basic cleaning before painting. The main challenge is layer lines. Sanding and filler primer matter more for PLA than for resin because FDM prints often have visible ridges.
Resin prints are smoother out of the printer and hold fine detail better. This makes resin ideal for miniatures, jewelry prototypes, and small display models. The trade-off is cleaning. Resin must be fully washed and UV-cured before primer. Uncured residue can ruin adhesion and is unsafe to handle.
PETG is more flexible and less paint-friendly than PLA. Because the material can bend slightly, paint may crack if the part flexes. Use a flexible primer and consider mixing acrylic paint with a flexible medium. PETG works best for parts that will be lightly handled rather than constantly bent.
In short: PLA needs more sanding, resin needs cleaner curing, and PETG needs flexibility-aware paint.
How to Seal and Protect Your Painted 3D Print
Sealing protects the paint from scratches, fingerprints, moisture, and handling wear. Acrylic paint on plastic can rub off over time if you leave it unsealed, especially on props, gaming pieces, and display objects that people touch.
Matte varnish is the most common final coat for miniatures, terrain, realistic props, and non-shiny finishes. It reduces glare and makes a model look less plastic.
Satin varnish sits between matte and gloss. It works well for skin, leather, product mockups, and objects that need a slight sheen.
Gloss varnish is useful for glass, gems, wet effects, polished armor, eyes, and decals. Many painters apply gloss before decals or washes because the smooth surface helps them flow evenly, then finish with matte varnish afterward.
Apply varnish like primer: two or three thin coats. Let paint dry fully before sealing, and let the varnish cure for about 24 hours before heavy handling. A rushed topcoat can trap moisture, cloud the finish, or make the surface tacky.
Design Your Model in Tripo AI Before You Print
Paint quality starts before sanding, priming, or brushing. A clean, well-designed mesh with separated surfaces, readable details, and strong silhouette lines is much easier to paint than noisy geometry. If a model has messy folds, fused details, or unclear edges, paint will not fix the design.
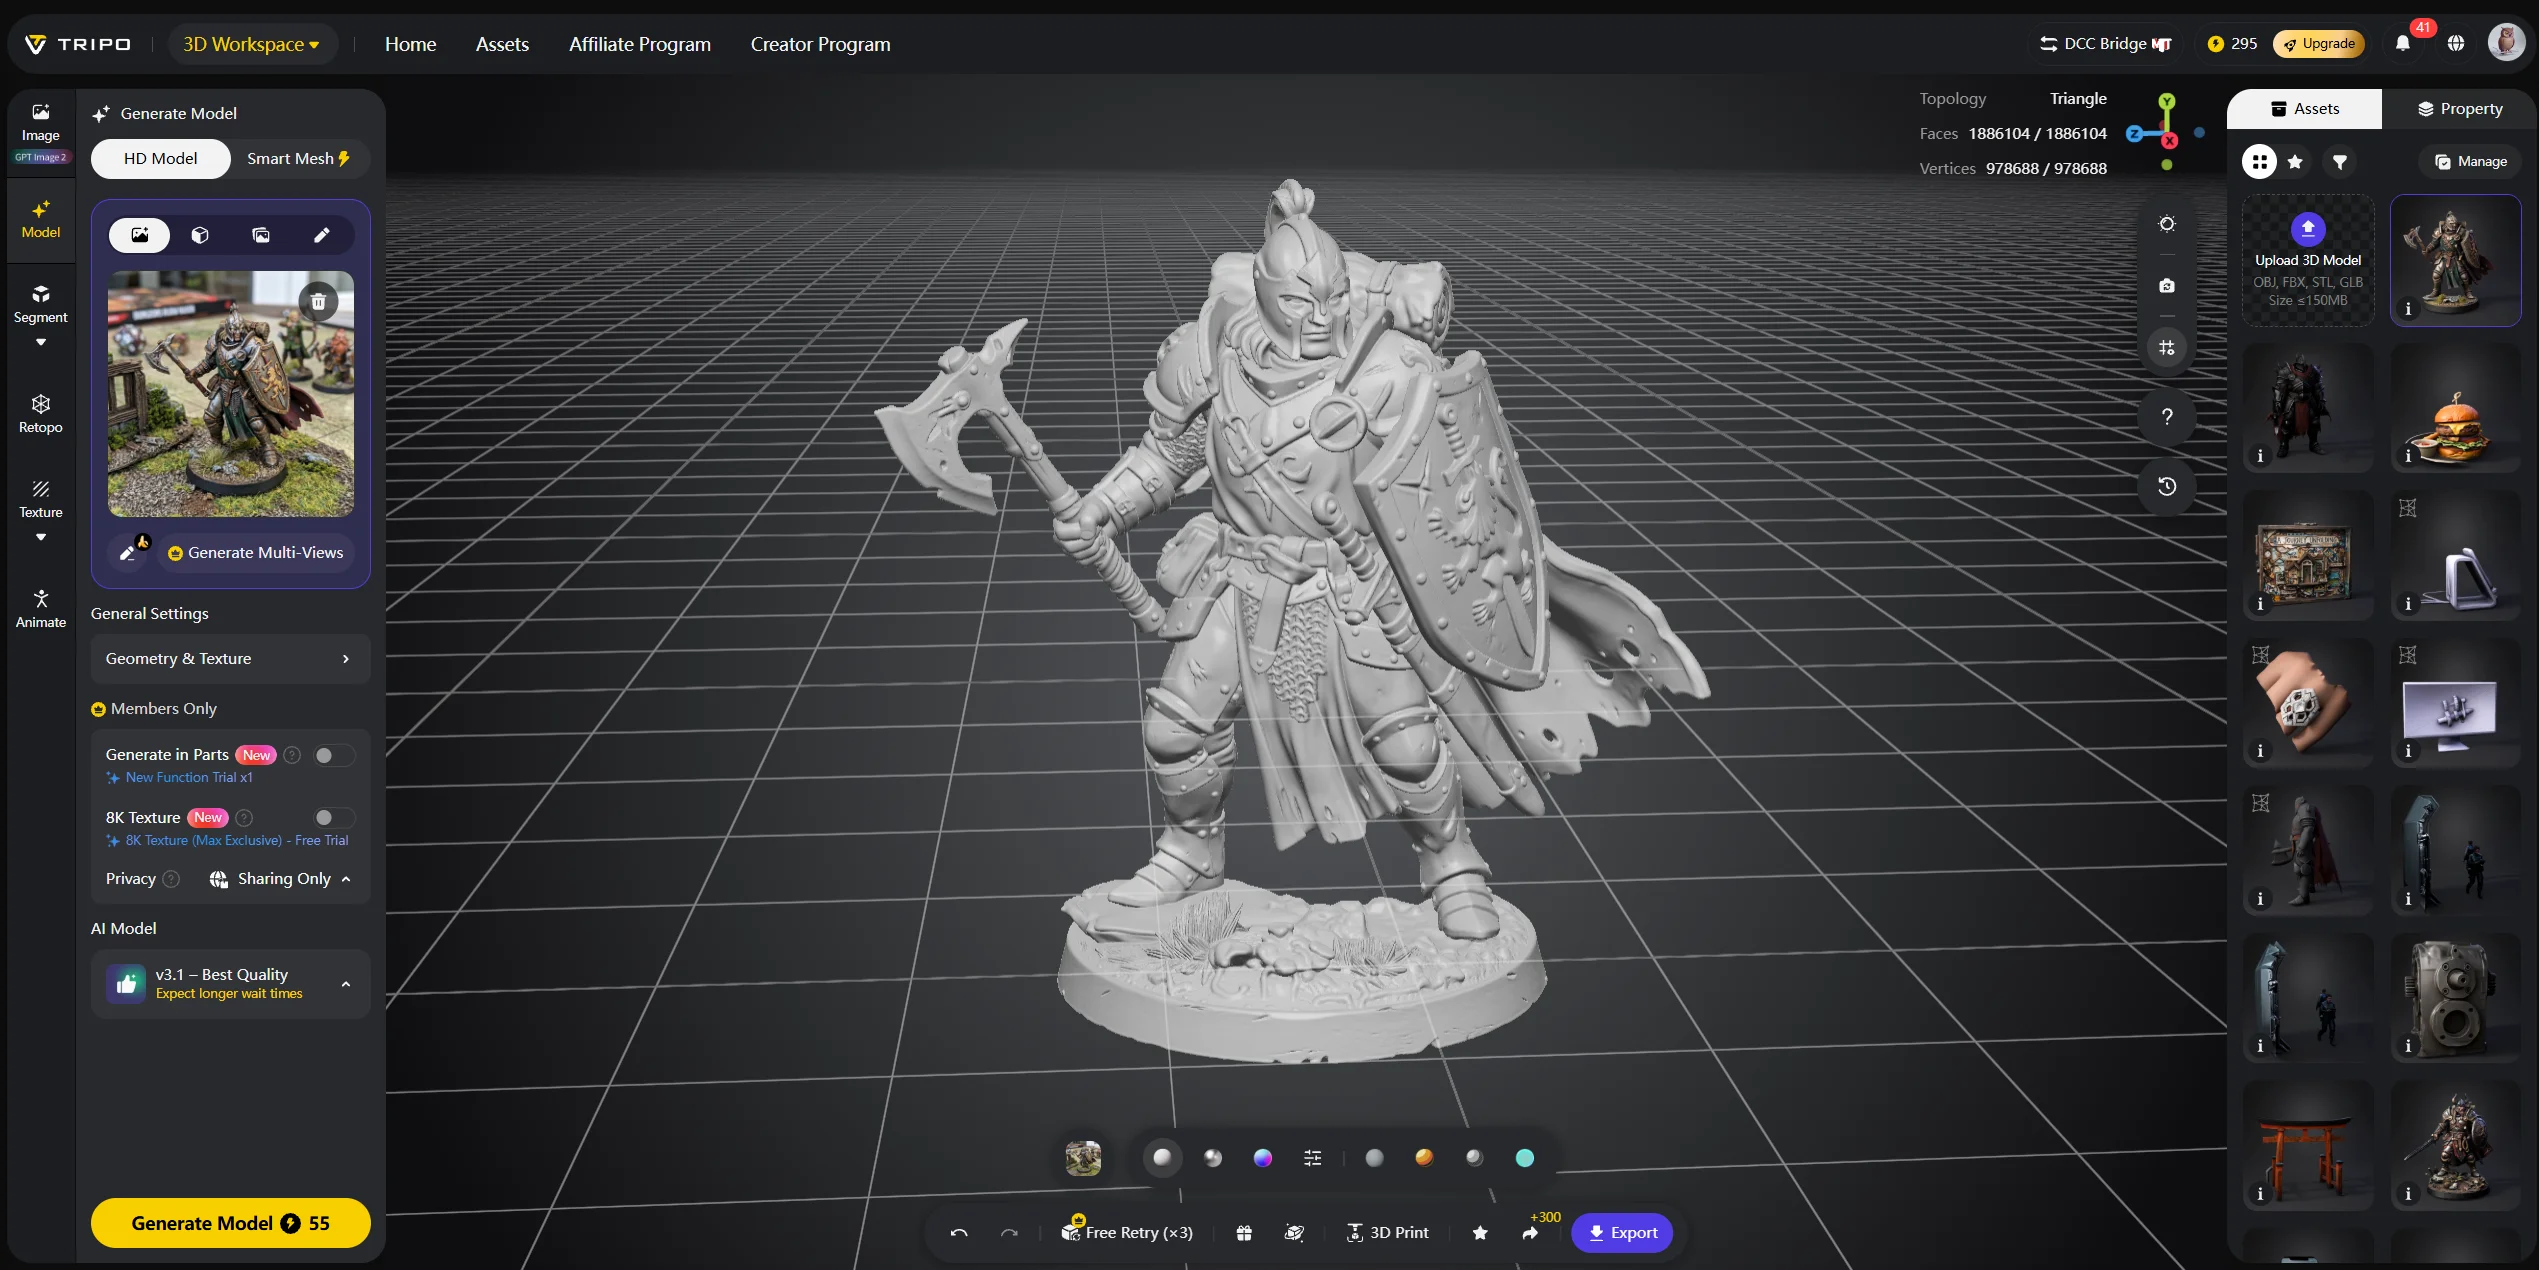
Tripo AI can provide a 3D starting point from a text prompt or reference image through its AI 3D Model Generator and Image-to-3D workflow. Results vary with the input, settings, and model complexity. Before printing and painting, inspect and repair the mesh, confirm scale and wall thickness, export a suitable format, and validate the sliced preview.
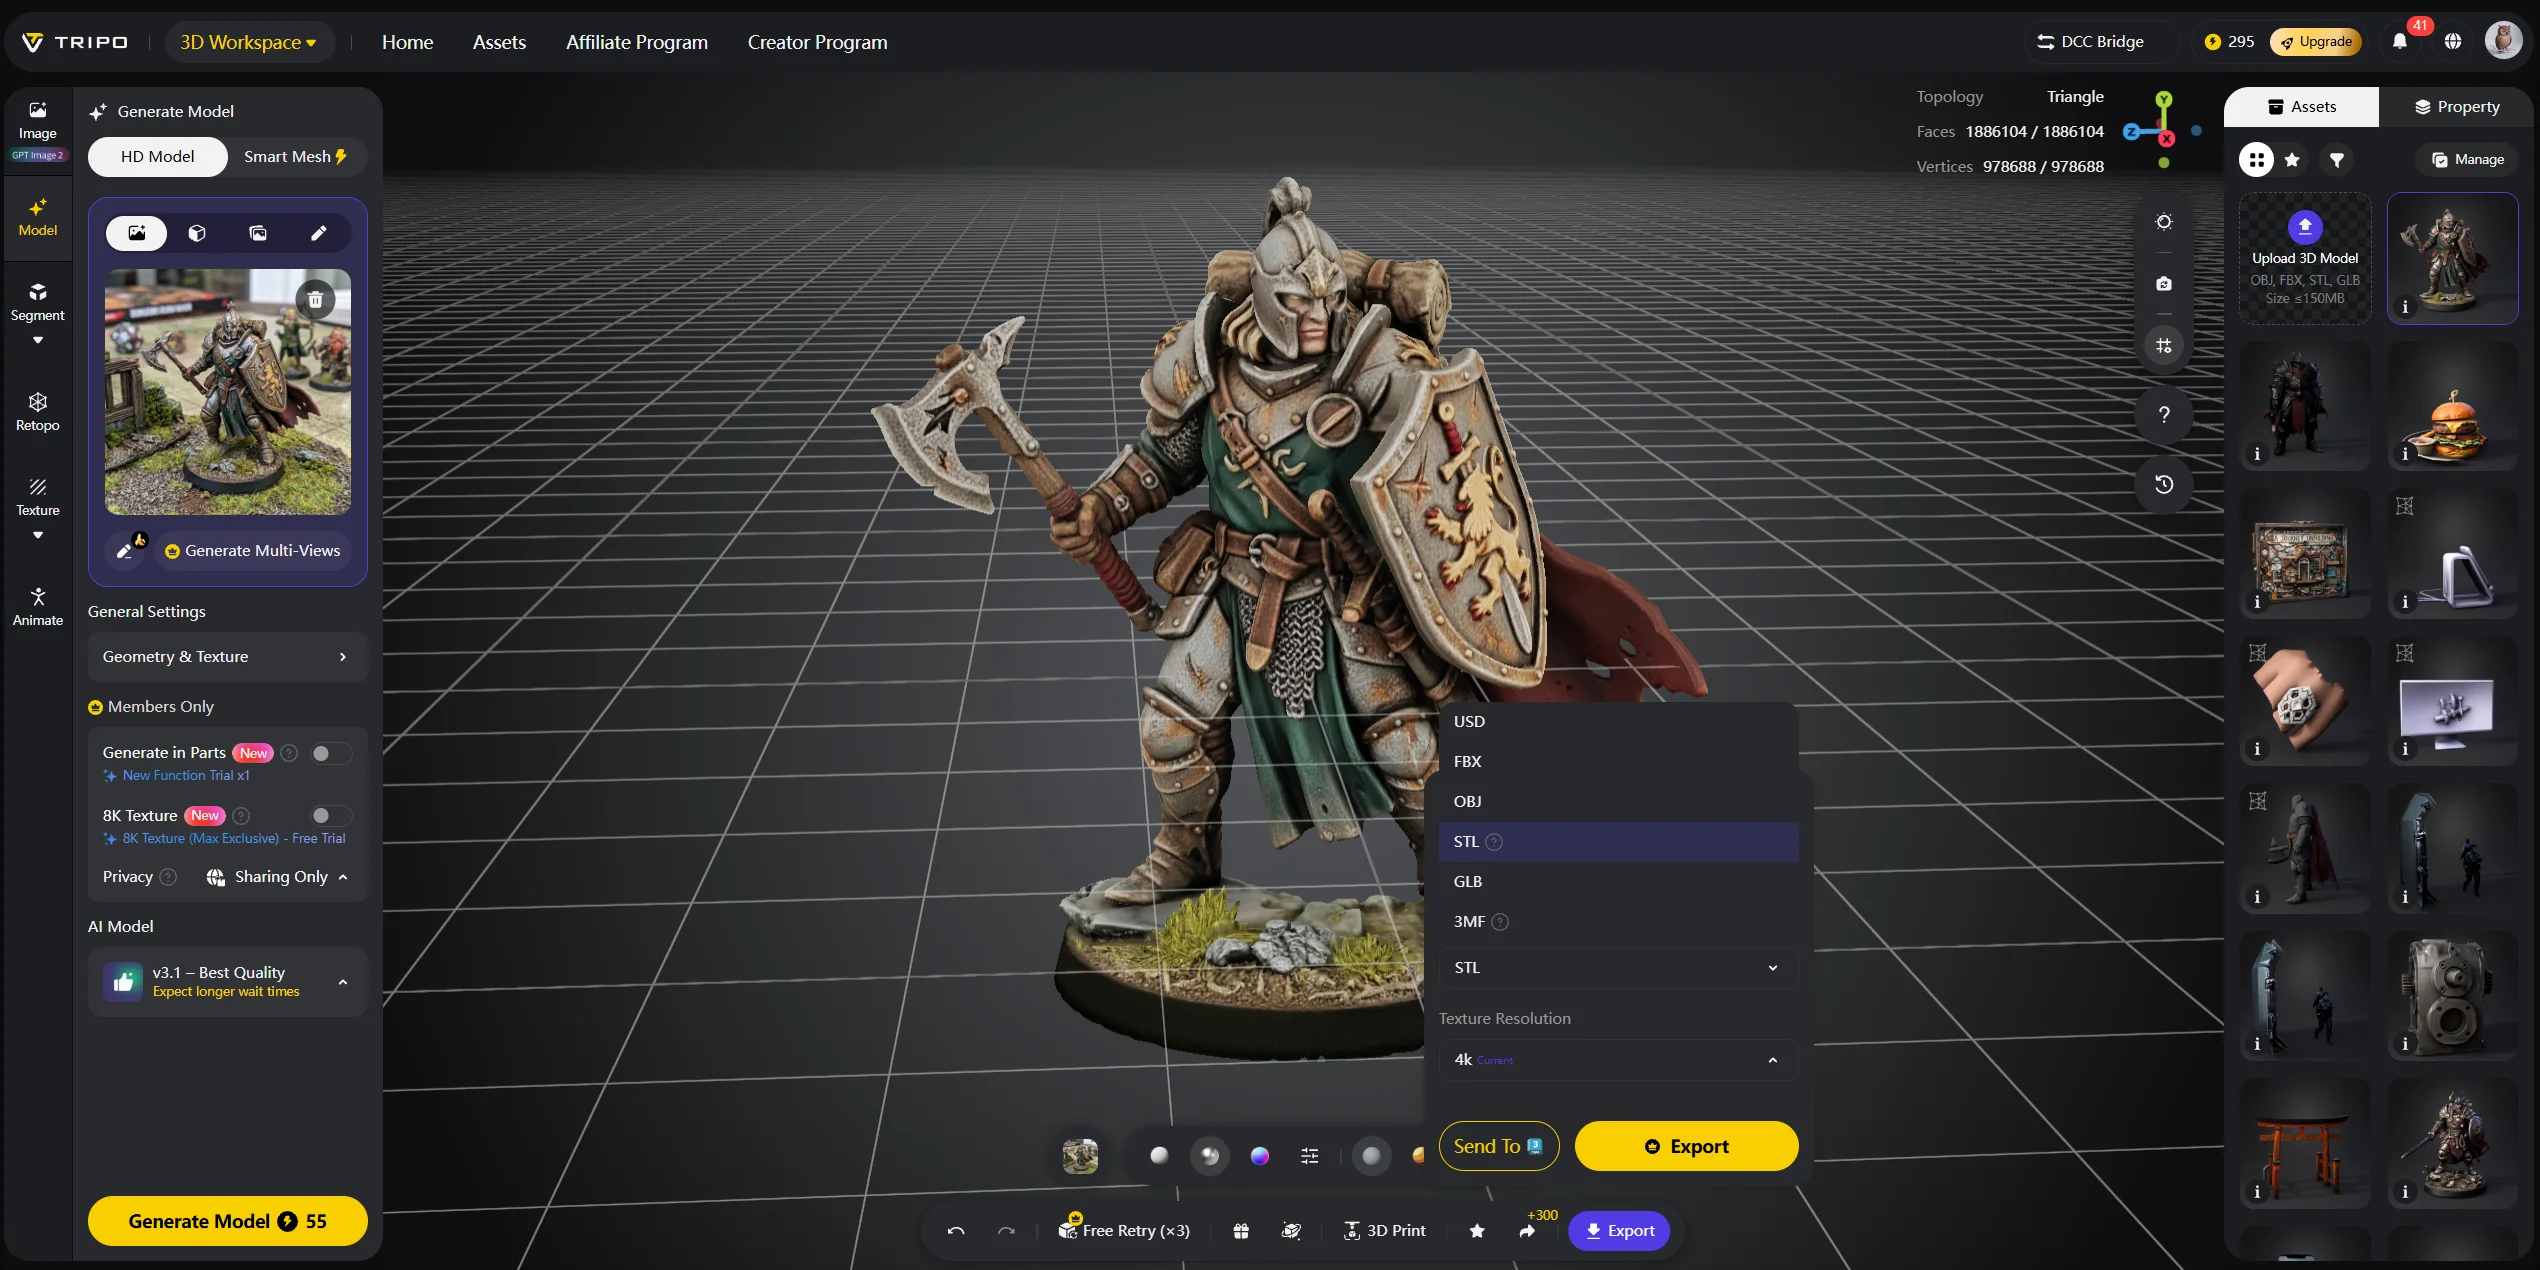
Tripo AI’s AI Texturing feature can also help before you paint. You can preview color schemes digitally, test palettes, and identify which surfaces may need masking or separate paint passes.
Try designing your next paintable model in Tripo AI Studio before you print it.
Frequently Asked Questions
What kind of paint do you use on 3D prints? Acrylic paint is the most popular choice. It is water-based, dries quickly, and works well over primer. Spray paint works for base coats, while airbrush acrylics work best for smooth blends.
Can you paint directly on 3D prints without primer? Technically, yes, but it is not recommended. Paint adhesion is weaker, coverage is uneven, and the finish scratches more easily. A thin primer coat makes the result last longer.
Can I paint 3D prints without sanding? You can, but layer lines and support marks will show through. For display-quality results, sand from 220 to 800 grit before priming.
How do you prepare 3D prints for painting? Remove supports, sand progressively, clean off dust or resin residue, apply thin coats of primer, and let everything dry before painting.
Does acrylic paint stick to PLA? Yes, especially when PLA is primed first. Unprimed PLA can feel slightly waxy, causing paint to bead or scratch off.
How do I paint fine details on 3D prints? Use a size 0 or 00 detail brush, thin your paint slightly, and work in small strokes. Good lighting and magnification help with miniature-scale details.
What is dry brushing and when should I use it? Dry brushing uses a nearly dry brush to highlight raised surfaces. Use it after a base coat and wash to make texture, edges, and worn areas stand out.
How do I seal painted 3D prints? Apply two or three thin coats of matte, satin, or gloss varnish over fully dried paint. Let the final coat cure before heavy handling.
Can I paint PETG 3D prints? Yes, but PETG is more flexible than PLA. Use a flexible primer and acrylic medium to reduce cracking on parts that bend.
Is spray painting or brush painting better for 3D prints? Spray paint is faster for base coats and large surfaces. Brush painting gives more control for details. Most painters use both.
Conclusion
Painting a 3D print gets easier with each project. Start with good prep, apply primer, work in thin layers, and protect the final piece with varnish.
Use Tripo AI Studio to create a model for further preparation, then inspect the mesh, scale it, slice it, print it, and bring the finished surface to life with paint.
Explore Tripo AI Pricing to find the right tier for your workflow.