GPT-6 Astra 3D Character Workflow: Rig and Animate from One Image
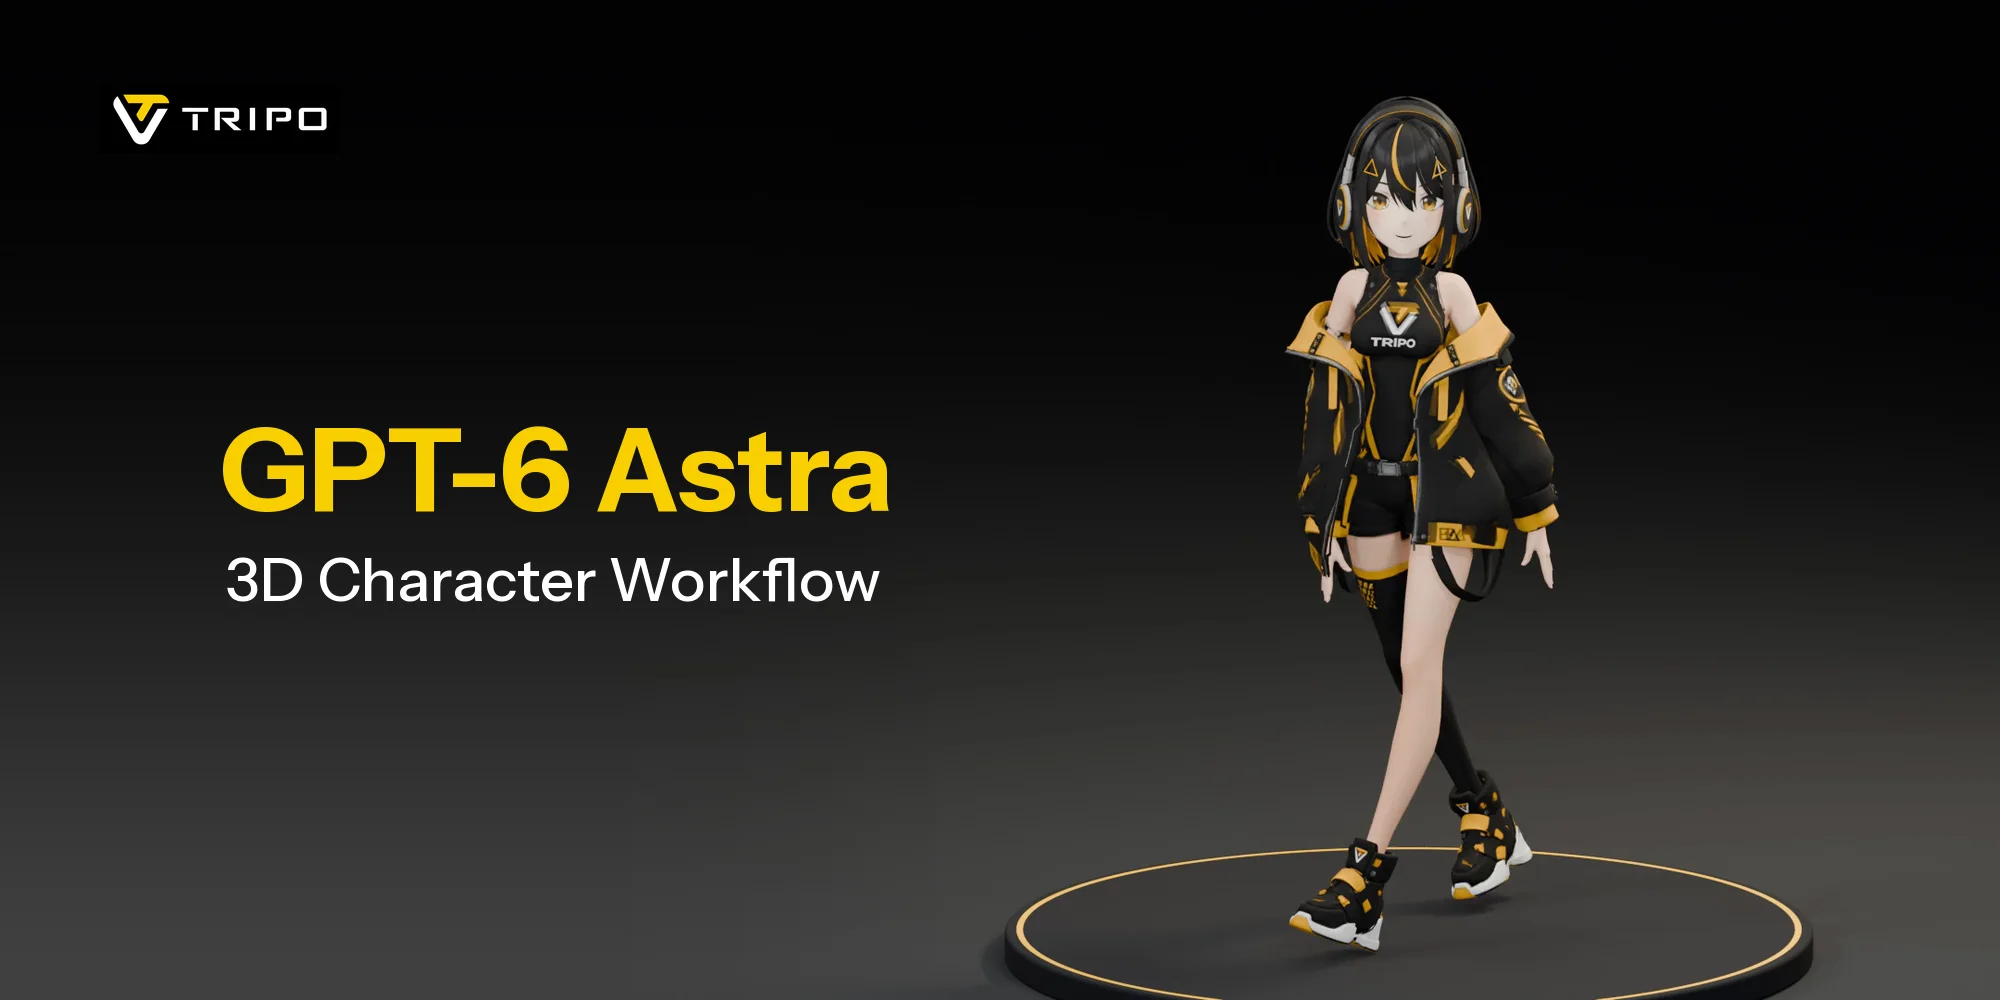
Turn a character reference into 3D assets with Tripo, then bring the design to life in Blender. This workflow takes you from body, head, and hair generation to assembly, rigging, expressions, and a short animation, with Astra assisting on the Blender tasks.
The approach draws on Nano (@Dstudio_ai), who generated her character in three parts with Tripo and used Astra to assemble them in Blender. Follow the seven steps below, using the example prompts to describe the result you want at each stage.
What You Will Build
Build toward a textured character with a readable full-body performance and expressive facial movement. The greeting and close-up below show two ways to present the finished result.
The tutorial's character images, greeting clip, and facial close-up are separate demonstration assets. Creator works are credited in the showcase section. The prompts are starting points to adapt to your own scene.
What you need: a character reference, a Tripo Studio account, Blender, access to GPT-6 Astra, and a configured Blender MCP connection between your assistant client and Blender.
Why Combine Tripo and Astra?
Tripo is where the character takes shape as 3D assets. Generate the body, head, and hair, review them against your design, and bring the selected parts into Blender. From there, direct Astra through alignment, rigging, material checks, and animation, reviewing each stage as you go.
Work on the body, head, and hair as separate parts. Give each one a clear reference, review its result, then bring the selected pieces together around the full character's proportions.
Step 1: Prepare Your Reference Image
Start with a clear character reference. For this tutorial, aim for a front-facing, full-body image with the hands and feet visible, the arms away from the torso, and a plain background. Keep a copy of the complete design as your proportion and color reference when preparing separate parts.
Reference image brief:
Full-body character reference, front-facing T-pose, arms extended, hands and feet fully visible, plain white background. Keep the clothing, hairstyle, and colors consistent. Describe your character.
Check the image before continuing. Can you see the neck? Are the fingers readable? Does the hair silhouette make sense? Fix ambiguous areas in the reference rather than carrying them through the rest of the workflow.
Step 2: Generate Body, Head, and Hair in Tripo
Use one original image as the design reference, then prepare isolated references for the clothed body, a hair-free head, and the hair with any attached hat or accessories. Cropping alone may leave unwanted parts or hide the surfaces needed for assembly. Edit each reference so the intended part is clear, while preserving the original design and proportions.
Prepare a hair-free head reference and keep the hair with any attached hat as a separate part. Review the edited references before generating; a simple crop may leave unwanted features or omit surfaces needed for assembly.
Part 1: Body with Clothing
Prepare a body-focused reference that makes the outfit, arms, hands, and legs readable. Review the generated silhouette and check that you have enough neck area to join the head.
Part 2: Head
Prepare a face-and-neck reference. Look closely at the eyes, mouth, and neck before moving on. These areas will matter when you add expressions and connect the head to the body.
Part 3: Hair
Prepare a hair-focused reference that preserves the outer silhouette and its relationship to the head. Keep the resulting hair separate when bringing the parts into Blender.
Before exporting, compare each result with the full reference: the body's outfit and silhouette, the head's facial features, and the hair's overall shape. Choose the parts you want to keep, name the exports Body, Head, and Hair, and use a format supported by your Blender workflow. Confirm the generation and topology options available in your Studio workspace.
Step 3: Set Up Blender MCP
For an assistant-driven workflow, configure the Blender MCP add-on and an MCP-capable assistant client using the project's setup instructions. The add-on and the client-side MCP connection are separate parts of the setup; a local Blender socket address alone is not the complete configuration.
Blender MCP setup and documentation
Before allowing scene edits, start with a read-only check. Open your Blender scene, confirm that the connection can identify its objects, and verify that you are editing the intended scene.
Ask the assistant to report the open scene's name and existing objects without modifying them. After importing the character parts in Step 4, confirm that it can identify Body, Head, and Hair correctly.
Step 4: Assemble the Character with Astra
Import the body, head, and hair into Blender. Name them clearly and use the body as the scale reference. Ask Astra to handle alignment before attempting rigging.
Prompt to try:
Assemble the Body, Head, and Hair meshes into one character. Use Body as the scale reference, align Head at the neck, and fit Hair to the scalp. Correct local gaps while preserving the silhouette, UVs, materials, and any existing rig. Keep the parts separately selectable. Show front, side, and back previews of the completed assembly and identify any join that still needs work.
What to check: a continuous neck join, hair that sits naturally on the head, and face-to-body proportions that match your reference. Review the front, side, and back before continuing.
Check the back of the hair and the neck join as well as the front. Fill or refine local open surfaces where necessary, then review the silhouette and texture continuity again. Complete these geometry checks before relying on a movement preview.
Describe adjustments precisely: “Lower the hair until it sits naturally along the forehead, while preserving the face.” Keep each edit focused so the parts you have already approved remain consistent.
Step 5: Rig the Character with Astra
This route uses a body rigged in Tripo and imported into Blender as a rigged GLB. Reuse its armature and weights, replacing the earlier unrigged body rather than leaving both versions in the scene. Align the separate head and hair to the rigged body's coordinate system, then attach them to the same skeleton. Creating a new skeleton in Blender is an alternative when no usable rig is available.
Prompt to try:
Make this assembled character poseable. Reuse the body's imported armature and weights if available; otherwise create and bind a biped rig. Attach the head and hair to the same body rig, preserving their alignment. Add head-turn, arm-raise, elbow-bend, and knee-bend test poses in a new action. Show the resulting poses and refine local weights where needed, without replacing working materials or unrelated geometry.
Test the deformation: raise an arm, bend an elbow, turn the head, and bend a knee. Look for a natural shoulder shape, a smooth neck turn, and clothing that follows the body. Refine individual regions as needed before animating.
The shoulder deforms badly when the arm rises. Adjust the shoulder and upper-arm weights only, then repeat the same test pose. Keep the rest of the rig unchanged.
Add Facial Expressions
Choose an expression approach for your character. One route is to prepare distinct expression variants and switch between them in Blender. Plan the states you need, such as neutral, smiling, and closed eyes; this route uses discrete changes rather than continuous blending.
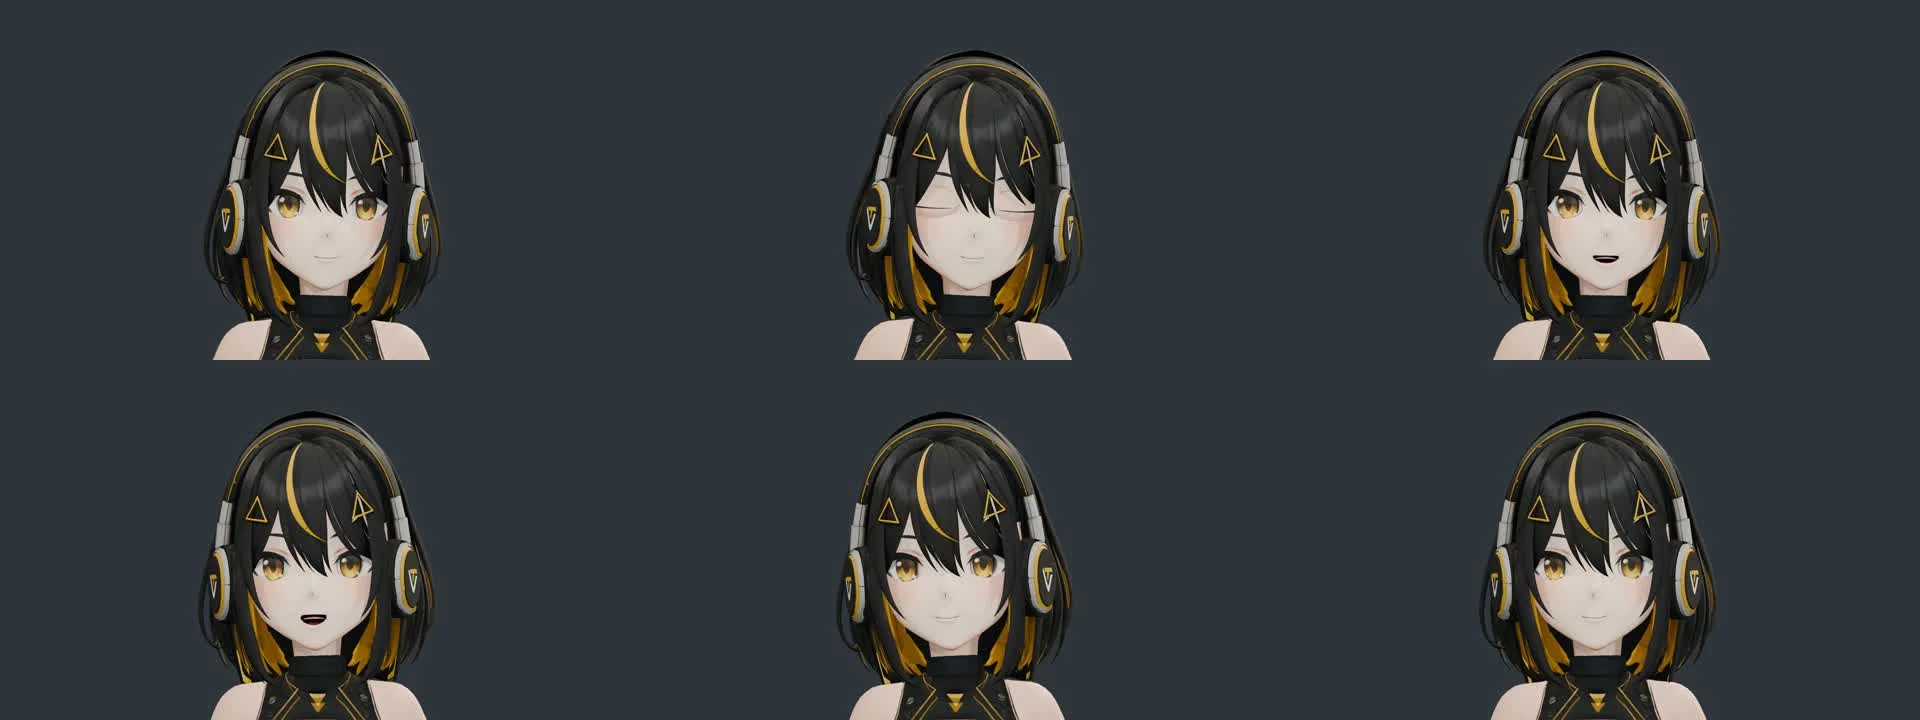
The close-up below demonstrates continuous blinking and mouth movement. These controls need suitable facial geometry and deformation, not just named sliders. Test a neutral face, partial blink, full blink, and smile in close-up. If the mesh lacks usable eyelids, add and fit them, then check the eyelid edges, lashes, and skin material together.
Step 6: Check and Finish the Materials
With textured GLB parts imported, check and finish their existing Blender materials. This stage does not require a new texture-generation pass. Review the body, head, and hair together, preserving the colors and visual identity of the reference.
Match the available color, roughness, metallic, and normal images to their corresponding parts. Connect confirmed maps to the appropriate shader inputs, preserve existing intentional shading, and render a comparison under the same lighting. If a map's role is unclear, resolve it before changing the material.
Use consistent lighting to check the final look: matching face and neck tones, readable clothing detail, and hair that feels part of the same design. Compare a rendered preview with the reference before moving to animation.
Step 7: Animation
Choose a short movement first: a greeting, a weight shift, or a simple loop. Keep the performance readable so you can see whether the rig and facial controls behave correctly.

Route A: Import an Existing Motion
Use an existing motion when you want to adapt a ready-made performance to your character. Check the motion's required rig setup and format before importing, then preview how it fits your character's proportions.
If you follow this route, use a motion you have permission to use and check its compatibility with your character. Preview the transferred motion before rendering, especially the hands, feet, and clothing.
Route B: Ask Astra for a Short Keyframe Study
This is an alternative to importing a dance. Start with a small action instead of requesting a complex performance immediately.
Prompt to try:
Create a new 3-second greeting action at 24 fps using the existing rig. Start in a relaxed pose, raise one hand for a small wave, add a slight head motion, and return to rest. Keep the feet planted and the hands clear of the clothing. Preserve existing actions. Show full-body previews at the start, middle, and end, refine visible intersections, then render the approved action at 1920 × 1080.
Review the motion and give frame-specific feedback: “The left hand passes through the jacket at frame 20. Reduce the swing and keep the hand outside the sleeve.” Repeat the preview after each correction.
When the movement looks right, frame the character head to toe, set your lights, and render. For a result matching the demonstrations here, use 1920 × 1080 at 24 fps. The greeting shown above is approximately 3.54 seconds; the facial study is 6 seconds.
Finish with secondary motion that suits the action. The example uses keyed hair movement; physics-based motion would be a separate setup.
What Creators Are Building with Tripo
Creators are exploring this workflow beyond a single character. These examples cover anime-character assembly, rigging experiments, and game prototyping.
Nano (@Dstudio_ai)
Nano brought an anime character from separate Tripo-generated body, head, and hair assets into a rigged Blender assembly, with expression changes and an imported dance performance.
View Nano's character workflow
Stefan Vaskevich (@Stefan_3D_AI)
Stefan Vaskevich explored Blender MCP and Computer Use for assembly and rigging, including a non-humanoid character example. See his post for the creator's own workflow and results.
View Stefan's Blender workflow
Lucca Cerf (@luccacerf)
Lucca Cerf shared a Warcraft-style game prototype combining AI-assisted game logic, Tripo assets, Blender assembly, and Unity.
Conclusion
The workflow: clear character reference → separate body, head, and hair generation → Blender assembly → rigging and expression setup → material checks → animation → render.
Start with the character you want to create. Use Tripo to generate its parts, bring them together in Blender, and build a short performance one stage at a time. A clear reference and specific feedback keep the result connected to your original design.
Start with your character reference in Tripo Studio and generate your first part.
Frequently Asked Questions
Why generate the character in three parts?
This tutorial organizes generation around the body, head, and hair so you can review each part against the design before assembly. Keep the complete reference nearby to guide proportions and check the joins in Blender.
Do I need to know Blender?
Basic familiarity helps you judge proportions, pose quality, and material appearance. You can use the prompts to direct the work, but you still review the result and decide what to refine.
What animation should I start with?
Start with a short greeting or a simple weight shift so you can review the silhouette, hands, and feet clearly. For a longer performance, you can explore an existing motion after checking its usage terms and fit to your rig.
How should I choose a facial expression approach?
Decide whether you need distinct expression states or continuous transitions. Expression switching uses separate states, while the close-up here demonstrates continuous controls. Choose the approach that matches the performance you want to show.
How long does the workflow take?
Your timeline will depend on the character, generation choices, and refinement needed. Plan time for assembly, pose checks, expressions, and the final animation preview. Complete one short performance before expanding to a larger set of actions.

.webp?x-oss-process=image%2Fresize%2Cw_720%2Fformat%2Cwebp%2Fquality%2Cq_80)