What Is UV Unwrapping? A Beginner's Guide to 3D Texturing
- UV unwrapping flattens a 3D surface so textures land correctly.
- Seams control where the mesh opens into UV islands.
- Good UVs reduce stretching and keep texture detail consistent.
- Texel density and padding matter for baking clean normal maps.
- Tripo AI can generate textured models with packed UV maps.
UV unwrapping is the process of cutting and flattening a 3D model’s surface into a 2D layout so that textures can be applied accurately. Think of peeling an orange in one piece and laying the skin flat — that’s exactly what UV unwrapping does to a 3D mesh. Without it, any texture you apply will stretch, tile randomly, or look completely wrong.
Every 3D model you’ve ever admired in a game or film — the scuffed leather on a character’s jacket, the chipped paint on a wall — that detail lives in a texture. And every texture needs a UV map to land correctly on a 3D surface. This guide explains what UV unwrapping is, how to place seams intelligently, how to avoid the most common pitfalls, and where AI tools now do the work for you.
Why Is It Called "UV"?
In 3D space, every point on a model has X, Y, and Z coordinates. These describe the object’s position in three dimensions: left-right, up-down, and forward-back.
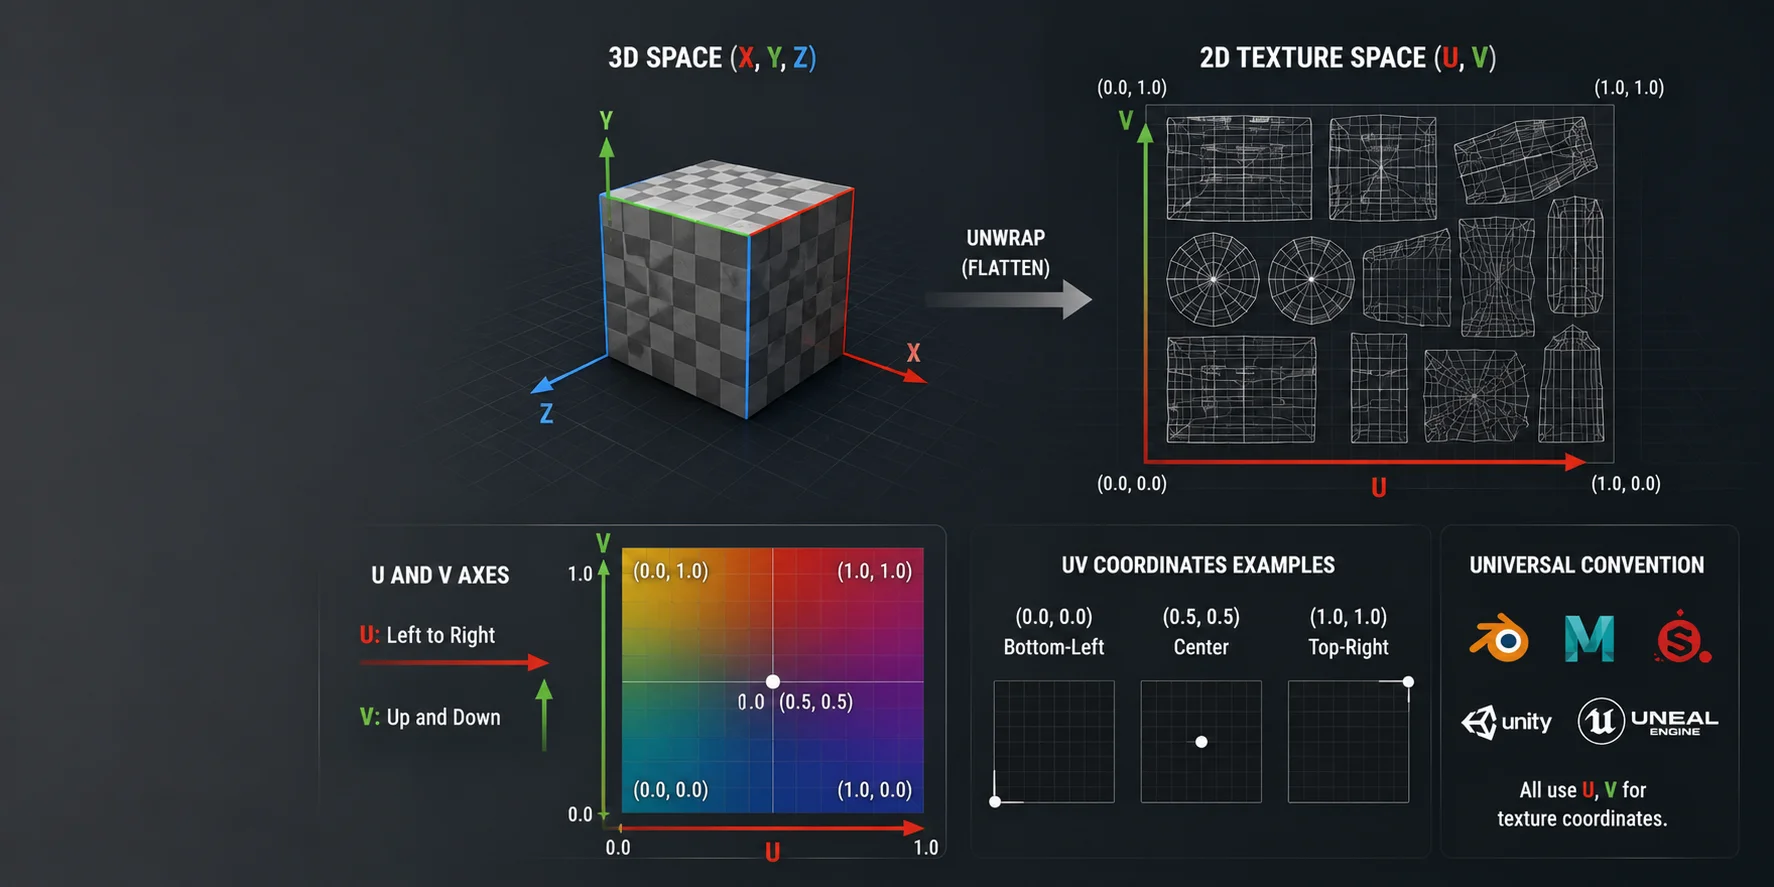
When you flatten a 3D surface into a 2D texture layout, the software needs another coordinate system. Since X, Y, and Z are already used for 3D space, 3D tools use U and V for the horizontal and vertical axes of the 2D texture space.
U goes left to right. V goes up and down. A UV coordinate like (0.5, 0.5) means the center of the texture image. (0.0, 0.0) is the bottom-left corner, and (1.0, 1.0) is the top-right corner.
This naming convention is universal. Blender, Maya, Substance Painter, Unity, Unreal Engine, and most renderers all use U and V for texture coordinates.
Now that the name makes sense, let’s look at what the actual process involves.
What Does UV Unwrapping Actually Do?
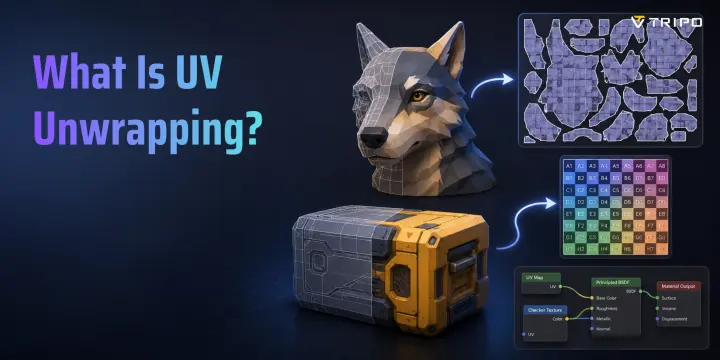
A 3D mesh is made of polygons. Each polygon exists in 3D space, but a texture image is flat. UV unwrapping creates a second set of coordinates for every vertex on the mesh: its position on a flat 2D canvas called UV space, or a UV map.
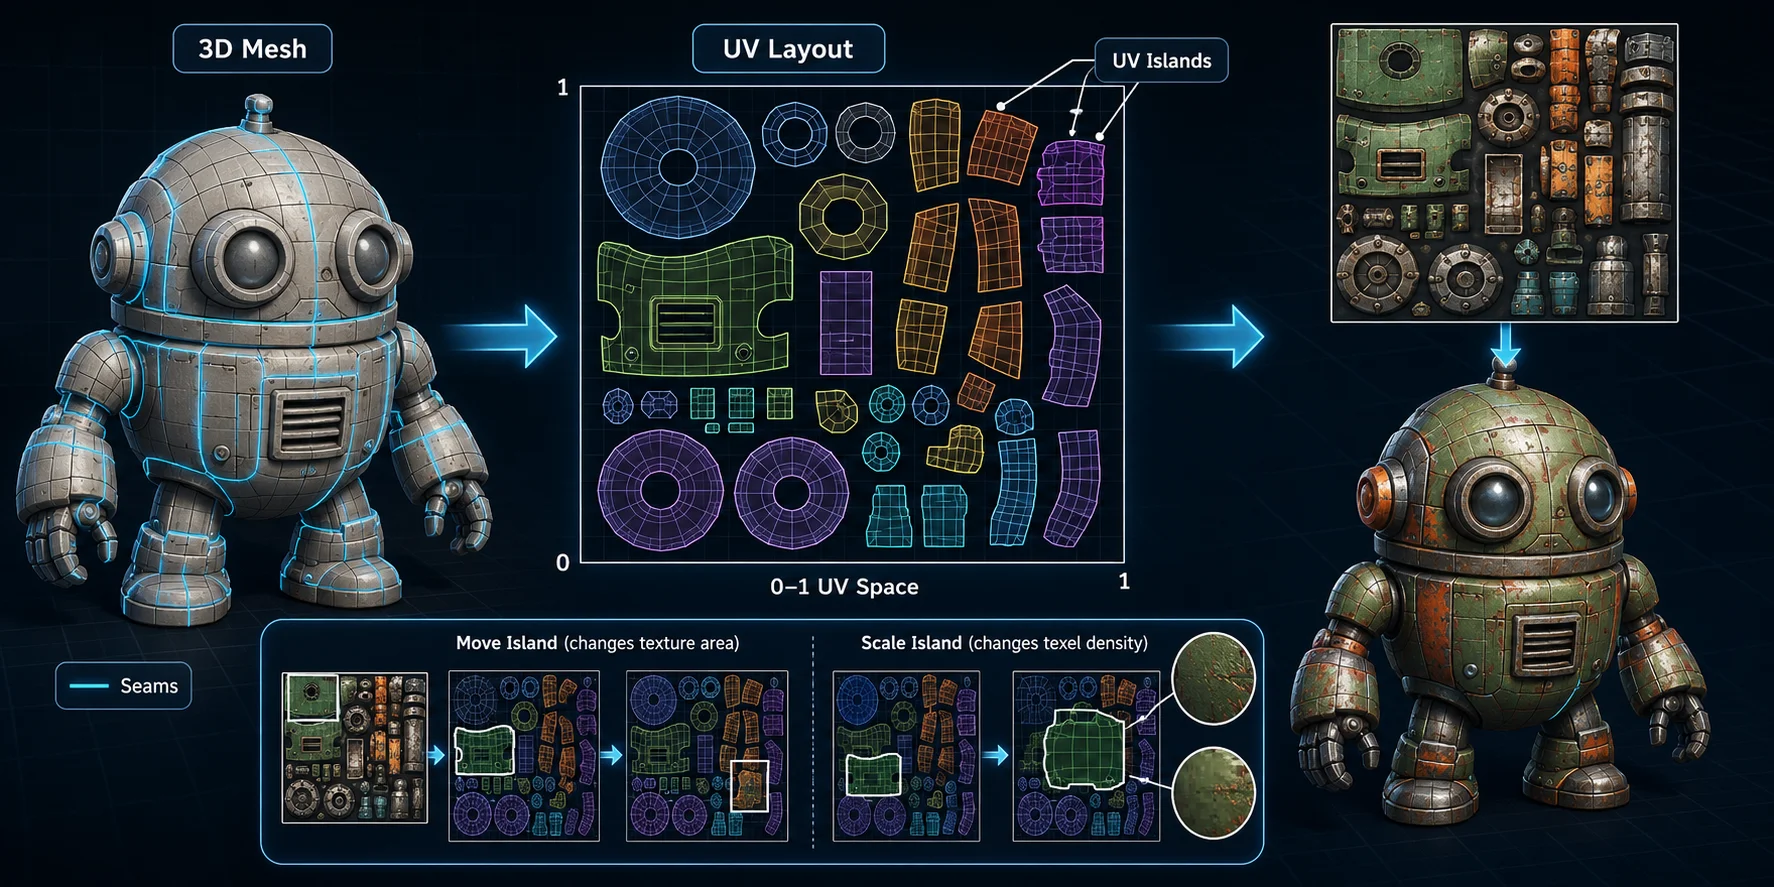
The result is a UV layout. This layout looks like a flattened diagram of your model’s surface. It is divided into UV islands, which are connected patches of flattened polygons. A character, for example, might have separate UV islands for the face, torso, arms, legs, hands, shoes, and clothing.
Each UV island sits somewhere inside the 0–1 UV space. The texture image is layered over that space, and the software uses the UV coordinates to decide which part of the image appears on each part of the model.
Move a UV island, and a different part of the texture covers that surface. Scale an island up, and that surface gets more texture detail. Scale it down, and the same surface becomes blurrier.
The most important skill in UV unwrapping is knowing where to cut — called placing seams.
What Are UV Seams and Where Should You Place Them?
A UV seam is a cut you mark on an edge of your 3D mesh. When you unwrap the model, the software cuts along those edges and unfolds the surface into UV islands.
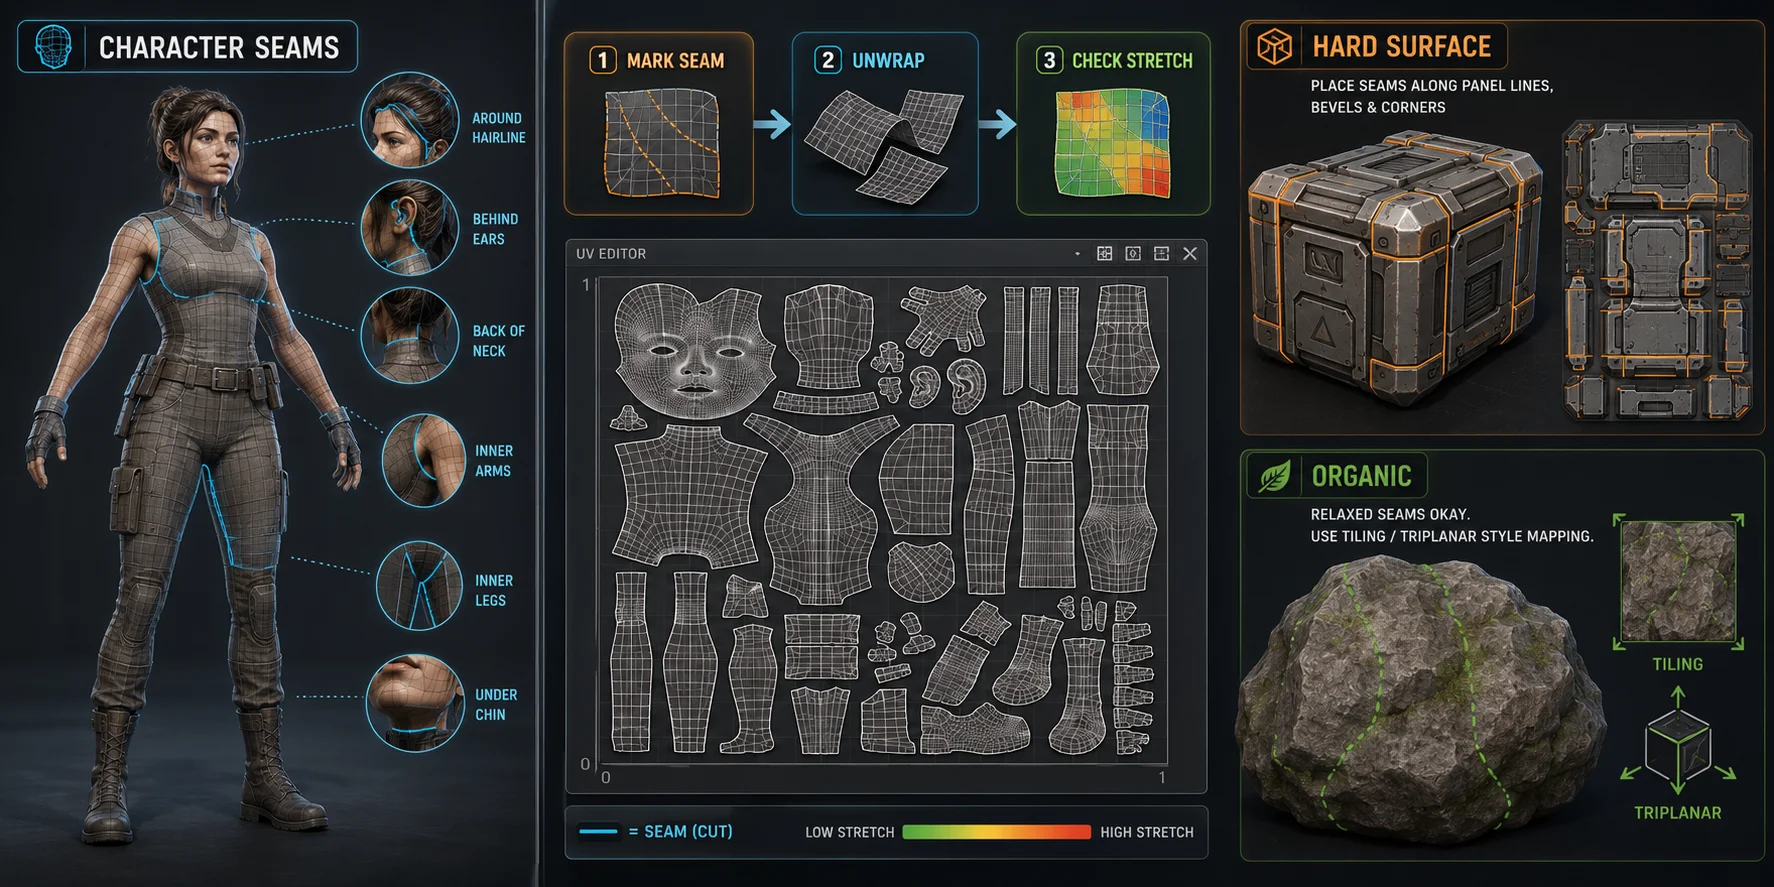
Think of a jacket. To lay it flat as fabric, you need to cut along seams: under the arms, along the sides, around the sleeves, and near the collar. UV seams work the same way. They tell the software where the 3D surface is allowed to split.
The goal is not to remove seams entirely. Most complex models need seams. The goal is to hide them where viewers will not notice and to cut at natural fold points so the surface flattens with less distortion.
For characters, place seams in low-visibility areas: inner arms, inner legs, between fingers, under the chin, around the hairline, behind the ears, and at the back of the neck. Avoid placing seams across the center of the face, chest, or other visible hero areas unless the design hides them.
For hard-surface assets, such as props, vehicles, crates, weapons, and machinery, place seams along panel edges, bevels, corner transitions, and areas where the surface direction changes sharply. A sci-fi crate already has panel lines, so use those edges to hide UV cuts.
For organic shapes, such as rocks, roots, cliffs, and terrain chunks, seams often matter less. These assets usually use tiling textures, box projection, sphere projection, or triplanar mapping instead of carefully hand-painted unique textures.
In Blender, select the model, enter Edit Mode, select the edges you want to cut, then right-click and choose Mark Seam. You can also use Ctrl+E → Mark Seam. After marking seams, press U → Unwrap, then inspect the result in the UV Editor.
Once your seams are in and you have unwrapped the mesh, the most common problem is stretching.
How to Spot and Fix UV Stretching
UV stretching happens when a UV island is distorted. Some polygons receive too much texture space, while others receive too little. On the model, stretching appears as blurry detail, pulled patterns, squashed logos, warped checker grids, or texture lines that bend in strange directions.
A simple test is to apply a checker texture. If the squares look even, the UVs are healthy. If the squares become long rectangles or warped shapes, the UVs are stretched.
In Blender, open the UV Editor, go to Overlays, and enable Stretch. Blue areas mean low distortion. Red or orange areas mean high distortion. Your goal is to keep as much of the layout blue as possible.
The most common cause is not enough seams. If the software tries to flatten a curved surface without enough cuts, it has to pull the island into shape. Add seams at curves, creases, joints, and hidden areas, then unwrap again.
Long, thin shapes can also stretch. Tubes, cables, sleeves, tentacles, and straps often need one seam running along their length. In Blender, you can also try U → Cylinder Projection for cylindrical forms.
Another issue is poles. A pole is a vertex where five or more edges meet. Stretching can radiate from that point. You can fix it by moving the pole to a less visible area, changing the topology, or placing a seam to isolate the problem.
With stretching under control, the next step is packing your UV islands efficiently.
UV Packing and Texel Density
After unwrapping, your UV islands sit scattered across the UV canvas. UV packing arranges them so they use the texture space efficiently. Tightly packed islands give more texture resolution to the model, while wasted empty space lowers the effective quality of your texture.
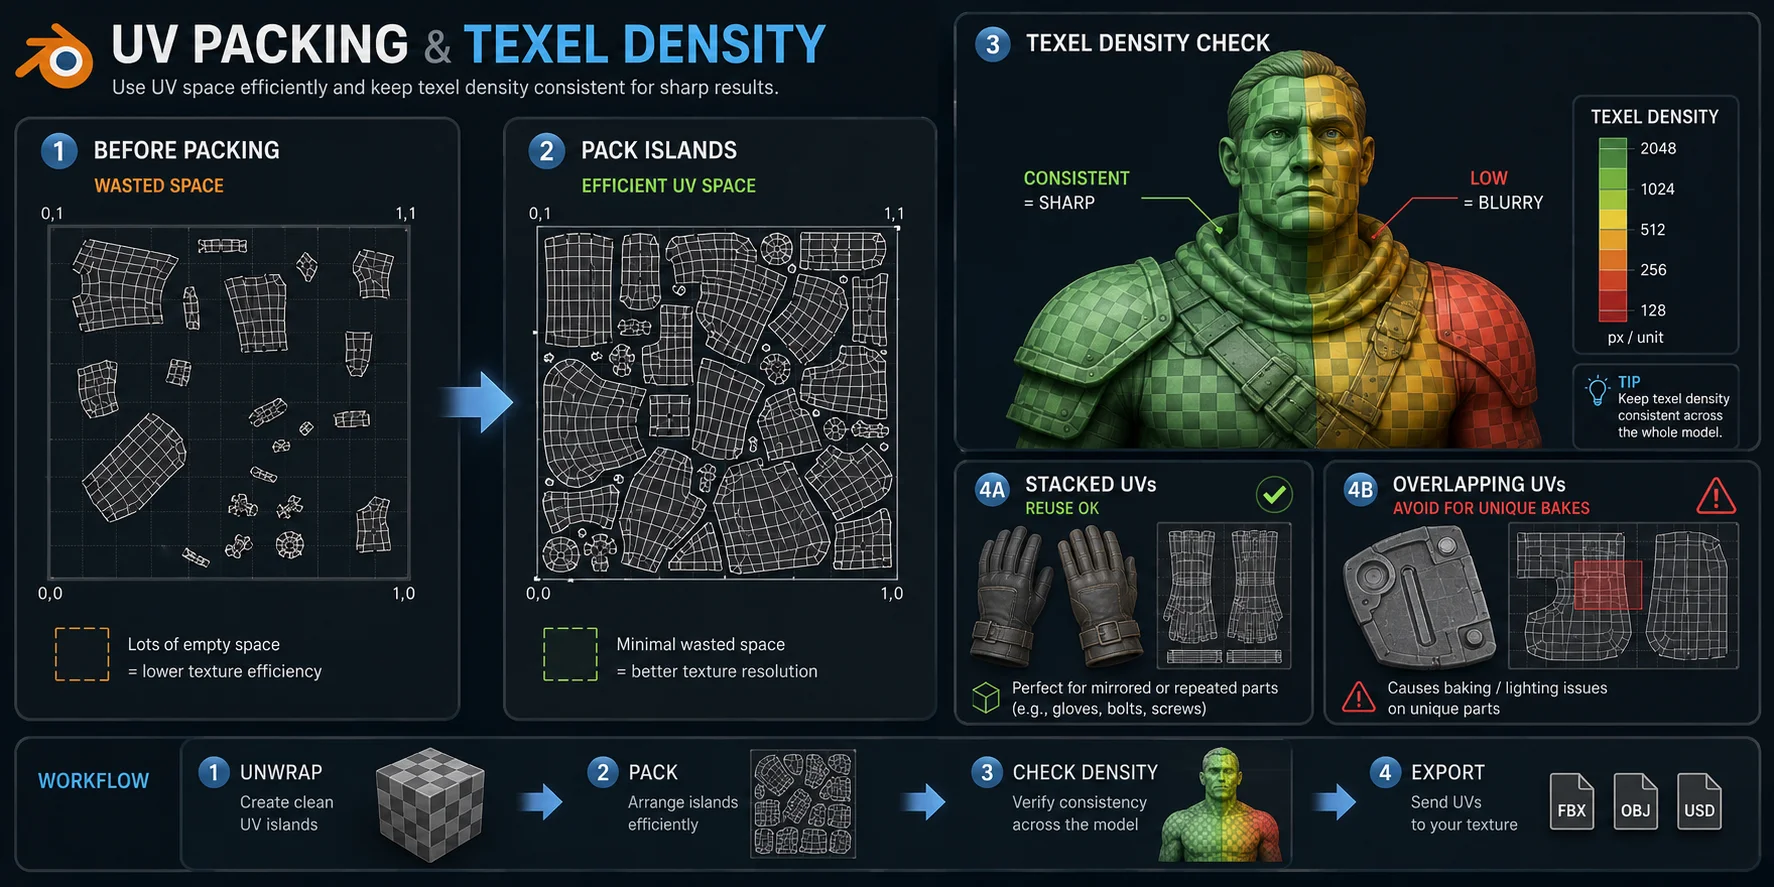
In Blender, select your UV islands in the UV Editor and use UV → Pack Islands. This auto-arranges islands inside the 0–1 UV space. You can still rotate, scale, or move islands manually afterward.
Texel density means how many texture pixels, or texels, cover one unit of 3D space. Consistent texel density keeps texture sharpness even across the model. If a character’s face has high texel density but the torso has low texel density, the face may look crisp while the torso looks blurry, even if both use the same texture size.
Game studios often set texel density targets. A background prop might use 512px per meter, while a hero asset might use 1024px per meter or more. The right target depends on camera distance, platform, art style, and texture budget.
For Blender users, add-ons like TexTools can help measure and normalize texel density. This is useful when you manually scaled UV islands and need to make them consistent again.
UV islands can also overlap on purpose. Stacked UVs are useful when two surfaces share the same texture, such as mirrored gloves, identical boots, repeated bolts, or duplicate bricks. But do not overlap islands that need unique baked lighting or unique normal map data. Overlapping UVs in a lightmap or normal bake can cause artifacts.
For many modern pipelines, you do not have to do all of this manually.
Automatic UV Unwrapping vs Manual: When to Use Each
Automatic UV tools can save time, but they are not always the best choice. Manual UV unwrapping gives you more control, especially for characters, hero assets, and models that need clean painted texture detail.
| Workflow | Best For | Strengths | Weaknesses |
|---|---|---|---|
| Automatic UV unwrapping | Background props, simple hard-surface assets, prototypes | Fast and easy; good enough for many models | Can create messy islands, visible seams, or uneven texel density |
| Manual UV unwrapping | Characters, hero props, close-up assets | Better seam control and cleaner painting areas | Slower and requires practice |
| Projection mapping | Rocks, terrain, boxes, cylinders, tiling materials | Quick for simple shapes and repeated textures | Poor for complex unique textures |
| AI-generated UVs | AI-generated assets and fast texturing workflows | Skips manual setup and outputs usable UVs with textures | Less control than hand-authored UVs |
For simple props, Blender’s Smart UV Project can work well. Select the model in Edit Mode, press U → Smart UV Project, adjust the angle limit if needed, and check the result. This is useful for crates, bolts, background objects, and early tests.
For characters and close-up assets, manual unwrapping is usually better. You need predictable seams, readable UV islands, clean texture painting areas, and enough space for important details like faces, hands, armor, or clothing.
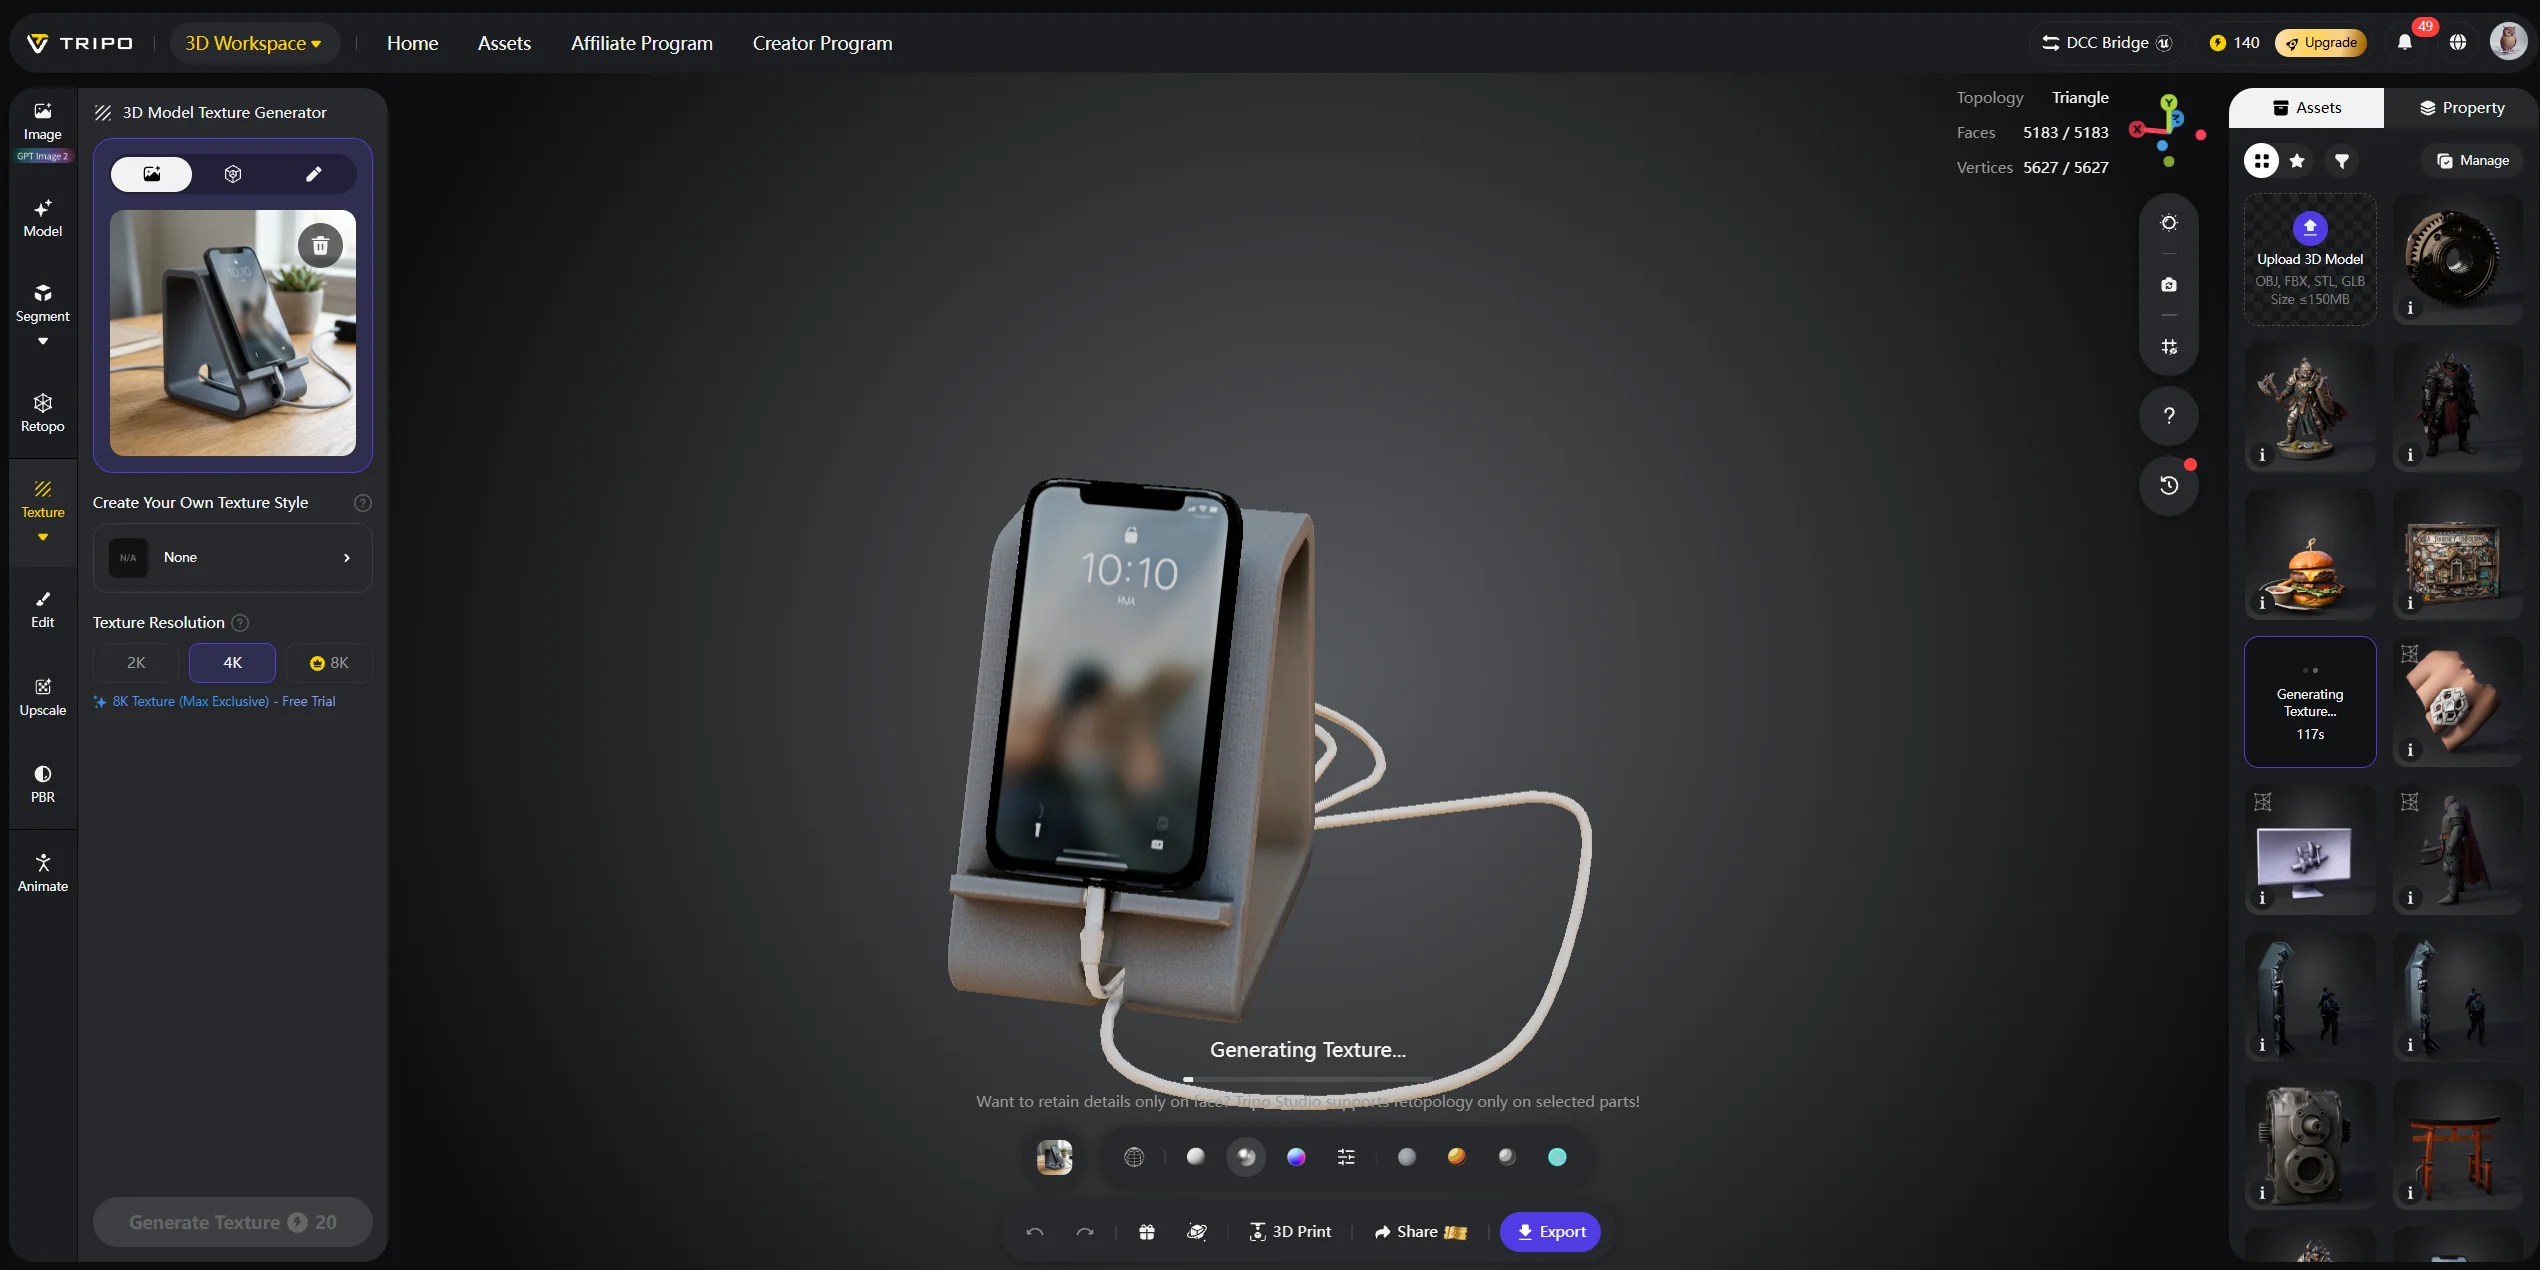
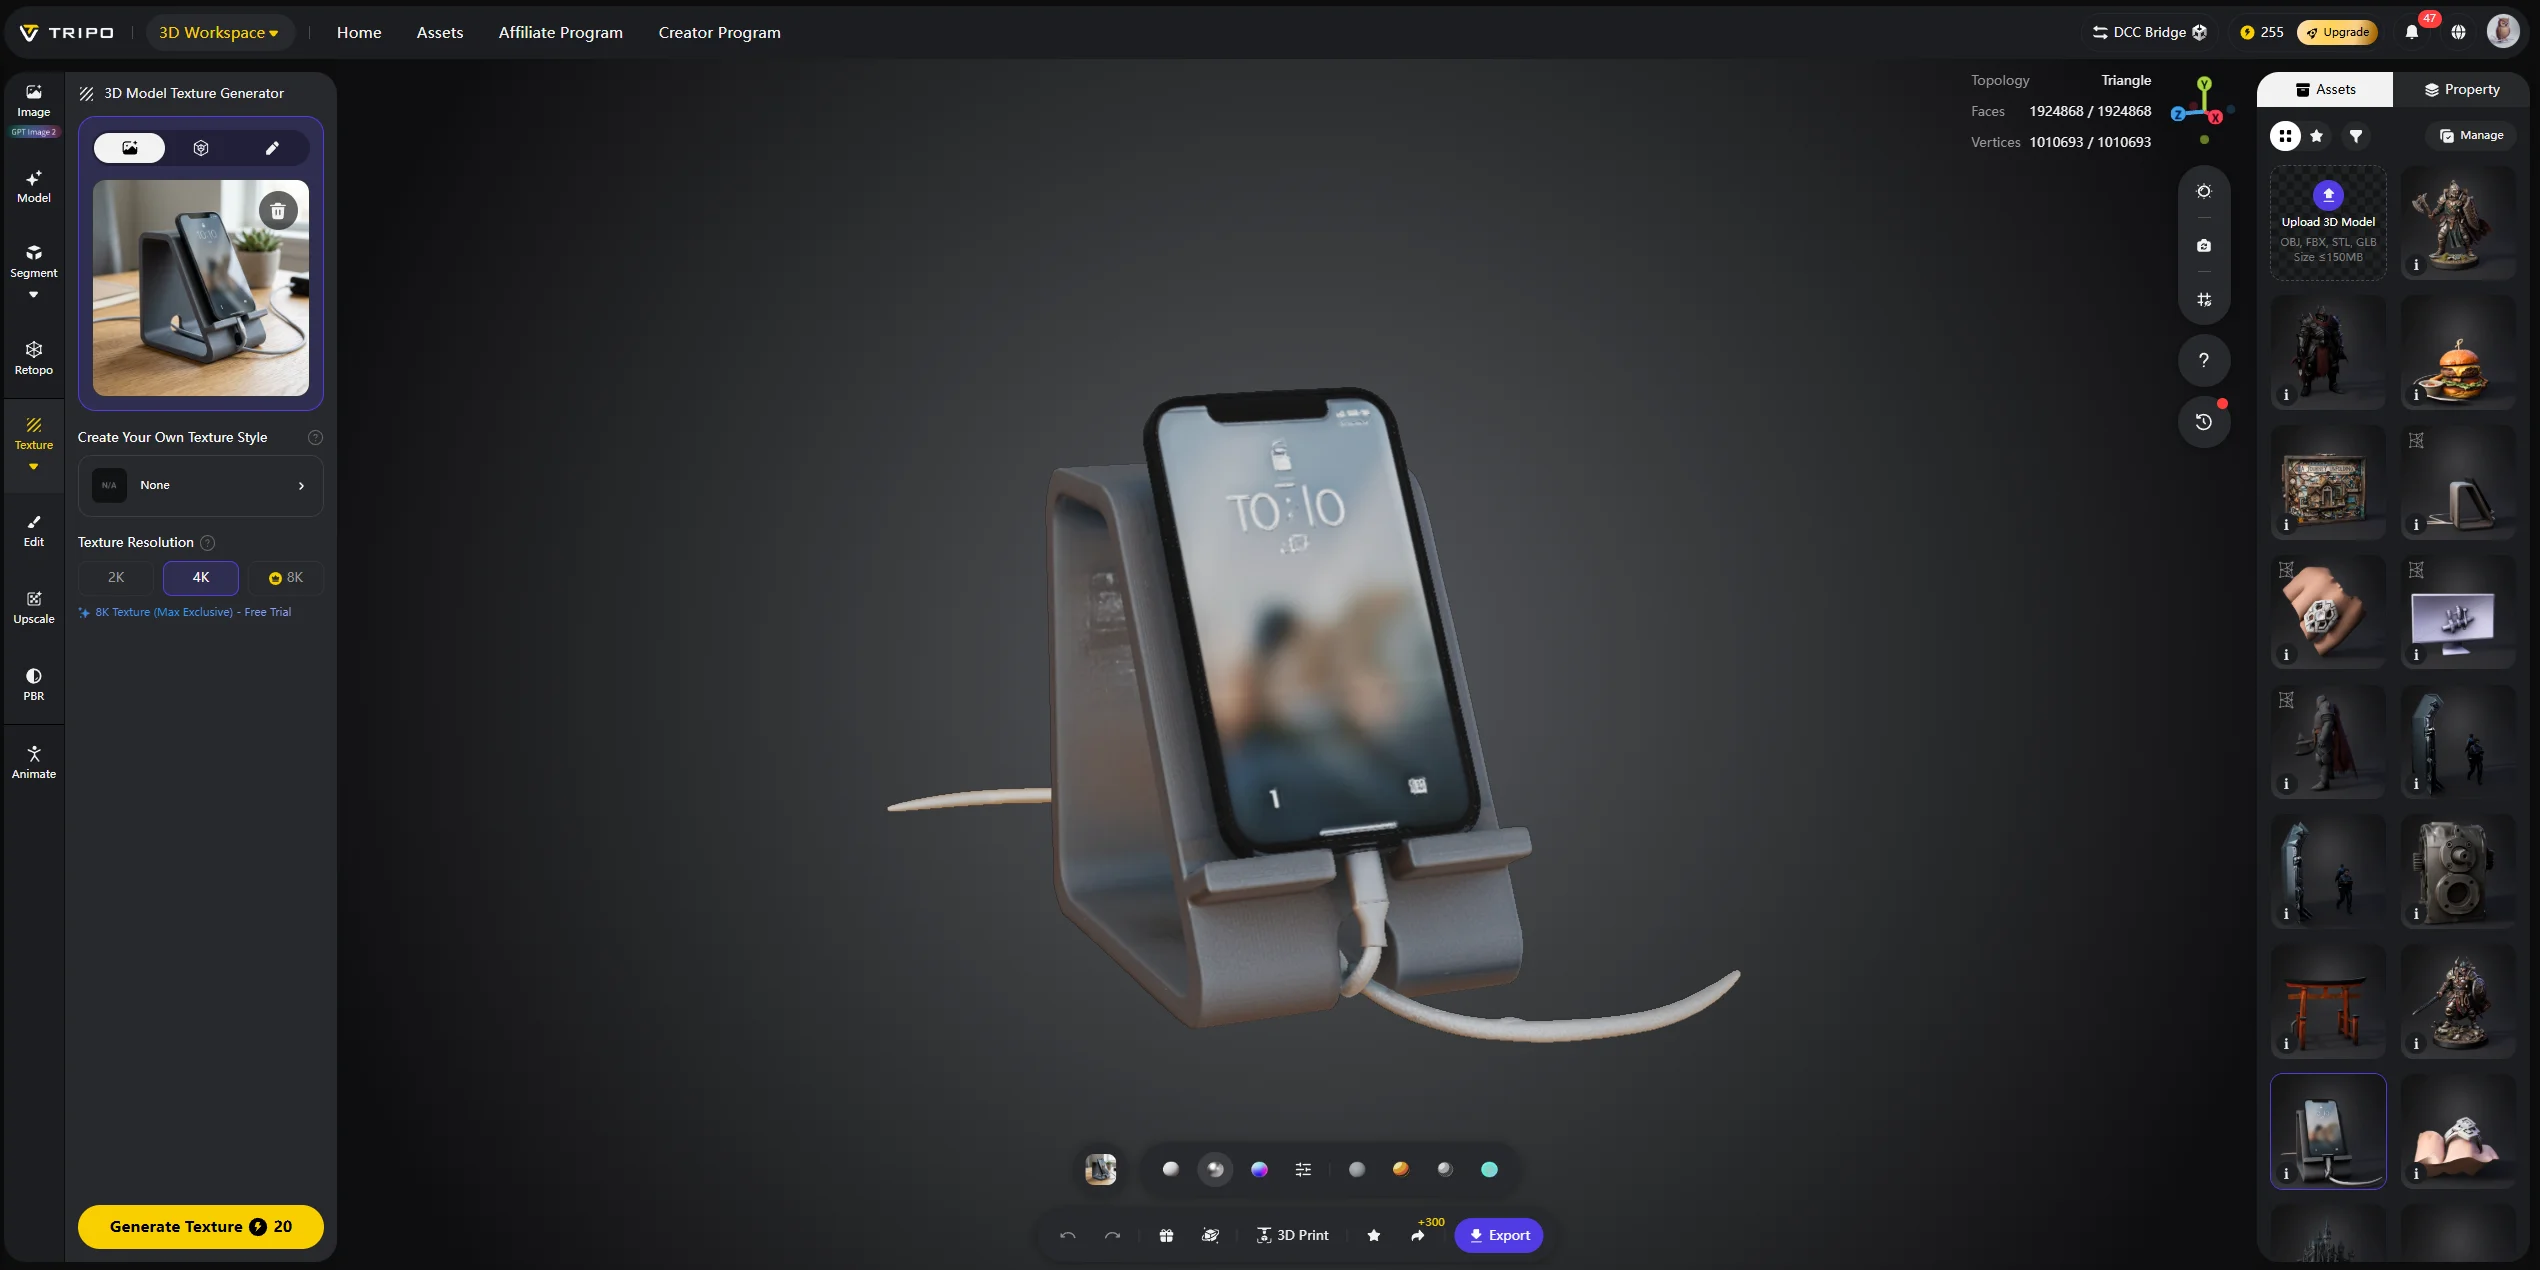
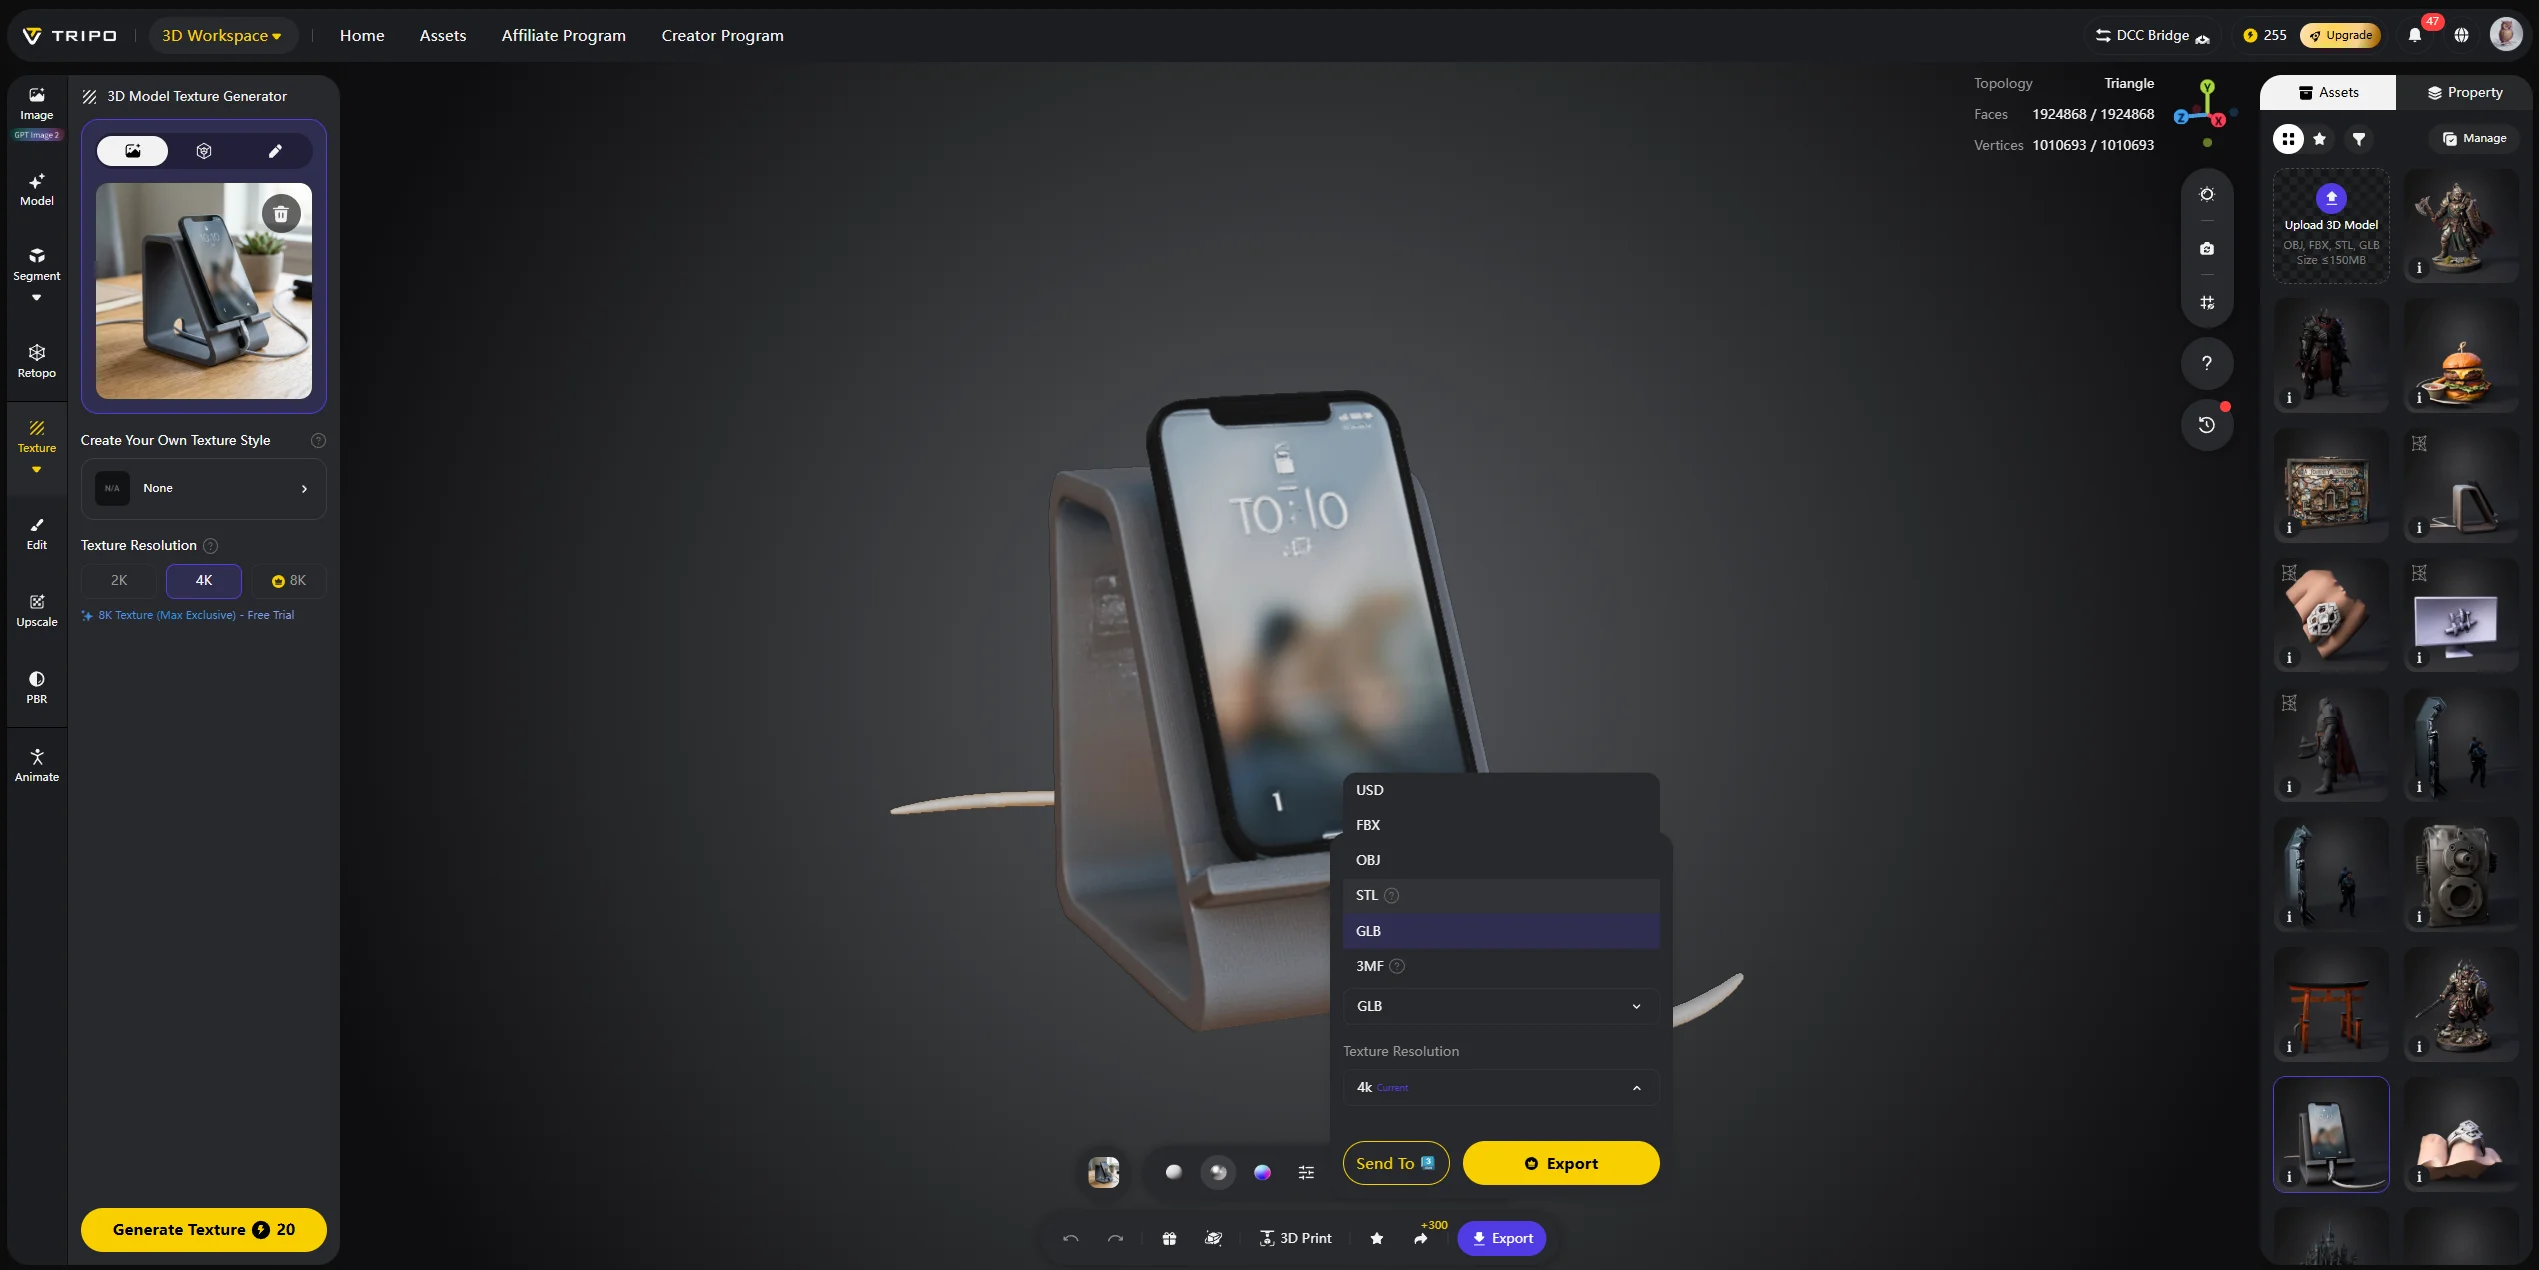
For AI-generated models, you may not need to unwrap manually at all. Tripo AI Studio can generate models with UVs and textures already prepared, helping you move from prompt or reference image to textured asset much faster.
A simple decision rule works well: use automatic UVs for speed, manual UVs for control, and AI-generated UVs when you want the fastest path from generated model to textured output.
UV Unwrapping and Normal Map Baking — The Connection
UV unwrapping becomes even more important when you bake a normal map from a high-poly model to a low-poly model. This is a common step after retopology.
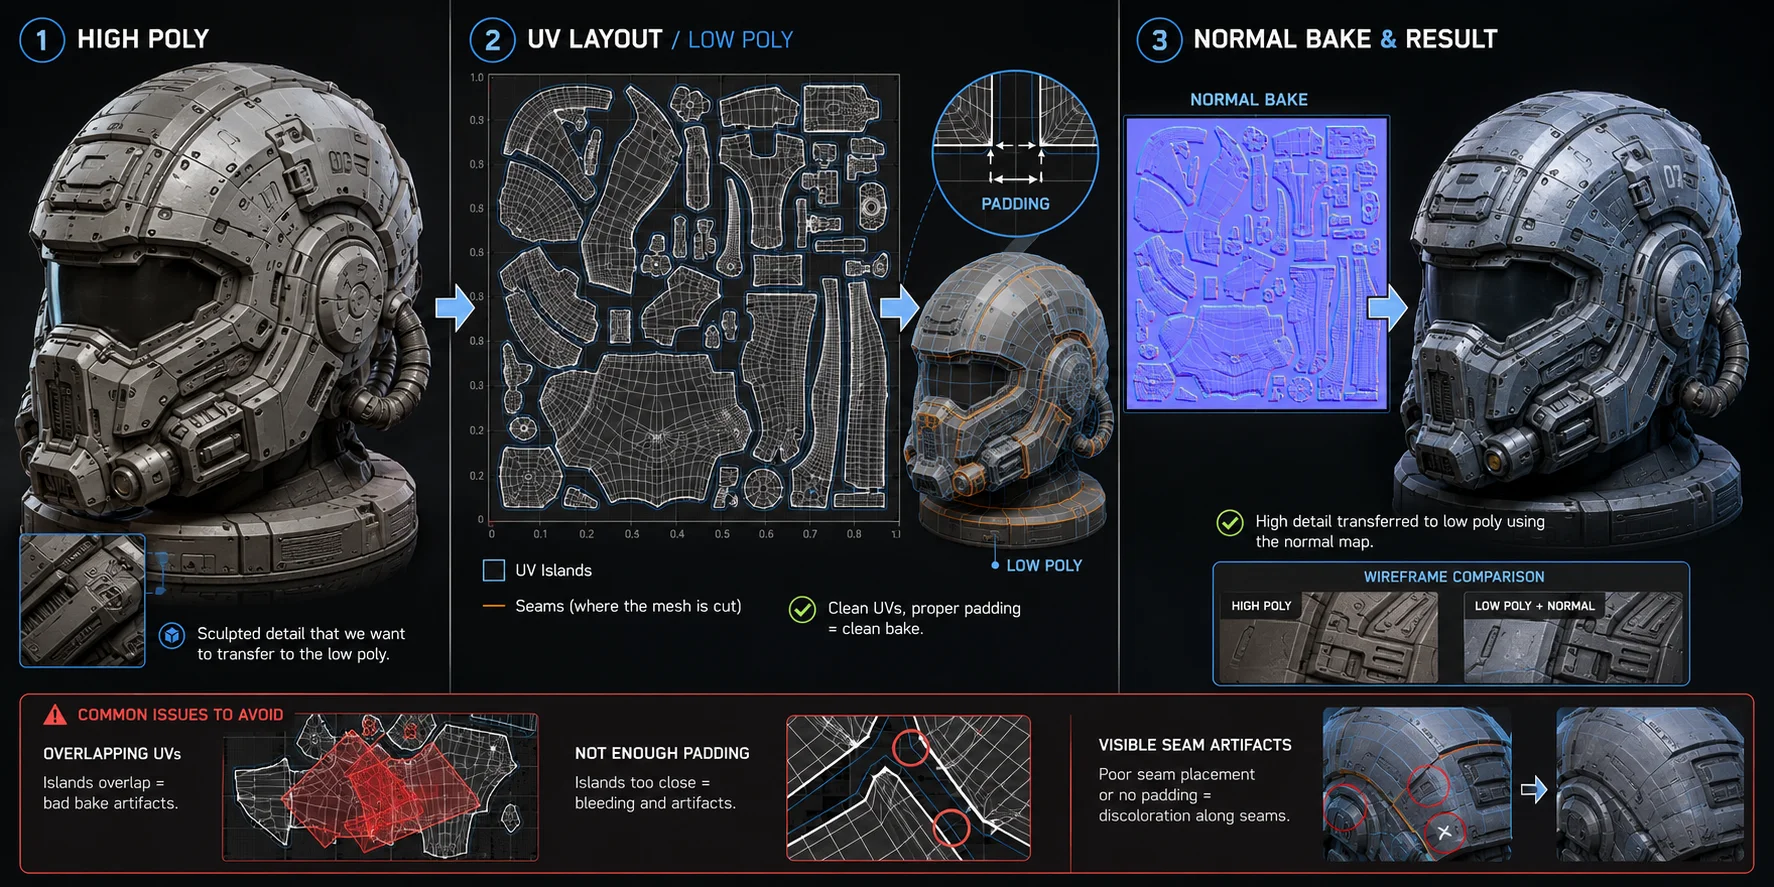
A normal map bake uses the low-poly model’s UV layout as the target. Each UV island acts like a window into the bake texture. The baker compares the low-poly model to the high-poly model and writes surface direction detail into that island’s texture space.
If two UV islands overlap when they should contain different details, the bake can become corrupted. Two high-poly areas may write into the same pixels, causing broken shading, strange dents, flipped detail, or visible artifacts.
Seam placement matters here too. Put seams where normal map transitions are least visible: inside joints, under clothing, under hair, behind accessories, or along existing hard edges. Avoid placing seams across large visible flat areas unless the design already hides them.
Padding also matters. Padding is the empty space between UV islands. Without enough padding, mipmap blending can bleed pixels across island borders, creating dark edges or color artifacts in-engine.
A common starting point is 4px padding for 2K textures and 8px padding for 4K textures. Increase padding if the asset will be viewed from far away, uses strong mipmapping, or ships in a game engine with texture compression.
If you have just finished retopologizing your model, use this UV layout for normal-map baking. The workflow is explained here without relying on the unavailable Brief link.
Frequently Asked Questions
How to UV unwrap fast? For hard-surface and background props, use Smart UV Project in Blender with U > Smart UV Project. It can produce a usable layout quickly. For characters, speed comes from learning standard seam placements, while AI tools like Tripo AI can skip manual UV setup by outputting packed UVs with generated models.
What is the purpose of UV unwrapping? UV unwrapping allows a 2D texture image to apply accurately to a 3D surface without stretching or misalignment. It creates a flat map of the model’s surface so the renderer knows which part of the image belongs to each polygon.
What is the difference between UV mapping and UV unwrapping? UV mapping is the broader process of assigning 2D texture coordinates to a 3D model. UV unwrapping is one method of creating a UV map by cutting and flattening the mesh. Box mapping, cylindrical projection, and triplanar mapping can also create UVs, but they are not the same as manual unwrapping.
What is the process of UV unwrapping? The basic process is: mark seams, run the unwrap operation, check for stretching, fix distorted islands, pack UV islands efficiently, and set consistent texel density. For baked assets, leave enough padding between islands to avoid texture bleeding.
Conclusion
UV unwrapping is the bridge between a finished 3D mesh and a textured, production-ready asset. Get the seams right, keep the texel density consistent, and your textures will look sharp from any angle. Skip it, or let it go wrong, and no amount of texture resolution will fully fix the result.
If you want to skip the UV setup entirely for AI-generated assets, Tripo AI Studio outputs fully textured models with packed UV maps included from a text prompt or reference image in seconds.
See Tripo AI Pricing to find the plan that fits your workflow.