Tripo DCC Bridge for Unity: Installation & Quick Start
Tripo3D Unity Bridge is a lightweight plugin that connects Unity directly to the Tripo Studio frontpage. With this bridge, you can send generated models from the browser straight into your Unity editor—no manual downloads, imports, or extra steps required.
It's designed to streamline workflows for artists, technical artists, and game developers, allowing you to focus on scene building and gameplay integration instead of file management.
Requirements
- OS: Windows, Mac
- Unity: 2021.3 LTS or newer (recommended 2022.3 LTS+ or Unity6 LTS+)
- Browser:
- Supports Google Chrome 116+, Edge 116+, Opera 102+
- Other browsers are not supported
- Default Import Settings:
- Generate Colliders:
false - Import Materials:
true - Import Textures:
true - Pivot: Center Bottom
- Texture Resolution: Current Maximum
- Generate Colliders:
Step-by-Step Installation
Step 1: Go to Tripo Studio and download the Tripo3D Unity Bridge ZIP file.
Step 2:
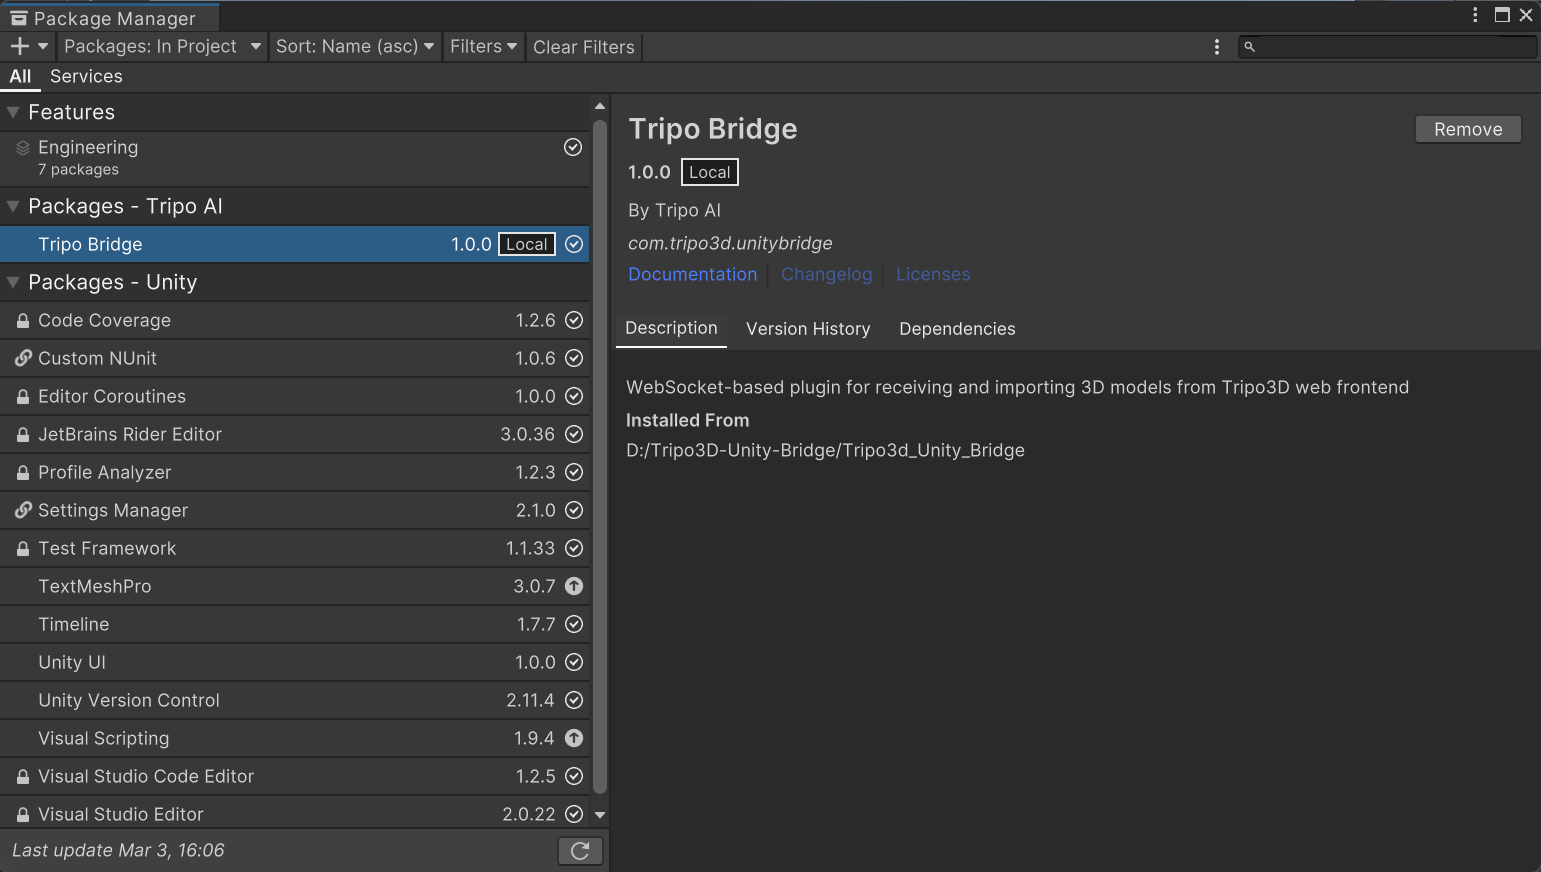
- Import the Package into Unity. Open your Unity project and navigate to: Window → Package Manager
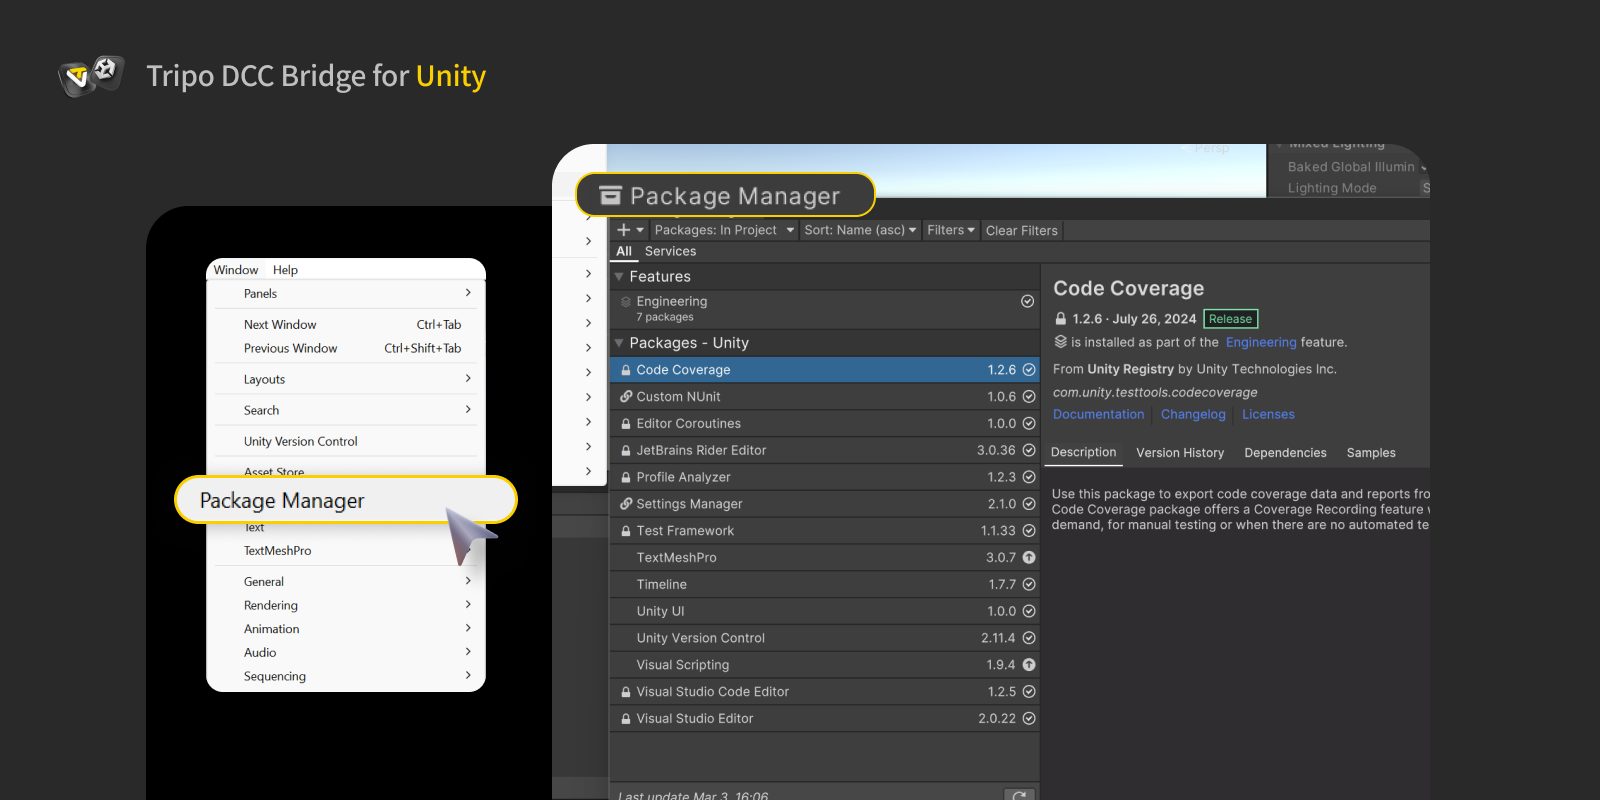
- In the Package Manager window, click the "+" button in the top-left corner. Select Add package from disk…
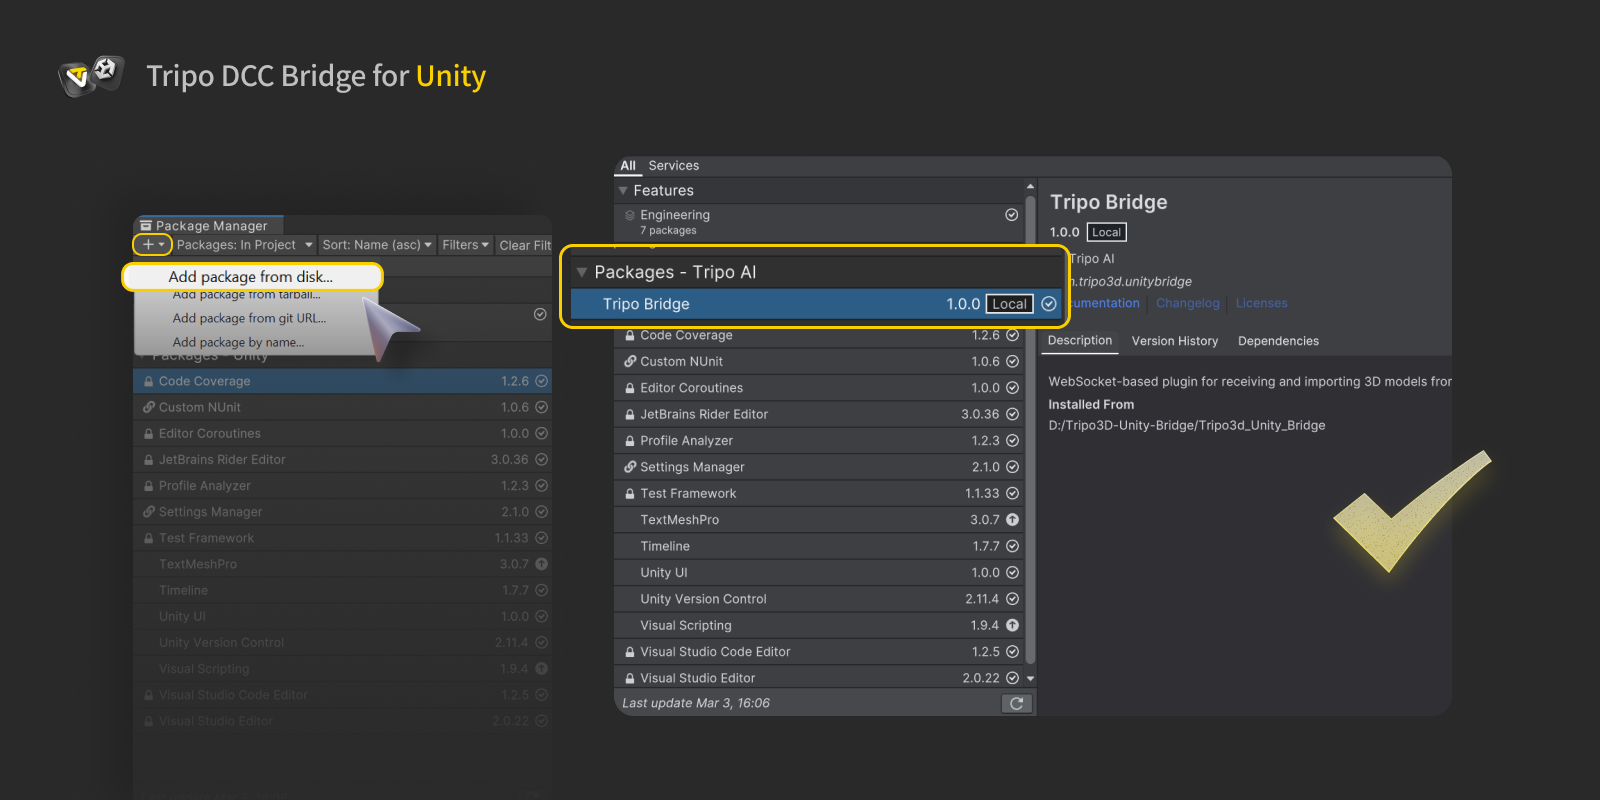
- Browse to the extracted plugin folder. Select the
package.jsonfile.

- After installation, the plugin will appear in your Package Manager list and its files will be available inside the project.
Step 3:
- After installation: Navigate to: Tools → Tripo Bridge
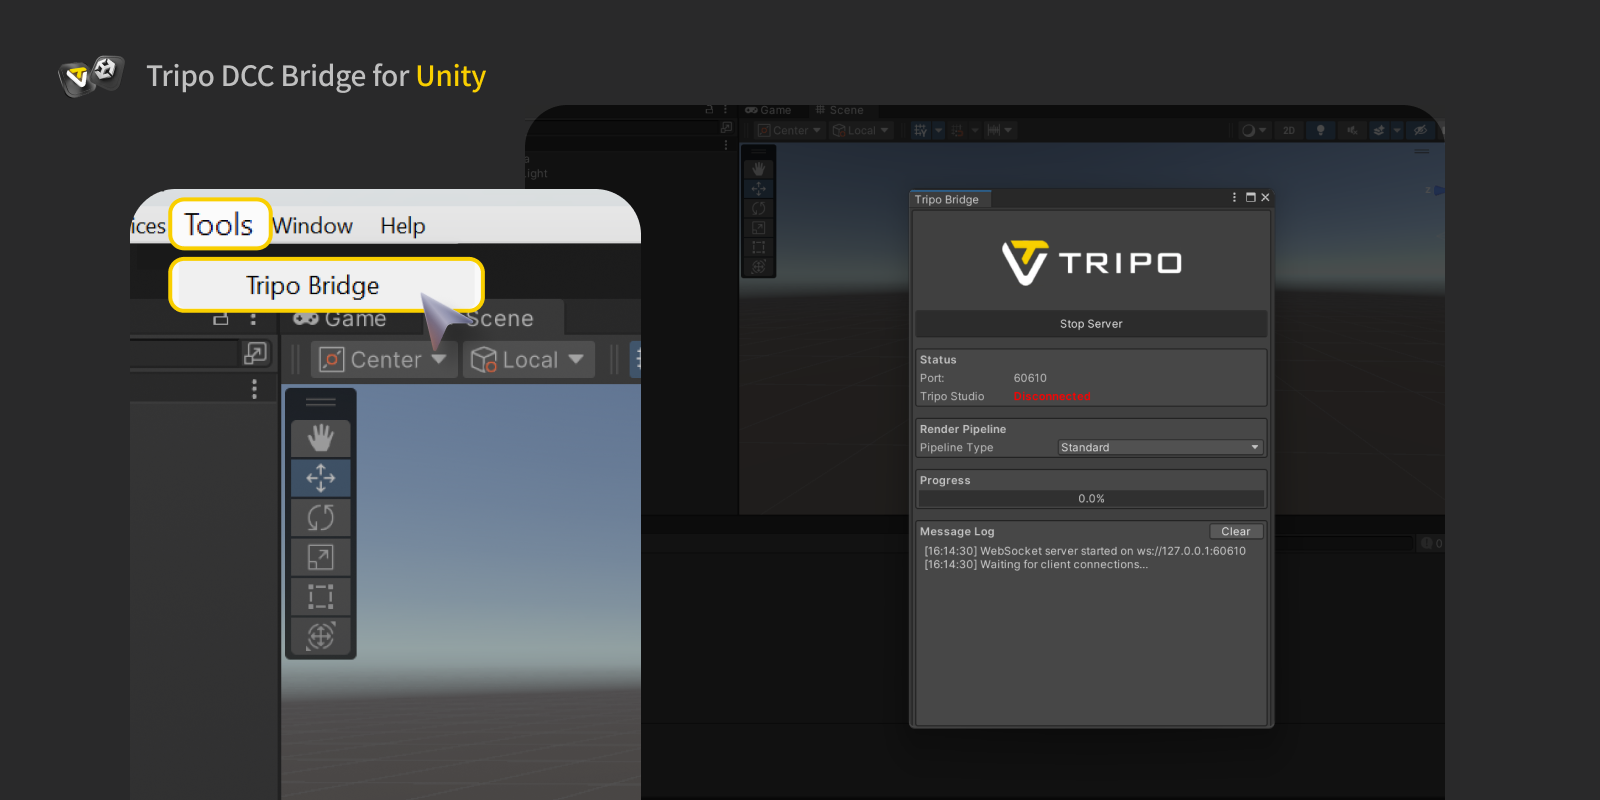
- When the panel is opened, the Bridge service starts automatically.
- The Bridge service must remain running while connecting to the web browser.
- Do not close Unity or the Bridge panel during model transfer.
- Inside the Tripo bridge panel, the Render Pipeline is automatically detected based on the current Unity project. The supported pipelines include:
- Standard (Built-in Render Pipeline)
- URP
- HDRP
You can also monitor the real-time connection status and view detailed log output.
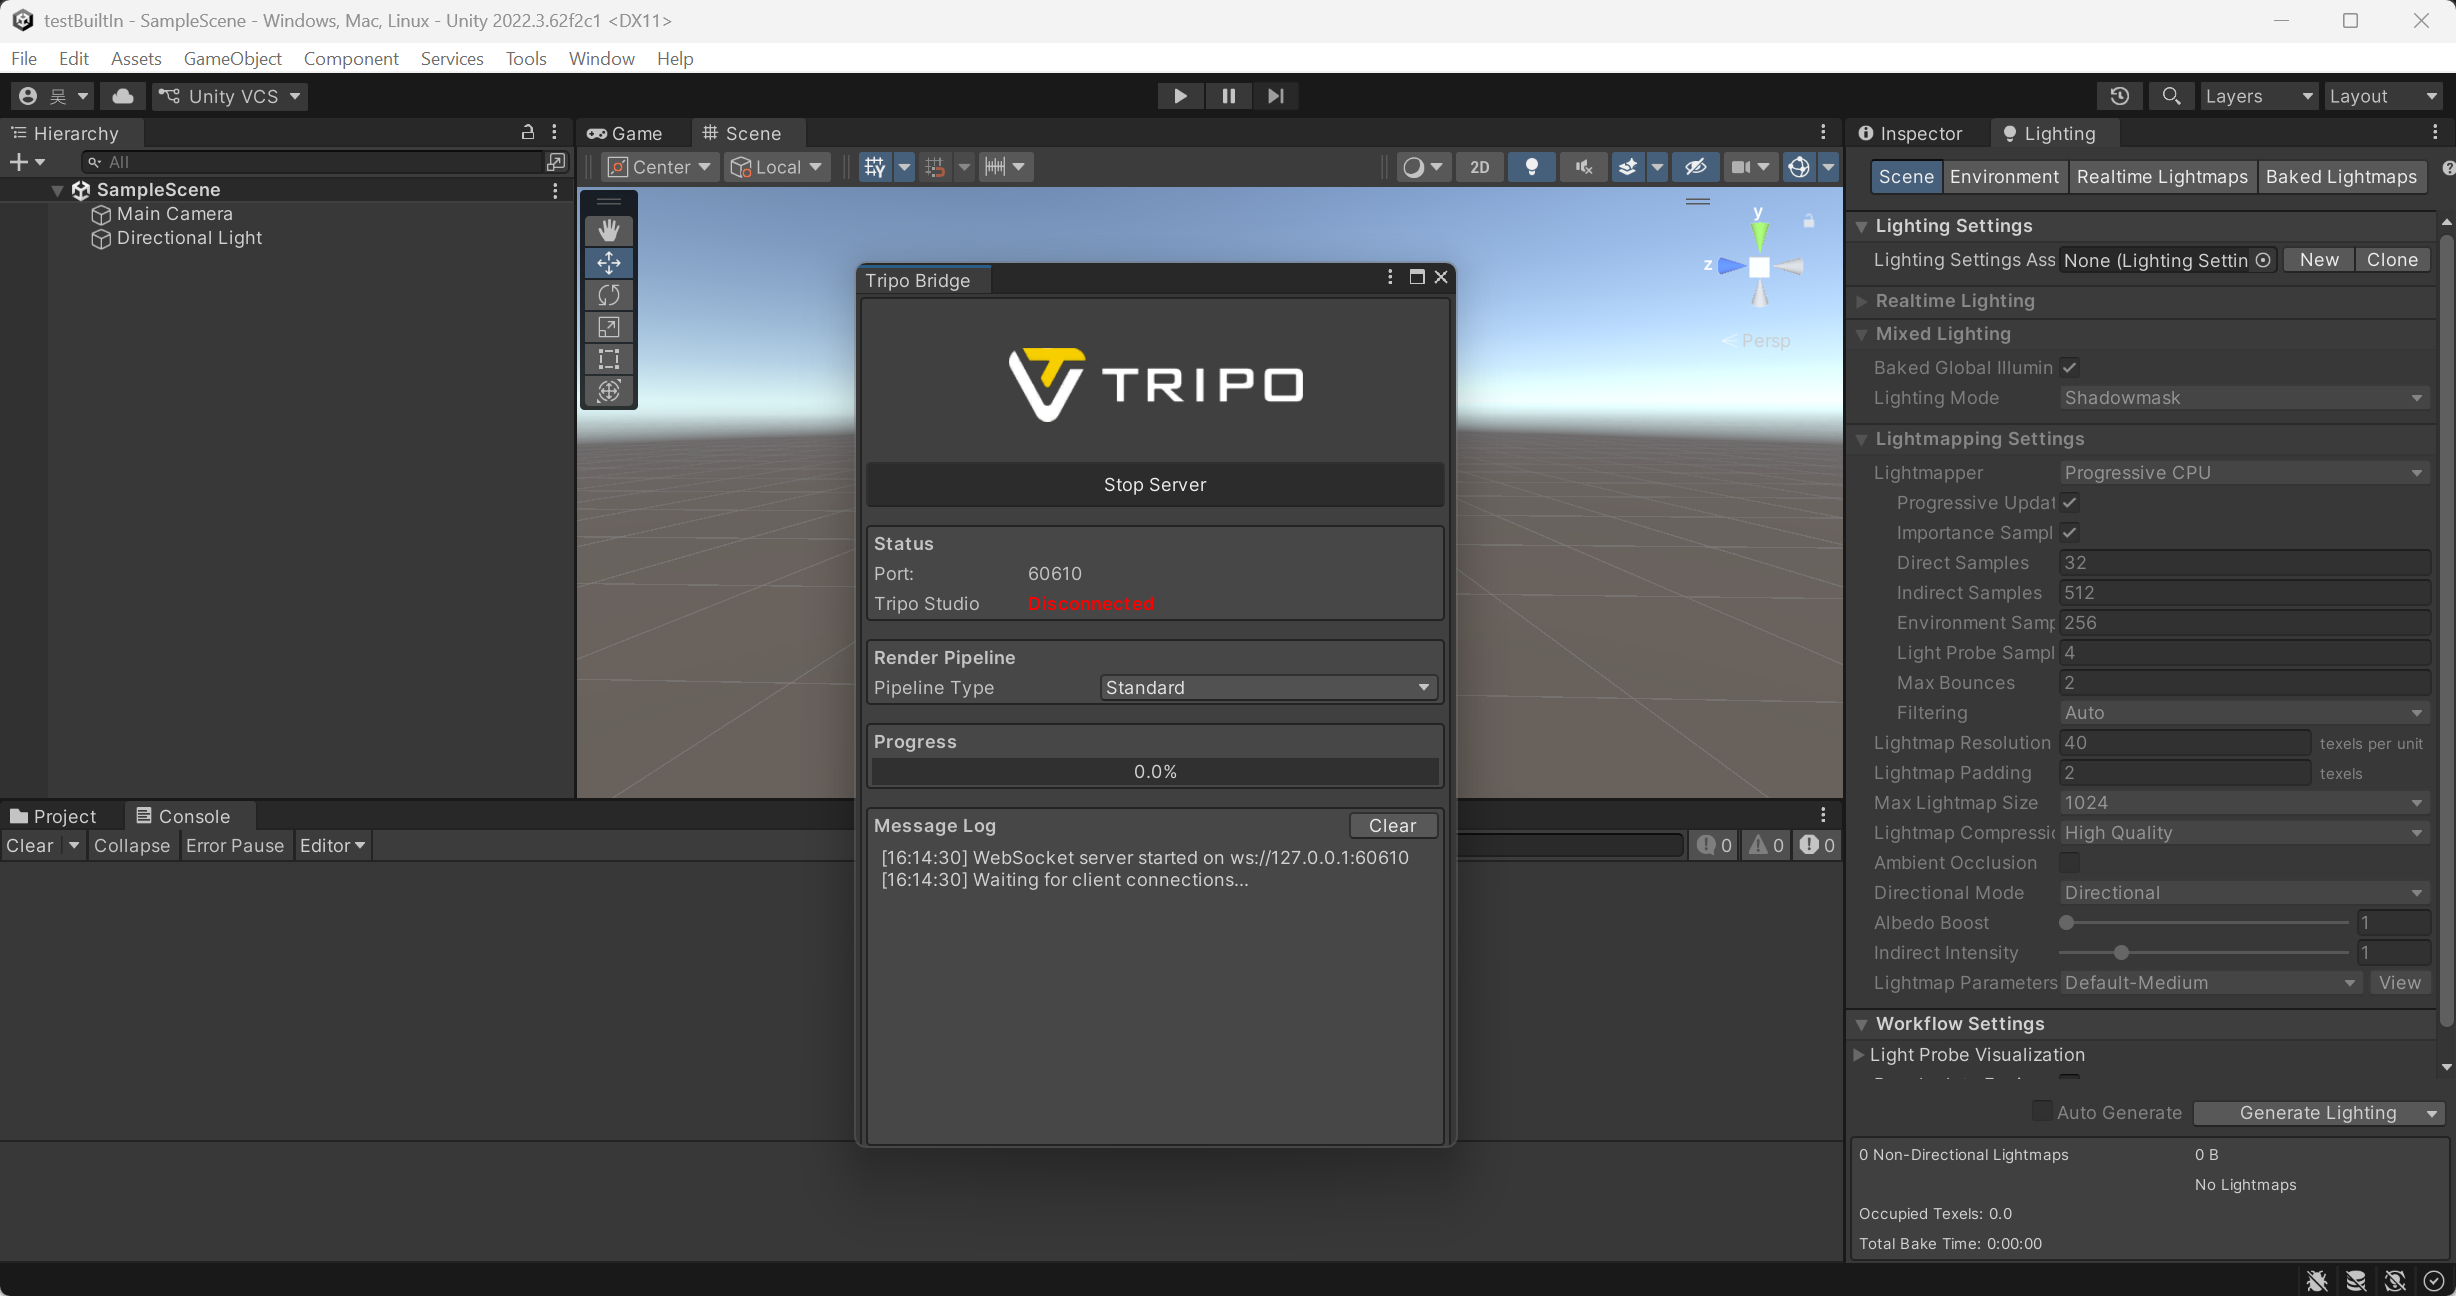
PS: If you need to manually stop the service, click Stop Server in the panel. However, to send or receive models from Tripo Studio, the service must be running. If it has been stopped, click Start Server before attempting a transfer.

Step 4:
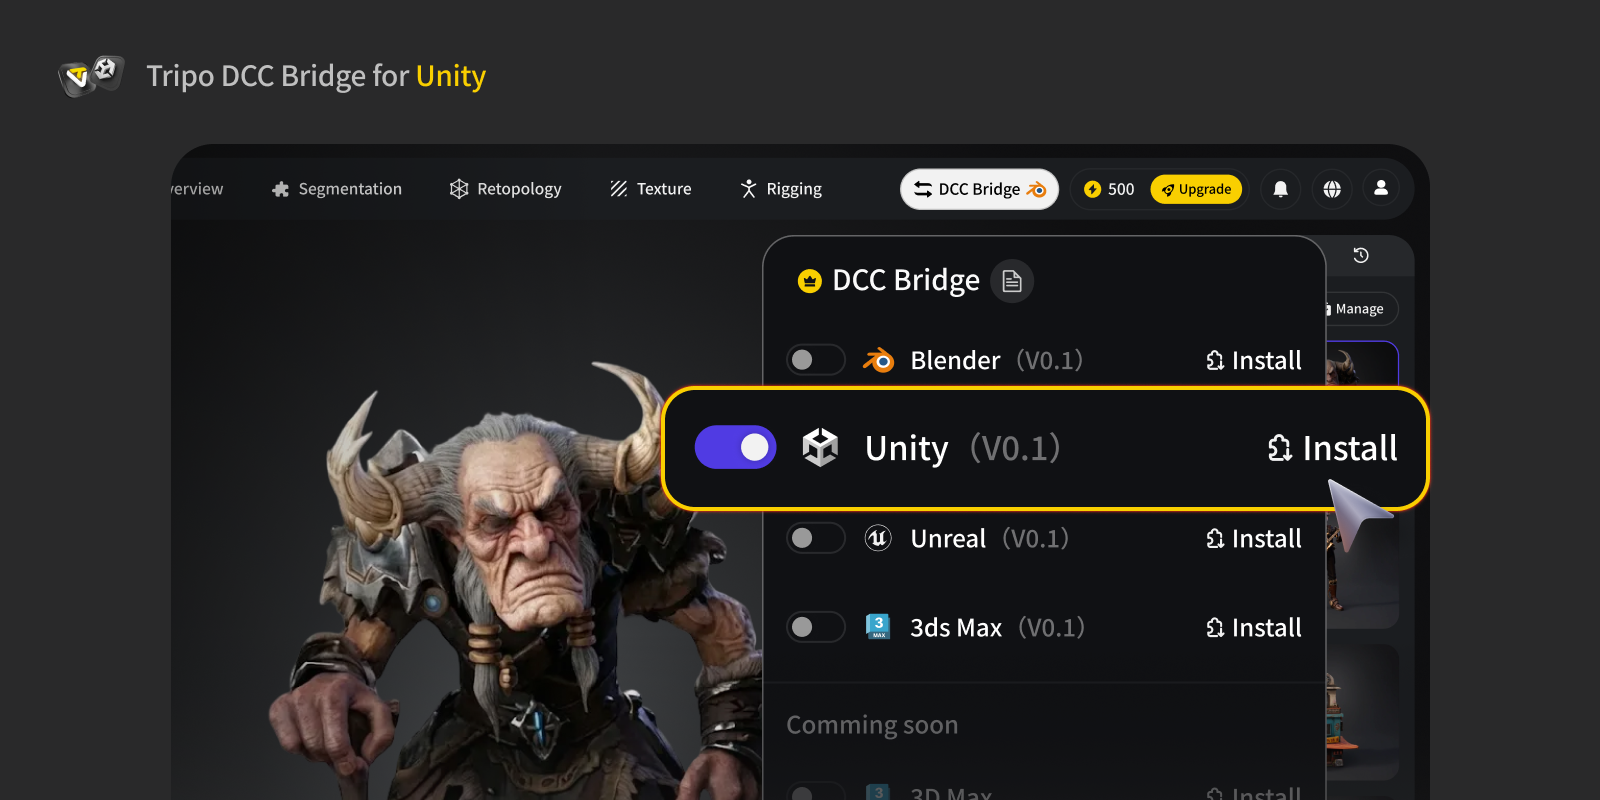
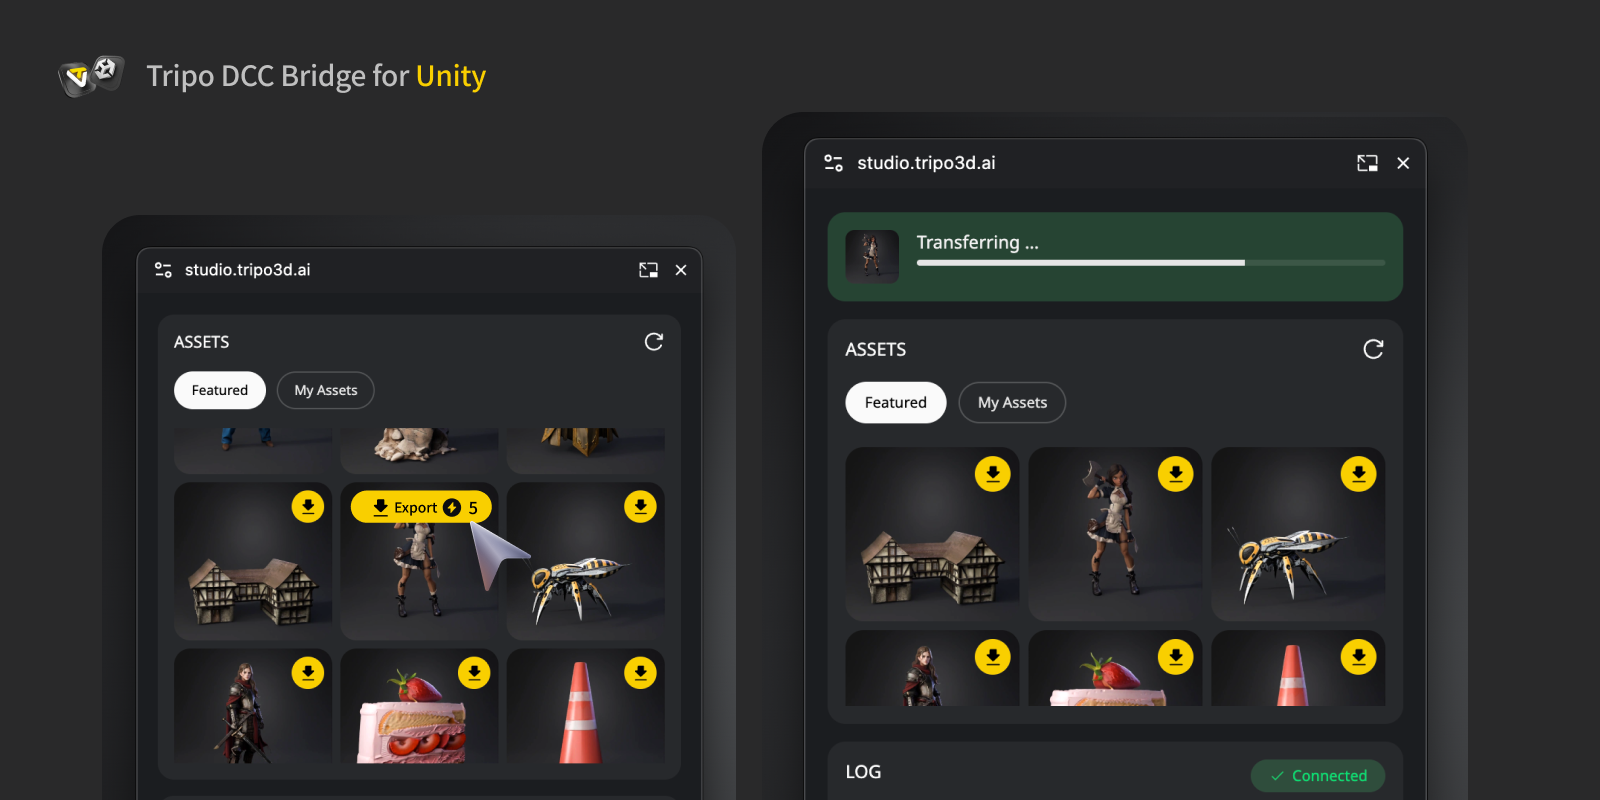
- Open the Tripo Studio website, click the DCC Bridge button, and activate the Unity plugin.
- Confirm the connection is set up correctly.
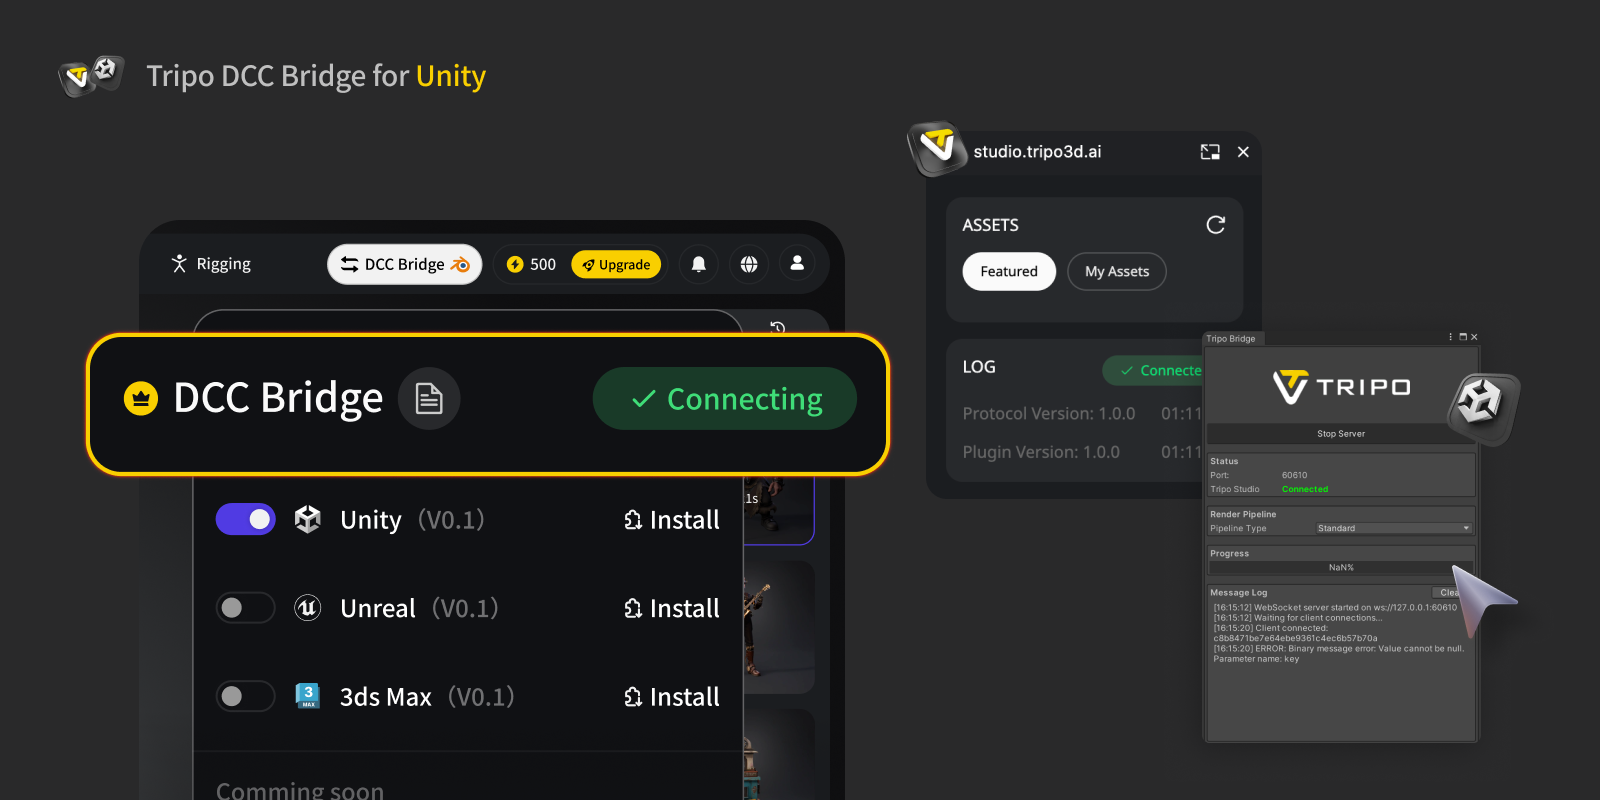
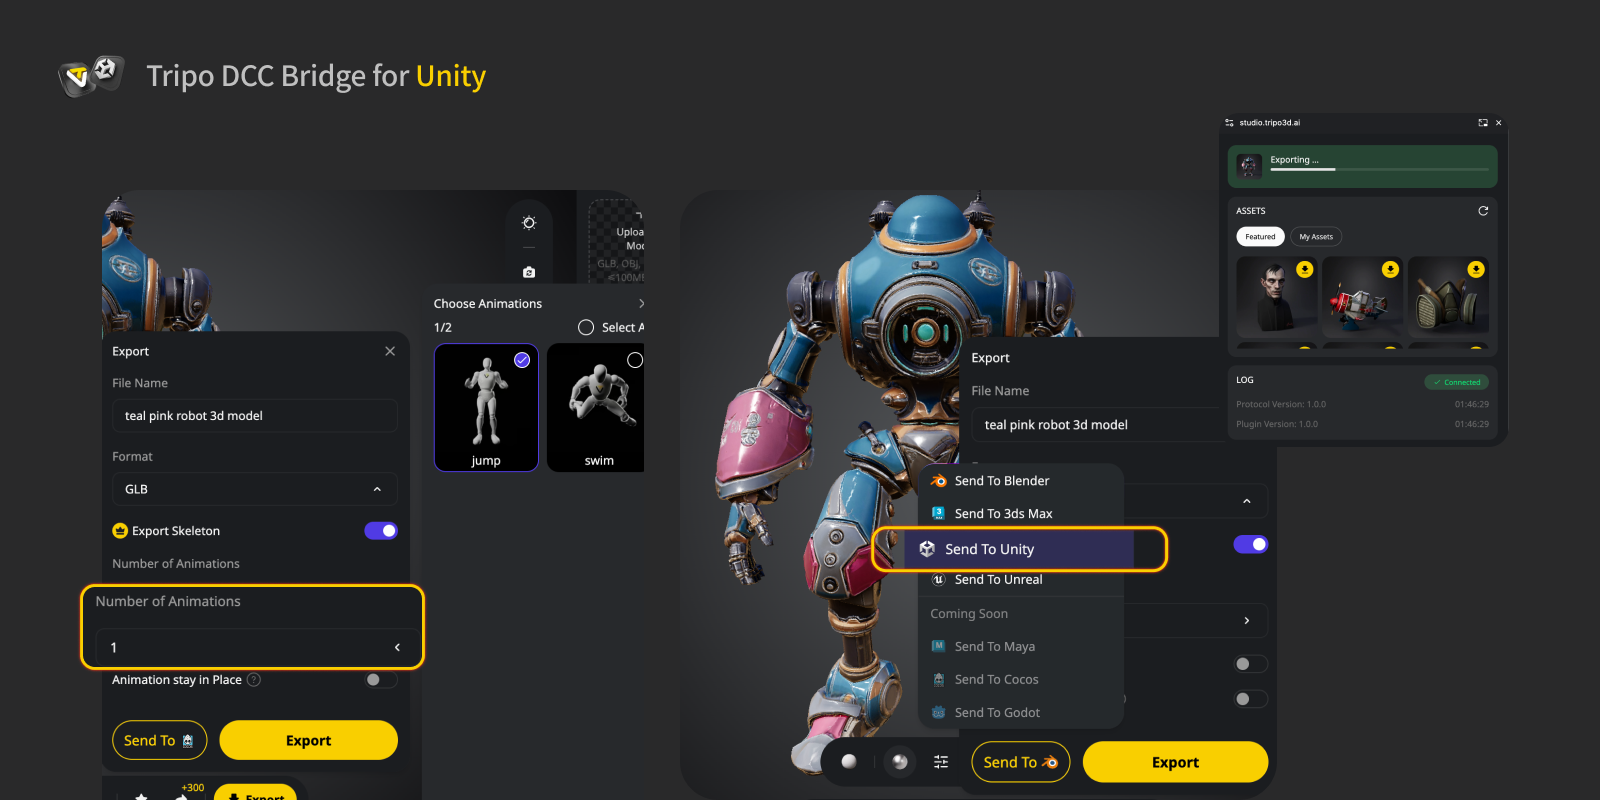
- Select a model. Press the Export button in the mini window.
- Click Send to Unity.
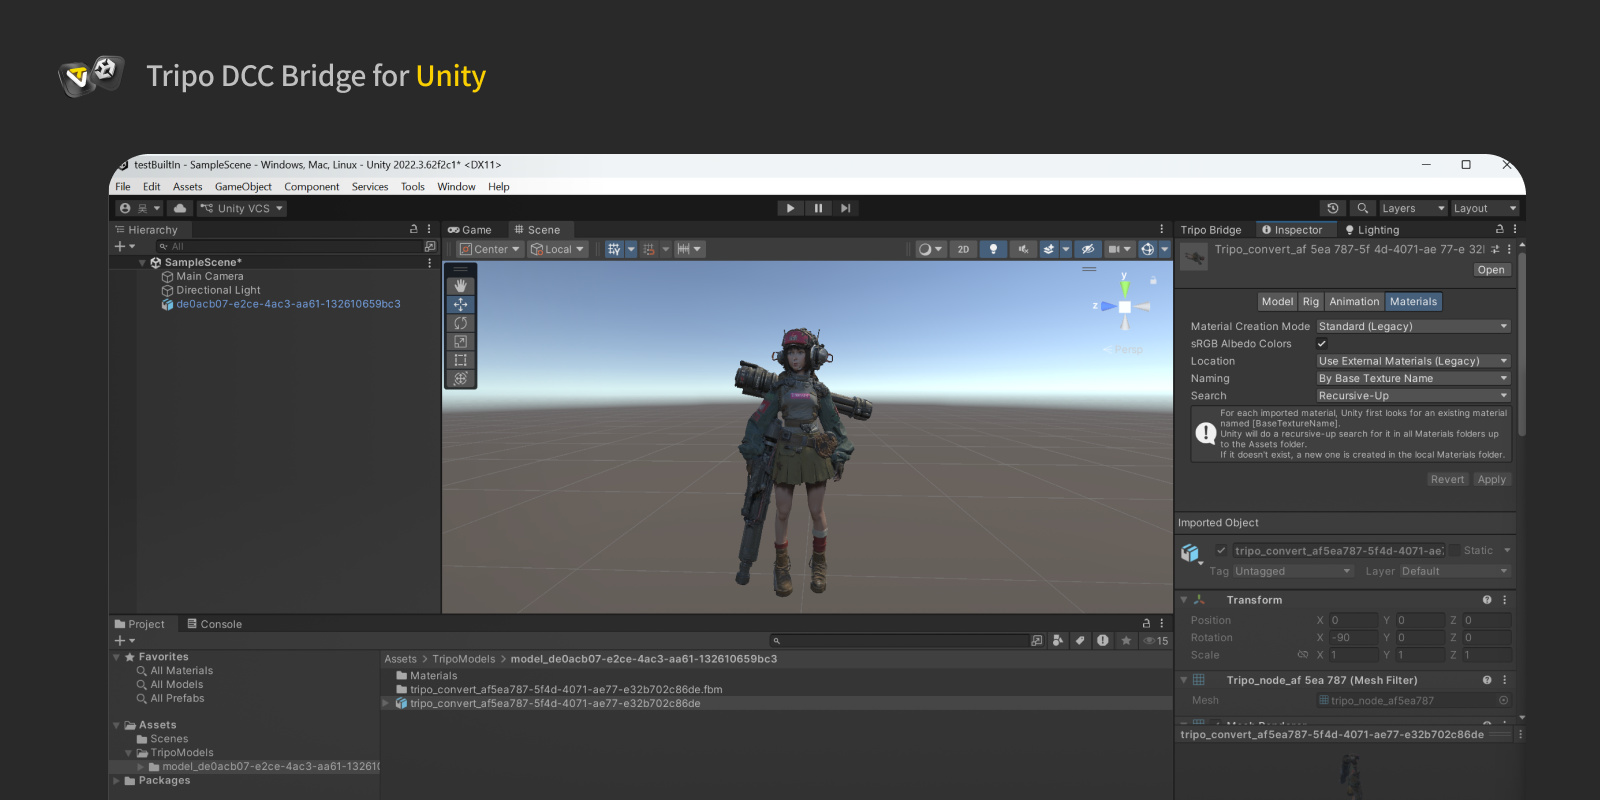
After the transfer, make sure the Unity window is focused so that the Unity UI can timely refresh and show the incoming model correctly.
- If you want to export a model with animations, first generate the animations in Tripo Studio, then select the desired animations in the Export panel and send them directly to Unity.
Step 5: You can now see the model in Unity from the website.
FAQs
Q: The imported model appears purple in Unity.
A: A purple (magenta) material in Unity usually indicates a shader or render pipeline mismatch.
If your project uses URP or HDRP:
- Open the Tripo Bridge Panel.
- Make sure the correct Render Pipeline (URP / HDRP) is selected, then the model from Tripo Studio again.
- Alternatively, you can manually fix materials by selecting the affected material, changing its Shader to Universal Render Pipeline/Lit (for URP) or HDRP/Lit (for HDRP), replacing the corresponding textures, and, if the issue persists, ensuring a valid Render Pipeline Asset is assigned in Project Settings → Graphics.
Q: Can I transmit data to multiple Unity instances simultaneously?
A: No. The connection only recognizes the first Unity launched.
Q: Can I send models while Unity is in Play mode?
A: Currently, model transfer is only supported in Unity Editor mode.
