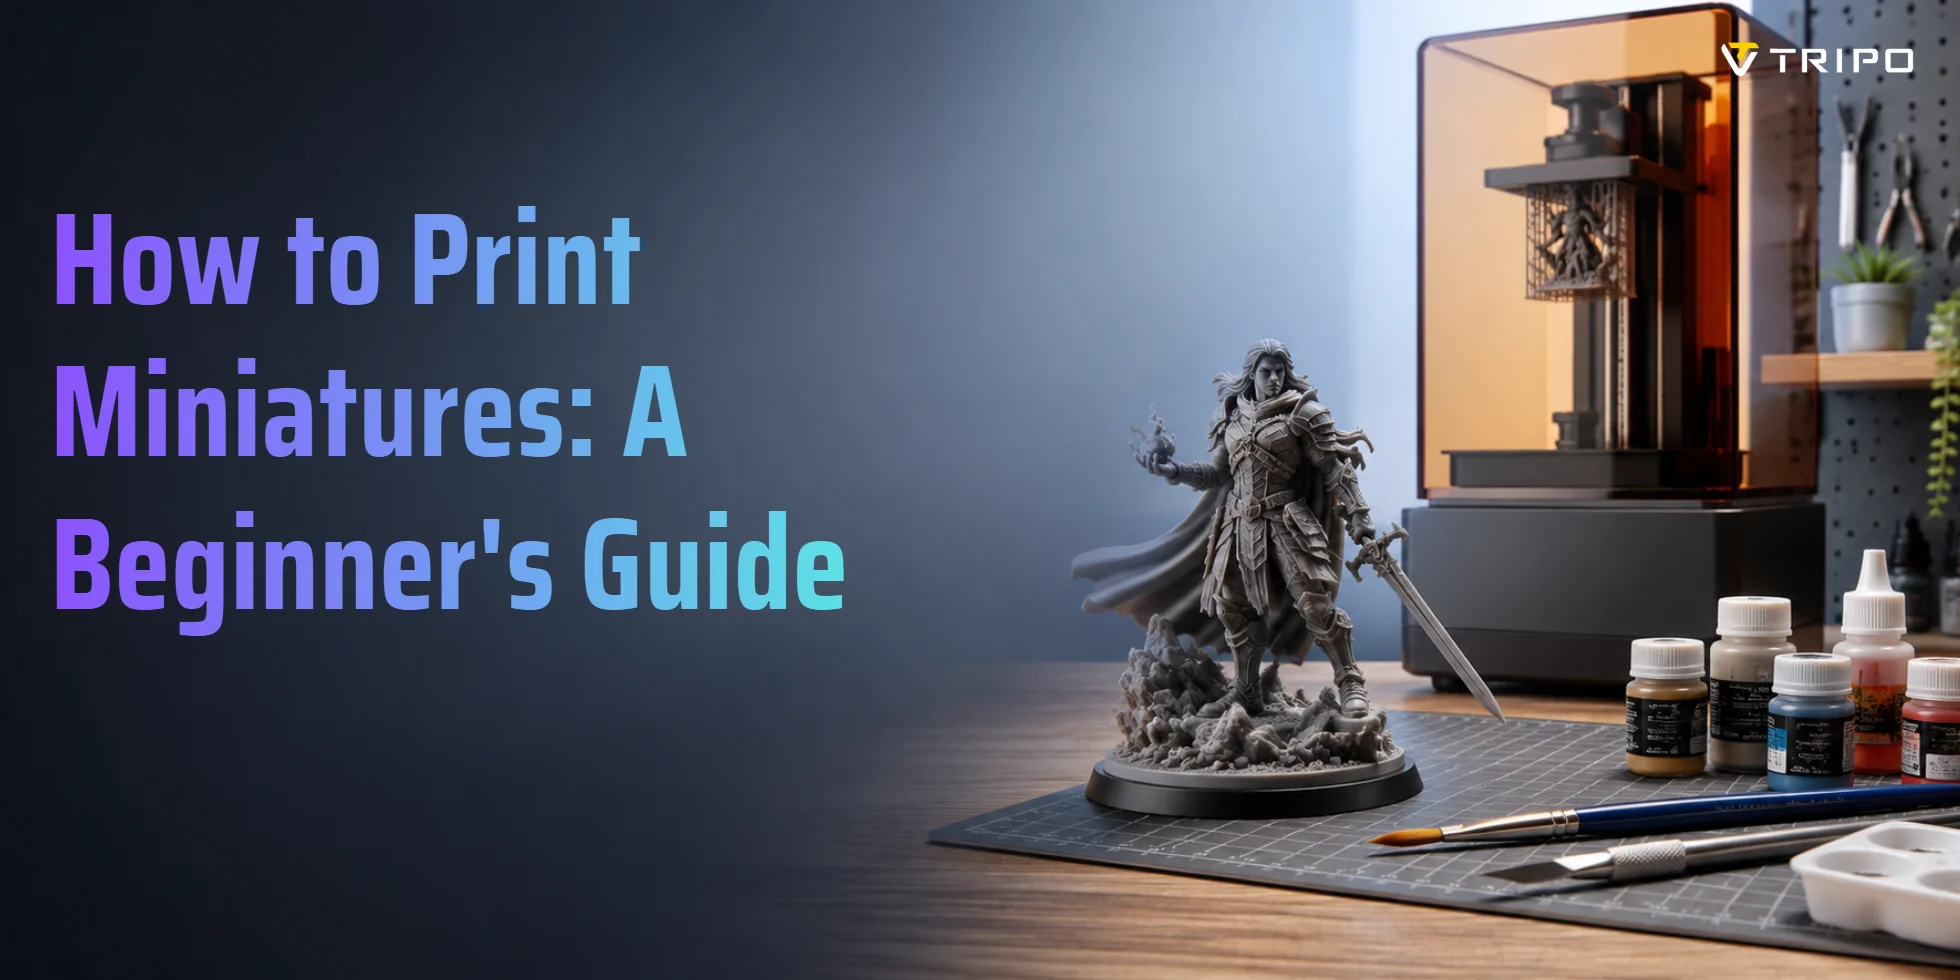
How to Print Miniatures: A Beginner's Guide
- Resin printers create the sharpest miniatures.
- FDM printers are cheaper and easier for beginners.
- PLA works well for terrain and basic minis.
- Supports and layer height matter more than speed.
- Tripo AI helps you create custom miniature files.
To print miniatures at home, you need a 3D printer, a sliced STL file, and the right settings. Use a layer height of 0.1 mm or lower, slower print speeds, and well-placed supports. Resin printers produce finer detail; FDM printers using PLA are more affordable and beginner-friendly.
Tabletop gaming keeps growing, and many players now want custom characters instead of the same store-bought figures. One market report projects the global table top games market to reach $3.4 billion by 2028, while broader tabletop categories are much larger depending on scope. With a home 3D printer and a good STL file, you can print heroes, monsters, terrain, and custom NPCs for your next campaign. This guide walks you through printer choice, slicer settings, supports, hollowing, post-processing, painting prep, and custom model creation.
FDM vs. Resin: Which Printer Is Right for Miniatures?
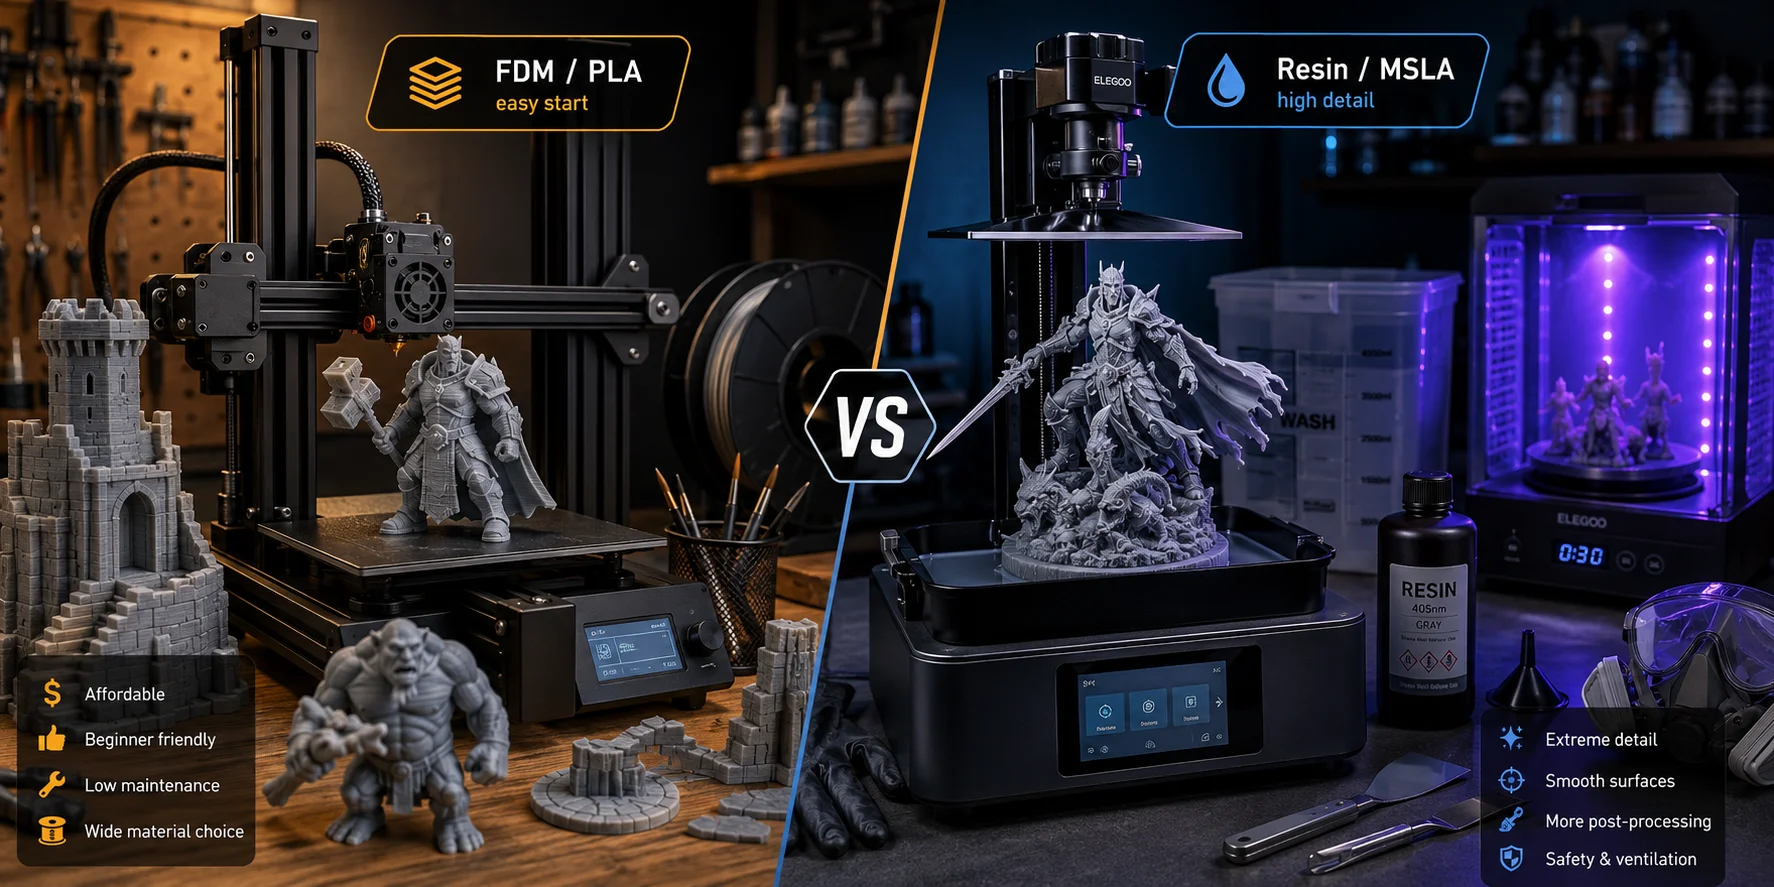
FDM printers build miniatures by melting plastic filament and laying it down layer by layer. Common beginner machines include compact FDM printers like the Bambu A1 Mini, which ships with a 0.4 mm nozzle and supports optional smaller nozzles for fine-detail work. FDM is affordable, clean, and easy to run with PLA filament, but layer lines are more visible than on resin prints.
Resin printers, usually MSLA or SLA machines, cure liquid photopolymer resin with UV light. They can capture tiny faces, armor edges, sword tips, teeth, cloth folds, and scales much better than most FDM machines. Resin is the best choice if you want tabletop-quality heroes and monsters right off the printer.
The tradeoff is safety and cleanup. Resin printing needs gloves, ventilation, washing, curing, and careful waste handling. FDM is simpler and better for beginners on a budget. For your first printer, choose FDM if you want a forgiving start. Choose resin if fine detail matters most.
Can you print minis with PLA? Yes. PLA is the default FDM choice because it is cheap, easy to print, and low-warp. It works best for terrain, bases, monsters, and larger figures.
Essential Slicer Settings for Printing Miniatures
Slicer settings make or break miniature prints. A great model can still fail if you print it with settings meant for quick prototypes.
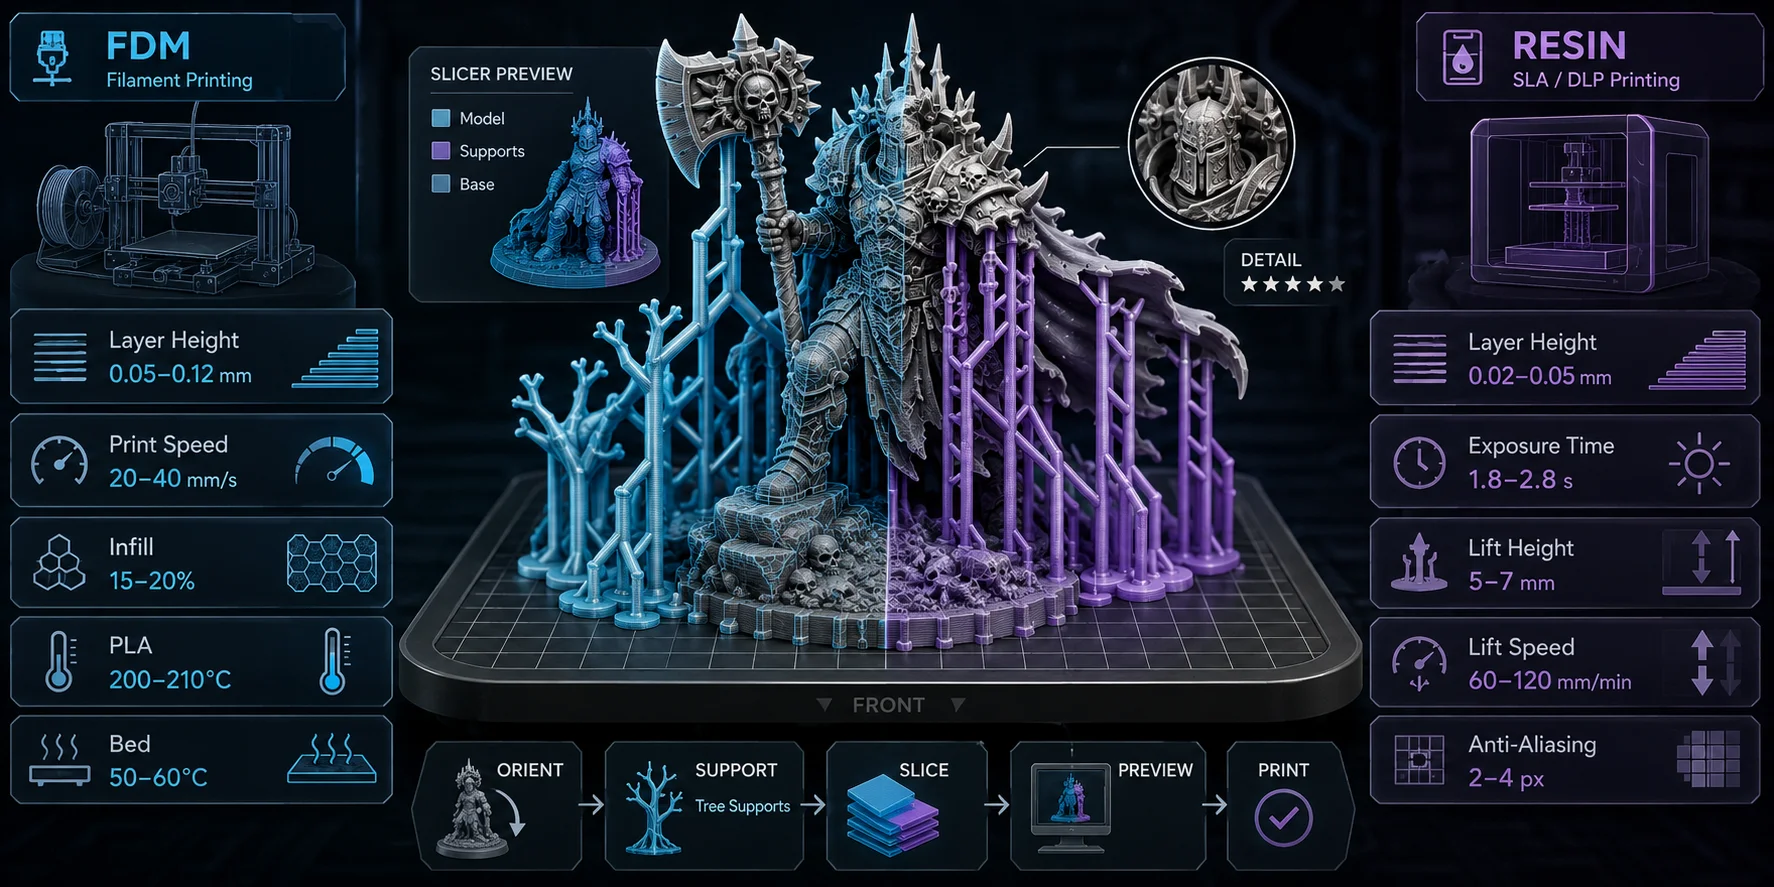
Layer height. For FDM miniatures, use 0.05-0.12 mm. The standard 0.2 mm setting is fine for boxes and brackets, but it shows obvious ridges on faces, cloaks, shields, and weapons. For resin miniatures, 0.05 mm is a common starting point.
Print speed. Slow FDM prints down to about 20–40 mm/s for small figures. Fast movement can blur details, knock thin parts loose, or create ringing around small features. Resin printers work differently; exposure time per layer matters more than travel speed.
Infill. For FDM minis, 15–20% infill is enough for most figures on bases. Solid infill wastes time and material. Resin prints can be printed solid when small, but larger minis should be hollowed to save resin and reduce cracking risk.
Temperature for PLA. Start around 200–210 °C nozzle temperature and 50–60 °C bed temperature. Higher temperatures may improve layer adhesion, while lower temperatures can reduce stringing on spears, staffs, and horns.
Supports. Use tree or organic supports with a 45° overhang rule as a starting point. Keep supports away from faces and chest details whenever possible.
How to Set Up Supports for Miniatures
Miniatures usually have dramatic poses. Outstretched swords, capes, fingers, horns, wings, and weapon tips often need support. Without supports, overhangs can droop, curl, or fail.
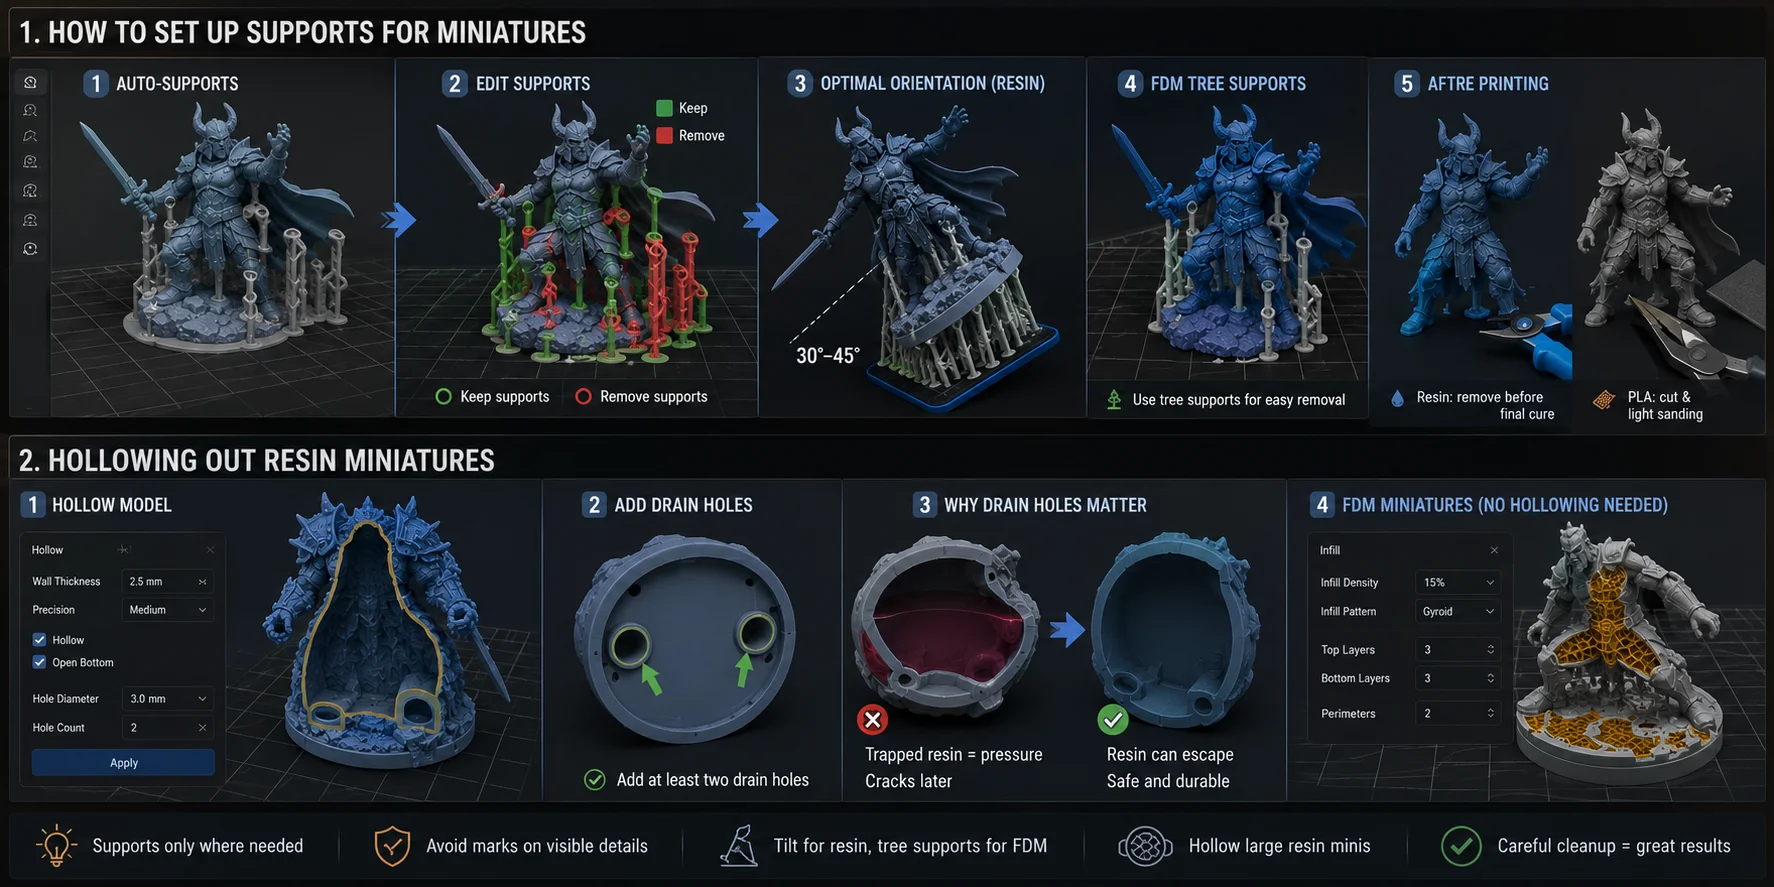
In PrusaSlicer, Bambu Studio, CHITUBOX, or Lychee Slicer, start with auto-supports, then edit them manually. Auto-supports are useful, but they often place contact points on visible details. Remove supports from faces, armor fronts, shields, and decorative surfaces. Add manual supports under the chin, weapon tips, elbows, capes, tails, and horizontal limbs.
For resin prints, orient the miniature about 30–45° from the build plate. This reduces suction force and spreads peeling stress across layers. It also moves support marks toward less visible areas.
For FDM prints, tree supports are usually easier to remove than blocky supports. Use small contact points and avoid over-supporting. Too many supports can scar the model worse than a failed overhang.
After printing, remove supports carefully. Resin supports come off cleaner before the final cure, when the print is slightly flexible. PLA supports usually need flush cutters, needle-nose pliers, and a light sanding pass.
Hollowing Out Resin Miniatures
Small resin miniatures can often print solid, but larger resin figures should usually be hollowed. Solid resin uses more material, adds weight, increases suction, and can crack later as resin inside continues to cure.
In your slicer, set wall thickness around 2–3 mm for larger minis. Add at least two drain holes, ideally in the base or another hidden spot. CHITUBOX documentation describes hollowing and hole creation tools, including drain holes that allow resin to escape during printing and cleanup.
Drain holes matter. If liquid resin stays trapped inside, it can slowly cure and build pressure. That pressure may split the miniature days or weeks later. After washing, make sure wash liquid can enter and exit the hollow space.
FDM miniatures do not need hollowing. Just lower the infill and let the slicer create the internal structure automatically.
Finding or Creating Your Miniature STL File
You can start with free STL libraries such as Thingiverse, Printables, and MyMiniFactory. Search by creature type, game system, scale, or artist. The common tabletop scale is around 28 mm, but some creators design for 32 mm or larger heroic scale.
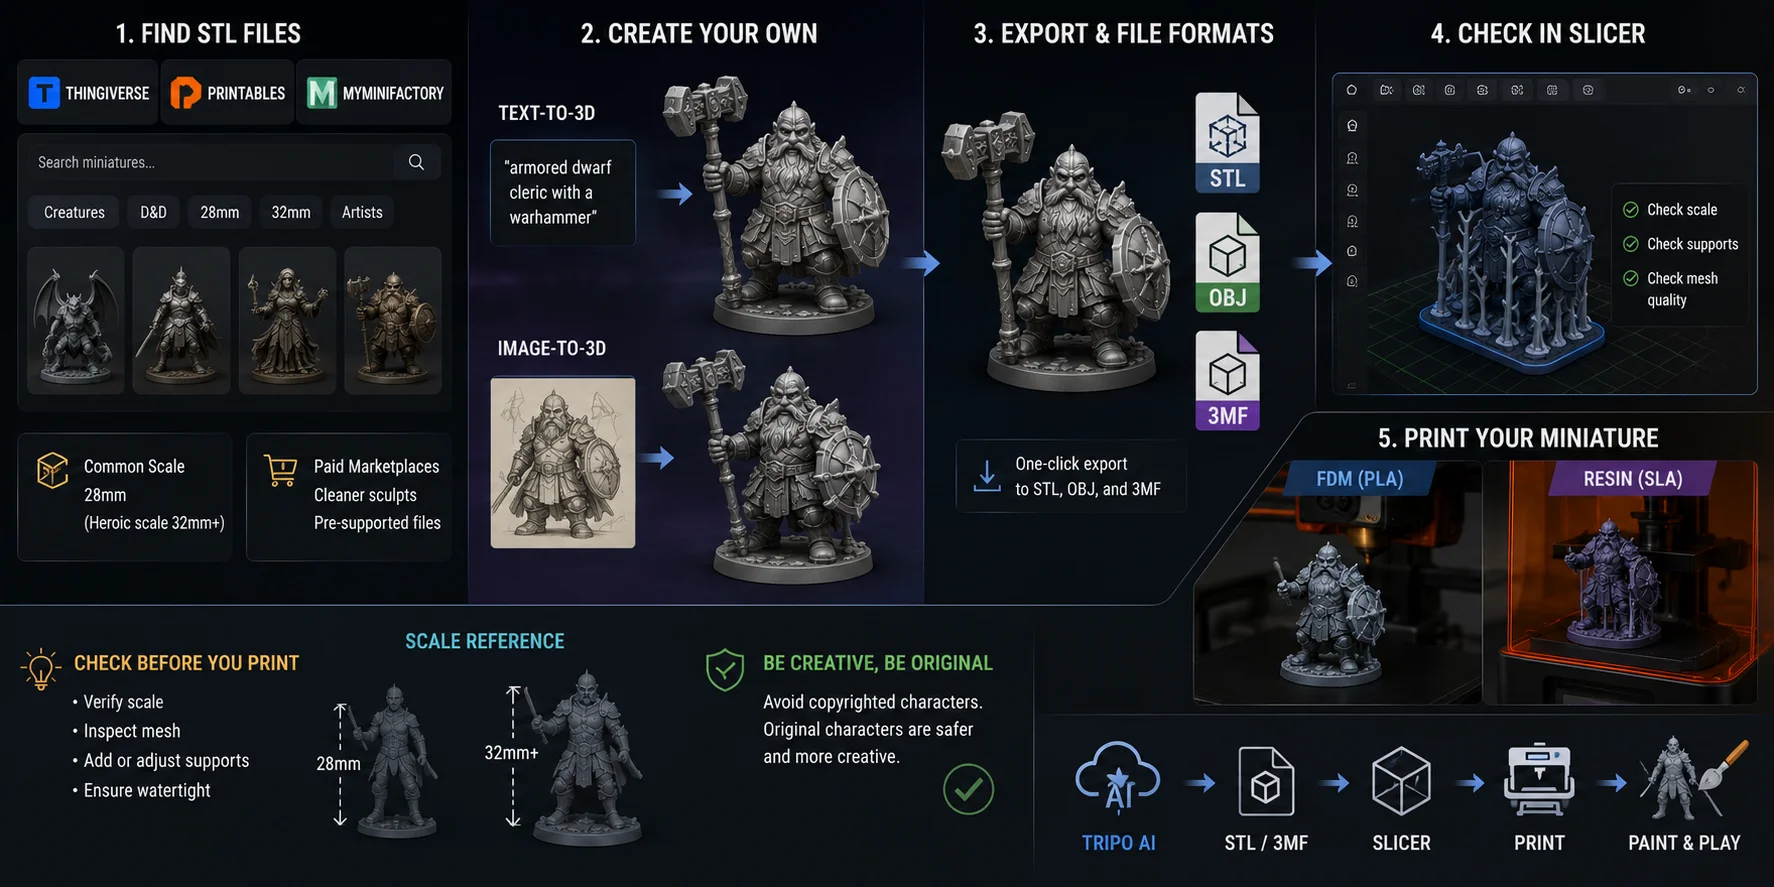
Paid marketplaces can be worth it when you want cleaner sculpts, themed sets, or pre-supported resin files. Pre-supported files save time because the artist already placed supports for resin printing. Even then, check the file in your slicer before printing.
The next step is creating your own miniature. This is where Tripo AI fits naturally. If you cannot find the exact character you need, Tripo AI’s Text-to-3D tool can turn a prompt like “armored dwarf cleric with a warhammer” into a 3D model. If you already have a sketch or reference image, Image-to-3D gives you a fast starting point from image to mesh.
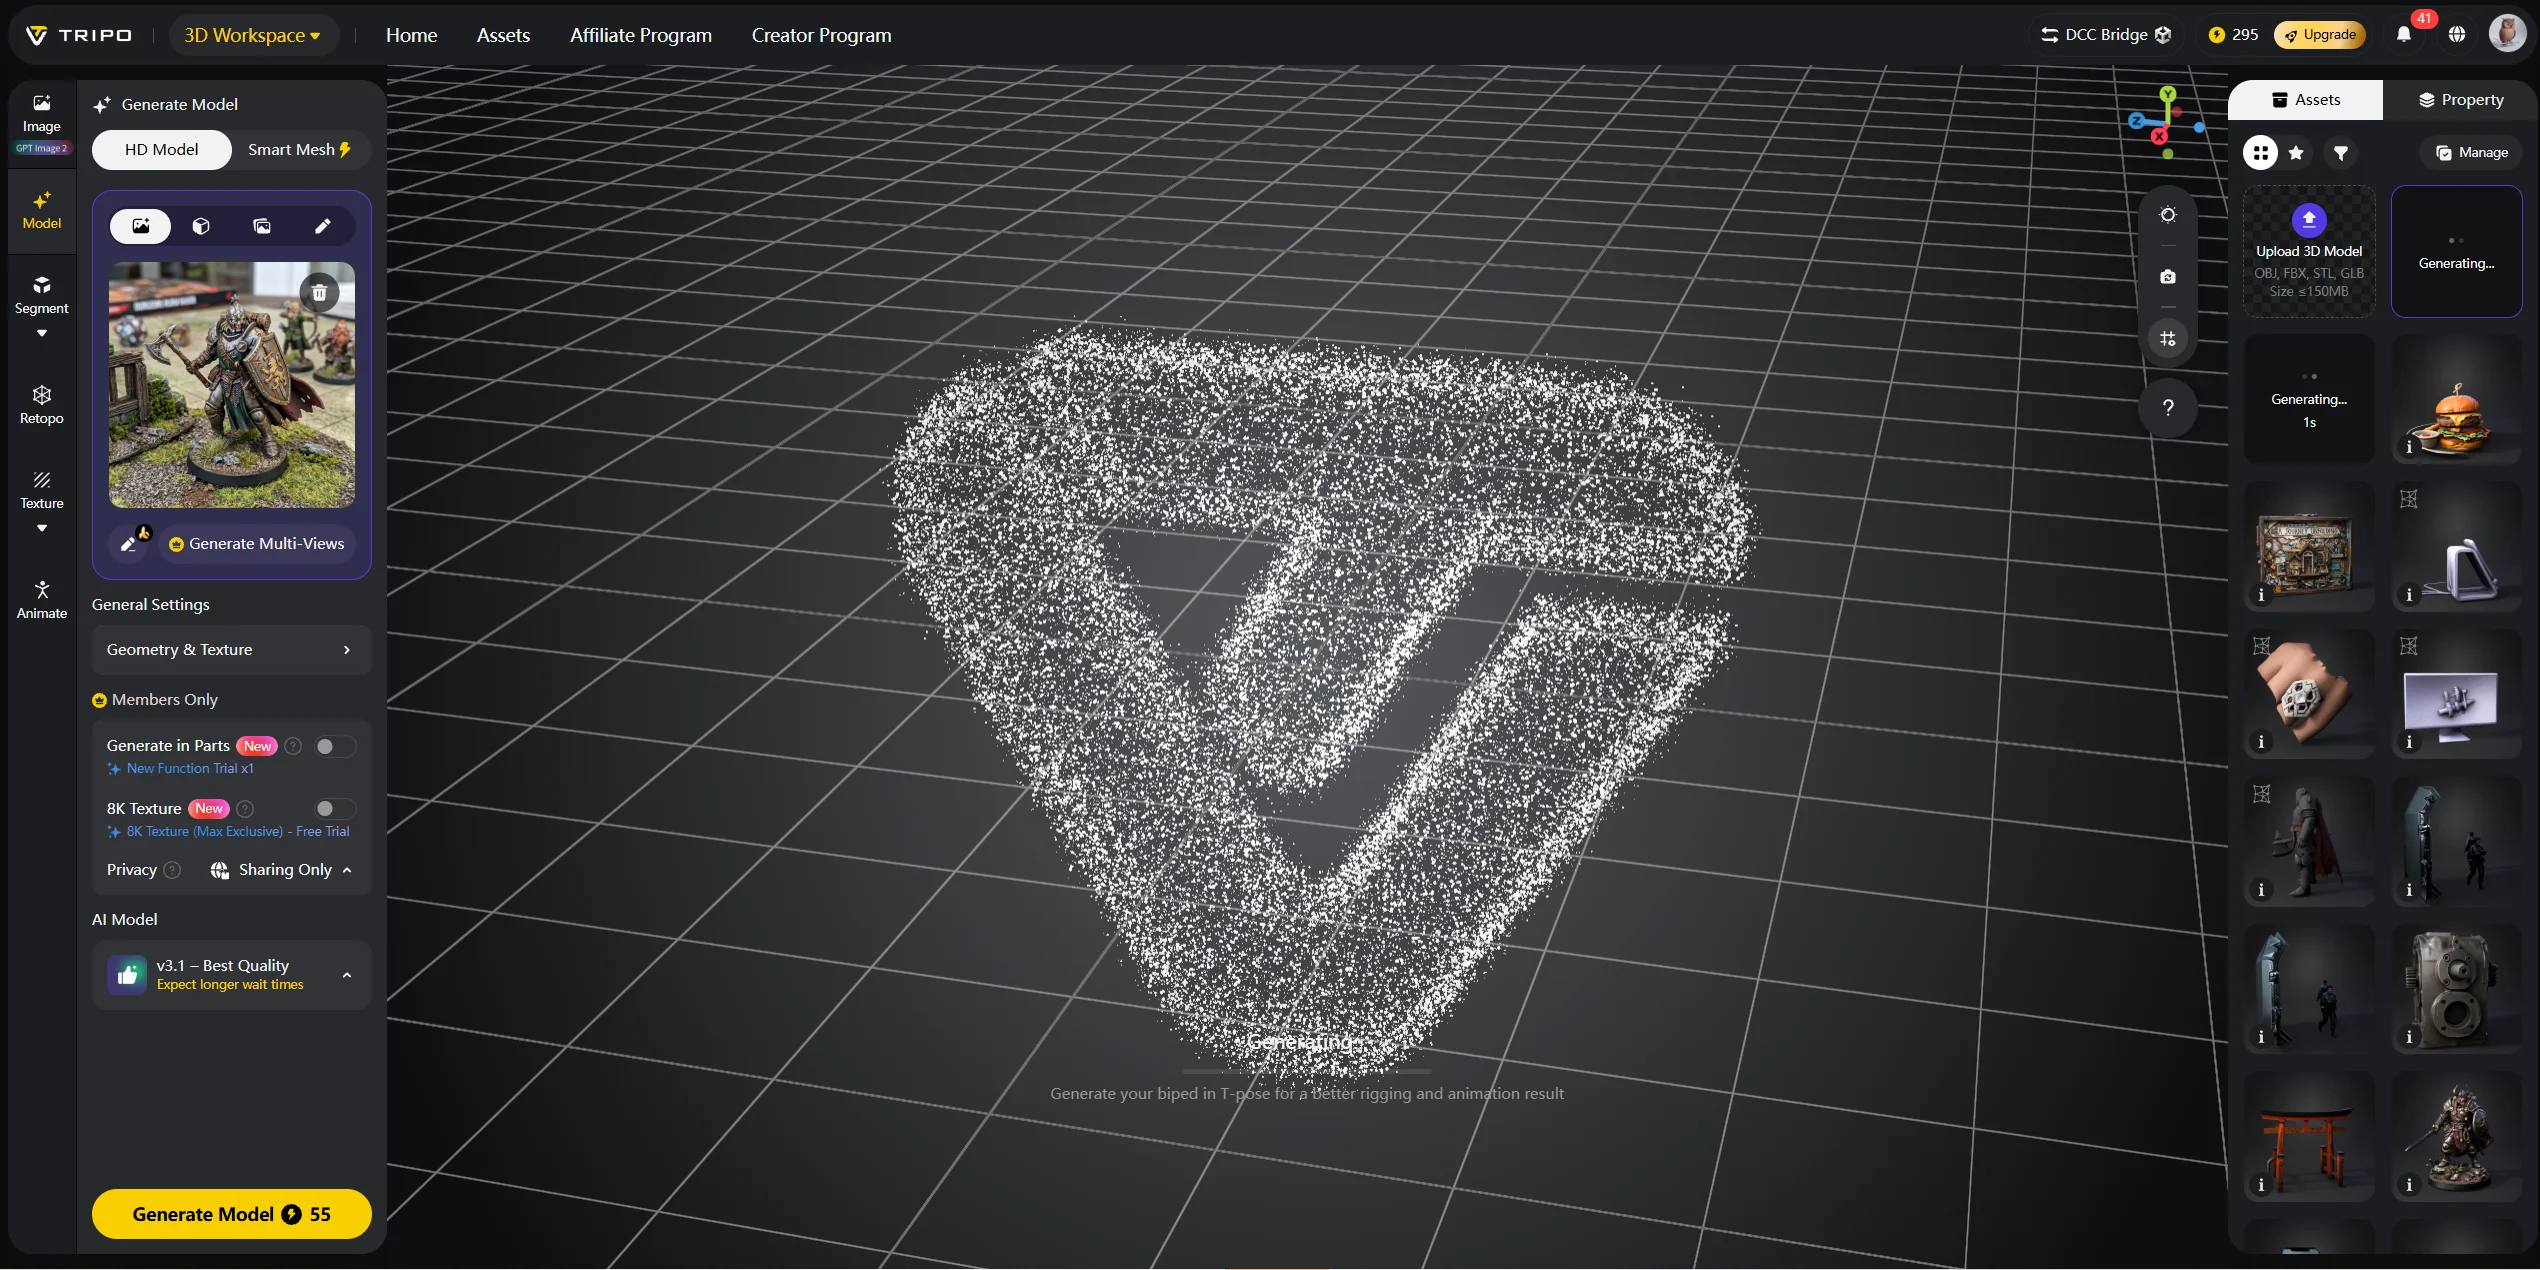
Tripo AI supports export workflows for printable formats such as STL and 3MF, which you can open in common slicers after checking scale, supports, and mesh quality. Its official 3D printing page describes one-click export to STL, OBJ, and 3MF.
One note: be careful with copyrighted characters. Original characters are safer and more creative than copying protected IP.
Is It Legal to 3D Print Miniatures?
For personal tabletop use, printing miniatures from free or purchased STL files is common in the hobby. The important part is the license. Some files are personal-use only, some allow remixing, and some allow commercial printing if you buy a merchant license.
Do not assume “free download” means “free to sell.” Free STL files on sites like Thingiverse can use different licenses, including Creative Commons, personal-use, or remix-friendly terms. Always check the file page before sharing, modifying, or selling prints.
Recreating protected IP can create legal risk, especially if you sell or distribute the model. That includes recognizable Warhammer-style figures, Games Workshop factions, famous game characters, and branded miniatures from commercial games. This is not legal advice, but the safest route is simple: use properly licensed files or make original designs.
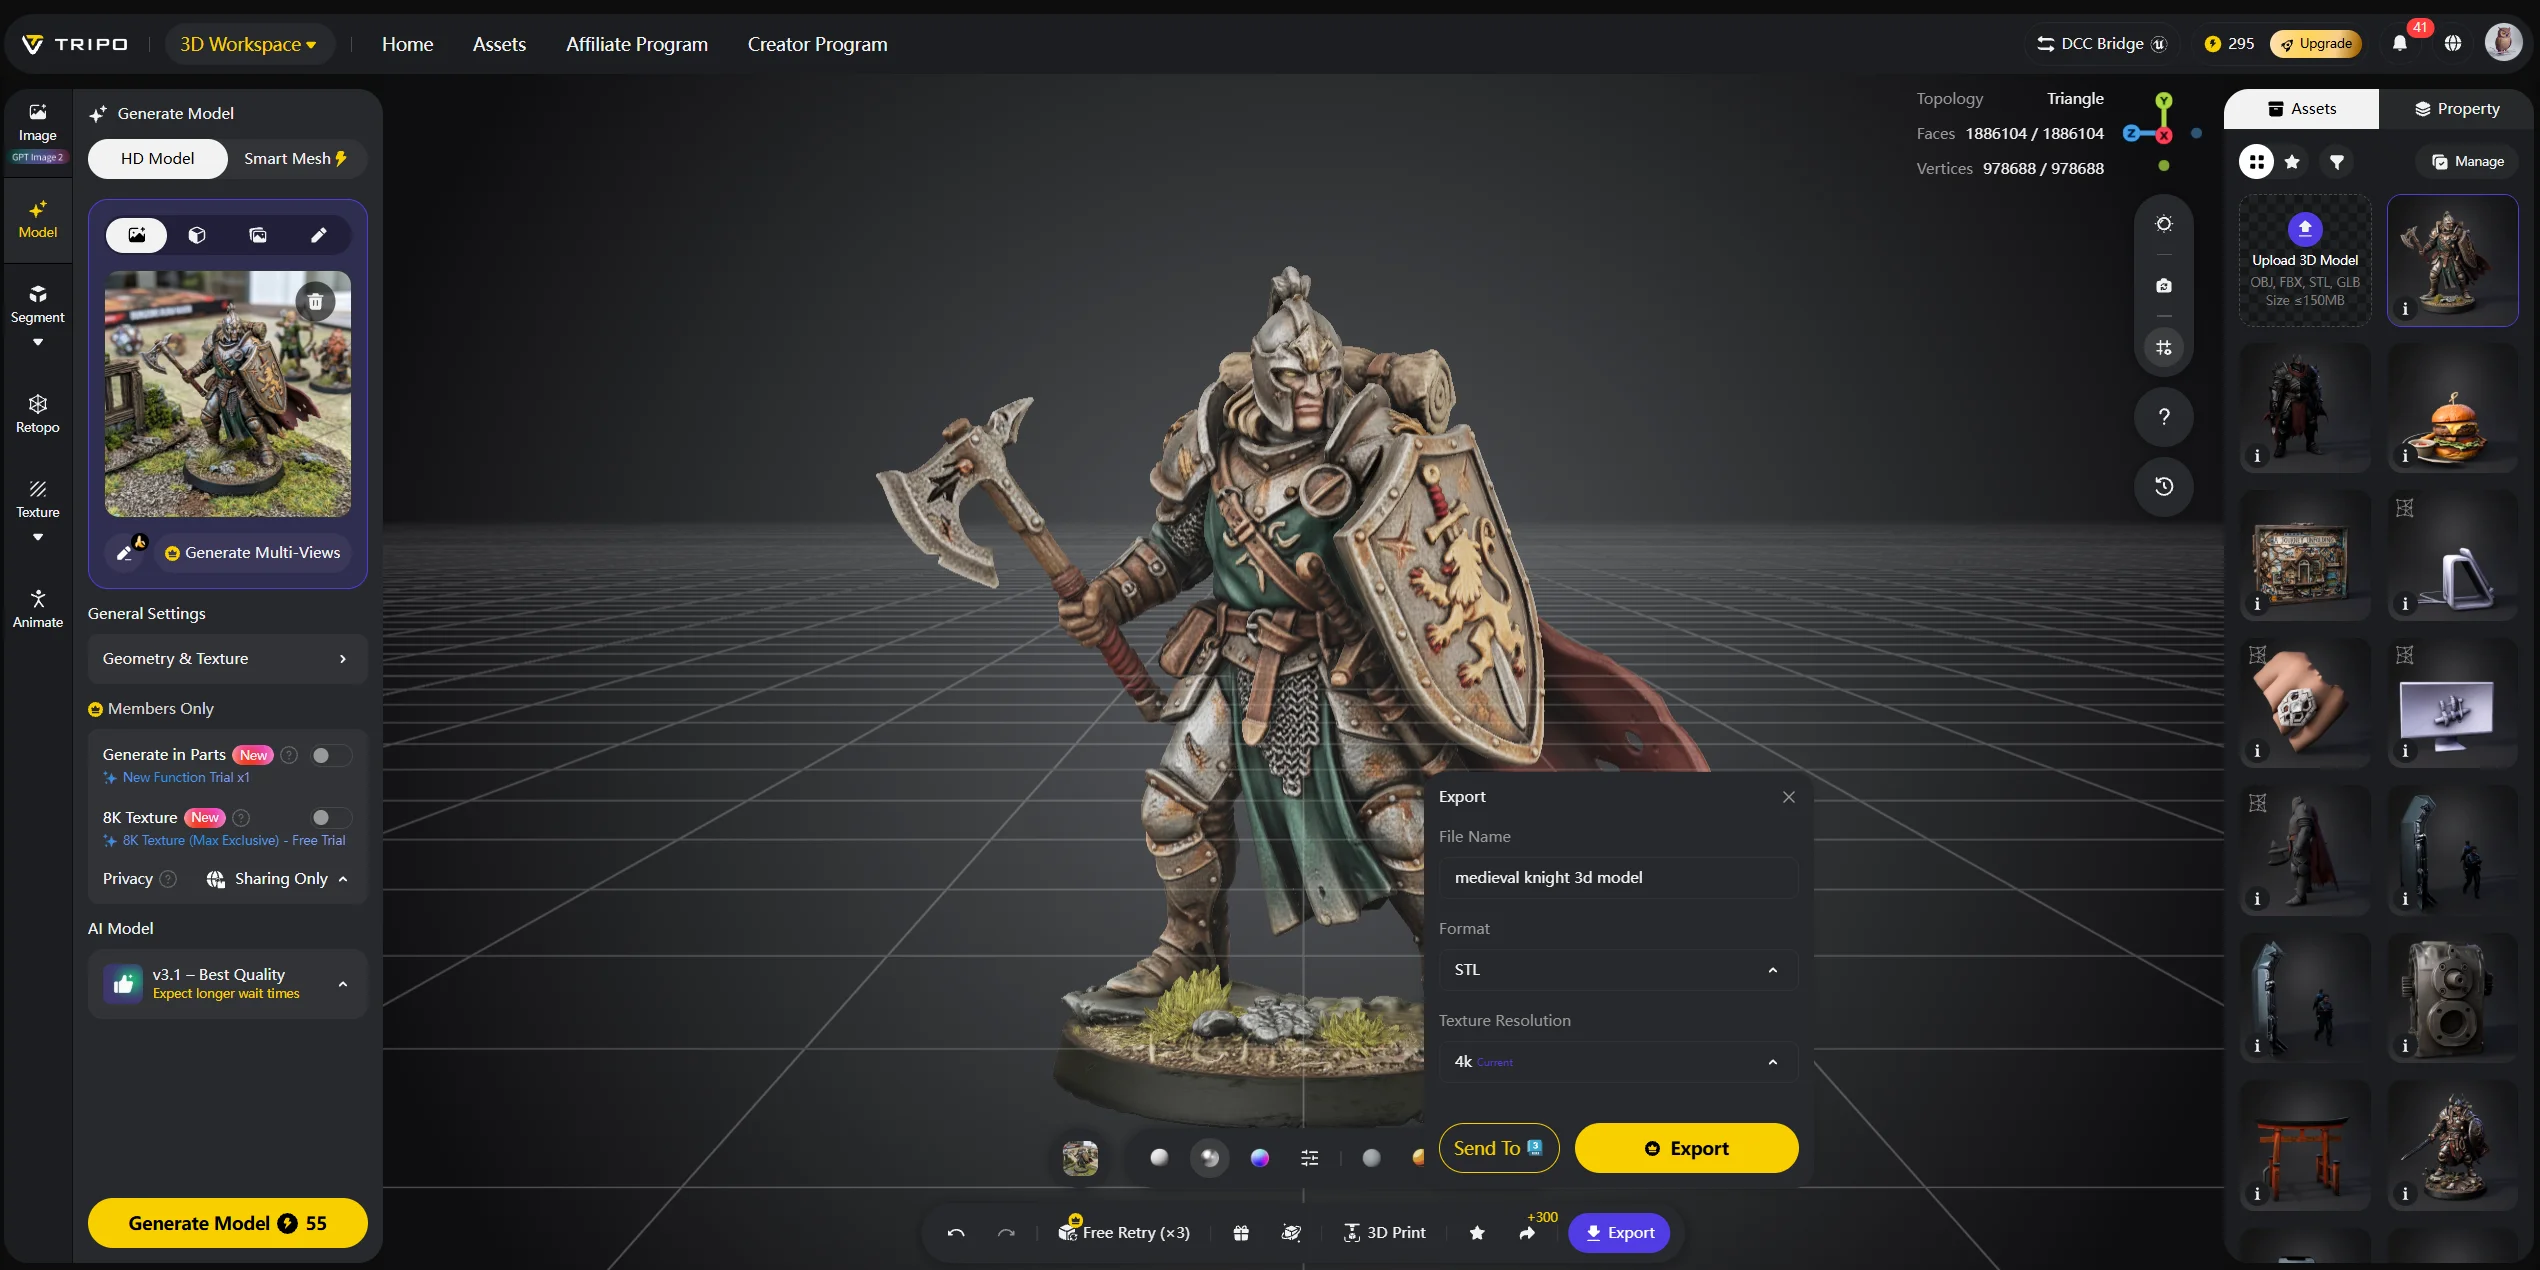
Tripo AI Studio helps with that creative path. You can generate your own fantasy hero, monster, or NPC from a prompt instead of copying an existing character.
Post-Processing: Cleaning, Curing, and Priming
Post-processing depends on the printer type.
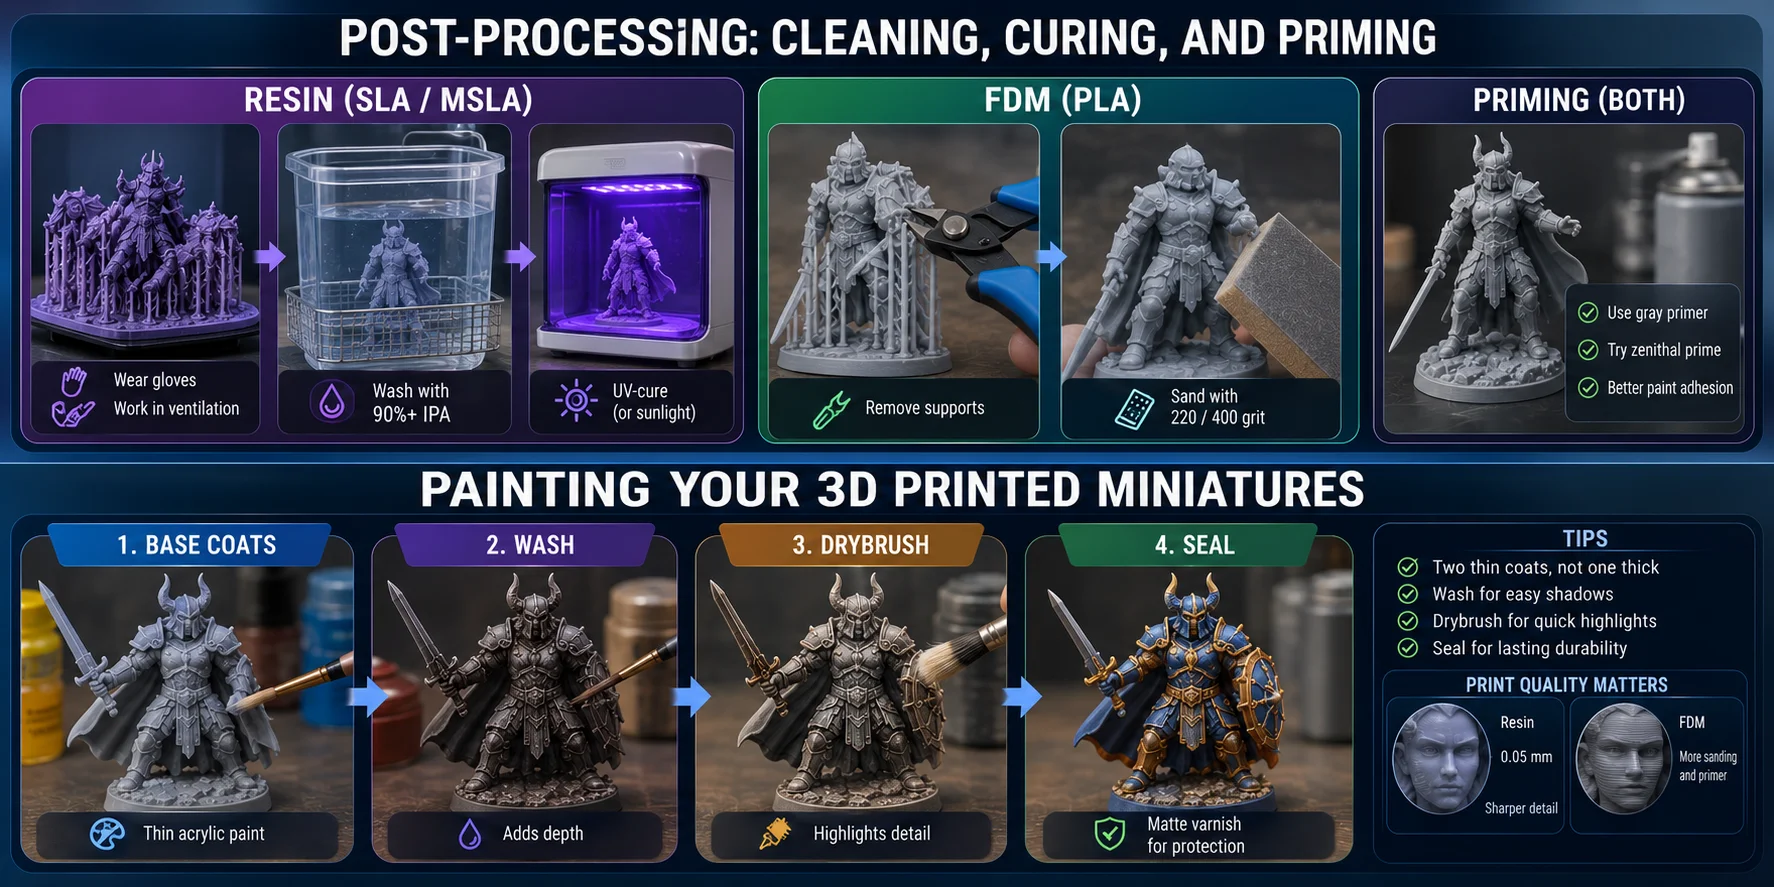
For resin miniatures, wear nitrile gloves and work in a ventilated area. Wash the print in 90%+ IPA or resin wash solution for a few minutes, then let it dry. After that, UV-cure it under a curing lamp or direct sunlight. Do not paint uncured resin. It can feel sticky, block primer adhesion, and irritate skin.
For FDM and PLA miniatures, remove supports first. Use flush cutters for support stubs, then sand visible layer lines with 220-grit and 400-grit sandpaper. A filler primer can hide small ridges and make the paint stick better.
Both FDM and resin minis benefit from priming. A simple gray primer gives you a neutral base. A zenithal prime, with dark primer followed by a light spray from above, helps preview shadows and makes painting easier.
Painting Your 3D Printed Miniatures
Once primed, 3D printed miniatures paint like plastic kits. Start with base coats using thinned acrylic paint. Two thin coats look better than one thick coat because they preserve small details.
Next, add a wash. A dark wash flows into recesses and makes armor plates, fur, chainmail, cloth folds, and monster skin easier to read. Popular hobby washes work well, but you can also thin dark acrylic paint with water or medium.
Drybrushing is the fastest way to highlight raised detail. Load a stiff brush with a lighter color, wipe most paint off on a paper towel, then brush gently across the model. The paint catches edges and texture.
Seal finished minis with matte varnish to protect them during play. For models handled often, apply a gloss varnish first for strength, then finish with matte to remove shine.
Print quality affects painting. Resin prints at 0.05 mm layer height usually show sharper detail. FDM miniatures may need more sanding and primer before they paint cleanly.
FAQ — Frequently Asked Questions
What kind of 3D printer do I need to print miniatures? FDM printers are easier and cheaper for beginners. Resin printers produce finer detail. Choose FDM for budget and terrain; choose resin for tabletop-quality figures.
Can you print minis with PLA? Yes. PLA is the most beginner-friendly FDM filament for miniatures. Use low layer height, slow speeds, and good supports for the best result.
What layer height should I use for miniatures? Use 0.05–0.12 mm for FDM miniatures. Use around 0.05 mm for resin. Lower layer height improves detail but increases print time.
Do I need supports for 3D printing miniatures? Almost always. Arms, weapons, capes, wings, and tails usually need supports. Place them away from faces and other visible details.
How do I hollow out a resin miniature? Use your slicer’s hollow tool, set 2–3 mm wall thickness, and add at least two drain holes. Place holes in the base or hidden areas.
Is it legal to 3D print Warhammer miniatures? Printing copyrighted miniatures can be legally risky, especially if you sell or share the files. Use licensed files or create original characters to stay safer.
How do I get rid of layer lines on FDM miniatures? Use 0.1 mm or lower layer height, slow print speed, sanding, and filler primer. A smaller nozzle can also improve fine details.
What slicer software should I use for miniatures? Use PrusaSlicer or Bambu Studio for FDM. Use CHITUBOX or Lychee Slicer for resin. All are common options for miniature workflows.
Can I print miniatures on a Bambu A1 Mini? Yes. Use PLA, low layer height, tree supports, and slower speeds. A 0.2 mm nozzle can improve small details, but the included 0.4 mm nozzle can still work.
How long does it take to 3D print a miniature? A 28 mm FDM miniature may take two to five hours. A resin miniature may take about 1.5 to three hours, depending on layer count and exposure.
Conclusion
Printing miniatures at home puts you in control of the character, pose, scale, and finish. Once you understand printer choice, slicer settings, support placement, post-processing, and painting prep, each print becomes easier and cleaner.
Use Tripo AI Studio to generate a custom miniature as a starting point. Actual results depend on the input, settings, and model complexity. Inspect and repair the mesh, confirm scale and minimum feature size, then export STL or 3MF and validate the sliced preview before printing.
Explore Tripo AI Pricing to find the right plan for your miniature workflow.