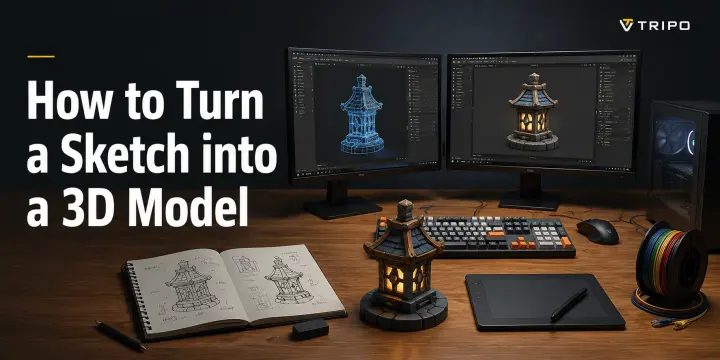
How to Turn a Sketch into a 3D Model (4 Methods)
TL;DR
- AI tools such as Tripo AI can turn a sketch into a 3D model in under 60 seconds.
- Blender is the best free manual option for full artistic control.
- Fusion 360 or SolidWorks suit engineering sketches that need precise measurements.
- Prepare a clean sketch with a white background, clear lines, and one subject.
- For 3D printing, export the generated model as STL or 3MF.
You can turn a sketch into a 3D model using three main approaches: AI tools (the fastest option, often producing results in under 60 seconds), manual software like Blender (free and flexible), or CAD programs like Fusion 360 (best for precise engineering parts). For most beginners, uploading a sketch to an AI platform can create a usable 3D model in under a minute without requiring any modeling experience.
Almost everyone has had the same moment: a great idea drawn on paper, left inside a desk drawer because turning it into a real object feels too difficult. Today, that gap is much smaller. This guide covers four practical methods for converting sketches into 3D models, whether your drawing is hand-made or digital. The workflow applies to different goals, including 3D printing, game assets, prototypes, and product visualization.
What "Sketch to 3D" Means — and Which Method Fits You
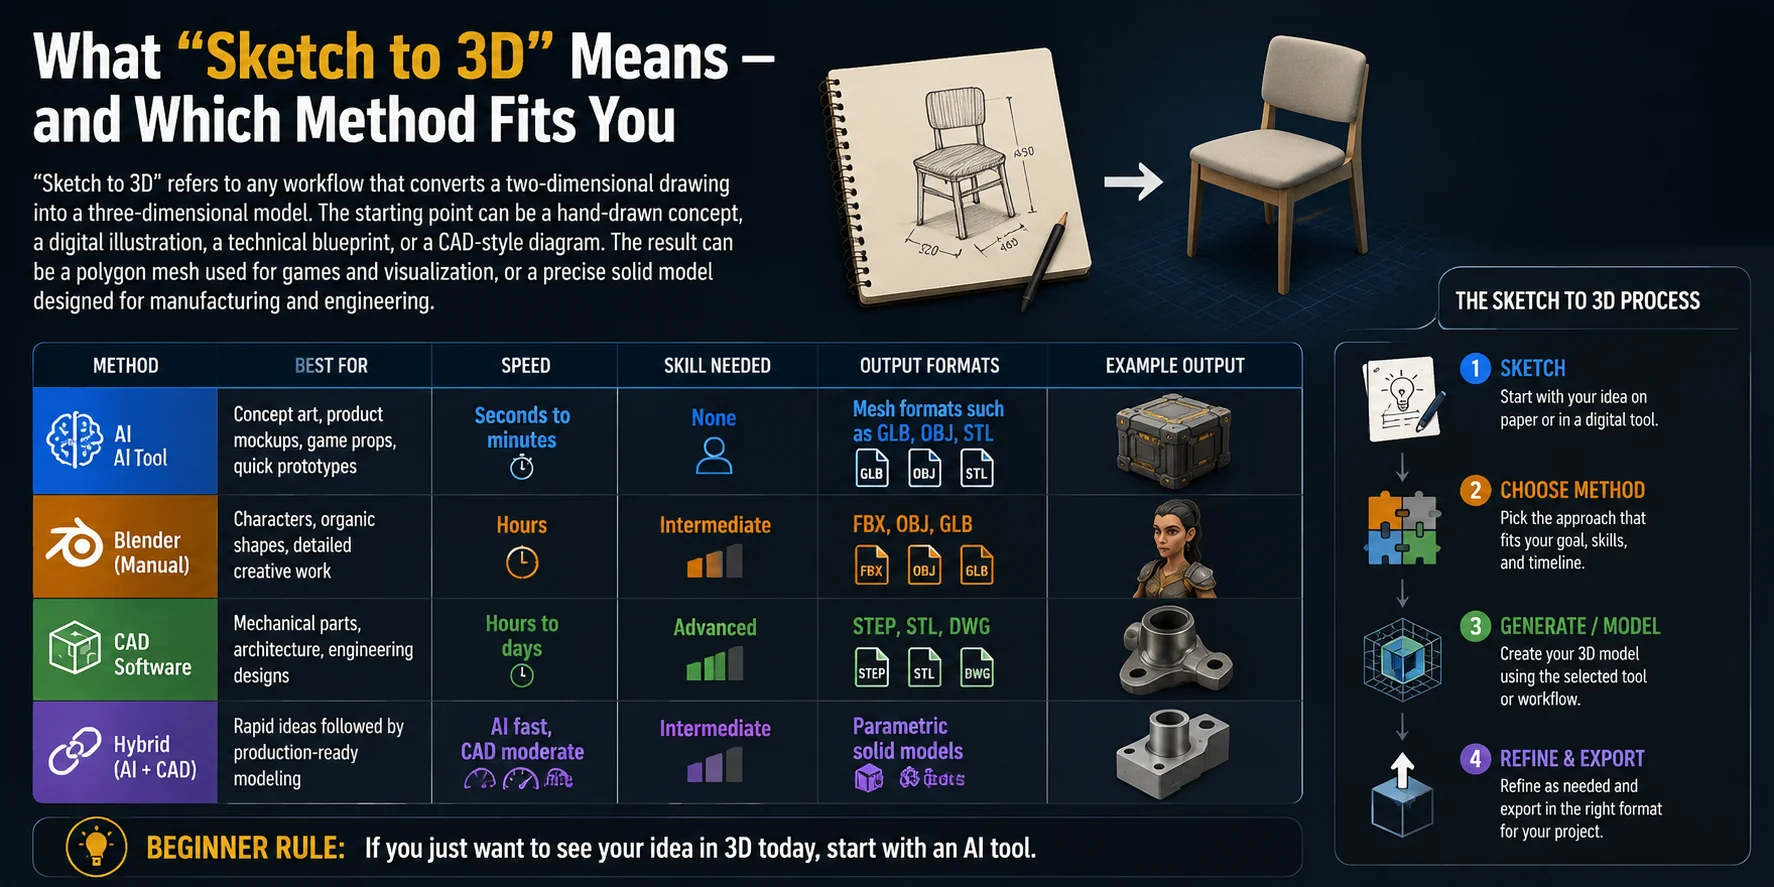
“Sketch to 3D” refers to any workflow that converts a two-dimensional drawing into a three-dimensional model. The starting point can be a hand-drawn concept, a digital illustration, a technical blueprint, or a CAD-style diagram. The result can be a polygon mesh used for games and visualization, or a precise solid model designed for manufacturing and engineering.
Different methods fit different goals. The best choice depends on whether you need speed, creative control, or technical accuracy.
| Method | Best For | Speed | Skill Needed | Output Formats |
|---|---|---|---|---|
| AI Tool | Concept art, product mockups, game props, quick prototypes | Seconds to minutes | None | Mesh formats such as GLB, OBJ, STL |
| Blender (Manual) | Characters, organic shapes, detailed creative work | Hours | Intermediate | FBX, OBJ, GLB |
| CAD Software | Mechanical parts, architecture, engineering designs | Hours to days | Advanced | STEP, STL, DWG |
| Hybrid (AI + CAD) | Rapid ideas followed by production-ready modeling | AI generation is fast, CAD refinement is moderate | Intermediate | Parametric solid models |
AI tools are usually the fastest way to explore an idea because they can interpret a sketch and generate a usable 3D asset without requiring traditional modeling skills. Blender gives artists maximum flexibility for shaping and refining models, especially for characters and creative assets. CAD software is the better choice when measurements, dimensions, and manufacturing accuracy matter.
A hybrid workflow combines the strengths of both approaches: use AI to quickly create a starting concept, then refine it in CAD for precise production requirements.
For beginners, the simplest rule is: If you just want to see your idea in 3D today, start with an AI tool.
Method 1 — Turn Your Sketch into a 3D Model with AI (Tripo AI)
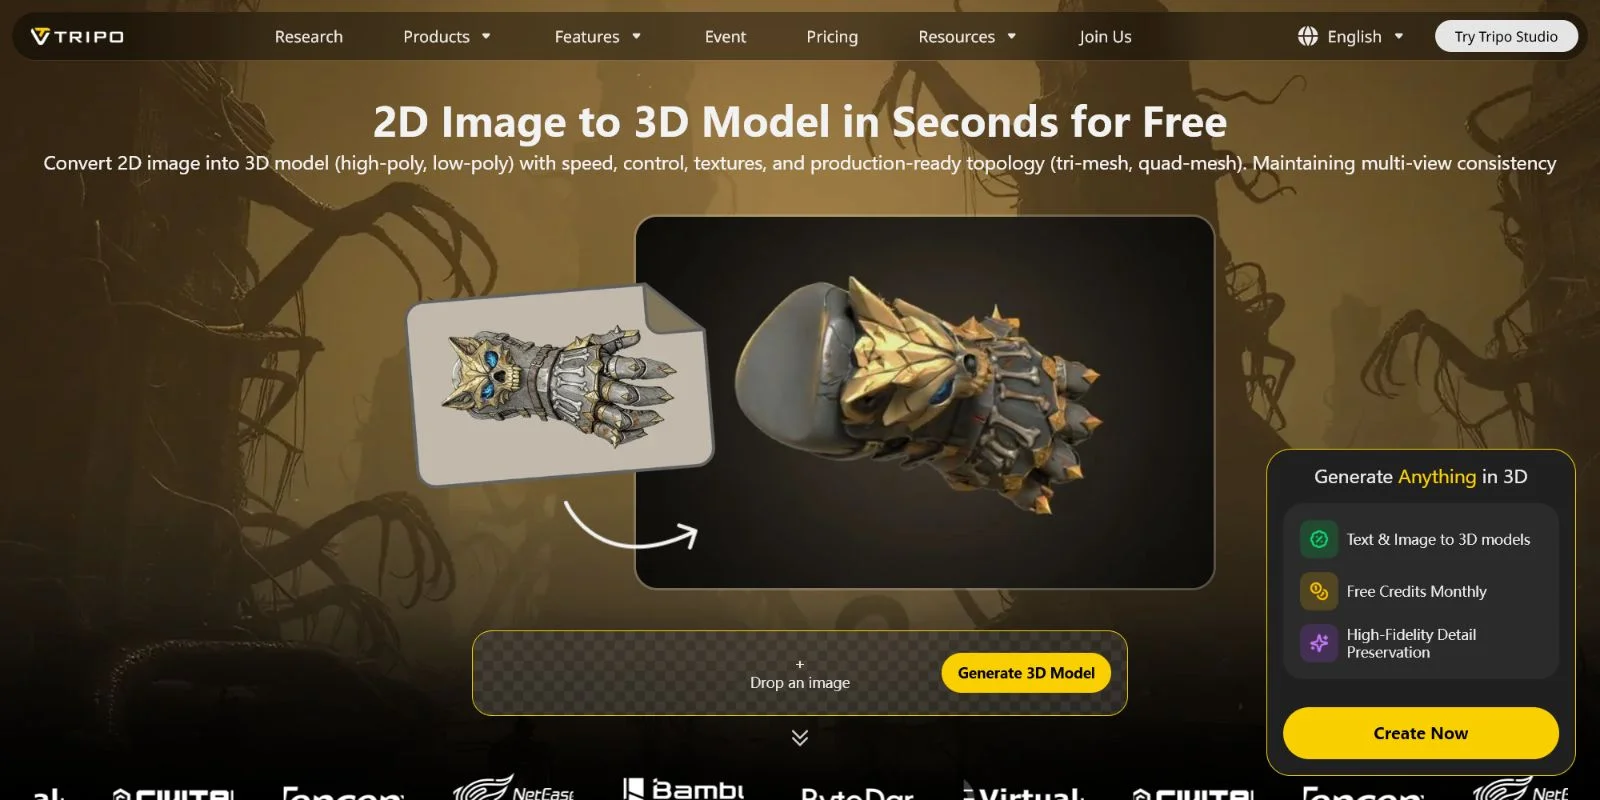
AI is the fastest way to turn a sketch into a 3D model because it removes the traditional barriers of 3D software, modeling skills, and complex workflows. Instead of manually building geometry, beginners can upload a drawing and let an AI model interpret the shape, structure, and details to create a usable 3D asset within seconds.
The workflow is simple:
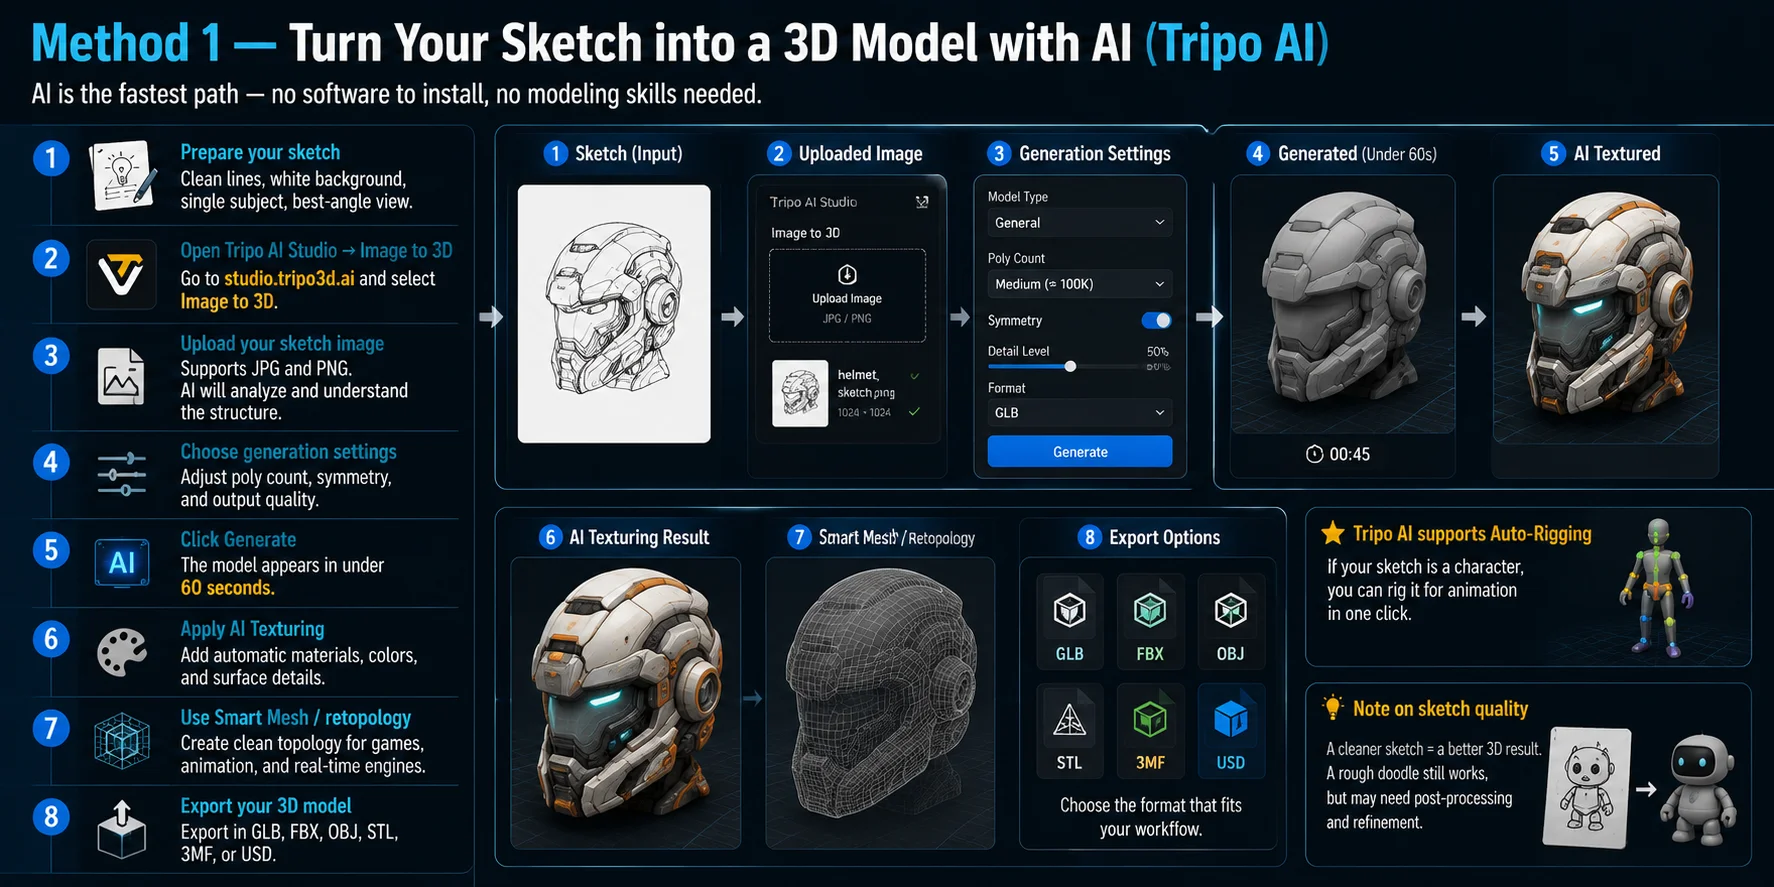
- Prepare your sketch Start with a clean reference image. For the best results, use clear lines, a white or simple background, a single main subject, and a view that shows the important shape information. A front, side, or three-quarter view usually works better than a heavily angled or unclear drawing.
- Open Tripo AI Studio and select Image to 3D Open Tripo AI Studio and select Image to 3D. This workflow allows you to transform a 2D reference image into a three-dimensional model using AI-based reconstruction.
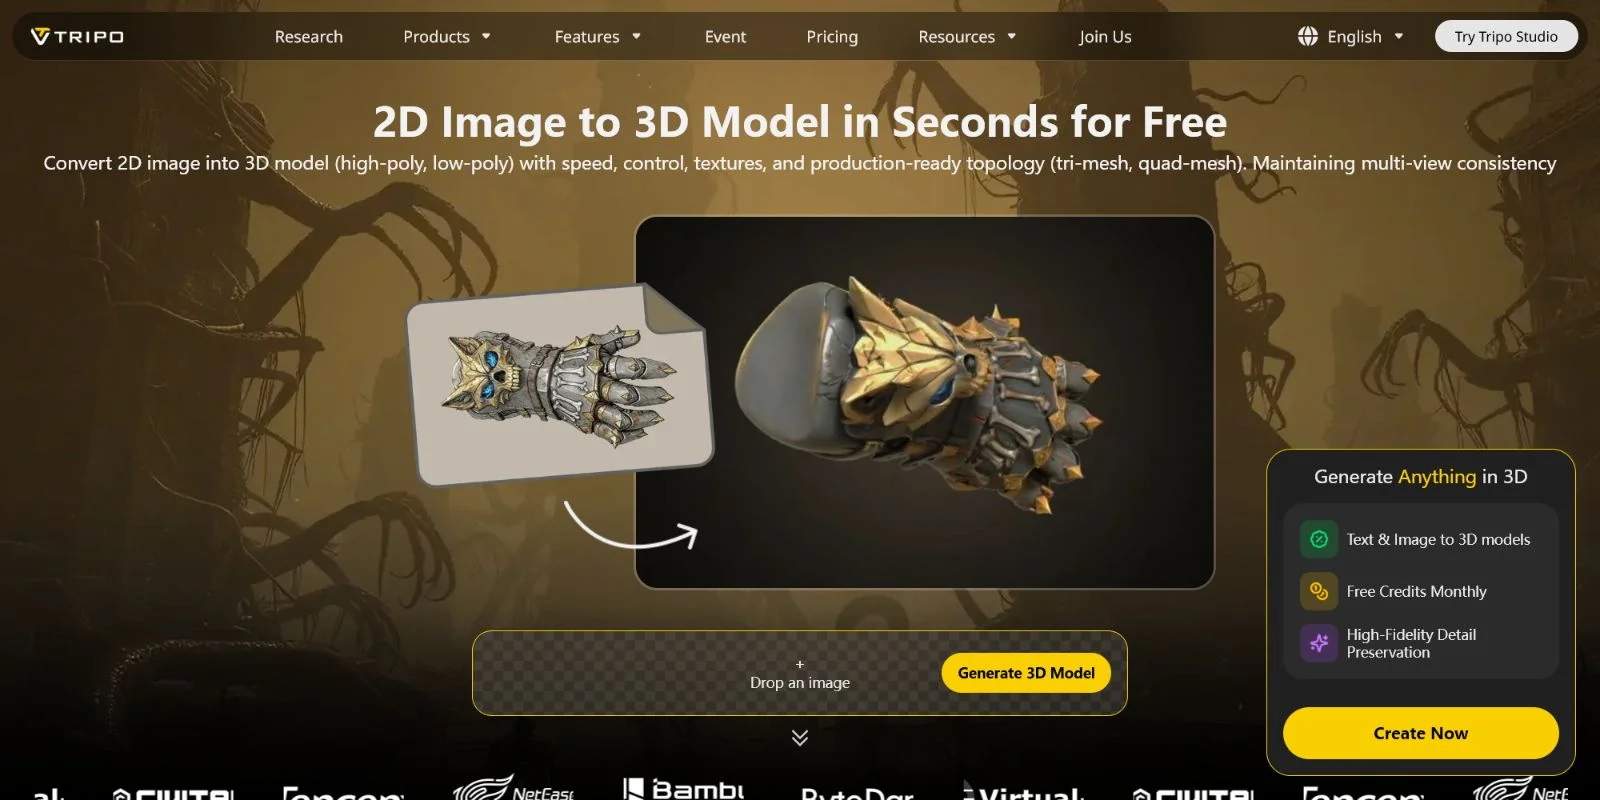
- Upload your sketch image Upload your drawing in a supported image format such as JPG or PNG. The AI will analyze the sketch, identify the main object structure, and estimate the missing 3D information from the 2D reference.
- Choose generation settings Adjust available options based on your project needs. You can balance polygon density, symmetry, and output quality depending on whether the model is intended for quick visualization, games, animation, or 3D printing.
- Click Generate and create your model Start the generation process. The AI creates a 3D model from your sketch, and the result can typically appear in under 60 seconds depending on the complexity and selected settings.
- Apply AI Texturing Add surface details automatically with AI Texturing. This helps transform a basic generated mesh into a more complete asset with materials, colors, and visual details.
- Optimize the model if needed For game development or real-time applications, use Smart Mesh or retopology tools to create cleaner topology and improve performance. This reduces unnecessary polygons while keeping the important shape details.
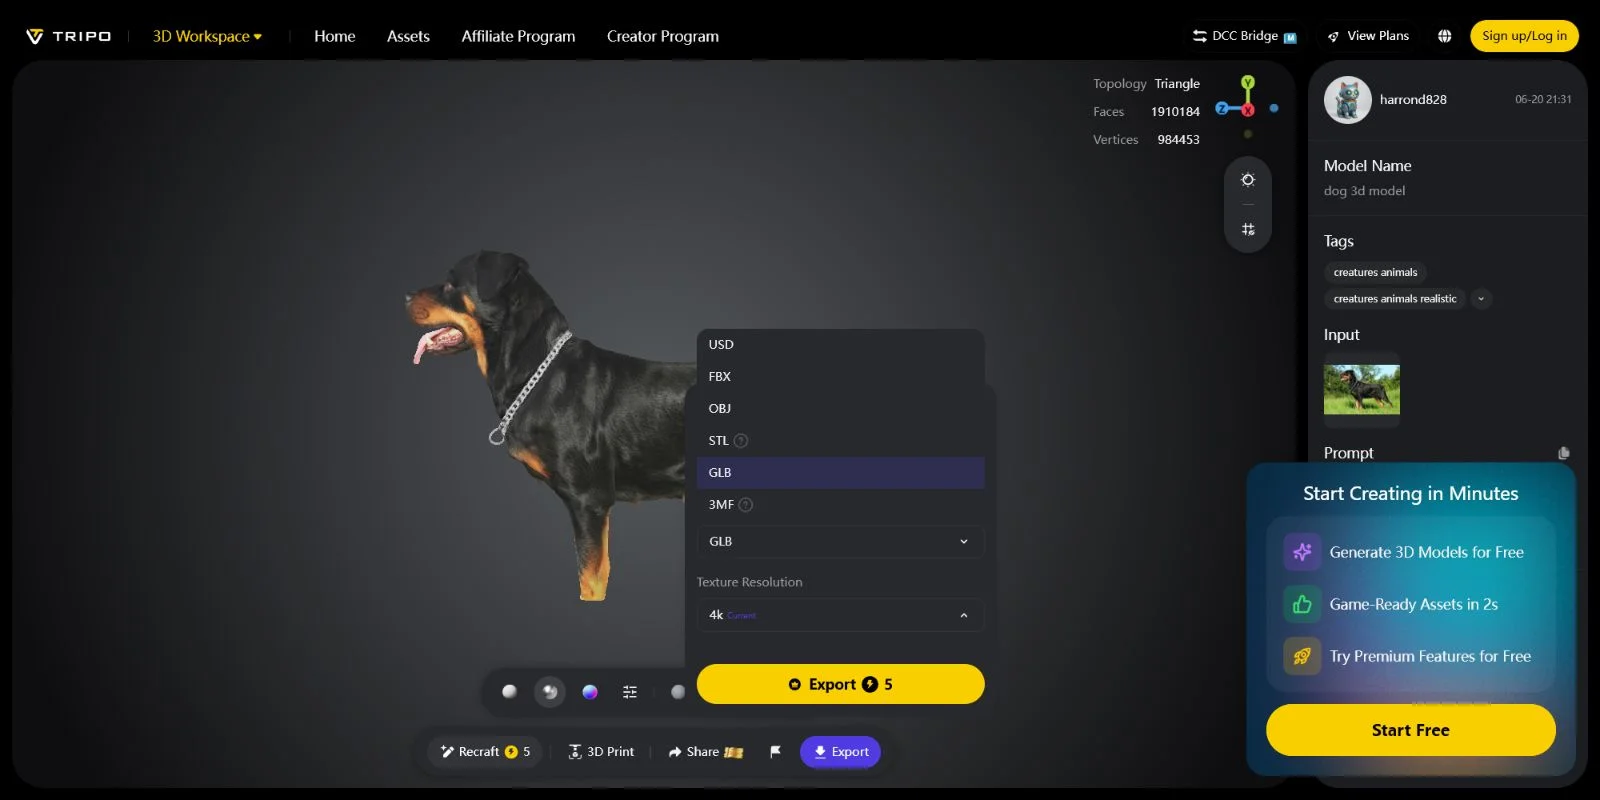
- Export your final 3D model Export the model in the format that matches your workflow, including GLB, FBX, OBJ, STL, 3MF, or USD. These formats support different uses such as animation, game engines, visualization, and 3D printing.
Callout: Tripo AI supports Auto-Rigging — if your sketch is a character, you can create a rig for animation with one click and prepare it for your animation workflow.
The quality of your sketch directly affects the quality of the generated model. A clean drawing with clear proportions and visible details usually produces better results. Rough doodles can still work, especially for exploring ideas quickly, but they may require additional editing or refinement after generation. For concept exploration, product ideas, and creative prototypes, AI sketch-to-3D tools provide one of the fastest paths from imagination to a usable 3D asset.
Method 2 — Convert a Sketch to 3D in Blender (Free)
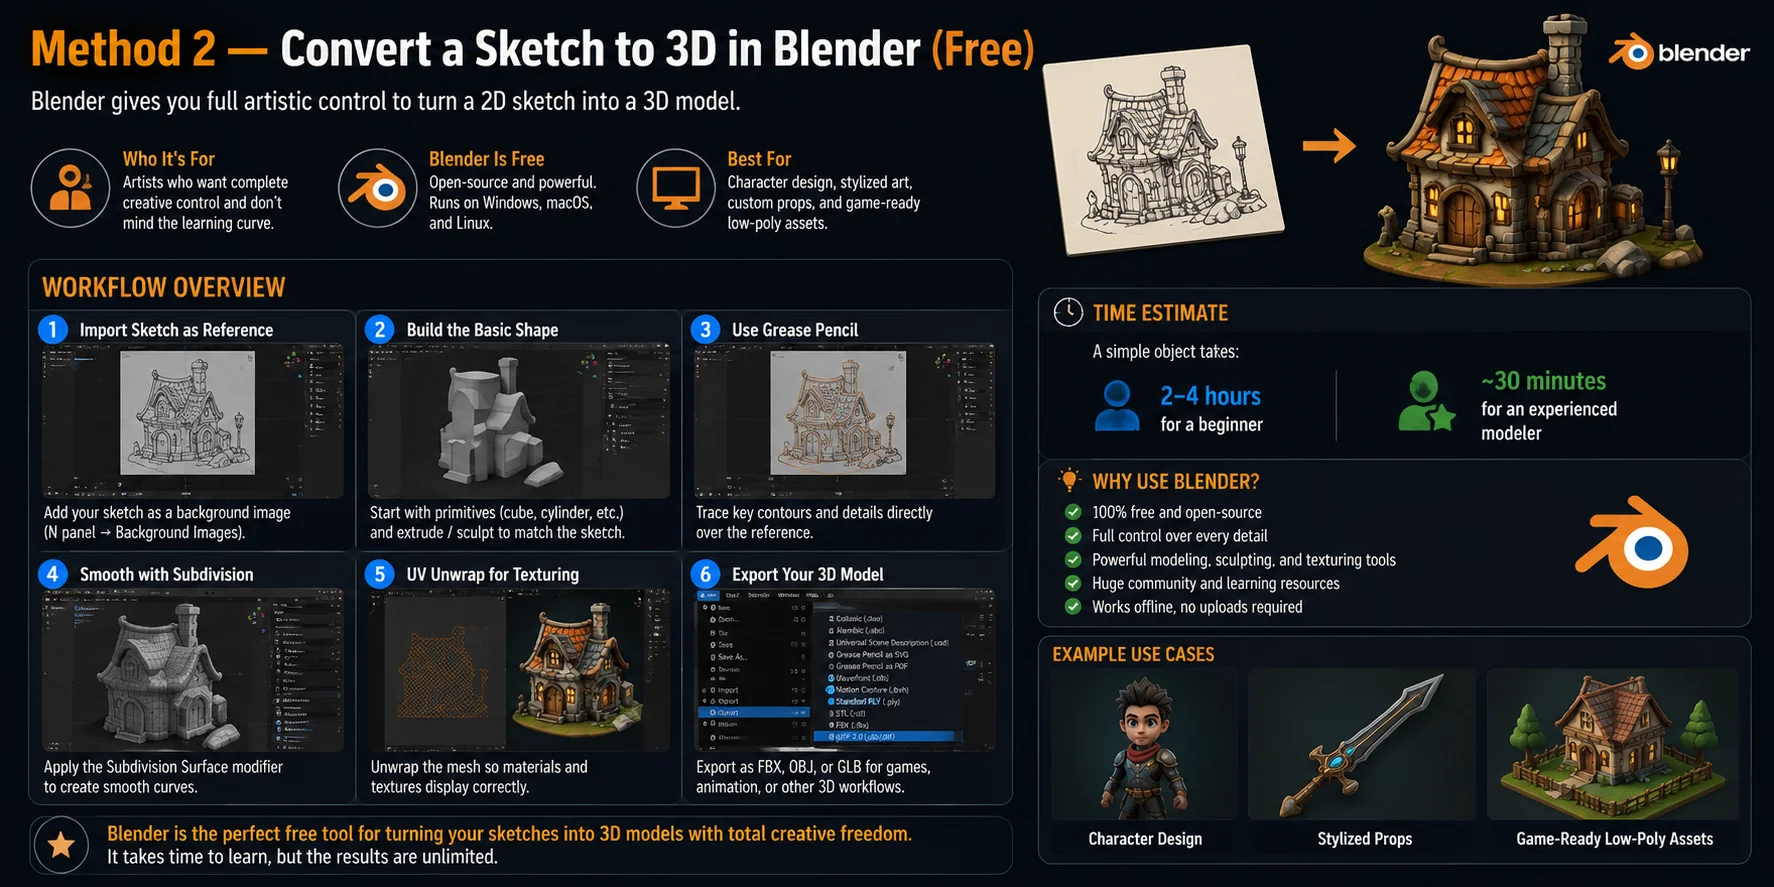
Blender is the best option for creators who want complete control over how their sketch becomes a 3D model. Unlike AI tools that generate results automatically, Blender gives you direct control over every part of the shape, topology, and style. The trade-off is the learning curve — creating a model manually requires more time and basic 3D modeling knowledge.
Blender is completely free and available on Windows, macOS, and Linux, making it one of the most accessible professional 3D tools. It is especially useful for artists who want to refine a concept, create custom characters, or build assets that need specific artistic direction.
A typical sketch-to-3D workflow in Blender looks like this:
- Import your sketch as a reference Add your drawing as a background image so you can use it as a visual guide while modeling. Blender allows you to place the sketch in the viewport and adjust your model to match the original design.
- Build the basic shape Start with simple primitives such as cubes, spheres, or cylinders, then modify, sculpt, and extrude the geometry until it follows the main silhouette of the sketch.
- Trace important details with Grease Pencil Blender’s Grease Pencil tool can help you draw directly over the reference image, making it useful for planning shapes, outlines, and design details.
- Smooth and refine the model Apply tools such as the Subdivision Surface modifier to create smoother curves and improve the final appearance, especially for organic objects and characters.
- Prepare the model for materials UV unwrap the mesh so textures and materials can be applied correctly. This step is important for game assets, product visualization, and detailed artwork.
- Export the final model Blender supports common formats including FBX, OBJ, and GLB, allowing your model to move into game engines, animation software, or other 3D workflows.
For beginners, creating a simple object from a sketch usually takes around 2–4 hours, while experienced Blender users may complete a similar model in about 30 minutes depending on complexity.
Blender works best for character design, stylized artwork, custom props, and game-ready low-poly assets where creative control matters more than speed. If you want a completely free sketch-to-3D workflow and are willing to invest time learning, Blender remains one of the most powerful choices available.
Method 3 — CAD Software for Engineering and Technical Sketches
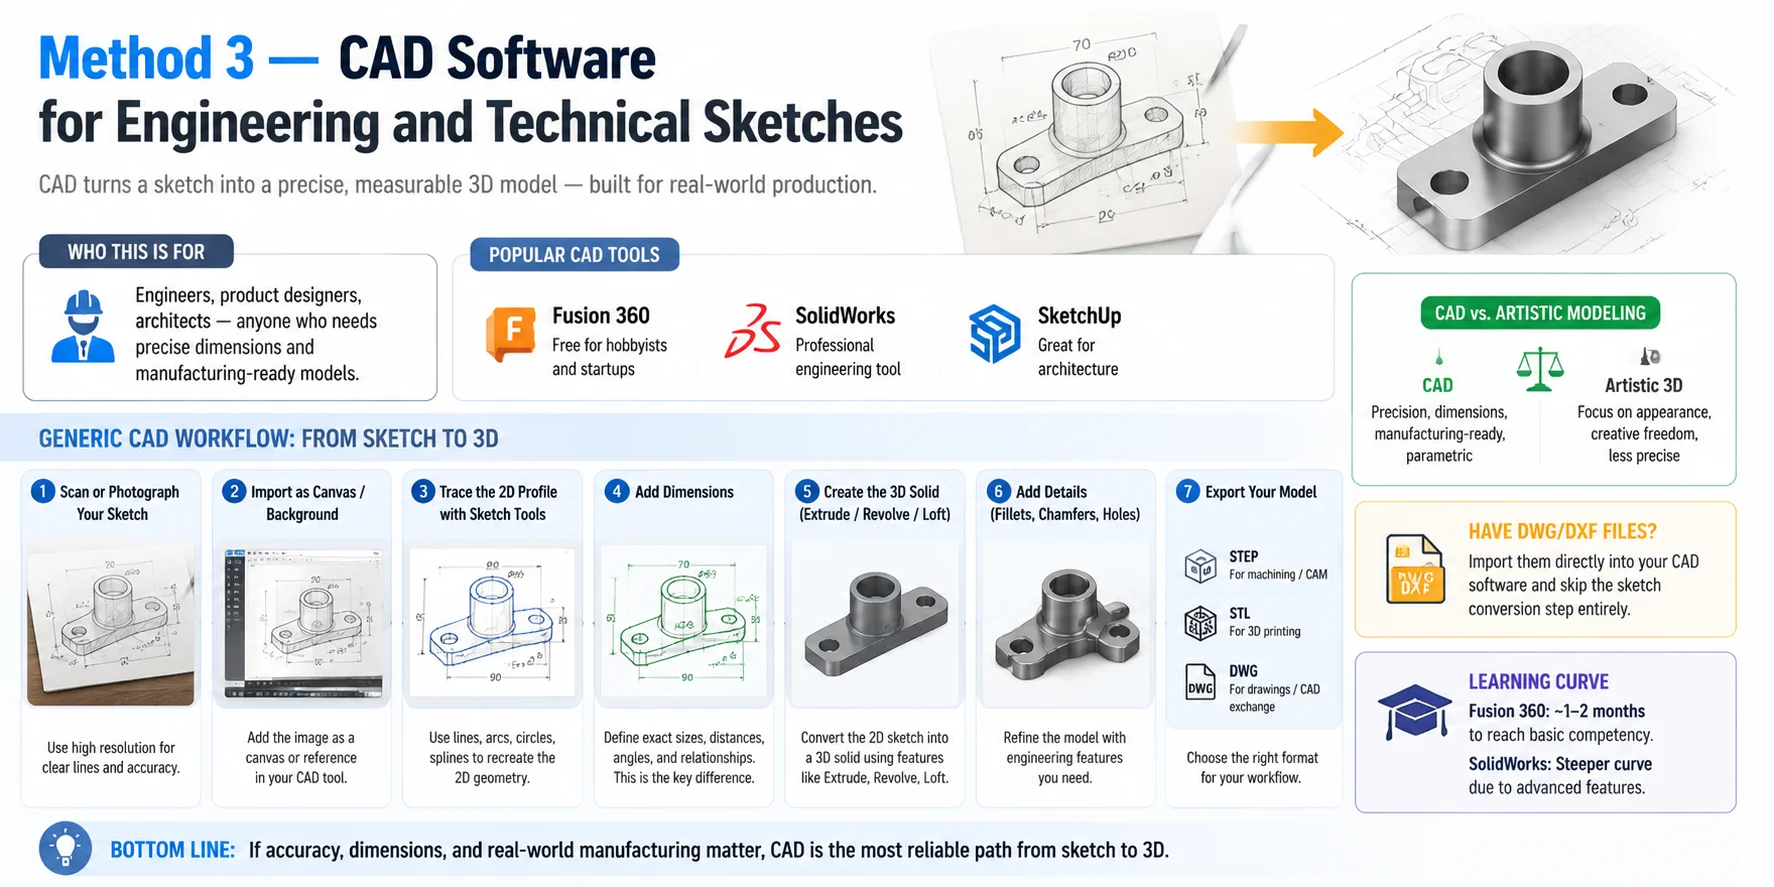
CAD software is the right choice when a sketch needs to become a precise, measurable 3D model rather than just a visual concept. This workflow is designed for engineers, product designers, architects, and anyone who needs accurate dimensions, mechanical relationships, or manufacturing-ready geometry.
Popular CAD tools include Fusion 360, SolidWorks, and SketchUp, each serving different professional needs. Fusion 360 is a popular option for hobbyists and makers, offering powerful modeling features with a free personal-use version. SolidWorks is widely used in professional engineering environments, while SketchUp is commonly used for architecture and spatial design.
A typical CAD sketch-to-3D workflow follows these steps:
- Prepare your sketch Scan or photograph your drawing at a high resolution. A clean image with clear lines makes tracing easier and improves accuracy.
- Import the sketch into your CAD software Add the image as a canvas or background reference inside your CAD tool. This allows you to trace the design while keeping the original proportions visible.
- Create the 2D profile Use CAD sketch tools such as lines, arcs, circles, and splines to recreate the drawing digitally. Unlike artistic modeling, every element can be controlled mathematically.
- Add precise dimensions This is the biggest difference between CAD and traditional 3D modeling. Dimensions define exact sizes, distances, angles, and relationships between parts, ensuring the final model can be manufactured.
- Build the 3D solid Convert the 2D sketch into a 3D object using operations such as Extrude, Revolve, or Loft. These tools create solid geometry from the measured profile.
- Refine the design Add details such as fillets, chamfers, holes, and other engineering features required for the final product.
- Export the model Export formats depend on the goal: STEP for machining and CAM workflows, STL for 3D printing, or DWG/DXF for technical drawings and CAD exchange.
If you already have a DWG or DXF drawing, you can often import it directly into CAD software and skip the sketch conversion process entirely.
The main limitation is the learning curve. Fusion 360 usually takes around 1–2 months to reach basic competency, while SolidWorks has an even steeper learning path due to its professional engineering features. However, for projects where accuracy matters more than speed, CAD remains the most reliable way to transform a sketch into a production-ready 3D model.
How to Prepare Your Sketch for the Best 3D Results
A good sketch is the foundation of a successful sketch-to-3D workflow. While all three methods — AI tools, Blender, and CAD software — benefit from a clear reference, preparation is especially important for AI generation because the system must interpret a 2D image and predict the missing 3D information. A cleaner input usually leads to better geometry, fewer errors, and less post-processing.
Use this checklist before converting your sketch into a 3D model:
✓ Use a white or light background A simple background removes visual noise and helps AI systems focus on the object instead of surrounding details.
✓ Keep one subject per image Avoid placing multiple objects, characters, or unrelated elements in the same sketch. A single clear subject gives the model a stronger understanding of the intended shape.
✓ Choose one clear viewpoint Front, side, or three-quarter views usually work best. Avoid extreme perspective or heavy foreshortening, which can make proportions harder to interpret.
✓ Use consistent line weight Draw with solid, visible lines. Broken, extremely thin, or faded outlines can cause missing details or inaccurate shapes.
✓ Scan at high resolution For hand-drawn sketches, scan at 300 DPI or higher when possible. Crop tightly around the subject to remove unnecessary empty space.
✓ Mark the centerline for symmetrical objects If your design is symmetrical, adding a center guideline can improve accuracy. Many AI tools can use symmetry settings to generate more balanced models.
✓ Use shading carefully Shadows, textures, and cross-hatching can provide useful depth information, but only include them when your chosen AI tool specifically supports sketch shading interpretation.
Avoid common mistakes such as uploading photos of wrinkled paper, using complex scenes with multiple characters, or submitting sketches with heavy background textures. A simple, clean reference gives both AI tools and manual modeling workflows the best chance of producing a usable 3D result.
Sketch to 3D for 3D Printing
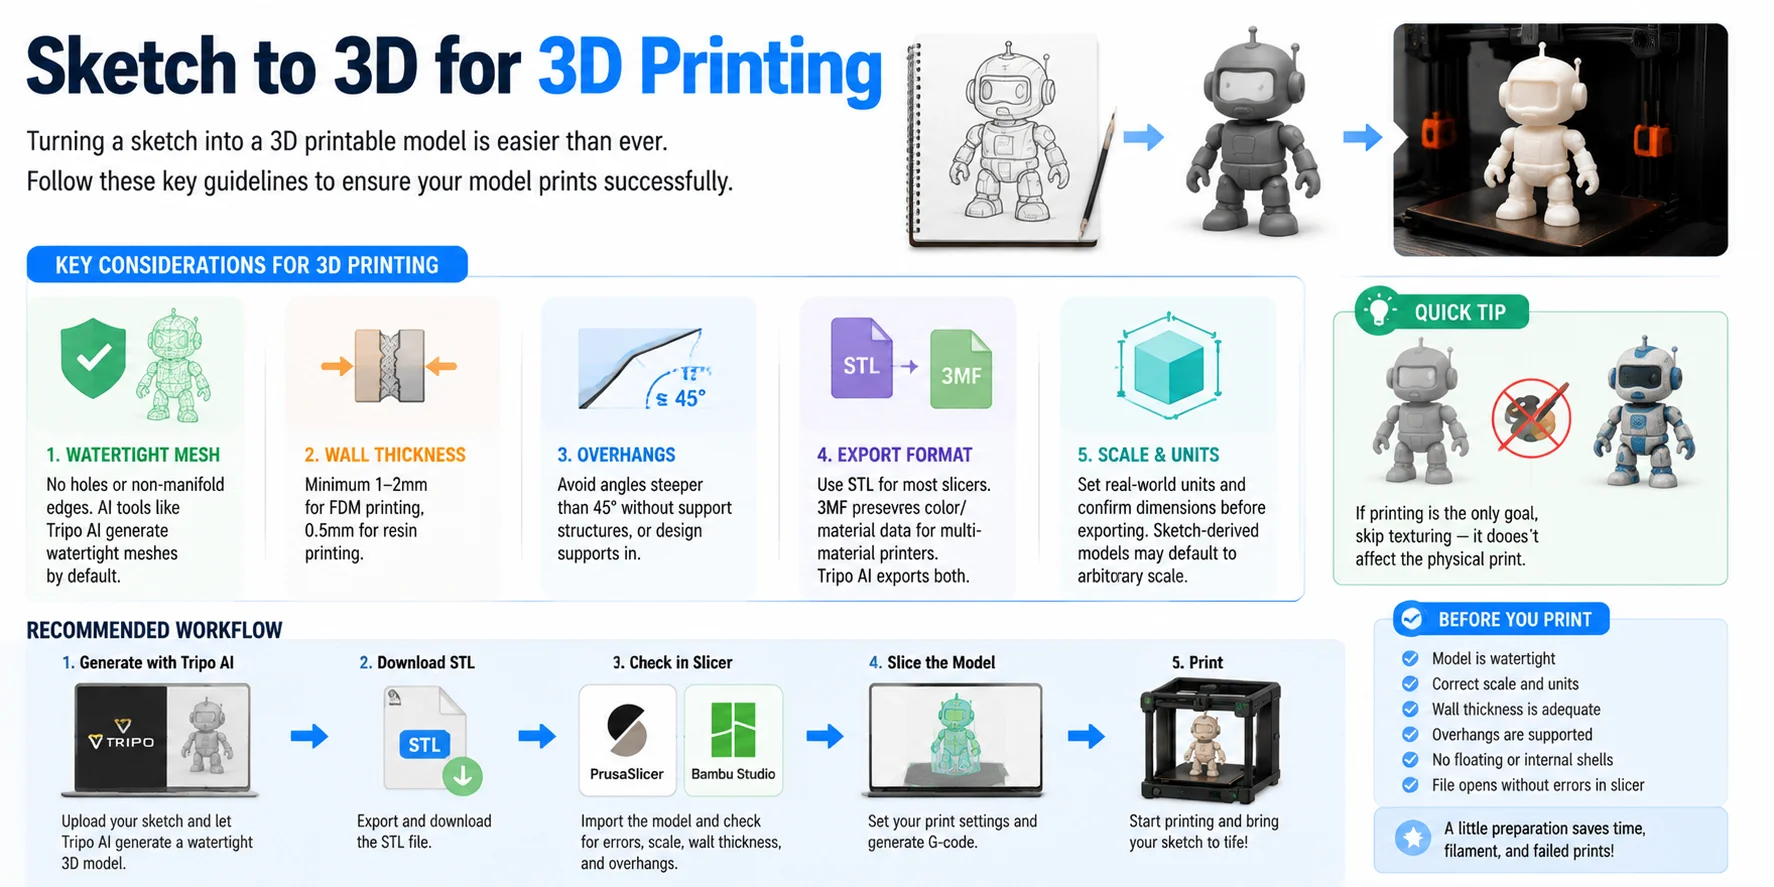
For many creators, the final goal of converting a sketch into a 3D model is not just visualization — it is creating a physical object. A sketch-to-3D workflow can produce printable designs quickly, but the model still needs to meet several 3D printing requirements before it reaches the printer.
The most important factor is a watertight mesh. A printable model must have a closed surface with no holes, open boundaries, or non-manifold edges. AI tools such as Tripo AI are designed to generate watertight, manifold-ready geometry by default, reducing common repair problems before slicing.
Other key checks include:
- Wall thickness — Thin areas may fail during printing. For typical FDM printing, a minimum wall thickness of around 1–2 mm is recommended, while resin printing can often support thinner details around 0.5 mm depending on the material and printer settings.
- Overhangs and supports — Avoid extremely steep overhangs that exceed roughly 45° unless you plan to add support structures. Designing printable angles from the beginning can reduce material waste and cleanup work.
- Export format — STL remains the most widely supported format for slicers and 3D printers. 3MF is a better choice when you need color, materials, or multi-material printing settings. Tripo AI supports both STL and 3MF export options.
- Scale and units — Sketch-based models may not have a real-world size automatically. Before exporting, confirm dimensions and set the correct units so the printed object matches your intended measurements.
A simple workflow is: Generate with Tripo AI → Export STL → Check the model in PrusaSlicer or Bambu Studio → Print. Before slicing, verify the mesh, scale, and wall thickness.
If your only goal is physical printing, you can usually skip texturing. Surface colors and materials do not affect the geometry of the printed object, so focus on clean shape and printable structure first.
Frequently Asked Questions
Can a sketch be 3D?
Yes — any flat 2D sketch can become a 3D model. AI tools like Tripo AI process a sketch image and generate a three-dimensional mesh automatically. Traditional software like Blender or Fusion 360 lets you use the sketch as a reference to build the 3D geometry by hand.
How do I convert an image to a 3D model?
Upload your image (sketch, photo, or concept art) to an AI Image-to-3D tool such as Tripo AI Studio. The AI analyzes the 2D image, infers depth and shape, and produces a 3D mesh — usually in under a minute. You can then refine, texture, and export the model.
Can ChatGPT make a 3D model?
ChatGPT itself cannot generate 3D models — it is a text-based AI and does not output 3D geometry or mesh files. Dedicated AI 3D generation platforms like Tripo AI are built specifically for this task and can produce exportable 3D models from text prompts or sketch images.
How do I make a 3D model from an image in SketchUp?
In SketchUp, import your image via File → Import, place it as a texture or reference background, then trace the outline with the Line and Arc tools. Use Push/Pull to extrude 2D faces into 3D shapes. SketchUp works best for architectural and rectilinear forms; organic shapes are harder to model this way.
What is the best free tool to convert a sketch to a 3D model?
For beginners, Tripo AI offers a free tier that converts sketch images to 3D models without any software installation. Blender is the best free option if you want full manual control — it is professional-grade, open source, and runs on any platform.
Can I turn a hand-drawn pencil sketch into a 3D model?
Yes. Photograph or scan your sketch at high resolution, then crop and clean the background in any image editor. Once the sketch is a clear image file (JPG or PNG), you can upload it directly to an AI tool like Tripo AI or use it as a reference in Blender. Cleaner lines produce better 3D results.
How long does it take to convert a sketch to a 3D model?
With an AI tool, generation takes 30–90 seconds. Post-processing (texturing, rigging, export) adds 5–15 minutes. Manual modeling in Blender takes 2–8 hours depending on complexity. CAD software for engineering parts can take a full day or more for complex assemblies.
What file formats can I export after converting a sketch to a 3D model?
It depends on your tool. Tripo AI exports GLB, FBX, OBJ, STL, 3MF, and USD. Blender exports FBX, OBJ, GLB, STL, and more. CAD tools like Fusion 360 export STEP, IGES, STL, and OBJ. Choose STL or 3MF for 3D printing, GLB or FBX for game engines, and STEP for manufacturing.
Is there a free online sketch to 3D converter?
Yes. Tripo AI Studio (studio.tripo3d.ai) offers a browser-based Image-to-3D converter with a free tier—no download or installation required. You can upload your sketch, generate a 3D model, and download the finished file entirely in your browser.
How does AI turn a 2D sketch into a 3D model?
AI sketch-to-3D tools use deep learning models trained on millions of 2D-to-3D pairs. The model infers depth, curvature, and surface normals from edge patterns, shading cues, and contour shapes in your sketch. It then reconstructs a 3D mesh that plausibly represents the object implied by the 2D drawing.
Conclusion
Turning a sketch into a 3D model is now faster and more accessible than ever. Whether you use an AI tool to transform a drawing into a model in seconds, choose Blender for complete creative control, or rely on Fusion 360 for precise engineering designs, the best workflow depends on your goal, experience level, and final output needs.
Ready to turn your idea into a 3D model? Upload your sketch and create your first model today:
Main CTA → Try Tripo AI Studio — free to startSecondary CTA → Explore Tripo AI Plans and Pricing