What Is a Roughness Map? PBR Values, Creation Methods, and AI Generation
- A roughness map controls how shiny or matte a surface appears.
- Black means smooth and reflective; white means rough and matte.
- Roughness and glossiness are inverse versions of the same property.
- Realistic roughness maps need variation, not flat grey values.
- Tripo AI can generate roughness maps inside complete PBR texture sets.
A roughness map is a grayscale texture that controls how light scatters across a 3D surface. Black pixels produce mirror-smooth reflections; white pixels produce a completely matte, light-scattering finish. Every shade of grey in between creates a surface somewhere on that spectrum, from polished chrome to rough concrete.
In a PBR, or Physically Based Rendering, workflow, the roughness map is one of the four essential textures that define how a material looks under any lighting condition. Get it wrong and your metal looks like plastic, your wood looks wet, and your concrete looks waxed. This guide explains what roughness maps do, which values work for real-world materials, three ways to create one, and how AI tools now generate them automatically.
What Is a Roughness Map and How Does It Work?
A roughness map is a grayscale image used by a PBR shader to control reflection sharpness. It contains no color information, only luminance values from 0.0 to 1.0.
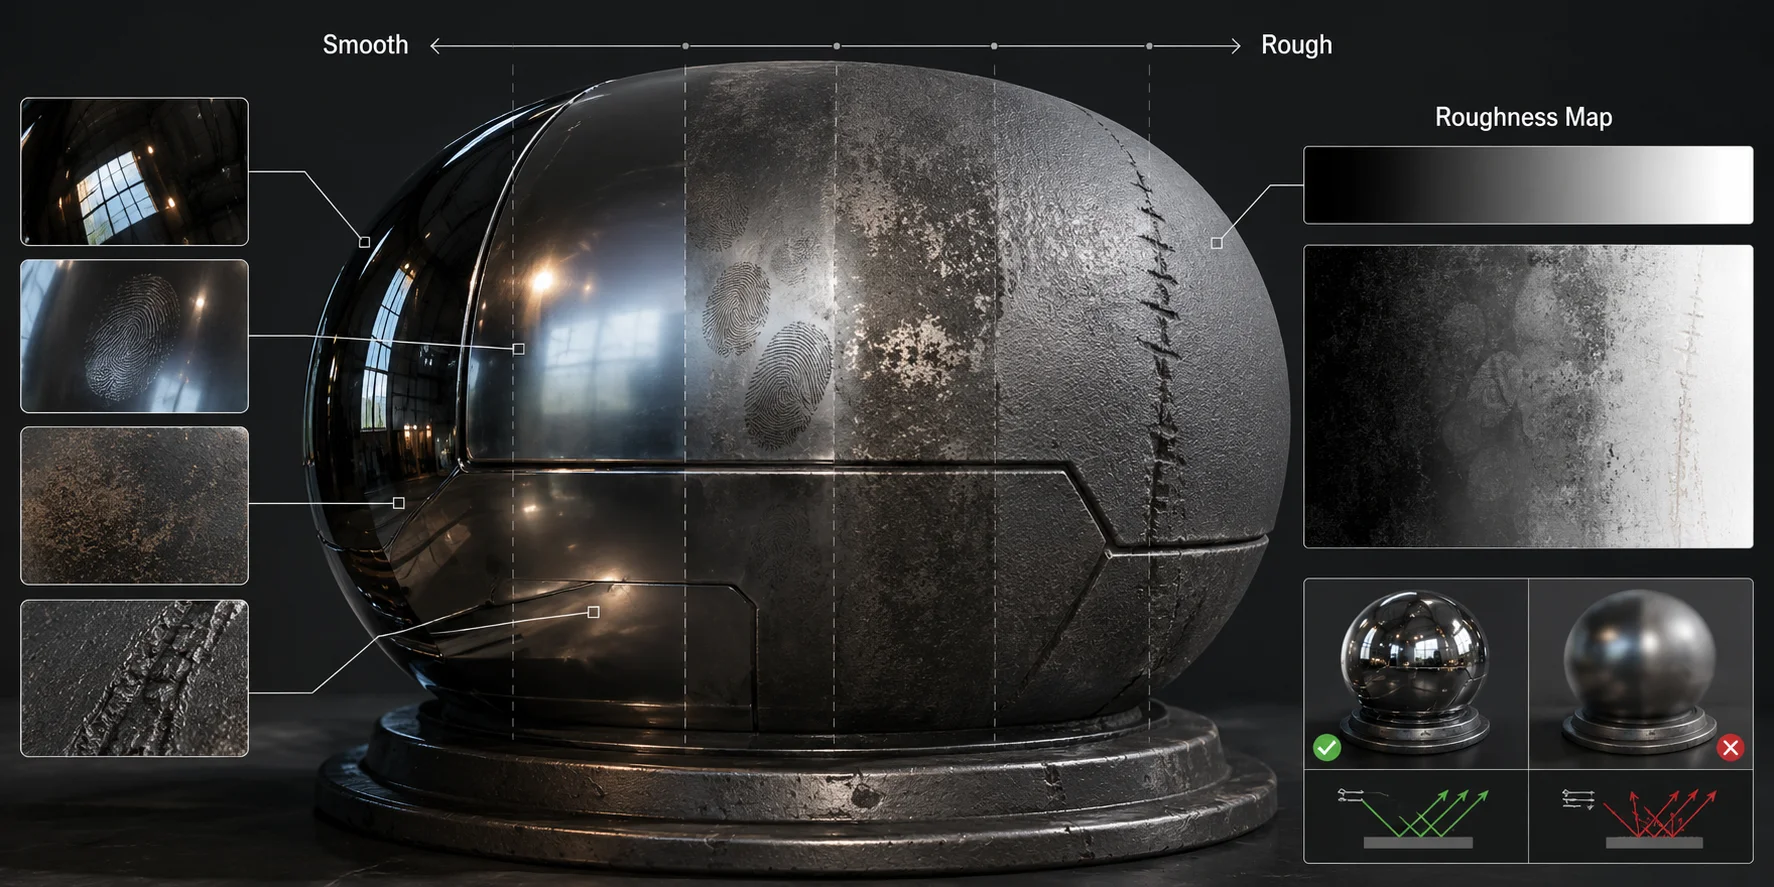
A value of 0.0, or pure black, means the surface is perfectly smooth. Light reflects in a tight direction, creating sharp highlights like a mirror, polished metal, or clean glass. A value of 1.0, or pure white, means the surface is completely rough. Light scatters in many directions, creating a matte look like dry concrete, chalk, or unfinished wood.
Think of steel before and after polishing. Rough steel scatters light, so reflections look blurry. Polished steel reflects light more directly, so reflections become crisp.
A roughness map does not change the shape of the model. It does not add bumps, dents, or geometry. It only changes how light bounces off the surface. In Blender, Unreal Engine, Unity, and most modern tools, it connects to the Roughness input of the Principled BSDF or equivalent PBR shader.
Because every pixel controls its own roughness, one object can have shiny edges, matte grooves, oily fingerprints, and dusty corners at the same time.
Roughness Values for Common Materials
The values below are practical starting points, not fixed laws. Lighting, art style, texture resolution, and renderer settings all affect the final result.
| Material | Roughness Value | Description |
|---|---|---|
| Mirror / polished chrome | 0.00–0.08 | Very sharp reflections with almost no blur. |
| Clean glass | 0.00–0.05 | Smooth and reflective; frosted glass is much higher. |
| Polished metal | 0.08–0.18 | Reflective, but less perfect than a mirror. |
| Glossy plastic | 0.15–0.30 | Strong highlights, common in toys and product shells. |
| Brushed metal | 0.25–0.40 | Visible but softened reflections. |
| Painted metal | 0.35–0.55 | Depends on paint finish, coating, dust, and wear. |
| Human skin | 0.45–0.60 | Soft highlights with natural oil variation. |
| Worn leather | 0.50–0.70 | Smoother where polished by use, rougher in cracks. |
| Satin fabric | 0.55–0.75 | Soft sheen, rarely mirror-like. |
| Raw wood | 0.60–0.85 | Rough grain; polished wood is lower. |
| Dry concrete | 0.75–0.95 | Very matte, with little visible reflection. |
| Chalk / dust / dry clay | 0.85–1.00 | Almost fully matte. |
The main rule is variation. A sword should not use one roughness value everywhere. The blade, handle, rust, scratches, and fingerprints should all reflect light differently. A good roughness map often looks like a subtle black-and-white photo of surface wear: darker where polished or oily, lighter where dry, dusty, scratched, or unfinished.
Roughness Map vs. Glossiness Map
Roughness and glossiness describe the same surface property from opposite directions.
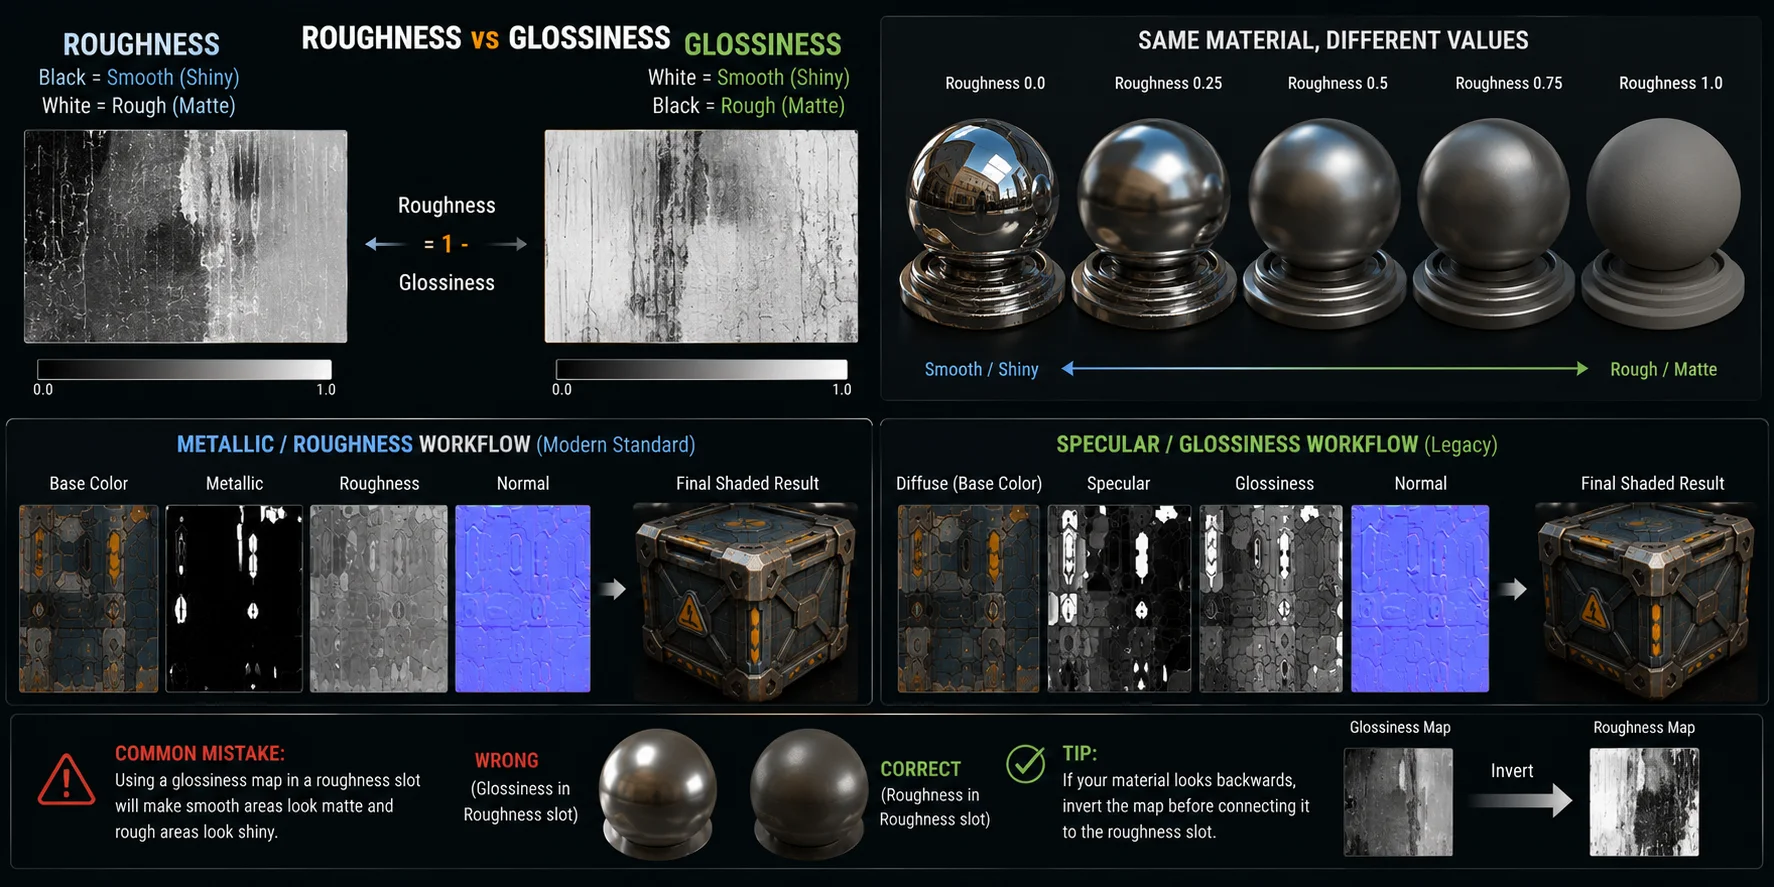
A roughness map says how rough the surface is. Black means smooth and reflective; white means rough and matte. A glossiness map says how glossy the surface is. White means smooth and shiny; black means rough and matte.
The conversion is simple:
Roughness = 1 - Glossiness
So a roughness value of 0.3 equals a glossiness value of 0.7.
Modern pipelines usually use the Metallic/Roughness workflow. This is the standard in Blender’s Principled BSDF, Unreal Engine, Unity HDRP, glTF, and many real-time asset pipelines. Older pipelines may use the Specular/Glossiness workflow, where glossiness replaces roughness and a specular map controls reflection color and intensity.
If your imported material looks backwards, you may have placed a glossiness map into a roughness slot. Smooth areas become matte, and rough areas become shiny. The fix is to invert the grayscale map before connecting it.
If you are starting a new project today, use roughness with the metallic workflow unless a studio or client specifically asks for specular/glossiness.
How to Create a Roughness Map — 3 Methods
Method 1: Paint It Manually in Blender or Substance Painter
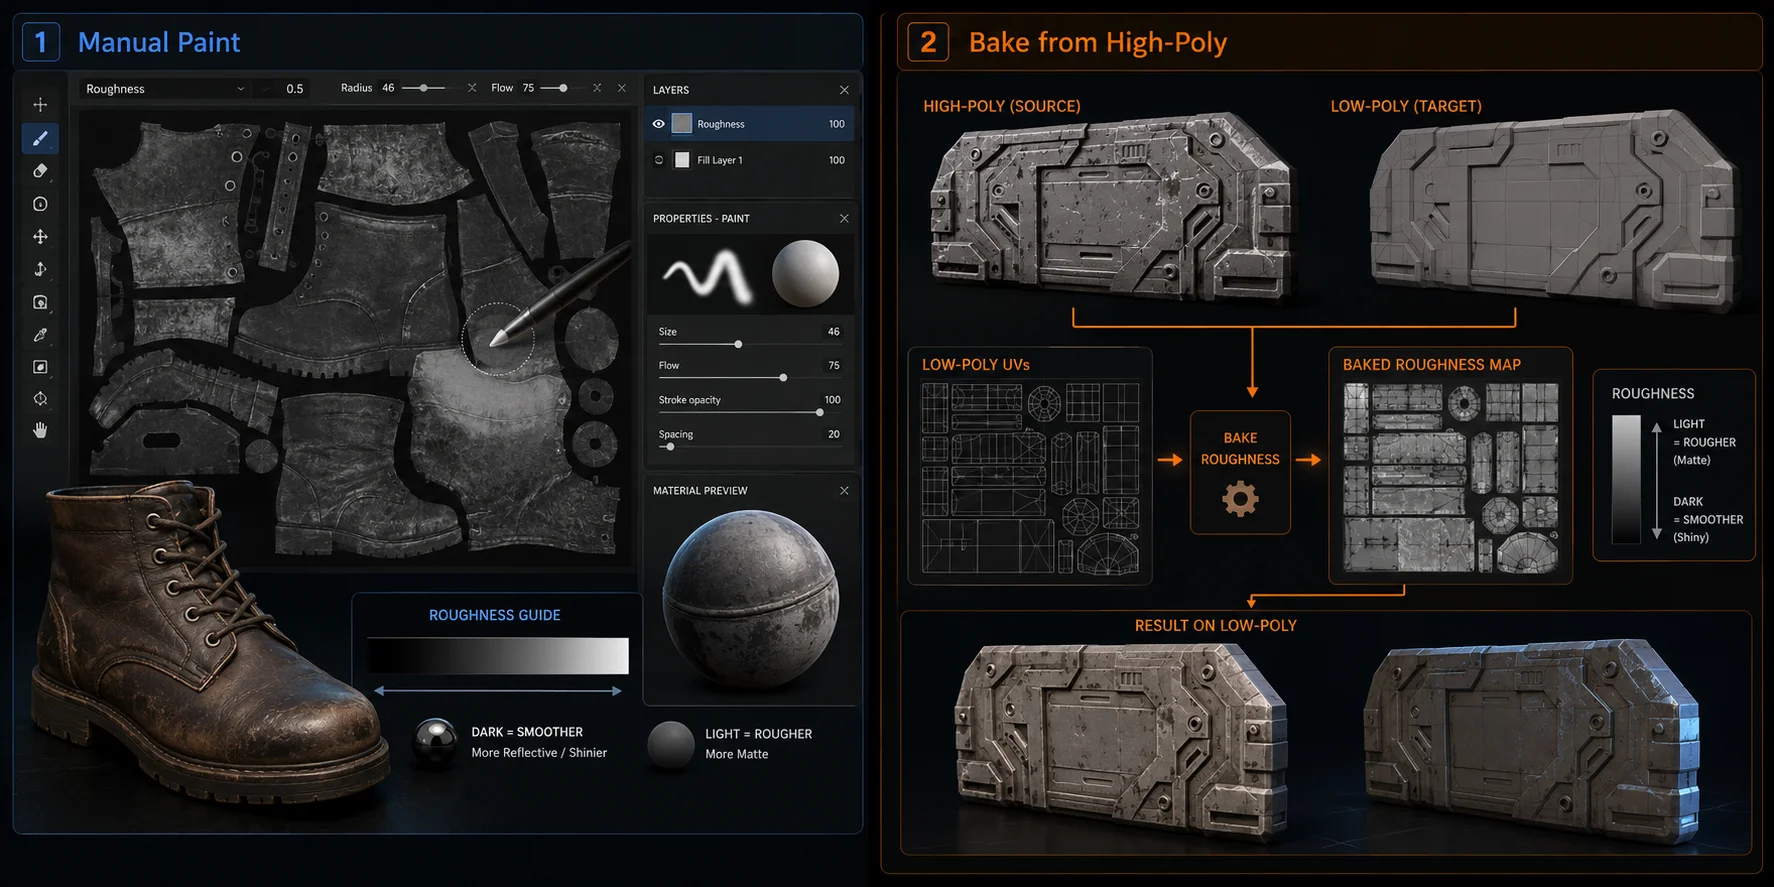
Manual painting gives you the most control. You use a grayscale brush to paint roughness values directly onto UV-unwrapped surfaces.
In Blender, switch to Texture Paint mode, create a new grayscale image, paint with grey values, then connect that image to the Roughness socket of the Principled BSDF shader. Darker areas become smoother and shinier. Lighter areas become rougher and more matte.
In Substance Painter, add a Fill Layer, enable the Roughness channel, and paint variation with brushes, masks, or generators. Start with a base value for the material type, then add detail. Plastic might begin around 0.25, leather around 0.6, and concrete around 0.85.
Method 2: Bake from High-Poly Detail in Blender
Baking is useful when roughness variation should match surface detail. For example, rivets may be rougher than flat panels, grooves may collect dust, and sculpted rock cracks may need higher roughness than worn edges.
In Blender, create or sculpt the high-poly detail, unwrap the low-poly model, then use Render Properties → Bake → Roughness to transfer material information to the low-poly UV layout.
This method takes more setup than painting, but it helps your roughness map follow the real shape and wear pattern of the asset.
Method 3: Generate with AI
AI generation is the fastest route when you need a complete PBR texture set without painting every map manually.
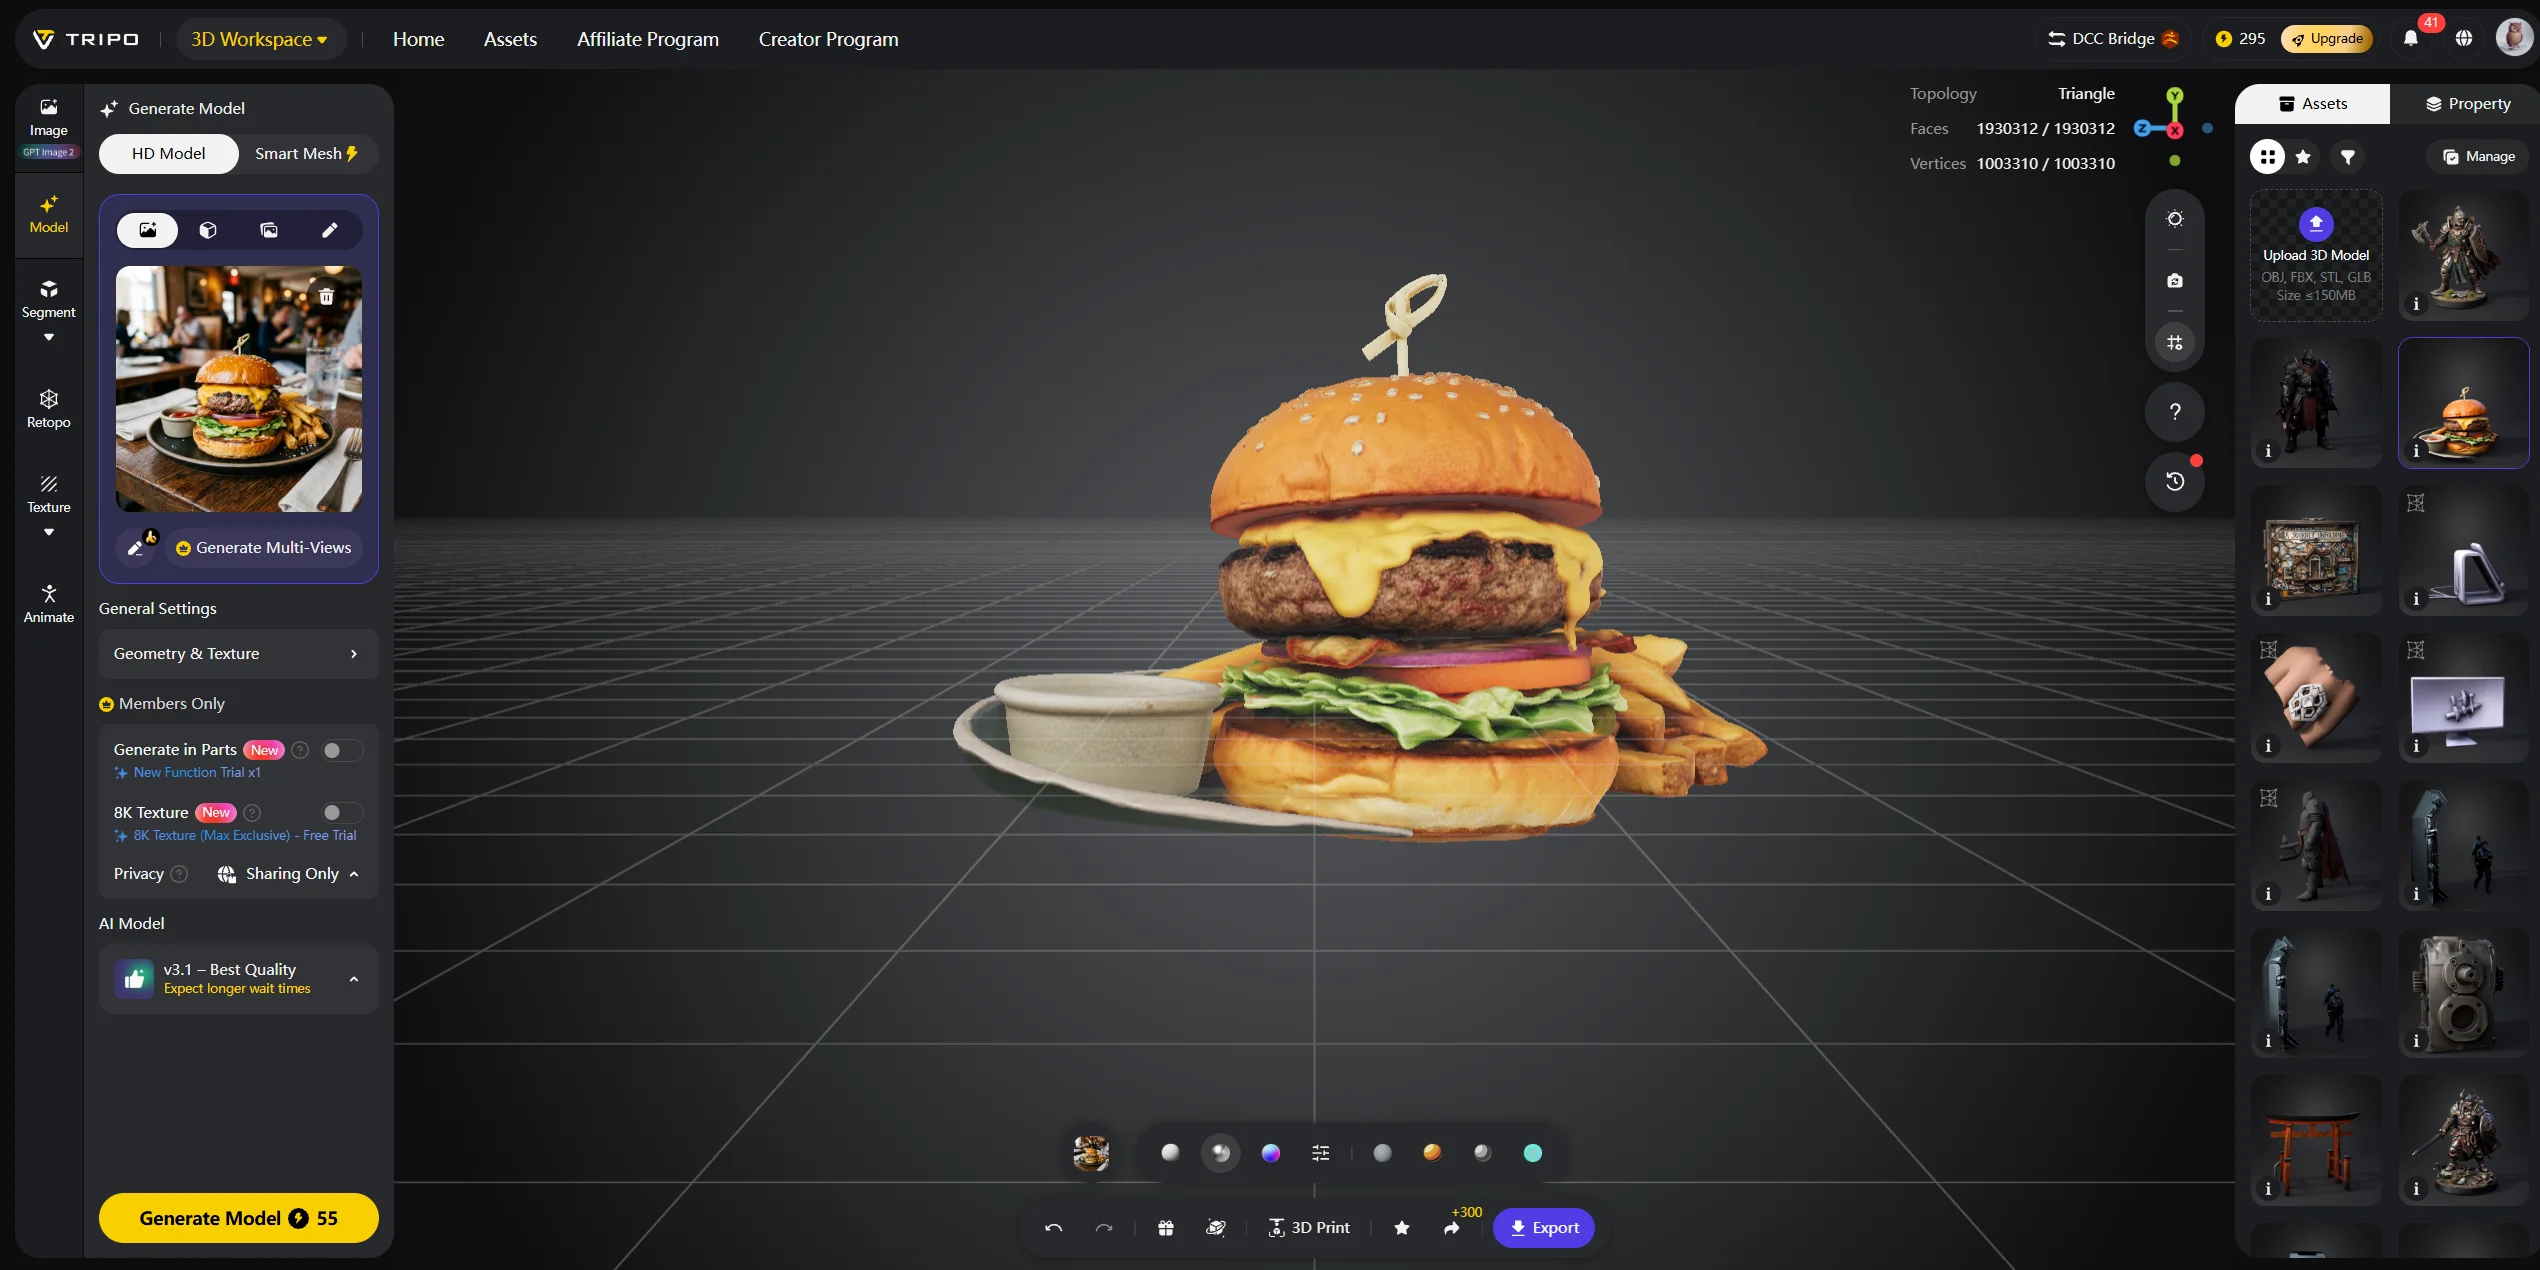
With Tripo AI Studio, you can generate or import a 3D model, use the texturing workflow, and create a full PBR material set that includes Roughness, Normal, Metallic, and Base Color maps. Instead of painting grey values from scratch, you describe the target material appearance and let the AI generate surface variation across the model.
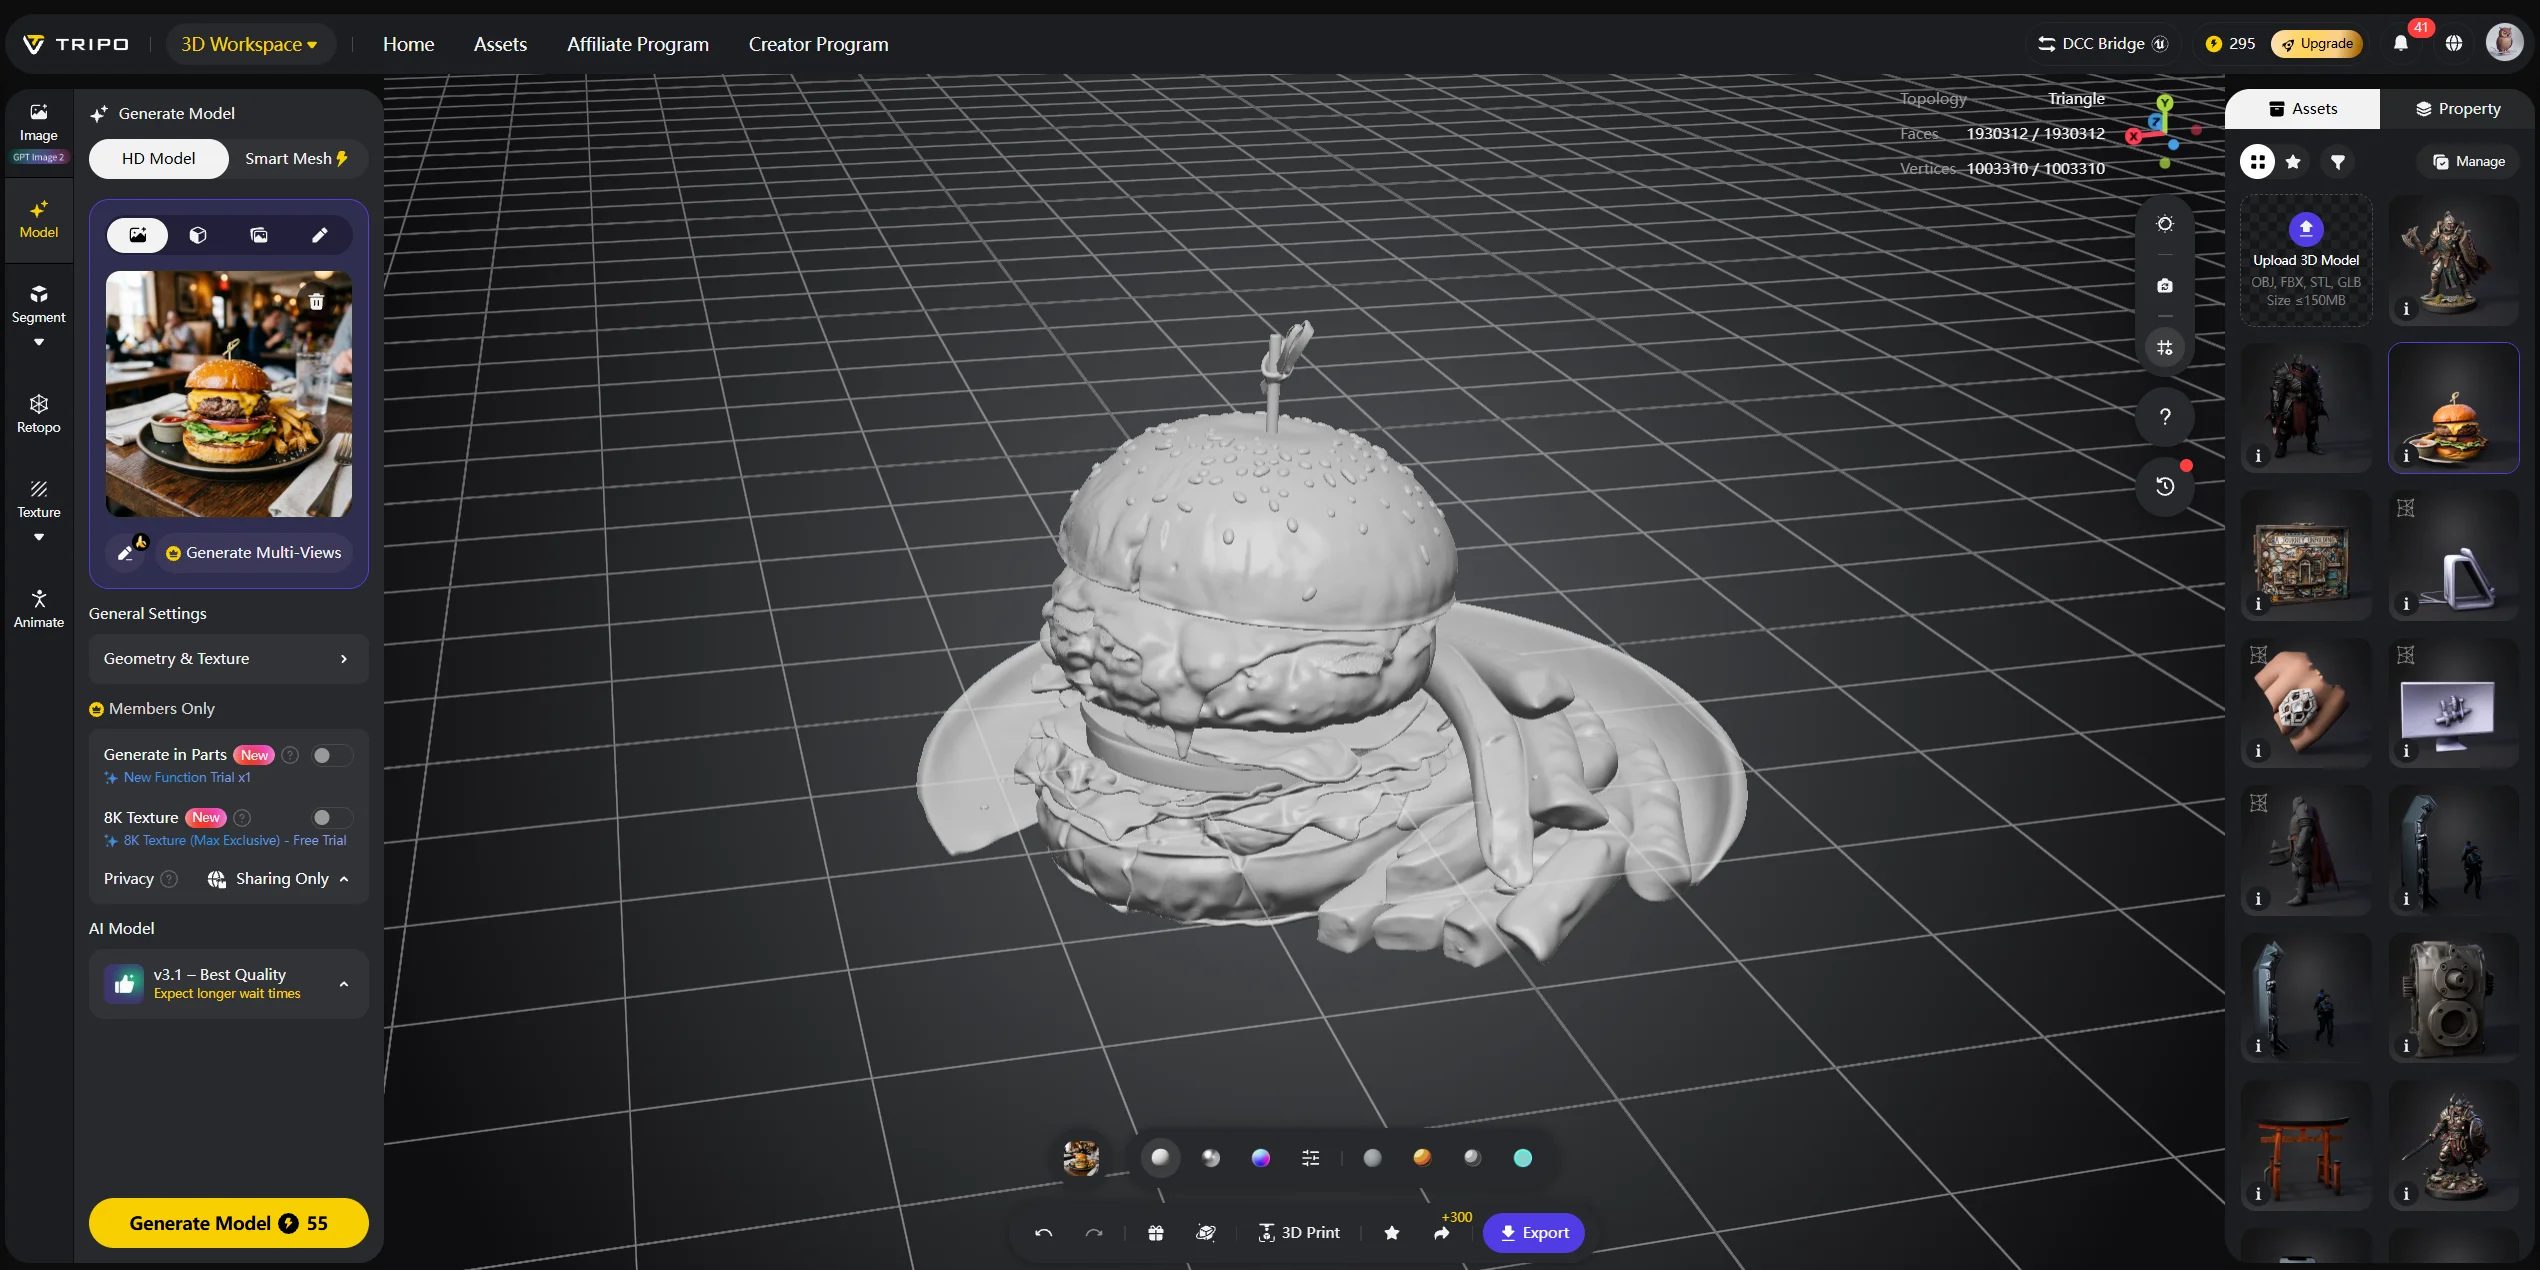
For example, a “worn leather backpack” should not have a flat roughness map. Edges, straps, creases, scratches, and polished contact areas should all behave differently under light. AI texturing can generate that kind of variation automatically, then you can refine specific areas afterward in Paint Mode or another texture tool.
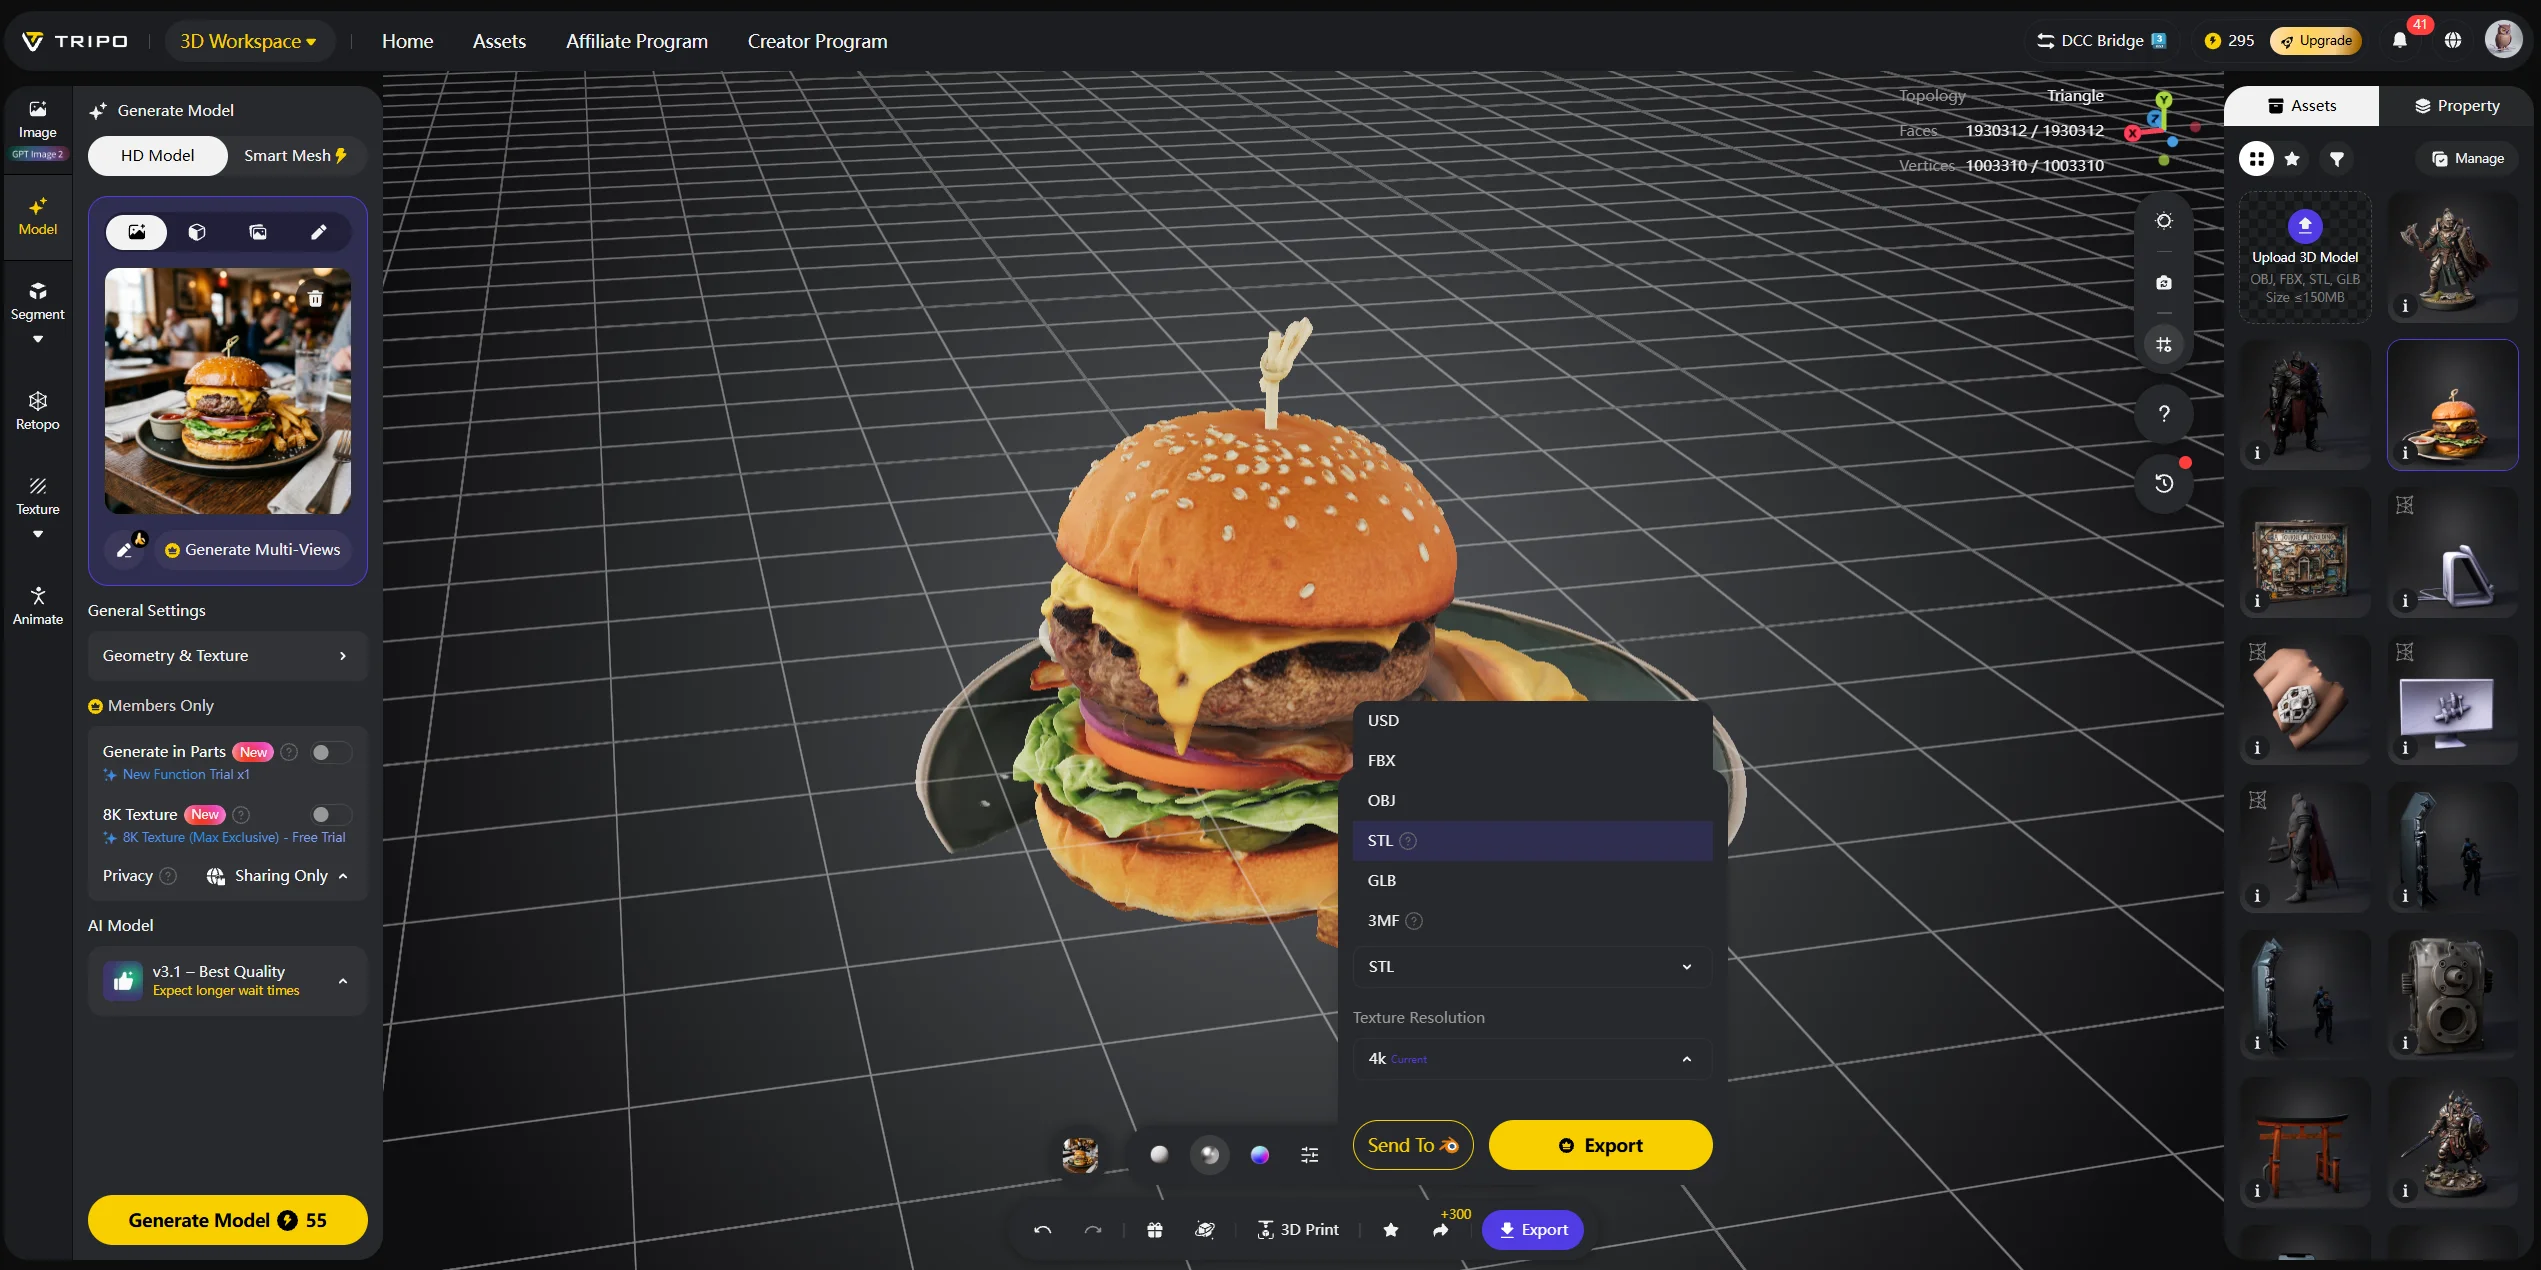
Use Tripo AI Texturing when you want the fastest path to a complete PBR set, then manually adjust only the hero details.
Common Roughness Map Mistakes and How to Fix Them
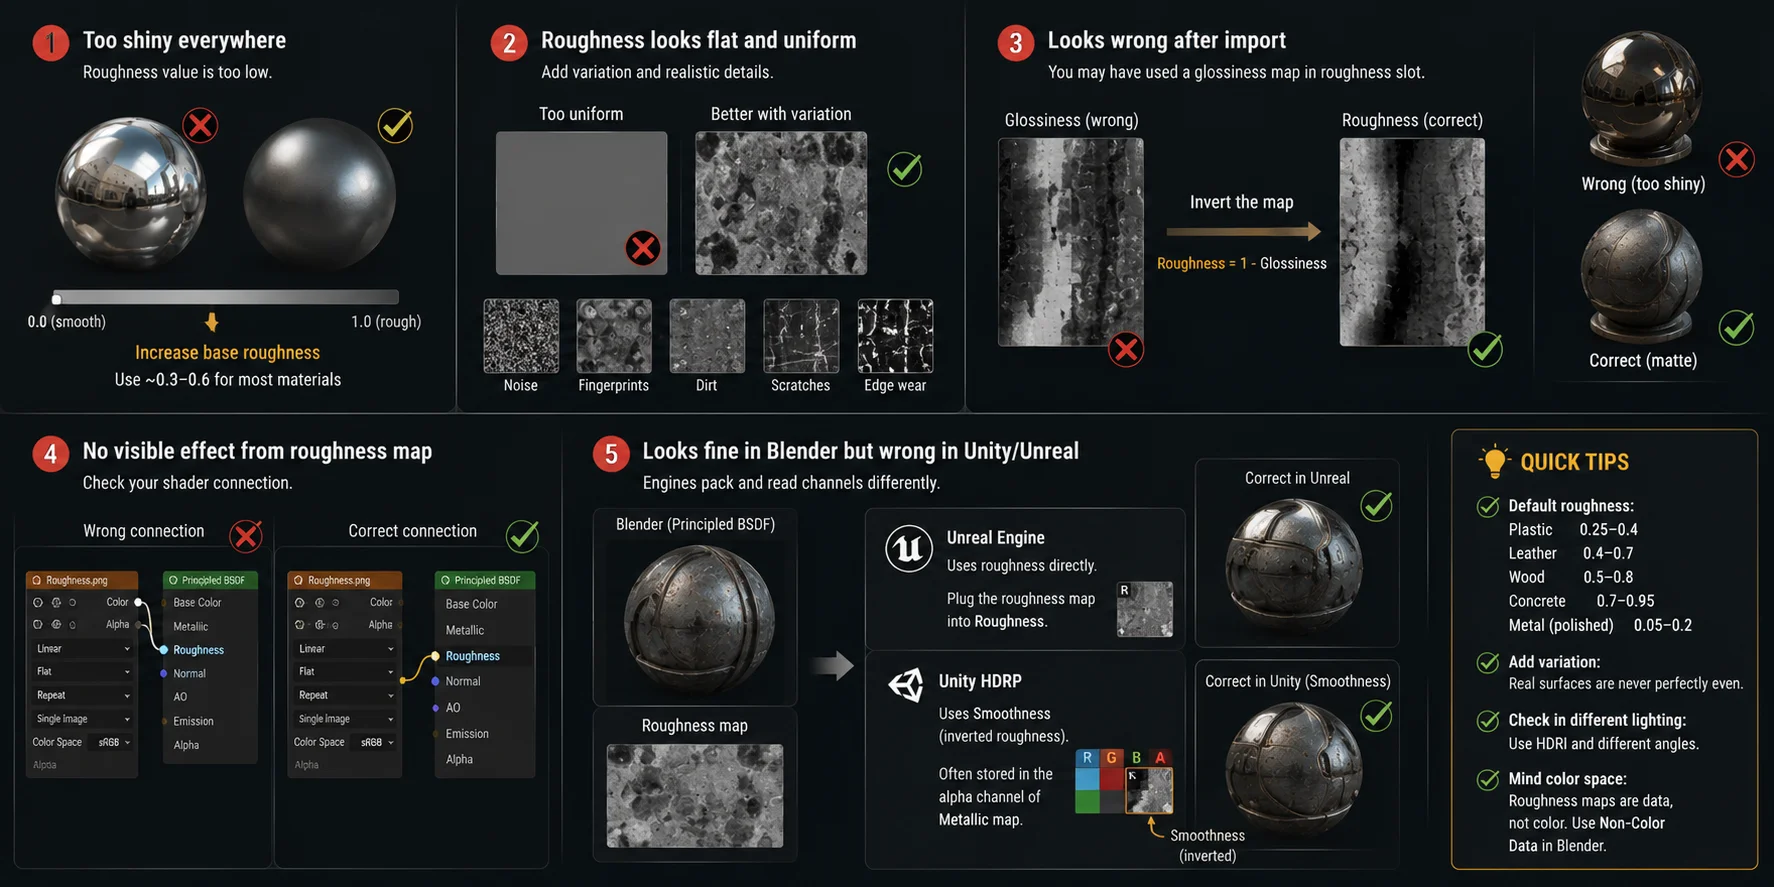
The model looks too shiny everywhere. Your roughness value is probably too low, close to 0. Raise the base roughness to around 0.3-0.6 depending on the material. Plastic, skin, leather, and painted surfaces should not behave like polished chrome.
The roughness looks flat and uniform. You may be using one solid grey fill. Real materials need variation. Add subtle noise, fingerprints, dirt, scratches, edge polish, or hand-painted wear.
The material looks wrong after importing into another engine. You may have loaded a glossiness map into a roughness slot. If smooth areas look rough and rough areas look shiny, invert the map using Roughness = 1 - Glossiness.
The roughness map has no visible effect. Check your shader connection. In Blender, the roughness texture should plug into the Roughness socket of the Principled BSDF, not the Base Color socket.
The texture looks fine in Blender but wrong in Unity or Unreal. Engines pack channels differently. Unreal usually uses roughness directly. Unity HDRP often uses Smoothness, which is inverted roughness, sometimes stored in the alpha channel of the Metallic map.
Frequently Asked Questions (FAQ)
What is a roughness map? A roughness map is a grayscale texture used in PBR to control how much light scatters across a surface. Black values create mirror-smooth reflections, while white values create matte, diffuse surfaces. It is one of the four core PBR maps alongside Base Color, Normal, and Metallic.
What should a roughness map look like? A roughness map should look like a grayscale version of your material’s surface variation. Darker areas should mark polished, oily, or smooth regions, while lighter areas should mark rough, dusty, scratched, or unfinished regions. Avoid solid grey fills because real materials almost always have variation.
What is the difference between roughness and glossiness? Roughness and glossiness are inverse values. A roughness value of 0.3 equals a glossiness value of 0.7. If your material looks inverted, you may have placed a glossiness map in a roughness slot; invert it to fix the material.
How to generate a roughness map? You can paint it manually in Blender or Substance Painter, bake it from high-poly surface detail, or generate it with AI. Tools like Tripo AI Studio can generate a full PBR texture set, including Roughness, from a model and texturing prompt.
Conclusion
The roughness map is a small grayscale file with a big visual impact. Its values decide whether a surface feels polished, oily, worn, dusty, dry, or matte. Once you understand the 0-to-1 scale and typical values for common materials, roughness becomes one of the fastest PBR maps to control.
Want to skip manual painting? Try Tripo AI Studio to generate a fully textured model with Roughness, Normal, Metallic, and Base Color maps in seconds.
See what is included in the free tier at Tripo AI Pricing.