How to Create AR Product Models: A Step-by-Step Guide for 2026
TL;DR
- Choose AI generation for speed, scanning for real-world detail, or manual modeling for maximum control.
- Prepare a GLB for the web, a USDZ for Apple, and test on real customer devices.
- Optimize geometry and textures, measure mobile loading, and fix scale, material, and placement issues before launch.
AR product models let shoppers visualize products in their own space before buying, which can help close expectation gaps. Learning how to create AR product models is now possible through AI generation, photogrammetry, or manual modeling. This guide covers each route, plus formats, optimization, testing, and deployment.
What Are AR Product Models and Why Do They Matter?
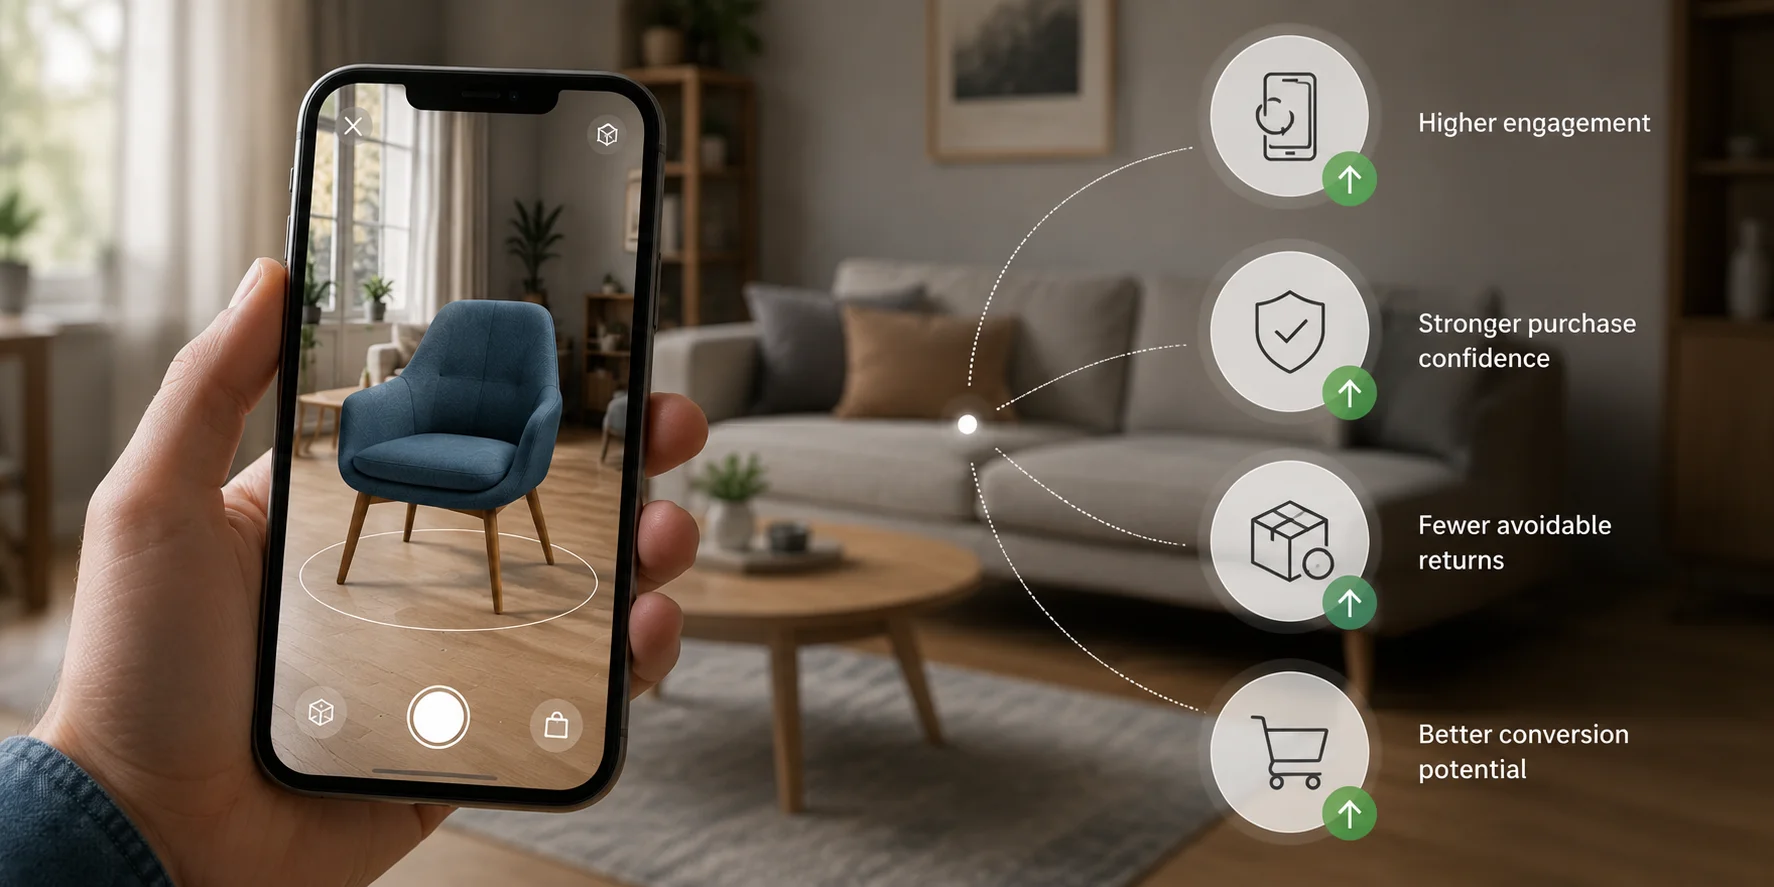
An AR product model is an interactive 3D asset placed over a live camera view through WebAR, Apple AR Quick Look, or Android Scene Viewer. Apple commonly uses USDZ, while web and Android workflows use GLB.
- Increase engagement beyond static images
- Show size, shape, color, and placement more clearly
- Strengthen purchase confidence and reduce expectation gaps
Step-by-Step Workflow Overview
- Choose AI generation, scanning, or manual modeling.
- Build the geometry and apply realistic textures.
- Prepare a web-ready GLB and an Apple-ready USDZ in a compatible export or conversion workflow.
- Optimize, test on real devices, and deploy.
Method 1: AI Image-to-3D Generation - A Fast Starting Point
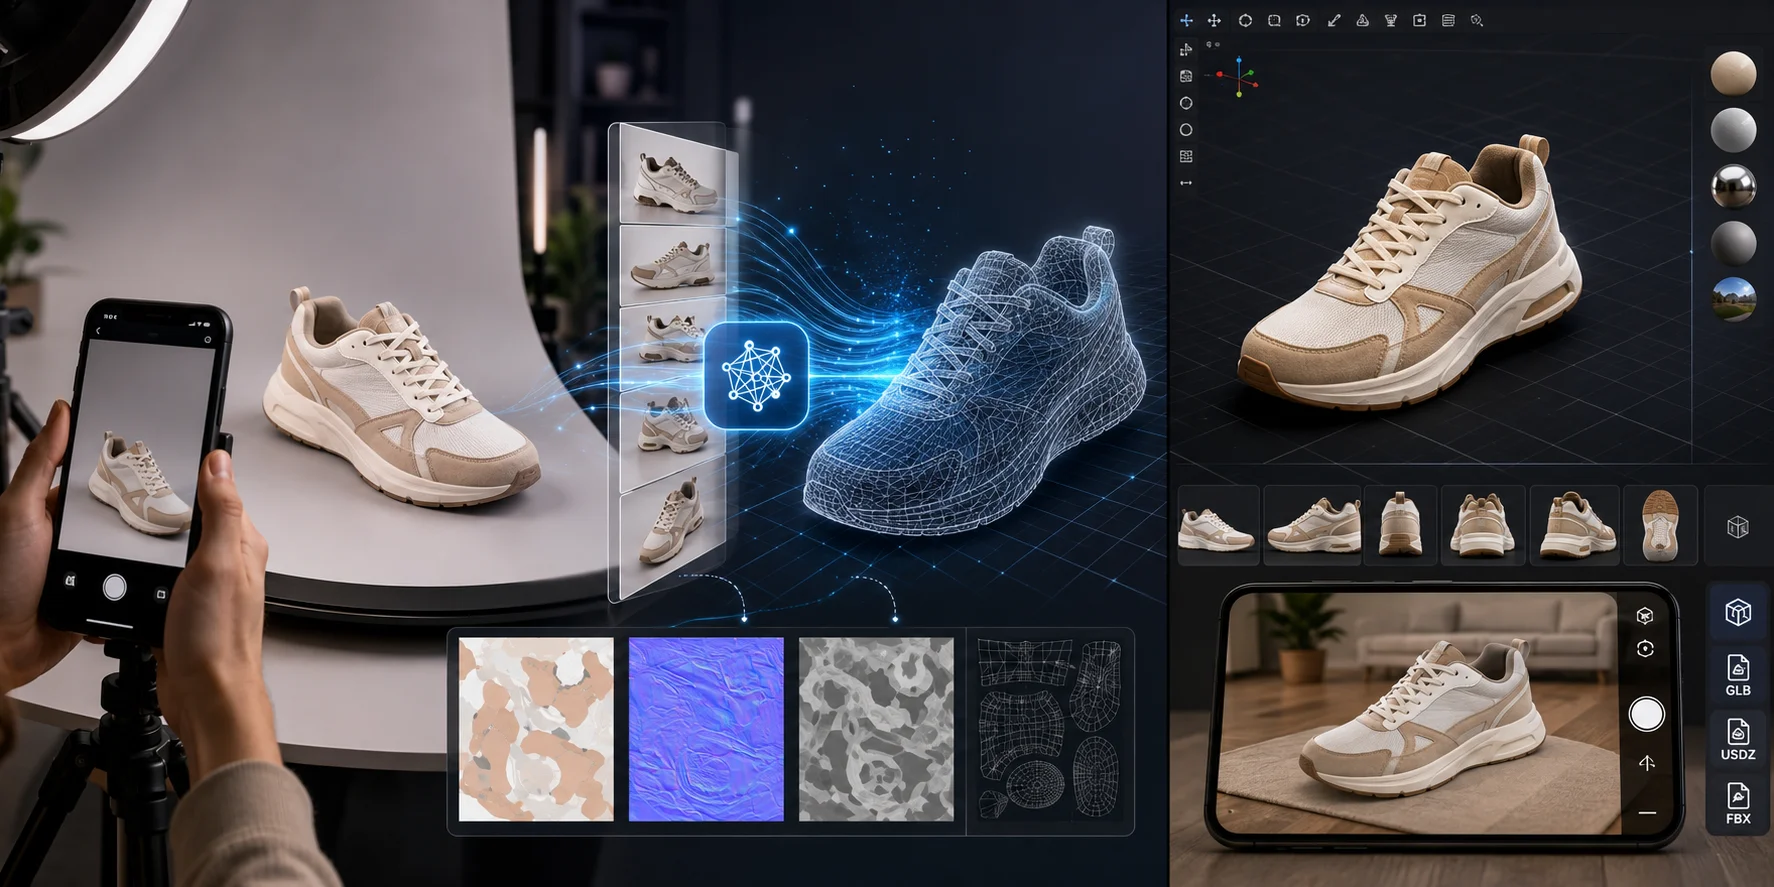
AI is often the fastest starting point. Photograph the product against a clean background, upload it to Tripo AI Image-to-3D, review the generated textured mesh, and download a supported source file. Use a compatible downstream export or conversion workflow to prepare GLB for the web and USDZ for Apple Quick Look. Tripo accepts single or multiple views, while AI Texturing can generate or refine PBR materials.
This method suits shoes, bags, furniture, toys, and electronics with clear surfaces. Transparent parts, internal mechanisms, and precision components may require manual correction.
Method 2: 3D Scanning and Photogrammetry
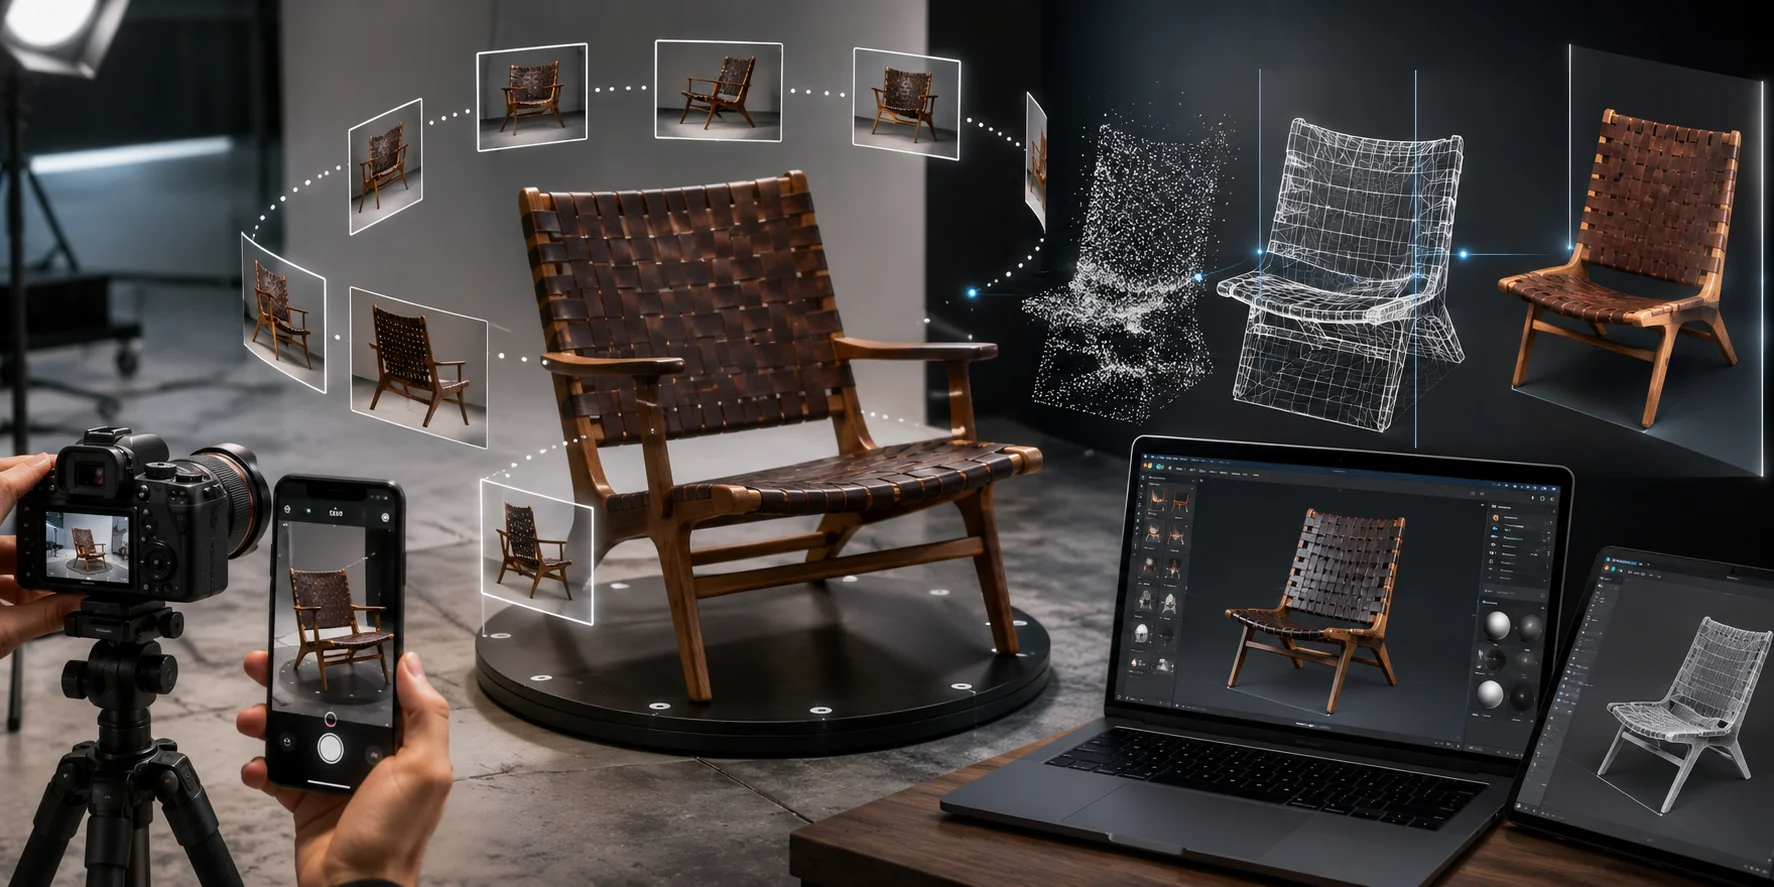
Photogrammetry reconstructs an object from overlapping photographs. Capture roughly 30–100 evenly lit images from all sides; software aligns them, builds a point cloud, and creates a textured mesh.
Photogrammetry apps can reconstruct a model from a photo set. This route works well for furniture, crafts, organic forms, and heritage objects.
Raw scans are often dense. Tripo’s AI Quad Remesher can rebuild irregular meshes with cleaner quad topology before AR delivery.
Method 3: Professional 3D Modeling
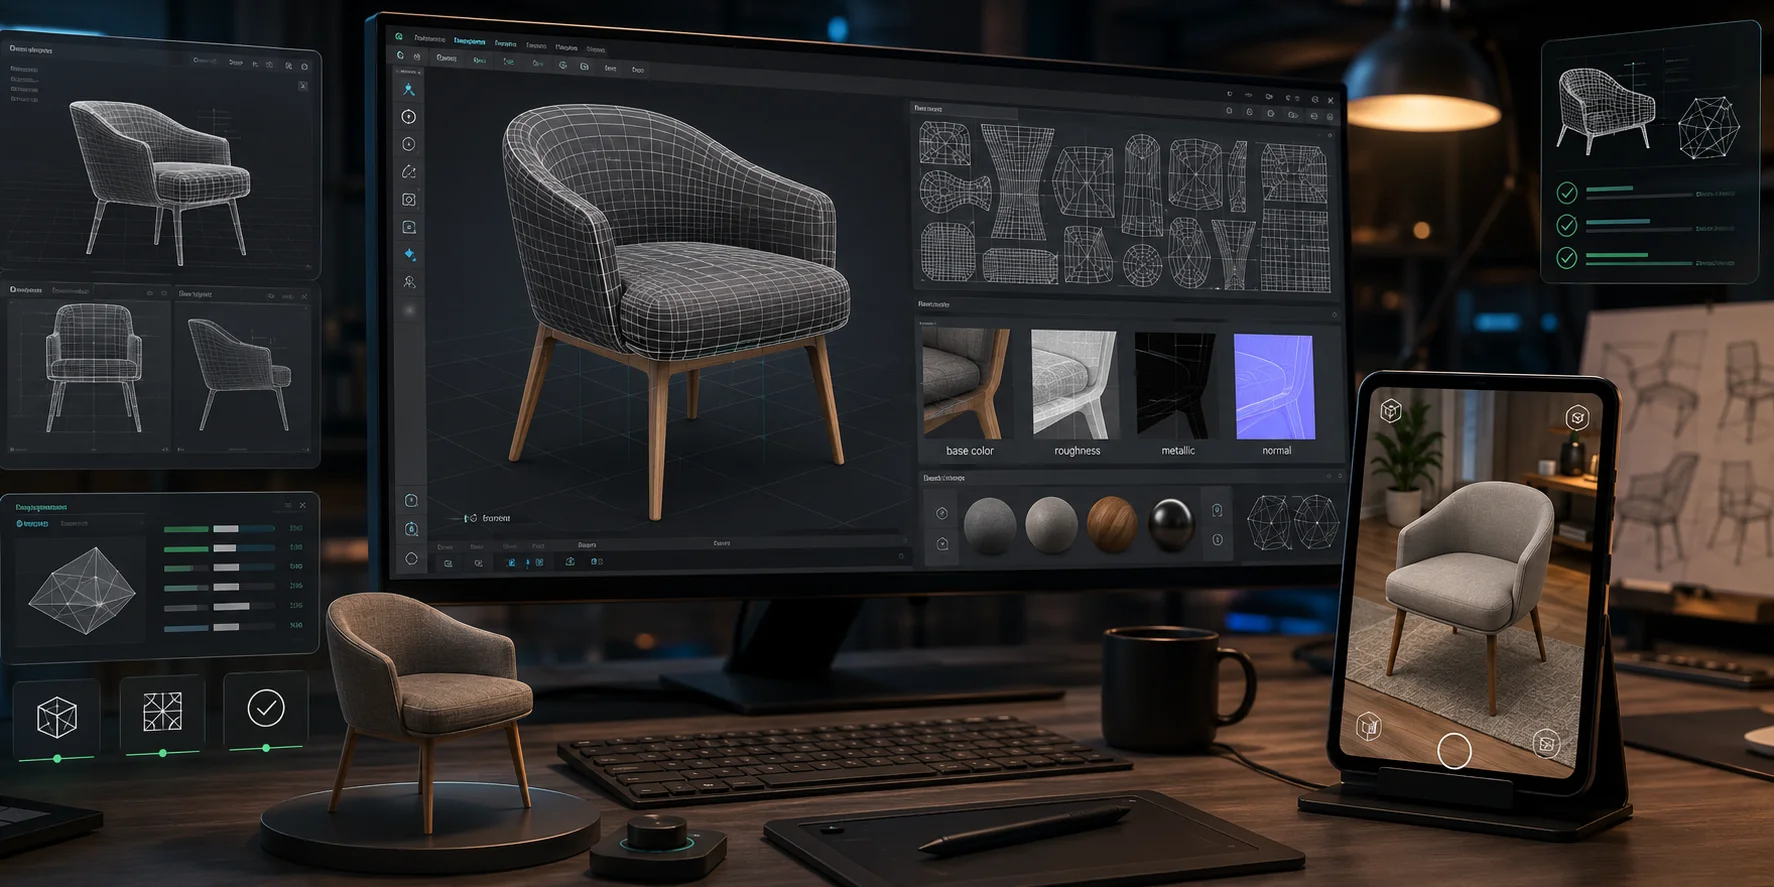
Blender, Maya, or Cinema 4D provides maximum control. It suits configurable products, precise hard-surface assets, and CAD-based designs, but requires the most skill and time.
Start with a triangle budget that matches the product, target devices, and desired visual quality. Simple products often fit within 10,000–50,000 triangles, while more complex assets need device testing rather than a universal cap. Use PBR materials with base color, roughness, metallic, and normal maps.
Geometry and Retopology: Keeping Poly Count AR-Ready
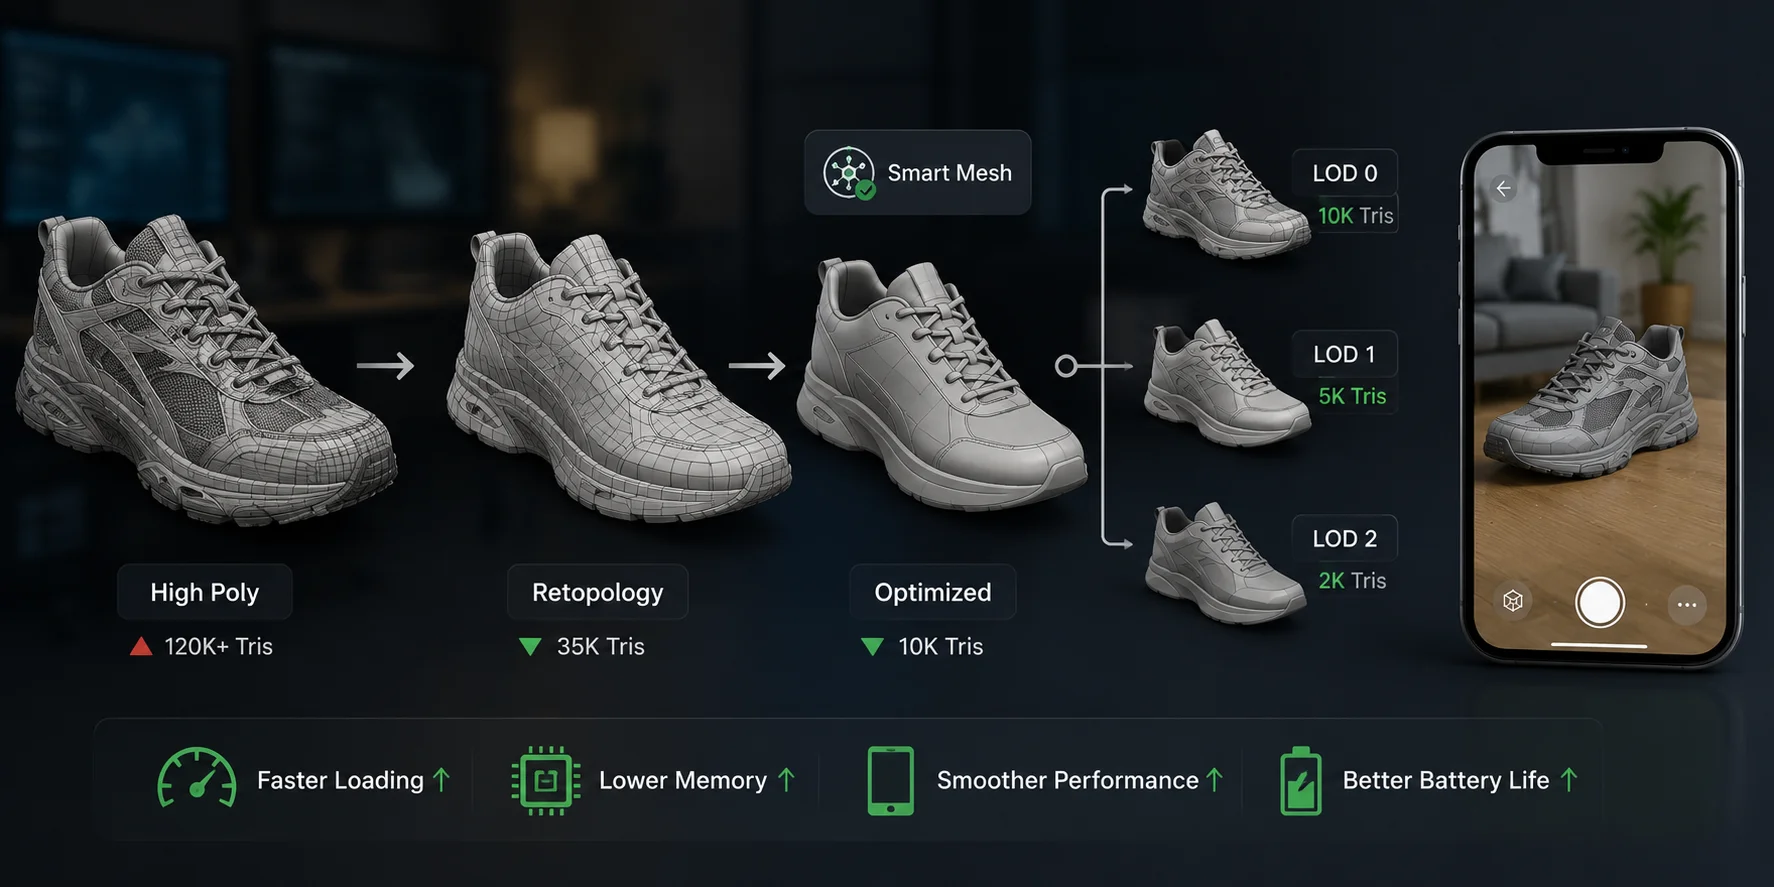
Heavy geometry slows downloads and causes mobile lag. Remove hidden faces, simplify unnecessary detail, and create LOD versions.
Tripo’s Smart Mesh generates optimized low-poly topology for real-time workflows.
Textures and Materials: PBR for Realistic AR
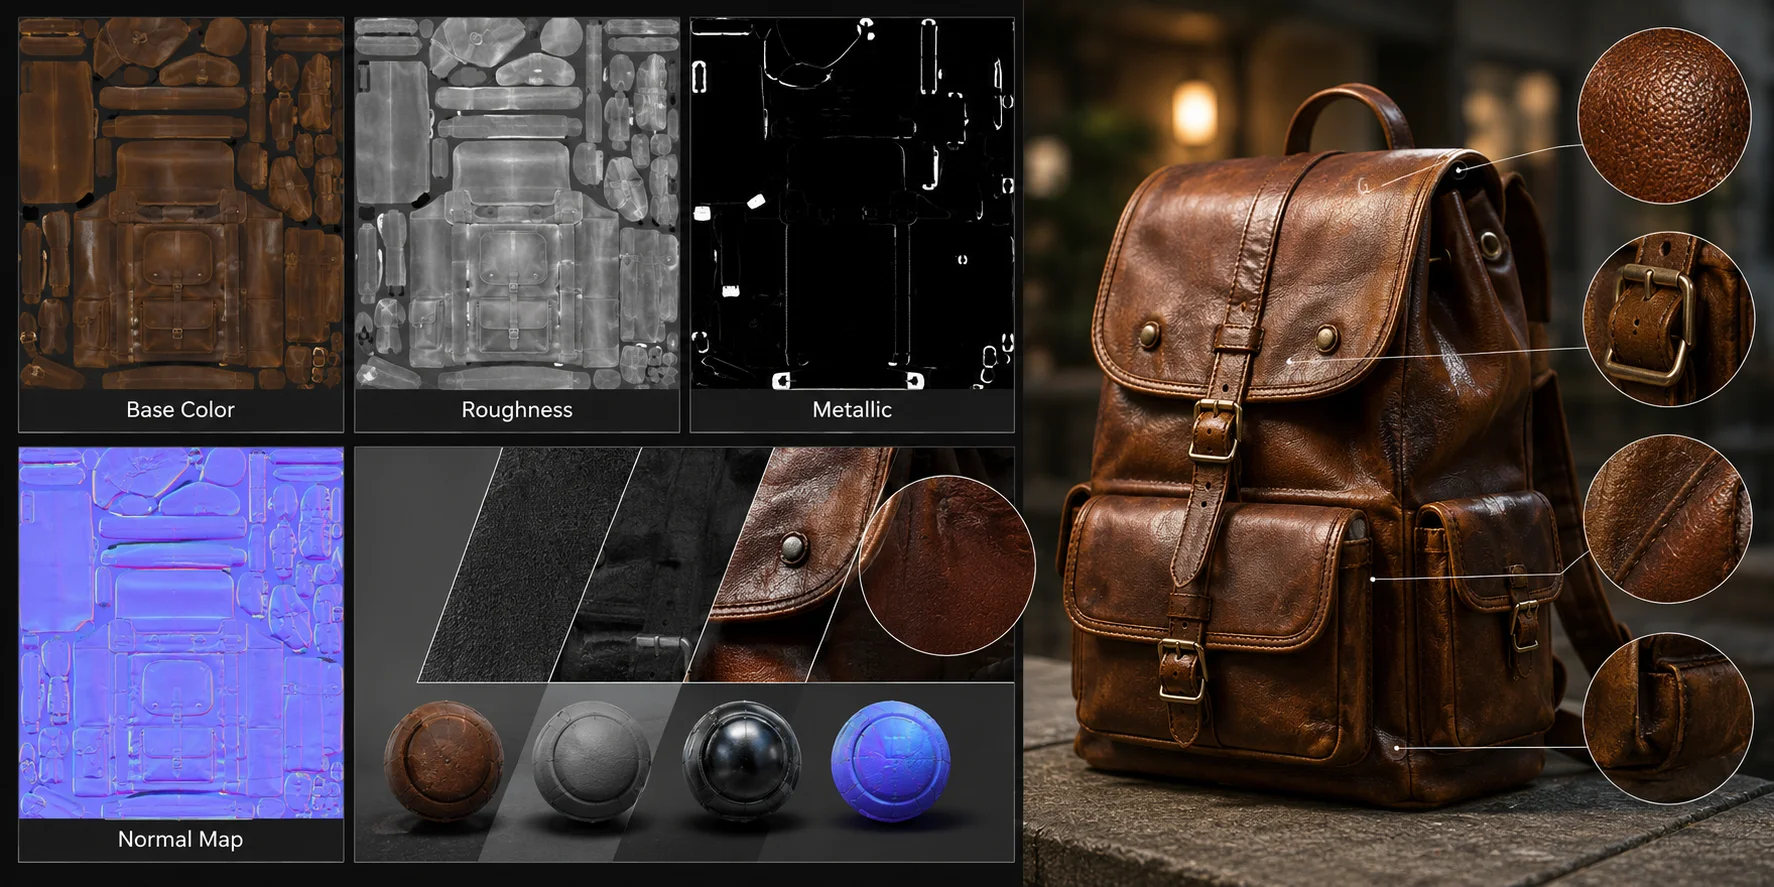
PBR makes products react naturally to light. Base color controls color, roughness controls gloss, metallic marks metal, and normal maps add small detail.
Start with 1024×1024 textures for small products and 2048×2048 for hero assets, then test on target devices. Use 4K only when close-up detail clearly outweighs the download and memory cost.
AR File Formats: GLB vs. USDZ
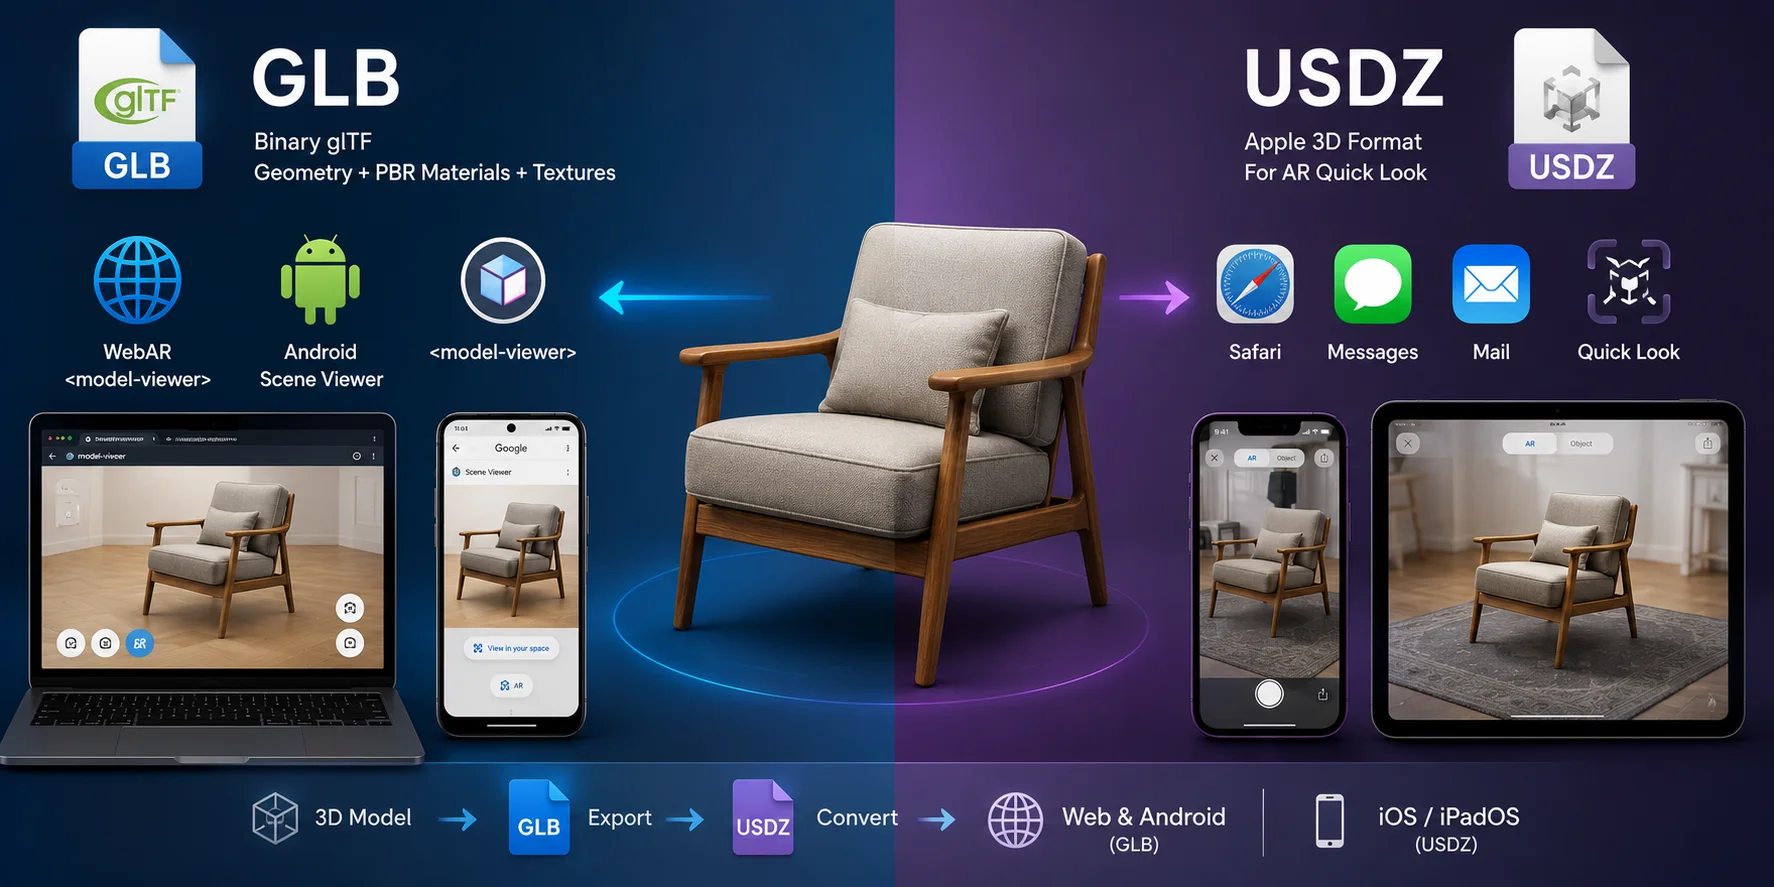
- GLB: Used by WebAR, Android Scene Viewer, and most web viewers.
<model-viewer>supports glTF/GLB and compatible AR launching. - USDZ: The format used by Apple Quick Look in supported Apple apps and on iPhone and iPad.
Prepare both delivery formats: GLB for web and Android, plus a tested USDZ for Apple Quick Look. Generate the model in your creation tool, then use a compatible export or conversion workflow when the source format is not already AR-ready.
Performance and File Size: Compression Best Practices
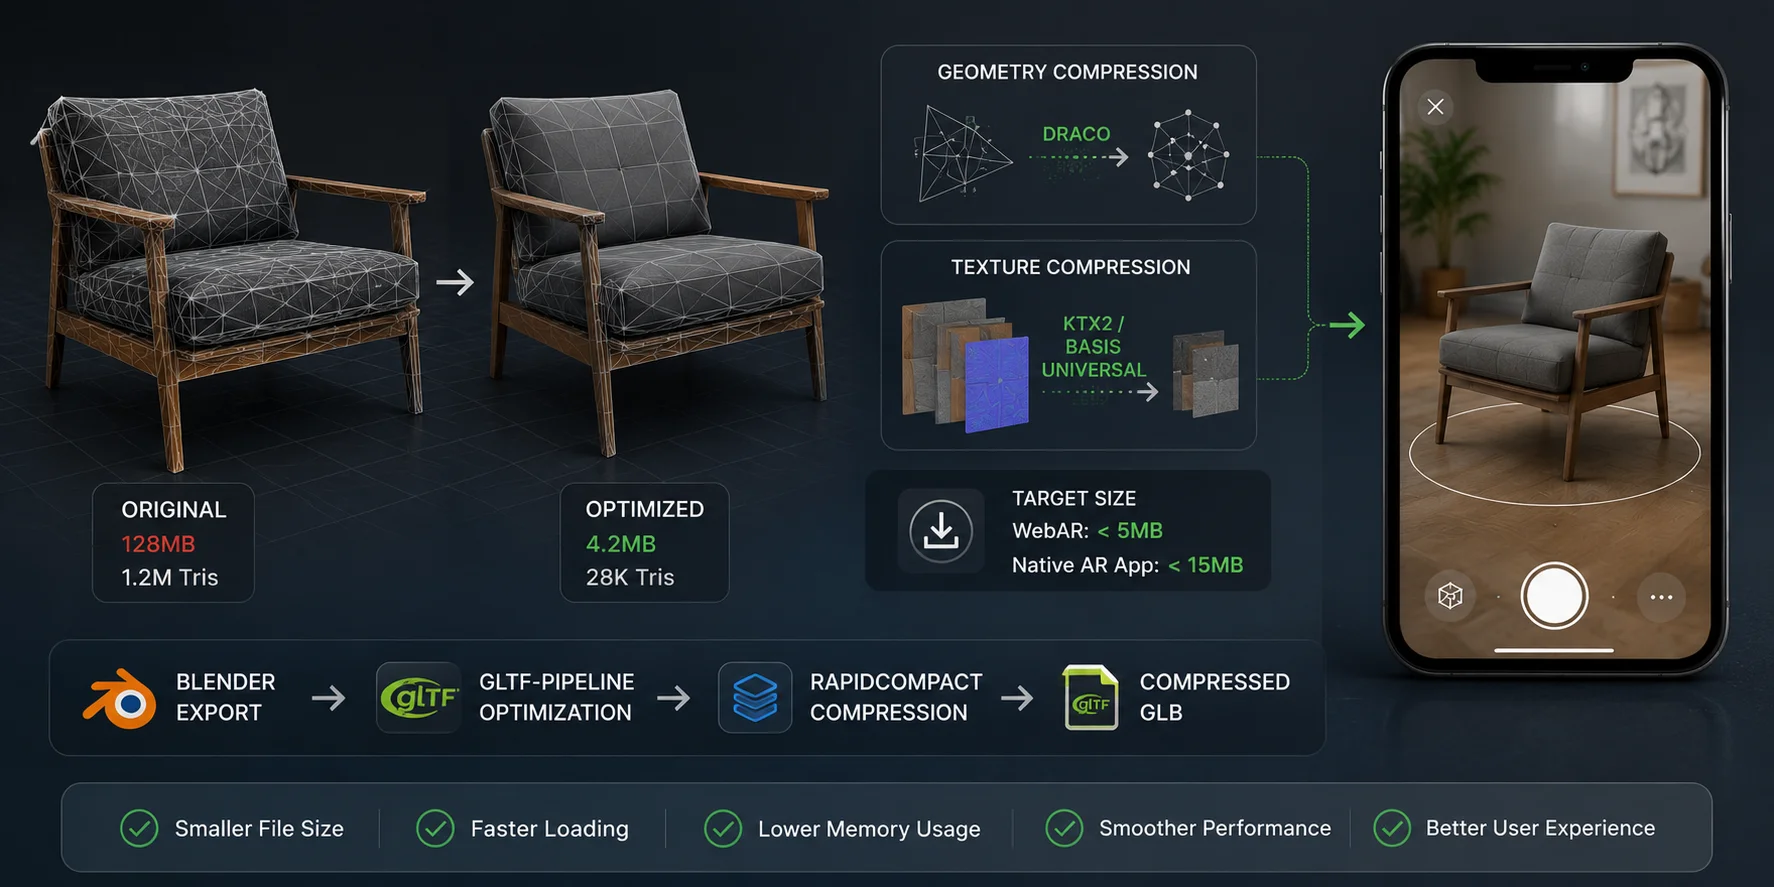
Note: The sizes and triangle counts shown above are illustrative, not universal delivery limits. Validate the final asset on representative devices and connections.
Treat file-size budgets as starting points, not platform rules: measure loading on representative mobile devices and connections, then reduce geometry and texture cost where it affects the experience. Draco can compress glTF geometry, while KTX2/Basis is a texture-compression workflow for compatible pipelines.
Use tools such as Blender, glTF Pipeline, RapidCompact, or the Khronos glTF Compressor, then validate the final asset in the target viewer. Large files can slow mobile loading, so optimize based on measured results.
Testing Your AR Model Before Going Live
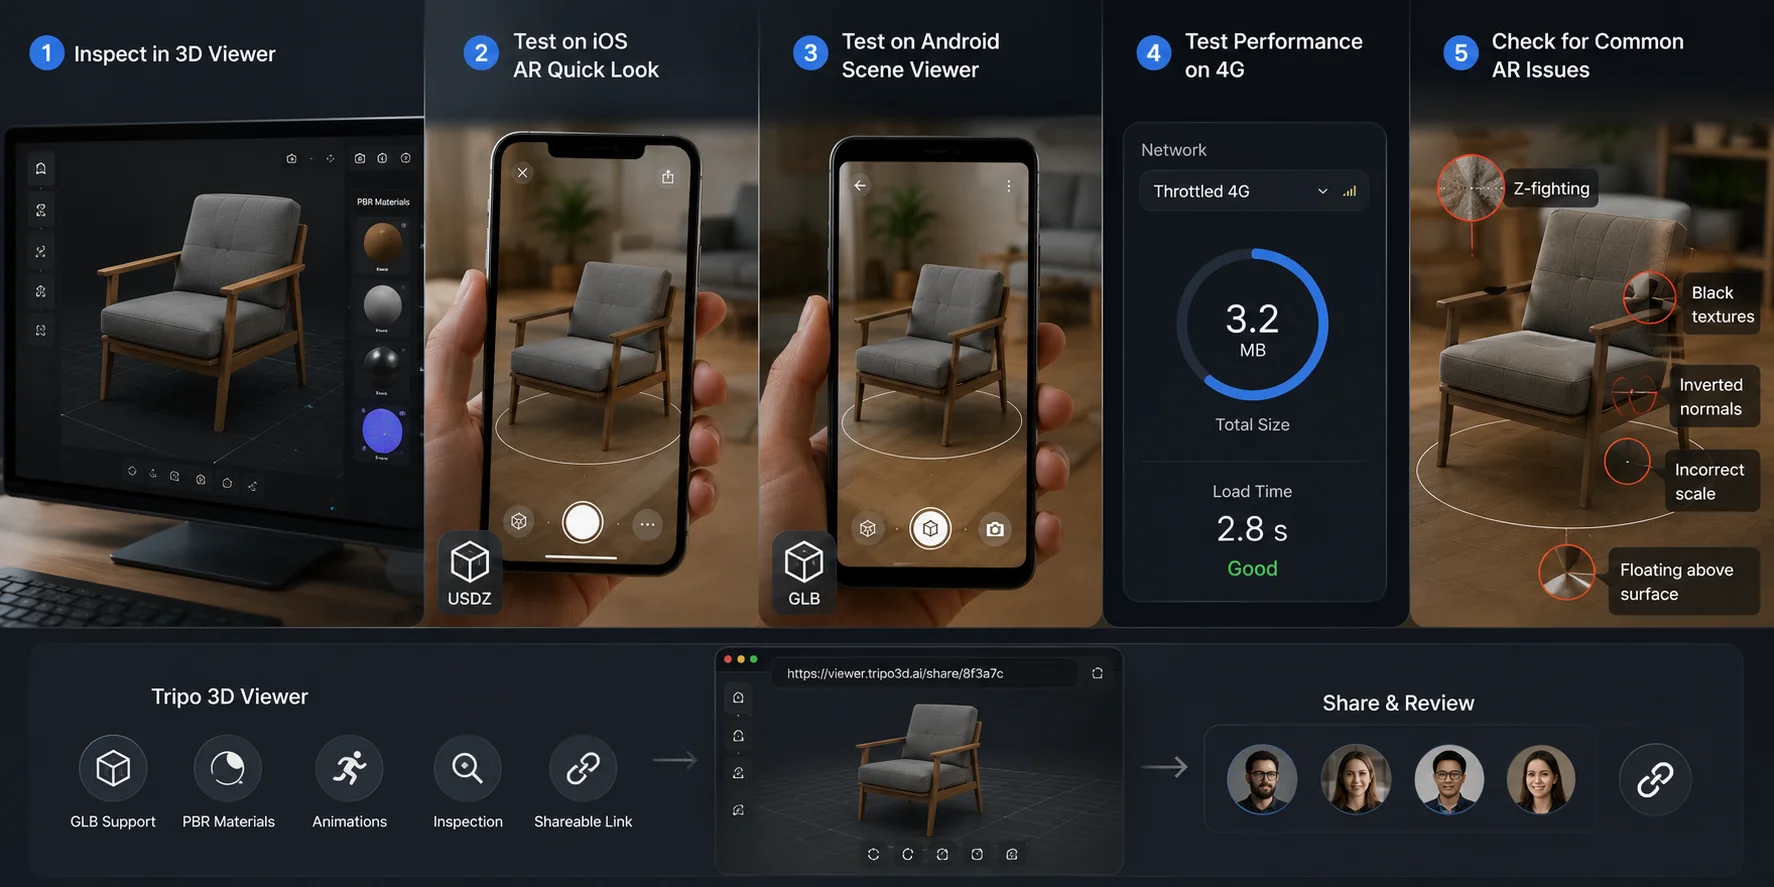
- Inspect geometry, scale, and materials in the Tripo 3D Viewer.
- Test USDZ in Apple Quick Look on a physical iPhone or iPad.
- Test GLB through Android Scene Viewer on a supported device.
- Measure loading on throttled 4G.
- Check z-fighting, black textures, wrong scale, inverted normals, and floating models.
Tripo’s viewer supports inspection and shareable review links.
How to Deploy and Share Your AR Product Model
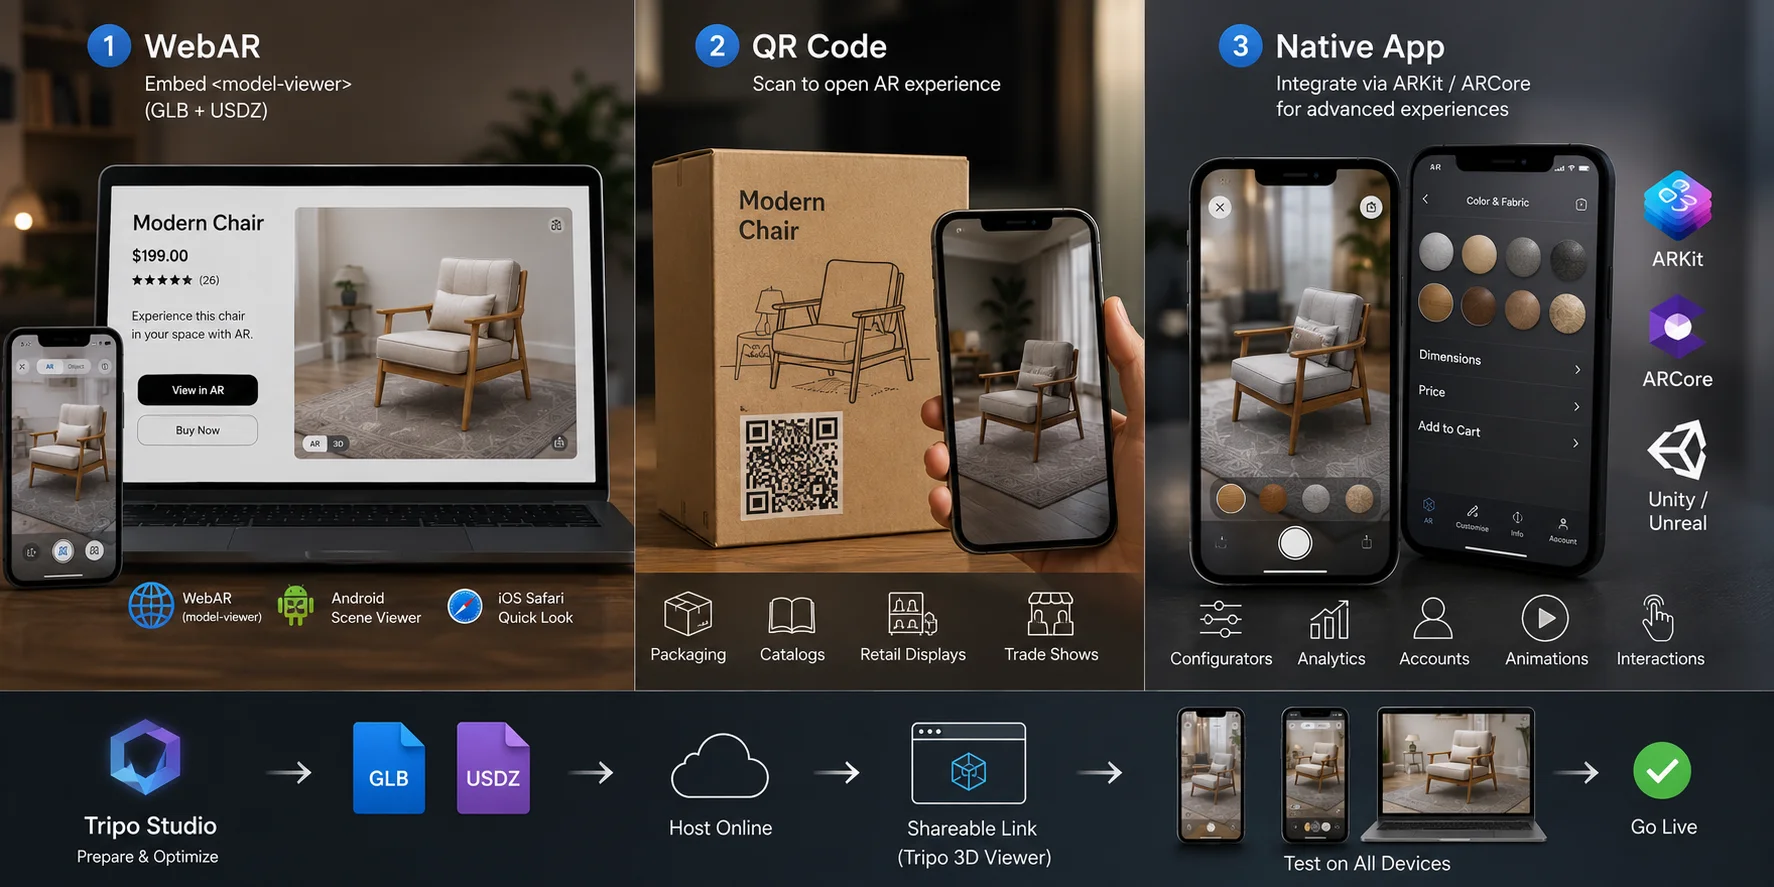
WebAR: Embed <model-viewer> on the product page with a GLB/glTF source and the AR modes your deployment supports. It can reduce installation friction for e-commerce, but the AR handoff still depends on the visitor's browser and device support.
QR code: Link to a mobile page that opens the correct AR experience.
Native app: Use ARKit or ARCore for configurators, accounts, analytics, or custom interactions.
Tripo’s browser viewer can provide shareable model links for inspection and review. Confirm the final AR handoff separately on each target device and deployment path.
Frequently Asked Questions
How do I create an AR 3D model?
Choose AI generation, scanning, or manual modeling. Prepare a GLB for web and Android plus a USDZ for Apple Quick Look through a compatible export or conversion workflow, then test on real devices.
What software is used to create augmented reality?
Use a 3D creation tool for the model, a photogrammetry app for real objects, and a web or native AR delivery layer. <model-viewer>, ARKit, and ARCore cover common delivery paths.
How do I create a 3D model of my product?
Start with a clear product photo for AI image-to-3D or a complete photo set for photogrammetry. Use manual modeling when dimensions, configurable parts, or surface accuracy need more control.
Can ChatGPT create a 3D model?
ChatGPT can help plan geometry, write scripts, or improve a workflow. Use a dedicated 3D creation tool to produce, inspect, and convert the final asset.
How can I create AR product models online for free?
As of July 22, 2026, Tripo lists a Free plan with 200 monthly credits and up to 8 models. Confirm current pricing, download limits, and commercial-use rights before publishing.
How do I optimize models for AR?
Set geometry and texture budgets for the product, then test on representative devices and mobile connections. Reduce hidden geometry and use compatible compression where it improves measured loading.
What skills are required?
AI generation can start from a clear reference image. Scanning needs careful capture and cleanup, while manual modeling requires deeper 3D training and gives the most control.
Conclusion
AR product creation now ranges from AI-assisted generation to professional modeling. Choose the method that matches your product, then optimize, test, and deploy both formats.
Build your first model at Tripo AI Studio. Compare options at Tripo AI Pricing.
