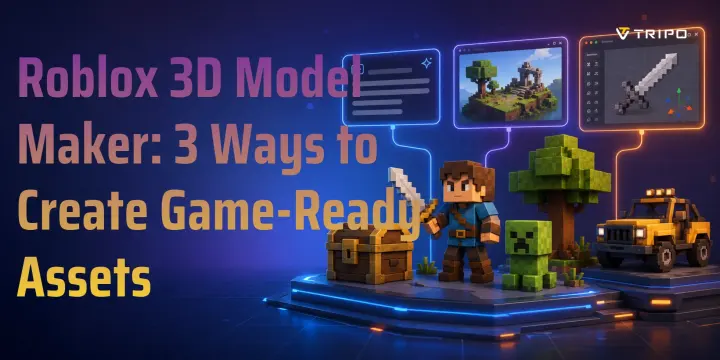
Roblox 3D Model Maker: 3 Ways to Create Game-Ready Assets
- Roblox Studio imports FBX and OBJ files for custom 3D models.
- Keep most Roblox assets around 5,000–8,000 triangles for safer performance.
- Use 1 stud ≈ 28 cm when scaling models before import.
- Use PNG or JPG textures, ideally no larger than 1024×1024.
- Tripo AI Smart Mesh outputs lightweight assets around ≈5,000 faces.
- Import path: Roblox Studio → Model → Import → 3D Model → choose FBX/OBJ.
Custom 3D models make a Roblox game feel more original, polished, and memorable. Default assets are useful, but they can make your game look like everyone else’s. A custom chest, vehicle, pet, weapon, or building can instantly change the feel of your world. In this guide, you’ll learn three ways to make Roblox-ready models: AI generation, Blender, and Roblox Studio itself. You’ll also learn the file formats, scale rules, texture tips, optimization steps, and import workflow that many beginner guides skip.
Roblox Model Requirements: What You Need to Know Before You Start
Before choosing a Roblox 3D model maker, understand the technical rules that affect whether your asset imports cleanly and runs well.
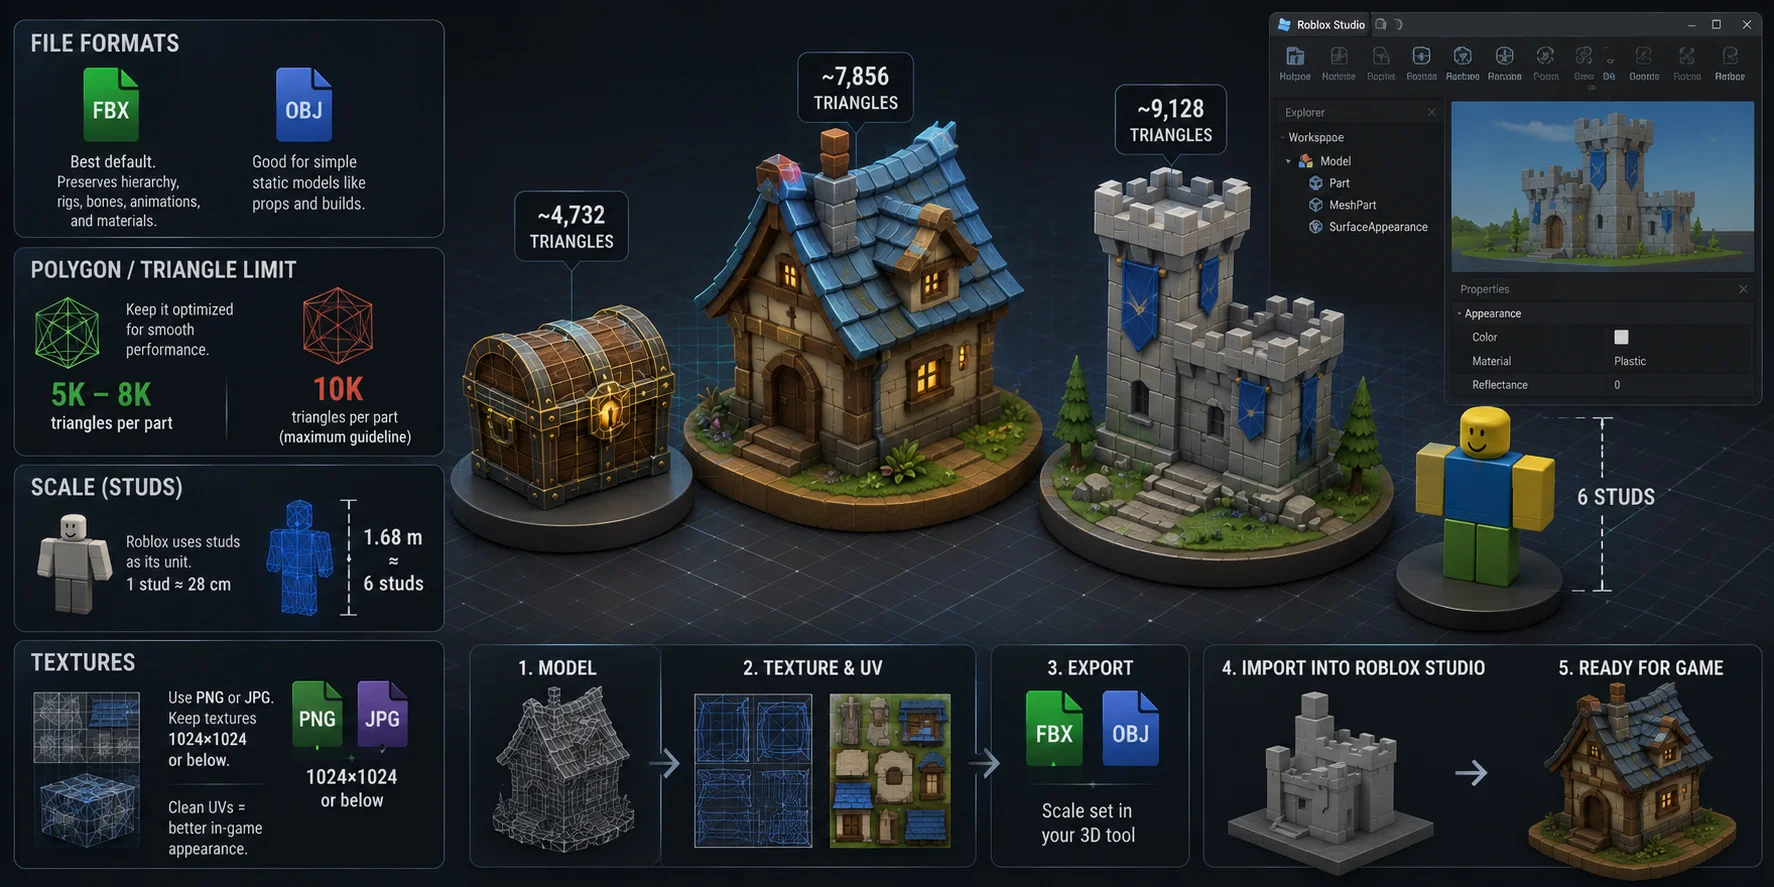
File Formats Roblox Studio commonly imports FBX and OBJ files for custom mesh assets. FBX is the better default because it can preserve hierarchy, rigging, bone data, animation data, and material information. OBJ is better for simple static models, such as props, blocks, furniture, and environment pieces.
Polygon / Triangle Limit For practical Roblox game assets, treat 10,000 triangles per mesh part as a conservative working budget. Going too high can hurt performance or trigger unwanted simplification depending on your workflow. For most props, pets, chests, vehicles, and environment models, aim for 5,000–8,000 triangles to leave performance headroom.
Scale Roblox uses studs as its unit, with 1 stud ≈ 28 cm. A human-sized character around 1.68 m tall is about 6 studs. Set scale before export when possible, or resize carefully in Roblox Studio after import so the model does not appear huge or tiny.
Textures Use PNG or JPG textures. Keep texture maps at 1024×1024 or below unless you have a strong reason to go higher. Oversized textures can be compressed and may look blurry in-game. Clean UV unwrapping is important because SurfaceAppearance depends on the model’s UV layout.
Method 1 — Use an AI 3D Model Generator (Fastest)
AI tools are the fastest way to create Roblox assets because they can generate a model from a prompt or image, then export it as FBX or OBJ. This saves you from manual modeling, sculpting, UV work, and polygon reduction at the earliest stage.
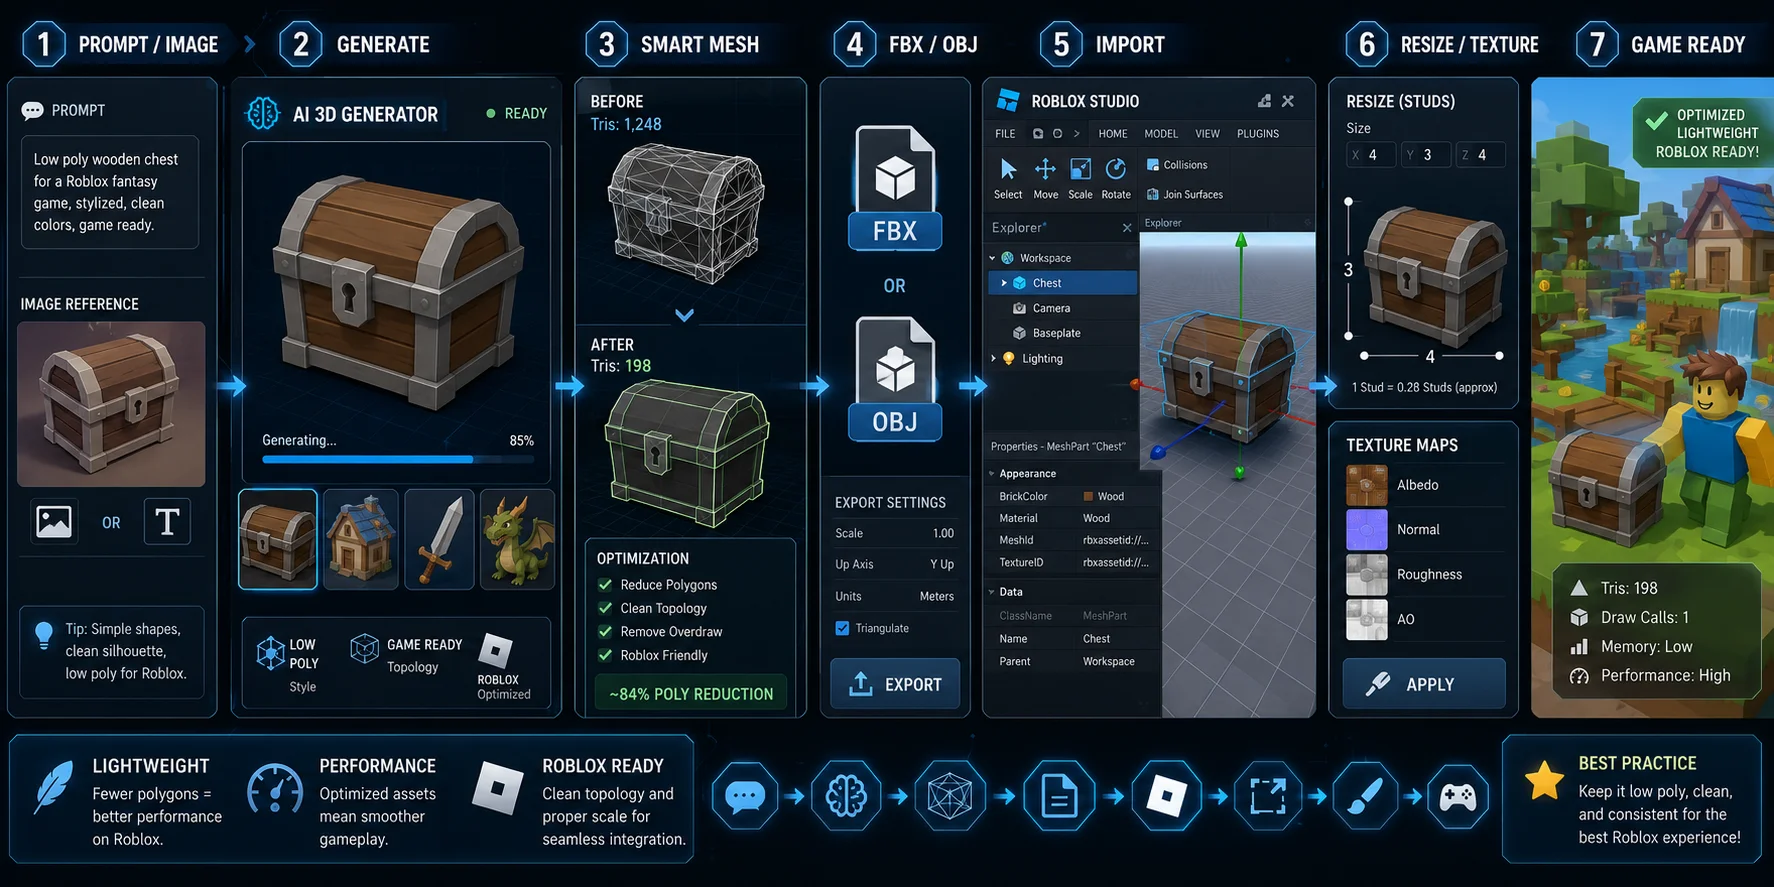
Tripo AI is the main recommendation for this workflow because its Smart Mesh output is lightweight, around ≈5,000 faces, and naturally fits Roblox’s low-poly needs. That makes it useful for chests, pets, stylized weapons, buildings, vehicles, collectible items, and background props.
Why AI tools work for Roblox
Roblox needs optimized game assets, not heavy sculpt files. A high-detail model might look impressive in a render, but it can slow your game down or import poorly. Tripo AI’s Smart Mesh workflow helps avoid that by creating a lighter mesh from the start.
You can use Text-to-3D when you have an idea in words, or Image-to-3D when you already have a sketch, screenshot, or reference image. Both routes work well for Roblox asset ideas.
Step-by-step: Tripo AI → Roblox Studio
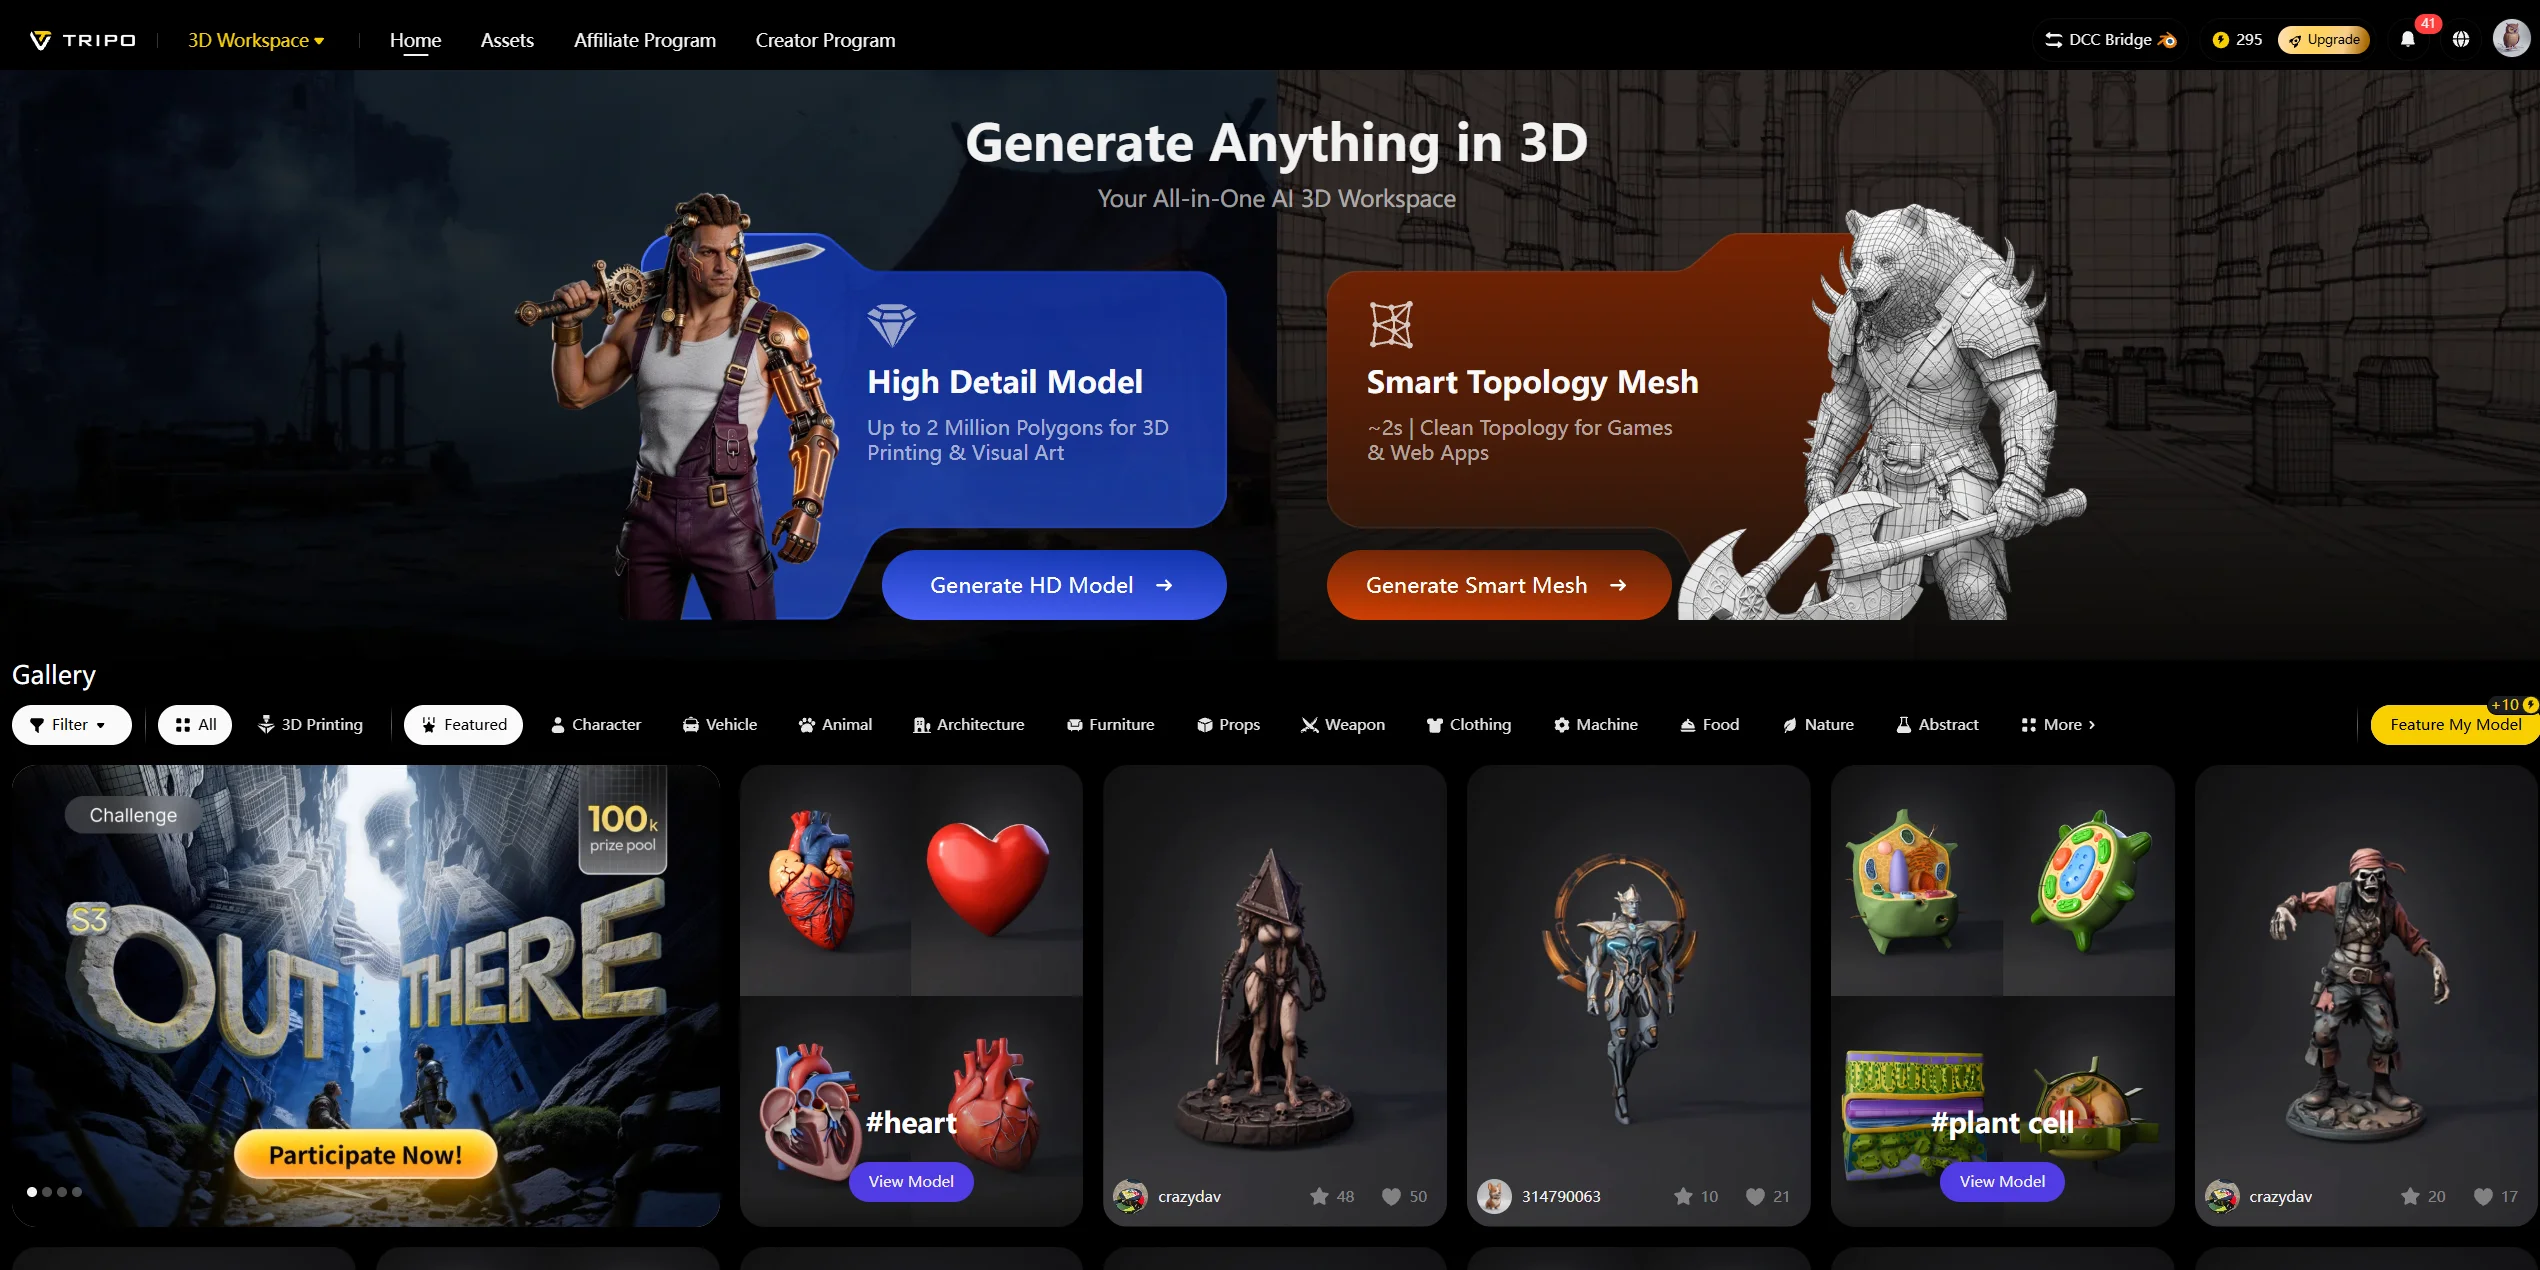
Step 1: Open Tripo AI Studio. Sign in at Tripo AI Studio. Select Text-to-3D when starting from a prompt, or Image-to-3D when using concept art or a reference image.
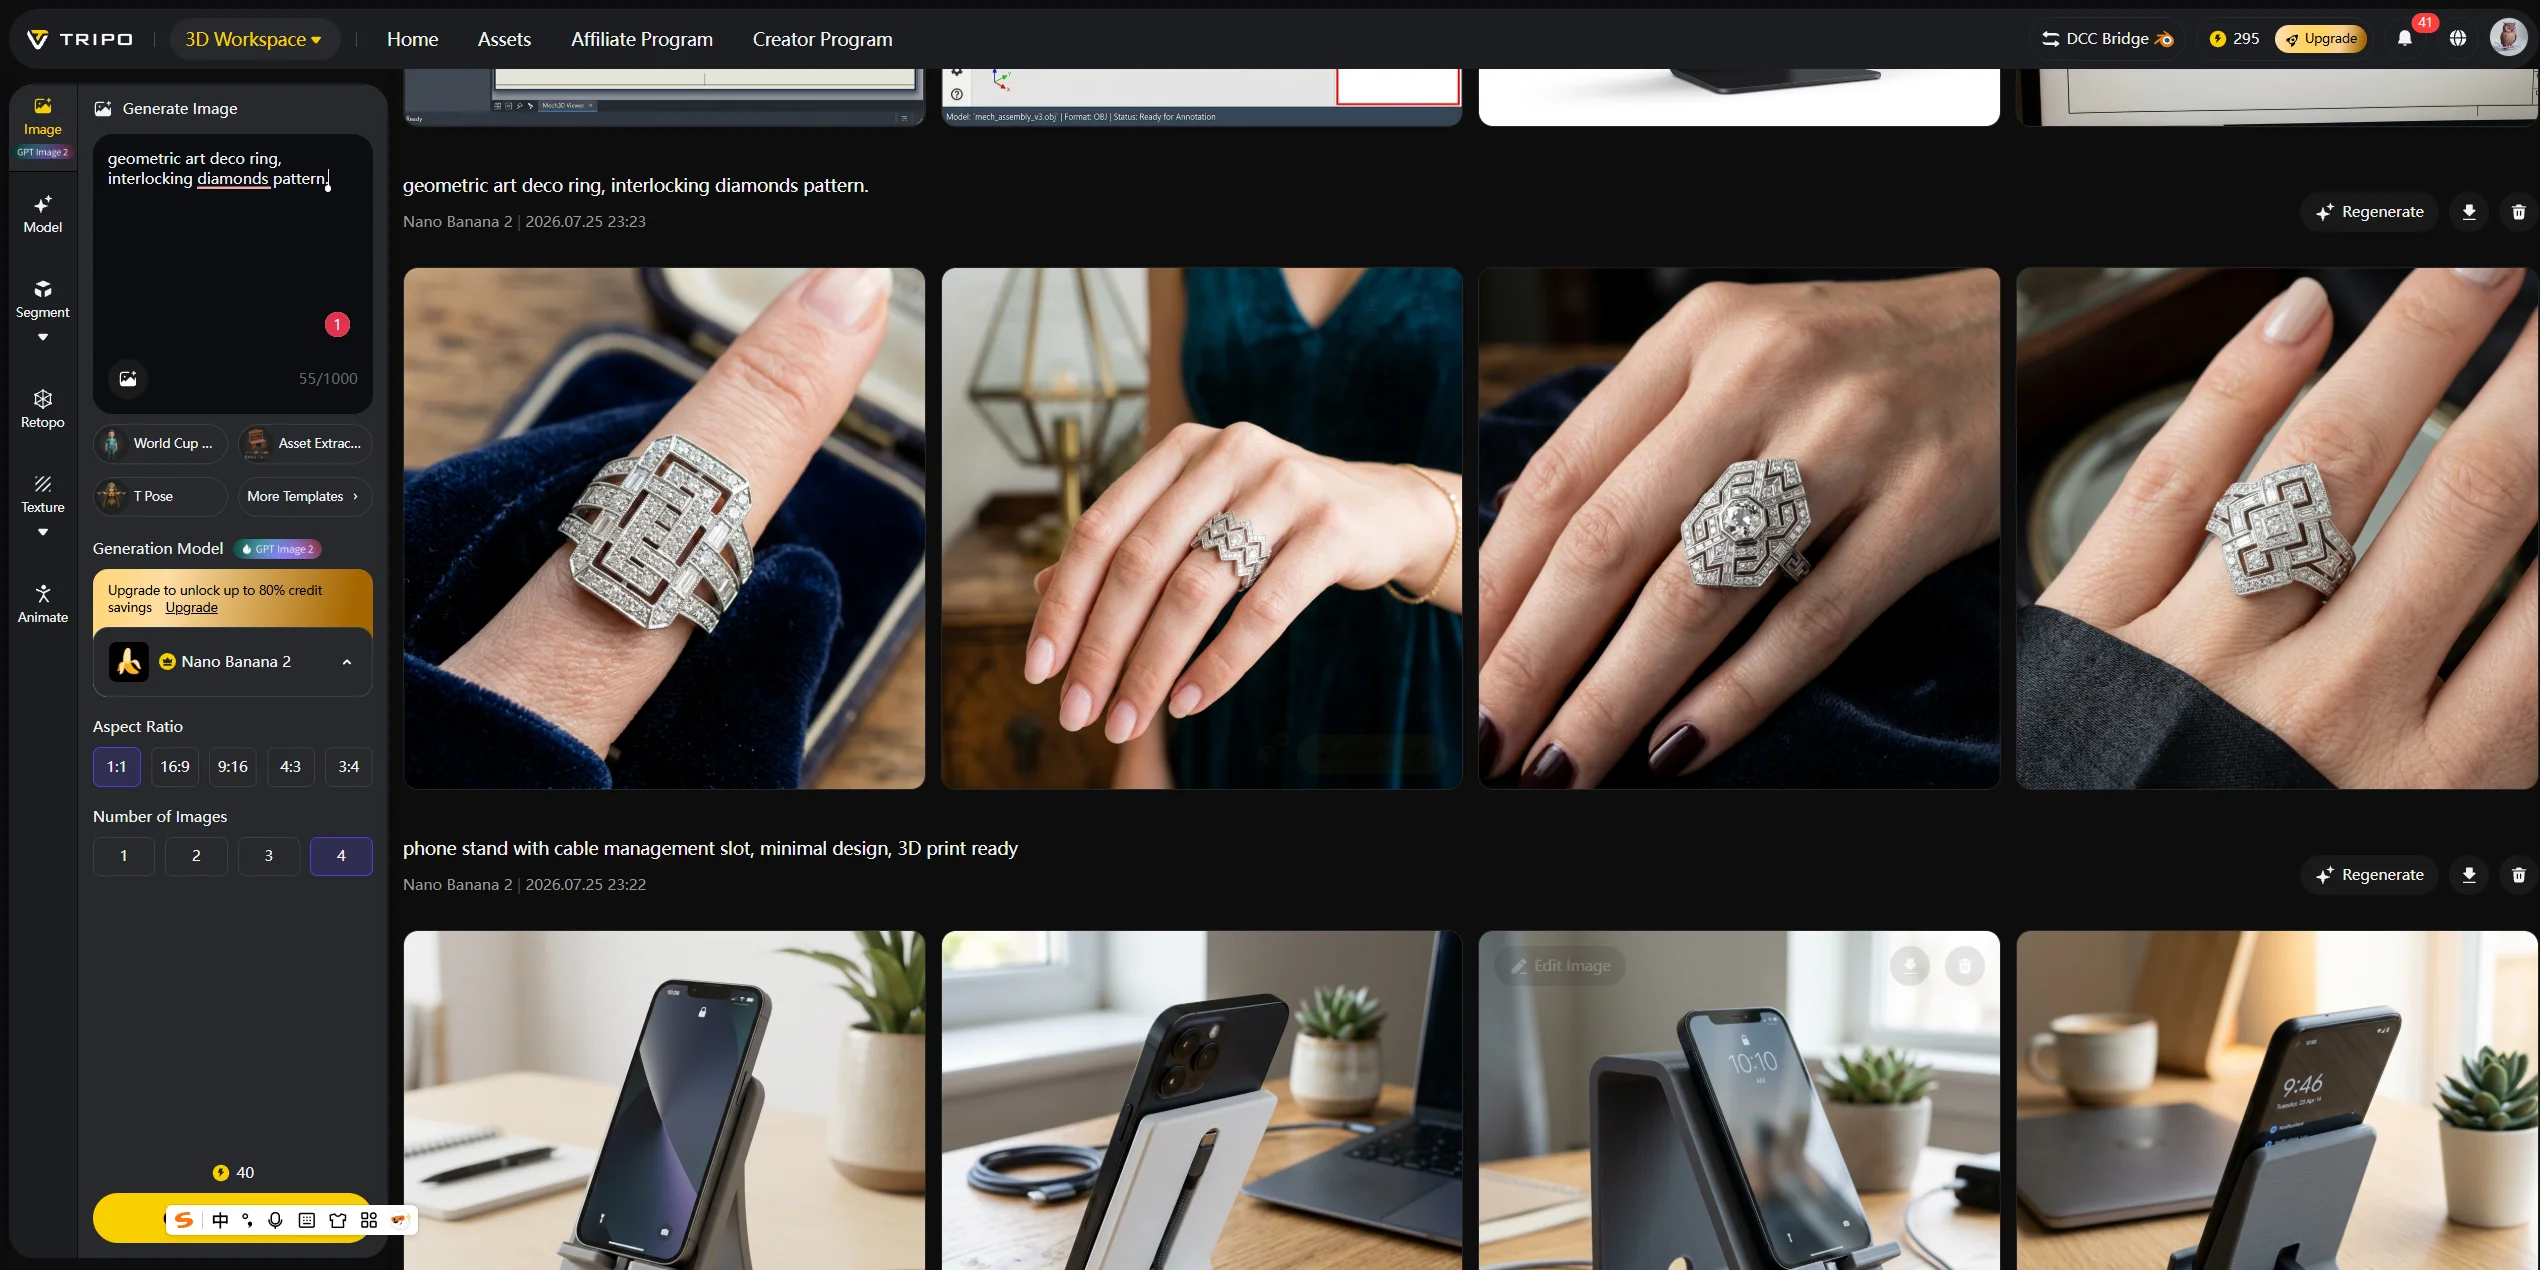
Step 2: Enter a prompt or upload a reference. For example, use a prompt like “low-poly wooden chest for Roblox game” or “cartoon pet dragon, simple shape, game asset style.” If you have concept art, upload it as a reference.
Step 3: Generate and choose Smart Mesh. After generation, use Smart Mesh to convert the model into a lower-poly game-ready asset. This helps keep the mesh around Roblox-friendly complexity.
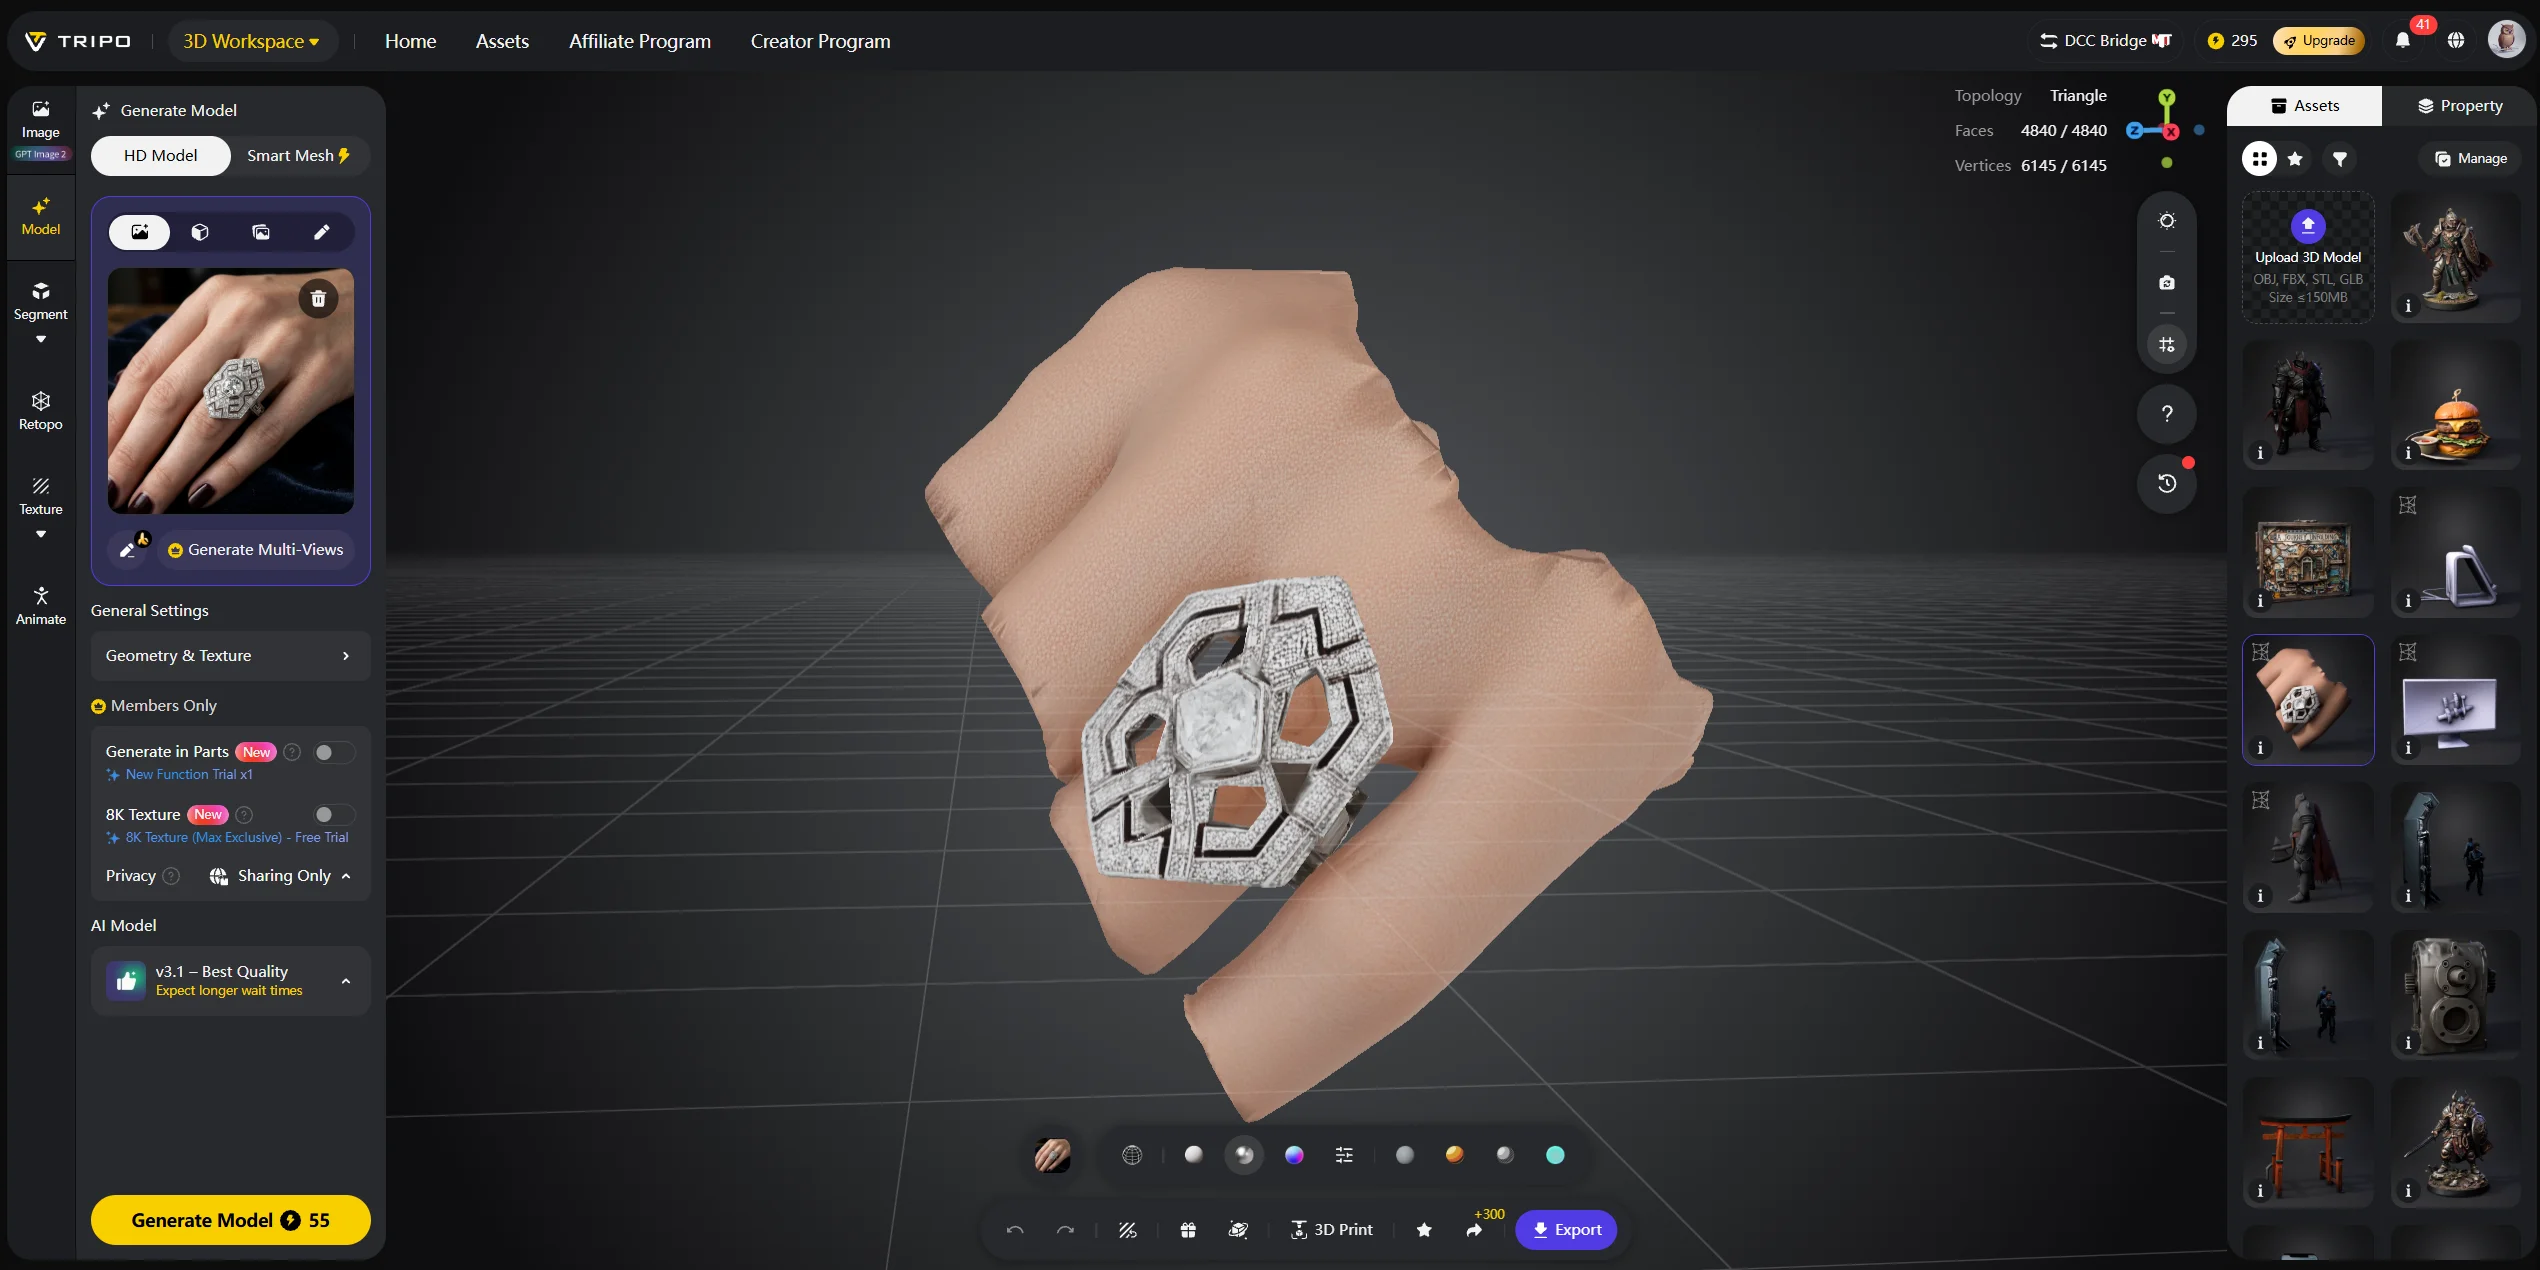
Step 4: Export as FBX or OBJ. Choose FBX first if you want the safest game-asset workflow. Choose OBJ for simple static props.
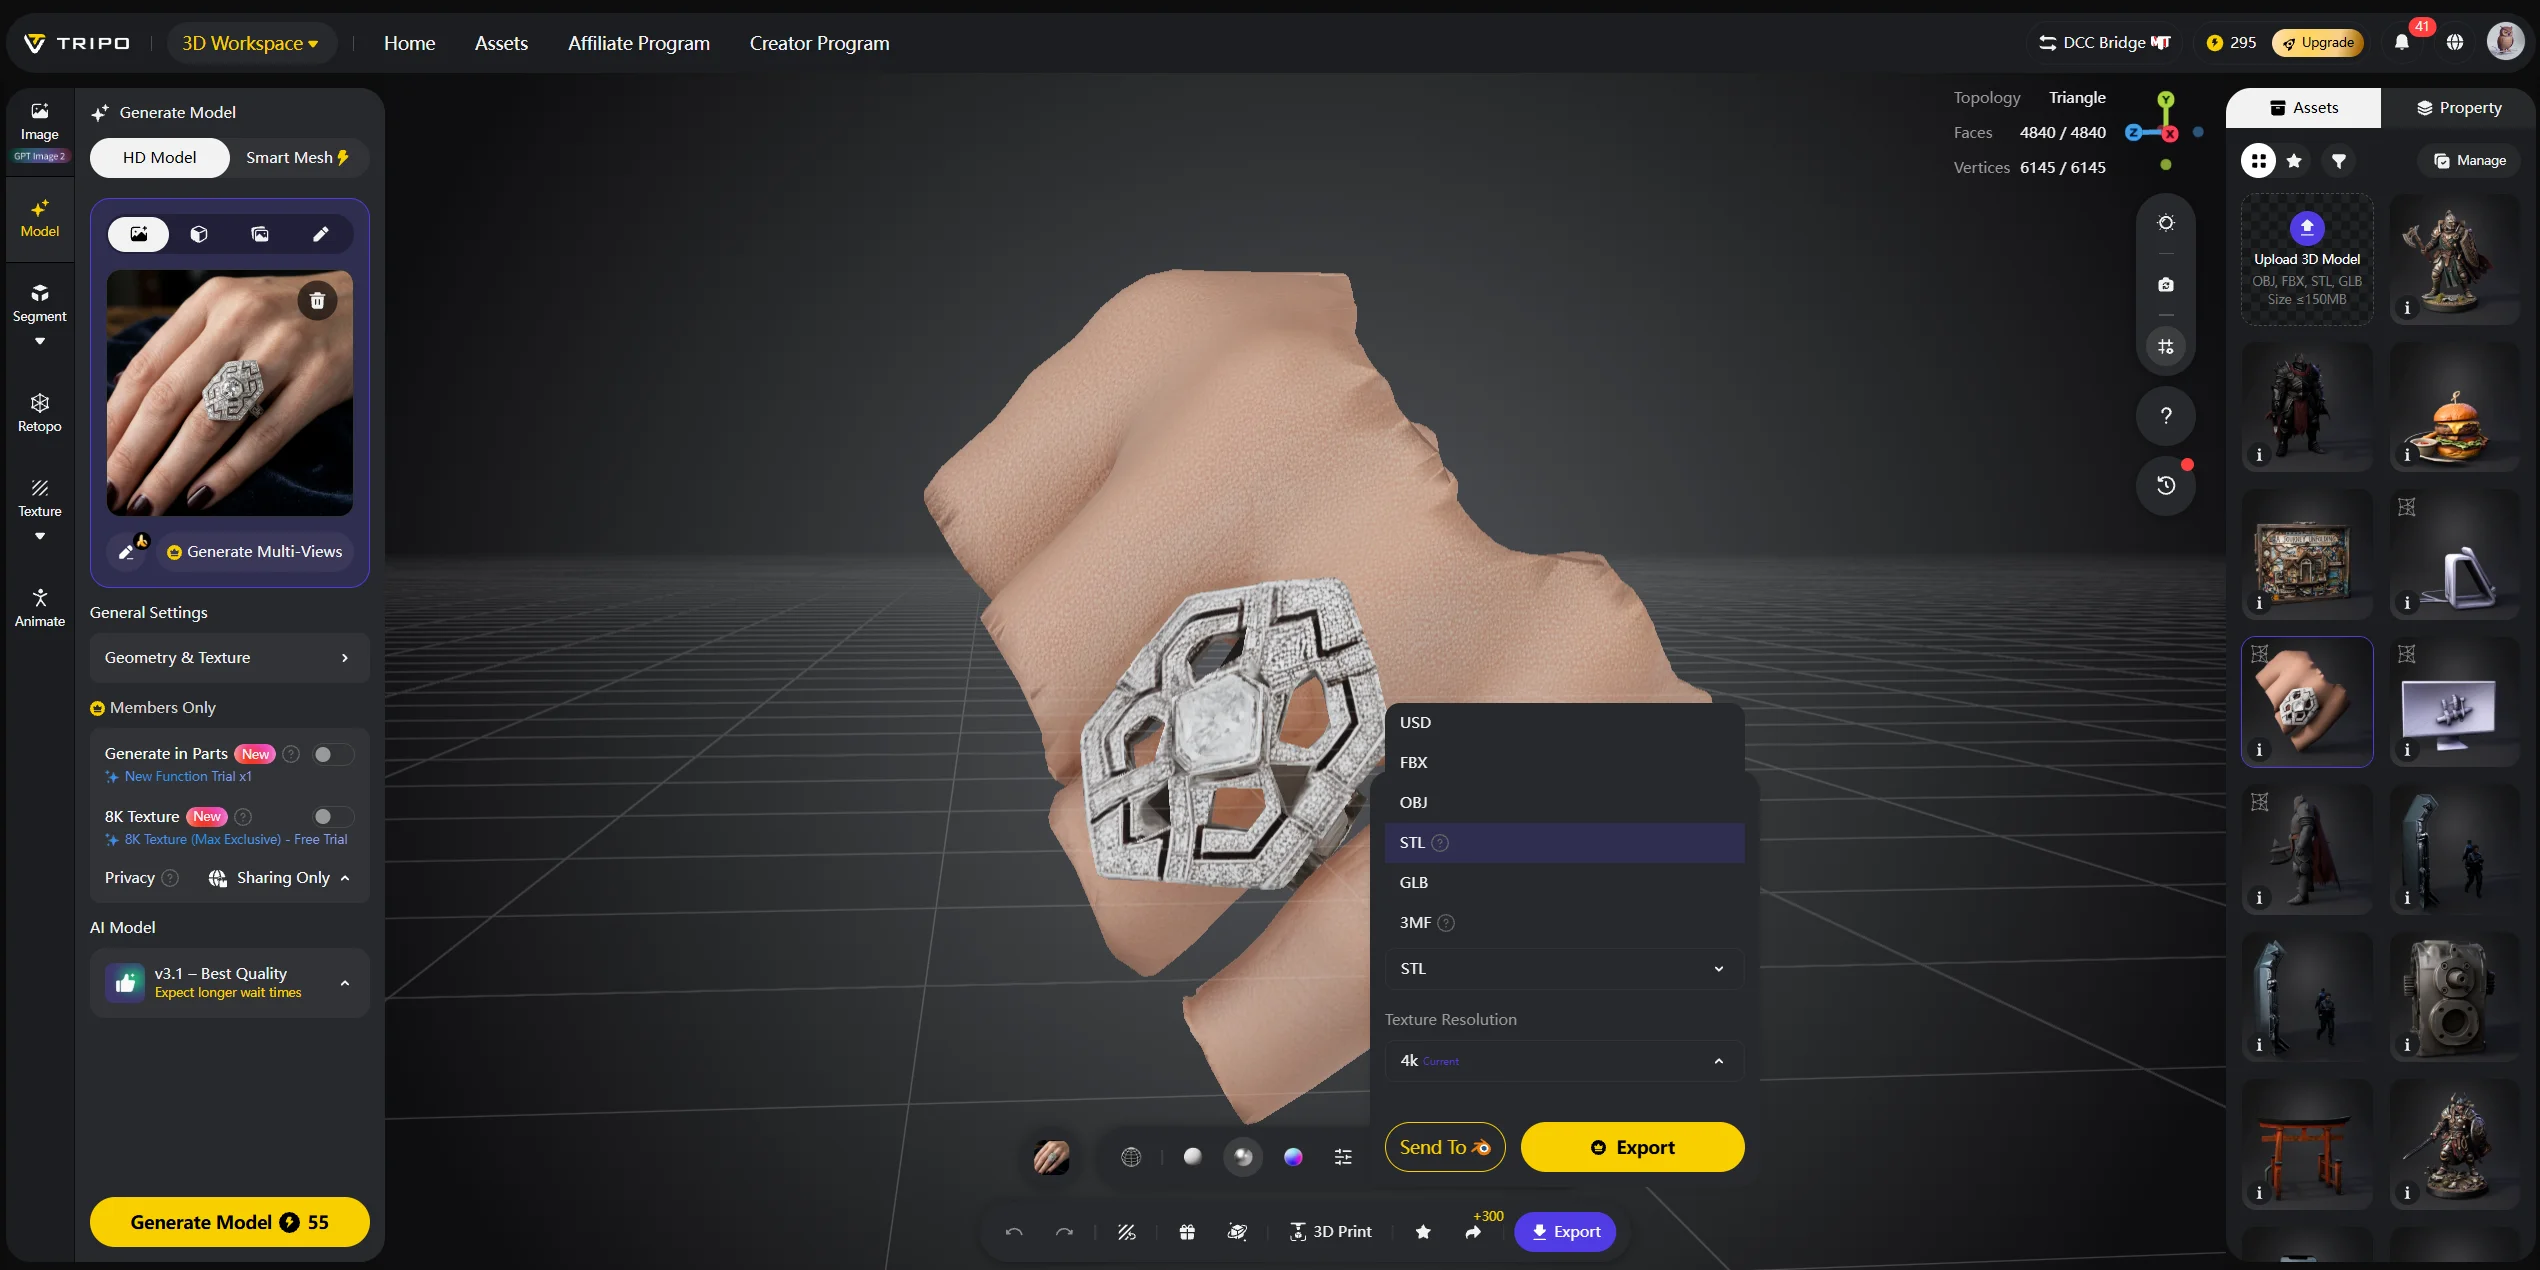
Step 5: Import into Roblox Studio. Open Roblox Studio, go to Model → Import → 3D Model, then select your exported FBX or OBJ file.
Step 6: Adjust Position and Size. Resize the model using the stud scale. A small crate, for example, might be 2–3 studs wide, while a humanoid character should be around 6 studs tall.
Step 7: Add textures if needed. Import PNG texture maps into Roblox and assign them through SurfaceAppearance. Check that the UVs look clean and the texture is not stretched.
Tip: include words like “low-poly,” “game asset,” “simple silhouette,” “Roblox-style,” and “clean shape” in your Tripo AI prompt to guide the result toward a lighter game-ready model.
Method 2 — Use Blender (Most Control)
Blender is the best option when you need full control. Choose Blender if your Roblox asset requires custom topology, rigging, bone setup, animation, precise UV unwrapping, or exact proportions.
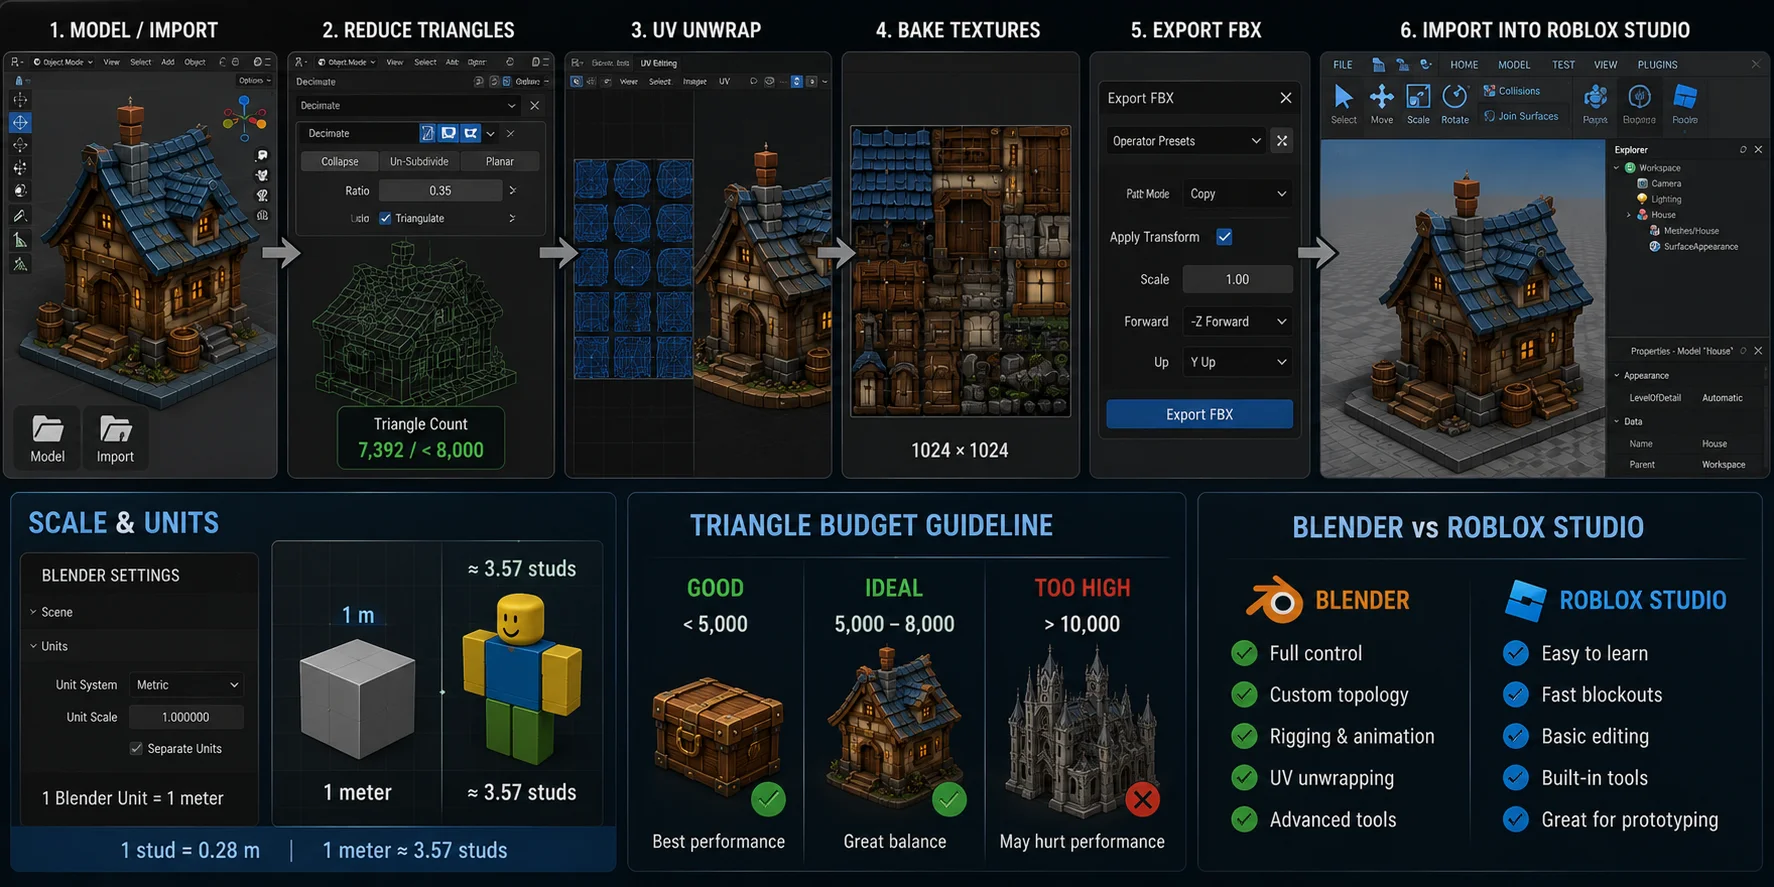
A typical Blender workflow looks like this: build or import the model, reduce triangle count with the Decimate Modifier, target fewer than 8,000 triangles for most assets, unwrap UVs, bake textures at 1024×1024, then export as FBX with Apply Transformations enabled. After that, import it into Roblox Studio using the same import workflow from Method 1.
Scale is important. In Blender, set units to Metric and treat 1 Blender Unit = 1 meter. Since 1 stud = 0.28 m, one meter is about 3.57 studs. You can either export with the correct scale or resize the asset in Roblox Studio after import.
Blender is much more powerful than Roblox Studio’s built-in tools, but it also has a steeper learning curve. Roblox Studio is simpler and faster for basic blockouts, while Blender is better for polished meshes, rigging, animation, and precise UV control.
Method 3 — Build Inside Roblox Studio (No Extra Software)
Roblox Studio is the easiest option if you do not want to install anything else. It works best for simple shapes, blocky assets, platforms, walls, crates, basic vehicles, and quick prototypes.
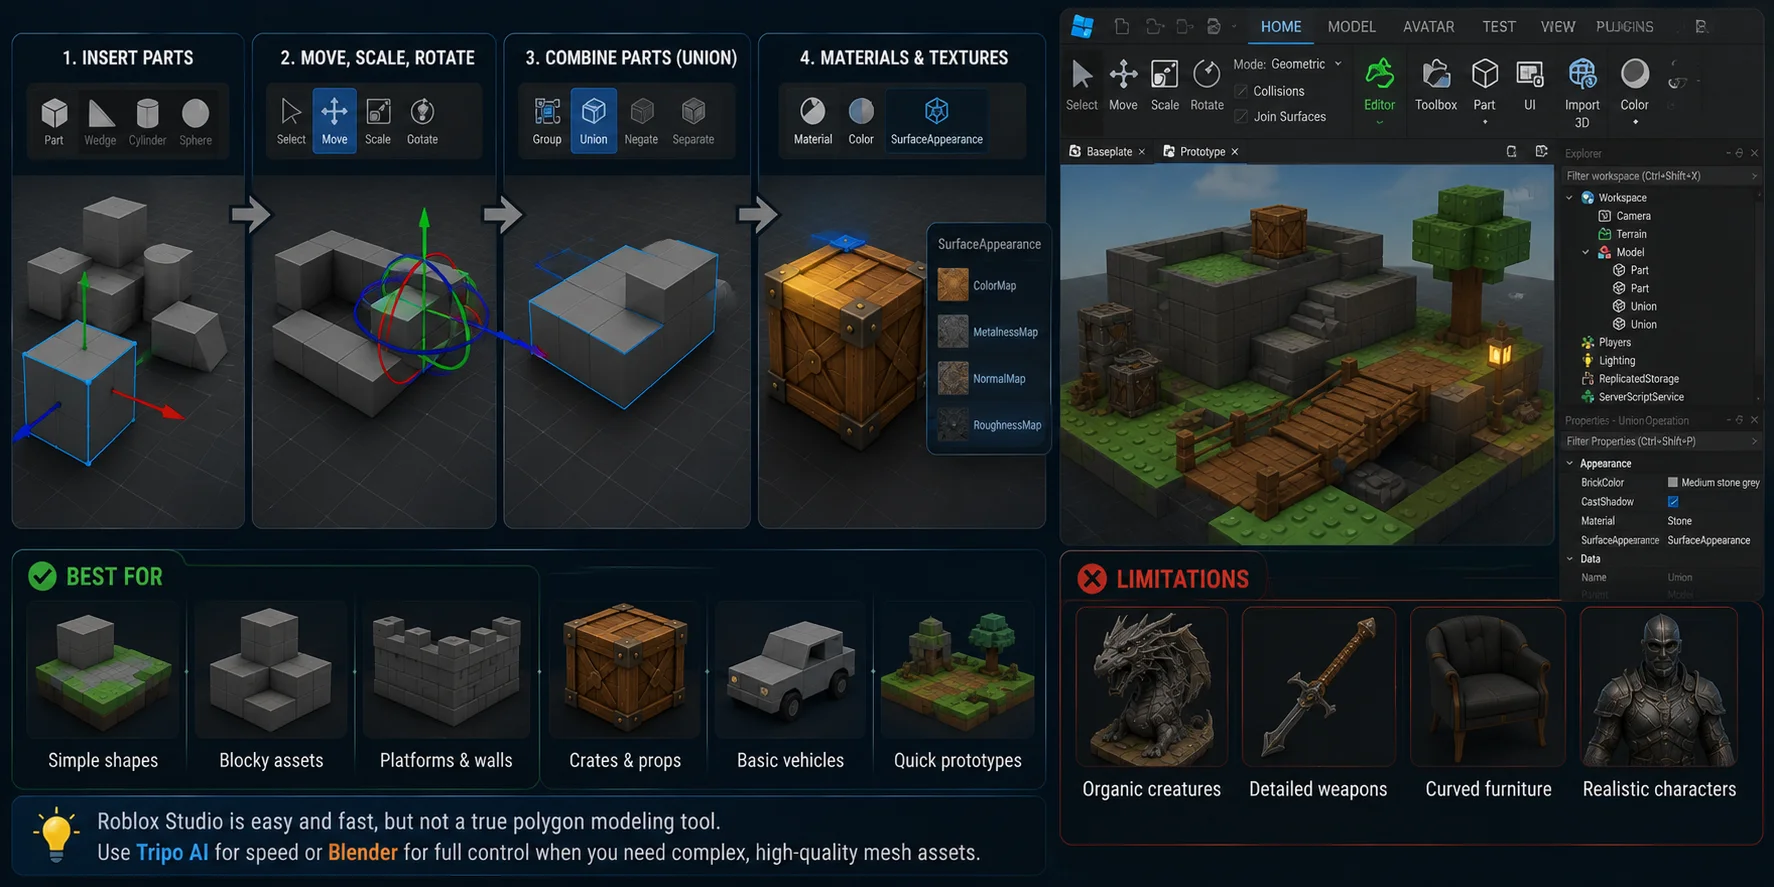
The basic workflow is simple: insert a Part or BasePart, then use Move, Scale, and Rotate to shape it. Combine multiple Parts into a model. If you need a combined shape, select multiple Parts and use Model → Union. You can then apply materials, colors, and SurfaceAppearance textures.
The limitation is complexity. Roblox Studio is not a true polygon modeling tool. It cannot easily create organic creatures, detailed weapons, curved furniture, realistic characters, or high-quality mesh assets. For those, use Tripo AI for speed or Blender for manual control.
Tool Comparison: Which Roblox 3D Model Maker Is Right for You?
| Tool | Free Tier | Roblox-Compatible Export | Poly Control | Skill Level | Best For |
|---|---|---|---|---|---|
| Tripo AI | Free tier available | FBX, OBJ | Smart Mesh ≈5,000 faces | Beginner | Fastest AI workflow |
| Meshy | Free tier available | FBX, OBJ | Manual | Beginner | AI alternative |
| Sloyd | Free tier | FBX | Procedural | Beginner | Simple game assets |
| Blender | Free | FBX, OBJ | Full control | Intermediate–Advanced | Complex models, rigging |
| Roblox Studio | Free, built-in | N/A, native | Part-based only | Beginner | Quick prototypes |
If you want the fastest path from idea to Roblox asset, start with Tripo AI. If you want exact topology and rigging control, use Blender. If you only need simple shapes, Roblox Studio is enough.
Optimization Tips for Roblox Models
Reduce polygon count. Use Tripo AI Smart Mesh or Blender’s Decimate Modifier. For most assets, target fewer than 8,000 triangles to keep performance safe.
Clean up UVs. SurfaceAppearance depends on UV mapping. Keep UV islands organized, avoid stretching, and make sure important details have enough texture space.
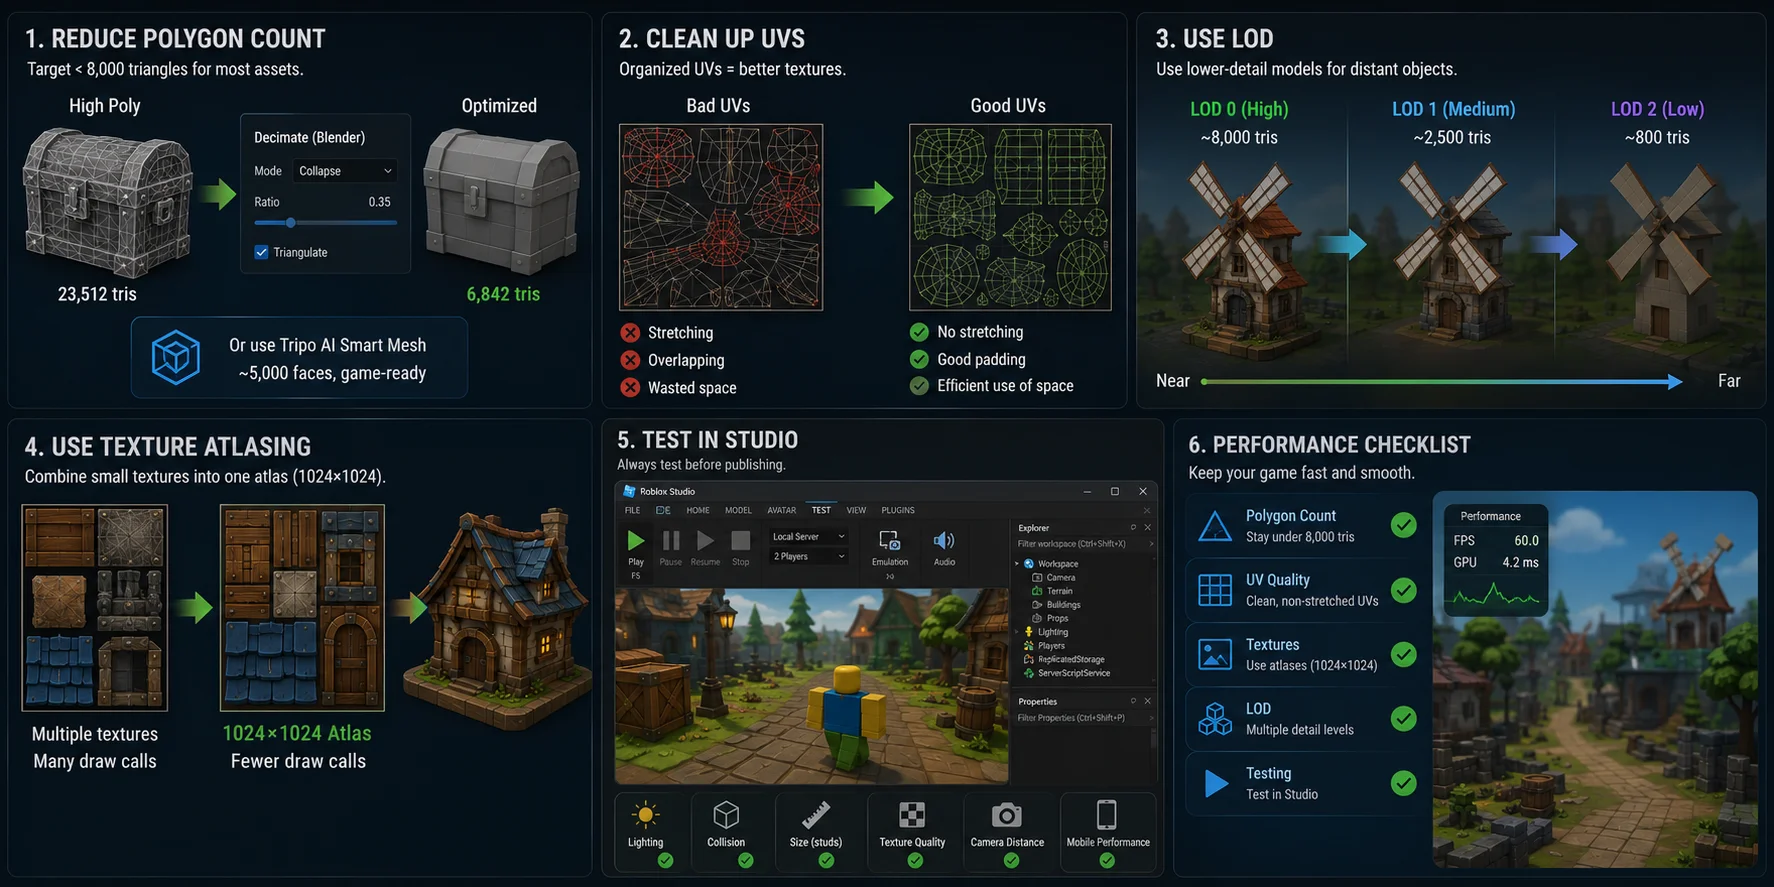
Use LOD. For complex scenes, create two or three versions of important assets: high, medium, and low detail. Use lower-detail versions for distant objects to reduce rendering pressure.
Use texture atlasing. Combine several small textures into one 1024×1024 atlas when possible. This can reduce draw calls and keep asset management cleaner.
Test in Studio. After importing, run your game in Roblox Studio’s Test mode. Check lighting, collision, size, texture quality, camera distance, and mobile performance before publishing.
Frequently Asked Questions
What is the best Roblox 3D model maker?
It depends on your skill level. Tripo AI is fastest for beginners because you can generate a model in seconds and export FBX directly into Roblox Studio. Blender gives the most control for advanced users.
What 3D file formats does Roblox Studio support?
Roblox Studio supports FBX and OBJ for mesh import. FBX is preferred because it can retain hierarchy, material data, and bone information. Both formats are commonly exported by AI tools such as Tripo AI, Meshy, and Sloyd.
What is the polygon limit for Roblox models?
For this workflow, use 10,000 triangles as a conservative upper budget per mesh part, and stay under 8,000 triangles when possible. Tripo AI Smart Mesh or Blender’s Decimate Modifier can help reduce face count.
How do I scale my 3D model for Roblox?
Roblox uses studs as its unit, where 1 stud ≈ 28 cm. Before exporting from Blender or another tool, scale your model so that 1 meter equals about 3.57 studs. You can also import first and then resize in Roblox Studio using Position and Size.
Is there a free Roblox 3D model maker?
Yes. Tripo AI, Meshy, and Sloyd offer free tiers, though export options can vary by plan. Blender is fully free and open-source. Roblox Studio itself is also free and includes basic Part-based modeling tools.
Can I use Blender to make Roblox models?
Absolutely. Blender is one of the most common tools for creating Roblox assets. Model your object, reduce the poly count with Decimate, unwrap UVs, export as FBX with Apply Transformations enabled, and import it into Roblox Studio.
How do I import a 3D model into Roblox Studio?
Open Roblox Studio, go to Model → Import → 3D Model, and select your FBX or OBJ file. The mesh will appear in your workspace after import. Adjust Position and Size to fit your scene.
Can kids make 3D models for Roblox?
Yes. AI tools like Tripo AI are beginner-friendly because users can describe what they want and generate a model automatically. Roblox Studio’s built-in Part tools are also simple enough for basic shapes and prototypes.
What texture size should I use for Roblox models?
Use PNG or JPG textures at 512×512 or 1024×1024. For most Roblox assets, 1024×1024 is enough. Larger textures may be compressed and can look blurry or waste memory.
Is Tripo AI compatible with Roblox?
Yes. Tripo AI exports FBX and OBJ, both suitable for Roblox Studio workflows. Smart Mesh produces lightweight assets around ≈5,000 faces, which fits well within a conservative Roblox asset budget. The workflow is: generate in Tripo AI → export FBX → import into Roblox Studio.
Conclusion
There are three practical ways to make Roblox 3D models. Use Roblox Studio for simple Part-based prototypes, Blender when you need full control over topology, UVs, rigging, and animation, and Tripo AI when you want the fastest AI-to-Roblox workflow. For most creators, Tripo AI is the smoothest starting point because Smart Mesh keeps models lightweight and FBX/OBJ export fits the Roblox import process.
Ready to create your first custom asset? Try Tripo AI free at Tripo AI Studio. For higher-quality exports and advanced workflows, see Tripo AI plans.