Nano Banana for 3D Printing: Complete Workflow Guide
TL;DR
- Nano Banana creates 3D-style images, but needs an AI 3D generator to make printable files.
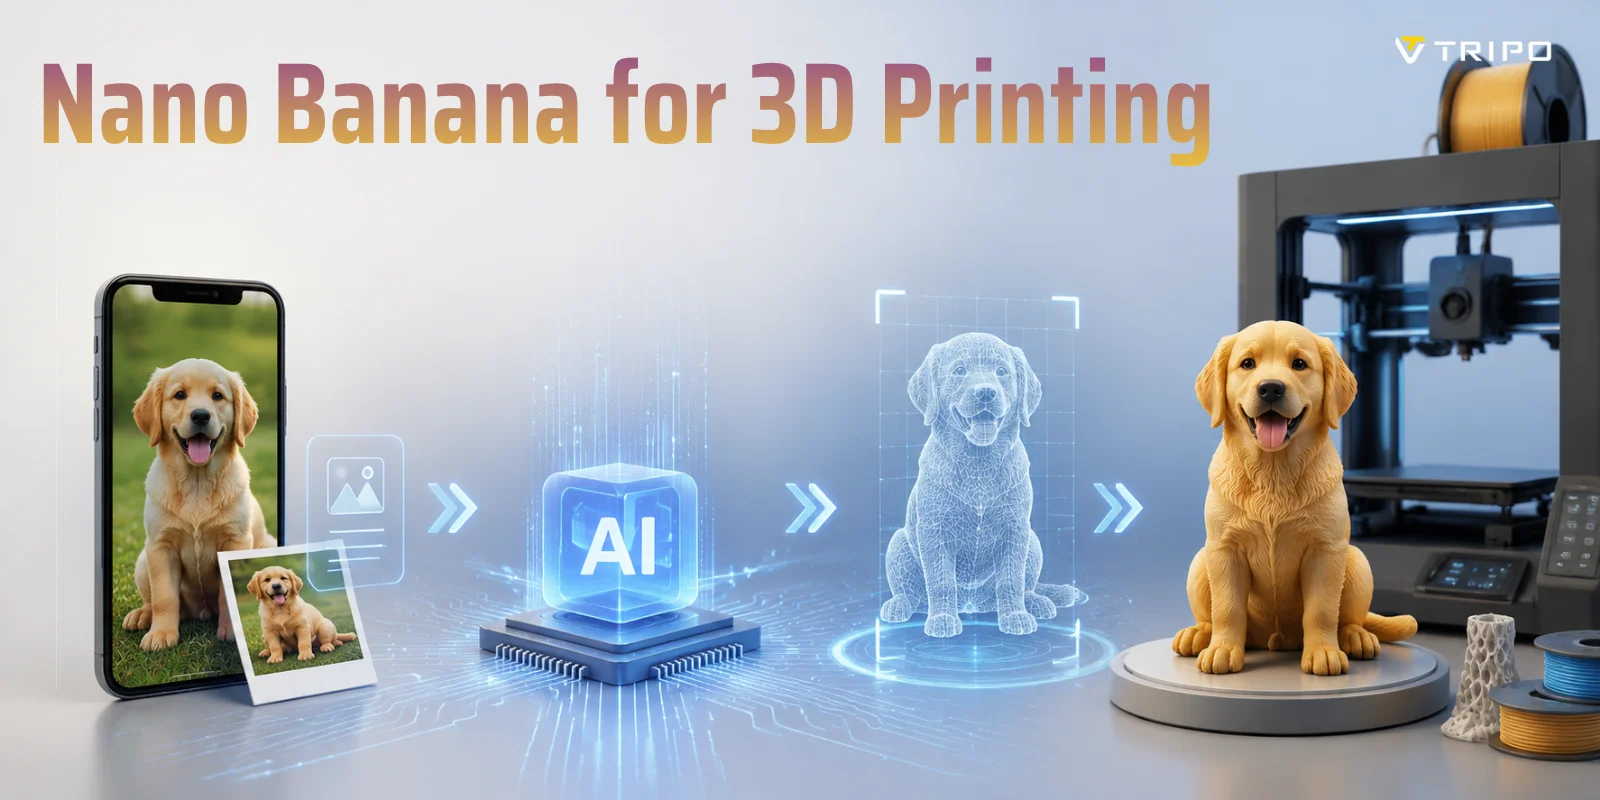
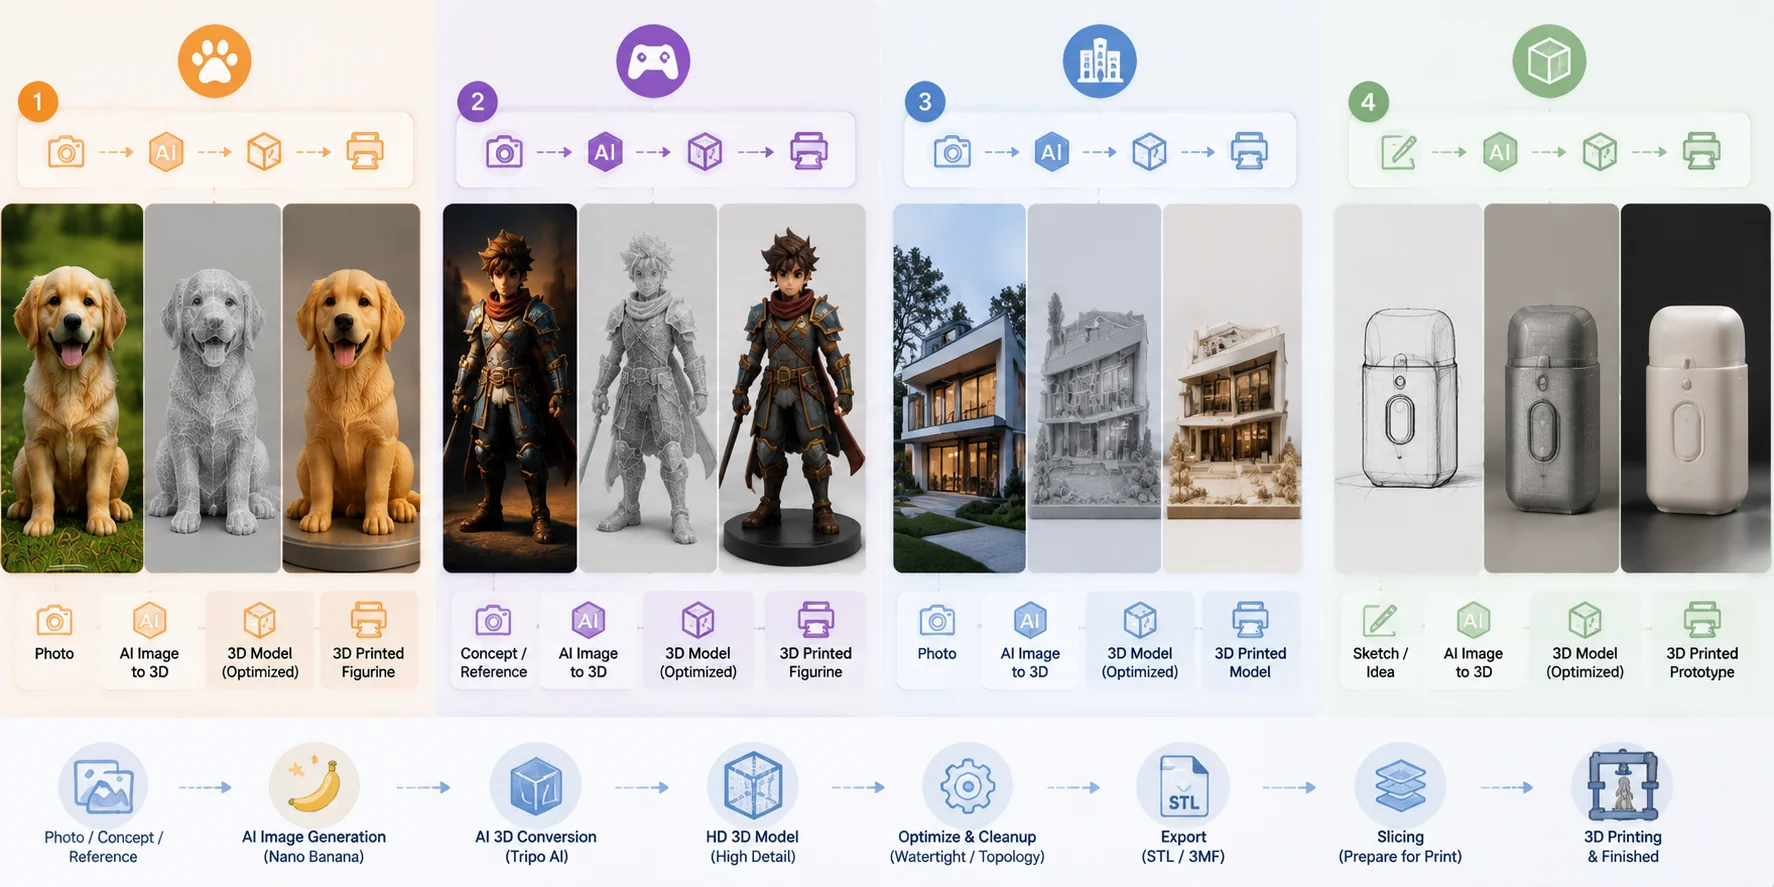
- The workflow is simple: generate image → convert to 3D model → optimize → export STL/3MF → print.
- Clean backgrounds and clear angles improve AI image-to-3D print quality.
- Tripo AI can turn Nano Banana images into detailed printable models with HD Model and Smart Mesh.
- STL works best for standard printing, while 3MF supports color and advanced workflows.
- Nano Banana 3D printing is great for figurines, characters, prototypes, and architecture models.
- No Blender or CAD skills are required — AI handles the full creation process.
Nano Banana can generate impressive 3D-style images from a single photo, but it does not create printable 3D files. To turn a Nano Banana image into something you can actually print, you need one extra step: convert the image into a real 3D model using a dedicated AI 3D generator. This guide shows the complete workflow from image creation to finished print.
The AI image-to-3D market is growing rapidly, expanding from USD 327 million in 2025 to more than USD 2 billion by 2035,according to Precedence Research Whether you want a custom pet figurine, a game character, an architectural model, or a product prototype, Nano Banana provides a fast way to create a clean visual reference — and Tripo AI handles the conversion into a printable 3D asset. Here is the complete Nano Banana 3D printing workflow,from photo to final STL or 3MF file.
What Is Nano Banana — and Why It's Not a 3D Printer
Nano Banana is Google's AI image generation capability built into Gemini 2.5. Available through Google AI Studio, it can transform photos and text prompts into realistic or stylized images within seconds. Users can create isometric 3D renders, collectible figurine concepts, blueprint-style illustrations, product mockups, and many other visual outputs.
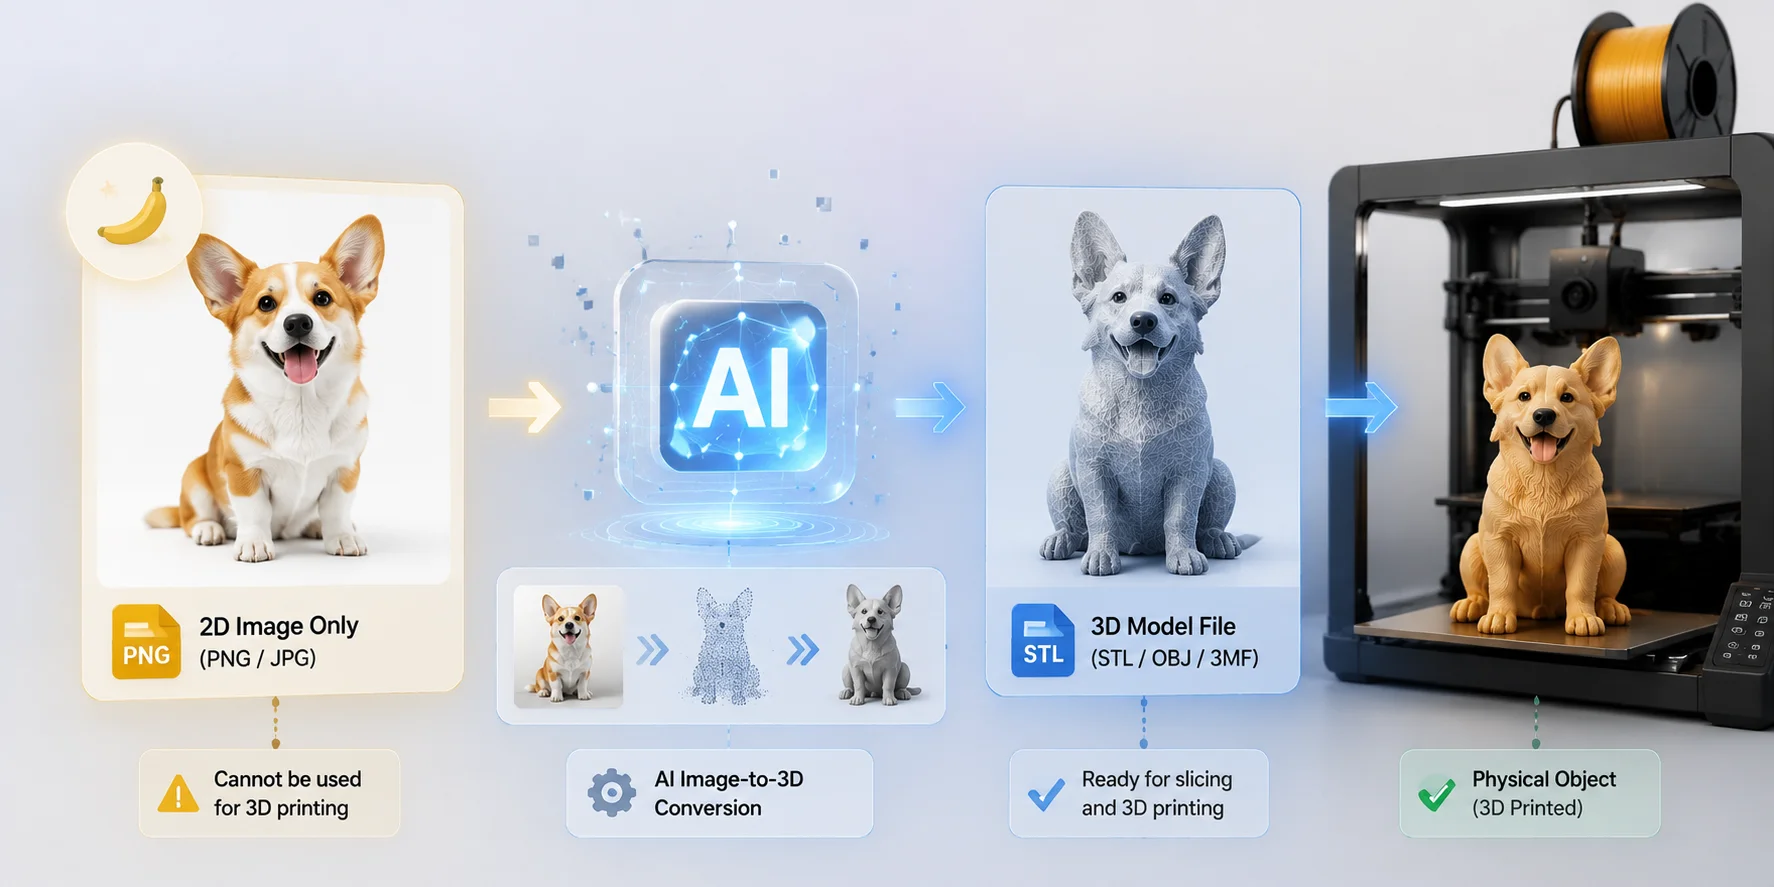
For people interested in Nano Banana for 3D printing, the most important thing to understand is that Nano Banana only creates a 2D image. The output is usually a PNG or JPG file, not a 3D mesh.
A 3D printer cannot use this image directly. Slicer software such as Cura, PrusaSlicer, or Bambu Studio requires a real 3D model file, such as STL or 3MF, containing geometry information. In other words, a Nano Banana image is the starting point — not the finished printable object.
This limitation is actually useful because image quality directly affects the final Nano Banana 3D model. A clean reference image gives AI 3D generators more information to reconstruct the object's shape.
For the best results:
- Use a plain white or neutral background.
- Keep the subject centered.
- Avoid heavy shadows or dramatic lighting.
- Use a front-facing or slightly angled view.
- Make sure important details are clearly visible.
The cleaner the input image, the easier it is for AI to understand the object's structure.
From Nano Banana Image to Printable 3D Model
The Full Workflow: From Nano Banana Image to Print-Ready File
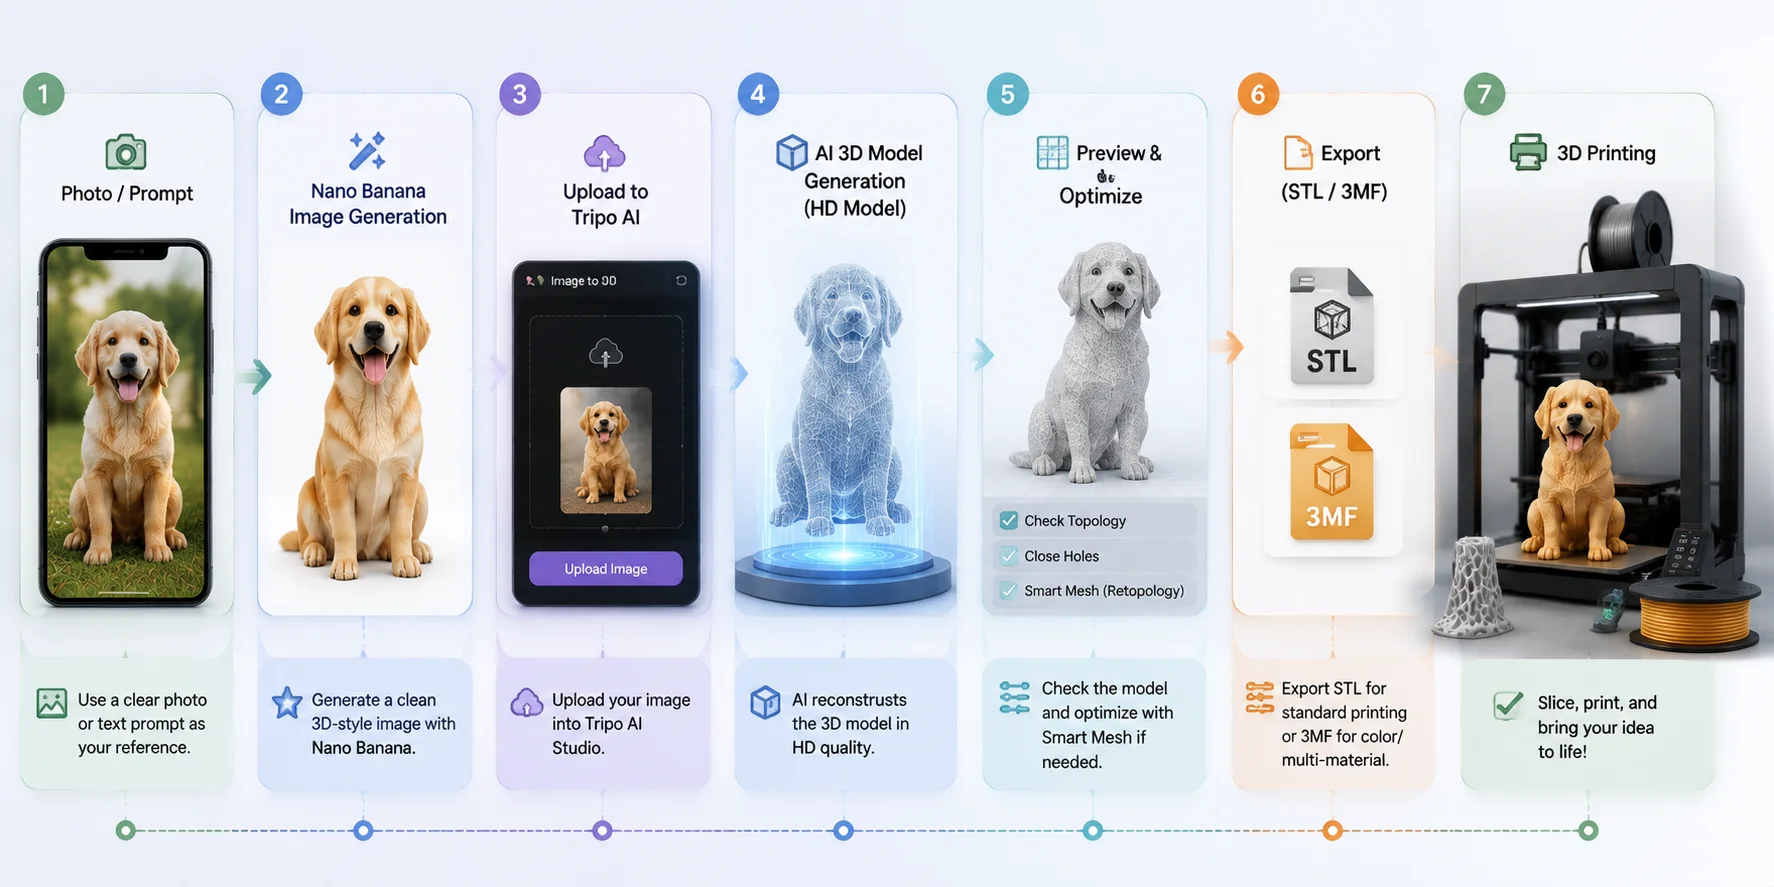
The complete Nano Banana 3D print workflow has two main stages:
- Generate a clean 3D-style image with Nano Banana.
- Convert that image into a printable 3D model with an AI 3D generator.
Part 1 — Generate Your Image in Nano Banana
Start by creating a reference image designed specifically for 3D reconstruction.
Follow these steps:
- Go to Google AI Studio and sign in with your Google account.
- Select Gemini 2.5 with Nano Banana capabilities.
- Upload a reference photo or describe your subject using a text prompt.
- Add 3D-friendly instructions, such as:
"3D figurine, front-facing, plain white background, even lighting"
For architecture or objects, try:
"isometric 3D model, clean geometry, neutral background"
- Click Run and generate your image.
- Download the final PNG or JPG output.
Prompt quality matters because the AI 3D conversion process depends heavily on the image's silhouette and visible details.
Part 2 — Convert Nano Banana Image into a 3D Printable Model
After creating your image, the next step is AI image to 3D print conversion.
Using Tripo AI Studio:
- Open Tripo AI Studio and select Image to 3D.
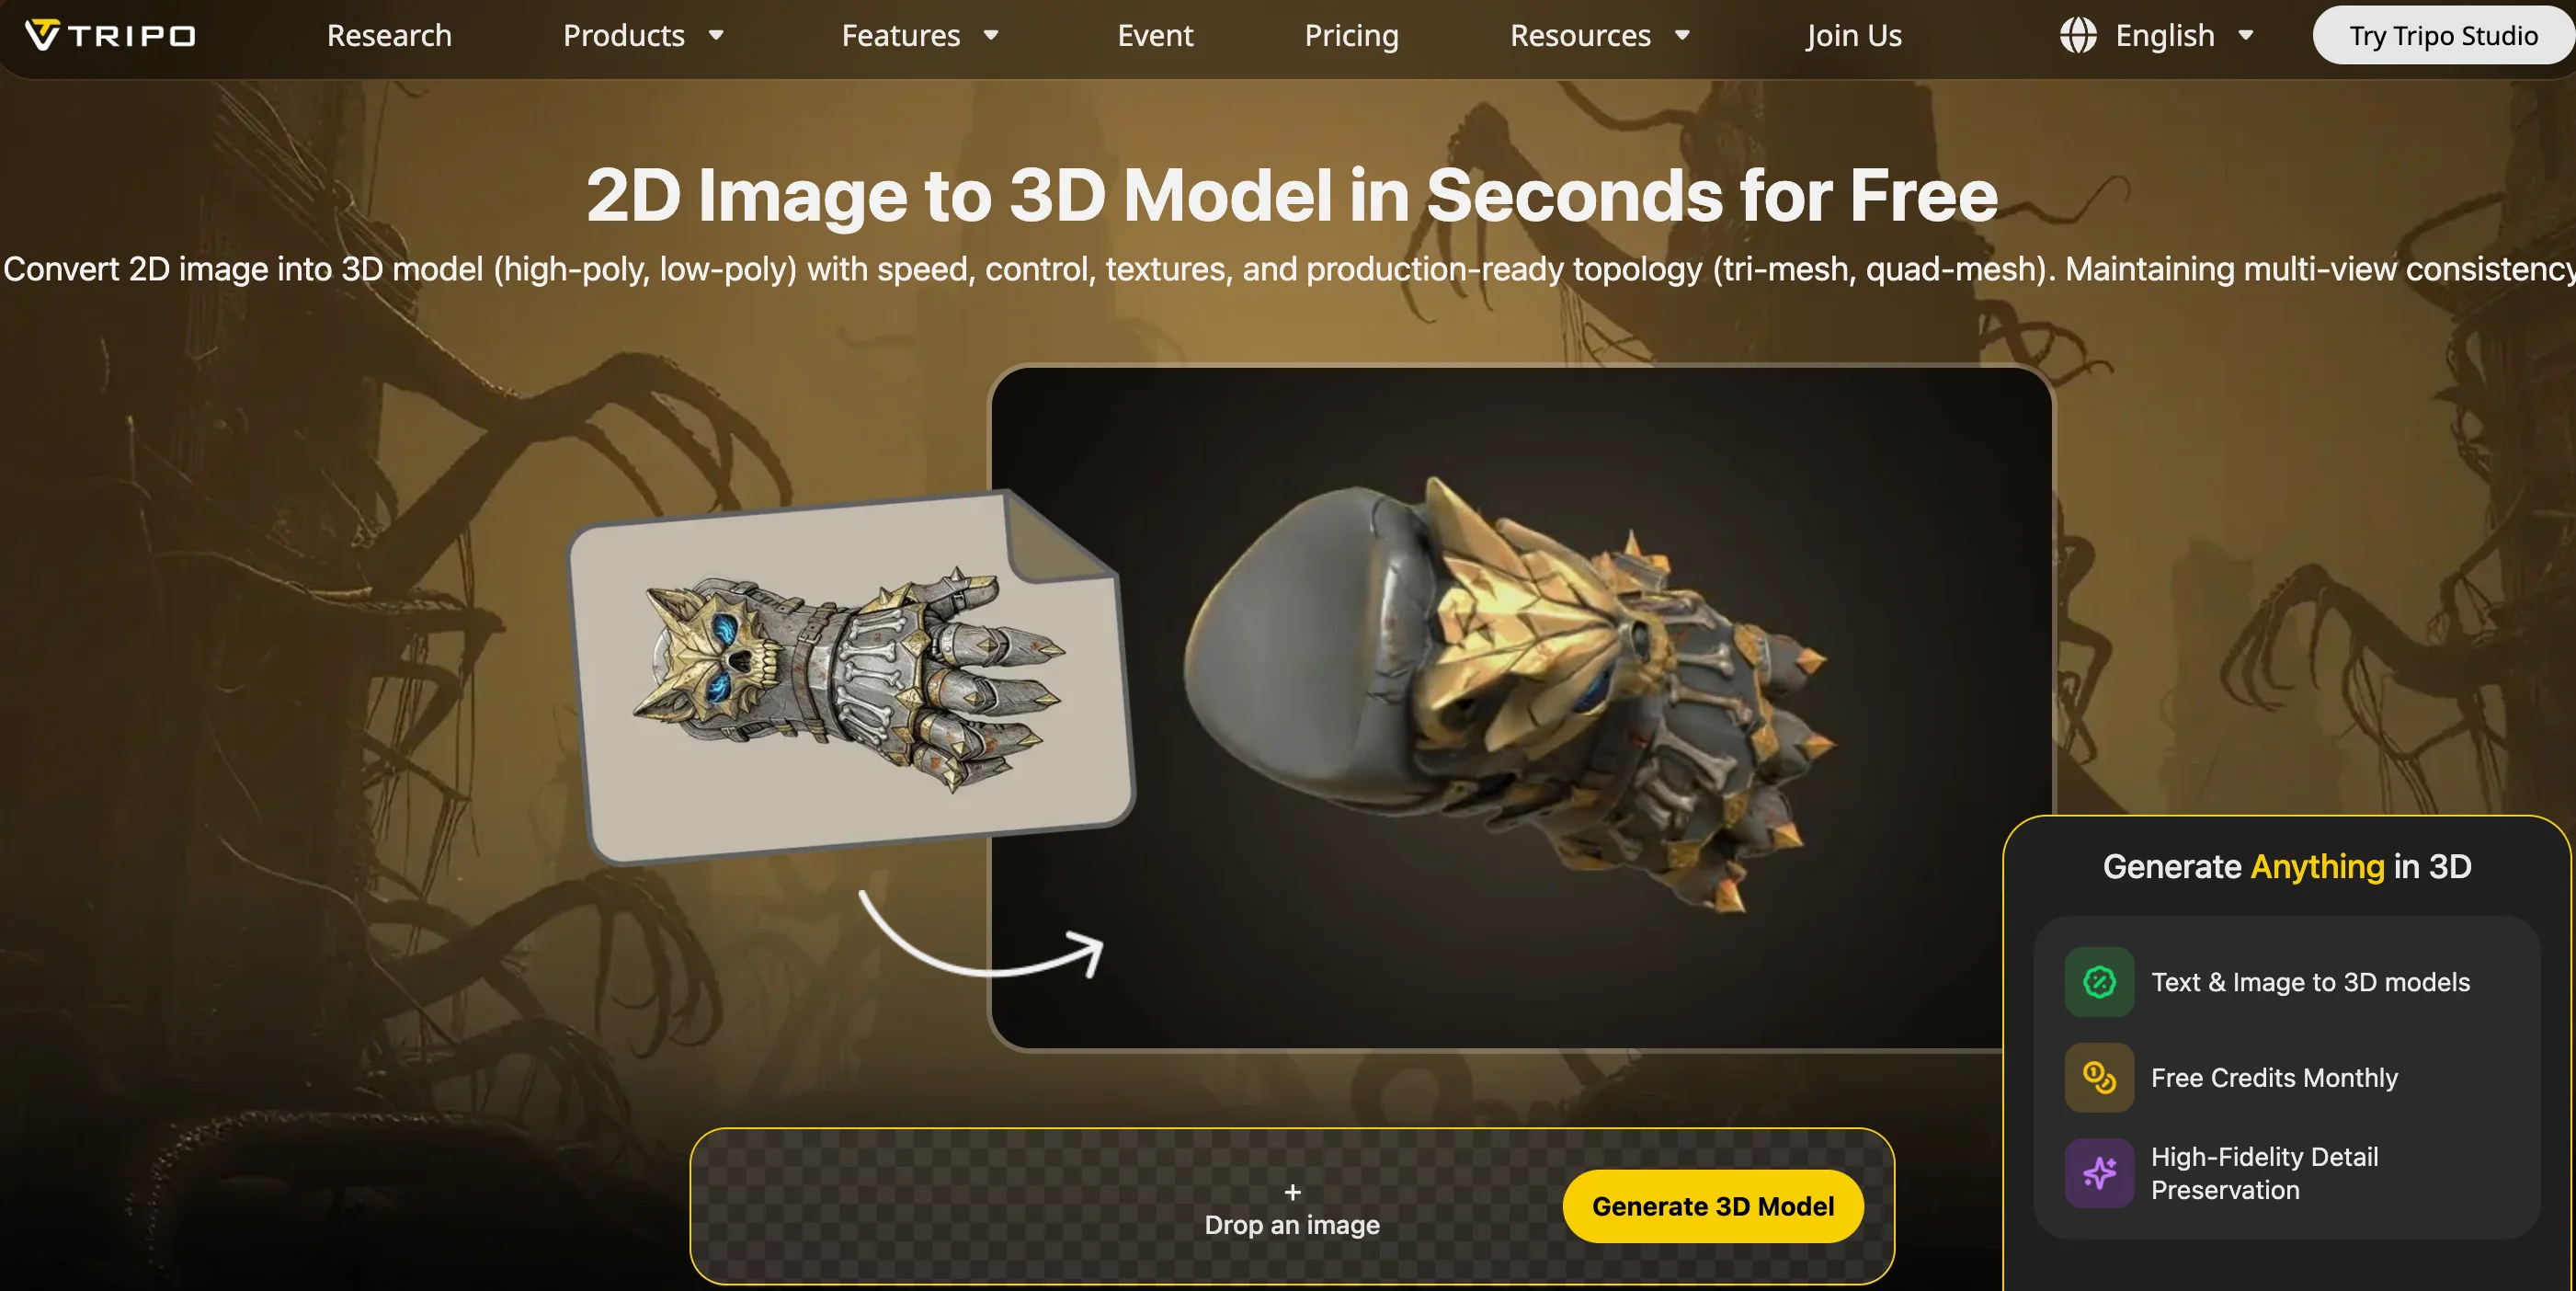
- Upload your Nano Banana image.
- Choose HD Model as the output mode.
- Click Generate 3D Model.
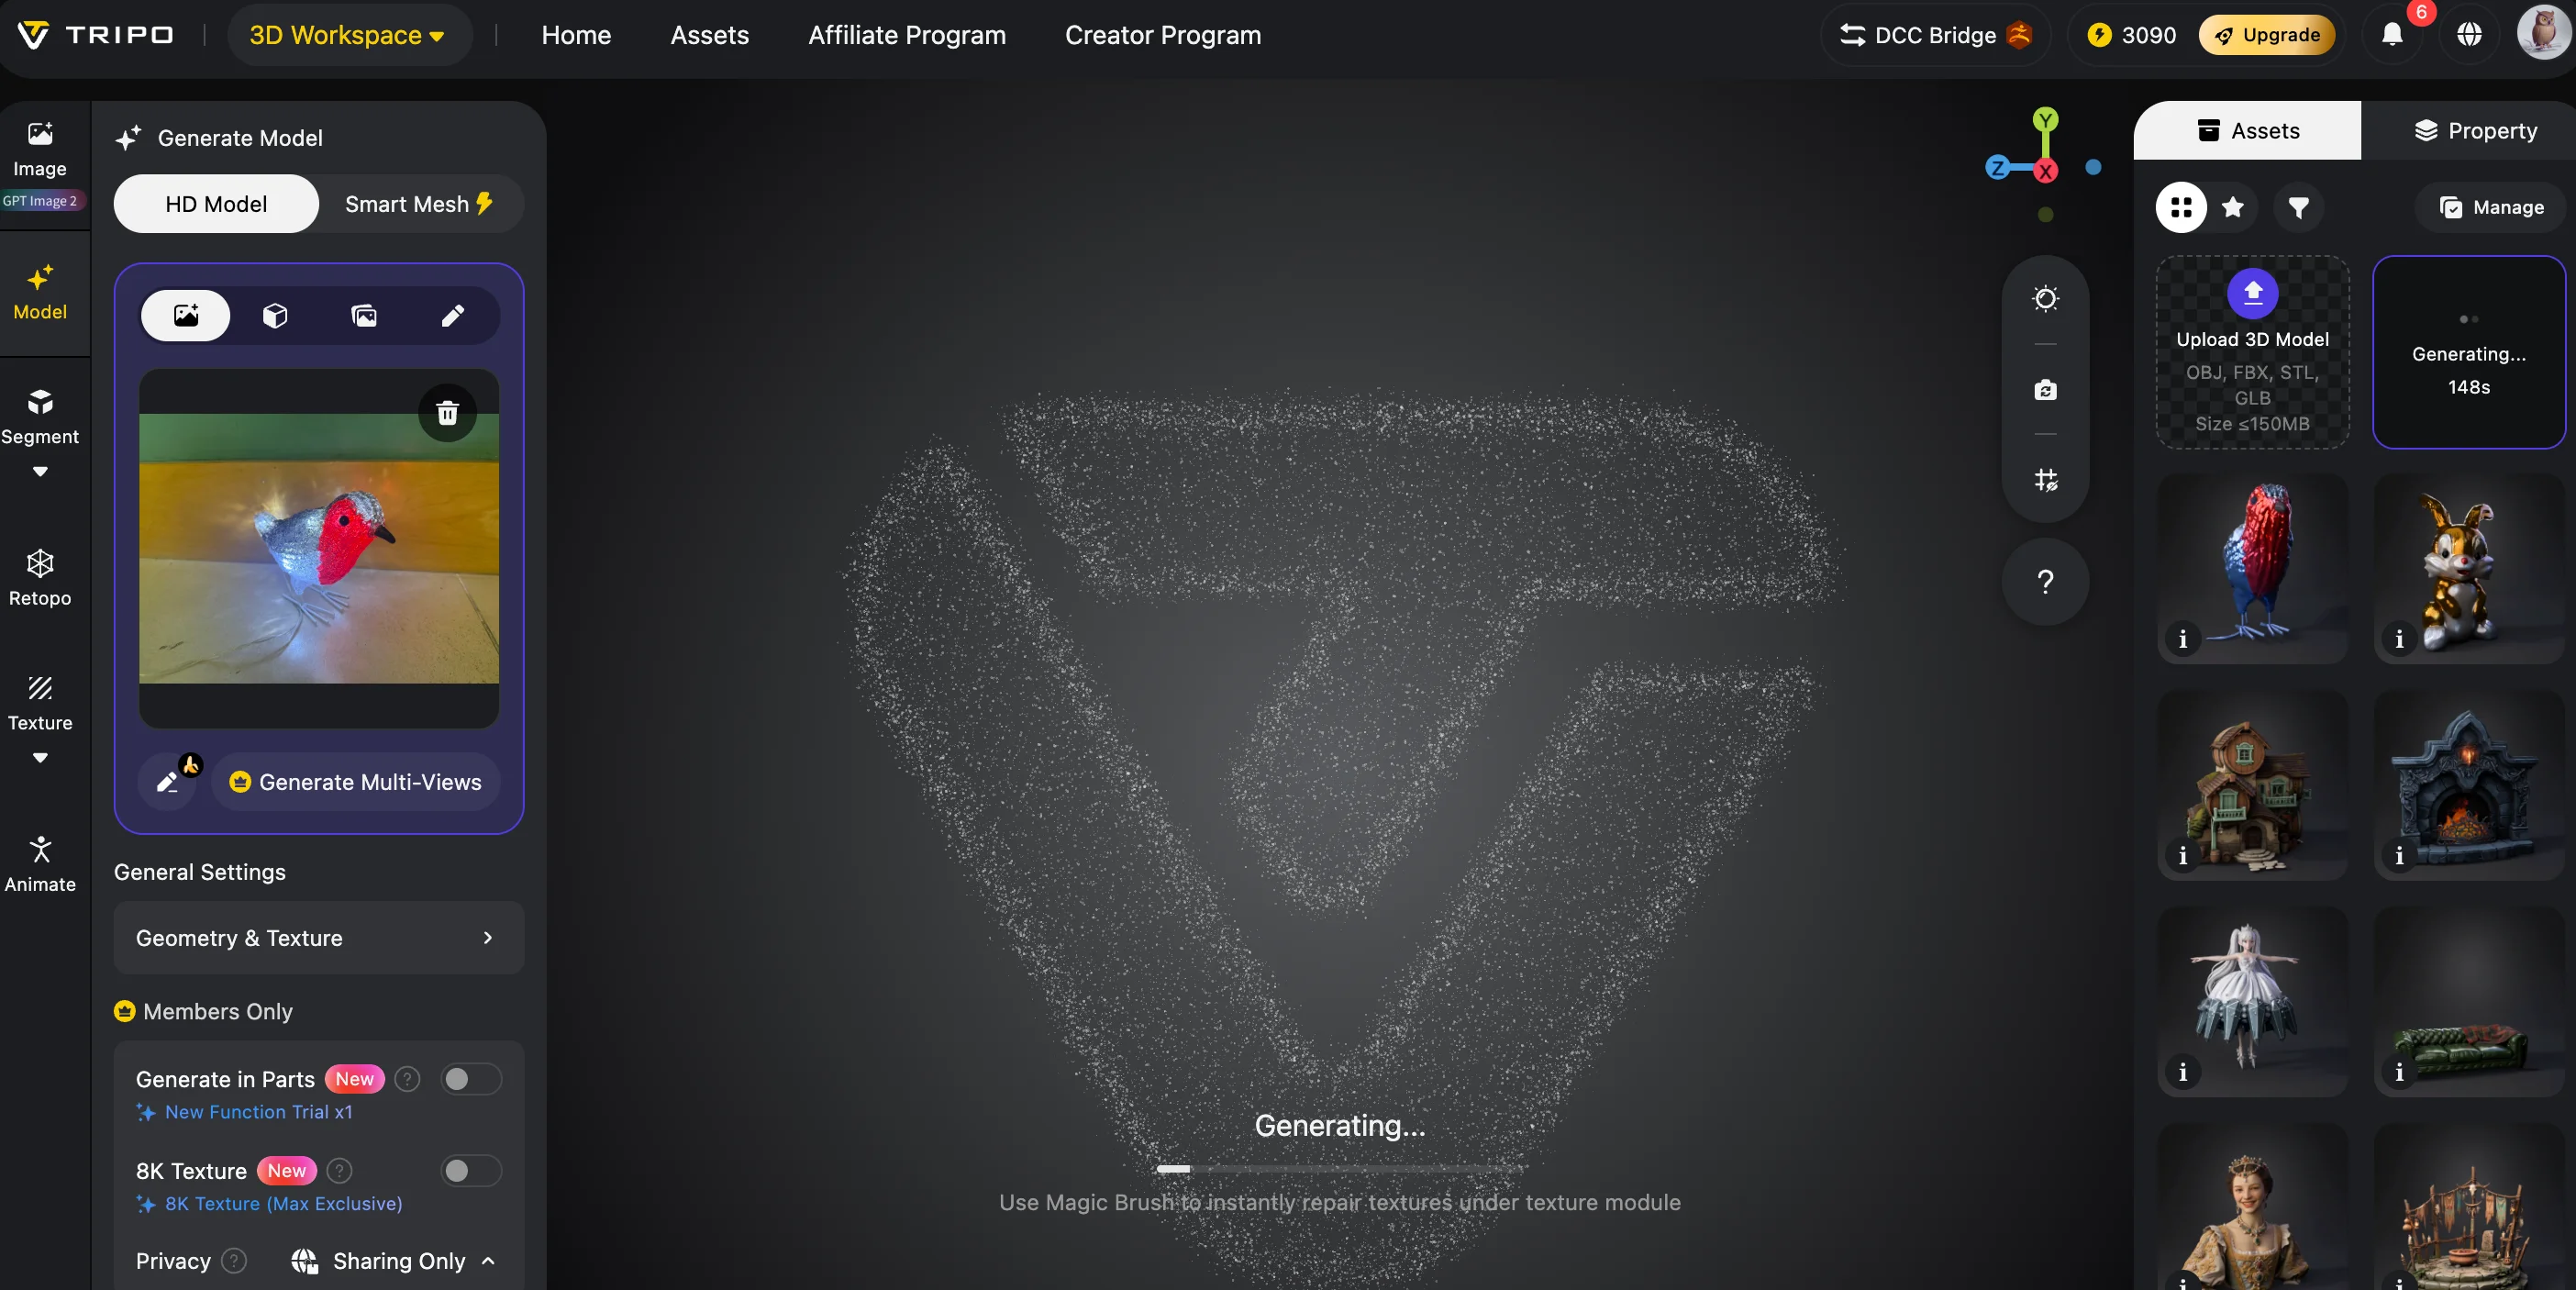
- Wait for the AI reconstruction process to complete.
- Preview the generated model.
- Check the mesh shape, surface details, and overall structure.
- Use Smart Mesh retopology if you need a lighter model.
- Export the final file as STL or 3MF.
The HD Model option is especially useful for printing because it can generate models with up to 2 million polygons, allowing small surface details to be preserved.
For standard 3D printing:
- STL is the safest choice. It contains geometry only and works with almost every slicer.
- 3MF is better when you need color information, metadata, or multi-material printing support.
A complete workflow from a real photo to a printable STL file can take less than ten minutes, without requiring Blender, CAD software, or traditional modeling experience.
For users searching for Nano Banana for 3D printing free, the good news is that Nano Banana is available through Google AI Studio with a Google account, and Tripo AI also provides a free plan for testing AI 3D generation.
Nano Banana to 3D Print: The Complete AI Workflow
Getting the Best Results — Nano Banana Prompt Tips for 3D Printing
The quality of your final Nano Banana 3D model depends heavily on how you create the first image.
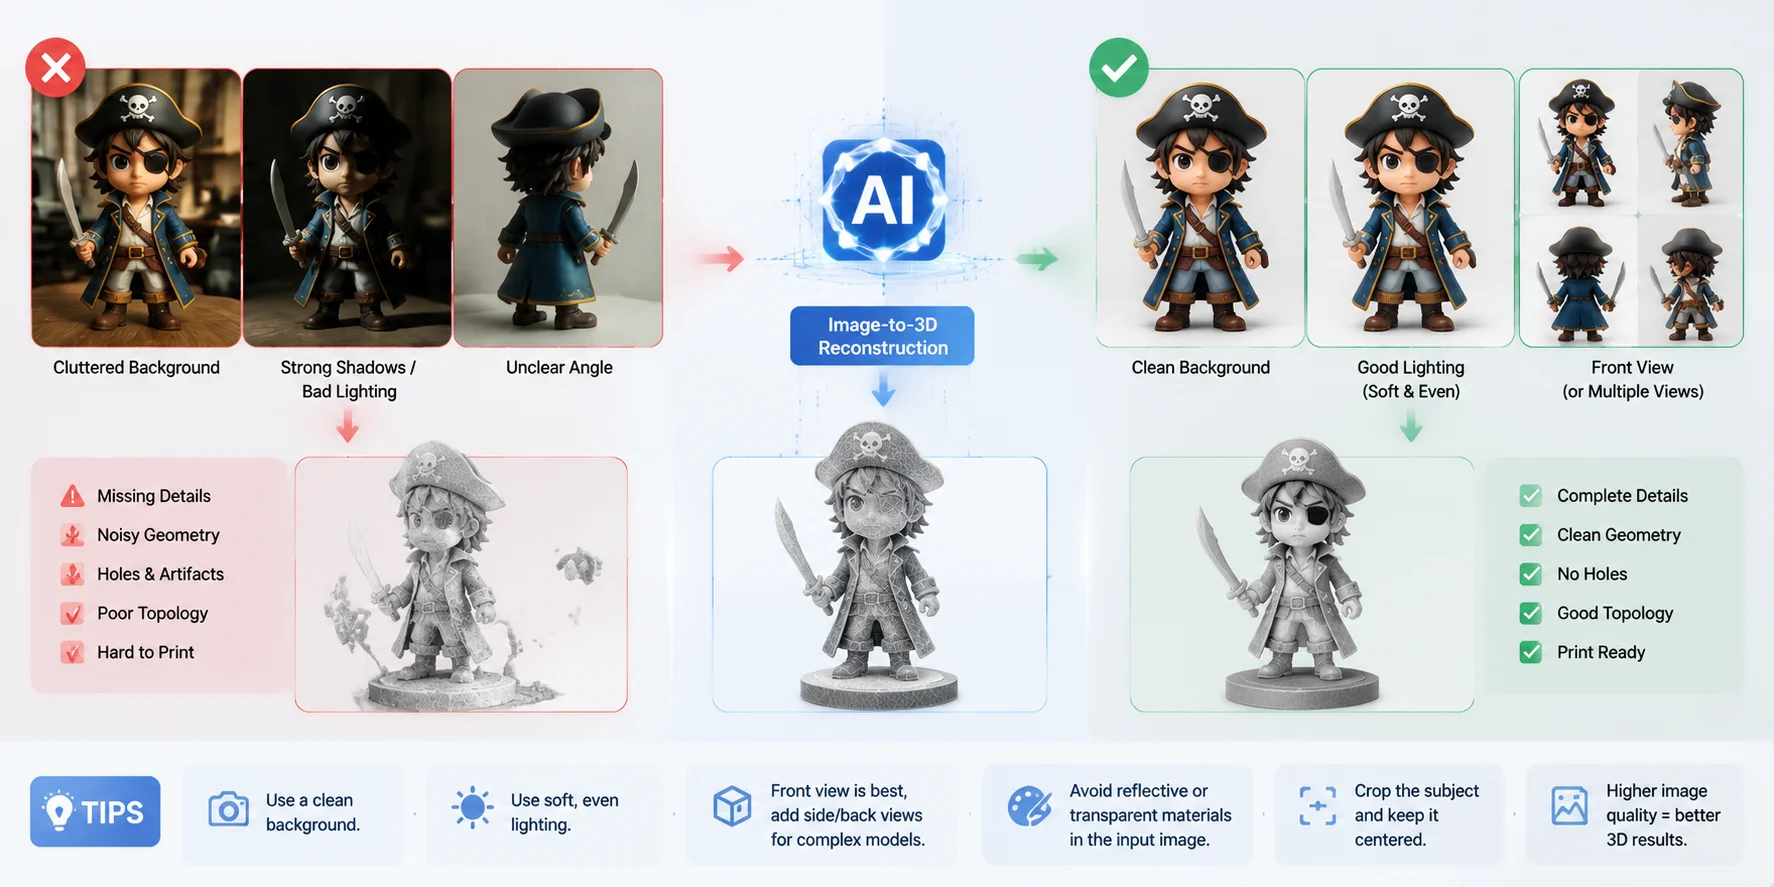
Prioritize Object Isolation
A messy background is one of the biggest causes of poor AI reconstruction.
Instead of:
"A dog sitting in a park"
Use:
"A dog figurine, isolated on a plain white background, full body visible"
The AI needs to understand the object's boundaries. Background objects, shadows, and reflections can confuse the reconstruction process.
If your original photo has clutter, first use Nano Banana to create a cleaner version before converting it into 3D.
Use Front-Facing Views
AI reconstructs 3D shape from visual clues. A front-facing or 3/4 view usually produces better results than extreme angles.
Avoid:
- Side-only profile images.
- Top-down views.
- Cropped objects.
- Hidden important features.
A straight view gives AI enough information to estimate missing geometry behind the visible surface.
Use Print-Friendly Style Prompts
Some image styles convert better into physical models.
Recommended prompts:
- matte surface
- clay render
- solid color
- simple materials
- clean studio lighting
Avoid:
- metallic reflections
- glass effects
- strong shadows
- lens flare
- cinematic backgrounds
These effects may look good in a 2D image but create confusing texture information during 3D reconstruction.
Use Multi-View Images for Complex Objects
Single-image reconstruction works well for simple objects and figurines. However, detailed characters, buildings, or products often benefit from multiple angles.
Tripo AI's Multi-view-to-3D option allows you to upload 2–4 images of the same object from different viewpoints. This gives the AI more information about hidden surfaces and improves geometric accuracy.
For complex Nano Banana figurine projects, multi-view input can significantly reduce problems with missing backs, distorted shapes, or incorrect proportions.
Nano Banana Prompt Tips for Better 3D Reconstruction
Optimizing Your Nano Banana 3D Model for 3D Printing
Generating a model is only the first step. A successful print requires proper optimization.
Polygon Count and Print Detail
Nano Banana itself does not control polygon count because it creates images, not meshes. The polygon density comes from the AI 3D generation stage.
Tripo AI HD Model can produce up to 2 million polygons, which is excellent for capturing fine details. However, more polygons do not always mean better prints.
Most desktop printers cannot reproduce extremely tiny details. For typical FDM printing:
- 0.2mm layer height is common.
- 500K–1M polygons are often enough.
- Excessively dense meshes increase file size without improving visible quality.
Use Smart Mesh retopology to reduce unnecessary geometry while keeping the overall shape.
Check Printability Before Export
Before sending your model to a slicer, check:
Non-manifold geometry
A printable model needs a closed surface. Holes or broken surfaces can cause slicing errors.
Thin walls
Very thin parts may disappear during printing.
For FDM printers:
- Features below 1mm are risky.
- Small fingers, ears, or accessories may need thickening.
Floating parts
Separate objects may require merging before printing.
Choose the Right File Format
STL
Best for:
- Standard FDM printing.
- Simple single-color models.
- Maximum slicer compatibility.
STL stores geometry only.
3MF
Best for:
- Multi-color printing.
- Modern printers.
- Preserving color and material information.
3MF files are also usually smaller and more efficient.
Plan Supports and Orientation
Even a perfect AI model requires good printing orientation.
For figurines:
- Tilt the model slightly.
- Reduce large unsupported areas.
- Add supports under arms, heads, or overhangs.
For higher-polygon outputs suited to resin printing, Tripo's high-detail model generator is the right tool.
What You Can Make with Nano Banana for 3D Printing
Custom Pet Figurines
One of the most popular uses of a Nano Banana workflow is turning a pet photo into a personalized 3D-printed figurine.
A practical workflow looks like this:
- Start with a clear reference photo. Use a single pet against a clean background with good lighting. A front or 3/4 view works best because it gives the AI a clear understanding of the head, ears, and body shape. Avoid heavy shadows, motion blur, or multiple animals in the same image.
- Generate a stylized image in Nano Banana. You can use a prompt such as:
Create a cute collectible vinyl toy version of this golden retriever, oversized head, simplified body proportions, smooth matte surface, centered pose, plain white background, front three-quarter view.
Keeping the background simple and asking for a centered pose usually produces an image that converts more cleanly into a 3D model.
- Convert the image into a 3D model with Tripo AI. Upload the generated image to Tripo AI's Image-to-3D workflow. If the model is intended for 3D printing rather than real-time rendering, choose the HD Model option to preserve small surface details before exporting.
- Export a printable file. Export the finished mesh as STL (or 3MF if your slicer supports it). Before slicing, inspect the model for thin features or floating geometry and repair them if necessary using your preferred mesh-editing software.
- Prepare the print. For resin printing, a layer height around 0.05 mm is a common starting point for miniature figurines. Add supports beneath overhanging parts such as ears, tails, or raised paws according to your slicer's recommendations. For FDM printers, larger figurines with thicker details generally print more reliably than very small models.
The exact workflow and processing time depend on image quality, model complexity, and the hardware or cloud service being used.
Character and Game Figurines
Artists can also turn original character concepts into printable collectibles.
Typical workflow:
Character sketch → Nano Banana stylized render → Tripo AI Image-to-3D → STL export → Resin or FDM printing
If you plan to animate the character later, creating the concept in a neutral T-pose or A-pose can make later rigging and mesh editing easier.
Architecture Models
Architects and designers can quickly create physical presentation models from concept images.
Typical workflow:
Building reference → Nano Banana isometric concept render → Tripo AI Image-to-3D → STL export
Simple massing models usually convert more reliably than highly detailed architectural facades, making this workflow useful for early-stage presentations and design reviews.
Product Prototypes
Industrial designers can visualize early product ideas before investing time in detailed CAD modeling.
Typical workflow:
Product sketch or reference photo → Nano Banana concept image → Tripo AI Image-to-3D → STL export → Prototype print
This approach works best for evaluating overall form and proportions. Functional mechanical parts that require precise dimensions should still be modeled in dedicated CAD software before manufacturing.
Nano Banana 3D Printing Workflow: From Image to Physical Object
Frequently Asked Questions
Can Nano Banana create 3D printable files?
No. Nano Banana creates 2D images, not printable STL or 3MF files. To create a physical model, you need to convert the image through an AI 3D generator that produces a real mesh.
How do I use Nano Banana for 3D printing?
Create a clean image in Google AI Studio using Nano Banana, upload it to an AI 3D generator such as Tripo AI Studio, generate the model, and export it as STL or 3MF for slicing and printing.
Is Nano Banana free for 3D printing projects?
Nano Banana can be used through Google AI Studio with a Google account. Tripo AI also offers free credits for testing AI 3D generation. Some advanced exports and higher-level features require a paid subscription.
What file format should I use for 3D printing from Tripo AI?
STL is the standard choice because every slicer supports it. Use 3MF when you need color information, multi-material printing, or additional print metadata.
What is the best material for Nano Banana figurines?
PLA is the easiest option for beginners because it is affordable and reliable. For small detailed figurines, resin printing usually produces better surface quality than FDM.
How accurate is a 3D model generated from Nano Banana?
Accuracy depends on the quality of the input image. Clean backgrounds, clear silhouettes, and multiple viewpoints improve results. For complex objects, multi-view images usually create more accurate geometry.
Do I need 3D modeling experience?
No. The entire workflow is browser-based:
Prompt → Generate image → Convert to 3D → Export → Print
No Blender or CAD experience is required.
Conclusion
Nano Banana handles the creative first step: turning photos and ideas into clean 3D-style references. Tripo AI handles the technical step: converting those images into printable 3D models.
Together, they create a faster path from imagination to physical objects — from custom figurines to prototypes and architectural models.
Ready to print your first model? Start with Tripo AI Studio, upload your Nano Banana image, and generate a printable 3D asset in minutes.
Explore available plans and free credits through Tripo AI Pricing.