How to Fix a Non-Manifold Mesh: Types, Detection & Repair (Blender, Maya + More)
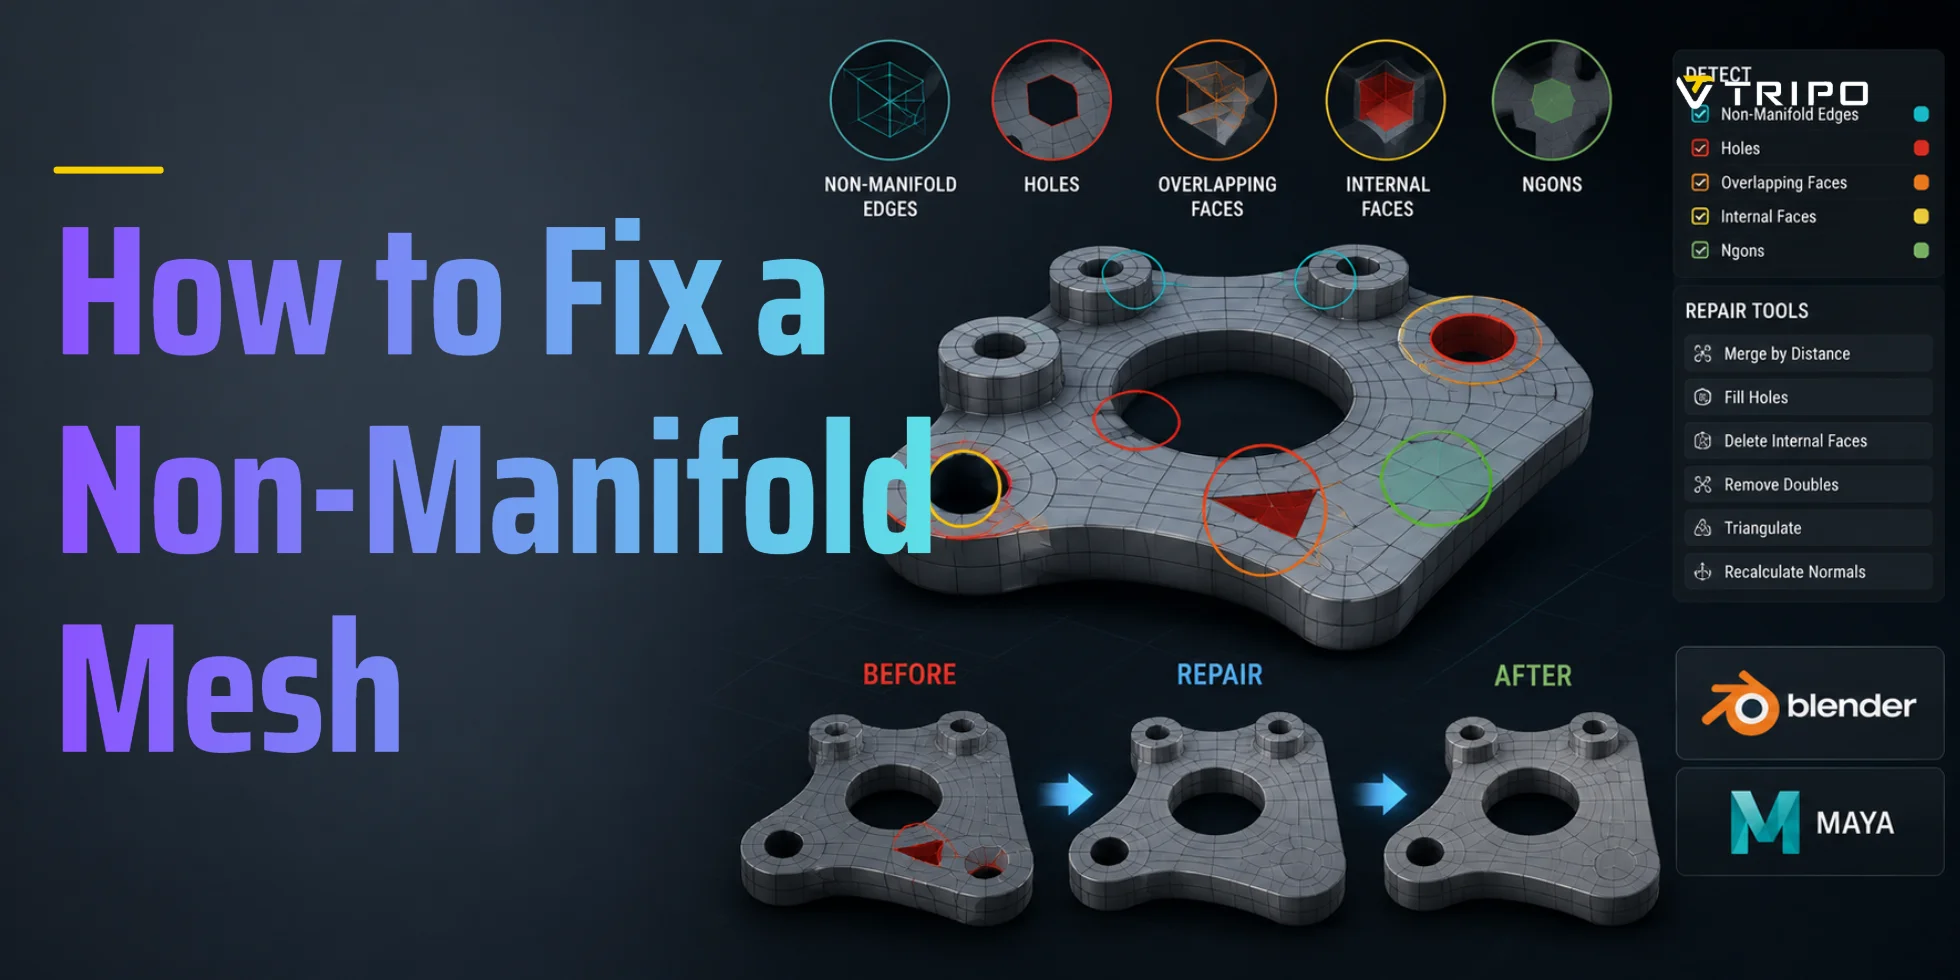
To fix a non-manifold mesh, open your model in Blender, enter Edit Mode, then go to Select → Select All by Trait → Non Manifold. Identify the issue type: open hole, T-junction, interior face, self-intersection, or isolated edge. Fill holes with F, delete interior faces, dissolve extra edges with Ctrl+X, then run the same detection again. For a faster fix, use Meshmixer’s Auto Repair All or Netfabb’s online repair tool.
What Is a Non-Manifold Mesh?
A manifold mesh is a closed, watertight 3D surface where every edge is shared by exactly two faces. It has no gaps, overlapping inner surfaces, or loose edges.
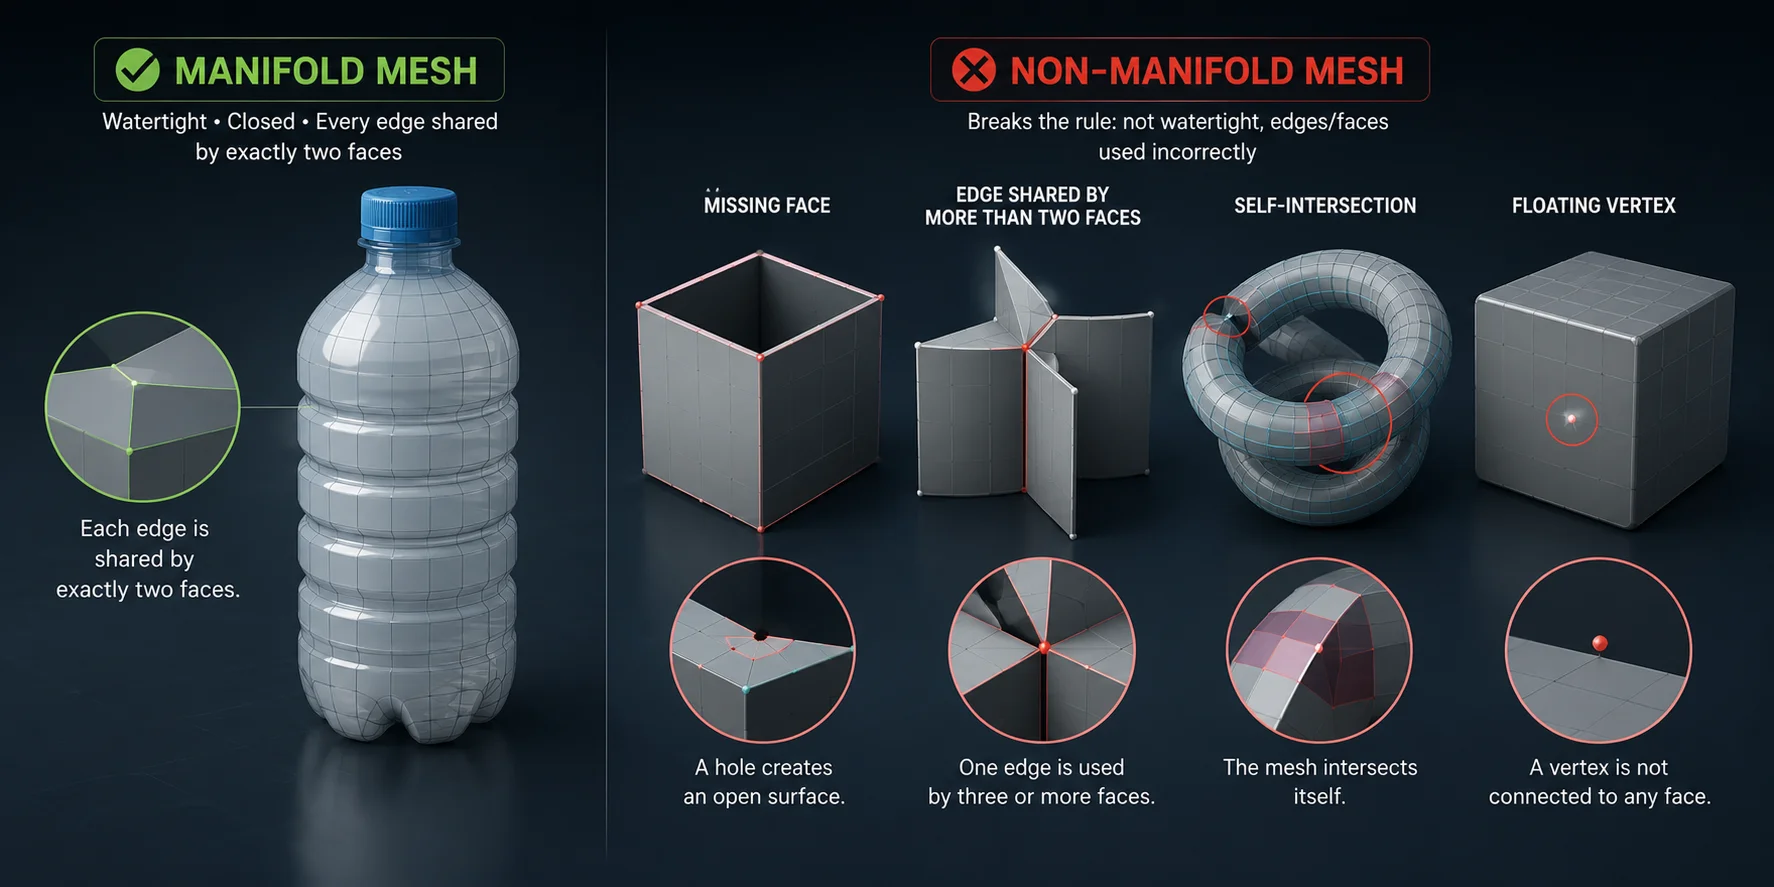
Think of a sealed water bottle: the surface is continuous, with no cracks or extra plastic layers inside. A non-manifold mesh breaks this rule. It may contain a missing face, an edge shared by too many faces, a self-intersection, or a floating vertex.
Why Non-Manifold Geometry Breaks Your Workflow
For 3D printing, slicers such as Bambu Studio, OrcaSlicer, Cura, and PrusaSlicer must identify the inside and outside of a model. Non-manifold geometry makes this ambiguous, causing missing walls, bad infill, failed supports, or rejected files.
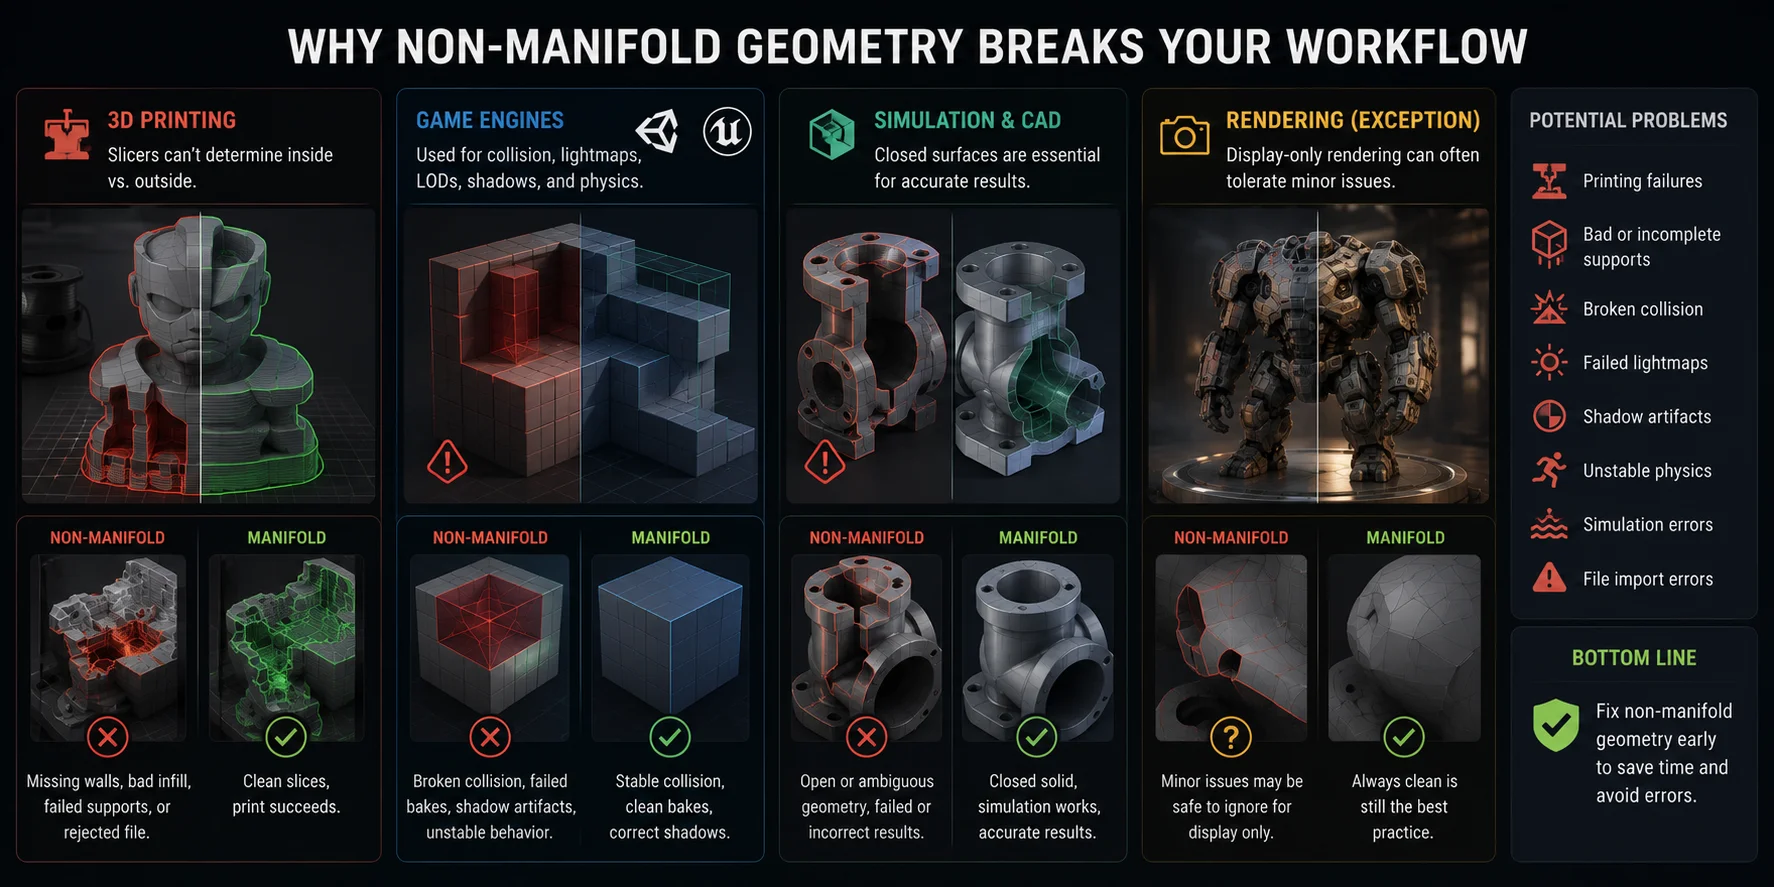
For game engines, Unity and Unreal use mesh geometry for collision, lightmaps, LODs, shadows, and physics. Non-manifold surfaces can cause broken collision, failed bakes, shadow artifacts, or unstable behavior.
For simulation and CAD, closed solids are essential. FEA, fluid simulation, and CAD tools may fail or return incorrect results if the surface is open.
One exception is display-only rendering. If the mesh is only rendered in Cycles or V-Ray, minor non-manifold warnings may be safe to ignore.
The Five Types of Non-Manifold Geometry
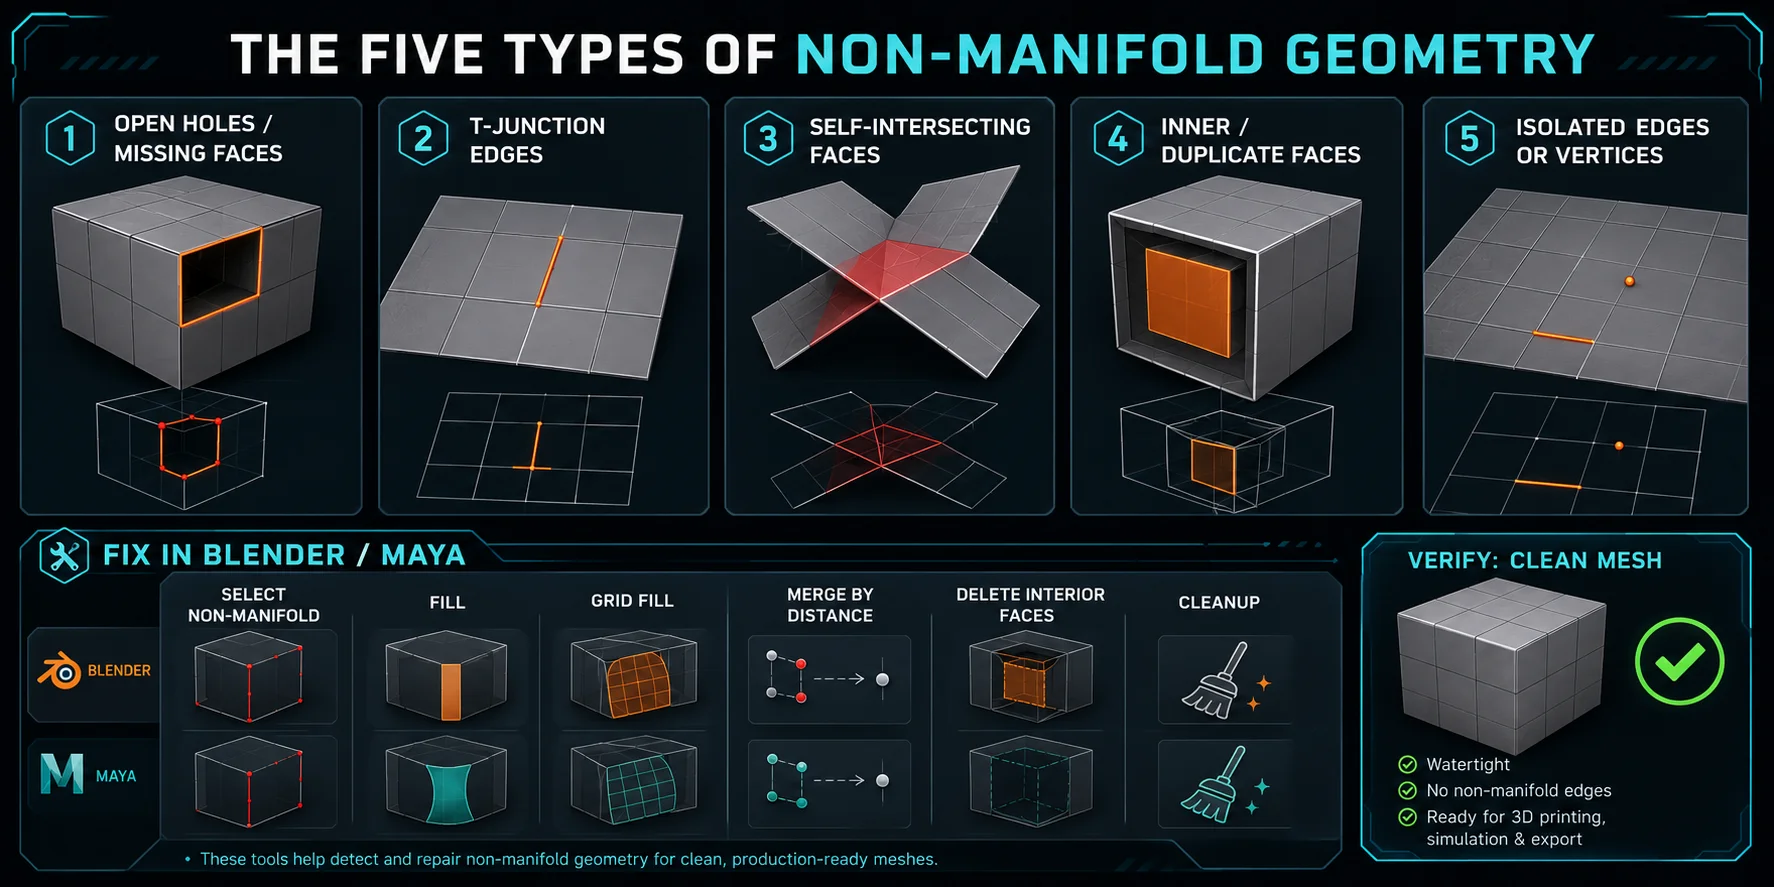
Type 1 — Open Holes / Missing Faces A missing face leaves boundary edges with only one adjacent face, often in imported OBJ or STL files. Fix it by selecting the boundary loop and pressing F, or use Grid Fill for cleaner topology.
Type 2 — T-Junction Edges A T-junction appears when edges meet without clean shared topology, often after merging meshes. Fix it with Ctrl+X to dissolve extra edges, or M → By Distance to merge nearby vertices.
Type 3 — Self-Intersecting Faces Self-intersections happen when geometry overlaps itself, usually after booleans, mirroring, or aggressive scaling. Fix with Boolean Union cleanup, or manually separate, delete, and re-weld the area.
Type 4 — Inner / Duplicate Faces Internal or duplicate faces often remain after booleans or bad imports. In Blender, use Select → Select All by Trait → Interior Faces, then X → Faces.
Type 5 — Isolated Edges or Vertices Loose edges or floating vertices may be invisible but still break validation. Use Select → Select All by Trait → Loose Geometry, then delete them.
How to Fix Non-Manifold Mesh — Step by Step
In Blender:
- Select the object and press Tab for Edit Mode.
- Choose Select → Select All by Trait → Non Manifold.
- For holes, select the boundary loop and press F; use Ctrl+F → Grid Fill for larger holes.
- For interior faces, use Select All by Trait → Interior Faces, then X → Faces.
- For T-junctions, use Ctrl+X or M → By Distance.
- Run the non-manifold check again. If nothing is selected, the mesh is clean.
In Maya: Use Mesh > Cleanup, enable Non-manifold geometry, then repair holes with Mesh Tools > Fill Hole or merge T-junctions with Mesh > Merge. Run Cleanup again to verify the repair.
Automatic Repair Tools
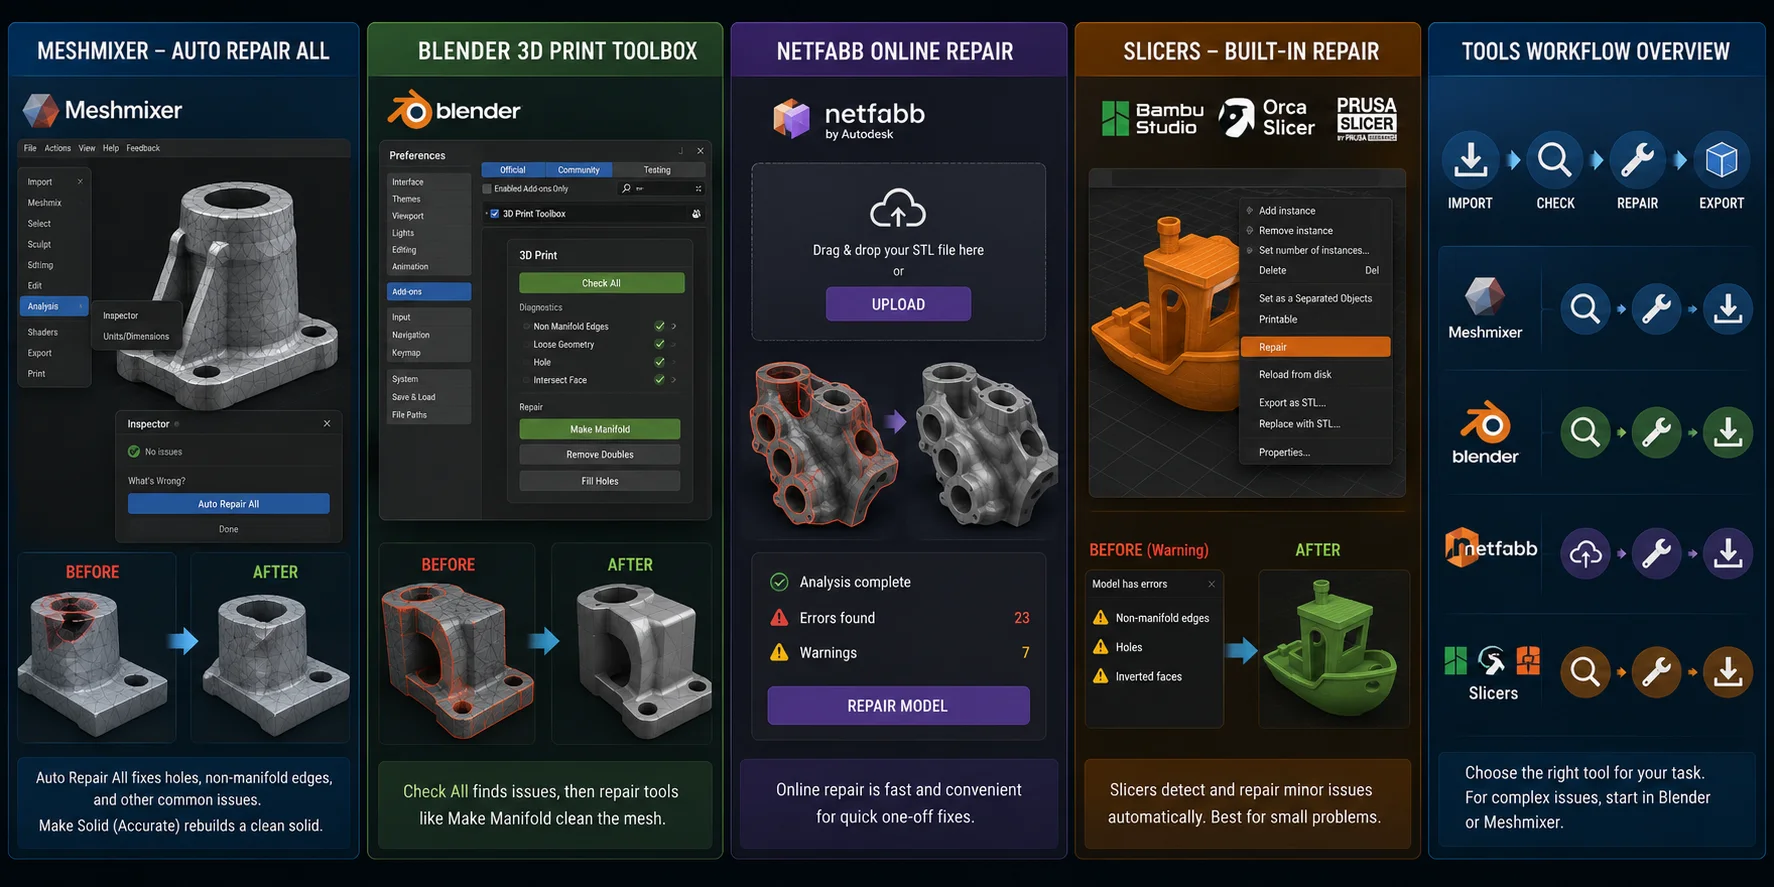
Meshmixer — Auto Repair All
Open the model, go to Analysis → Inspector, and click Auto Repair All. For deeper repair, use Edit → Make Solid in Accurate mode. This rebuilds the mesh as a clean solid, but may reduce fine surface detail.
Blender 3D Print Toolbox
Enable it under Preferences → Add-ons → 3D Print Toolbox. In Object Mode, open the 3D Print panel, click Check All, then use repair options such as Make Manifold.
Netfabb Online Repair
Upload your STL, run the repair, and download the fixed file. This is useful for quick one-off fixes without installing extra software.
Bambu Studio / OrcaSlicer / PrusaSlicer
Modern slicers often detect non-manifold files automatically. Right-click the object and choose Repair. This works for minor issues, but severe geometry problems should still be fixed in Blender or Meshmixer.
Why Tripo AI Outputs Clean Manifold Geometry
Fixing non-manifold geometry is reactive: you are cleaning errors after they already exist. Tripo AI takes a preventive approach with Smart Mesh, which helps generate cleaner, manifold-friendly geometry from the start, reducing repair work before printing, editing, or engine export.
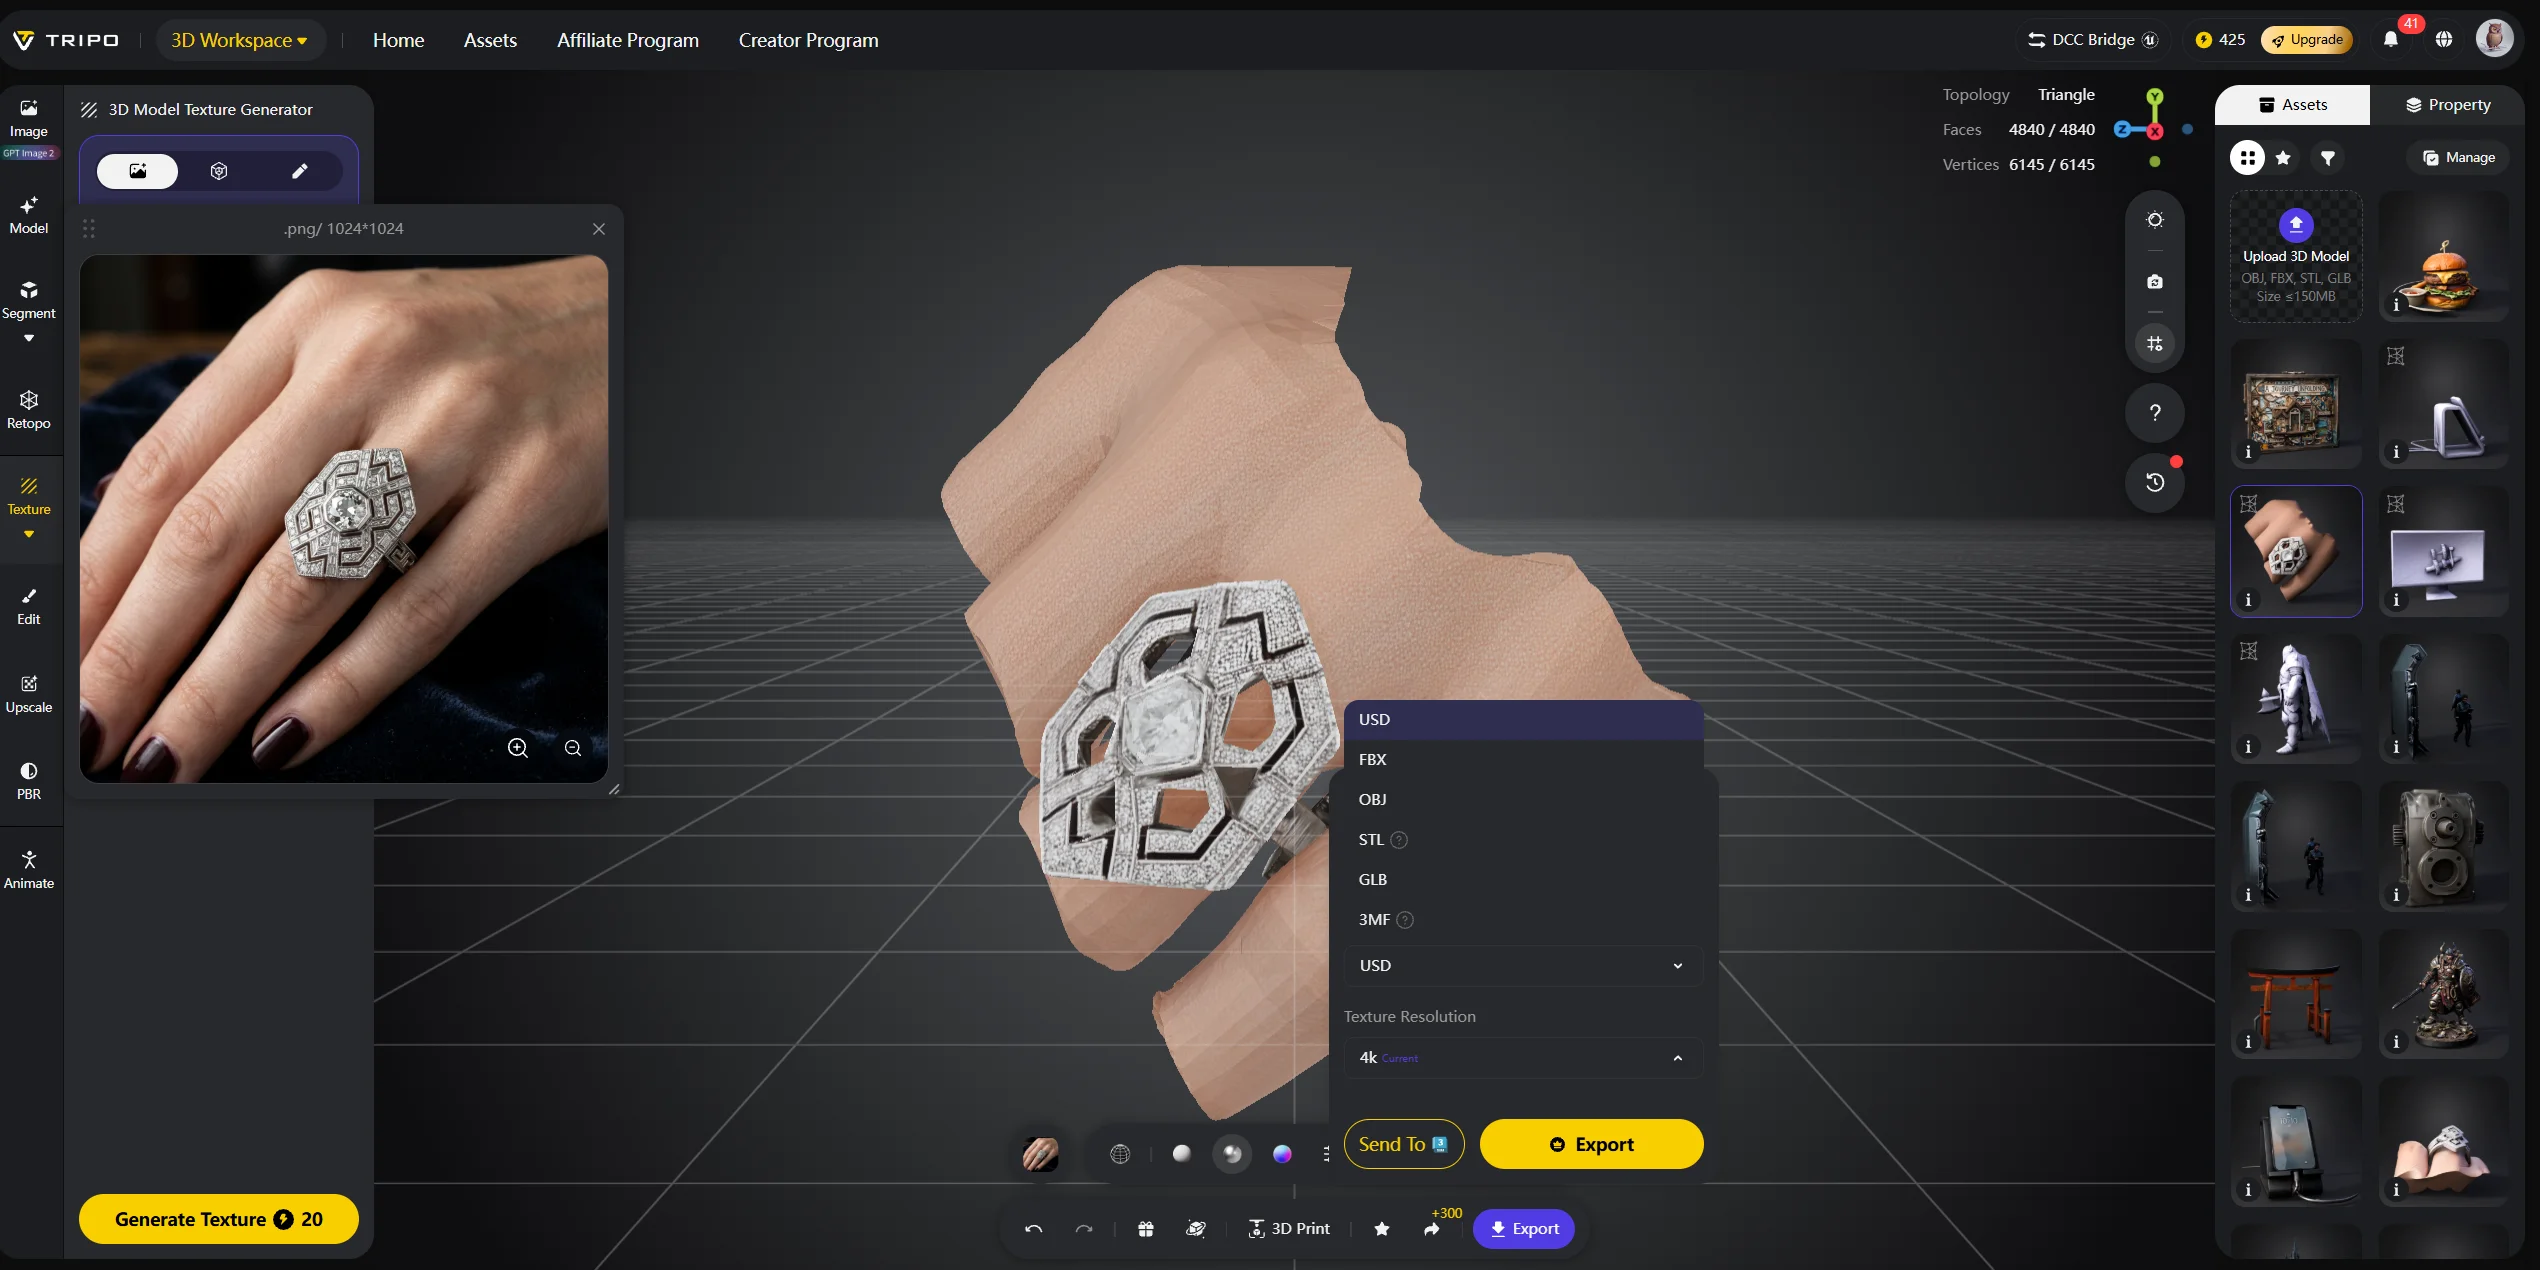
For messy existing assets, AI Quad Remesher can rebuild triangle-heavy topology into a cleaner quad-based structure that is easier to edit, animate, and prepare for downstream use. If you regularly fix imported models, starting with Tripo AI can remove a whole category of cleanup work.
Try Tripo AI Studio or see Tripo AI Pricing.
Frequently Asked Questions
Why is my mesh non-manifold?
Non-manifold geometry usually comes from booleans, missing faces, overlapping surfaces, duplicate interior faces, or import/export errors. Sculpting and decimation can also create loose vertices or zero-area faces.
Should you repair non-manifold edges?
Yes, if the model is for 3D printing, game engines, CAD, or simulation. Display-only rendering is the main exception.
Can I still 3D print something with non-manifold edges?
Sometimes. Modern slicers can fix minor issues, but severe non-manifold geometry may cause missing walls, bad infill, or failed prints. Repairing first is safer.
How to fix non-manifold edges in Meshmixer?
Open the model in Meshmixer and go to Analysis → Inspector. Use Auto Repair All for quick fixes, or Edit → Make Solid for deeper reconstruction.
Conclusion
Non-manifold errors are common but usually fixable. Identify the type, repair it manually or automatically, then verify the mesh again.
To reduce cleanup, Tripo AI’s Smart Mesh helps generate cleaner geometry from the start. Try Tripo AI Studio or review Tripo AI Pricing.