Food Model Generator: How to Make 3D Food Models
TL;DR
- A food model generator can create flat images or reusable textured 3D assets.
- Use a dish photo for accuracy and text prompts for concept exploration.
- Keep web and AR models light; preserve detail for renders and printing.
- Choose GLB for online use and 3MF for color-aware printing.
- Repair liquids, glossy sauces, fused ingredients, and scale before publishing.
A food model generator turns a text prompt or dish photo into a food asset. It may create a flat JPG or PNG image, or, with an AI 3D tool, a textured model you can place in a menu, AR preview, delivery-app listing, ecommerce page, animation, or game scene.
Online food delivery is projected to reach USD 483.9 billion by 2032, while the augmented reality market is forecast to grow at a 25.35% CAGR from 2026 to 2031. These are downstream markets, not estimates of the 3D food-model segment. This guide explains how to choose between 2D and 3D, generate a model from text or a photo, select an export format, and repair common food-specific problems.
What Is a Food Model Generator?
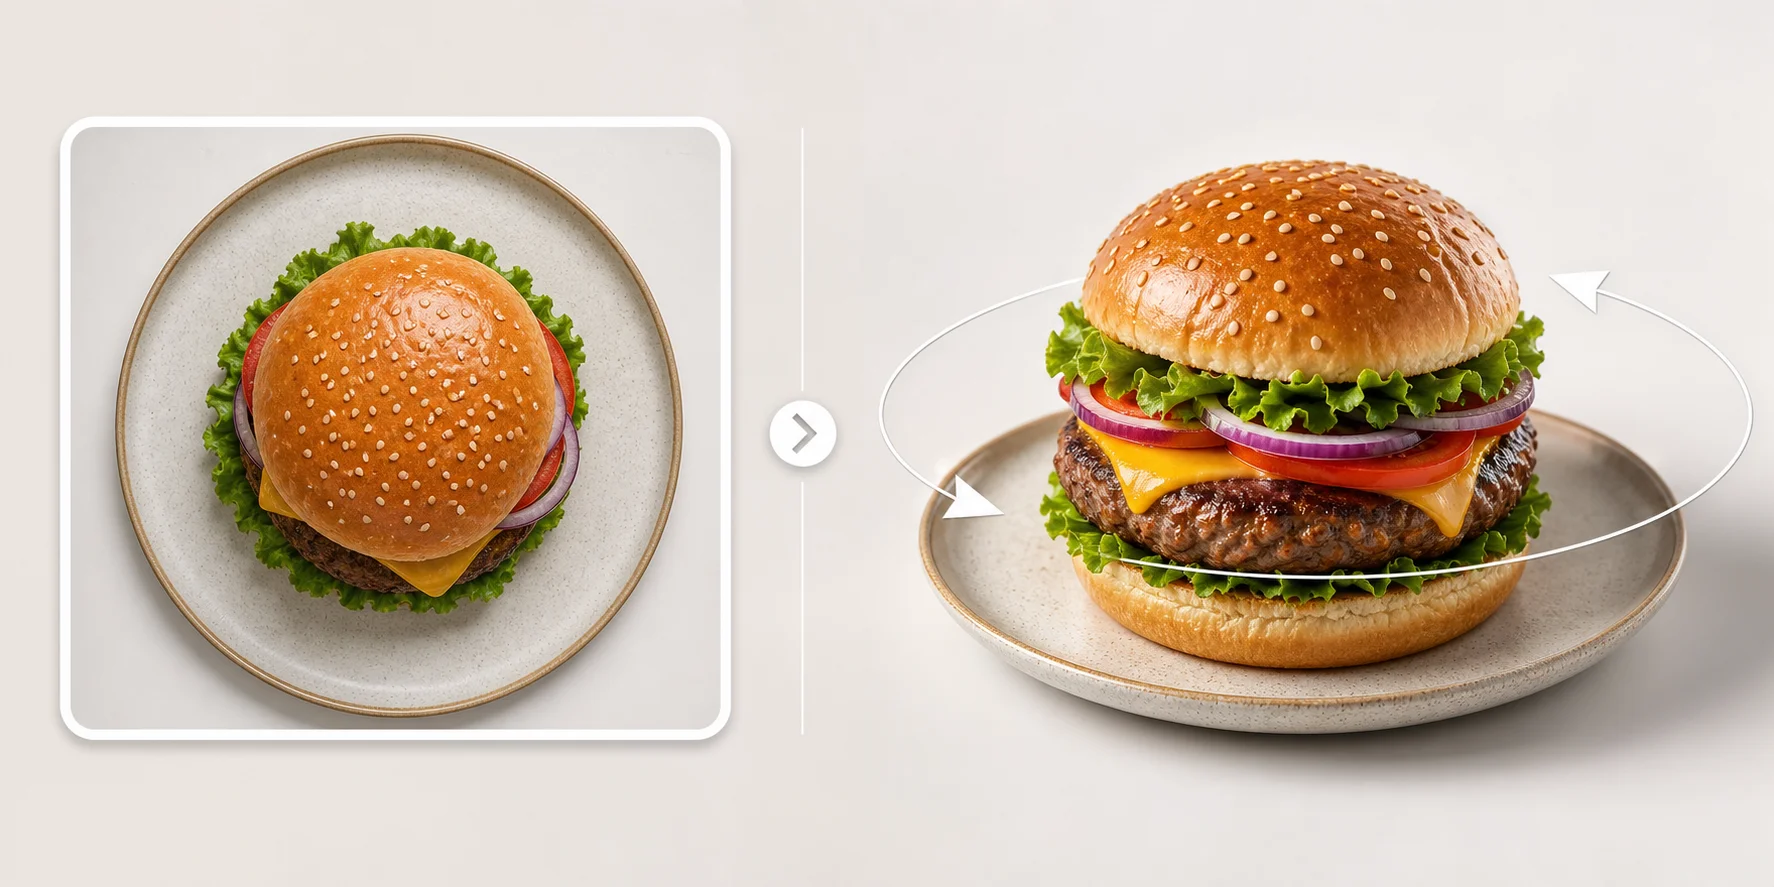
“Food model generator” can describe two different tools. An AI food image generator creates a flat JPG or PNG for social media, printed menus, advertising, recipe pages, or early plating concepts. An AI 3D model generator creates a textured digital object that can enter an AR experience, web viewer, game engine, animation scene, or 3D-printing workflow.
People search the same phrase for both because the desired subject is food, but the required deliverable is often unclear. The download format reveals the difference: an image generator gives you pixels, while a 3D generator gives you geometry.
A usable 3D food asset normally contains a mesh, a texture map, and sometimes PBR materials. The mesh is the object’s geometric shape. The texture map wraps color and surface detail around it. PBR, or physically based rendering, controls how the surface reacts to light, which makes bread look rough, ceramic look smooth, and sauce look glossy.
You can begin with text-to-3D or image-to-3D. Text-to-3D suits fast concepts, such as “a stacked cheeseburger with a sesame bun.” Image-to-3D is better when you need the model to match a real dish, plate, portion, or restaurant presentation. Multiple consistent photos can provide stronger shape information than one view. This matters most for layered dishes, because a single camera angle cannot clearly show every gap, underside, or overlapping ingredient. Tripo currently supports both text-based generation and single-view or multi-view image inputs.
2D Food Images vs 3D Food Models: Which Do You Need?
| Decision | 2D food image | 3D food model | Practical takeaway |
|---|---|---|---|
| Output | PNG or JPG | GLB, FBX, OBJ, STL, USDZ, or 3MF | Check the required file before choosing a tool |
| Best for | Social posts, ads, blogs, and printed menus | AR ordering, web products, games, animation, and printing | Choose based on the final channel |
| Can you rotate or relight it? | No | Yes | New views need geometry |
| Typical turnaround | Seconds to a few minutes | Minutes, plus cleanup and optimization | 3D takes longer but supports reuse |
| Where it breaks | New angles require another image | Shape, scale, materials, and performance need checking | Both formats still need review |
Choose 3D when the result must rotate, receive new lighting, enter a 3D or AR scene, or go to a printer. Choose 2D when you need one static frame and no editable geometry.
One 3D asset can serve several channels. Render consistent views from the same model, then change the camera or lighting without changing the dish’s portion, plating, or props.
How to Generate a 3D Food Model From Text or a Photo
Step 1 — Pick Your Input: A Photo or a Prompt
For an existing dish, take a clear photo from the front and slightly above, near a 45-degree angle. Keep the whole plate visible, use soft lighting, and remove hands, cutlery crossings, steam, and distracting backgrounds.
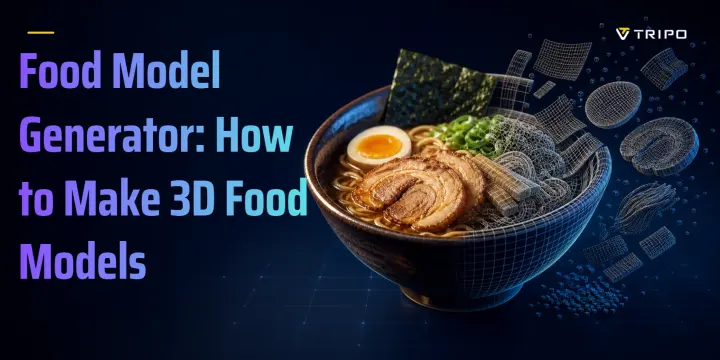
For text-to-3D, include four elements: dish name, plating, container, and style. A useful prompt is: “A bowl of tonkotsu ramen with chashu slices, soft egg, nori, in a black ceramic bowl, photorealistic.”
If all you have is a dish name, a text to 3D model workflow can produce a rough shape to iterate on. If you already photographed the plate, an image-to-3D converter gives the generator a visual reference for the dish and its proportions.
Step 2 — Generate the Base Mesh
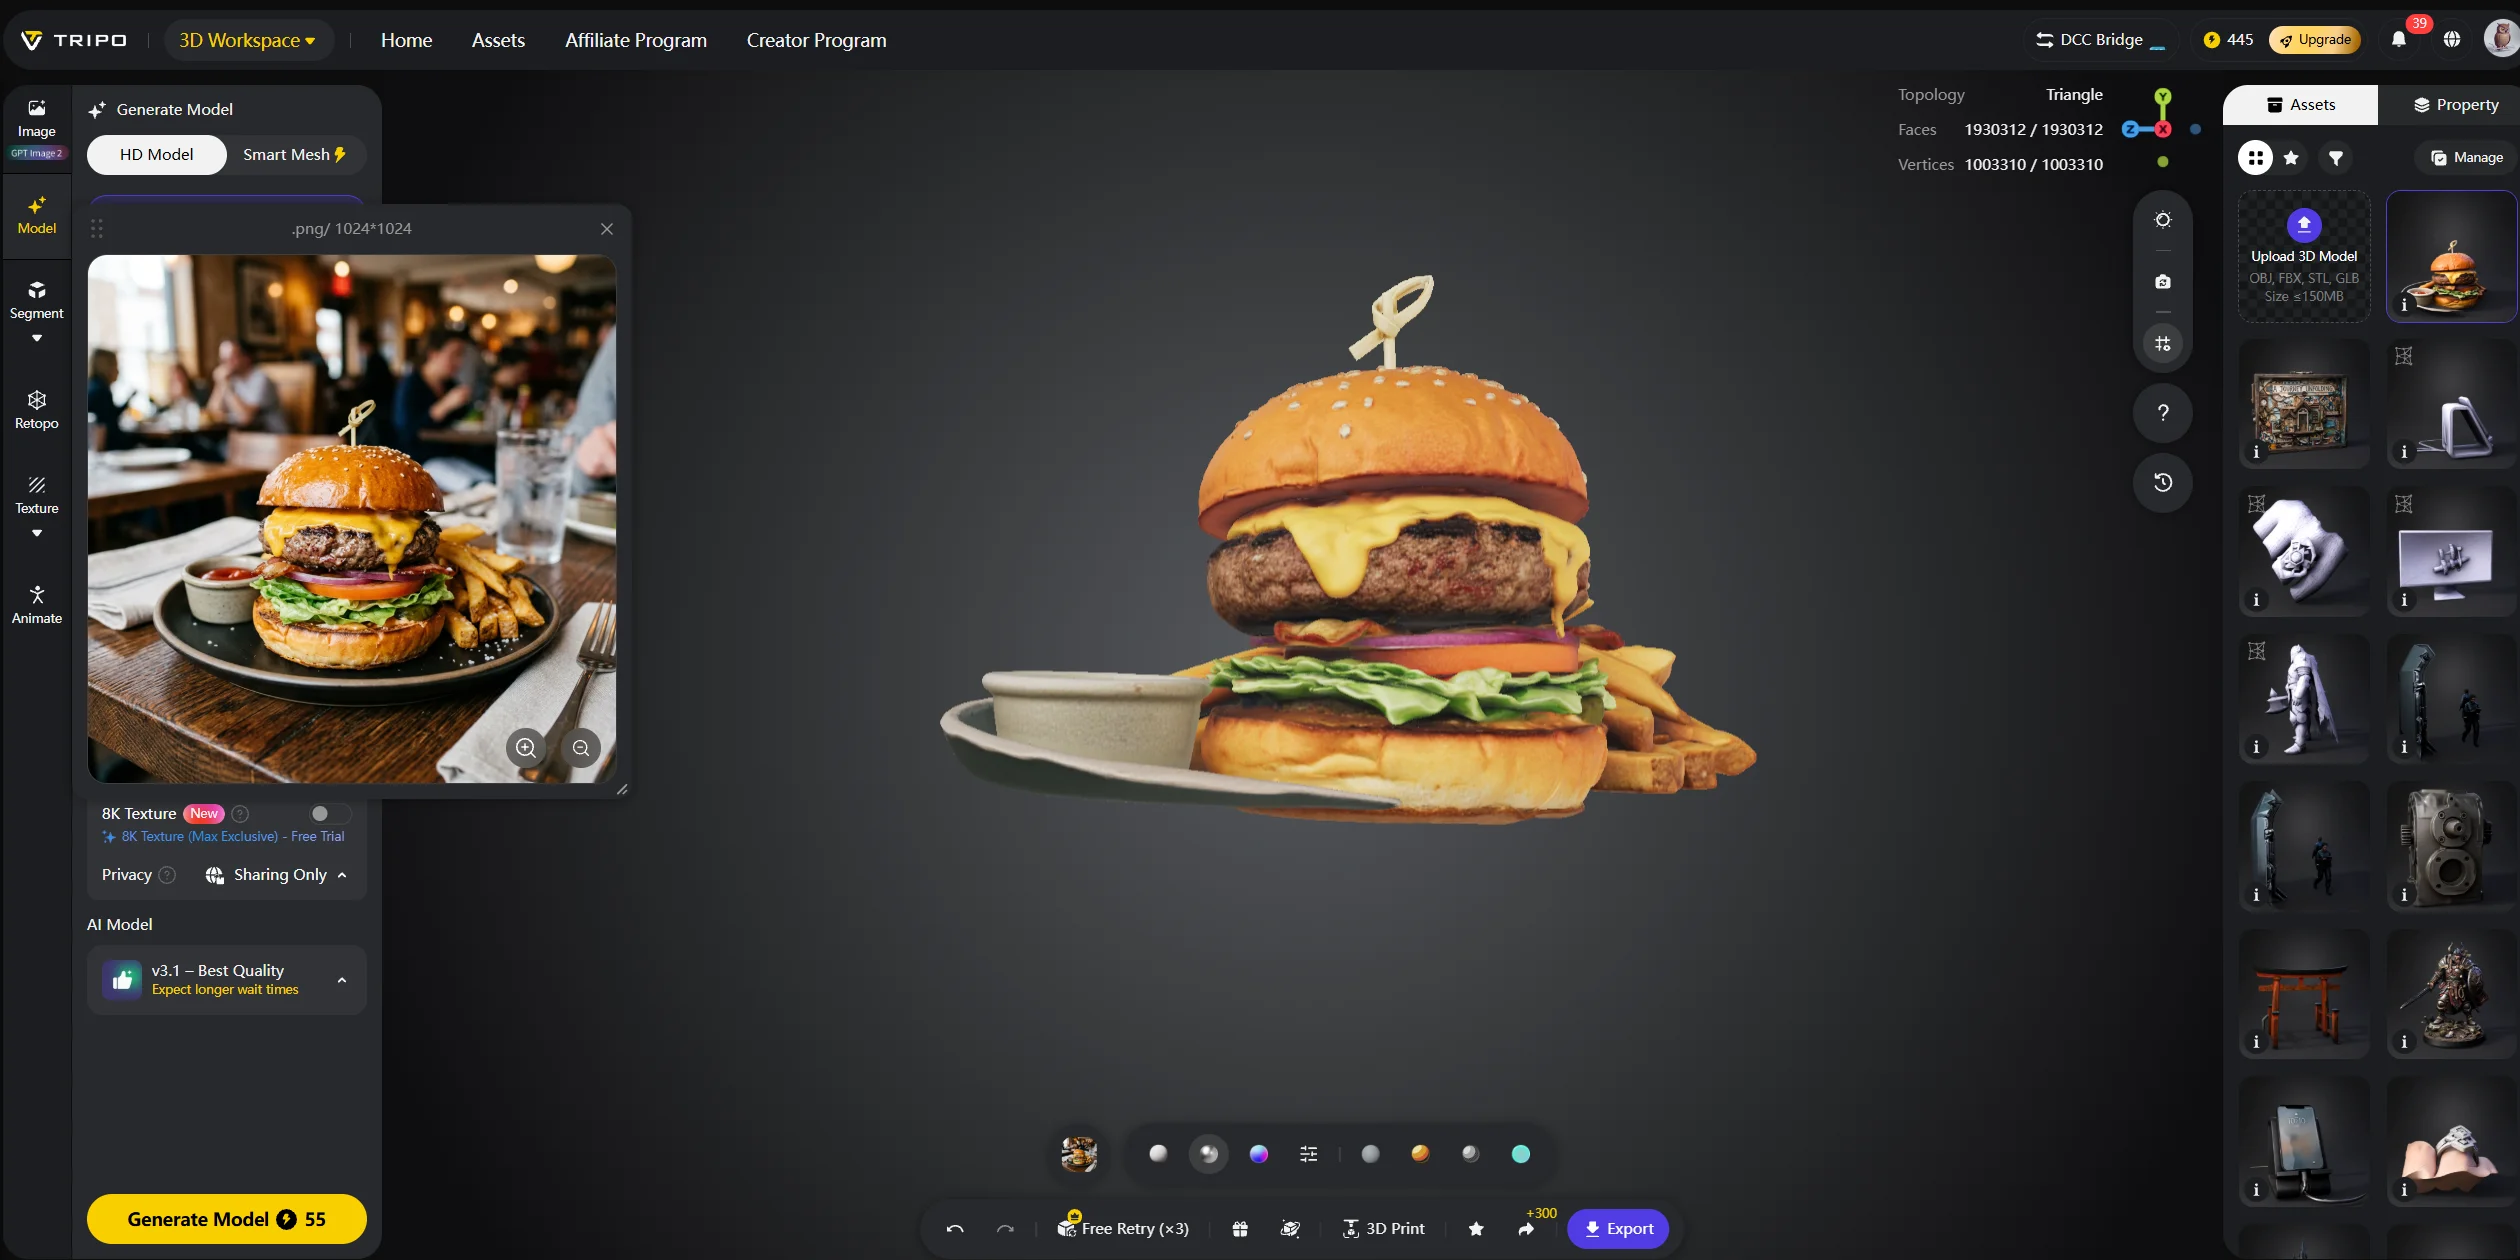
In Tripo AI Studio, use Generate Model → upload an image or enter a prompt → choose an available model version → Generate. When the result appears, rotate the preview and inspect the underside, rear, ingredient layers, and container shape before refining textures.
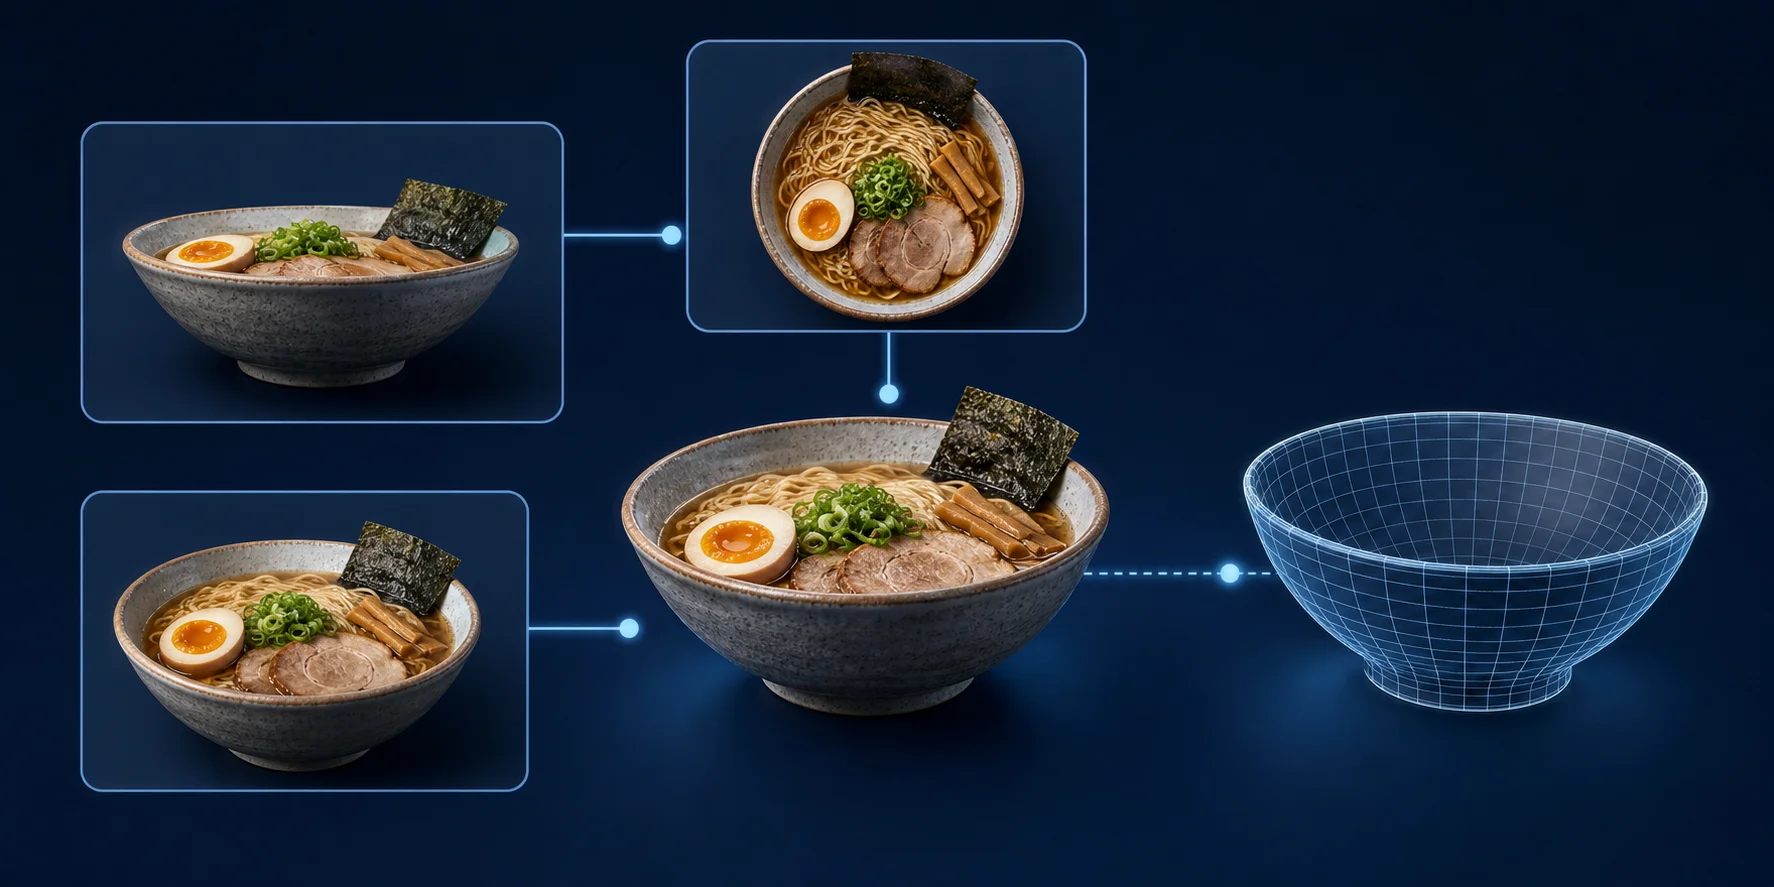
Use several consistent photos when hidden structure matters. Keep the dish, camera distance, lighting, and plating unchanged between views. Extra angles provide more visual information about burger layers, sushi pieces, garnish, or bowl contents, but you should still inspect and repair fused parts.
Step 3 — Add Texture and PBR Materials
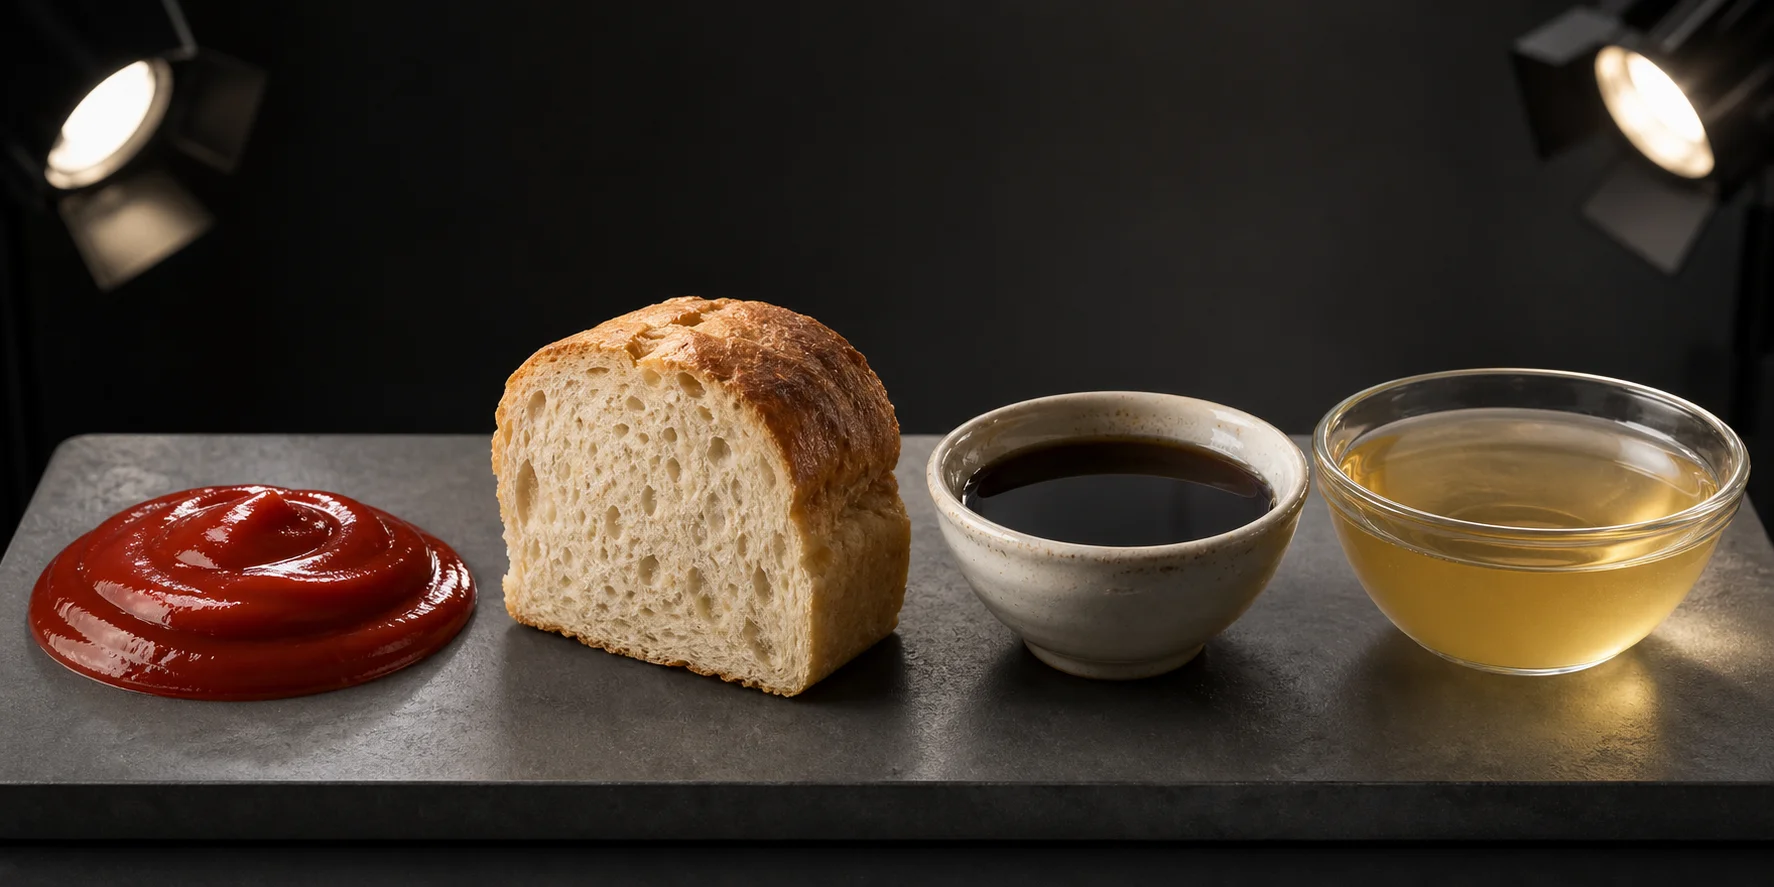
Apply global AI texturing with one pass, then inspect ingredient boundaries and surfaces hidden from the original camera. Use a local brush tool to repaint only the incorrect area instead of regenerating the whole asset.
Let PBR materials create highlights on sauce, syrup, icing, or glaze. Do not paint a fixed white reflection into the base-color texture, because it will stay in place when the light moves. The roughness map should control whether a surface appears dry and matte or wet and reflective.
Tripo’s AI texturing workflow supports global texturing, local Magic Brush corrections, and PBR maps such as base color, normal, and roughness.
Step 4 — Control the Polygon Budget
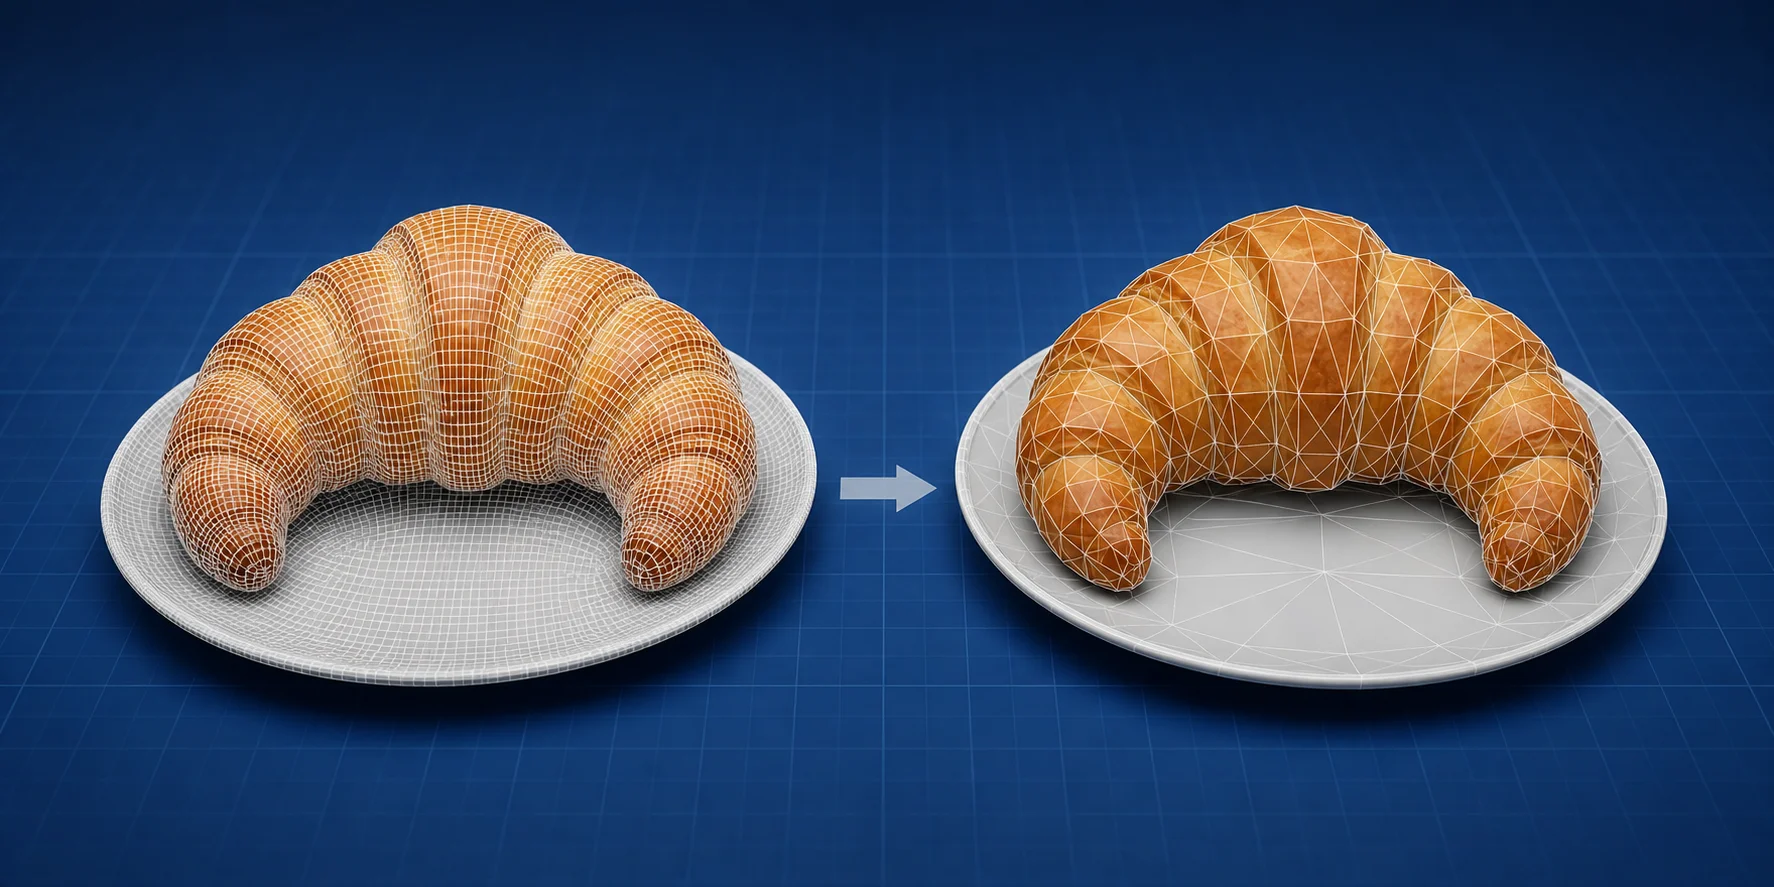
Use lower polygon counts for online menus, delivery apps, AR previews, and mobile games. These channels need fast loading, smooth rotation, and stable performance on ordinary phones.
Keep more geometry for close-up advertising renders, printed display models, or detailed hero assets. A print or still render can tolerate geometry that would make a mobile product page slow.
Keep one high-detail master and generate a separate optimized version rather than damaging the original. Preserve more faces around curved bowl edges, layered ingredients, pastry folds, garnishes, and detailed meat surfaces.
Step 5 — Export in the Format Your Target Needs
Confirm the model’s scale, orientation, textures, and material links before downloading. Export for the final destination instead of choosing a format first and converting repeatedly later.
Create separate copies when the same dish must support several channels. A lightweight online menu model and a detailed printing model should not use the same polygon budget.
**Try it in **Tripo AI Studio →
Which Export Format Should You Use for 3D Food Models?
| Format | Use it for | Watch out for |
|---|---|---|
| GLB | Web listings, AR/VR, and game engines; textures can stay in one file | Reduce mesh and texture size |
| USD | VFX, animation, and collaborative scene workflows | Application support can vary |
| FBX | Games and professional 3D animation software | Materials may need relinking |
| OBJ | Broad 3D editing compatibility and basic print preparation | Textures often remain separate |
| STL | Standard 3D printing | Geometry only; no color or texture |
| 3MF | Modern color-aware 3D printing | Confirm slicer and printer support |
Start with the destination: browser, engine, printer, or iOS preview. Use GLB for an online menu or interactive product page, USD for scene-based production, FBX for many game pipelines, and OBJ for broad editing compatibility. Use STL when the printer only needs geometry. Choose 3MF when a compatible color-printing workflow should retain richer visual information.
STL is a poor choice for a colored display model because it carries geometry only. It does not store the sauce color, grill marks, bread texture, garnish, or other surface artwork. A 3MF file can retain richer printing information when the selected slicer and printer support it.
If a client sends an OBJ but your pipeline requires GLB, a browser-based 3D file converter can handle the conversion without opening a desktop 3D editor.
Tripo officially lists GLB, USD, FBX, OBJ, STL, and 3MF as its six core export formats.
Check download eligibility before promising a handoff. Exporting requires an eligible subscription even when credits remain. Basic can export v2.5 models only; exporting v3.0 or v3.1 models requires an active paid subscription. Before commercial delivery, confirm the current license and make sure you have rights to the input images and other source material.
Where 3D Food Models Actually Get Used
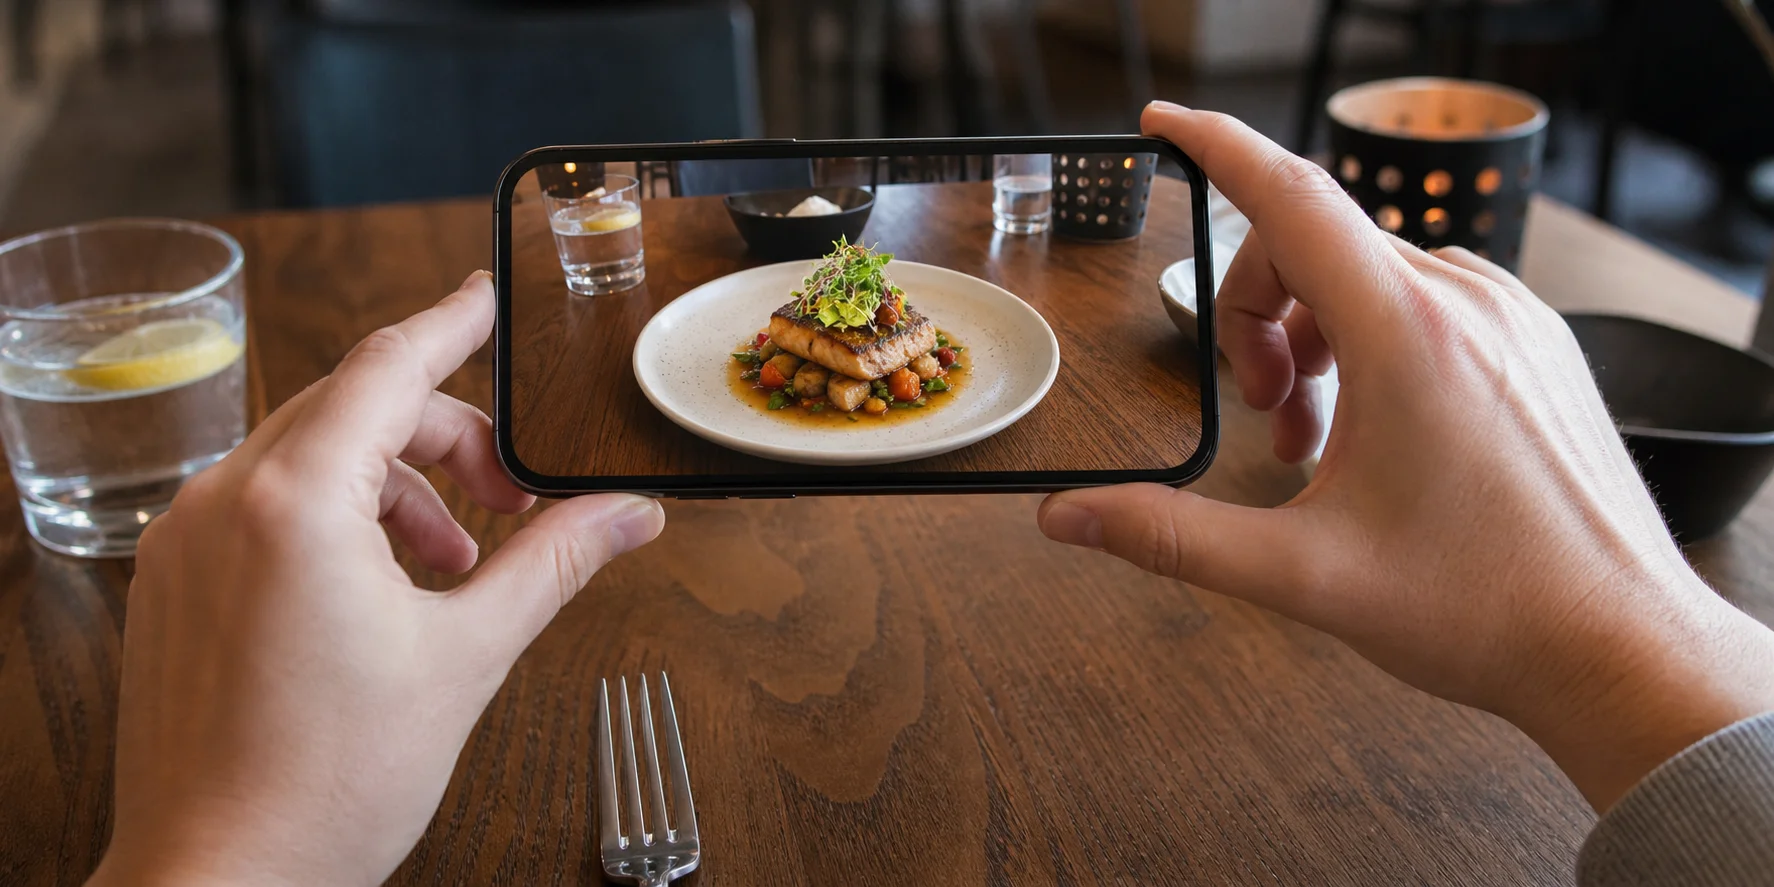
These use cases need an asset that can be reused, viewed from different angles, or placed inside another scene:
- AR menu previews: Customers place a dish on their table at approximate scale. Unlike a picture, the model lets them inspect size and angle before ordering.
- Delivery-app and ecommerce listings: A rotatable view reveals the food from more than one angle. The same model can also render consistent still images across the site.
- Digital signage and 3D menu boards: One asset can drive animations on several screens. A static image cannot provide the same reusable camera movement without another shoot.
- Game and app props: Cafés, restaurants, and simulation games need coordinated sets of lightweight dishes. Real geometry can be moved, lit, repeated, and viewed from any gameplay angle.
- Packaging and product concepts: Teams can review the food, container, label, and package together. A shared 3D scene exposes proportion conflicts before anyone commits to physical samples.
Common Problems With AI-Generated Food Models (and How to Fix Them)
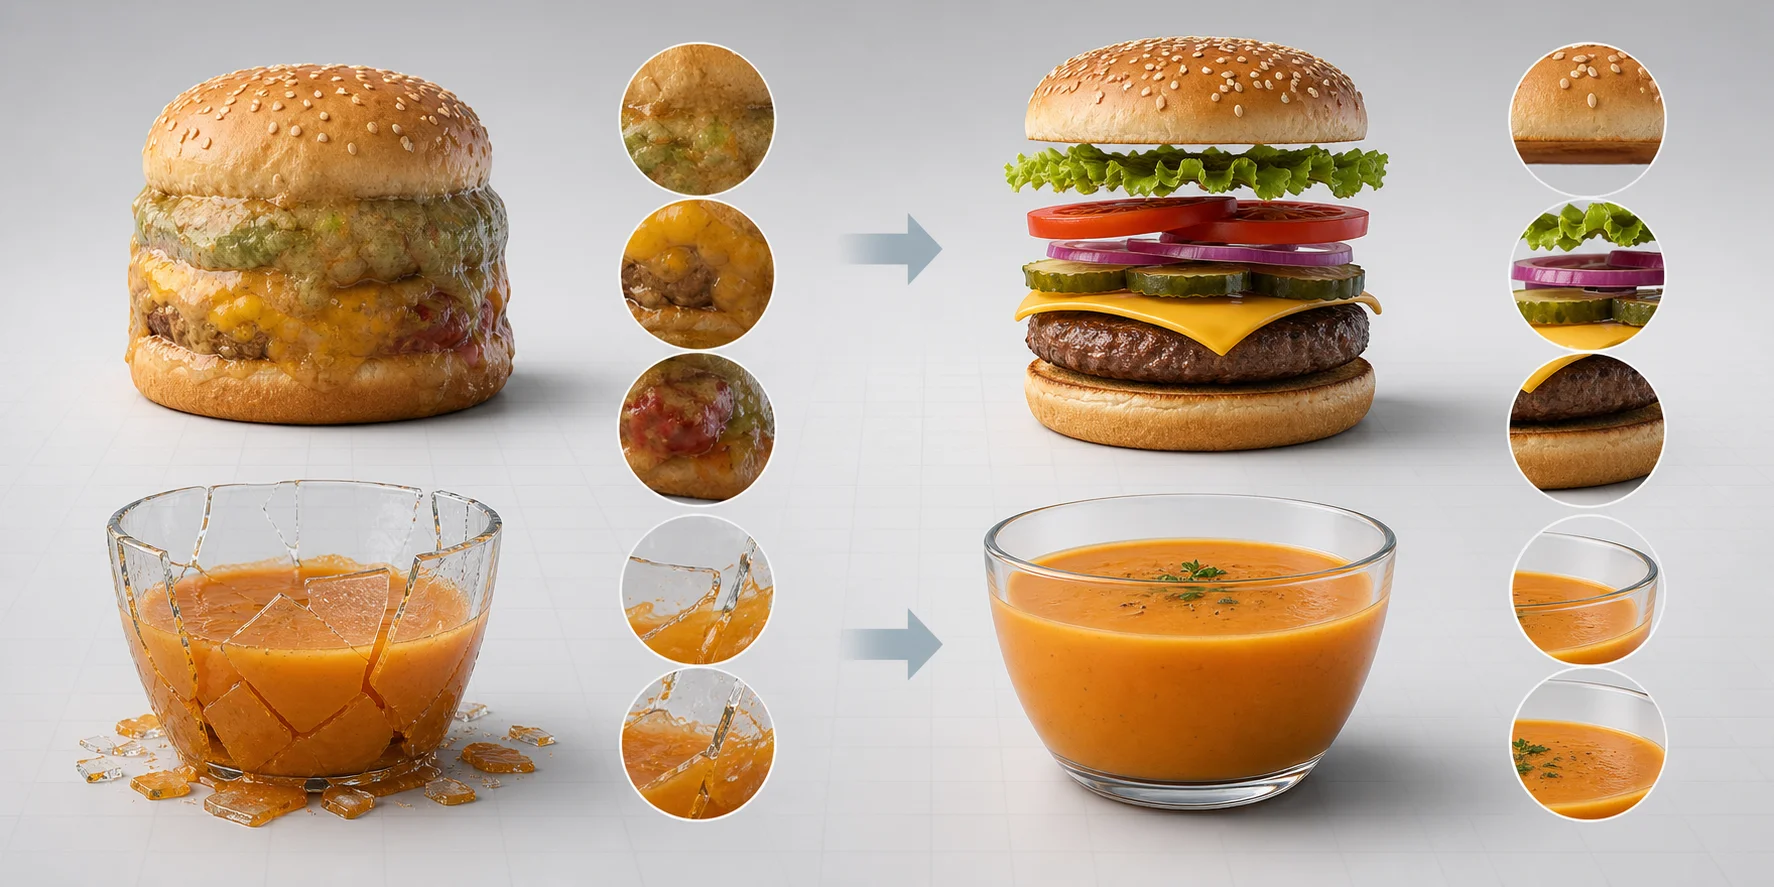
- Melted or overly smooth surfaces Symptom: Pastry layers, meat grain, crumbs, or rice detail disappear. Cause: The input image or generated texture lacks enough detail. Fix: Use a closer, sharper photo, increase the texture resolution, or run texture enhancement before export.
- Wrong proportions or oversized portions Symptom: The serving looks larger than the real menu item. Cause: The generator has no reliable scale reference. Fix: Include a known plate, bowl, utensil, or hand, then scale the model using the measured plate diameter.
- Fused ingredients Symptom: Burger layers, sushi pieces, toppings, or garnish merge into one mass. Cause: A single view cannot reveal depth between overlapping parts. Fix: Add consistent multi-view photos, segment major ingredients, or separate and repair the parts in modeling software.
- Transparent and liquid trouble Symptom: Soup, drinks, glass, jelly, or syrup creates holes and broken surfaces. Cause: Transparency, refraction, and hidden liquid boundaries are difficult to infer from one image. Fix: Generate the container and contents separately, or represent the liquid with a simple solid surface and controlled material.
- Glossy sauce baked into the texture Symptom: A painted highlight remains fixed when the lighting changes. Cause: The reflection was stored in the color texture instead of the material. Fix: Remove the highlight from the base color and control it with PBR roughness and specular response.
- Too many polygons for the web Symptom: The menu, ecommerce viewer, or AR preview loads slowly. Cause: A high-detail mesh was published directly without optimization. Fix: Keep the dense master, then create a lightweight web or AR copy with mesh optimization. Test the copy on the actual page and target devices before publishing.
Frequently Asked Questions
What is a food model generator?
It creates a food image or a three-dimensional food asset from text or photos. A 3D result can be rotated, relit, edited, exported, or printed.
Can a food model generator make 3D models, not just images?
Yes, when you use an AI 3D generator rather than an image-only tool. Check whether it exports model files instead of only JPG or PNG images.
How do I generate a 3D food model from a text prompt?
Describe the dish, plating, container, ingredients, and visual style. Generate a base mesh, correct its shape and materials, then optimize and export it.
Can I turn a photo of a real dish into a 3D model?
Yes. A clean image can guide the shape and appearance, while several consistent views improve hidden surfaces and stacked ingredients.
Which file format should I use for a 3D food model?
Use GLB for web delivery, FBX for many game pipelines, and USD for scene workflows. Use STL for geometry-only printing or 3MF for supported color printing.
Can I 3D print an AI-generated food model?
Yes, after checking scale, wall thickness, holes, and unsupported areas in a slicer. Choose STL for shape or 3MF when the workflow supports color.
Are AI-generated food models accurate enough for a restaurant menu?
They can support presentation, but compare portion scale, ingredients, garnish, and plating against the real dish. Do not publish a model that misrepresents what customers receive.
How is an AI food generator different from stock food photography?
AI generates a new asset around your instructions, while stock photography licenses an existing image. A 3D generator also provides geometry for new views and interaction.
Do free food model generators work well enough for commercial use?
They may work for tests, but limits can cover privacy, downloads, resolution, formats, and commercial rights. Read the current plan and license before using an asset commercially.
Why does my AI food model look melted or fused together?
The source image may lack detail or clear depth between overlapping ingredients. Use sharper multi-view references, separate major parts, and repair the mesh before texturing.
Conclusion
A prompt or dish photo can become a rotatable, exportable 3D food asset. Decide where the model will go, choose the matching format, then inspect its geometry, materials, scale, and performance before publishing or printing.
Generate your first dish in Tripo AI Studio and export it in the format your project needs.
If you are weighing this against a photo shoot, the Tripo AI pricing page lays out what each plan includes.