How to Create Mech 3D Models with AI
TL;DR
- Use AI image generators to create a clear mech concept before making the 3D model.
- Convert your design into a 3D asset with an image-to-3D or text-to-3D AI tool.
- Add AI textures, materials, and details to make your mech look realistic.
- Use Smart Mesh, retopology, and optimization tools to prepare cleaner geometry for the target workflow.
- Export your mech as GLB, FBX, OBJ, STL, or 3MF for games, animation, or 3D printing.
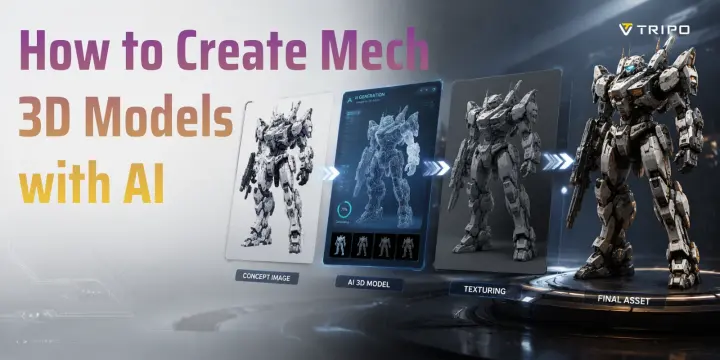
You can create a mech 3D model with AI by combining an AI image generator for concept work with a text-to-3D or image-to-3D tool for a first-pass mesh. AI can speed up early creation, but the time needed to refine, validate, rig, print, or ship the asset depends on the model and destination.
Creating a detailed mech robot 3D model traditionally involves hard-surface modeling, iteration, and production checks. AI can help you explore concepts, generate an initial mesh, apply textures, and prepare a draft asset faster. In this guide, you will learn how to design a mech concept, convert it into a 3D model, improve the materials, and prepare it for games, animation, or 3D printing.
What Is a Mech Generator AI?
Define, Generate, and Check a First-Pass Mech
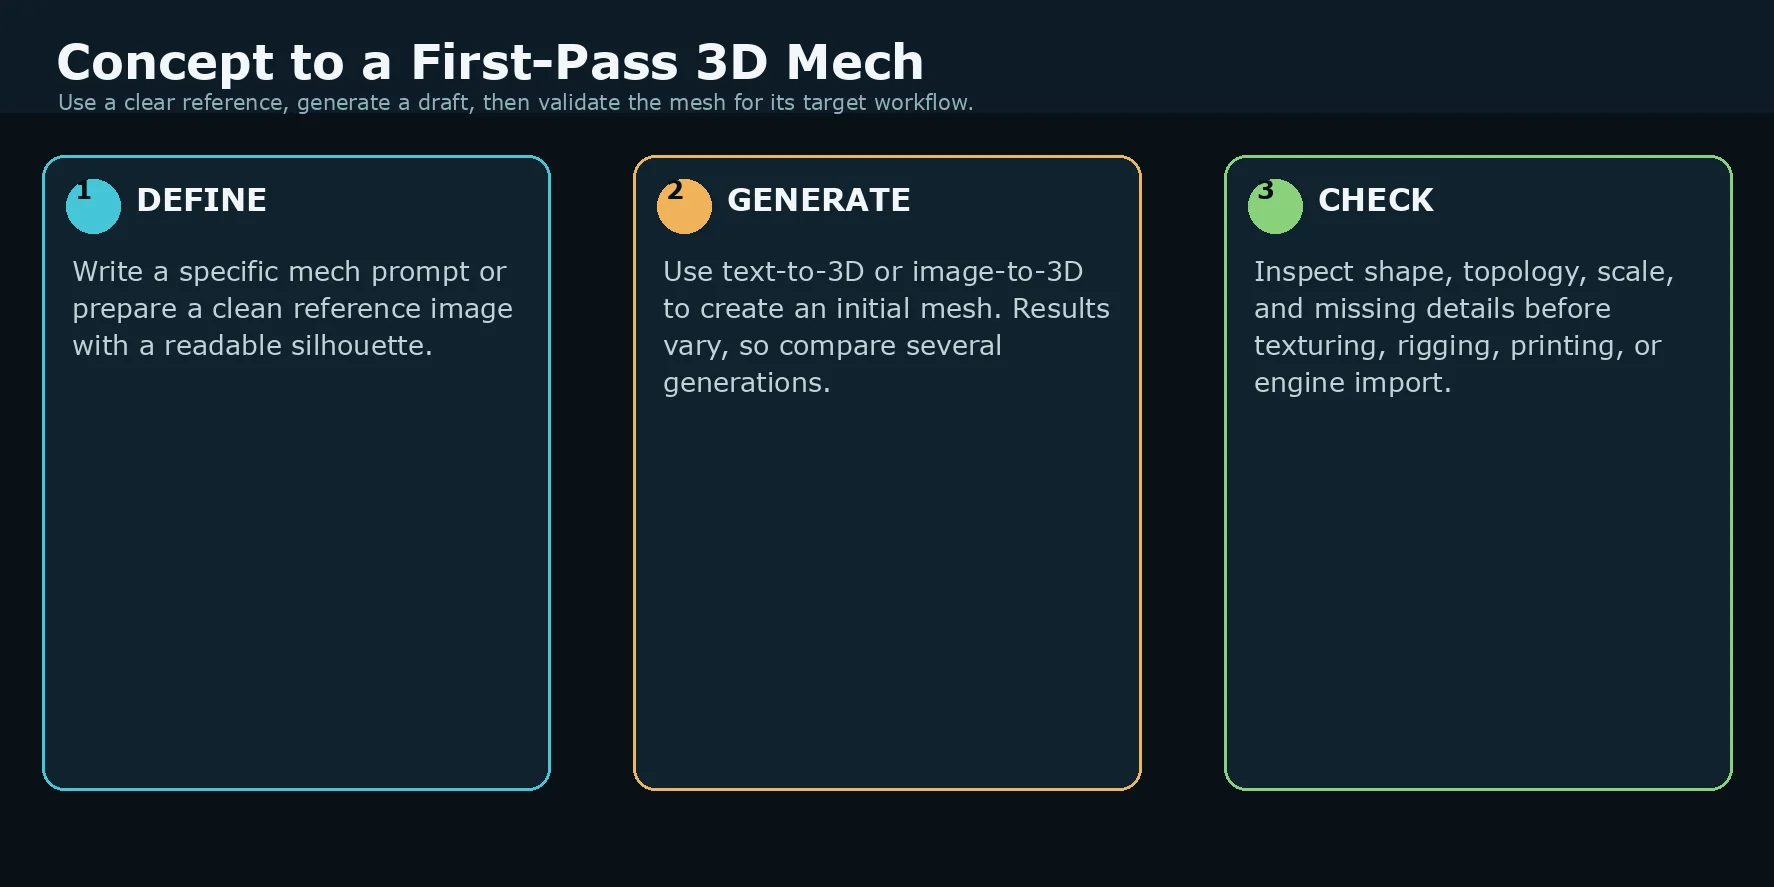
A mech generator AI is a workflow that uses artificial intelligence to create futuristic mechanical robots from text descriptions or images. Instead of starting with an empty 3D scene, you can use AI to generate a design idea and transform it into a usable 3D asset.
Most AI mech workflows combine two types of tools.
The first category is 2D AI image generation. A concept image can define the silhouette, style, and visible details of your mech before you start the 3D step.
The second category is AI 3D model generation. These tools convert text or images into 3D geometry that you can inspect, edit, texture, or export for a downstream workflow.
This combination lets you test robot ideas without starting from an empty 3D scene. It is useful for concept exploration and first-pass assets, while final production work still needs workflow-specific review.
AI-generated mech models are now used for many purposes, including game assets, animation prototypes, digital collectibles, product visualization, and 3D printing projects.
Step 1 — Design Your Mech Concept with an AI Image Generator
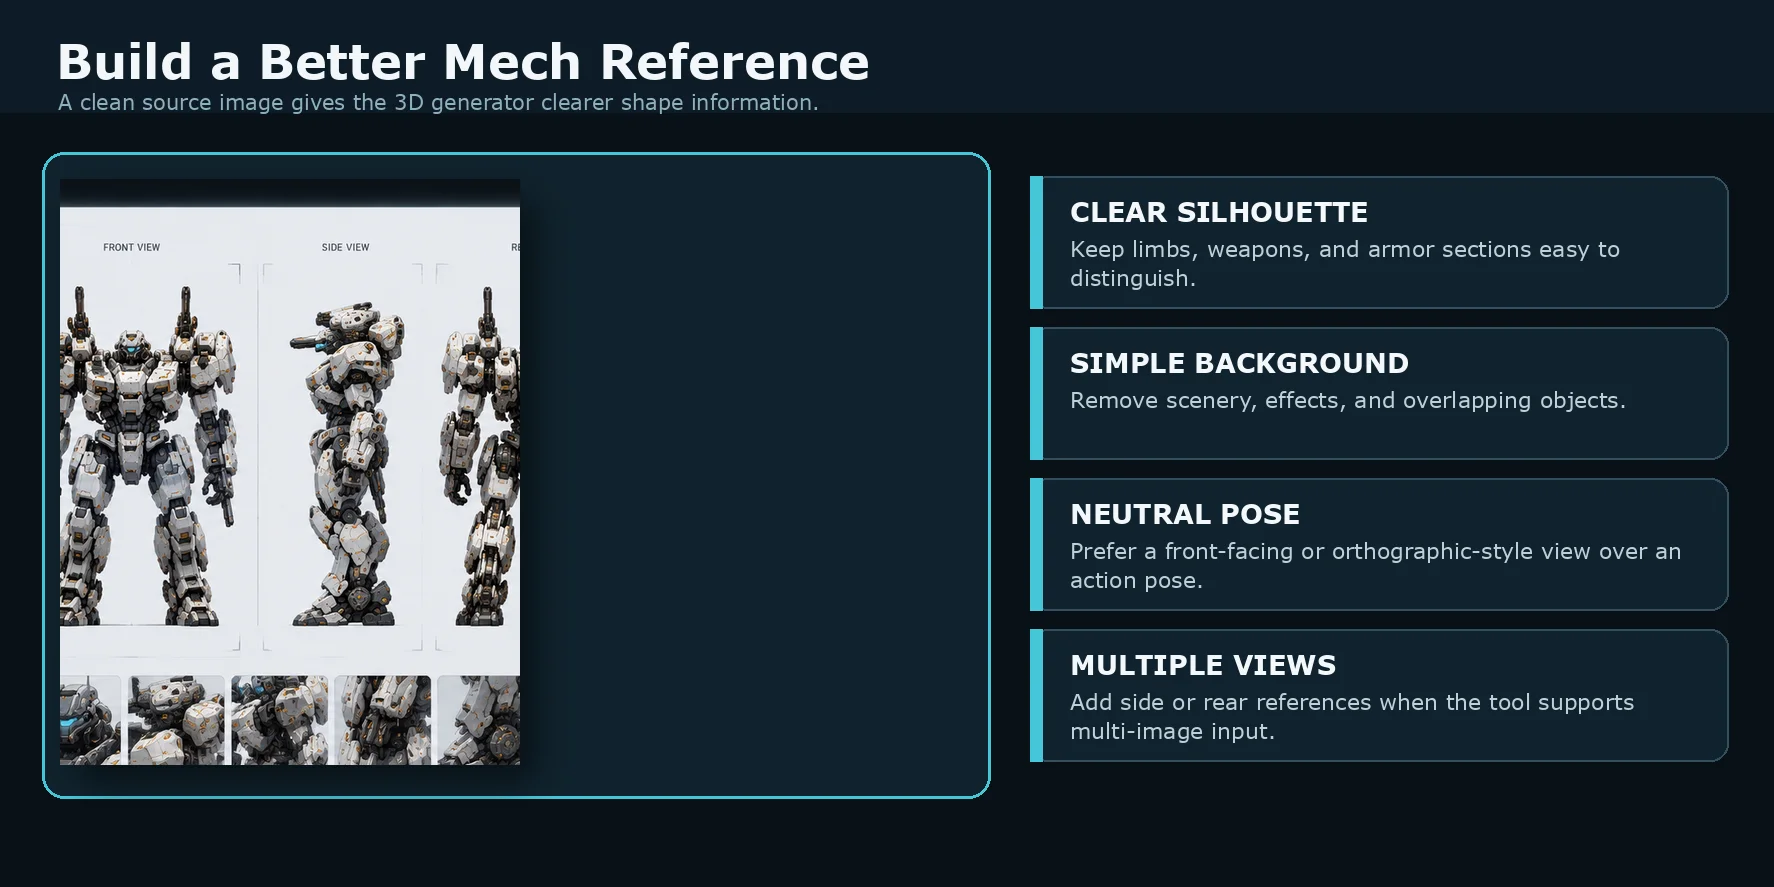
The first step is creating a clear visual concept. AI 3D tools work better when they receive a clean reference image that clearly shows the robot’s structure.
For mech designs, you should avoid complicated scenes or dynamic poses. A robot running through an explosion may look impressive, but the AI may struggle to understand the correct shape of the body, arms, and legs.
A simple front view or orthographic view usually creates better results because the AI can identify:
- Body proportions
- Armor sections
- Mechanical joints
- Weapon placement
- Overall silhouette
Your prompt should describe physical details rather than only the story behind the robot.
For example:
“Front-view orthographic mech robot, hard surface design, white background, sci-fi armor, mechanical joints, segmented shoulder armor, exposed hydraulic pistons, no background.”
You can improve your results by adding more specific design information:
- “Heavy military combat mech”
- “Industrial sci-fi robot”
- “Futuristic armored machine”
- “Carbon fiber panels”
- “Metal mechanical components”
The cleaner your reference image is, the easier the next AI conversion step becomes.
If your AI 3D tool supports multiple images, you can also create front, side, and rear views. Multiple angles provide more information about the robot shape and can improve the final mesh accuracy.
Remember that your AI image is not the finished product. It is a blueprint that helps the 3D generator understand your idea.
Reference Image Checklist for AI Mech Generation
Step 2 — Convert Your Mech Image to a 3D Model with Tripo AI
After creating your concept image, the next step is turning it into a 3D model with an image-to-3D workflow.
You can use Tripo AI Studio to transform a mech reference into a first-pass 3D asset.
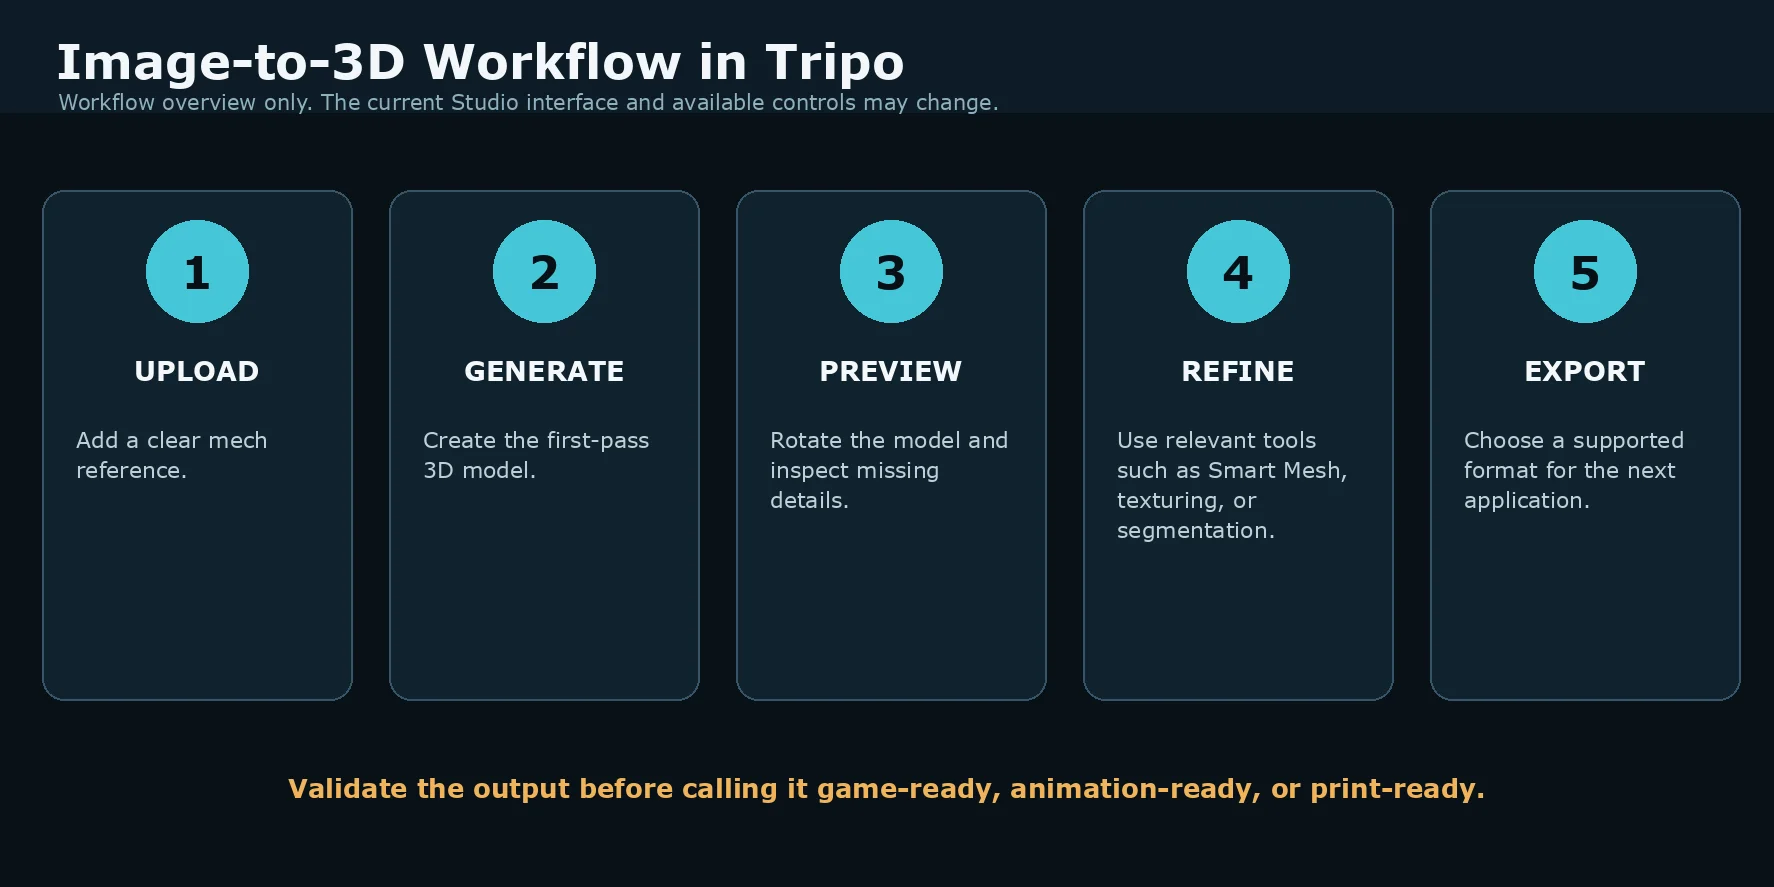
The process is simple:
- Upload your mech reference image.
- Select the Image-to-3D option.
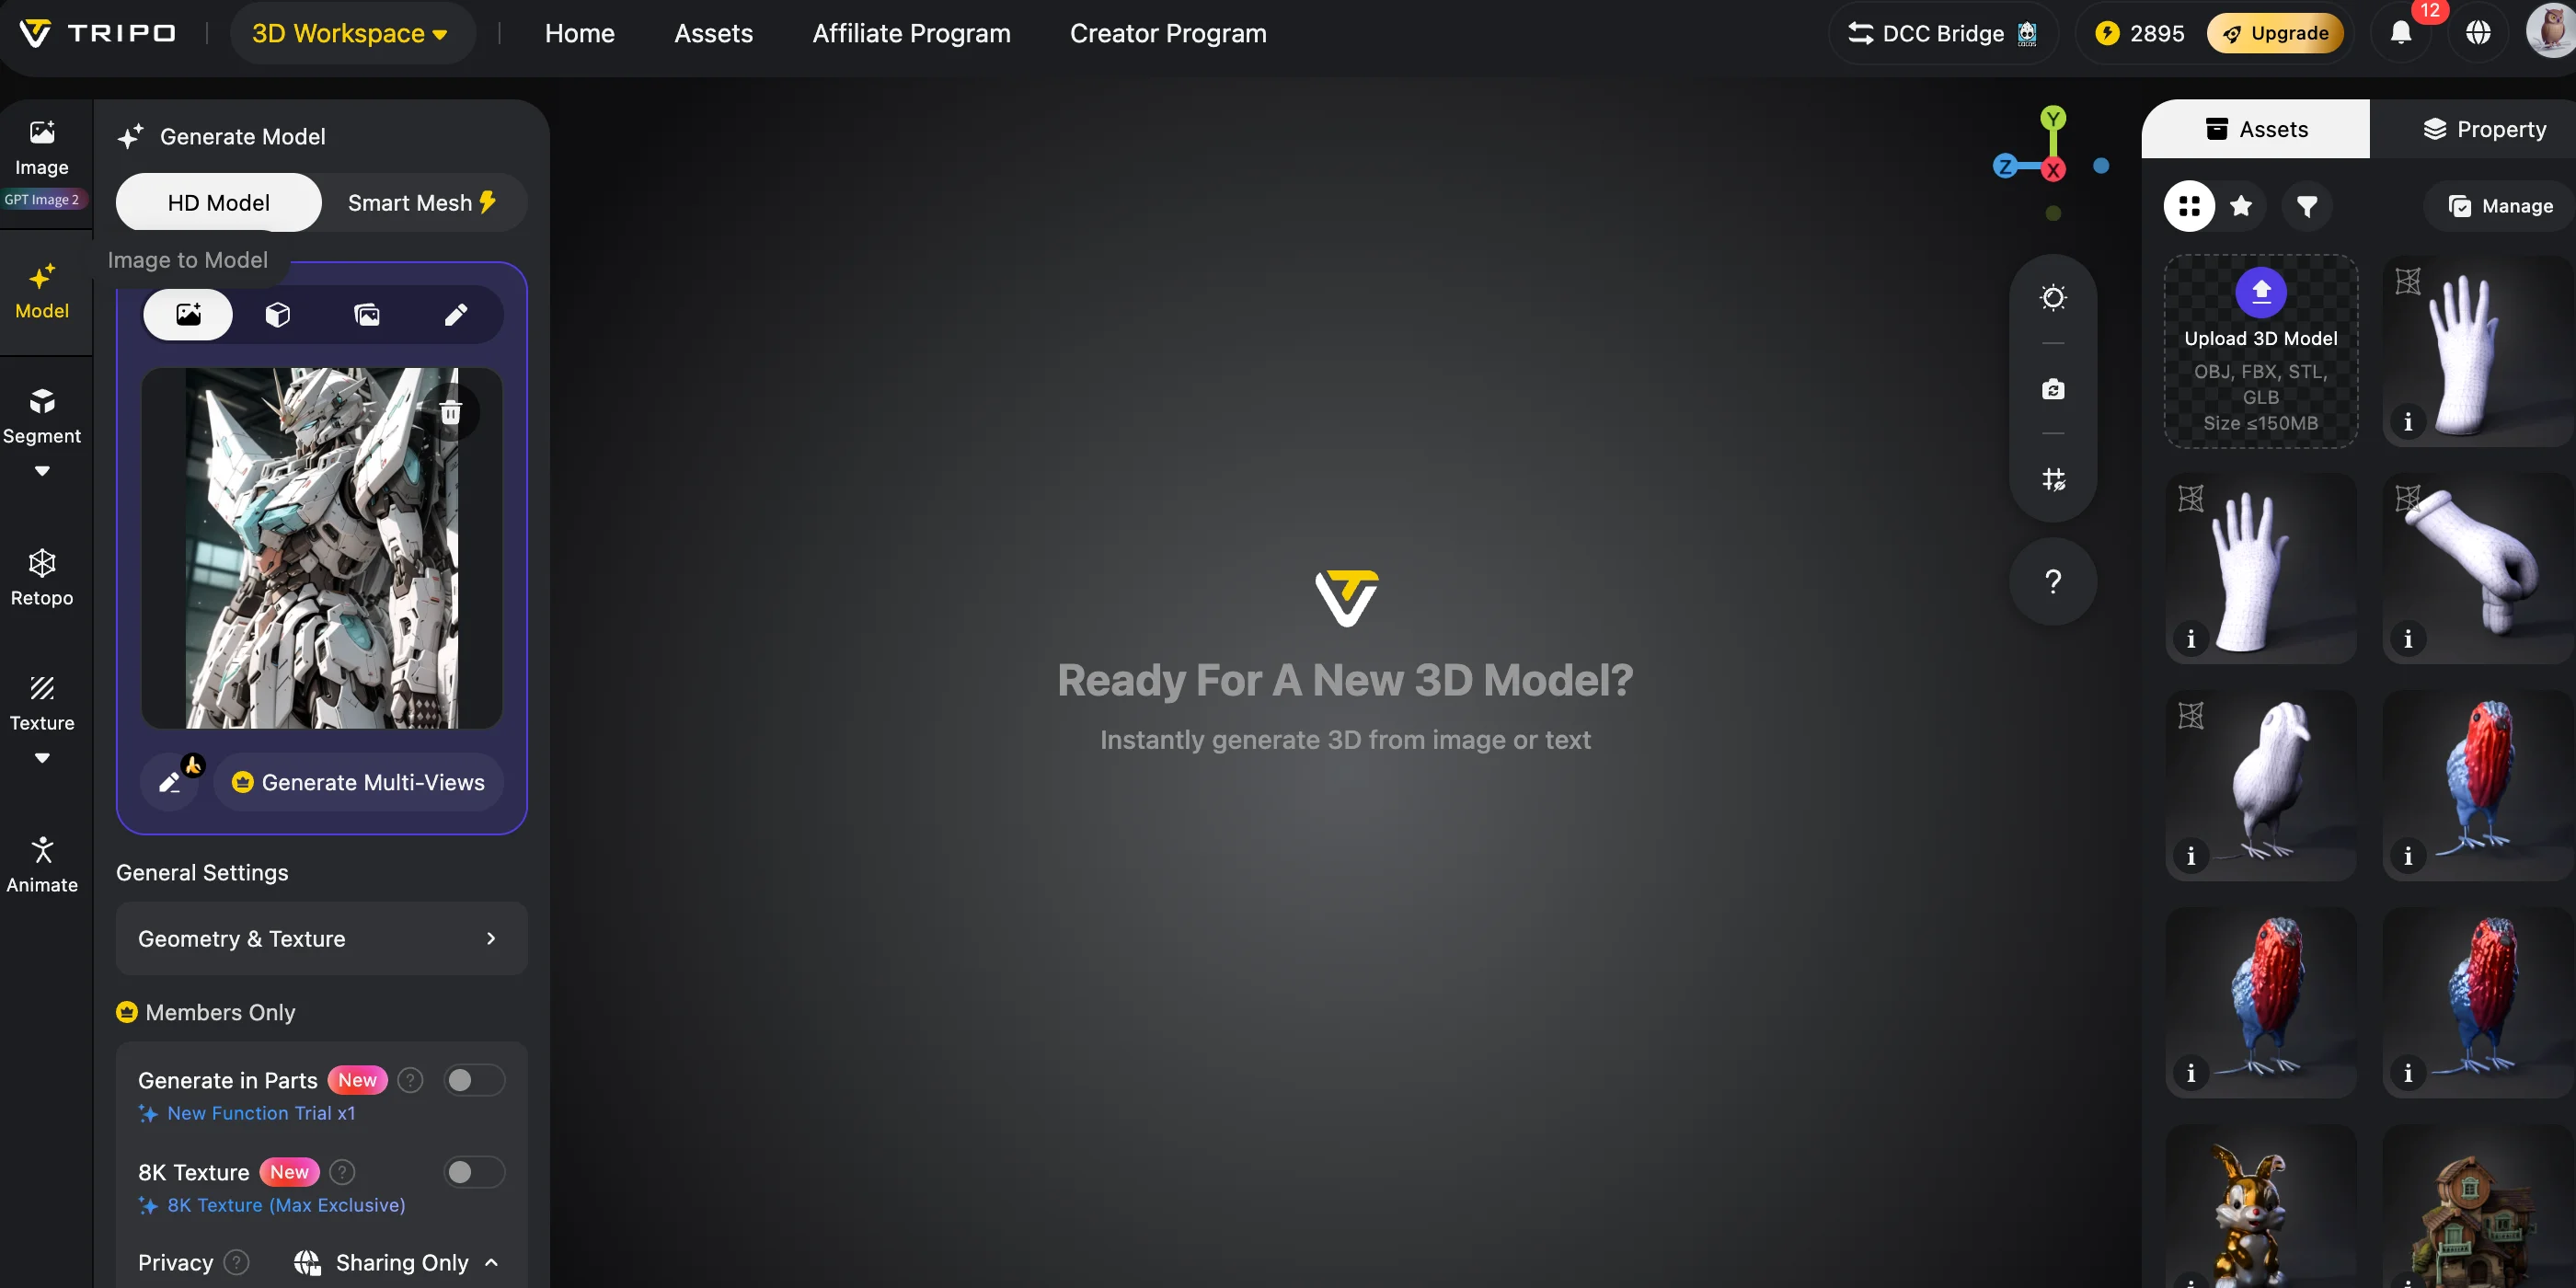
- Let AI generate the 3D mesh.
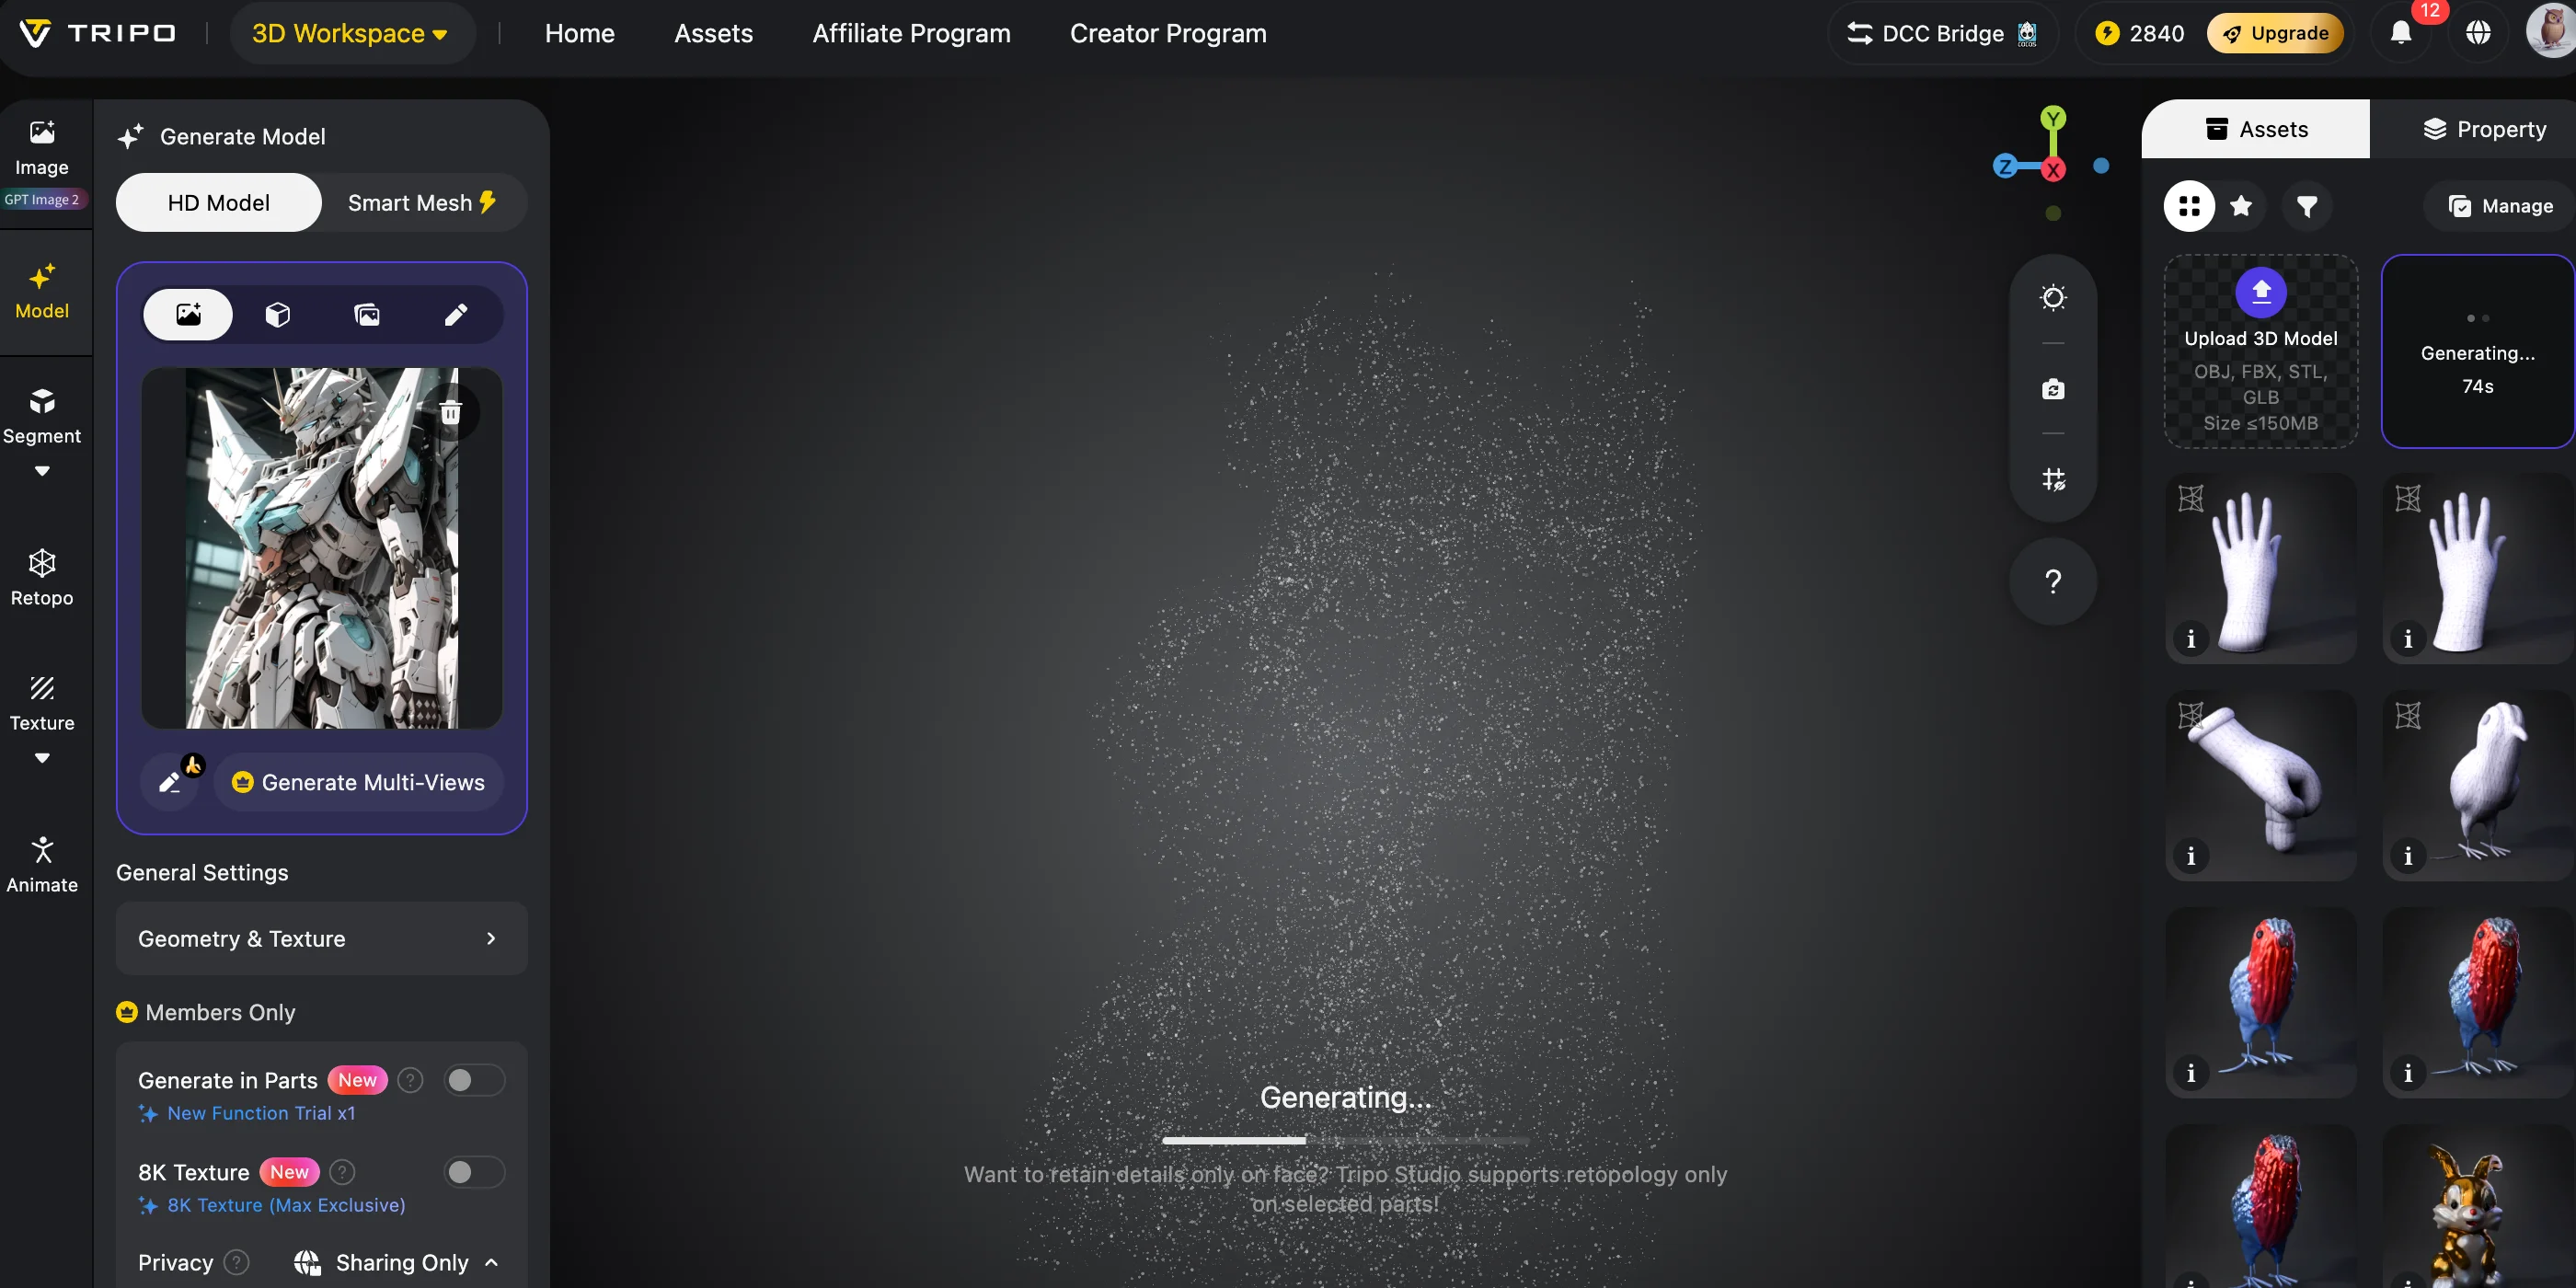
- Preview the model and check the details.
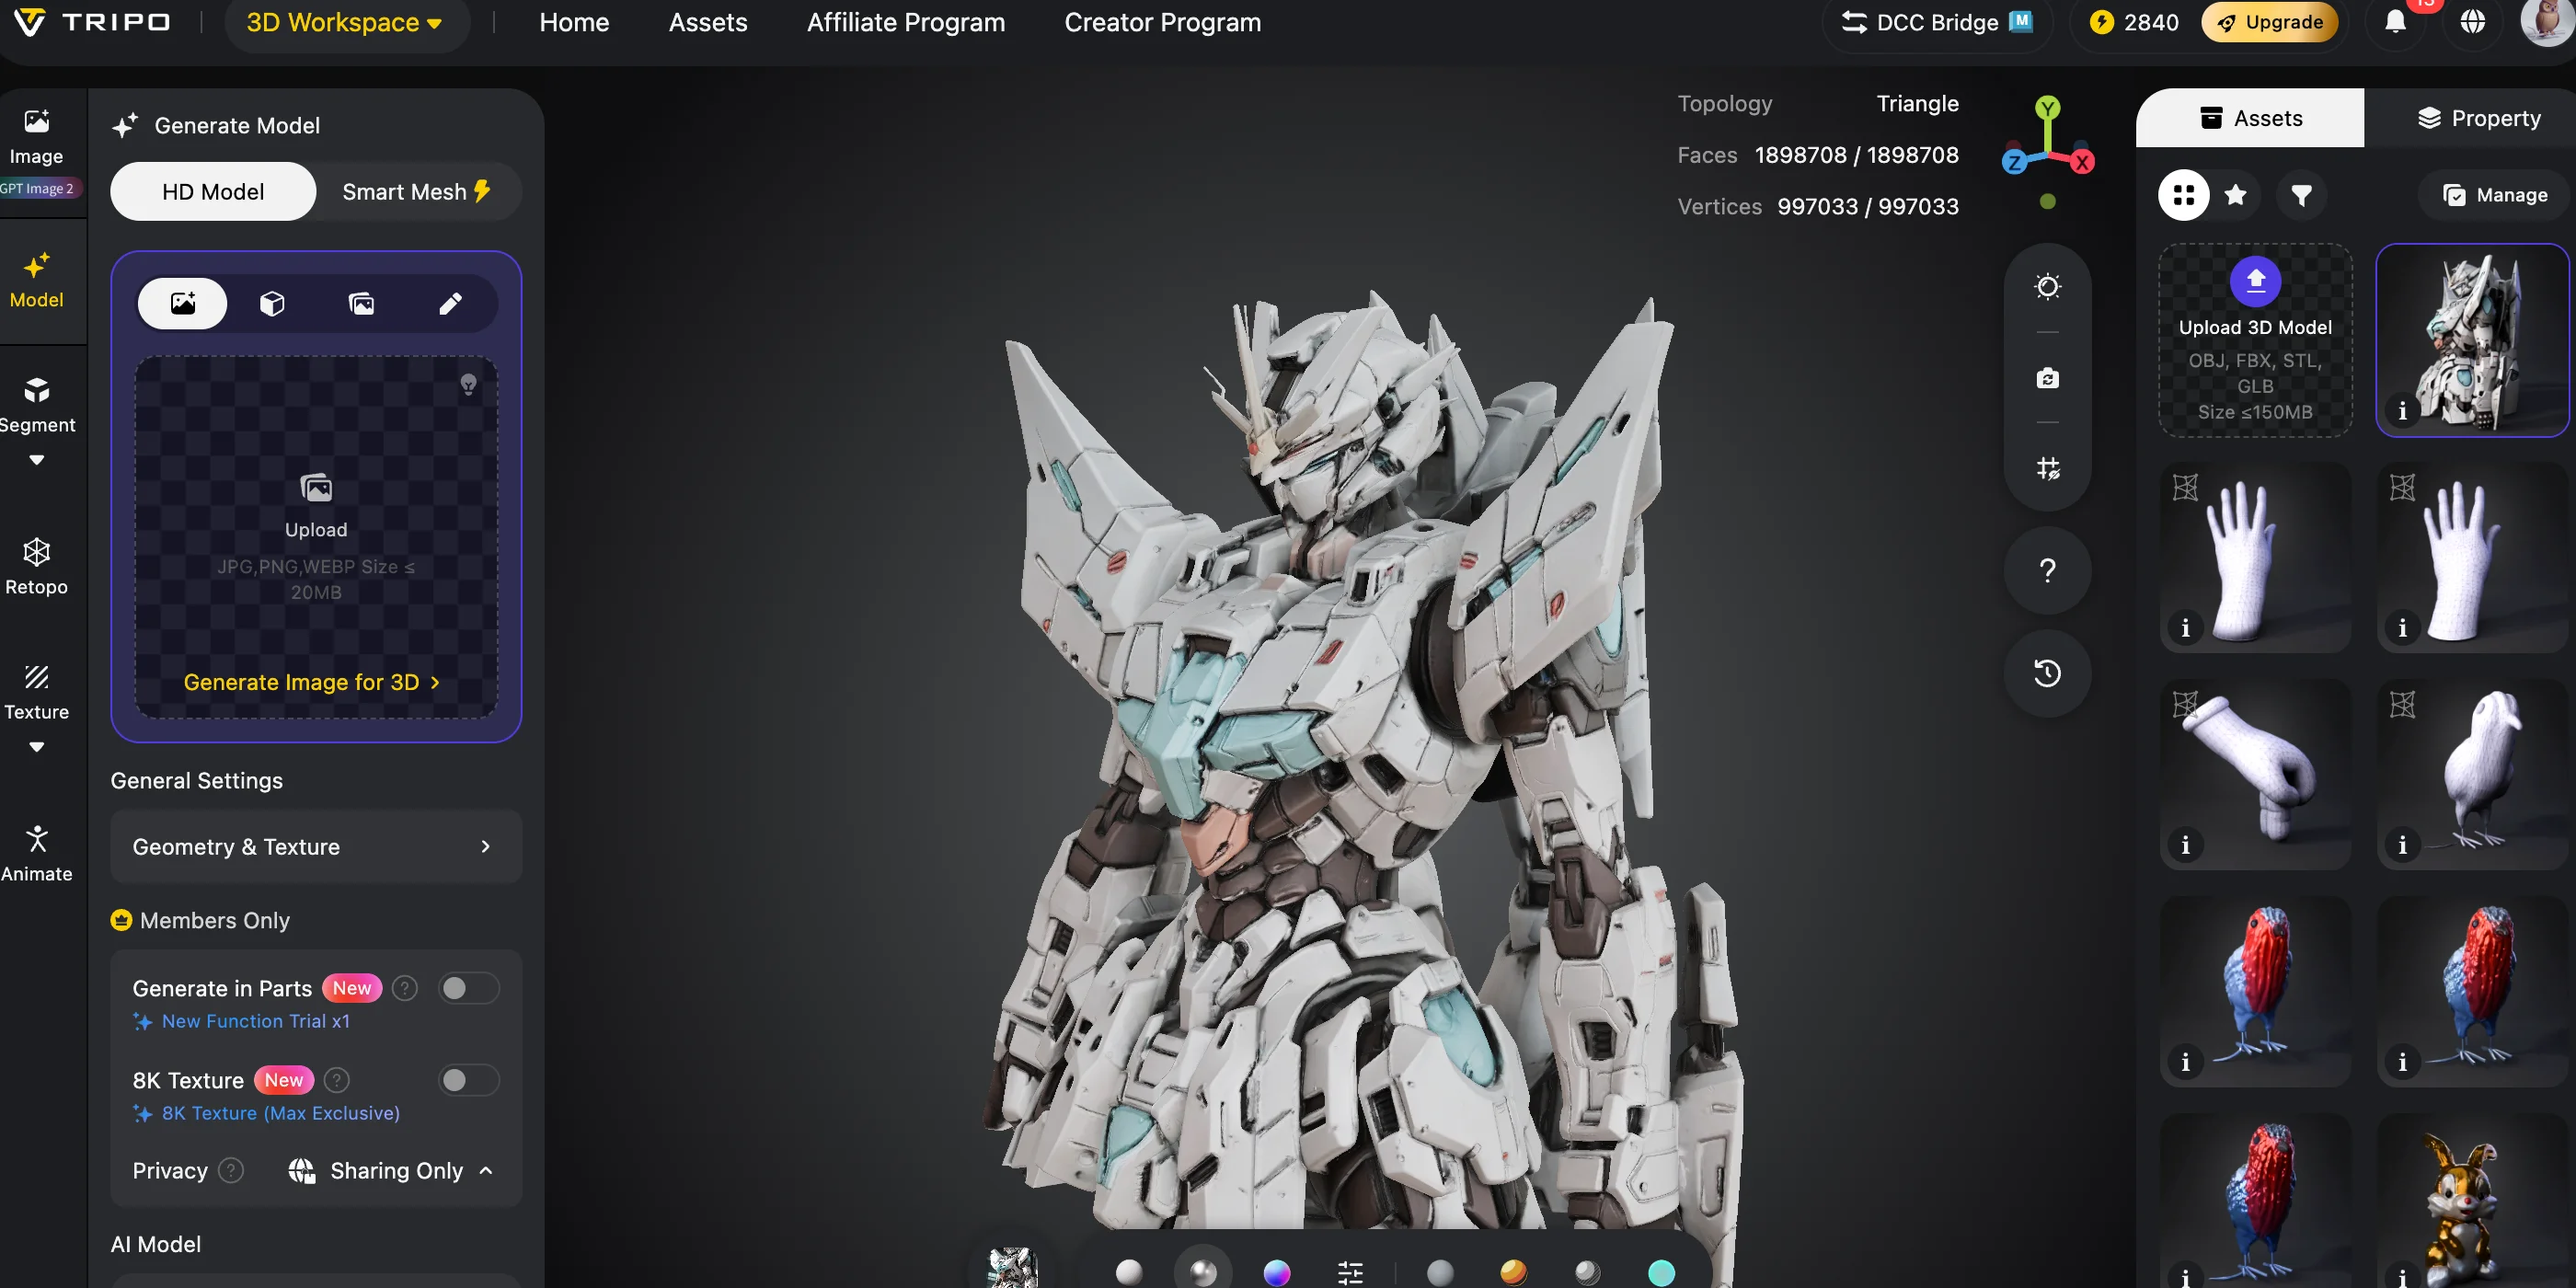
- Export the final asset.
Instead of manually creating every armor plate and mechanical part, AI creates the initial structure for you. This gives you a strong starting point that you can refine later.
For example, a concept image showing a futuristic robot with shoulder weapons, armored legs, and mechanical joints can provide a useful starting point for an AI-generated mech model. Inspect the result before using it in a production workflow.
If you do not want to create an image first, you can also use Text-to-3D. Simply describe your idea:
“A futuristic combat mech with heavy armor, hydraulic legs, shoulder cannons, glowing energy core, and military sci-fi design.”
The AI will generate the model directly from your text prompt.
Mechanical robots are a good match for AI generation because they contain many hard-surface elements. However, topology quality still matters. A model that looks good visually may need cleaner geometry before entering a game engine or animation pipeline.
Features like Smart Mesh and retopology help improve the structure of AI-generated models by creating cleaner geometry and reducing unnecessary complexity.
After generation, you can export your model in several formats:
- GLB — useful for web, AR, and real-time viewing
- FBX — useful for animation and many real-time pipelines
- OBJ — broadly compatible for static editing and asset exchange
- STL / 3MF — suitable for 3D printing
- USD — used in compatible 3D workflows
These export options make an image-generated 3D model adaptable to different creative workflows.
Illustrative Tripo Workflow Overview
Step 3 — Add Textures and Materials to Your Mech
A generated mesh is only the foundation. Textures and materials give your mech its final appearance.
A gray 3D model does not show whether the robot is made from military steel, futuristic carbon fiber, or damaged battlefield armor. Good materials create a sense of realism.
For mech designs, common texture details include:
- Metallic armor plates
- Scratched surfaces
- Painted markings
- Glowing energy parts
- Rubber cables
- Industrial components
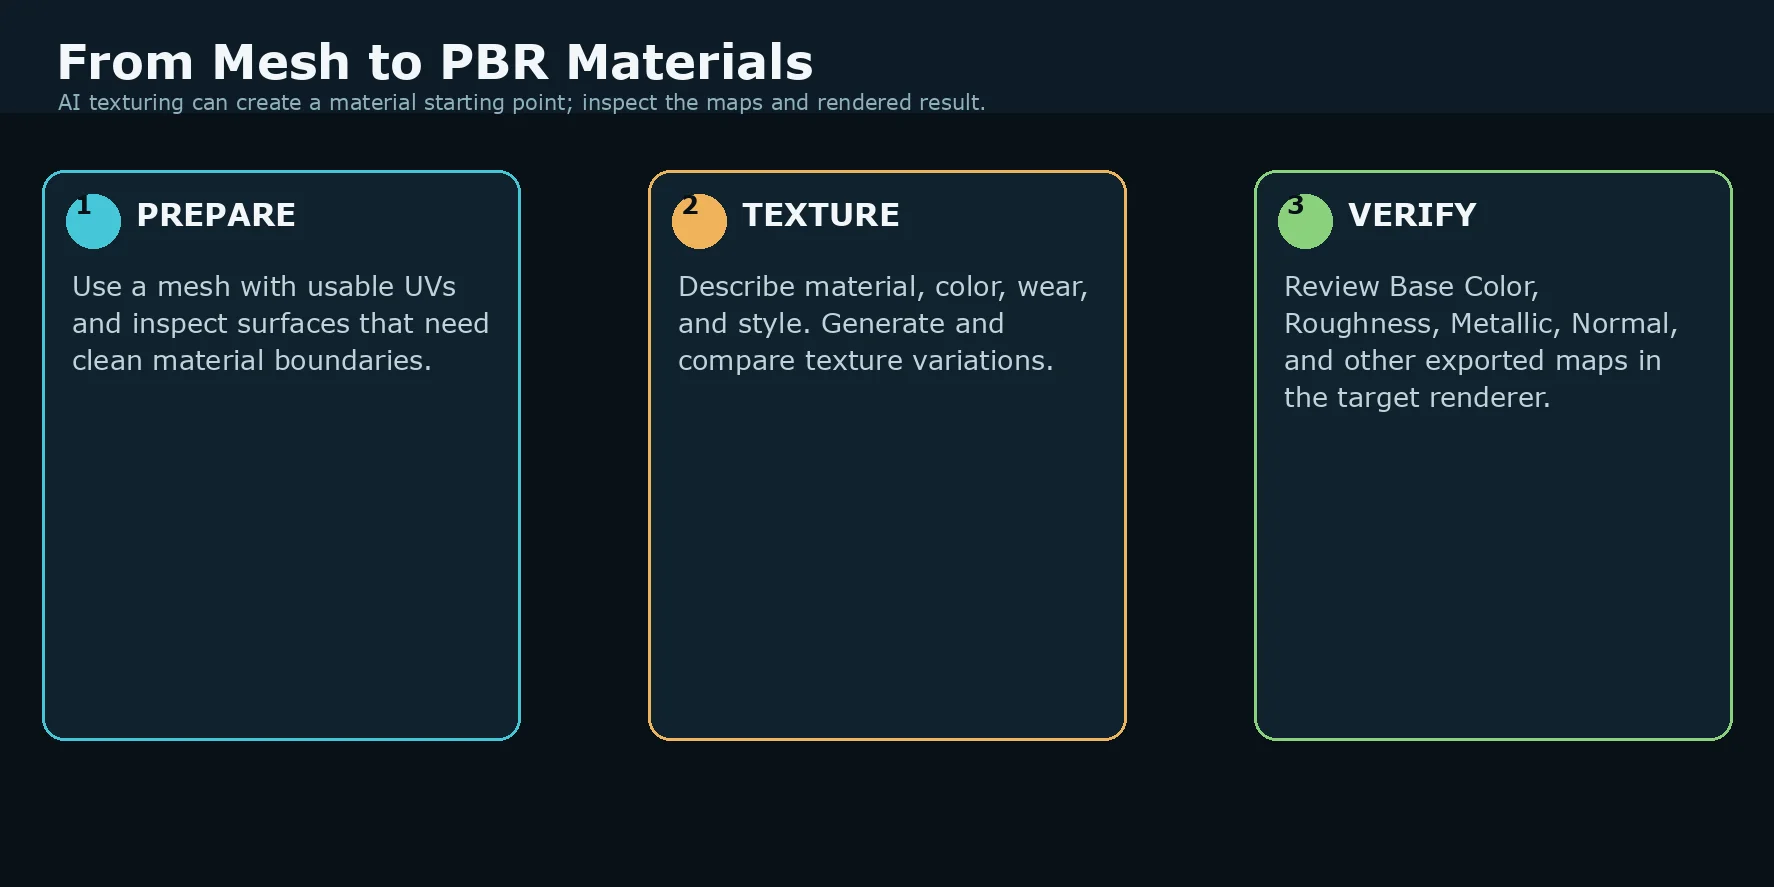
In Tripo AI Studio, open the Texture panel, enter a prompt like 'battle-worn gunmetal...', and use Texture Gen or Magic Brush to apply PBR materials directly to your mech model.
For example:
“Battle-worn gunmetal armor with orange energy panels, scratched metal surfaces, industrial military design, realistic PBR materials.”
You can describe:
- Material type
- Color style
- Damage level
- Technology style
A brand-new factory robot might need clean polished metal, while an old combat mech may need rust, scratches, and worn paint.
For more manual control, you can export the model to a compatible DCC or texturing application and adjust UVs, materials, and surface details there.
Mechanical assets benefit greatly from PBR (Physically Based Rendering) because metallic and roughness maps help create realistic reflections and surface depth.
Prepare, Texture, and Verify PBR Materials
Step 4 — Rig and Export Your Mech for Games or Print
The final step depends on your goal. A mech used in a game requires different preparation from a mech created for 3D printing.
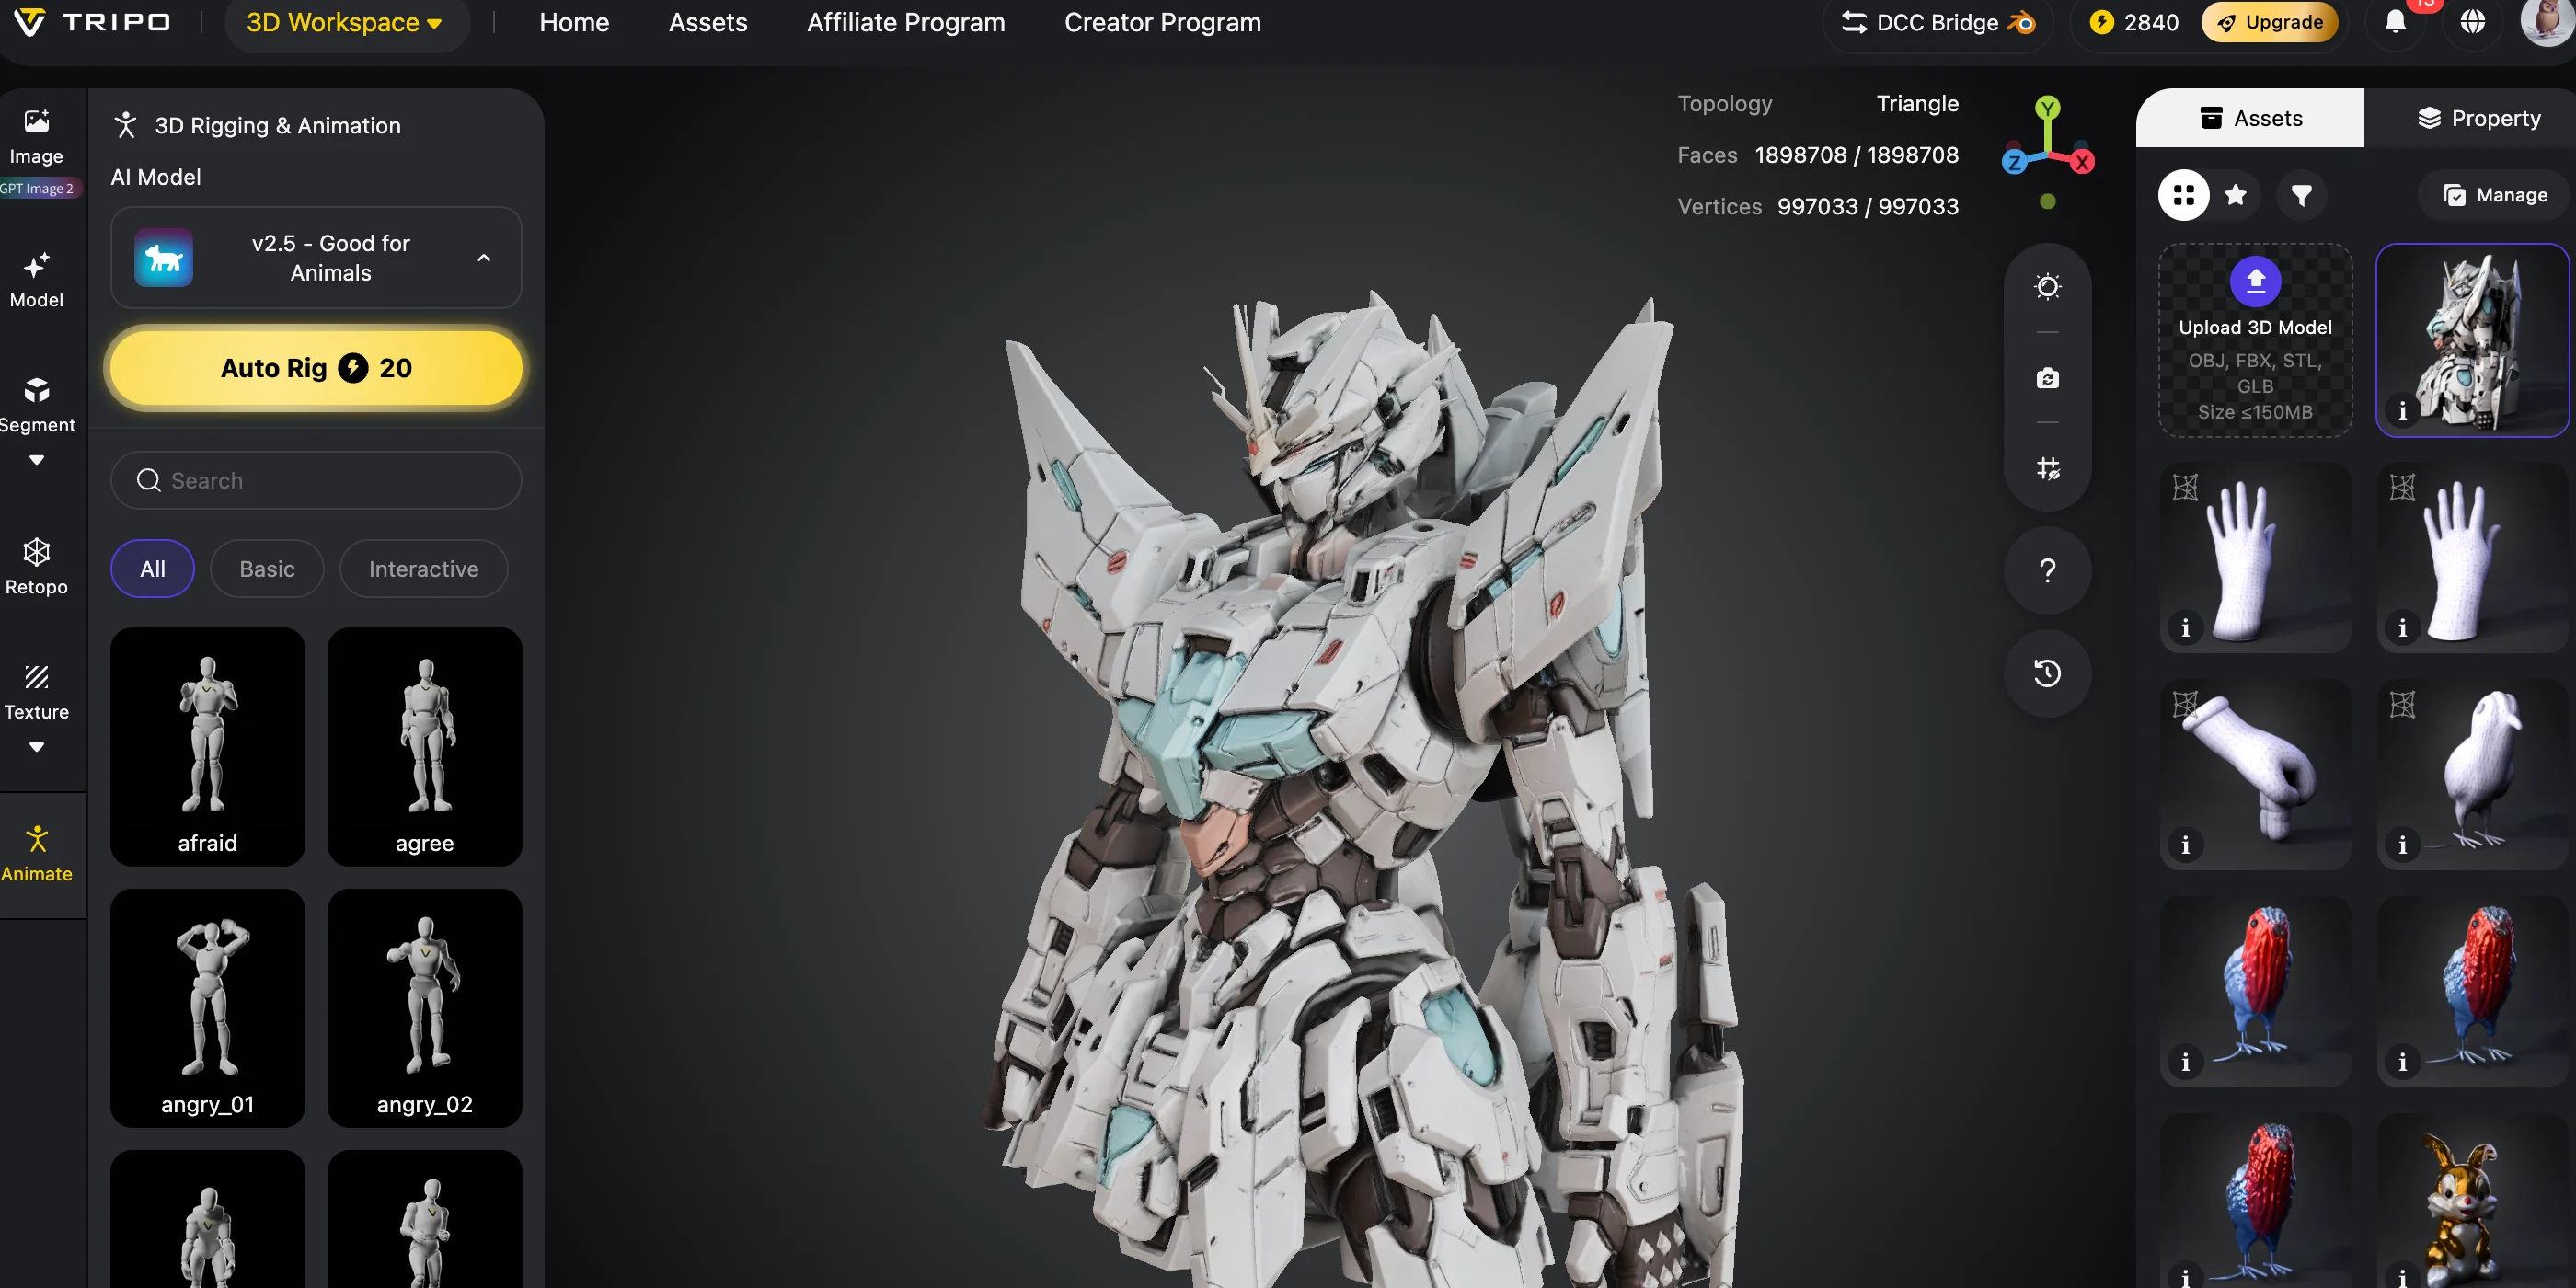
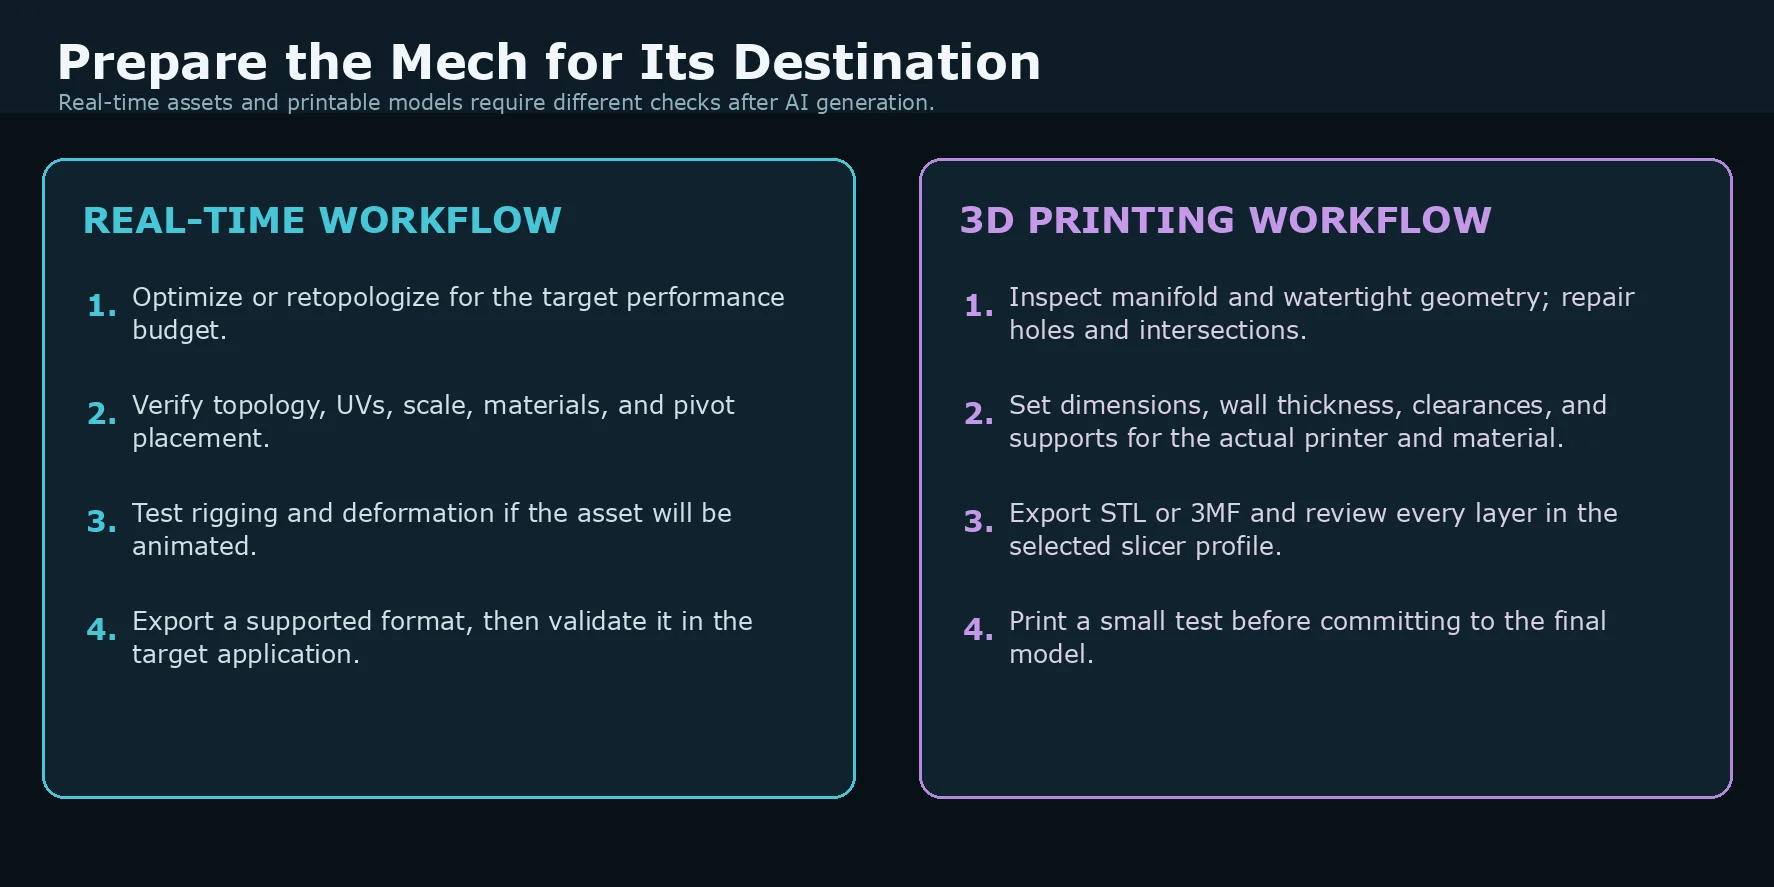
For animation, a mech needs a rig that matches how its parts should move. Hard-surface joints, independent weapons, and rigid panels often need manual hierarchy, pivot, and deformation checks.
Tripo's Auto Rig can provide a starting point for suitable character-like models. For a mech, especially one with a non-standard pose or mechanical articulation, test the generated rig and refine it as needed rather than assuming every part will animate correctly.
For modular robots, separating different parts is also useful. Many mech designs contain:
- Separate weapons
- Replaceable armor pieces
- Individual limbs
- Cockpit sections
Tripo's Model Segmentation feature can help separate a model into components for later editing. It does not by itself create mechanical joints, print clearances, or an animation-ready hierarchy.
- Modular game assets
- Animation testing
Before exporting, check these important details:
✅ Polygon count matches your target platform
✅ Textures and UV files work correctly
✅ Model scale is correct
✅ The export format matches your software
Choose formats based on your workflow:
- FBX / GLB → animation and real-time workflows
- OBJ → static editing and asset exchange
- STL / 3MF → 3D printing
Validation Steps for Real-Time and Printing Workflows
Tips for Better AI Mech 3D Models
Use multiple reference angles
If your tool supports multiple images, provide different views. More references help AI understand hidden areas and improve the final shape.
Keep your image clean
Use a simple background and avoid extra objects. A clear subject gives better 3D results.
Describe mechanical details
Specific prompts create stronger results.
Instead of:
“Cool robot”
Try:
“Bipedal combat mech with exposed hydraulic pistons, segmented shoulder armor, reinforced legs, and futuristic mechanical joints.”
Create several versions
Do not stop at the first result. Generate multiple designs and select the strongest silhouette before adding textures.
Optimize for your final use
Game assets need efficient geometry and a tested performance budget. Printable models need geometry repair, correct scale, clearances, supports, and material-specific checks.
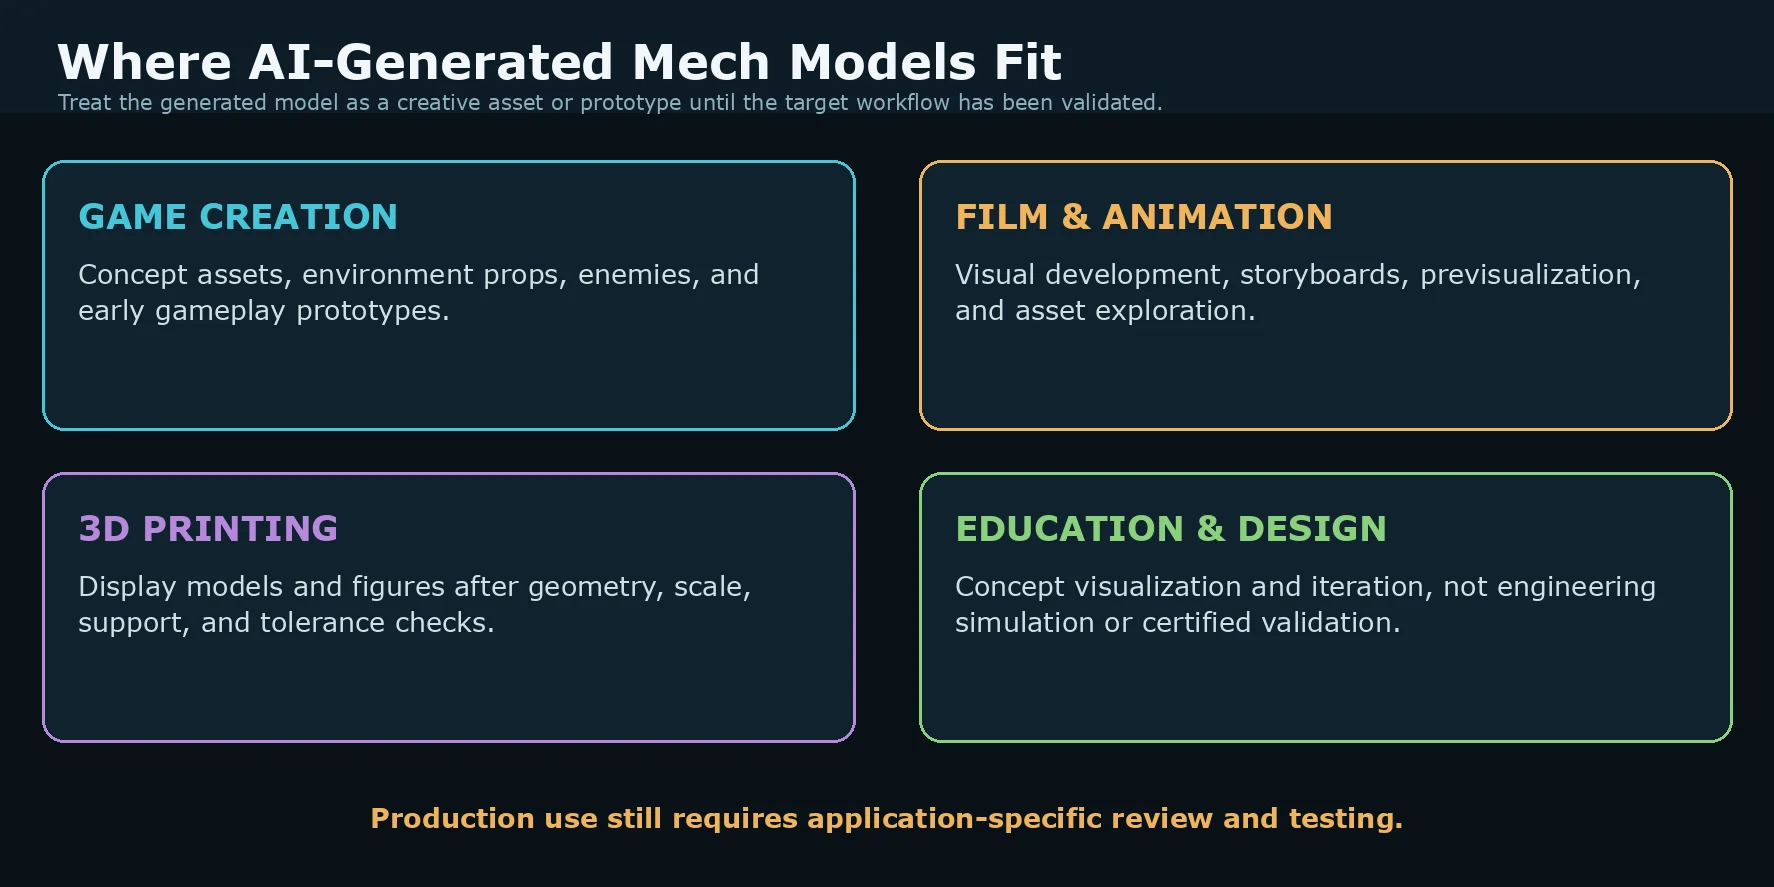
Use Cases for AI-Generated Mech Models
Game development: Prototype robots, enemies, vehicles, and environment assets before final production work.
Film and animation: Explore robot concepts before spending time on detailed production modeling.
3D printing: Create tabletop mech figures, display models, and cosplay accessories after checking geometry, scale, supports, and material-specific print requirements.
Digital collectibles: Generate unique robot characters with different designs and styles.
Education and design exploration: Quickly visualize mechanical ideas before detailed modeling. Treat the result as a creative concept, not as engineering simulation or certified validation.
Creative Use Cases and Production Boundaries
Frequently Asked Questions
Is there a way to AI generate 3D models?
Yes. AI 3D model generators can create downloadable meshes from text descriptions or images. Tools like Tripo AI support Text-to-3D and Image-to-3D workflows with formats such as GLB, FBX, OBJ, STL, and 3MF.
How do you make an AI 3D model figure?
Start with a clear concept image or text prompt. Upload it to an AI 3D generator, create the mesh, apply textures, and export the final model. For mech figures, clean reference images usually produce better results.
Can I try an AI mech generator for free?
Tripo offers a Free plan with 200 monthly credits (up to 8 models). Export rights, commercial use, credits, and advanced features depend on the current plan, so check the pricing page before starting a production project.
Can I use AI mech models in commercial games?
Commercial use depends on the plan, the platform's current terms, and the rights to your input material. Review Tripo's current pricing and terms before using an AI-generated asset in a commercial release.
How do I make a mech model low-poly?
Use Smart Mesh or retopology tools to reduce unnecessary geometry while preserving the main robot silhouette. Then test the exported model against the target application's performance budget and material requirements.
Do I need 3D modeling skills to use a mech generator AI?
No prior modeling experience is required to try the basic prompt-to-model workflow. However, game integration, animation, texture cleanup, and 3D printing benefit from learning the relevant downstream tools and checks.
Conclusion
AI can speed up the early stages of mech creation: concept design, first-pass geometry, and material exploration. Before production use, validate the mesh, textures, scale, and export in the application or print workflow that will receive the asset.
Whether you are exploring a sci-fi game asset, designing a display figure, or iterating on a futuristic concept, use AI to accelerate the draft and reserve time for the checks that make the asset fit for its destination.
Explore the workflow in Tripo AI Studio.
See current plan and export details on Tripo AI Pricing.