AI 3D Workflow for Indie Game Developers: 4 Steps
TL;DR
- AI 3D tools can help solo devs create and iterate on game-ready assets faster.
- A clean workflow has four stages: prompt → generate → export → integrate.
- Export format matters: GLB for web/mobile, FBX for animation-heavy pipelines.
- Auto-rigging can reduce one of the hardest solo-dev bottlenecks, but rigs still need testing.
- Tripo AI's Smart Mesh is designed for clean, optimized topology for real-time assets.
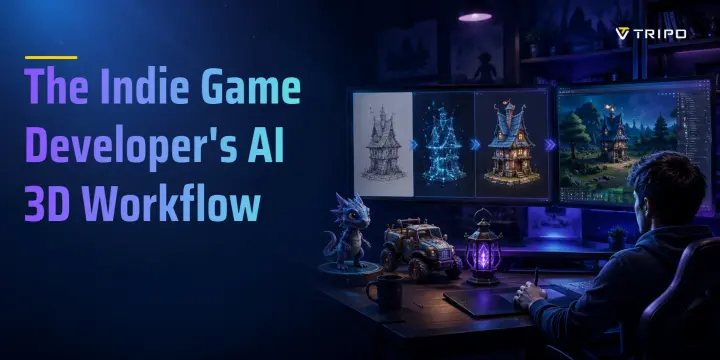
An AI 3D workflow for indie game developers typically involves four steps: generating assets from text or image prompts, reviewing and iterating outputs, exporting in the right format for your engine, and integrating polished assets into your scene. The right tools can compress weeks of modeling work into hours.
The promise of AI 3D generation is not just speed — it is scope. For solo developers and small teams, the question is no longer only “can I afford 3D assets?” but “how do I build a repeatable workflow around them?”
AI 3D tools are changing how indie developers prototype and build asset libraries. This guide focuses on the practical workflow: plan assets, generate and review models, choose an export format, and test the result in your engine.
This guide walks through a four-step AI 3D workflow designed specifically for indie developers: asset generation, quality control, engine export, and integration.
Why AI 3D Generation Changes the Indie Game Dev Equation
For solo developers, 3D asset production has traditionally been one of the biggest bottlenecks in game development. Modeling, UV unwrapping, texturing, and rigging each required either years of specialized skill or thousands of dollars in outsourcing. A solo dev could often prototype movement, combat, or level logic quickly, but building enough props, characters, weapons, and environments to make a game world feel complete was much harder.
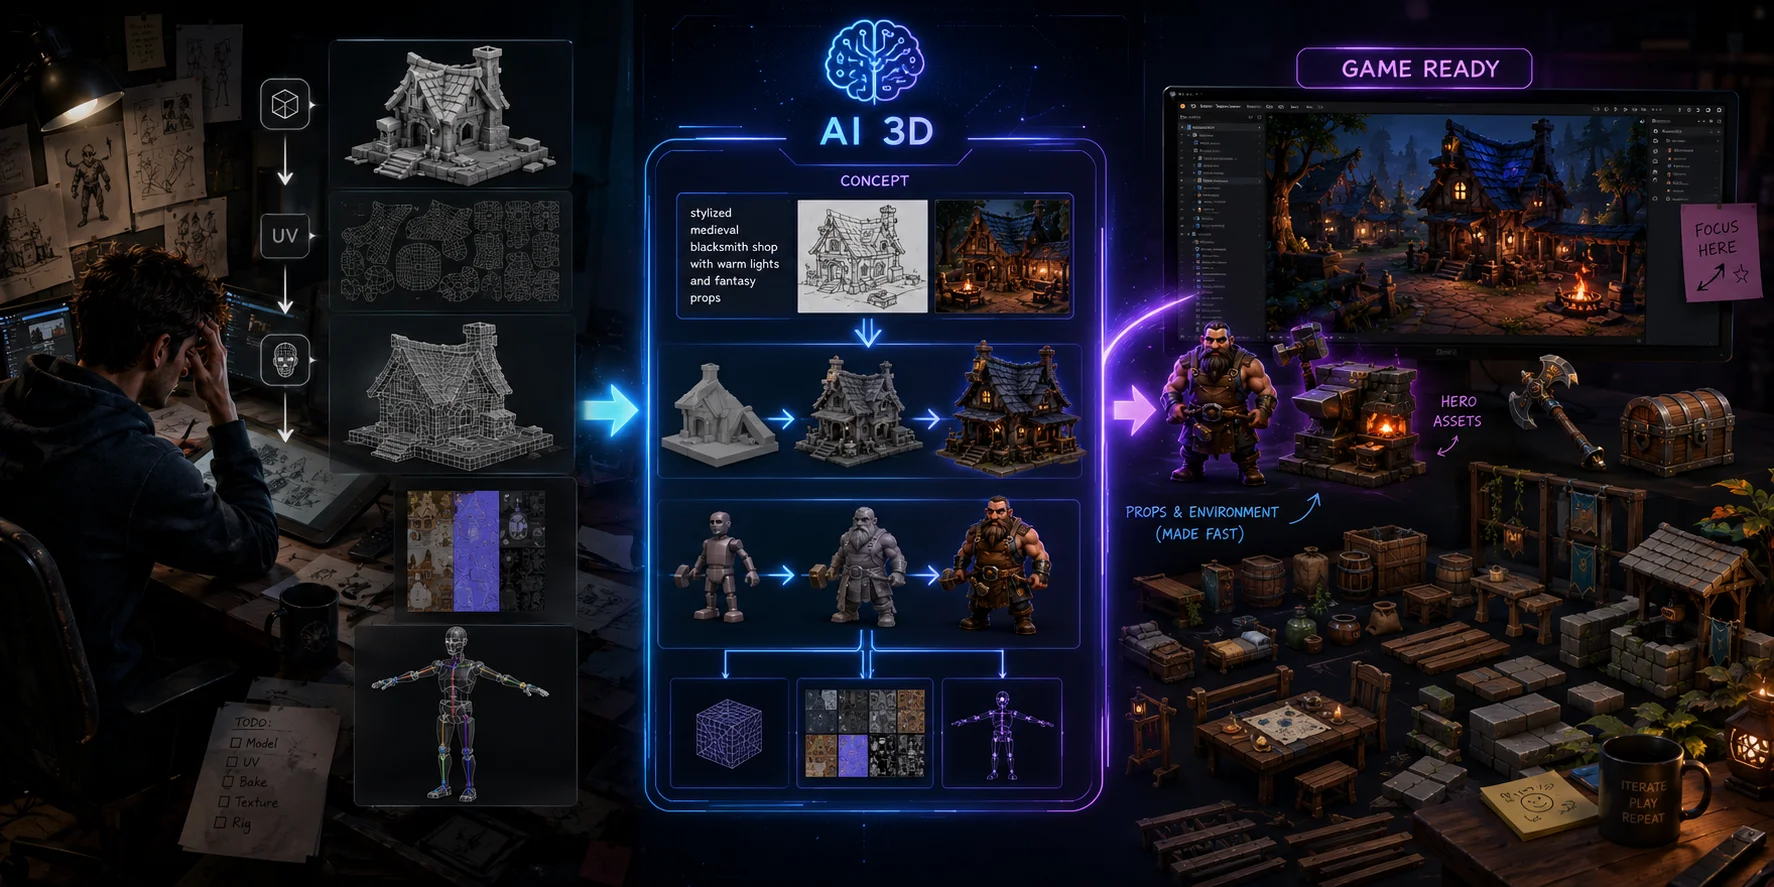
AI 3D generation changes that equation by collapsing the distance between concept and usable asset. Instead of starting every model from a blank scene in Blender or Maya, a developer can now move from a written description, sketch, or reference image to a usable first-pass mesh in a short iteration cycle.
For indie teams, the main benefit is not eliminating every production step. It is reducing the time needed to explore ideas and assemble a usable first-pass asset library, while leaving room for engine-side testing and manual polish.
As a result, indie developers can compete more on design, game feel, and iteration. The question is how to turn that capability into a reliable, repeatable workflow — which is exactly what the next section covers.
The Core AI 3D Workflow for Indie Games
Before diving into each stage, here is the workflow at a glance:
- Concept and Prompt — translate your game design into prompts or reference images.
- Generate, Review, Iterate — run generation, evaluate outputs, refine until game-ready.
- Export for Your Engine — choose the right format and understand subscription requirements.
- Polish and Integrate — handle retopology, rigging, and scene assembly.
Each step maps directly to a decision point that solo developers commonly get wrong. The sections below cover each in depth.
Step 1: Concept and Prompt — Turning Ideas into 3D Assets
A strong AI 3D workflow starts before generation. The goal is to translate your game design needs into clear asset instructions: what the asset is, how important it is, what style it follows, and whether text or image input gives the AI the best starting point.
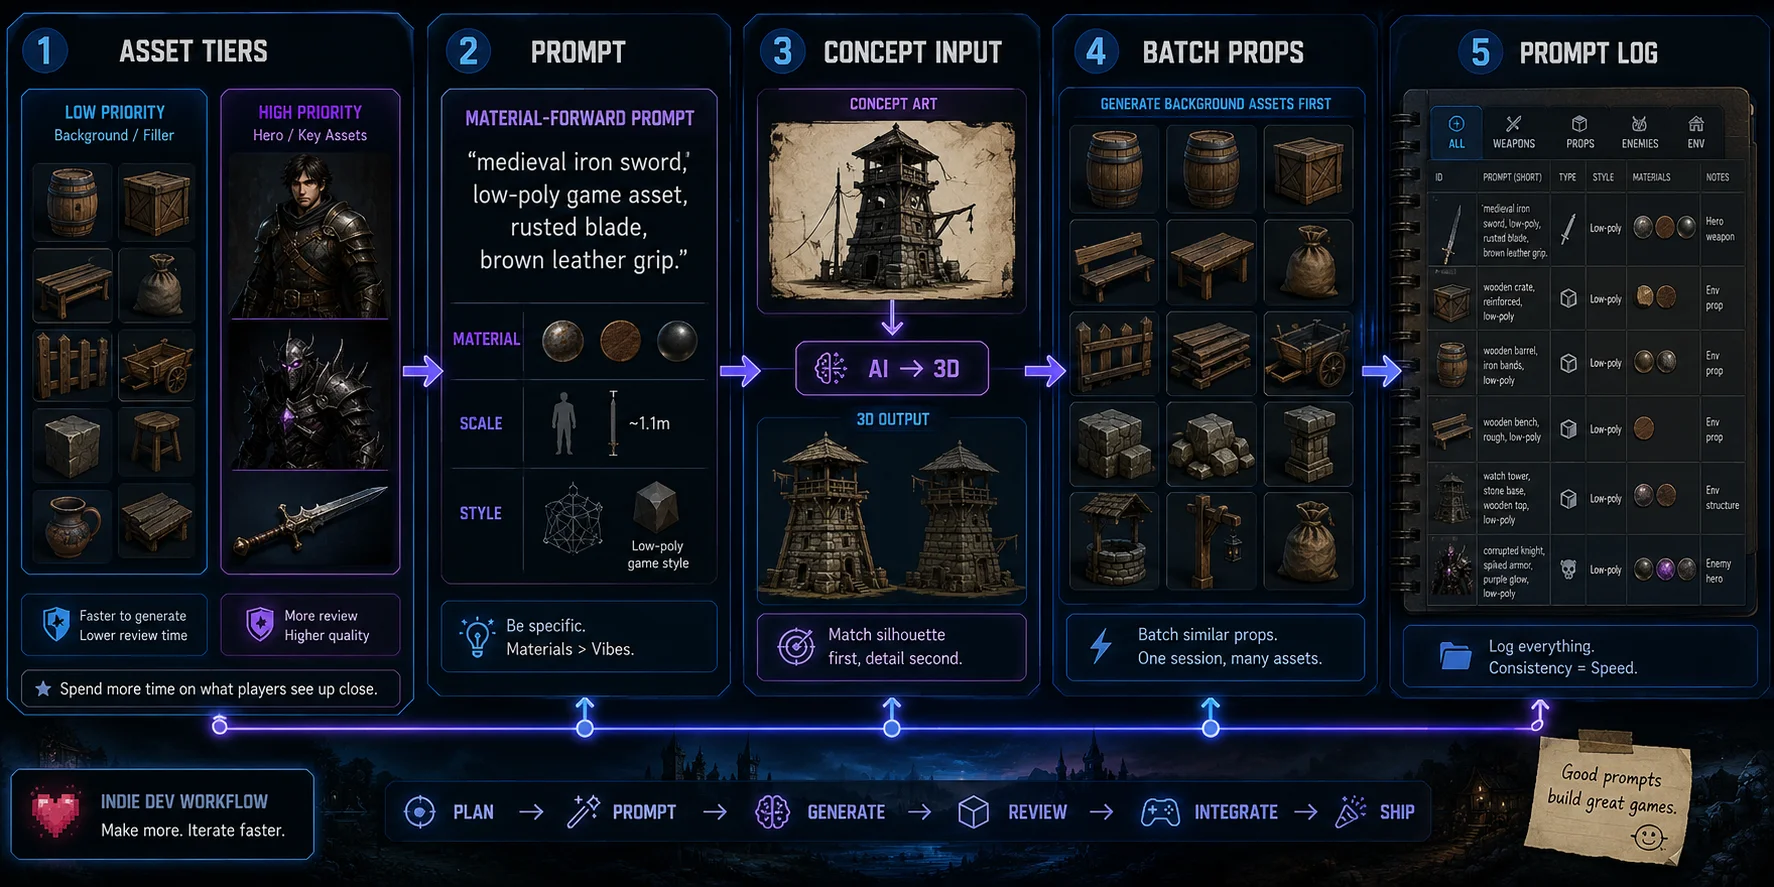
- Define asset priority tiers first. Before generating anything, categorize your asset list: background props (benches, barrels, crates) can be bulk-generated with minimal iteration; hero assets (player character, key enemies, signature weapons) deserve extra prompt refinement and manual review
- Write specific, material-forward prompts. Vague prompts produce generic results. Include surface material ("rusted iron"), scale reference ("handheld size"), and art style ("low-poly stylized"). Example: "a medieval iron sword, low-poly game asset, rusted blade, brown leather grip, stylized proportions."
- Use concept art as your input. If you already have 2D concept sketches or painted references, image to 3D model workflows can give the model a more direct silhouette and detail reference than text-only prompts. Upload concept art when you need to preserve a specific visual direction, then review the generated asset for shape and material issues.
- Batch background assets first. Generate all low-priority environment props in a single session. This builds prompt intuition before you tackle the assets that matter most.
- Keep a prompt log. For any asset you need to regenerate or iterate on, record the exact prompt and settings. Consistency across a game's art style depends on reproducible inputs.
Step 2: Generate, Review, Iterate
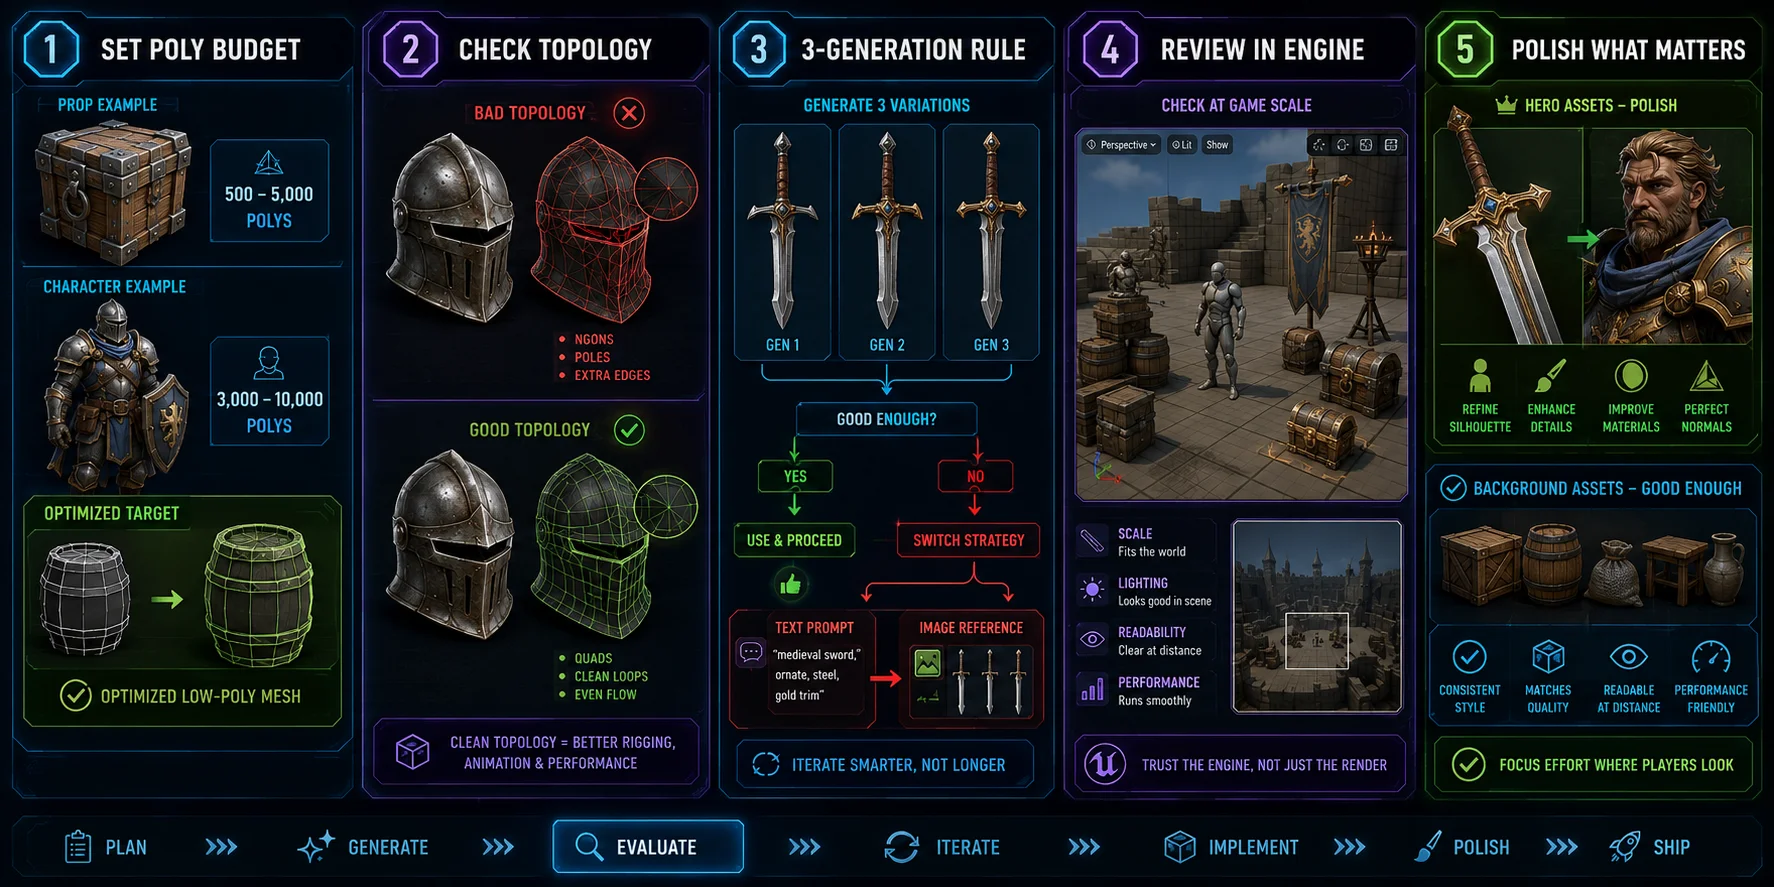
- Set a polygon budget before you generate. Most real-time projects need different budgets for props, characters, and hero assets. Tools like Tripo AI's game-ready mesh generator (Smart Mesh) are designed for clean, optimized topology. Set the final budget according to the asset's screen prominence and target platform.
- Evaluate topology, not just appearance. A mesh that looks good in a render preview may have broken geometry or non-manifold edges that cause problems in-engine. Check the wireframe view before approving any asset.
- Use the three-generation rule. If an asset doesn't meet quality in three generations with prompt refinement, switch strategies: use an image reference instead of text, or break the asset into simpler sub-components.
- Batch-review in context. Import a set of generated assets into a neutral scene in your engine before approving them. Lighting and scale issues that are invisible in a 3D viewer become obvious at game camera distance.
- Separate “good enough” from “needs polish.” Not every asset requires perfection. Reserve manual polish time for assets the player sees up close. Background and environment assets approved at game camera distance save hours.
Step 3: Export for Your Game Engine
- Choose your format based on pipeline, not habit. GLB, the binary form of glTF, is often a strong default for static or lightweight assets because it can bundle geometry, textures, and material data in one file. FBX is better when your pipeline depends on skeletons, animation retargeting, shape keys, or DCC tools such as Blender and Maya.
- Match format to engine. Tripo AI supports multiple export formats, including USD, FBX, OBJ, STL, GLB, and 3MF. For indie game development, GLB and FBX are the most common choices.
| Format | Best Use | What to Know |
|---|---|---|
| GLB | Static props, web, mobile, lightweight scenes | Self-contained geometry, textures, and materials |
| FBX | Unreal, animation-heavy pipelines, rigged characters | Better for skeletons, retargeting, and DCC workflows |
| OBJ | Manual editing and fallback compatibility | Usually needs separate material and texture handling |
| STL | 3D printing | Geometry only; not recommended for game assets |
| USD | Advanced scene interchange | More common in larger pipeline-based production |
| 3MF | Modern 3D printing | Useful when color or material data matters |
Step 4: Polish and Integrate — Retopology, Rigging, and Scene Assembly
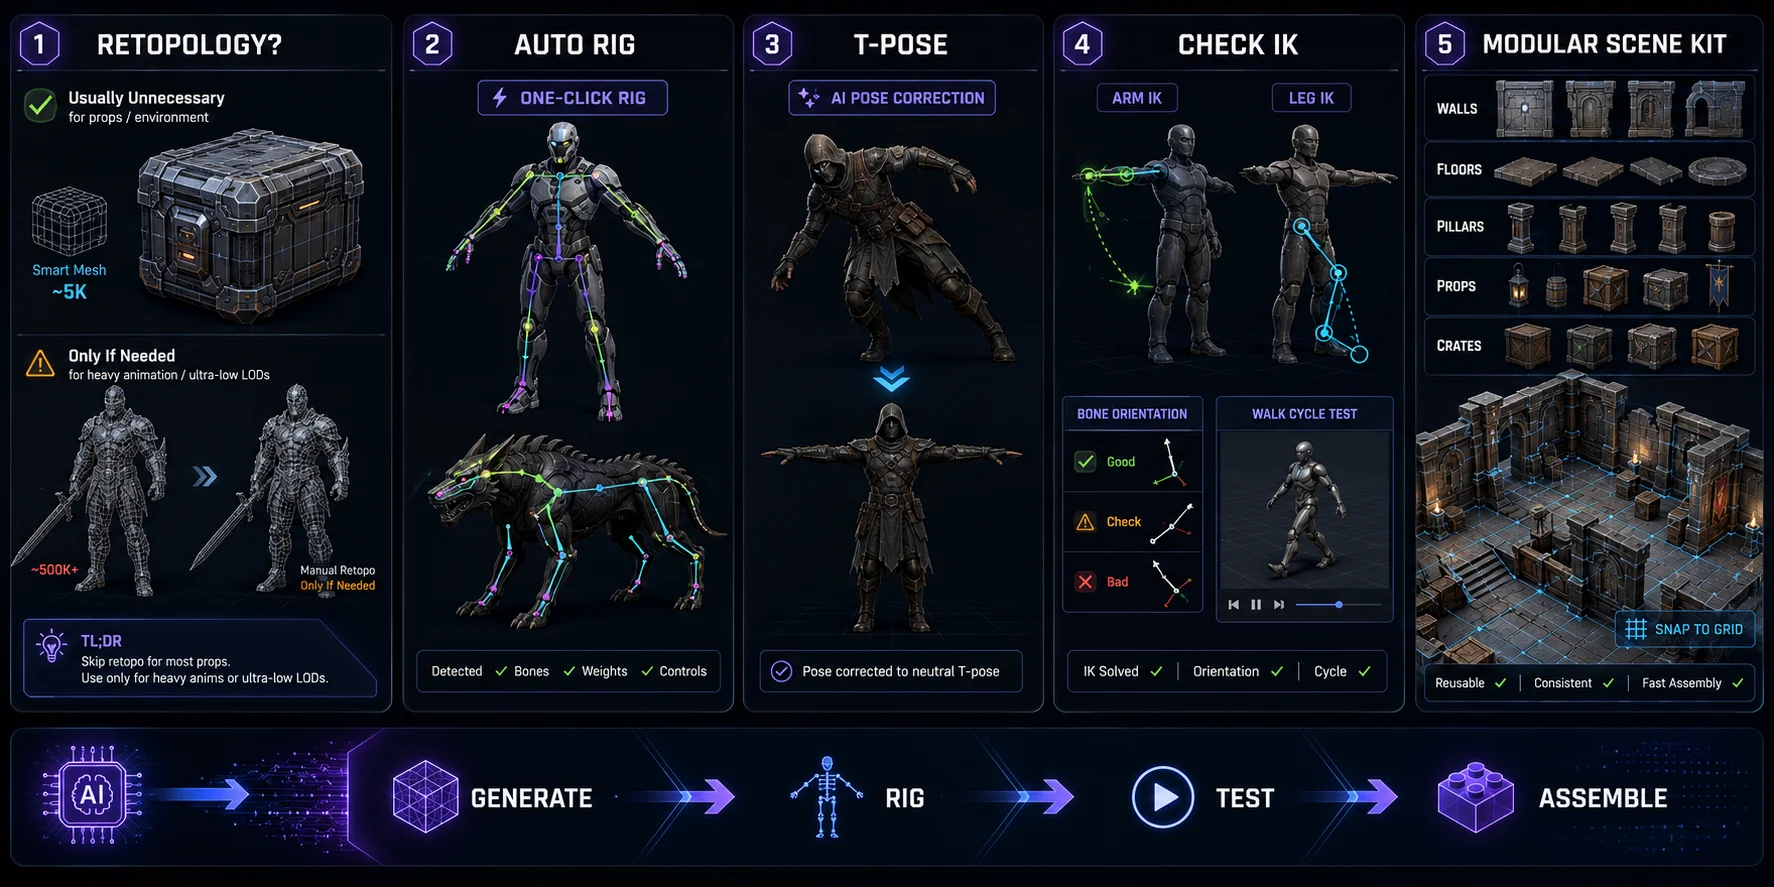
- Decide whether you actually need retopology. Smart Mesh is intended to provide clean, optimized topology for game-oriented assets. Many props may not need another retopology pass, but characters, aggressive LODs, and assets with special deformation needs still require review. Manual retopology in Blender is only worth the time for characters that will be heavily animated (facial rigs, cloth simulation) or assets that need very aggressive LOD levels below 500 polygons.
- Use auto-rigging for characters. Rather than building bone hierarchies by hand, use AI auto-rigging to generate a rig directly from your 3D model. Tripo supports standard skeletal rigging workflows for character models. Export the result in a format supported by your target engine, then verify the skeleton, scale, materials, and animation behavior before building gameplay systems around it.
- Set your character to T-pose before rigging. Auto-rigging algorithms produce the most accurate bone placement when the mesh is in a neutral T-pose. If your generated character came out in a different pose, use Blender's Pose Mode to manually correct it before running the rig.
- Check IK chains before animating. Once imported, verify that inverse kinematics (IK) chains on arms and legs resolve correctly with your engine's animation system. A quick test with a walk cycle animation clip will catch most bone orientation errors early.
- Assemble scenes with a modular mindset. Import assets as prefabs (Unity) or blueprints (Unreal). AI-generated assets work best at scale when they follow a modular grid: walls, floors, and props sized to a consistent unit so level designers can snap and reuse without gaps. This turns a batch of AI-generated props into a full level kit.
Common Workflow Mistakes Indie Devs Make
Even experienced developers run into these problems when adding AI 3D tools to their pipeline:
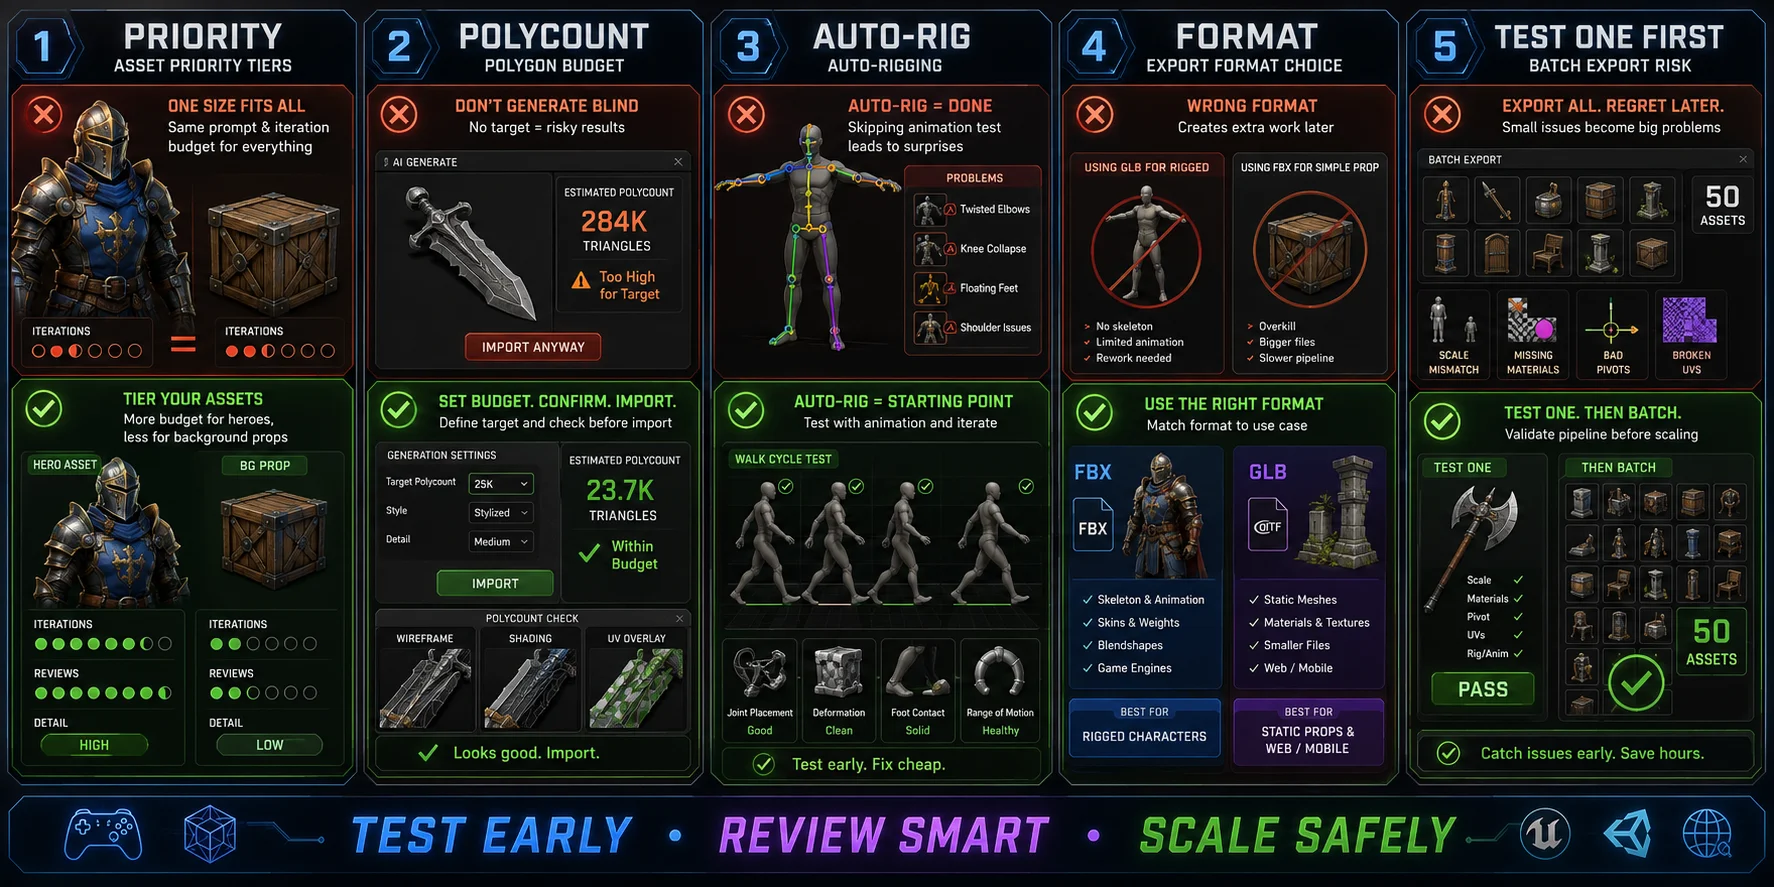
- Skipping asset priority tiers. Your main character and a background crate should not receive the same prompt iteration budget.
- Ignoring polygon count until integration. Set polygon budgets before generating, then confirm them before batch import.
- Treating auto-rigging as final. Auto-rigs are starting points. Always test at least one animation clip before building gameplay systems around the rig.
- Choosing export format by habit. FBX is not always best. GLB may be simpler for static props and web/mobile pipelines, while FBX is safer for rigged characters.
- Batch-exporting before testing one asset. Scale mismatches, missing materials, bad pivots, and broken UVs multiply when you import 50 assets at once.
Frequently Asked Questions
Can I use AI to create all 3D assets for an indie game?
AI 3D generators can produce props, environment pieces, and character meshes for many indie projects. A practical approach is hybrid: use AI for lower-priority assets, while hero assets and player characters receive additional polish or manual refinement.
What is the best AI 3D tool for indie game developers?
The best tool depends on your pipeline priorities. Look for game-oriented topology, suitable export formats, and a workflow that lets you review assets in the target engine. Auto-rigging can also help reduce character-production work, but generated rigs should still be tested before production use.
How do I get AI 3D models into Unity or Unreal Engine?
Choose a format supported by your target engine and import one test asset first. Verify scale, material assignments, pivots, and the skeleton if the asset is rigged before batch importing the rest.
Do I need a paid subscription to export 3D models from Tripo AI?
Export availability and commercial-use terms can vary by plan and model version. Check the Tripo AI pricing page and the applicable terms before using generated assets in a commercial game.
What’s the difference between FBX and GLB for game assets?
GLB can bundle geometry, textures, and material data in one file, which is convenient for static props and lightweight scenes. FBX is commonly used when a pipeline depends on skeletons, animation data, retargeting, or DCC tools. Confirm the import behavior in your target engine before standardizing on one format.
How do I keep a consistent art style across AI-generated assets?
Define three to five recurring descriptors, such as “low-poly, hard edges, warm color palette, stylized proportions,” and prepend them to every prompt. Review assets together in-engine at game camera distance so you can catch differences in scale, lighting, and material response.
Can AI handle rigging for game characters automatically?
AI auto-rigging can generate a starting bone hierarchy for supported character workflows. Treat the result as a first pass: verify bone placement, test a basic animation clip, and adjust orientations or weights when needed.
How many polygons should indie game 3D assets have?
There is no universal polygon budget. Set it according to the asset’s screen size, target platform, camera distance, material complexity, and scene performance. Use Smart Mesh as a starting point for game-oriented assets, then validate the result in the target scene.
Is AI-generated 3D content legal to use in a commercial indie game?
This depends on the platform’s terms and the source material used for generation. Read the current license terms before commercial use, and check restrictions on redistribution, resale of raw assets, or use of protected characters, logos, and proprietary IP.
What’s the fastest AI 3D workflow for a game jam?
For a 48–72-hour jam, prioritize speed over refinement. Use text-to-3D for simple props with a consistent style prefix, batch-generate background assets, export a format supported by your engine, and skip retopology unless something visibly breaks. Test one asset end to end before scaling the workflow.
Conclusion
An AI 3D workflow for indie game development is useful only if it is repeatable. The four stages covered here — prompt design, generation review, export selection, and scene integration — should work as a system, not as improvised one-off steps.
Better prompts produce better first-pass assets, clean export habits prevent import debt, and auto-rigging handled correctly saves weeks across a character roster. To test the workflow, start with one prop in Tripo AI Studio, run it through all four stages, and then scale the process across your asset list.