Supports for AI-Generated 3D Prints: A Beginner's Guide
TL;DR
- Repair and validate the mesh before you generate supports.
- Choose your workflow first: FDM and resin supports use different settings and checks.
- For curved display models, tree or organic supports are a useful first preview, not an automatic final choice.
- Orient the model before tuning supports, then inspect every layer in Preview.
- Split, thicken, or regenerate a model when supports would damage its important surfaces.
AI tools can generate a 3D model in seconds, but a raw AI mesh is not automatically ready to print. Before slicing, verify the geometry, choose the correct printing workflow, orient the model, and inspect the support preview. This guide explains how to prepare an AI-generated model for FDM or resin printing, select a support style, tune the settings that apply to your slicer, remove supports cleanly, and recognize when a model should be split or regenerated instead.
Why AI-Generated Models Need Special Attention Before Supports
What Supports Actually Do
3D print supports are temporary structures that hold up parts of a model the printer cannot build cleanly in mid-air. They are especially important for overhangs, floating details, steep angles, bridges, and thin decorative features.
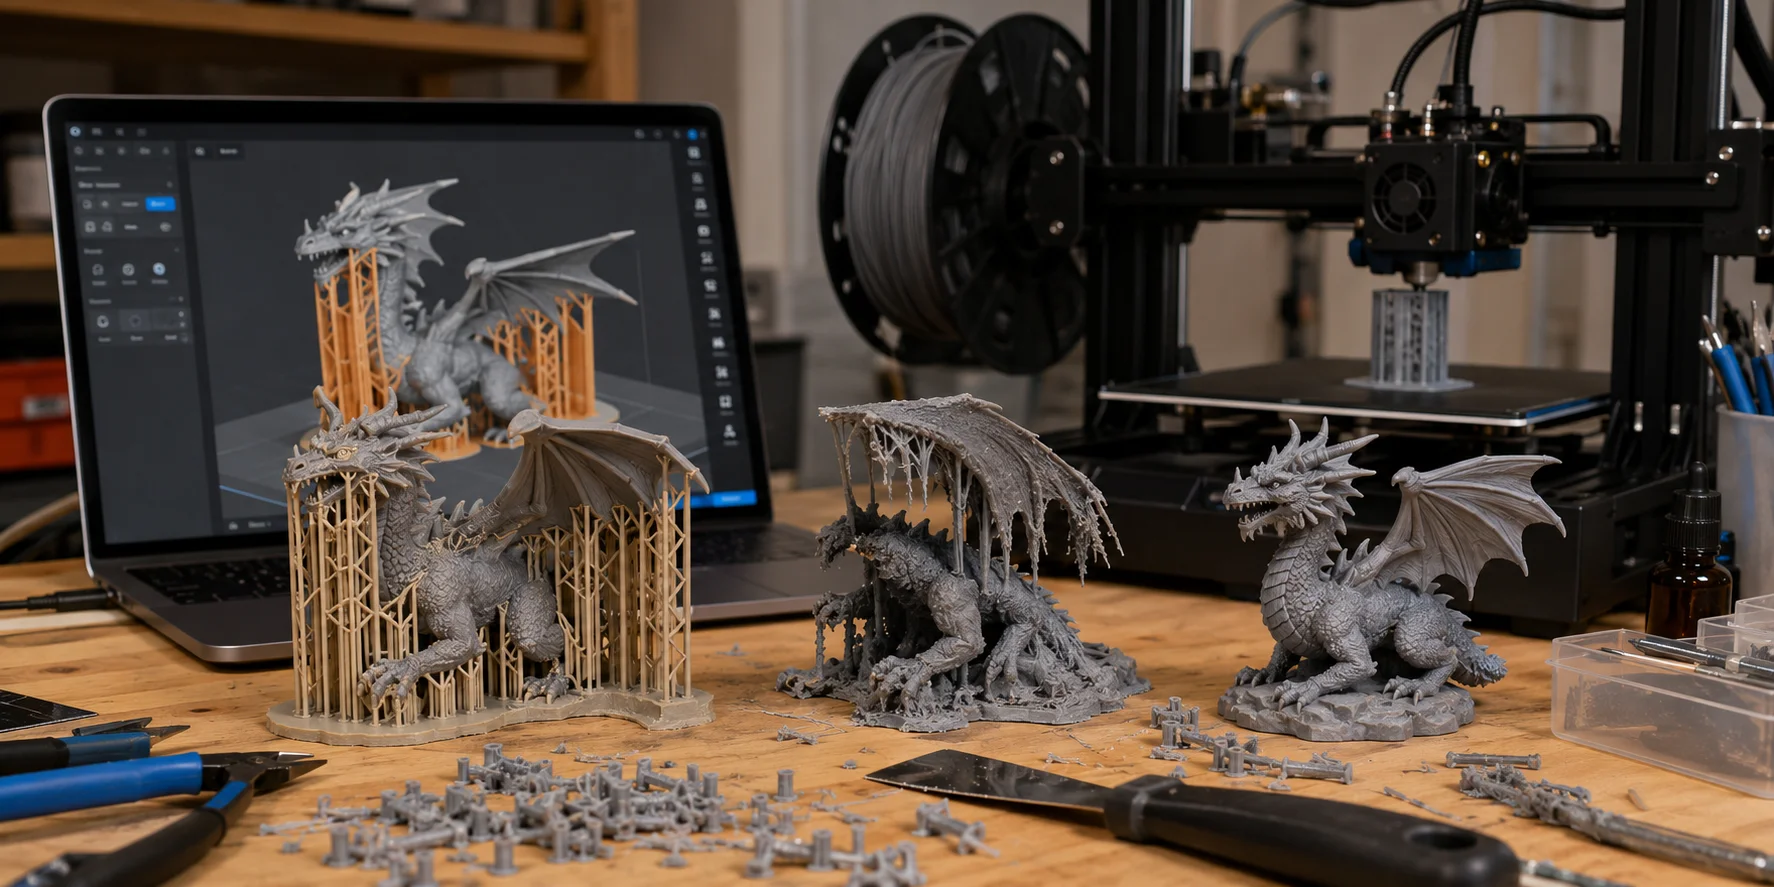
Without supports, filament or resin may have nothing solid to build on. In FDM printing, unsupported plastic can sag, curl, or collapse. In resin printing, unsupported sections can fail during peel forces, leaving missing details or failed layers.
Supports are not part of the final model. They are meant to be removed after printing, so the goal is to use enough support to prevent failure, but not so much that cleanup becomes difficult.
Why AI Models Are Trickier
AI-generated 3D models often have organic shapes, uneven surfaces, floating details, thin areas, and unpredictable geometry. A dragon, creature, character, sculpture, or decorative object may look impressive on screen but include many steep curves and unsupported details.
AI models can also contain mesh issues such as holes, non-manifold edges, inverted normals, overlapping faces, or disconnected shells. These problems confuse slicers and can cause supports to grow in the wrong areas or fail to appear where they are needed.
Scale is another common issue. AI-generated models may not have real-world dimensions, flat bases, or practical wall thickness. That means you should not jump straight from AI generation to printing. First, check the mesh, then add supports.
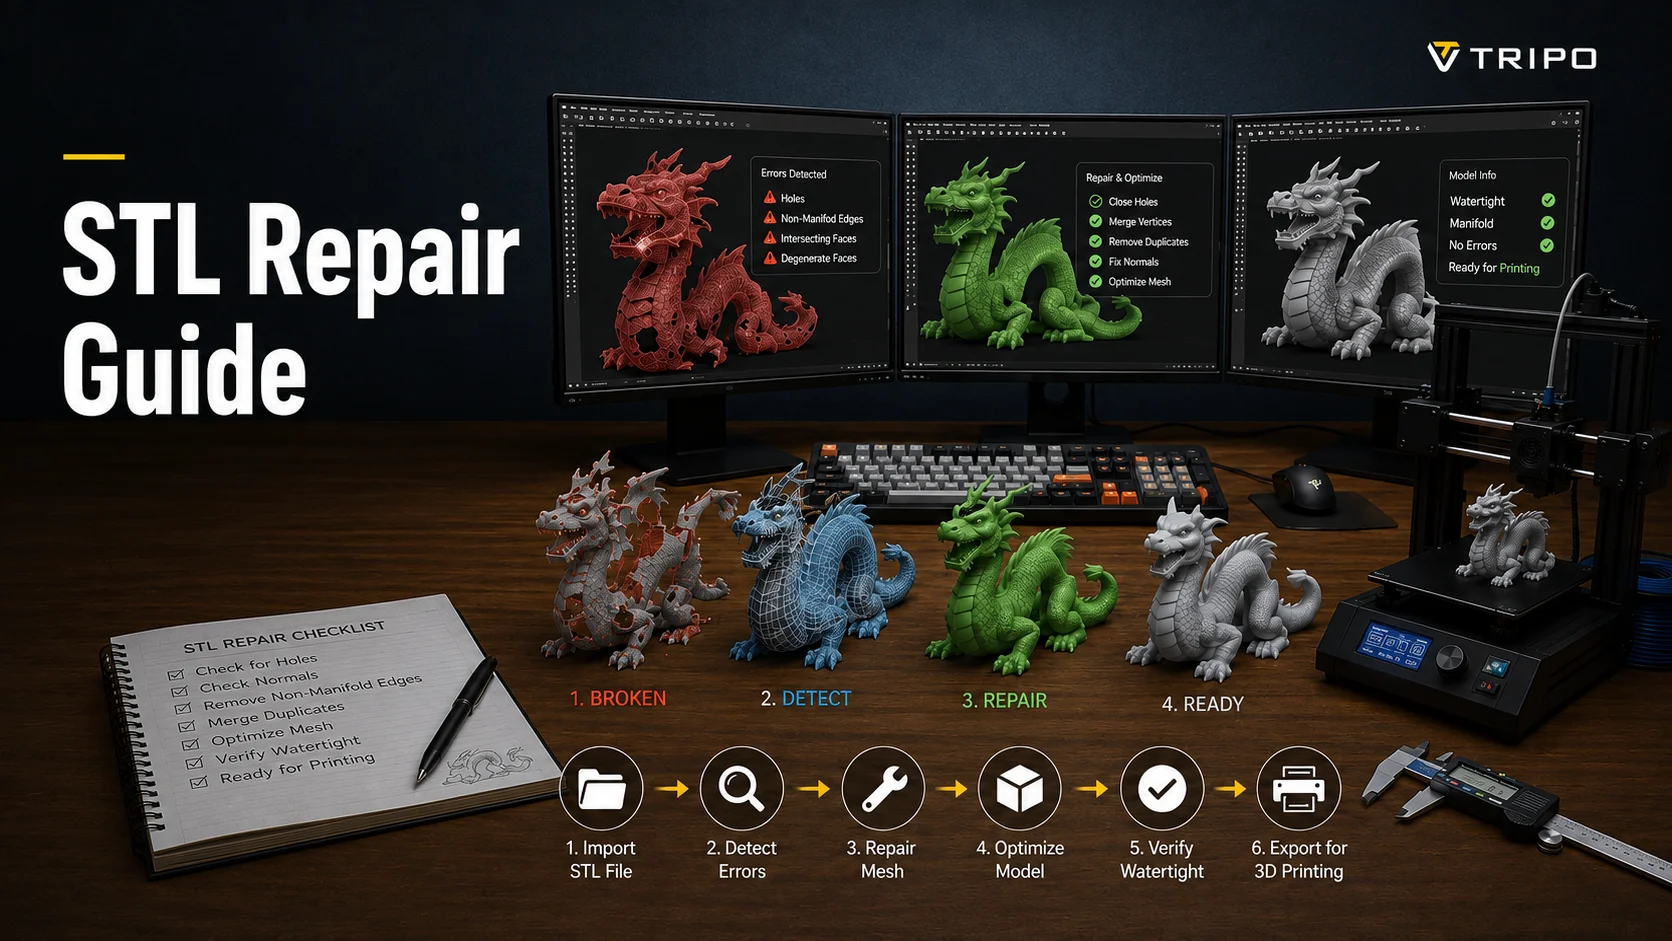
Step 1 — Validate the Mesh and Printability First
Spot the Problems
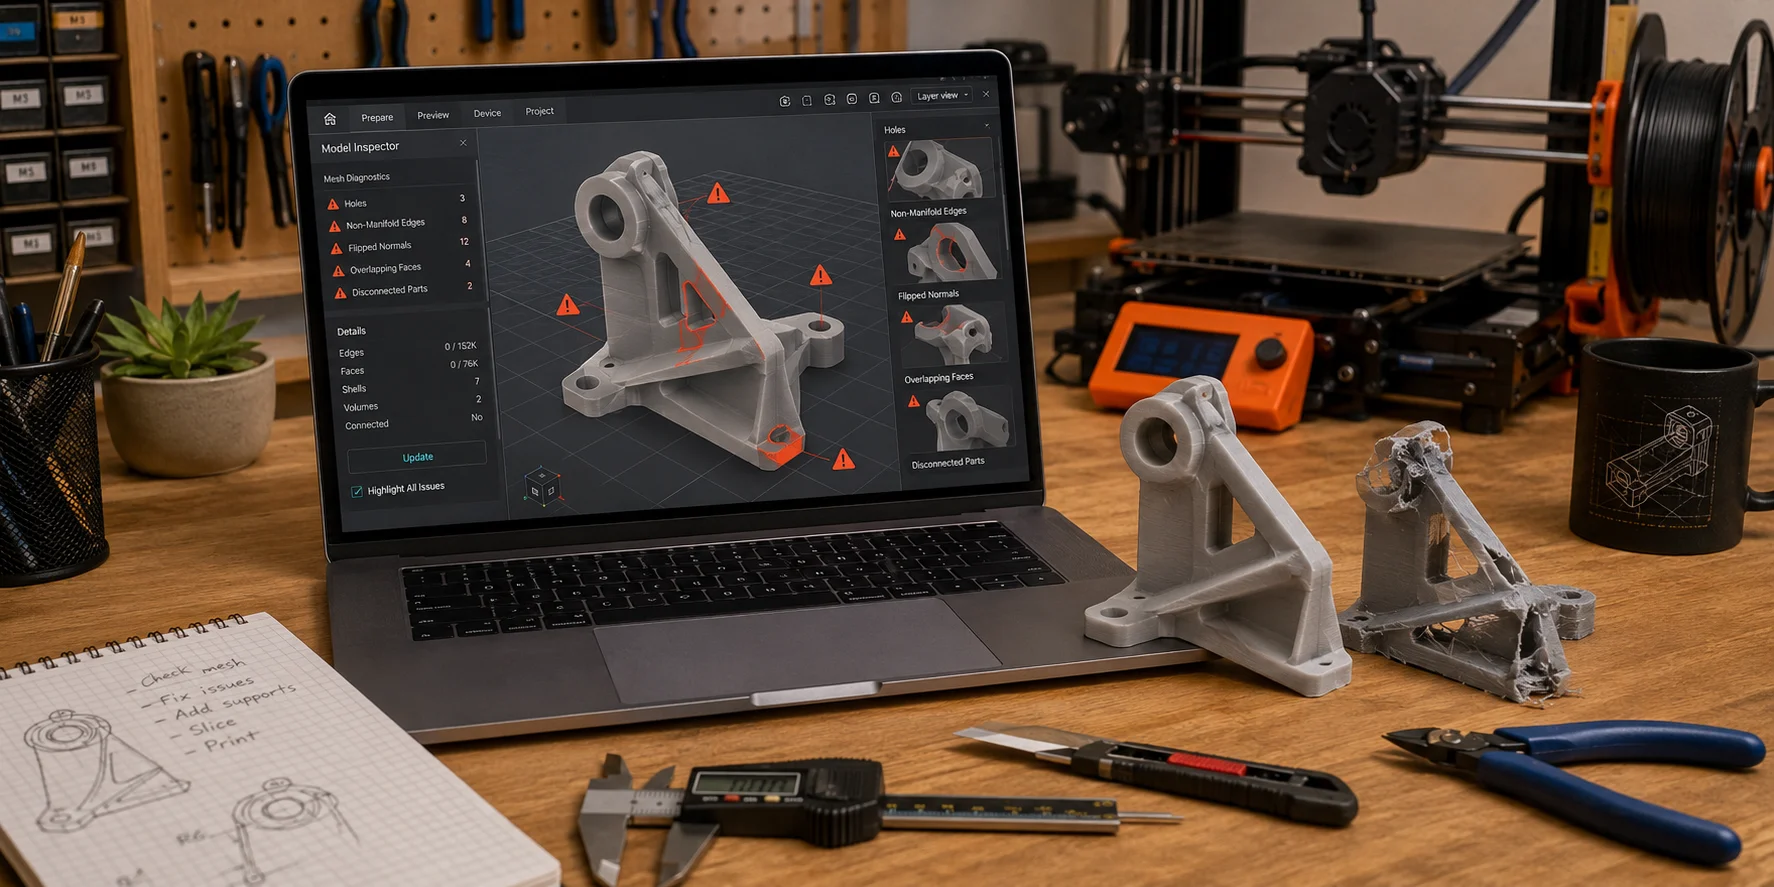
Before adding supports, make sure the model is printable. A watertight model is a closed solid with no holes. If you imagine filling the model with water, nothing should leak out.
Common AI mesh problems include holes, non-manifold edges, flipped normals, overlapping faces, and disconnected parts. These are not always visible in the 3D viewer, but they can break slicing.
Look for warning messages in Cura, PrusaSlicer, Bambu Studio, or Chitubox. If the slicer says the model has holes, mesh errors, or non-manifold geometry, fix that before changing support settings.
Fix It Before Support Generation
Use a mesh repair tool before adding supports. Meshmixer’s Inspector tool can find holes and broken areas. Blender can select non-manifold edges and recalculate normals. Many slicers also offer basic repair when a damaged STL is imported.
In Blender, a basic repair workflow is: enter Edit Mode, select non-manifold edges, fill or bridge gaps, remove duplicate vertices, and recalculate normals. In Meshmixer, use Analysis → Inspector and repair the highlighted areas.
If you are starting from an AI model, generating a cleaner high-detail mesh helps reduce repair work later. Tripo AI’s High-Detail Model workflow supports high-fidelity output suitable for 3D printing and visual arts, which can make the model easier to prepare before slicing.
Why Mesh Repair Comes Before Supports
Supports depend on the slicer understanding what is solid, what is outside, and what is unsupported. If the mesh has holes or broken surfaces, the slicer may misread the model and generate supports inside the wrong areas.
A broken mesh can also create missing supports, floating islands, internal support structures, or strange toolpaths. Repairing the mesh first gives the support generator a clean model to analyze.
Think of this as the correct order: repair the geometry, confirm the model is watertight, then add supports.
Step 2 — Validate Printability Before You Slice
Before slicing, check the model's scale, wall thickness, base stability, connected shells, and mesh integrity. A clean-looking model can still fail if it is too thin, has no stable contact area, or contains geometry the slicer cannot interpret.
If you are generating a model with text-to-3D or image-to-3D, describe the physical constraints in the prompt: a stable base, adequately thick details, no floating parts, and one connected object where possible. Treat these instructions as a starting point, then verify the resulting mesh before you print.
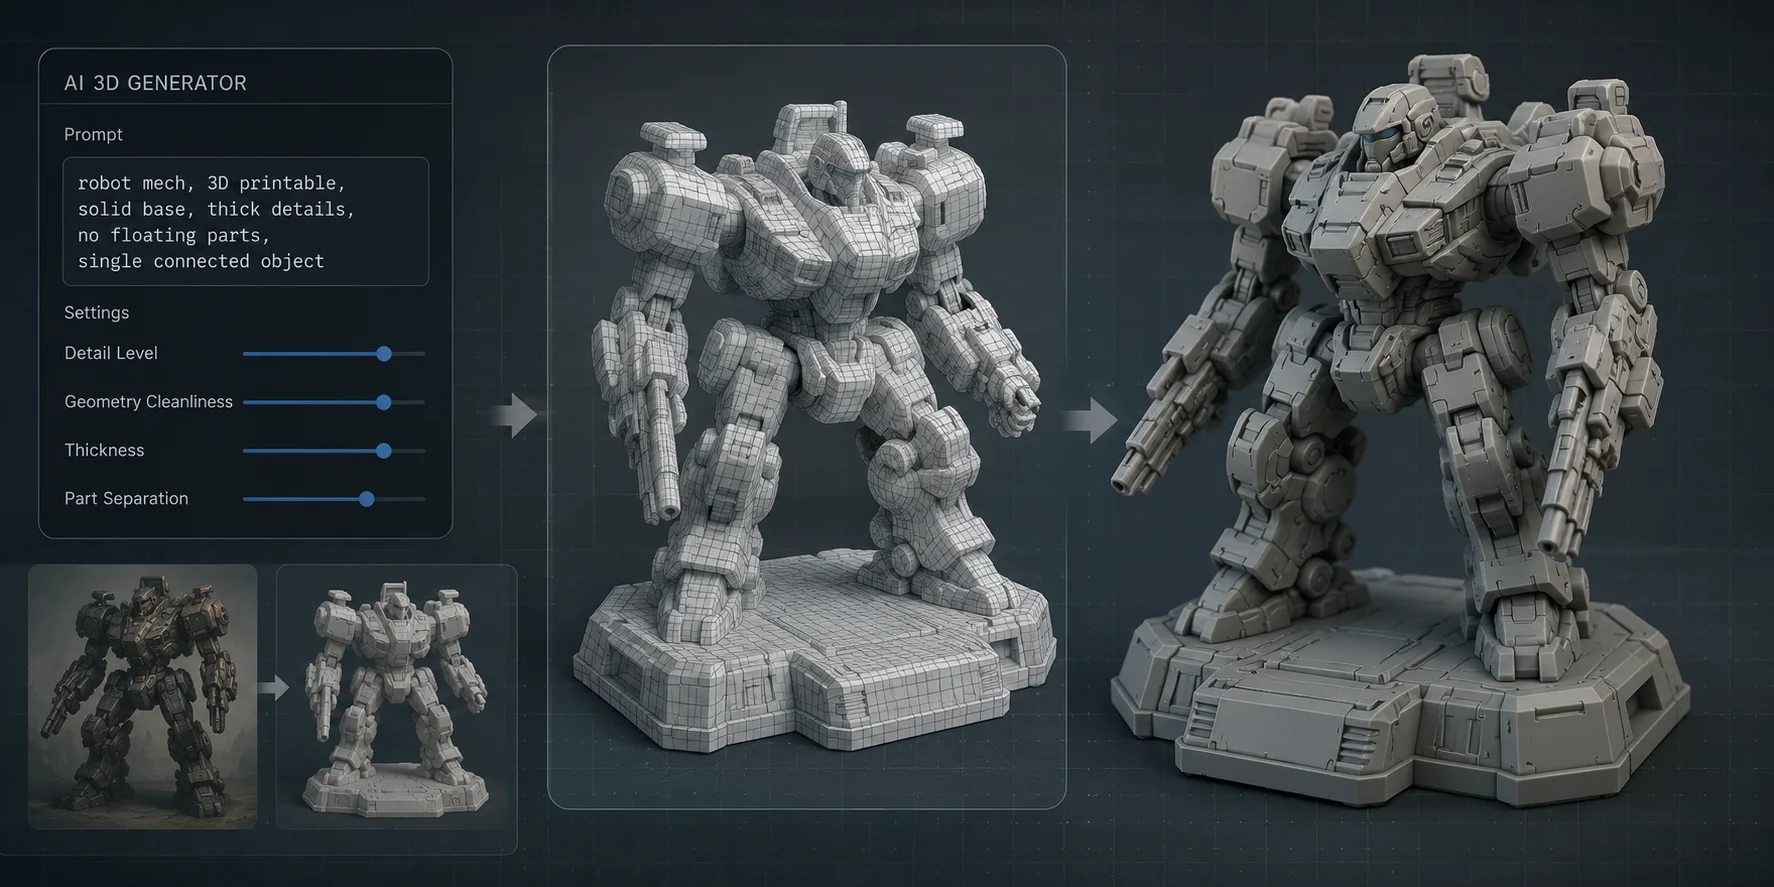
For detailed models, use high-definition or high-detail generation when available. Tripo’s 3D printing workflow recommends generating or uploading an image, using grayscale processing, creating an HD model, turning texture off, using Ultra settings, and selecting up to 2M triangles for rich detail. For complex models, the Parts option can segment the object into printable sections.
Part segmentation is especially useful for AI-generated characters, creatures, props, and sculptures. Instead of printing one difficult model with supports everywhere, you can split it into logical parts, rotate each part separately, and use less support material.
You can also use an image-to-3D workflow when starting from a sketch, concept image, or product reference. After generation, check scale, wall thickness, base stability, and mesh integrity before exporting to STL or 3MF.
Step 3 — Choose the Right Type of Support
Not all supports work the same way. The best option depends on the model’s shape, detail level, and how much cleanup you can accept.
Standard or Grid Supports
Standard supports create straight, block-like structures under overhangs. They are predictable and work well for simple mechanical shapes, flat overhangs, and basic objects.
They are not always ideal for AI-generated organic models. A character, monster, statue, or decorative object may end up covered in dense support material, which can leave scars or break small details during removal.
Use standard supports when the model has simple geometry, broad flat overhangs, or areas where surface quality is not critical.
Tree Supports
Tree supports grow upward with branching structures. They use less material than dense grid supports and usually touch the model at fewer points.
This makes them useful for organic AI shapes such as creatures, characters, fantasy props, animals, or sculptures. Because contact points are smaller, tree supports are often easier to remove and leave fewer marks.
For a curved display model, tree supports are a sensible first option to preview. Keep standard supports in play for heavy overhangs, flat mechanical surfaces, or any area where the tree branches are not stable enough.
Organic Supports
Organic supports are PrusaSlicer's tree-like support style. Other slicers may use a different name or offer a different implementation, so compare the preview and the available settings rather than assuming the options behave identically.
Organic supports are especially useful when the model has complex curves, small features, or delicate details. They can reduce scarring and make support removal easier.
Start by comparing the tree-like option available in your slicer with standard supports in Preview. Choose the version that reaches the overhang reliably while keeping contact points off the surfaces you most want to preserve.
| Support Type | Best For | Pros | Cons |
|---|---|---|---|
| Standard / Grid | Simple parts, flat overhangs, mechanical shapes | Stable, predictable, widely supported | Uses more material and can scar surfaces |
| Tree Supports | Organic models, characters, creatures, props | Less material, fewer contact points, easier cleanup | May need tuning for heavy overhangs |
| Organic Supports | Detailed AI models, curved shapes, sculptures | Efficient, detail-friendly, easier removal | Settings vary by slicer and may need testing |
Step 4 — Set Up Supports in Your Slicer
Overhang and Support Angle
Use your printer and material profile as the starting point for the support threshold. Different slicers define and label overhang angles differently, so do not copy one number blindly between applications. Change the threshold in small increments, then compare the layer preview before printing.
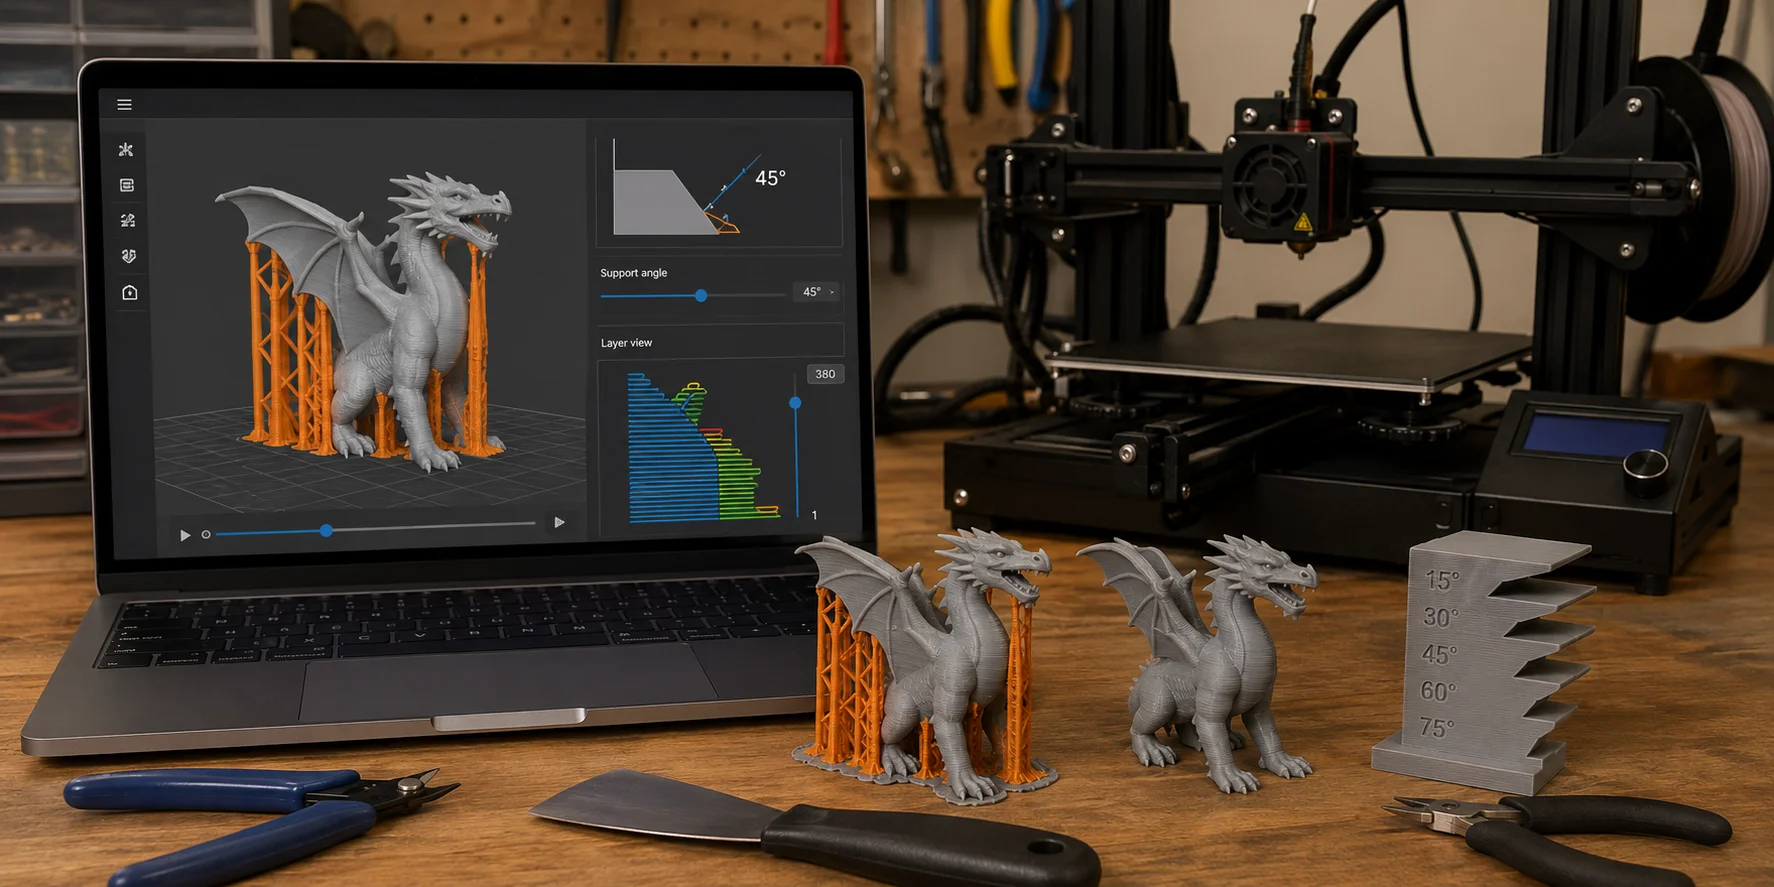
For a model with many curved surfaces or fine details, begin with the profile's default threshold and inspect the layer preview. If supports cover too much of the model, adjust the threshold gradually and verify that every overhang still has a stable path to the build plate.
Support Density and Z-Distance
Support density controls how solid the support structure is. Lower density is easier to remove and uses less material, but it may not hold heavy overhangs well. Higher density is stronger, but it increases print time and cleanup.
For FDM prints, a support density around 10–20% is a common starting point. For delicate AI models, begin lower and increase only where needed.
Z-distance controls the gap between the support and the model. A larger gap makes supports easier to remove but can create rougher undersides. A smaller gap improves support quality but may bond too strongly to the model.
In Cura, PrusaSlicer, and Bambu Studio
In Cura, enable supports and try its tree-support option for a curved display model. Start with the active printer profile, then use Preview to confirm that branches reach the build plate and do not cover priority surfaces.
In PrusaSlicer, choose organic supports for curved or detailed models. Use the preview mode to make sure supports reach the overhangs without covering important details.
In Bambu Studio, enable auto supports and consider tree-style support options for complex forms. Because Bambu Studio shows a detailed preview, check whether support contact points are easy to reach after printing.
Auto-support is a starting point, not a final answer. In Preview, confirm that every island or unsupported feature begins on support or on the model, branches reach the build plate, no support is trapped in an inaccessible cavity, and contact points avoid the surfaces you want to keep clean.
Step 5 — Orientation and Support Placement
Model orientation is the easiest way to reduce support problems. Before generating supports, rotate the model and look for the position that creates fewer steep overhangs.
For character models, avoid placing the most detailed face directly on supports. Details such as faces, hands, armor, textures, or engraved patterns should face upward or outward when possible. Support scars are much easier to hide on the back or underside of a model.
A flat base is usually best for stability. If the AI model has no stable bottom, add a base, cut a flat surface, or split the model into parts. Tall models may benefit from being tilted slightly or printed in sections.
Manual support placement can also help. Add support where auto-support misses a floating island, and remove support from delicate areas where scarring would be obvious. Support blockers in Cura, PrusaSlicer, and Bambu Studio are useful for protecting important surfaces.
The best order is: orient the model first, then generate supports, then manually tune the support contact points.
Step 6 — Remove Supports Cleanly
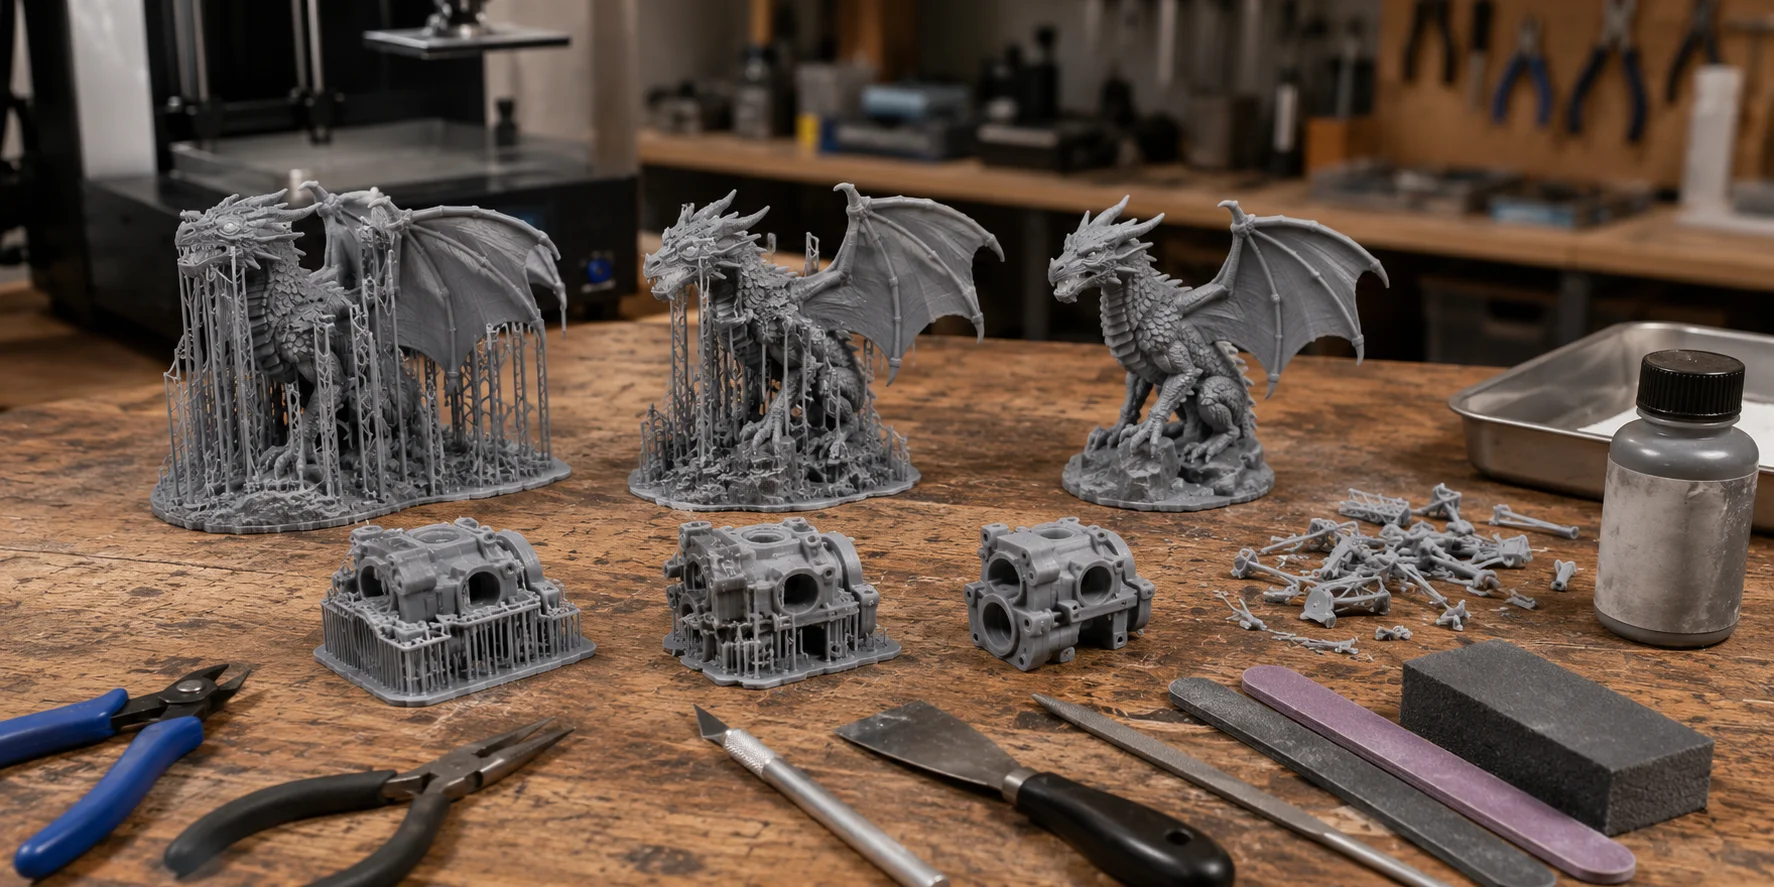
Support removal can damage an AI-generated model if you rush. Many AI models have thin details, small decorative shapes, and delicate surface textures, so cleanup should be slow and controlled.
For FDM prints, let the part cool before removing supports. Cooled plastic is usually easier to separate cleanly. Use flush cutters, needle-nose pliers, a scraper, or a hobby knife depending on the model.
Start with the outer supports. Remove large support branches first, then work toward smaller contact points. Do not twist or pull supports near thin details such as fingers, horns, ears, tails, weapons, or decorative trim.
Tree and organic supports usually help here because they use fewer contact points. That means less force is needed during removal, and there are fewer scars to clean afterward.
If support marks remain, use light sanding, a small file, or filler primer before painting. For display models, a little post-processing can make a big difference.
For resin prints, support removal depends on your resin, exposure settings, and workflow. Many users remove supports after washing and before final curing, when the resin is less brittle. However, delicate features still require care. Use small cutters and avoid snapping supports off by force.
Clean support removal starts before the print begins. Better orientation, tree or organic supports, correct Z-distance, and careful contact placement all make the final cleanup easier.
When to Re-Generate Instead of Fighting Supports
Sometimes the best fix is not more support. It is a better model.
Re-generate or redesign the model if it has too many floating details, extremely thin parts, no stable base, severe mesh damage, or large unsupported sections that would require supports everywhere. A model covered in dense support material may print, but cleanup can destroy the final result.
You should also reconsider the model if supports grow inside enclosed cavities or if important details are impossible to protect from scarring. In those cases, split the model into parts, thicken weak features, add a base, or generate a new version with more print-friendly instructions.
AI can help create models quickly, but it cannot always make an impossible physical object printable. If the structure itself is too fragile or unsupported, the most efficient path is to regenerate the model with printing constraints built into the prompt.
Frequently Asked Questions
Can I use AI to make 3D prints?
Yes, AI tools can generate 3D models from text prompts, images, or sketches, and many of those models can be prepared for 3D printing. However, you still need to check whether the mesh is watertight, scaled correctly, and thick enough to print. AI generation creates the starting model, while slicer preparation makes it printable.
What is the best support to use for 3D printing?
For simple mechanical parts, standard supports are often a reliable choice. For curved AI-generated models such as characters, creatures, statues, and decorative props, compare the tree-like option in your slicer with standard supports in Preview. Choose the option that gives stable coverage with the fewest visible contact points.
Do I need to repair an AI-generated model before adding supports?
Yes, you should check and repair the mesh before adding supports. If the model has holes, non-manifold edges, or inverted normals, the slicer may place supports incorrectly or miss unsupported areas entirely. Repair first, then generate supports.
Tree supports vs standard supports — which is better for AI models?
Neither style is always better. Tree-like supports can reduce surface contact on curved display models, while standard supports can be more reliable for flat, simple, or heavy overhangs. Compare both in Preview and keep contact points off the surfaces you most want to preserve.
Can ChatGPT actually make STL files?
ChatGPT can help write prompts, generate simple code-based shapes, or explain modeling steps, but it does not directly replace a 3D modeling or slicing workflow. To create printable 3D files, use a dedicated AI 3D tool, modeling software, or slicer that can export STL or 3MF.
What free slicer can add supports to an AI 3D model?
Cura, PrusaSlicer, and Bambu Studio can all add supports to imported AI-generated models. Cura offers tree supports, PrusaSlicer offers organic supports, and Bambu Studio provides auto-support tools with detailed preview options. Whichever slicer you use, inspect the supports before printing.
Conclusion
To print an AI-generated model successfully, validate the mesh and printability first, choose the FDM or resin workflow, orient the model before adding supports, compare support styles in Preview, and remove supports carefully. This workflow helps turn an AI idea into a physical object that actually prints.
If you want to generate or refine models before slicing, try Tripo AI Studio and prepare a cleaner starting point for 3D printing.