AI 3D Modeling for Beginners: How to Create Your First 3D Model with AI
TL;DR
- AI 3D modeling for beginners means using AI tools to create 3D models from text prompts, images, or simple references instead of building every vertex by hand.
- It is beginner-friendly because it lowers the first barrier: getting a base model on screen. You still need to learn basic 3D ideas such as shape, scale, mesh quality, texture, file formats, and export settings.
- A practical first workflow looks like this:
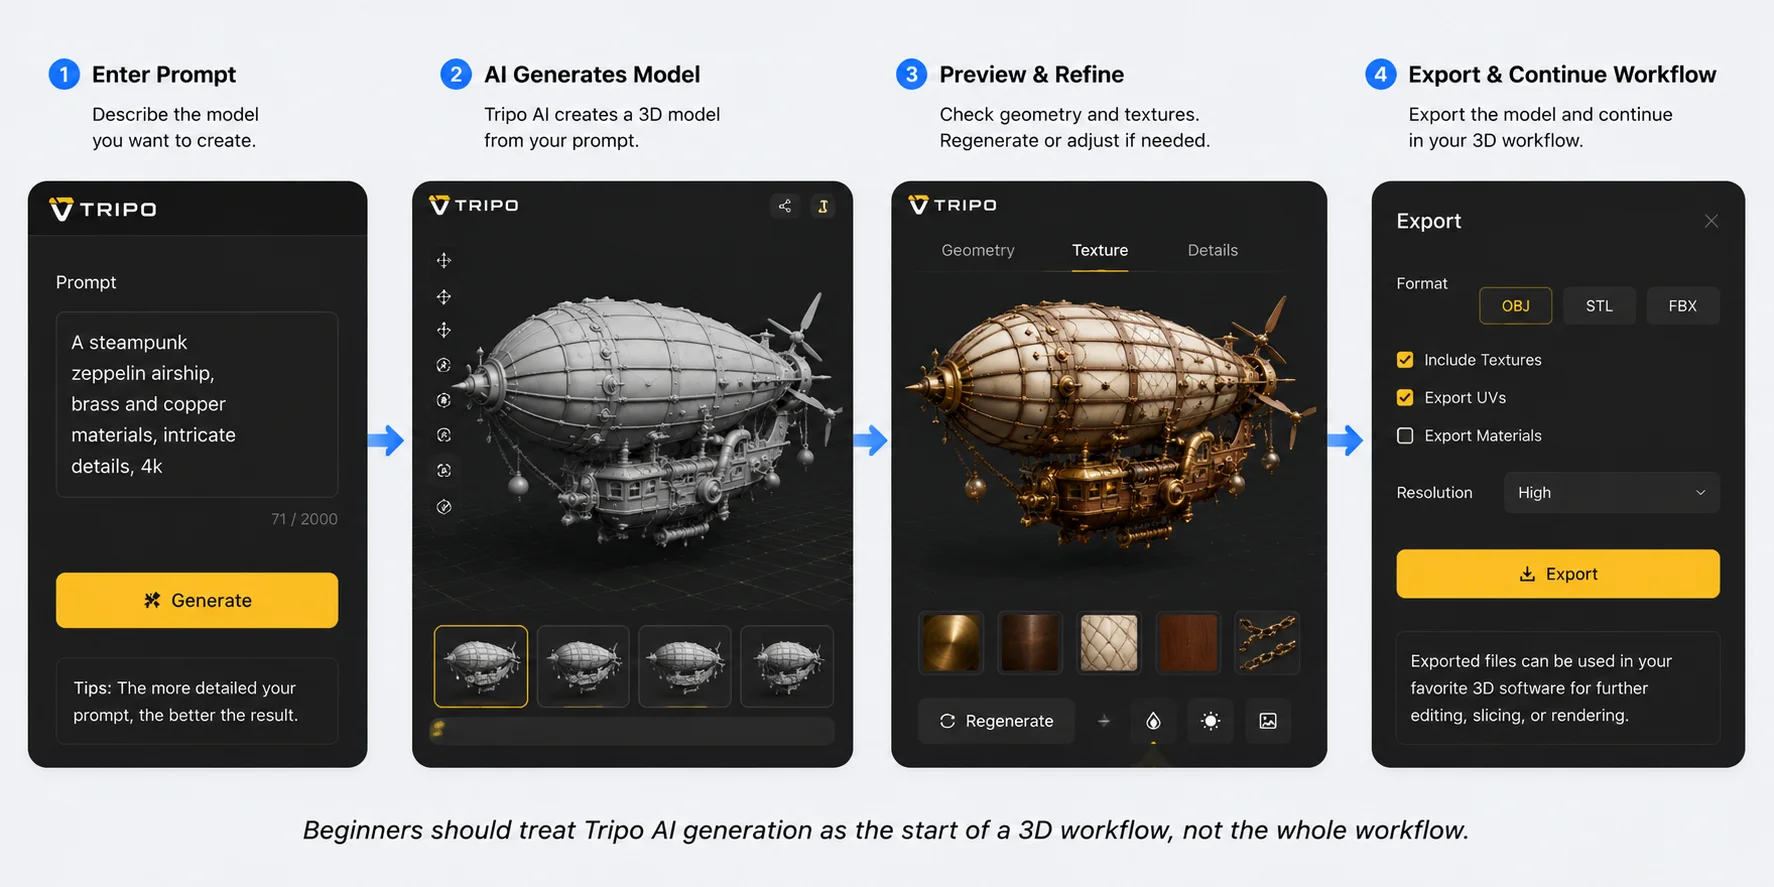
- Idea → Text Prompt or Image → Generate Model in Tripo → Review Geometry → Improve if Needed → Export → Use for 3D Printing, Blender, Unity, Unreal Engine, or Product Visualization
- Tripo fits into the early part of this workflow as an AI-powered 3D creation platform with Text-to-3D, Image-to-3D, HD Model, Smart Mesh, texture generation, multiple export formats, DCC Bridge, and support for 3D printing workflows.
Introduction
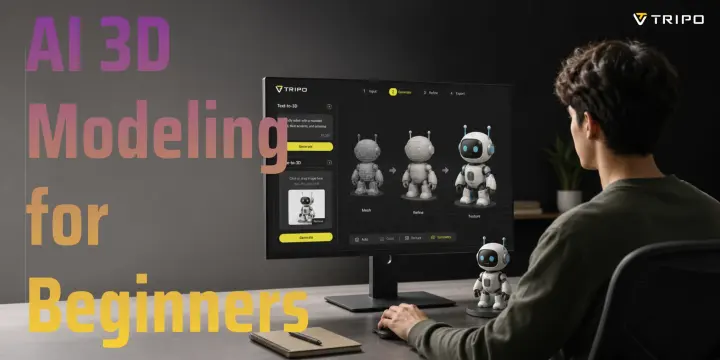
AI 3D modeling for beginners is a practical way to start making 3D models without spending weeks learning every tool in Blender, Maya, or ZBrush first. Instead of shaping a model point by point, you can describe what you want in text or upload an image, then use an AI 3D model generator to create a first version.
That does not mean 3D modeling has become automatic. A generated model still needs review. You may need to fix proportions, check the mesh, improve detail with HD Model, adjust textures, export the right file type, or prepare it for 3D printing, a game engine, or product visualization.
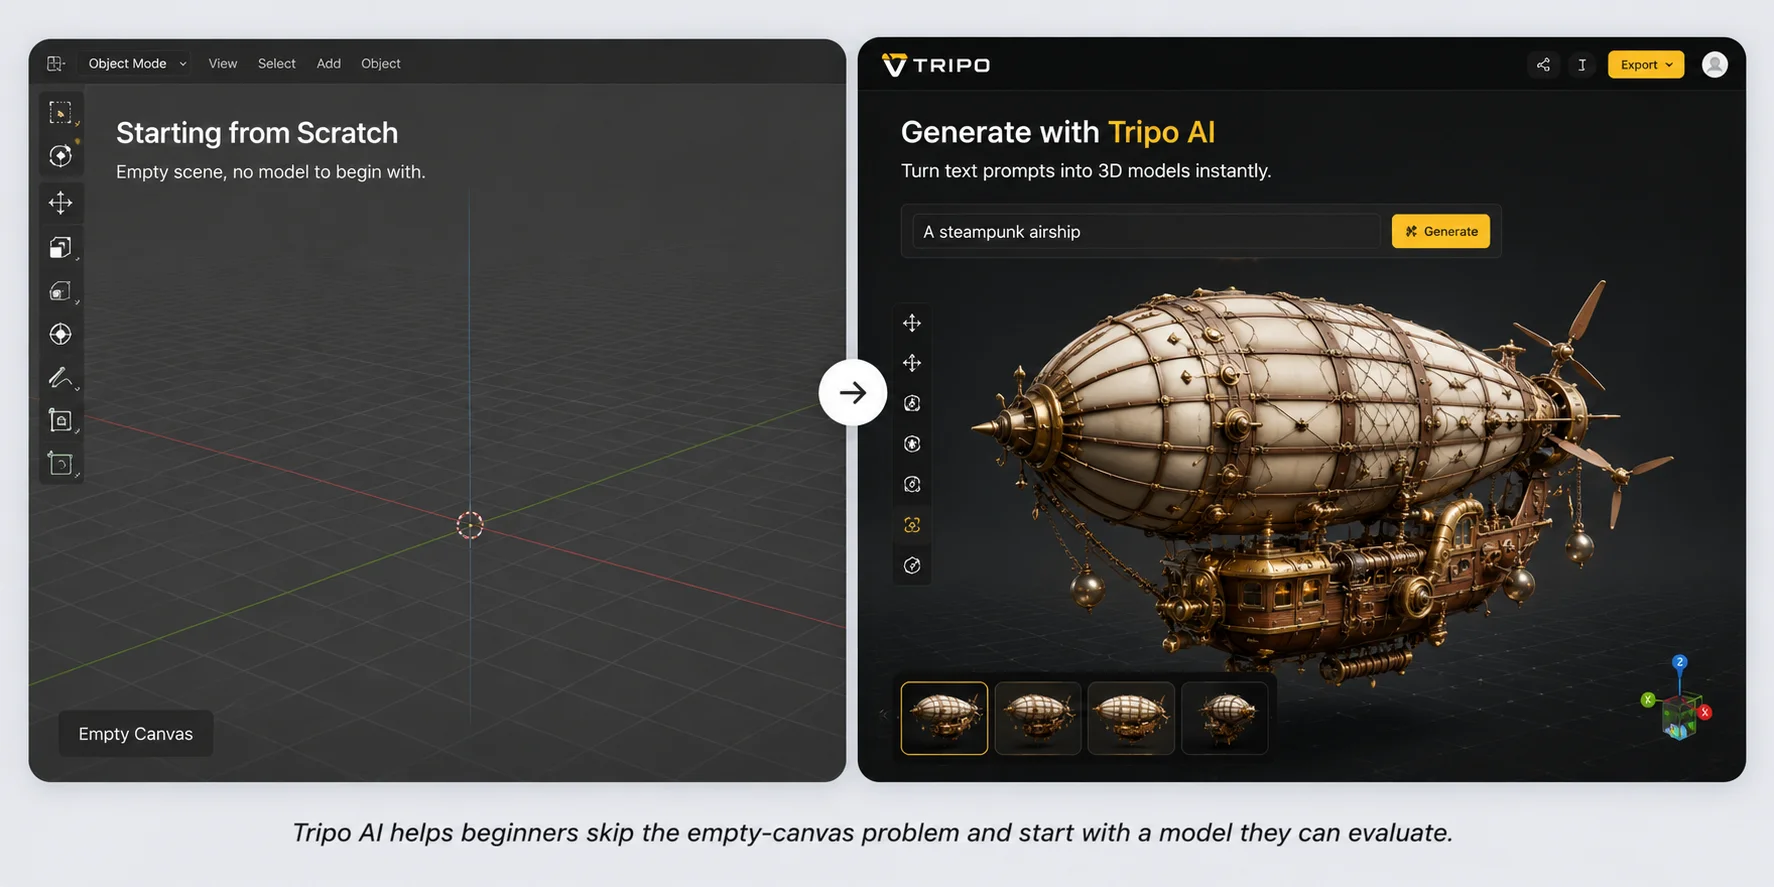
Beginners no longer have to start with an empty viewport. AI can give you something to inspect, edit, and learn from.
What Is AI 3D Modeling?
AI 3D modeling is the use of machine learning tools to generate or assist with 3D model creation. Depending on the tool, the input might be a text prompt, a single image, several images, or an existing 3D file that needs improvement.
A traditional 3D model is usually made by building geometry manually. The artist creates forms, adds details, unwraps UVs, applies materials, and prepares the model for a target use. AI 3D modeling changes the starting point. It can generate the base mesh, suggest forms, create texture detail, or help convert a visual idea into a model.
For beginners, the most common entry points are text to 3D and image to 3D.
Text to 3D starts with a written prompt, such as "a small sci-fi storage crate with rounded corners and panel lines." Image to 3D starts with a visual reference, such as a sketch, product photo, character concept, or object image.
The result is an AI generated 3D model. It may be useful right away for concept work, but it is better to treat it as a first draft. Like a photo from a camera, it still benefits from review and cleanup.
Why AI 3D Modeling Is Beginner-Friendly
Beginner 3D modeling is hard because the first steps are not intuitive. You have to learn navigation, modeling tools, topology, scale, materials, lighting, and file formats before you can make something that feels finished. Many people quit before they reach that point.
AI 3D modeling gives beginners a faster starting point. Instead of asking "How do I model this from scratch?", the first question becomes "Is this generated model close enough, and what needs fixing?"
That shift matters. Beginners can learn by examining a model rather than staring at an empty scene. They can rotate it, inspect its silhouette, compare the texture to the prompt, and see how geometry behaves in a real 3D workspace.
AI also helps with iteration. If your first prompt produces a model that is too plain, you can revise the description. If an image result misses a detail, you can try a cleaner reference. This feedback loop teaches practical 3D judgment: what makes a good source image, what details survive generation, and what must be edited later.
Still, beginner-friendly does not mean effort-free. You should learn the basics of mesh quality, object scale, export formats, and target platforms. A model for 3D printing has different requirements than a model for a game asset or a product render.
What Can Beginners Create with AI 3D Modeling?
Beginners can create a wide range of simple and mid-complexity 3D assets with AI. The best first projects are specific, compact, and easy to judge visually.
Good beginner examples include small props, stylized characters, decorative objects, product mockups, toys, tabletop pieces, environment assets, icons, collectible-style models, and concept models for later editing.
For 3D printing, beginners might create a desk ornament, a miniature, a simple holder, a toy-like object, or a decorative shell. Printing adds physical constraints, so thin parts, floating details, and fragile geometry need extra care.
For games, beginners can use AI generated 3D models as concept assets, background props, blockout objects, or starting points for retopology and optimization. A model that looks fine in a viewer may still need polygon reduction, UV cleanup, collision setup, or texture baking before it belongs in Unity or Unreal Engine.
For product visualization, AI 3D modeling can help create fast concept models. This is useful when exploring shape, color, proportion, or presentation before a final CAD or production-ready model exists.
The safest first projects are objects with a clear silhouette: a chair, helmet, backpack, mug, crate, stylized robot, lamp, shoe concept, or simple creature. Avoid transparent objects, complex mechanical assemblies, fine jewelry, and models with many separate moving parts until you have more experience.
Traditional 3D Modeling vs AI 3D Modeling
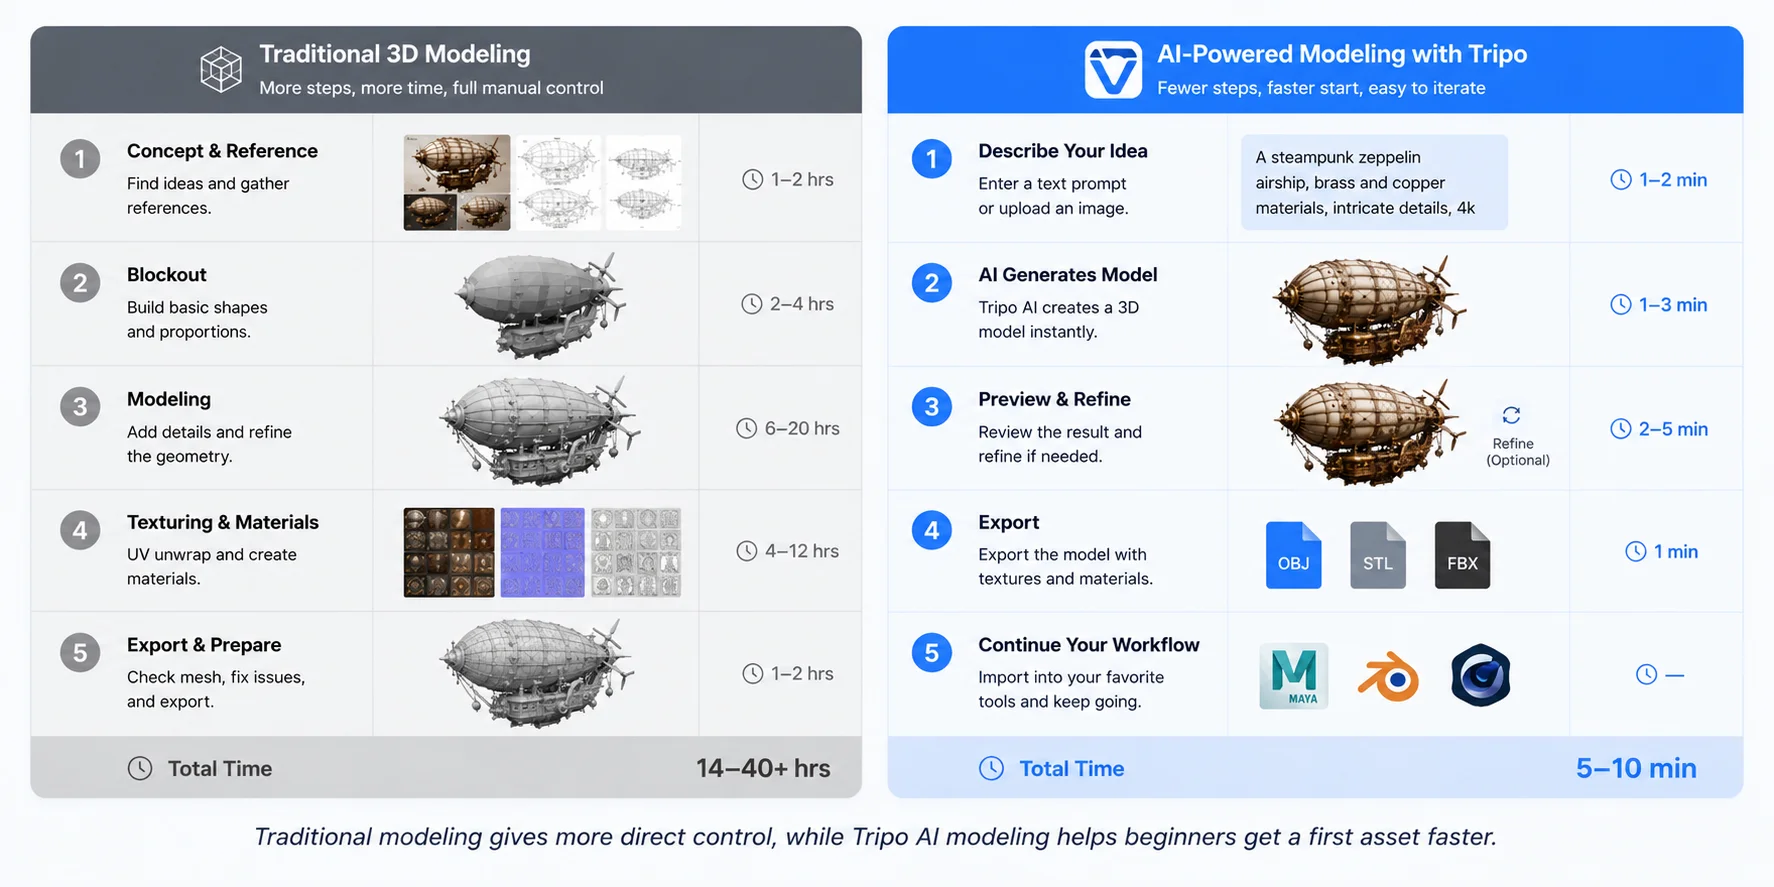
Traditional 3D modeling gives the artist direct control. You decide every curve, edge loop, bevel, UV seam, material, and detail. This is still the standard for production work where topology, animation, precision, and art direction matter.
AI 3D modeling trades some control for speed. It can generate a model from a prompt or image, but the output may need cleanup. You might get a good overall shape with messy topology. You might get a strong texture but imperfect proportions. You might get a printable-looking object that still has thin walls or disconnected parts.
Here is the practical difference:
| Area | Traditional 3D Modeling | AI 3D Modeling |
|---|---|---|
| Starting point | Empty scene or reference | Text prompt, image, or existing asset |
| Learning curve | Steeper at the beginning | Easier first model, still needs review |
| Control | High manual control | Faster generation, less precise control |
| Best for | Production modeling, animation, CAD-like control | Concepts, draft assets, quick exploration |
| Common issue | Slow for beginners | Output may need cleanup |
| Beginner value | Teaches fundamentals deeply | Helps beginners start and iterate |
The best approach is often a mix. Use AI to generate a base model, then use 3D modeling software to refine, optimize, rig, print, or render it.
Co
How to Start AI 3D Modeling with Tripo
Tripo is an AI-powered 3D creation platform that can generate 3D models from text or images. For beginners, its role is simple: it turns an idea into a first 3D asset that you can inspect, improve, and export for the next tool in your workflow.
A beginner workflow can stay very simple:
Model in Tripo → Review Geometry → Improve if Needed → Export → Use for 3D Printing, Blender, Unity, Unreal Engine, or Product Visualization
Each step matters. Skipping the review stage is the fastest way to end up with a model that looks fine in a preview but fails later in a slicer, renderer, or game engine.
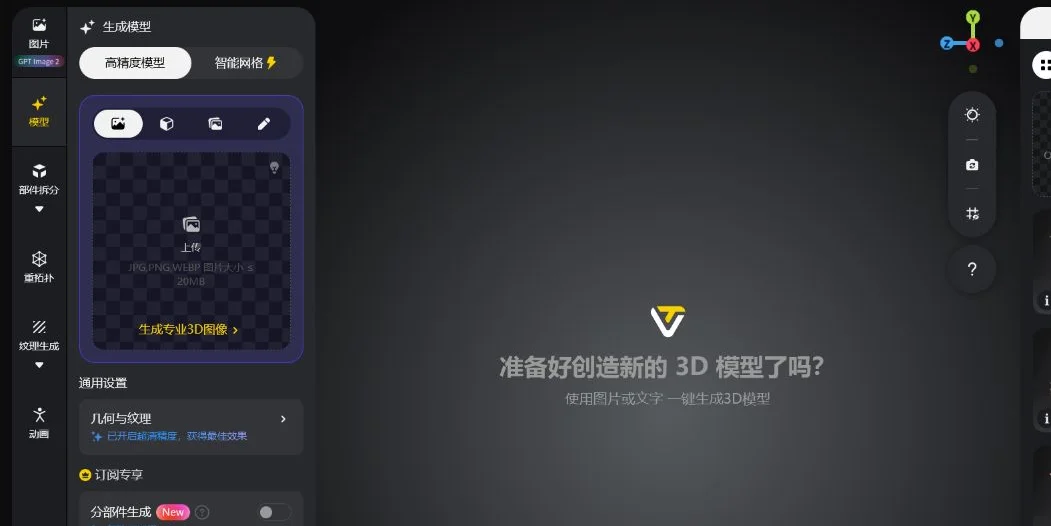
Step 1: Choose Text-to-3D or Image-to-3D
Start with Text-to-3D if you have an idea but no reference image. A useful prompt describes the object, visual style, important details, and intended use.
For example:
A stylized low-poly treasure chest for a fantasy mobile game, closed lid, simple metal bands, clean shape, suitable as a game prop.
Start with Image-to-3D if you already have a visual reference. Choose an image that shows the object clearly, with minimal background clutter and a readable silhouette. A clean product photo or concept sketch usually works better than a busy scene.
Use Text-to-3D for open-ended ideation. Use Image-to-3D when matching the proportions and shape of a reference matters more.
Step 2: Generate Your First Model
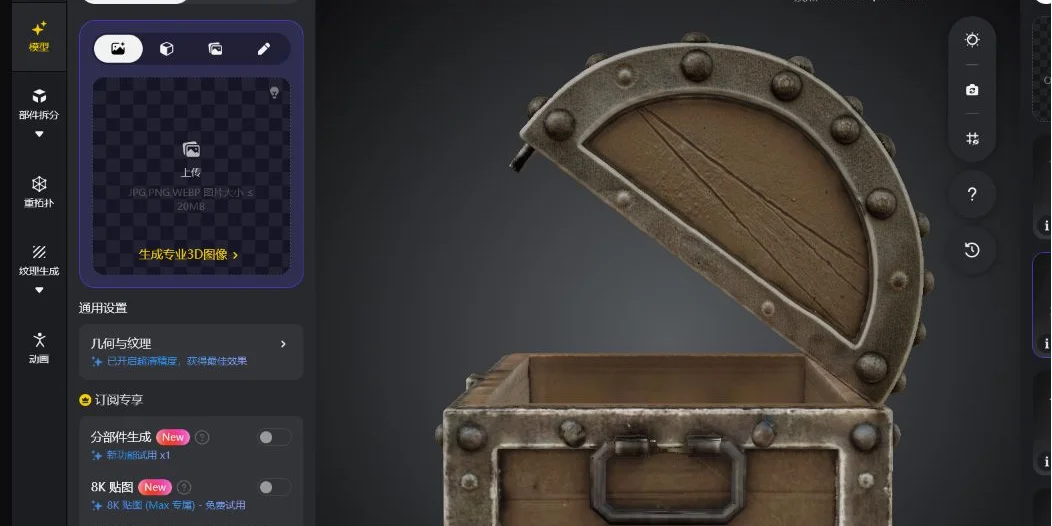
After choosing your input method, enter the prompt or upload the reference image and generate the model in Tripo.
Do not expect the first result to be final. Look at the large forms before worrying about small surface details. Check the silhouette, proportions, pose, major features, and overall style.
If you are making a game asset, confirm that the object remains recognizable from a distance. If the model is intended for 3D printing, check whether narrow components and raised details appear thick enough to print. For a product visualization concept, ask whether the overall shape communicates the design clearly.
Beginners often focus on texture too early. A polished surface cannot fix incorrect proportions.
Step 3: Review and Improve the Model
Rotate the generated model and inspect it from every angle. Pay particular attention to the back, underside, and side views. Problems often appear in areas that were not clearly described in the prompt or visible in the reference image.
Look for warped details, uneven symmetry, thin components, merged shapes, rough surfaces, holes, and unexpected bumps. Some models need only minor refinement. Others are better regenerated with a clearer prompt or a stronger reference image.
If the overall design is worth keeping but needs additional refinement, Tripo provides HD Model and Smart Mesh. Use these options when the model is close to the intended result but its geometry needs further work.
Texture generation is also relevant when surface appearance matters for rendering, product visualization, or game-asset review.
Step 4: Export Your Model
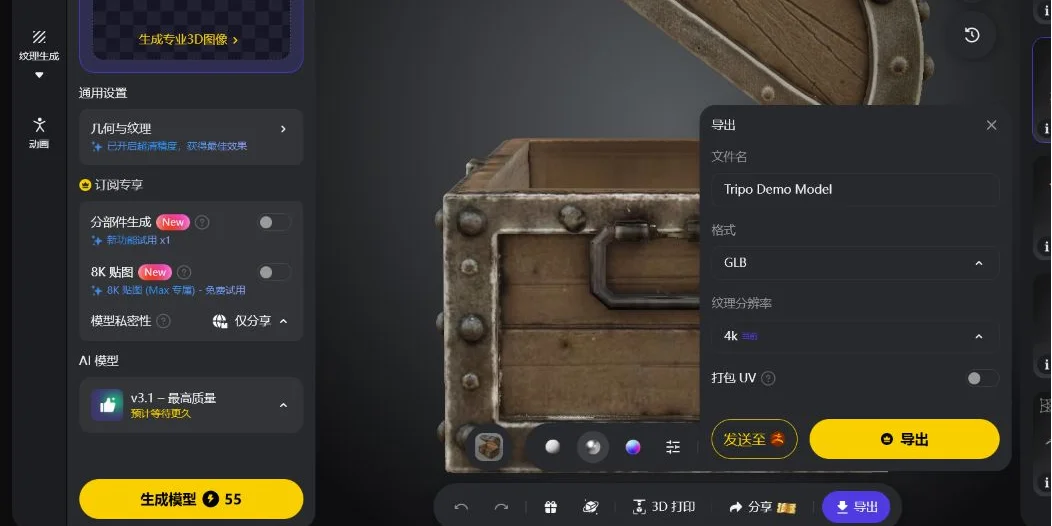
Choose the export format according to what you plan to do next. Learning this distinction early prevents a surprising amount of frustration.
For 3D printing, STL is widely supported by slicers. OBJ may be useful when material or texture information matters. GLB or FBX can suit real-time engines and DCC workflows, depending on the target application.
Tripo supports multiple export formats. Select a format based on the data required by the next tool, not simply the first option in the list.
If you plan to continue editing in a digital content creation application, DCC Bridge can connect the generated asset with a broader 3D workflow. Export should not be treated as an afterthought because the selected format determines which model data is preserved.
Step 5: Continue Your Workflow
After export, the model enters a workflow with its own technical checks.
For 3D printing, open the model in a slicer and check scale, orientation, wall thickness, supports, and the layer preview. A generated model may require repair or simplification before printing.
In Blender, inspect the mesh, clean up surfaces, adjust materials, prepare lighting, or create a render. Blender is also a practical place to learn conventional editing after generating your first asset with AI.
In Unity or Unreal Engine, check polygon count, scale, materials, textures, pivot placement, and collision. A game asset must perform well in context, not merely look good in a model viewer.
For product visualization, concentrate on proportions, surface finish, camera position, lighting, and material presentation. A concept model does not need manufacturing-level precision, but it should communicate the product clearly.
mmon Mistakes Beginners Should Avoid
The first mistake is writing vague prompts. "Cool robot" gives the AI too much room to guess. "Small rounded service robot with two arms, screen face, rubber wheels, white plastic body, game asset style" gives it something to work with.
The second mistake is using poor reference images. Busy backgrounds, cropped objects, reflections, and extreme angles can confuse image to 3D generation. Use clear images when possible.
The third mistake is skipping geometry review. Even a good-looking AI generated 3D model can have mesh problems. Always rotate it and inspect the shape before export.
The fourth mistake is choosing the wrong export format. A textured model exported to a geometry-only format may lose information. A print file exported with the wrong scale may import at the wrong size.
The fifth mistake is expecting one tool to finish the whole job. AI can create the starting model, but 3D printing, game development, and product visualization each have their own rules. Learning those rules is part of becoming competent.
The sixth mistake is starting with an overly complex project. A detailed creature with wings, fur, armor, and weapons is a rough first target. Start with a clean object. You will learn faster.
Best Beginner Projects
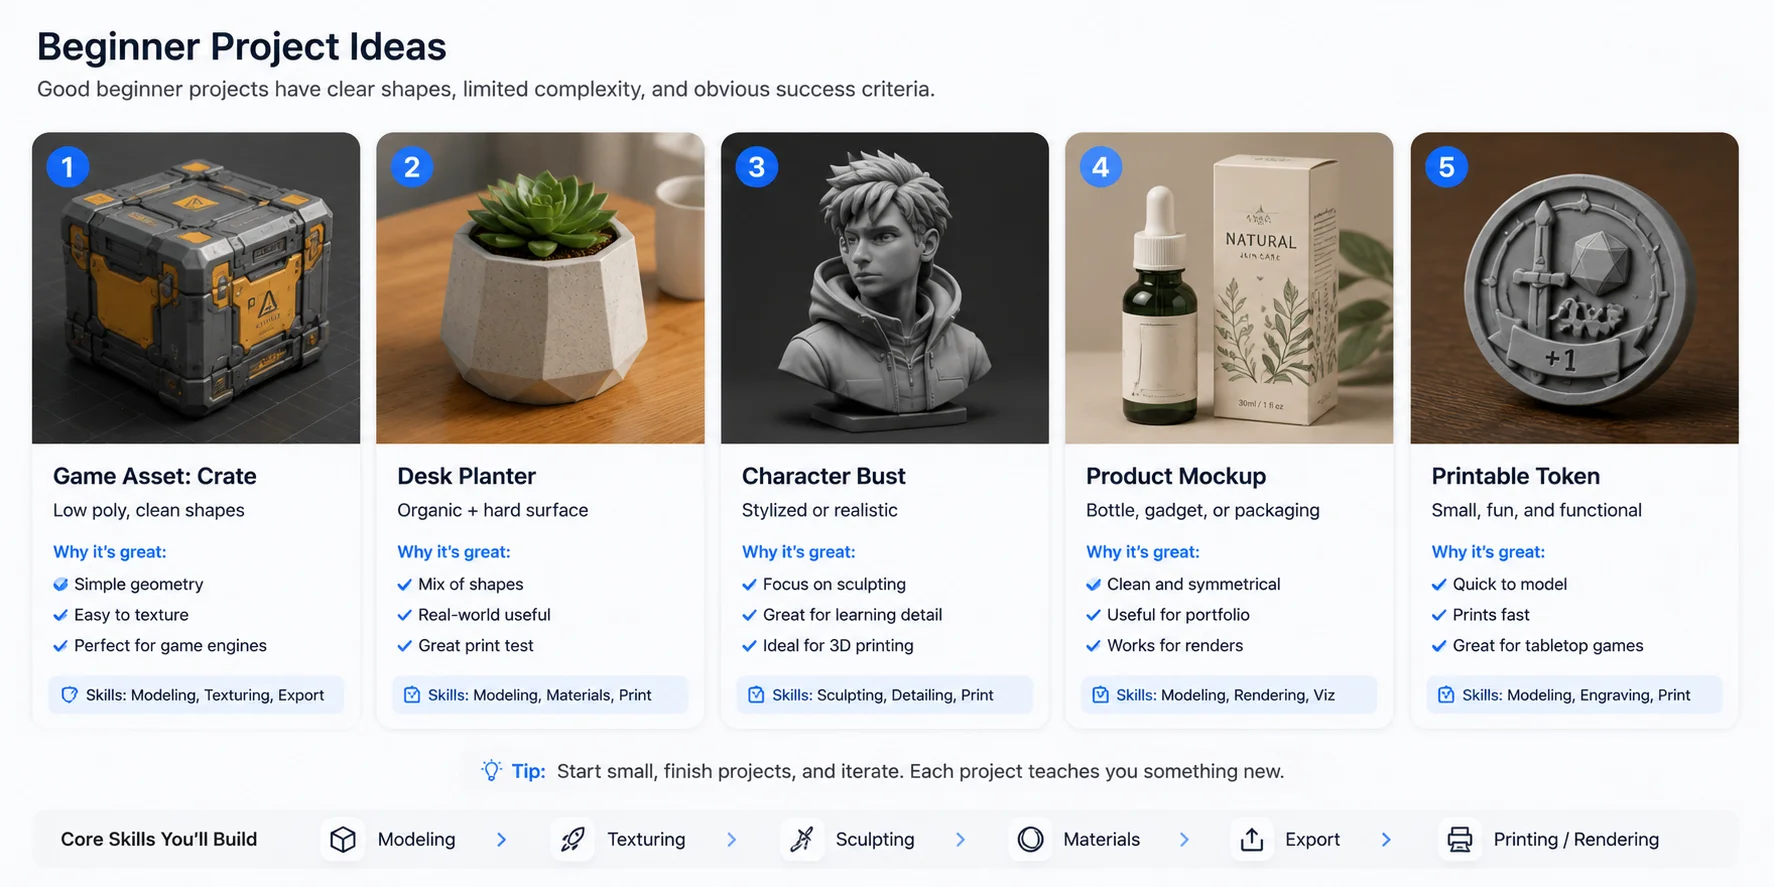
A good beginner project should be small enough to finish and clear enough to judge.
Try a simple desk object: a pen holder, stylized lamp, small planter, headphone stand, or decorative token. These are useful for 3D printing practice because scale and stability matter.
Try a game prop: a crate, potion bottle, shield, signpost, sci-fi panel, barrel, or stylized rock. These teach silhouette, texture, and export discipline.
Try a product concept: a sneaker shape, packaging mockup, speaker, bottle, mouse, chair, or wearable accessory. These help beginners think about form and presentation.
Try a character bust rather than a full body. Faces and anatomy are difficult, but a bust gives you enough structure to learn from without dealing with joints, hands, feet, and posing.
Try a before-and-after exercise. Generate a model, bring it into Blender, make five manual edits, and export it again. That is one of the fastest ways to connect AI 3D modeling with real beginner 3D modeling skills.
Frequently Asked Questions
Is AI 3D modeling for beginners a good way to start?
Yes. AI 3D modeling for beginners is useful because it gives new users a model to inspect, edit, and export without building everything manually. It does not remove the need to learn 3D basics, but it makes the first step less intimidating.
What is AI 3D modeling?
AI 3D modeling uses AI tools to generate or assist with 3D model creation. The input can be text, an image, or another asset. The output is a 3D model that can be reviewed, edited, textured, exported, or prepared for another workflow.
Do I need 3D modeling experience to use an AI 3D model generator?
No. You can generate a first model without prior modeling experience. Basic 3D knowledge still helps when you need to check geometry, choose export formats, prepare a model for 3D printing, or use it in game engines.
What is text to 3D?
Text to 3D means generating a 3D model from a written prompt. You describe the object, style, details, and intended use. The AI uses that description to create a 3D asset.
What is image to 3D?
Image to 3D means generating a 3D model from an image reference. It works best when the image shows the object clearly, with a readable shape and minimal background clutter.
Can AI generated 3D models be used for 3D printing?
Yes, but they need inspection first. Check scale, wall thickness, mesh integrity, supports, and slicer preview. Some models may need cleanup before printing.
Can I use AI 3D models in Blender?
Yes. You can export a model and continue editing it in Blender. Beginners often use Blender to inspect the mesh, adjust materials, clean up geometry, or prepare renders.
Can AI 3D modeling create game assets?
AI 3D modeling can create starting assets for games, especially props and concept models. Before using them in Unity or Unreal Engine, check polygon count, textures, scale, pivot, and performance.
What should beginners learn after generating their first model?
Learn navigation in a 3D editor, basic mesh editing, scale, file formats, materials, UVs, and export settings. If you want to print, learn slicer basics. If you want games, learn optimization and engine import settings.
Which tool should beginners use for AI 3D modeling?
Beginners should use a tool that supports text to 3D, image to 3D, model review, improvement options, and common export formats. Tripo is one option for creating a first AI generated 3D model and moving it into a larger 3D workflow.
Conclusion
AI 3D modeling for beginners works best when you treat AI as the starting point, not the finish line. It can help you turn an idea, prompt, or image into a first 3D model, but your judgment still matters. Review the shape, check the mesh, choose the right export format, and continue the workflow in the tool that fits your goal.
For 3D printing, that means slicer checks and print prep. For game assets, it means optimization and engine setup. For product visualization, it means materials, lighting, and presentation.
Want to create your first 3D asset with AI? Start from text or an image in Tripo Studio, review the result, and export it into the workflow you want to learn next.