AI 3D for Non Artists: How to Create 3D Models Without Traditional Modeling Skills
TL;DR
AI 3D for non artists means using AI tools to create 3D models from text prompts, images, sketches, or simple references instead of modeling every shape by hand.
It does not remove the need for judgment. You still need to review the model, check proportions, inspect the mesh, choose the right export format, and prepare the asset for its final use.
A practical workflow looks like this:
Idea → Text Prompt or Image → Generate Model in Tripo → Review Geometry → Improve if Needed → Export → Use for 3D Printing, Blender, Unity, Unreal Engine, or Product Visualization
For non artists, the main benefit is a faster starting point. Instead of learning every modeling tool before making anything, you can generate a first version, study it, and improve it step by step.
Introduction
AI 3D for non artists is aimed at people who need 3D models but do not have years of modeling, sculpting, or CAD experience. That includes founders making product mockups, hobbyists preparing 3D prints, game designers blocking out props, teachers building visual aids, and marketers testing product scenes.
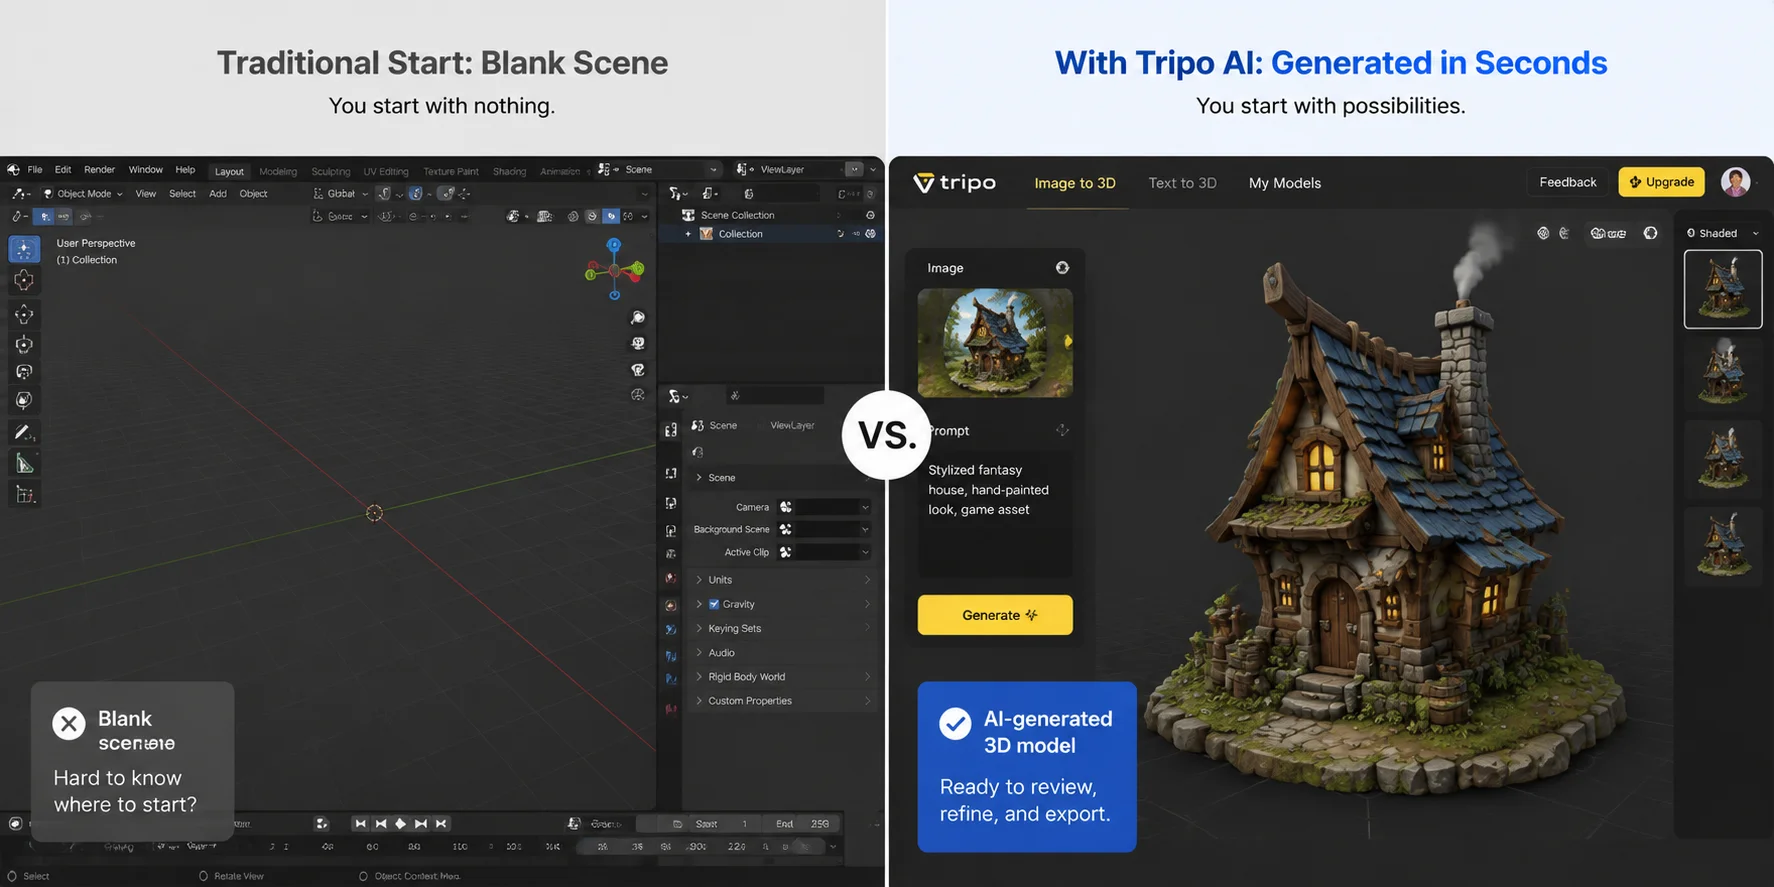
Traditional 3D modeling often starts with an empty viewport and a long list of unfamiliar tools. AI changes that starting point. You can describe an object, upload a reference image, generate a first model, and then decide what needs work.
The result is not always finished. A generated 3D asset can still have rough geometry, odd proportions, missing details, or texture issues. Tools such as HD Model can help when a model needs more detail, but the user still has to inspect the result and decide whether it fits the project.
This guide explains what AI 3D means for non artists, what you can realistically create, where Tripo fits into the workflow, and what to learn after generating your first model.
Who Is AI 3D for Non Artists Actually For?
AI 3D is most useful when you need a believable object, a rough asset, or a visual explanation before you need a perfectly engineered model. That makes it relevant to people who have a concrete goal but do not want their first task to be learning every modeling command.
Product designers and founders can use it to explore the form of a bottle, speaker, chair, package, or accessory before asking a specialist to refine the design. The first model is not manufacturing data, but it can make a discussion, pitch deck, or product direction easier to understand. A useful prompt names the object, its main materials, its intended scale, and the feature that must be visible.
Entrepreneurs and marketers can use simple 3D assets for concept boards, product storytelling, social content, or a test scene. The practical question is not whether the model is photorealistic from every angle. It is whether the shape communicates the idea clearly enough for the audience and whether the asset has been reviewed before it is placed in a campaign.
Indie developers, students, and hobby creators can use AI 3D for early props, environment objects, placeholders, and learning projects. A crate, lamp, rock, shield, planter, or stylized robot is a manageable first project because its silhouette is easy to inspect. A complex character with hands, hair, layered clothing, and animation requirements is a much harder first assignment.
Educators and content creators can use models to explain a structure, make a lesson more visual, or prototype an object for a presentation. In these cases, a model may only need to be clear enough to rotate, render, or place in a scene. The lesson still benefits from explaining what the model represents and what details are simplified.
Architects, engineers, and makers can also use AI 3D as a concept tool, but they should draw a firm line between a visual concept and an engineering-ready file. Dimensions, tolerances, joints, load-bearing features, material behavior, safety requirements, and manufacturing constraints need their own validation. AI can make the first conversation faster; it does not certify the result for production.
What Traditional 3D Modeling Requires and What AI Changes
Traditional modeling is valuable because it gives the creator direct control over geometry, edge flow, dimensions, materials, UVs, and the details needed for a specific pipeline. That control is why manual tools remain important for precision products, animation-ready characters, production game assets, and models that must meet print or manufacturing constraints.
For a beginner, however, the first barrier is often the number of decisions required before anything recognizable appears on screen. You may need to learn navigation, object transforms, mesh editing, modifiers, topology, UV mapping, materials, lighting, file formats, and export settings. Learning these skills is worthwhile when you need repeatable control, but it can be too much when the immediate task is simply to test an idea.
AI changes the starting point. Instead of beginning with an empty scene or a primitive shape, you can begin with a text description or an image reference and receive a draft model to inspect. This shifts the first task from operating every modeling tool to making decisions about the result: Is the silhouette right? Are the proportions plausible? Does the back of the object make sense? Are thin areas strong enough for the final use?
That does not mean AI removes skill. It changes which skills matter first. A non artist still benefits from learning how to look at a model, identify obvious errors, choose an appropriate export format, and explain what needs to change. Those are practical skills that carry over whether the next step is another AI generation, a 3D editor, a slicer, or a handoff to a professional.
“Just learn Blender” can be good long-term advice, but it is not the only useful first step. A better path is to generate a small, clear object, inspect it, and then learn the one manual skill that solves the next problem. For example, a beginner preparing a print may learn scale and manifold checks first. A beginner preparing a game prop may learn pivots, polygon budgets, and material setup first.
The strongest workflow is often hybrid. Use AI to produce a starting point or explore alternatives, then use a 3D application to clean, edit, render, optimize, or validate the model. The tool does not need to do every job. It needs to fit the current stage of the work.
What Is AI 3D for Non Artists?
AI 3D for non artists is the use of AI-powered tools to generate, assist with, or improve 3D models without requiring traditional modeling skills at the start.
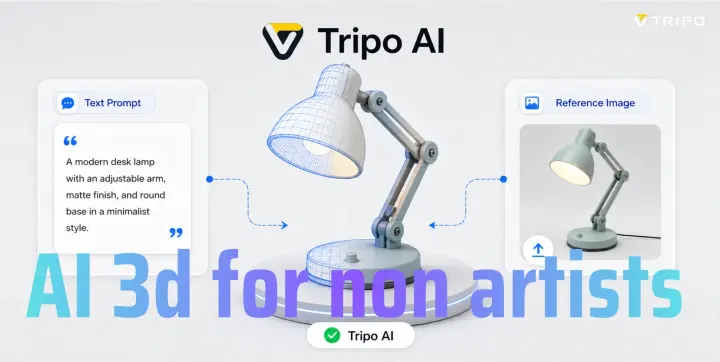
A non artist might type a prompt such as "a small ceramic desk lamp with a rounded shade and matte white finish" and use a text to 3D tool to create a model. Another user might upload a product sketch, logo mascot, toy photo, or concept image and use image to 3D to generate a first 3D version.
The AI creates a 3D model based on the input. Depending on the tool and settings, the model may include mesh geometry, surface detail, texture, and export options for other software.
This is different from hiring an artist or learning full manual modeling from day one. The AI gives you a draft asset. You still need to review it like a maker, designer, or editor. Does the shape read correctly? Is the scale useful? Are the details connected? Will it print? Will it import cleanly into a game engine?
That review step is where non artists start learning real 3D thinking.
Why AI 3D Helps People Without Art Skills
The hardest part of 3D is often not the idea. It is execution.
A person may know exactly what they want: a stylized shop sign, a prototype bottle shape, a fantasy game crate, or a simple 3D printable keychain. The problem is getting that idea into a 3D file.
Manual modeling asks beginners to learn navigation, mesh editing, modifiers, UVs, materials, lighting, topology, and export settings before they can make something recognizable. That is a lot of friction.
AI 3D lowers the first barrier by creating a model that you can rotate, compare, and adjust. Instead of spending the first session trying to find the extrude tool, you can spend it asking better design questions.
Is the silhouette clear? Are the proportions right? Is the object too thin? Would this work as a game prop? Could this survive a 3D print? Does the texture help, or is it hiding a weak shape?
For non artists, that is a better first lesson than memorizing buttons.
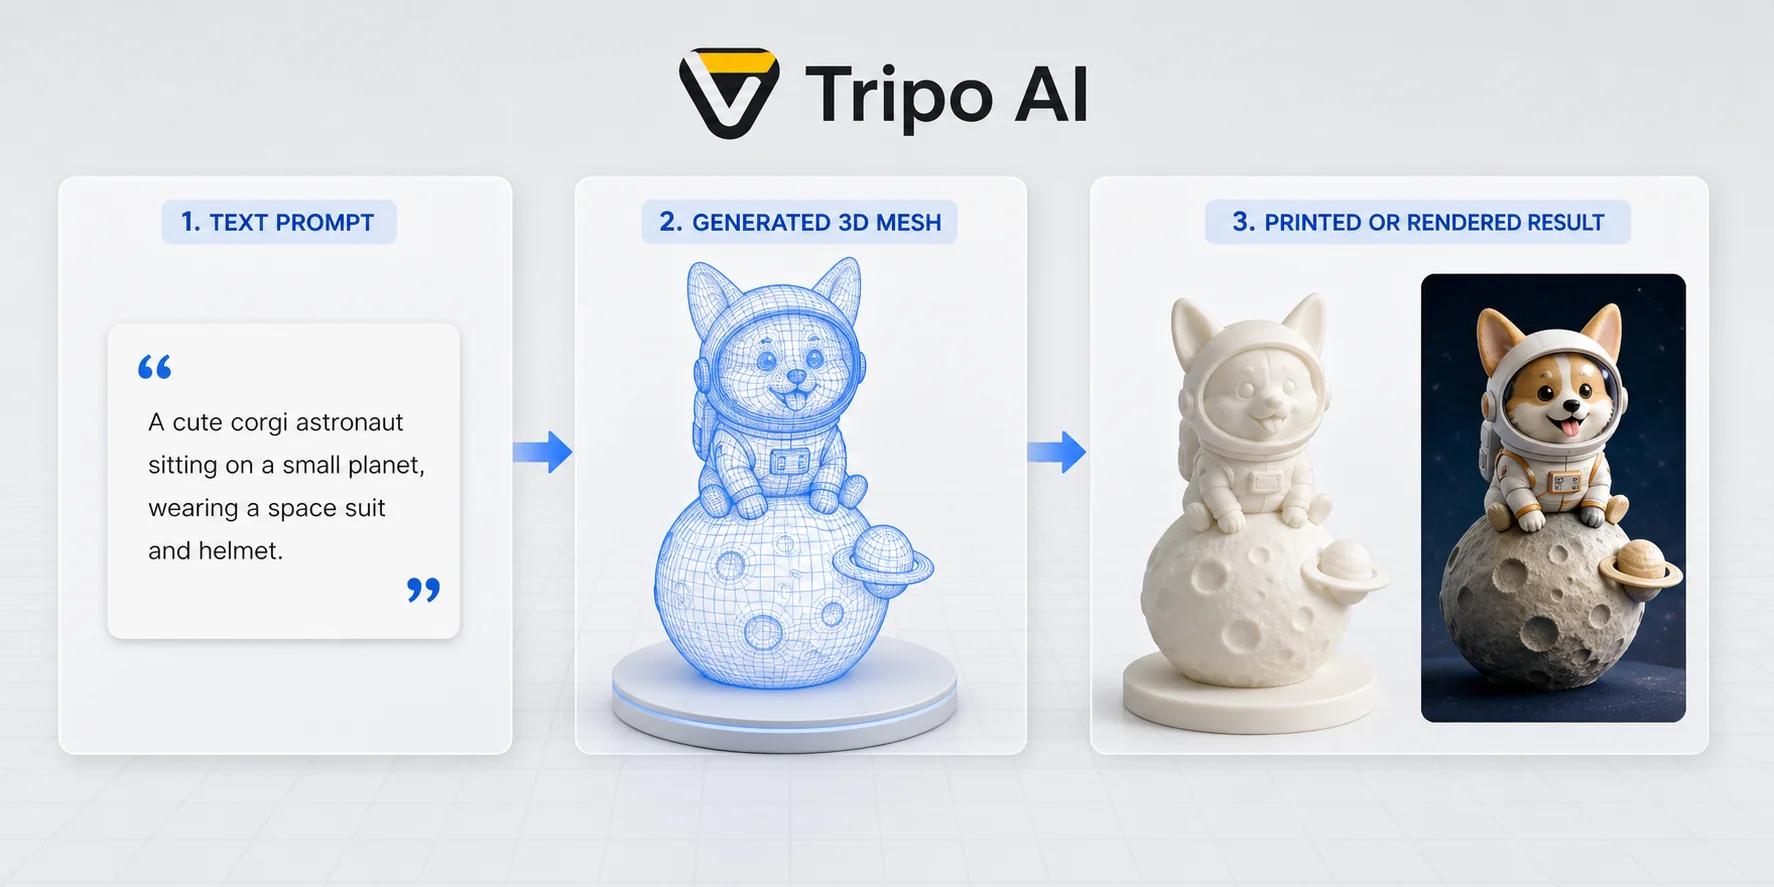
What Can Non Artists Create with AI 3D?
Non artists can create many useful 3D assets, especially when the goal is concepting, prototyping, visualization, or learning.
Good first projects include:
- Simple product mockups
- Desk accessories
- Toys and collectibles
- Game props
- Low-complexity characters
- Environment objects
- 3D printable decorations
- Product visualization concepts
- Educational models
- Social media or presentation visuals
A marketer might create a quick 3D product scene for a campaign concept. A game designer might generate barrels, crates, signs, rocks, and furniture for early level design. A hobbyist might create a printable ornament or tabletop piece. A founder might test several product shapes before sending a more serious brief to a designer or CAD specialist.
Some projects are still hard. AI 3D is not a shortcut to engineering constraints. Precision mechanical parts, moving assemblies, jewelry with tiny tolerances, rigged characters, and production-ready game assets still need specialist skills.
A good rule: start with objects that have a clear outer shape. Mugs, helmets, crates, planters, lamps, shields, stylized robots, and simple props are better first targets than complex machinery.
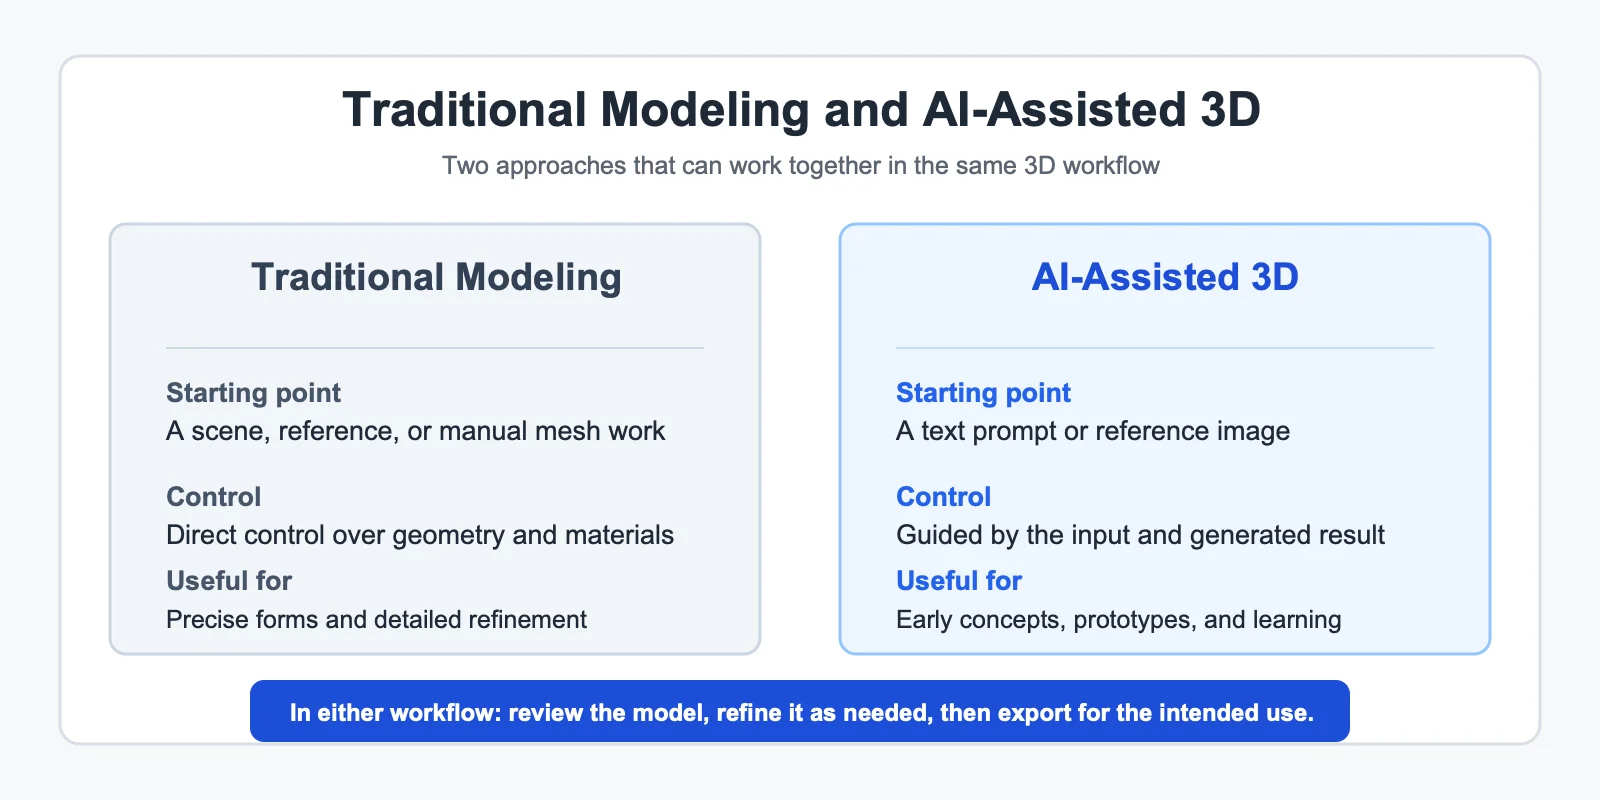
Traditional 3D Modeling vs AI 3D Modeling
Traditional 3D modeling gives the maker direct control. An artist or designer builds the mesh, shapes the form, creates materials, unwraps UVs, and prepares the asset for a specific use. It is slower to learn, but it gives more precision.
AI 3D modeling starts from a prompt or image. It is faster for exploration, but less predictable. The model may look good from the front and strange from the back. The texture may be useful, while the mesh needs cleanup. The silhouette may be right, but small details may merge together.
| Area | Traditional 3D Modeling | AI 3D Modeling |
|---|---|---|
| Starting point | Empty scene or reference | Text prompt or image |
| Beginner difficulty | High at the start | Easier first result |
| Control | More precise | More guided by the AI output |
| Speed | Slower for beginners | Faster for drafts and ideas |
| Best use | Production assets, precise forms, animation-ready models | Concepts, prototypes, learning, early assets |
| Main risk | Slow progress | Output needs inspection and cleanup |
The two approaches work well together. Use AI to get a base model. Use 3D software to clean, edit, print, render, or optimize it.
How to Choose an AI 3D Tool as a Non Artist
There is no single best AI 3D tool for every non artist. A useful choice depends on the input you already have, the kind of output you need, and what you plan to do after generation. Before opening an account, write down three things: whether you are starting from text or an image, whether the model needs to be exported as a usable file, and whether the result is for a personal experiment, a client project, or a commercial product.
Start with input. Text-to-3D is useful when you have an idea but no visual reference. It works best when the prompt describes one object, its main shapes, materials, style, and intended use. Image-to-3D is useful when the object already has a recognizable outline in a sketch, photo, concept image, or product reference. A clean image with a visible subject and simple background gives the model more useful shape information than a dramatic but cluttered photo.
Then check the output path. A visual 3D effect inside a design app is not automatically the same thing as an exportable 3D mesh for printing, a game engine, or a DCC application. If you need a model file, look for the export formats the service currently documents and test an export before you build a larger workflow around it. If you only need a dimensional image or an editable design element inside a layout, a design-focused tool may be enough.
Finally, check the account and rights terms at the moment you plan to use the asset. Free credits, download access, private ownership, and commercial rights can change by plan and product version. Treat the pricing page and terms page as part of the production checklist, not as a detail to remember after a campaign or client delivery is already scheduled.
Verified Tool Options for Different Starting Points
Tripo for text, images, and downstream 3D workflows
Tripo supports Text-to-3D and Image-to-3D generation, so it is a practical option when you may switch between a written idea and a visual reference. Its documented workflow also includes refinement-oriented capabilities such as HD Model, Smart Mesh, texturing, retopology, and rigging features, which can matter when a first draft needs to move toward a specific use rather than remain a concept.
For a non artist, the useful question is not whether to turn on every option. Use a detail-focused route when surface appearance or a print-oriented form matters. Use an optimized mesh route when the asset is intended for a real-time scene and should be reviewed for performance. Tripo documents exports including GLB, USD, FBX, OBJ, STL, and 3MF, but the correct choice still depends on the next tool: a slicer, a DCC app, a game engine, or a web viewer.
Tripo's current free plan and download limits are time-sensitive. It is sensible for trying the workflow, but confirm the current pricing and export conditions before relying on it for a paid job or a commercial delivery. The same caution applies to any plan-specific claim about credits, downloads, or rights.
Meshy for browser-based text and image generation
Meshy's current official product pages describe both text-to-3D and image-to-3D generation, along with exports such as FBX, OBJ, GLB, and STL. That makes it a relevant option for a non artist who wants to test an idea from a prompt or turn a clean image into a model file for a broader 3D workflow.
Meshy also advertises a free entry path with monthly credits. That can be useful for a small trial: generate one simple object, inspect it from all sides, and export a test file into the application you actually plan to use. Do not assume a free plan's limits, privacy settings, or commercial permissions will match a paid plan. Check the current pricing and applicable terms before using any output in a client, product, marketplace listing, or ad campaign.
3D AI Studio for text and image model generation
3D AI Studio currently presents both text-to-3D and image-to-3D generation and lists common 3D export formats on its official site. Its product FAQ also states that generated models can be used commercially. This makes it a candidate to test when you want a straightforward text or image starting point and an exported model for a game, app, visualization, or print workflow.
Commercial use is still not a substitute for source clearance. A platform grant does not give you rights to upload a protected character, brand, photograph, or concept image that you do not have permission to use. Keep your prompt and reference-image provenance with the project, especially when the model will be sold or used in paid work.
Canva for 3D visual design rather than a verified mesh-export workflow
Canva's current 3D tools are useful for creating 3D visual elements, characters, or dimensional design treatments inside Canva. For a marketer, teacher, or social creator who only needs a visual inside a poster, deck, or social design, that may be the simplest route.
However, a design-side 3D visual is not automatically an exportable mesh for a slicer, Blender, Unity, or Unreal Engine. If your goal is a downloadable 3D model, verify the exact export behavior before choosing a design tool. For this article's workflow, treat Canva as a design option rather than evidence of a general-purpose, file-export 3D model pipeline.
A Simple Comparison Framework
| Question | What to verify | Why it matters |
|---|---|---|
| What is my input? | Text prompt, single image, sketch, or several views | Choose a tool that accepts the material you already have. |
| What is my output? | Design visual, GLB/FBX/OBJ/STL-style model file, or print-ready asset | A visual effect and a usable mesh are different deliverables. |
| What happens after export? | Printing, rendering, game import, web view, or client handoff | The target determines which checks and formats matter. |
| Can I use it commercially? | Current plan terms, ownership language, and source-material rights | Commercial use depends on more than pressing Generate. |
| Can I test it first? | Current credits, export access, and file limits | A small test reveals more than a feature list. |
This framework is intentionally more useful than a permanent ranking. Product features, plans, and policies change. Your own test with the exact kind of object you need is a better decision signal than a generic “best overall” label.
How to Start AI 3D for Non Artists with Tripo
Tripo is an AI-powered 3D creation platform that can generate 3D models from text or images. For non artists, it is useful because it turns a plain idea or visual reference into a model that can move into a larger 3D workflow.
Use this simple workflow:
Idea -> Text Prompt or Image -> Generate Model in Tripo -> Review Geometry -> Improve if Needed -> Export -> Use for 3D Printing, Blender, Unity, Unreal Engine, or Product Visualization
Each step deserves a little care.
Step 1: Start with an Idea
Begin with a specific object, not a broad mood.
"Fantasy object" is too vague. "A stylized wooden treasure chest with metal corners, closed lid, simple game prop style" is much better.
If you are making something for 3D printing, include physical clues: thick parts, simple shape, stable base, no tiny floating details. If you are making a game asset, mention style and use: low-poly, stylized, sci-fi prop, background object, mobile game asset.
Non artists often think the prompt needs fancy language. It does not. It needs useful details.
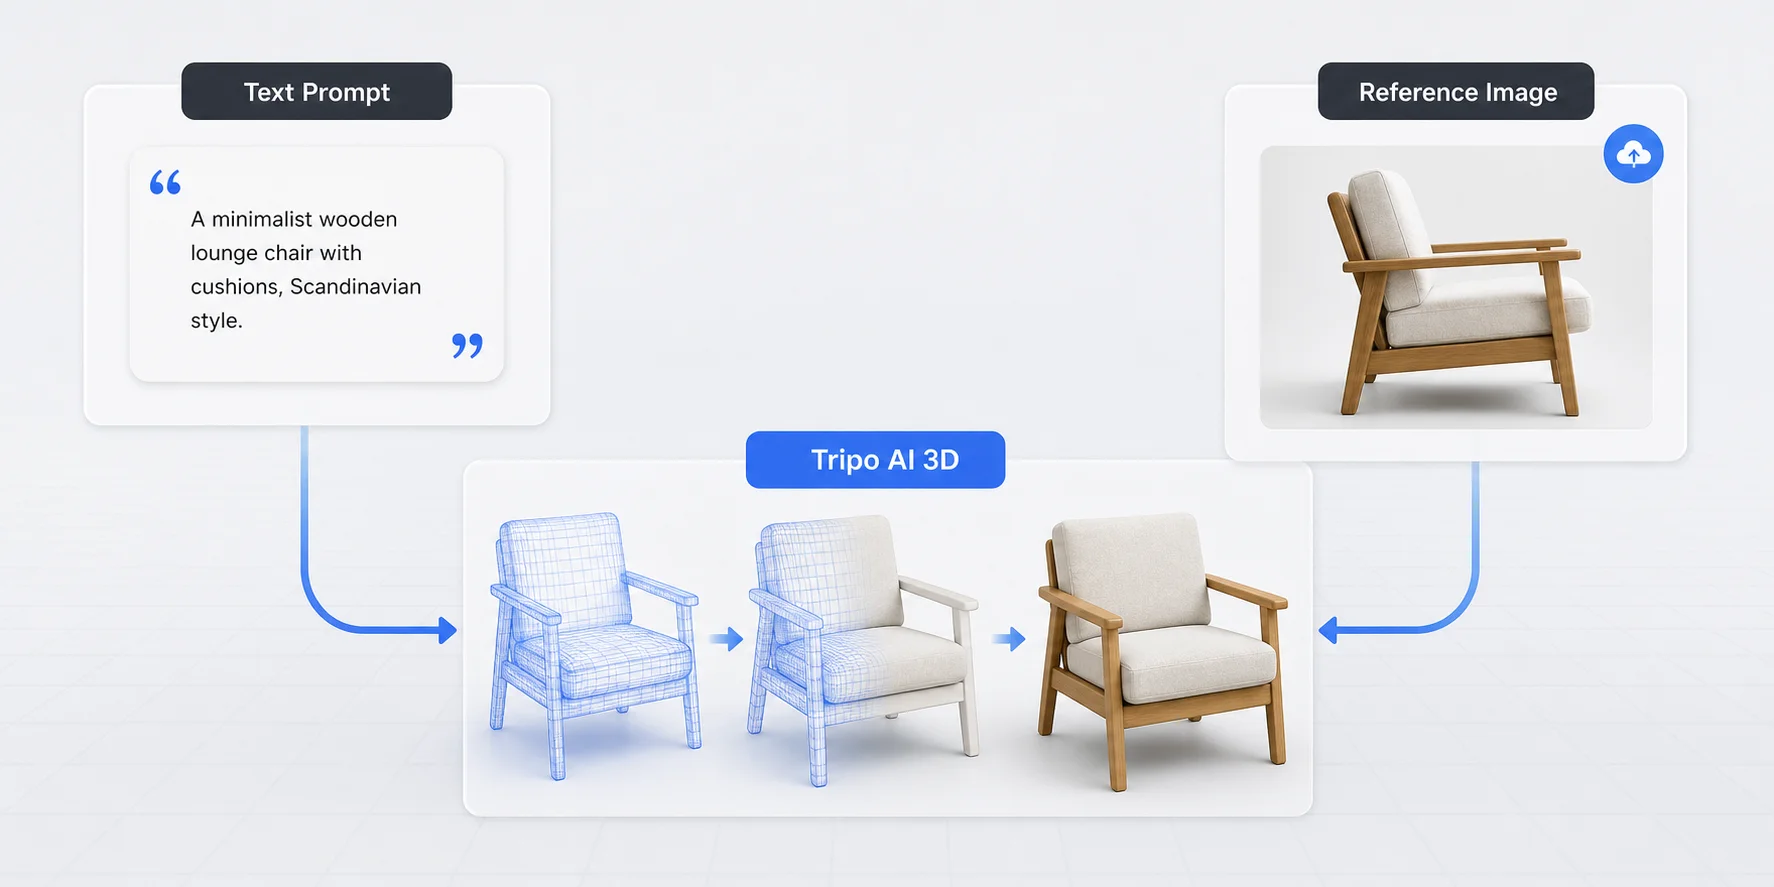
Step 2: Choose Text-to-3D or Image-to-3D
Use Text-to-3D when you have an idea but no reference. This is good for exploring shapes, props, creatures, product concepts, and decorative objects.
Use Image-to-3D when you already have a reference image. A clean sketch, product photo, concept image, or object reference gives the AI more visual direction.
The image matters. A busy background, cropped object, harsh reflection, or strange camera angle can produce a weaker model. Use the clearest image you have. If the object shape matters, a simple reference is usually better than a dramatic one.
Step 3: Generate the First Model
After choosing the input, generate the model in Tripo and inspect the overall result.
Do not judge it only from the preview angle. Rotate it. Look at the back, underside, and sides. Many AI-generated 3D models look strongest from the angle that has the most source information.
Check the large forms first. The silhouette matters more than tiny decoration. A mug should read as a mug before you worry about its surface texture. A game crate should have a clean boxy structure before you worry about scratches and labels.
If the first result misses the idea, revise the prompt or use a clearer image. Iteration is part of the workflow.
Step 4: Review and Improve the Model
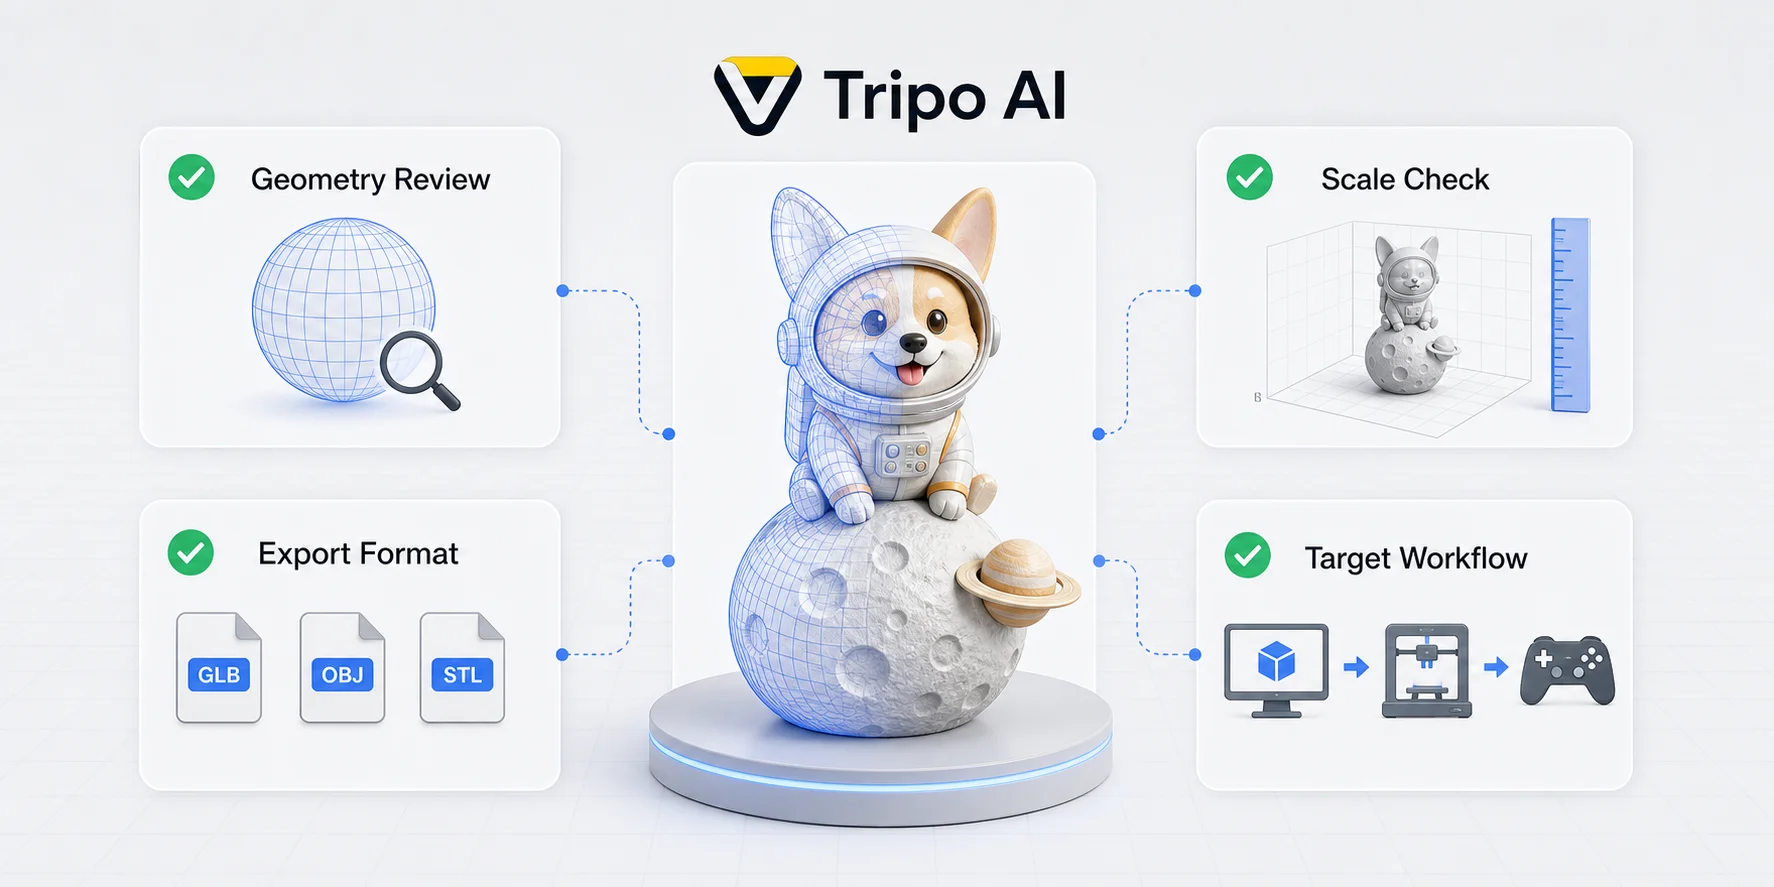
Review the model before exporting it.
Look for thin parts, holes, warped shapes, extra lumps, fused details, uneven symmetry, and unclear surfaces. If the model is printed, check whether small parts look physically strong enough. If it will go into a game engine, think about polygon count, texture size, scale, and how visible the object will be in the scene.
Tripo supports options such as HD Model, Smart Mesh, and texture generation. Use them when the model is close but needs refinement. Do not add detail just because the option exists. A cleaner model is often more useful than a denser one.
This is also where non artists start to build taste. You learn which mistakes matter and which ones do not.
Step 5: Export for the Next Tool
Export depends on the target workflow.
For 3D printing, you will likely move the model into a slicer and check scale, supports, wall thickness, and layer preview. For Blender, you may adjust materials, clean the mesh, set up lights, or render the object. For Unity or Unreal Engine, you need to check scale, pivot, materials, collisions, and performance. For product visualization, you may focus on lighting, camera angle, color, and surface finish.
Tripo supports multiple export formats, so choose the one your next tool expects. File format is not a minor detail. It affects what data survives, including geometry, material information, and textures.
What Non Artists Should Learn After the First Model
AI can create a first asset, but basic 3D knowledge still helps. You do not need to become a professional artist overnight. Learn the pieces that affect your work.
Start with navigation: orbit, pan, zoom, select, move, rotate, and scale. Then learn mesh basics: vertices, edges, faces, normals, holes, and non-manifold geometry. These terms sound technical at first, but they explain why a model imports badly or prints poorly.
Next, learn materials and textures. A texture changes how the surface looks. A material controls properties such as color, roughness, and shine. For games and renders, this matters. For many 3D prints, geometry matters more than texture.
Finally, learn export formats. STL, OBJ, FBX, GLB, and other formats carry different types of data. The right format depends on whether you are printing, editing, rendering, or importing into a game engine.
Common Mistakes Non Artists Should Avoid
The first mistake is expecting AI to understand a vague idea. Prompts need nouns, shape details, style, and use case.
The second mistake is trusting the first view. Always rotate the model. Check the hidden sides.
The third mistake is skipping scale. A model can look correct and still import at the wrong size.
The fourth mistake is using texture to cover geometry problems. A nice surface does not fix a broken mesh.
The fifth mistake is choosing a project that is too complex. Start with a clean object, not a full character with armor, hair, wings, and accessories.
The sixth mistake is assuming a generated model is ready for every use. A model for a product render, a 3D print, and a game engine may need three different preparation steps.
Best AI 3D Projects for Non Artists
The best first projects are simple enough to finish and useful enough to care about.
Try a 3D printable desk object: a small planter, cable holder, pen cup, coaster, or decorative token. These teach scale and physical constraints.
Try a game prop: a crate, sign, shield, potion bottle, sci-fi panel, stylized rock, or lamp. These teach silhouette and texture without requiring character anatomy.
Try a product concept: a speaker, bottle, mouse, shoe sole, chair, backpack, or packaging mockup. These help you think about shape and presentation.
Try an educational model: a simple molecule, landmark, tool, machine part concept, or historical object. These are good for teachers, students, and presentation work.
Try a personal mascot or collectible. Keep the body simple. Avoid complex hands, hair, and clothing at first.
Can Non Artists Sell 3D Models Made with AI?
Sometimes, but treat the answer as a checklist rather than an automatic yes. A platform may grant commercial-use rights for outputs, yet the final project can still have problems if the source image, prompt, trademark, character design, or marketplace listing violates someone else's rights or rules. Commercial permission from an AI tool does not turn unlicensed source material into cleared source material.
Start with the platform. Read the current terms and the plan-specific conditions for the account that generated the model. Pay attention to commercial-use language, output ownership, privacy, model download rules, attribution obligations, and whether the free plan differs from paid plans. Save a copy of the relevant terms or project record when the work has real business value, because policies can change after you create the asset.
Then check the inputs. A photo you took yourself, a sketch you created, or an original written concept is easier to trace than a random image found online. Avoid using copyrighted characters, protected logos, recognizable product designs, or client-owned references unless you have a clear right to use them. If a client provides the image, clarify in writing that they have permission to supply it.
Next, check the final model. A marketplace buyer or a game customer usually needs more than an attractive preview. They may expect clean geometry, sensible naming, the advertised file formats, usable textures, accurate screenshots, and a description that does not exaggerate the model's readiness. If a model needs manual cleanup before printing or engine import, say so rather than selling it as ready for every workflow.
For a first commercial experiment, choose an original, simple object with a clear use: a planter, game crate, stylized lamp, abstract decoration, or generic fantasy prop. Generate several versions, inspect them, clean the strongest candidate if needed, test the advertised file format, and document what the buyer receives. This is a more responsible starting point than trying to sell a complex character model after one generation.
Where a model is sold also matters. Each marketplace has its own rules for intellectual property, disclosures, file standards, prohibited content, and buyer expectations. Check the current rules of the specific marketplace before listing. Do not promise exclusive ownership unless your own agreement and the platform terms clearly support that promise.
How to Make an AI-Generated Model More Useful
A generated model becomes more valuable when it is prepared for a specific task. For a product visualization, focus on a convincing silhouette, materials, camera angle, and a clean render. For a game prop, focus on scale, pivot placement, texture resolution, polygon count, and testing inside the target engine. For a 3D print, focus on manifold geometry, wall thickness, unsupported details, scale, and slicer preview.
Use a consistent review sequence. First inspect the silhouette from the front, side, back, and underside. Then check connected parts, thin features, holes, floating pieces, and unexpected geometry. Next inspect materials and texture seams. Finally, export one test file and open it in the software that will consume it. A result that looks good in an AI preview may need different work after it reaches a slicer or an engine.
Keep a small project record: the prompt, reference-image source, generation date, selected output, edits made, exported formats, and test notes. This is helpful when you need to recreate an asset, explain a decision to a client, or prove that you used an original source image. It also teaches you which inputs and settings produce the most reliable results for your own work.
Is AI Replacing 3D Artists?
For non artists, the more useful question is what AI lets you try before you have a full 3D skill set. It can turn a concept into something visible, give you a model to critique, and make early exploration more accessible. That is a new capability for people who previously would have needed to wait for a specialist or learn a large toolset before testing an idea.
For professional artists, AI changes some tasks but does not eliminate the need for judgment, art direction, clean topology, production cleanup, animation knowledge, technical integration, and client communication. A model can be generated quickly and still be wrong for the project. Someone needs to identify the problem, decide the quality bar, and make the asset work in the final pipeline.
The healthiest way to use AI is to avoid treating it as a substitute for all expertise. Use it to make early iterations faster, to create reference material, or to generate a base asset. Bring in specialist skills when the work needs precision, distinctive art direction, manufacturing reliability, complex rigging, or a production-ready result with accountable quality control.
Common Limits of AI 3D for Non Artists
AI 3D output is strongly affected by the clarity of the input. A vague prompt can produce a vague shape. A single image can leave the hidden sides open to interpretation. A busy background, crop, reflection, or unusual camera angle can introduce features that do not belong to the object. When accuracy matters, use a clearer reference or multiple views where the chosen tool supports them.
Mechanical products and fitted assemblies are especially risky. A model may look plausible while missing exact dimensions, wall thickness, clearances, fasteners, or moving-part constraints. Treat AI output as a visual concept until it has been checked in the appropriate CAD, engineering, or manufacturing process.
Characters also need realistic expectations. A still model may look appealing but require dedicated work before it is suitable for animation, games, or close-up production. Hands, faces, clothing intersections, hair, accessories, UVs, skeletons, weights, and animation deformation can all require specialist attention.
Finally, do not confuse an exported file with a finished asset. Export is a handoff step, not a guarantee. Test the actual file in the final application, check what data survived, and fix the problems that matter for the target workflow.
Frequently Asked Questions
Which AI can make 3D models for free?
Several services advertise a free way to try AI 3D generation, including Tripo and Meshy. Free access, monthly credits, export limits, privacy, and commercial permissions can differ by service and may change, so use a free plan to test the workflow rather than assuming it covers a commercial project. Generate one simple model, inspect it, and confirm that the actual export works in your target software.
Can I use AI for 3D modeling?
Yes. AI can help create a starting model from a written description or a reference image. It is most useful when you treat the result as a draft to inspect, refine, and export for a specific purpose rather than as an automatic final asset.
Can I sell 3D models made with AI?
You may be able to, but first verify the platform's current commercial terms and the rules of the marketplace where you plan to sell. You also need rights to the prompt and any source images, and you should describe the file accurately. A model that still needs cleanup for printing or game use should not be marketed as universally production-ready.
Is AI replacing 3D artists?
AI can speed up early exploration and create a draft asset, but it does not remove the need for art direction, technical judgment, cleanup, and pipeline knowledge. For non artists, its immediate value is access: it makes it easier to test an idea and learn what a usable 3D asset requires.
What should I check before exporting a model?
Rotate the model and inspect the hidden sides, thin parts, holes, fused details, scale, materials, and the target format. Then open a test export in the actual slicer, 3D editor, engine, or viewer you plan to use. The target application is the final check for whether the asset is fit for purpose.
What is a good first AI 3D project for a non artist?
Choose a simple object with a clear silhouette, such as a planter, lamp, crate, coaster, stylized rock, or desk accessory. These projects make it easier to judge proportion and geometry. Save complex characters, mechanical assemblies, and highly accurate branded products for a later stage or a specialist workflow.
Conclusion
AI 3D for non artists is useful because it gives people a way into 3D creation without demanding full modeling skills on day one. You can start from an idea, generate a model, inspect it, improve it, and export it for printing, editing, games, or visualization.
The important part is the review. AI can create the first version, but you decide whether the shape works, whether the mesh is usable, and where the model should go next.
Want to create a 3D model without starting from a blank viewport? Generate one from text or an image in Tripo Studio, review the result, and use it in the workflow that fits your project.