How to 3D Print a Dragon: Files, Filament & Settings
TL;DR
- Articulated dragons create the biggest impact, but require precise settings like PLA, 0.15mm layer height, and 0.2mm joint clearance.
- Free STL libraries are great for beginners, while premium designs and Tripo AI offer more unique and polished dragon models.
- PLA is the best all-around filament; resin delivers maximum detail, and TPU is ideal for flexible dragons.
- Proper print settings, supports, and calibration are essential for successful dragon prints.
- Cleaning, sanding, painting, and sealing transform a simple print into a finished artwork.
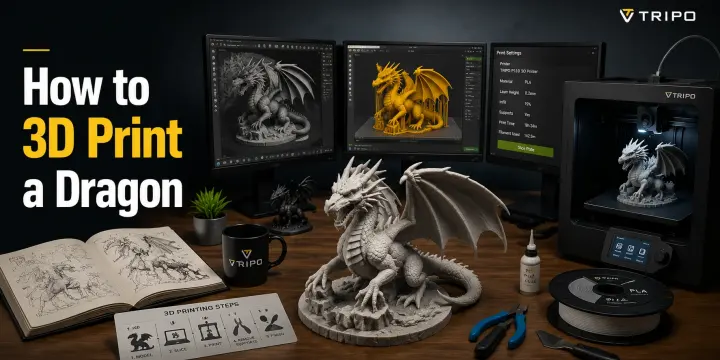
Few prints turn more heads than a dragon — especially one that moves. But between finding the right STL file, choosing the best filament, and dialing in the correct print settings, creating a great dragon model involves more than simply pressing “print.” Whether you want a flexible articulated dragon with moving joints or a detailed solid sculpture for display, the right choices make a huge difference. This guide covers articulated vs. solid dragons, where to find high-quality STL files, how to create custom dragon models with AI tools, which filaments work best for scales and joints, and the post-processing techniques that help bring your printed dragon to life.
Articulated vs Solid Dragons: Which Should You Print?
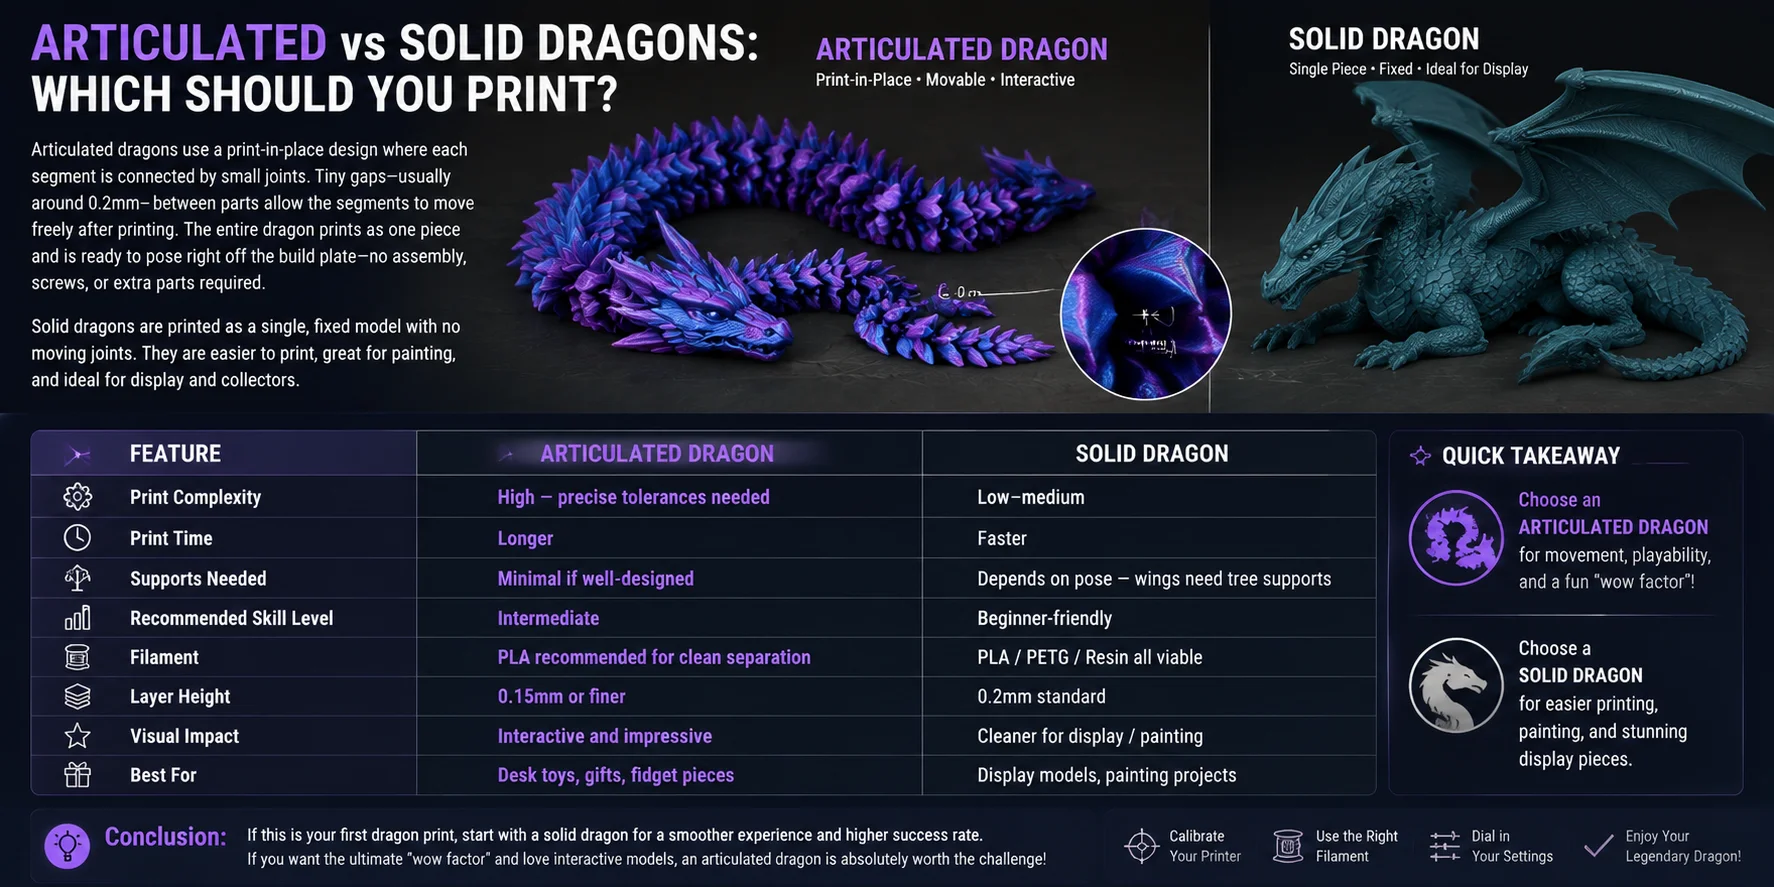
When it comes to 3D printing a dragon, the biggest decision is whether you want an articulated dragon with moving parts or a solid dragon designed mainly for display. Articulated dragons use a print-in-place design, where each body segment, joint, and connection is modeled with tiny gaps between moving parts. These gaps are usually around 0.2mm or more, allowing the pieces to separate after printing while remaining connected. The result is a flexible dragon that can move immediately after printing without assembly, screws, or additional components.
Solid dragons take a more traditional approach. They are printed as a single fixed model with no moving joints, making them easier to print and customize. They are often preferred for painting, collecting, or displaying detailed sculptural designs. While articulated dragons create a stronger “wow factor,” they require more precise printer calibration and better control over settings such as layer height, flow rate, and first-layer adhesion.
| Feature | Articulated Dragon | Solid Dragon |
|---|---|---|
| Print Complexity | High — requires precise tolerances and well-calibrated settings for joints to move correctly | Low–medium — fewer mechanical constraints and easier overall printing |
| Print Time | Longer because of detailed segmented designs and fine structures | Faster because of simpler geometry |
| Supports Needed | Minimal if the model is well-designed for print-in-place | Depends on the pose — wings, horns, and overhangs may require tree supports |
| Recommended Skill Level | Intermediate users familiar with slicer settings and printer calibration | Beginner-friendly and suitable for first-time dragon prints |
| Filament | PLA recommended for clean separation between joints and segments | PLA, PETG, and resin are all viable depending on the desired result |
| Layer Height | 0.15mm or finer for smoother joints and detailed movement | 0.2mm is usually sufficient for standard display models |
| Visual Impact | Interactive and impressive — moving wings, tails, and flexible bodies create a unique experience | Cleaner for display, painting, and realistic sculptural presentation |
| Best For | Desk toys, gifts, fidget pieces, and interactive collectibles | Display models, painting projects, miniatures, and decorative pieces |
If you are printing your first dragon, a solid dragon is usually the better starting point because it requires fewer adjustments and has a higher chance of success. However, if you want the extra “wow factor” of a dragon that can curl around your hand, move its tail, or become a satisfying desk toy, an articulated dragon is worth the additional challenge. With proper calibration and the right filament, print-in-place dragons can become some of the most impressive models you can create on a home 3D printer.
The typical AI 3D character workflow follows a simple process: users provide an input such as text or an image, the AI analyzes the data and generates a 3D mesh, then automatically applies materials, textures, and basic topology optimization. After refinement, the finished character can be exported in common formats for games, animation, VR, or other 3D workflows.
Where to Find 3D Printed Dragon STL Files
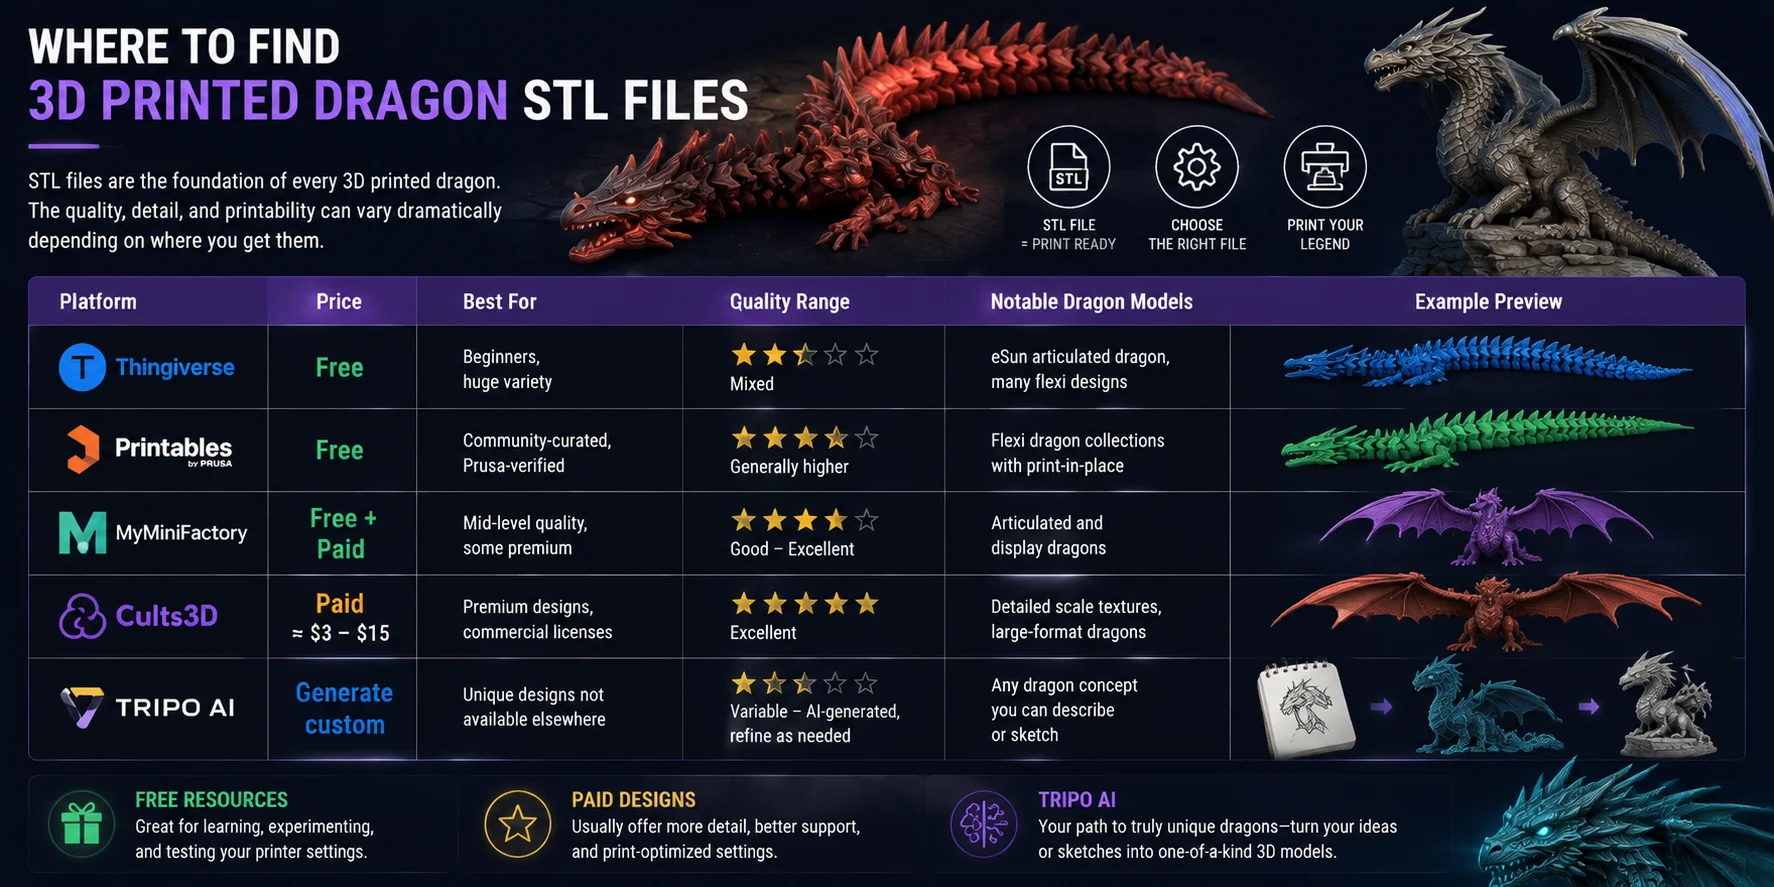
STL files are the foundation of most 3D printed dragons, but not all STL files are created equal. The source you choose can greatly affect the model’s detail quality, print success rate, support requirements, and overall experience. Free community platforms offer thousands of dragon designs for beginners, while premium marketplaces often provide professionally optimized models with better details and printing performance. For creators who want a completely unique dragon design, AI-powered generation provides another option by turning original ideas or sketches into custom 3D models.
| Platform | Price | Best For | Quality Range | Notable Dragon Models |
|---|---|---|---|---|
| Thingiverse | Free | Beginners, huge variety of community models | Mixed | eSun articulated dragon, many flexi dragon designs |
| Printables | Free | Community-curated models, Prusa-verified designs | Generally higher | Flexi dragon collections with print-in-place designs |
| MyMiniFactory | Free + Paid | Mid-level quality models and some premium designs | Good–Excellent | Articulated dragons and detailed display dragons |
| Cults3D | Paid (≈15) | Premium designs and commercial licensing options | Excellent | Detailed scale textures, large-format dragons |
| Tripo AI | Generate custom | Unique dragon concepts unavailable elsewhere | Variable — AI-generated, refine as needed | Any dragon concept you can describe or sketch |
Free STL resources are the best starting point for learning, testing printer settings, and experimenting with different dragon styles without spending money. Platforms like Thingiverse and Printables provide a large selection of community-created models, making them ideal for beginners who want to practice calibration, supports, and filament choices.
Paid marketplaces usually offer more detailed designs, cleaner topology, and better print optimization. Premium dragon models often include more complex scales, smoother surfaces, and designs created specifically for reliable printing. These options are worth considering when the final result matters, especially for collectibles, gifts, or display pieces.
For creators who want something truly different, Tripo AI provides a way to generate custom dragon models instead of searching through existing libraries. You can describe a fantasy dragon, upload a sketch, or provide a visual idea, then refine the generated model before exporting it for 3D printing. This makes AI generation a practical choice when you want a dragon design that cannot be found on traditional STL platforms.
Best Filament for 3D Printing Dragons
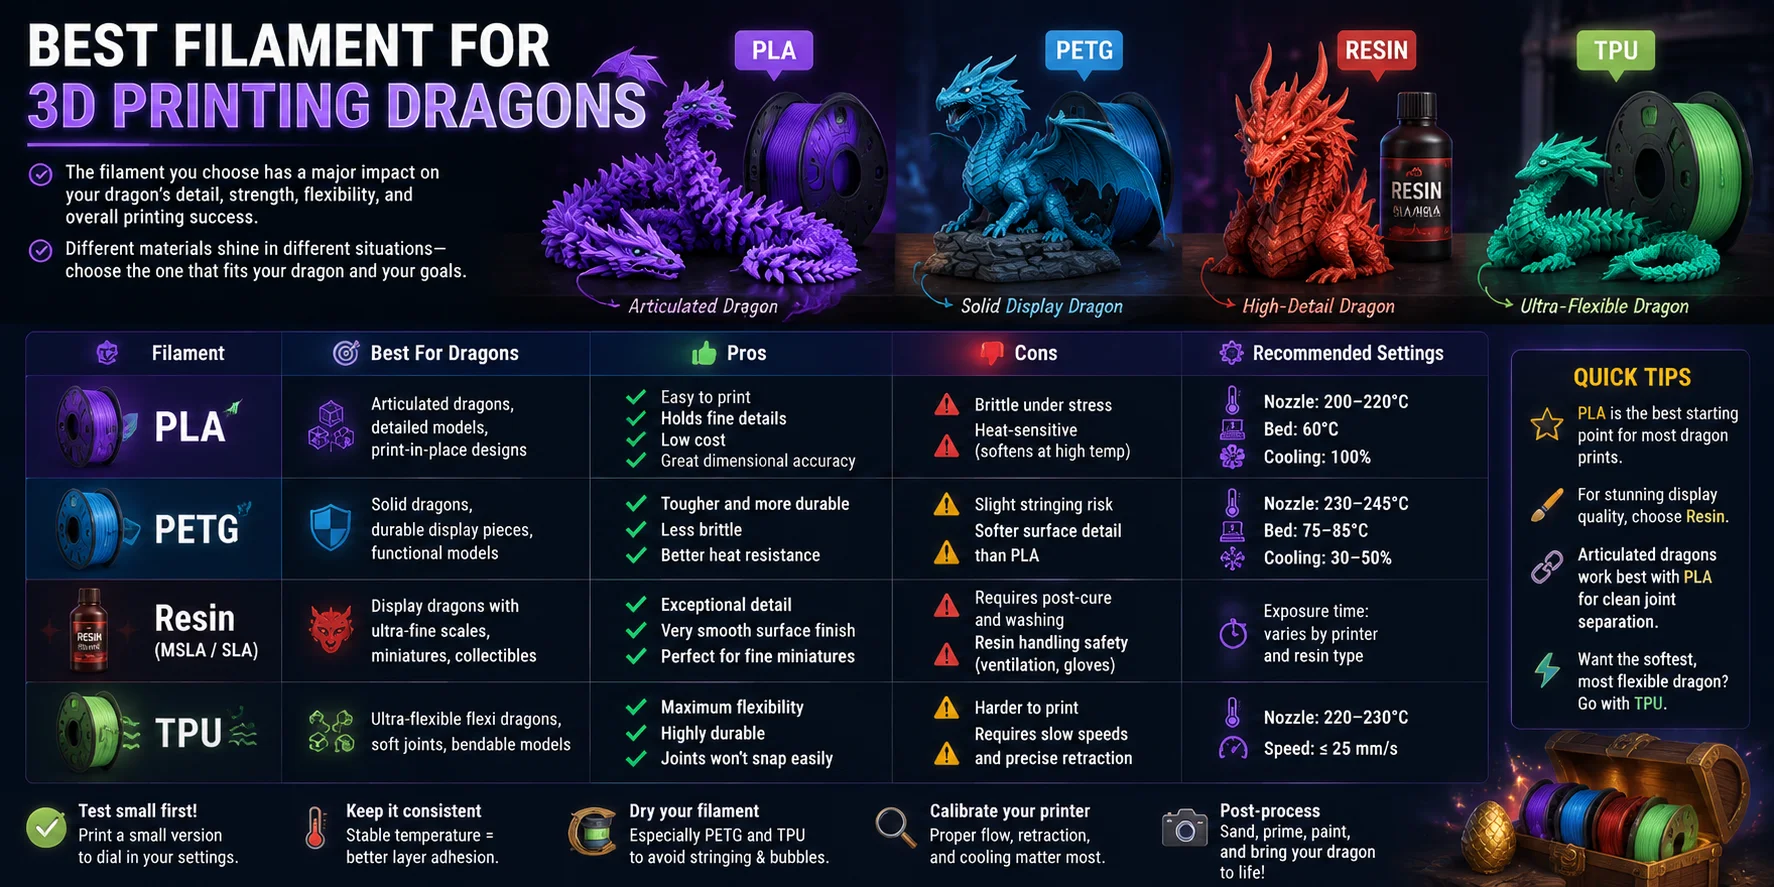
The filament you choose has a major impact on your dragon’s detail quality, strength, flexibility, and overall printing difficulty. A detailed articulated dragon with hundreds of moving segments requires different material properties than a large display dragon designed for painting or collecting. Factors such as layer adhesion, surface finish, flexibility, and heat resistance all affect the final result.
For most dragon prints, PLA remains the most popular choice because it provides a good balance between print quality, affordability, and ease of use. However, other materials such as PETG, resin, and TPU can be better choices depending on whether you prioritize durability, ultra-fine details, or flexibility.
| Filament | Best For Dragons | Pros | Cons | Recommended Settings |
|---|---|---|---|---|
| PLA | Articulated dragons, detailed character models | Easy to print, holds fine details, low cost, excellent dimensional accuracy | More brittle under stress, sensitive to high temperatures | Nozzle: 200–220°C; Bed: 60°C; Cooling: 100% |
| PETG | Solid functional dragons, durable display pieces | Tougher than PLA, better impact resistance, less likely to break | Slight stringing risk, softer surface details compared with PLA | Nozzle: 230–245°C; Bed: 75–85°C; Cooling: 30–50% |
| Resin (MSLA/SLA) | Display dragons with extremely fine scales and details | Exceptional detail, smooth surface finish, excellent for miniatures and collectibles | Requires washing and post-curing, resin handling requires safety precautions | Exposure time varies by printer and resin type |
| TPU | Ultra-flexible flexi dragons | Maximum flexibility, highly durable joints, almost impossible to snap during normal use | More difficult to print, requires slower speeds and careful setup | Nozzle: 220–230°C; Speed: ≤25 mm/s |
Which Filament Should You Choose?
For most users, PLA is the best starting point for 3D printed dragons. It is affordable, beginner-friendly, and produces clean details that work especially well for articulated dragons. Since print-in-place dragons rely on precise gaps between moving segments, PLA is often the preferred material because it separates cleanly and reduces the risk of fused joints.
If your goal is a display-quality dragon with extremely fine scales, facial details, and smooth surfaces, resin printing is the better option. Resin can capture details that FDM filaments cannot easily reproduce, making it ideal for collectible models and painted sculptures.
For articulated dragons, PLA is strongly recommended because its stiffness and dimensional accuracy help keep joints moving correctly after printing. PETG is a good choice when you need a stronger display model that can handle more impact or outdoor conditions.
Finally, if you want a dragon that is extremely soft, flexible, and satisfying to bend, TPU is the advanced option for flexi dragons. It creates impressive moving models but requires more experience because flexible filament is slower and more sensitive to printer settings.
Print Settings for Dragons: A Step-by-Step Guide
Printing a dragon successfully requires more than downloading an STL file and pressing “print.” The correct settings depend heavily on the type of dragon you are making. Articulated dragons need precise tolerances so joints remain movable, while solid dragons focus more on surface quality, stability, and support management. Adjusting layer height, wall thickness, infill, and support settings can make the difference between a clean dragon model and a failed print.
Part 1: Settings for Articulated Dragons
Articulated dragons use print-in-place joints, meaning the model is printed as a single piece with moving segments already connected. The most important factor is maintaining the small clearance between parts. If the gap is too small, joints fuse together; if it is too large, the dragon may feel loose and less durable.
| Setting | Recommended Value | Why It Matters |
|---|---|---|
| Layer Height | 0.15mm | Improves joint accuracy and helps preserve small moving details |
| Wall Count | 3–4 walls | Balances strength while keeping joints flexible |
| Infill | 15–20% | Extra density is unnecessary for most moving segments |
| Supports | None or minimal | Good articulated designs are usually support-free |
| Clearance Between Segments | 0.2mm | Critical gap size for smooth movement after printing |
| Cooling | 100% for PLA | Prevents layers from overheating and joints from fusing |
For articulated dragons, start with PLA because it provides clean separation between moving parts and is easier to tune. Before printing a large model, test a small section of the dragon or a calibration piece to confirm that your printer can reproduce the required tolerances.
Part 2: Settings for Solid Dragons
Solid dragons are generally easier to print because they do not require moving joints. The main challenges are managing overhangs, preserving surface details, and reducing visible support marks, especially around wings, horns, and complex poses.
| Setting | Recommended Value | Why It Matters |
|---|---|---|
| Layer Height | 0.2mm standard; 0.15mm for detailed areas | Provides a good balance between speed and surface quality |
| Supports | Tree supports for wings and overhangs | Easier removal and less damage to scales and textures |
| Infill | 10–15% for display models; 25%+ for functional models | Reduces material use while maintaining strength |
| Wall Count | 2–3 walls | Provides enough strength for decorative models |
| Print Orientation | Position wings upright when possible | Minimizes support contact and improves surface quality |
Quick Tips for Better Dragon Prints
- Test first, print big later: Use leftover filament to test joint clearance before committing to a large articulated dragon.
- Split large dragons into sections: Models over 30cm often print more reliably when divided into parts and assembled afterward.
- Increase first-layer adhesion: A first layer height around 0.3mm can improve bed adhesion and reduce failed prints.
With the right settings, even complex dragon models can be printed successfully at home. Start with conservative settings, adjust based on your printer’s behavior, and prioritize accuracy over speed when printing detailed articulated designs.
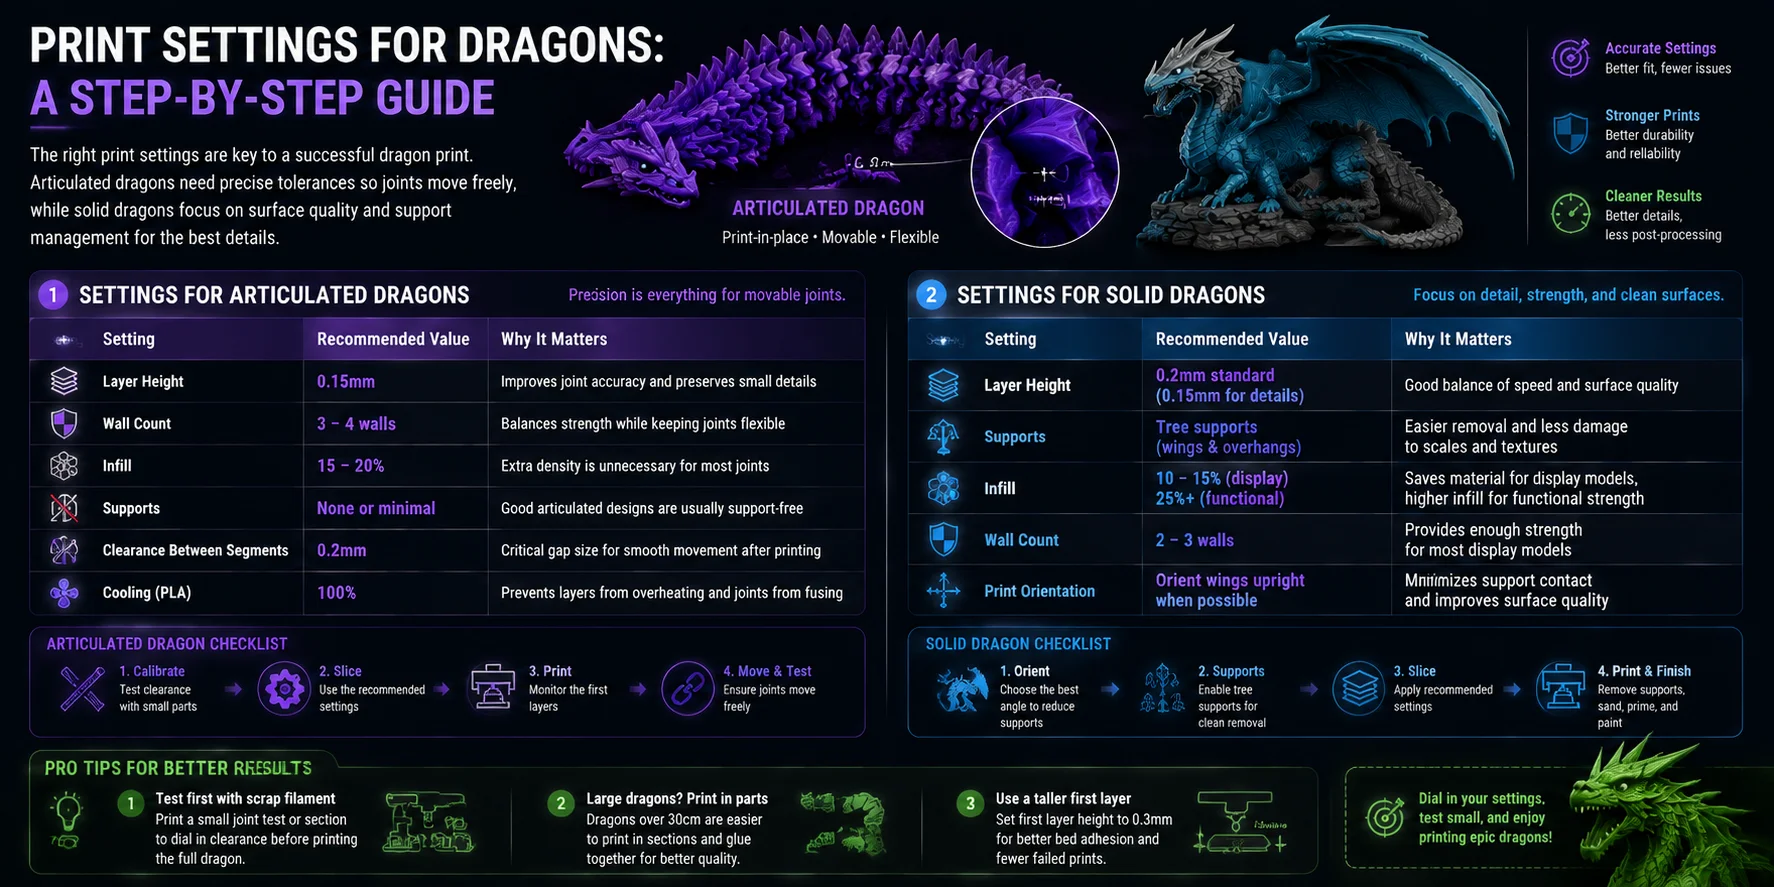
Design Your Own Dragon with Tripo AI
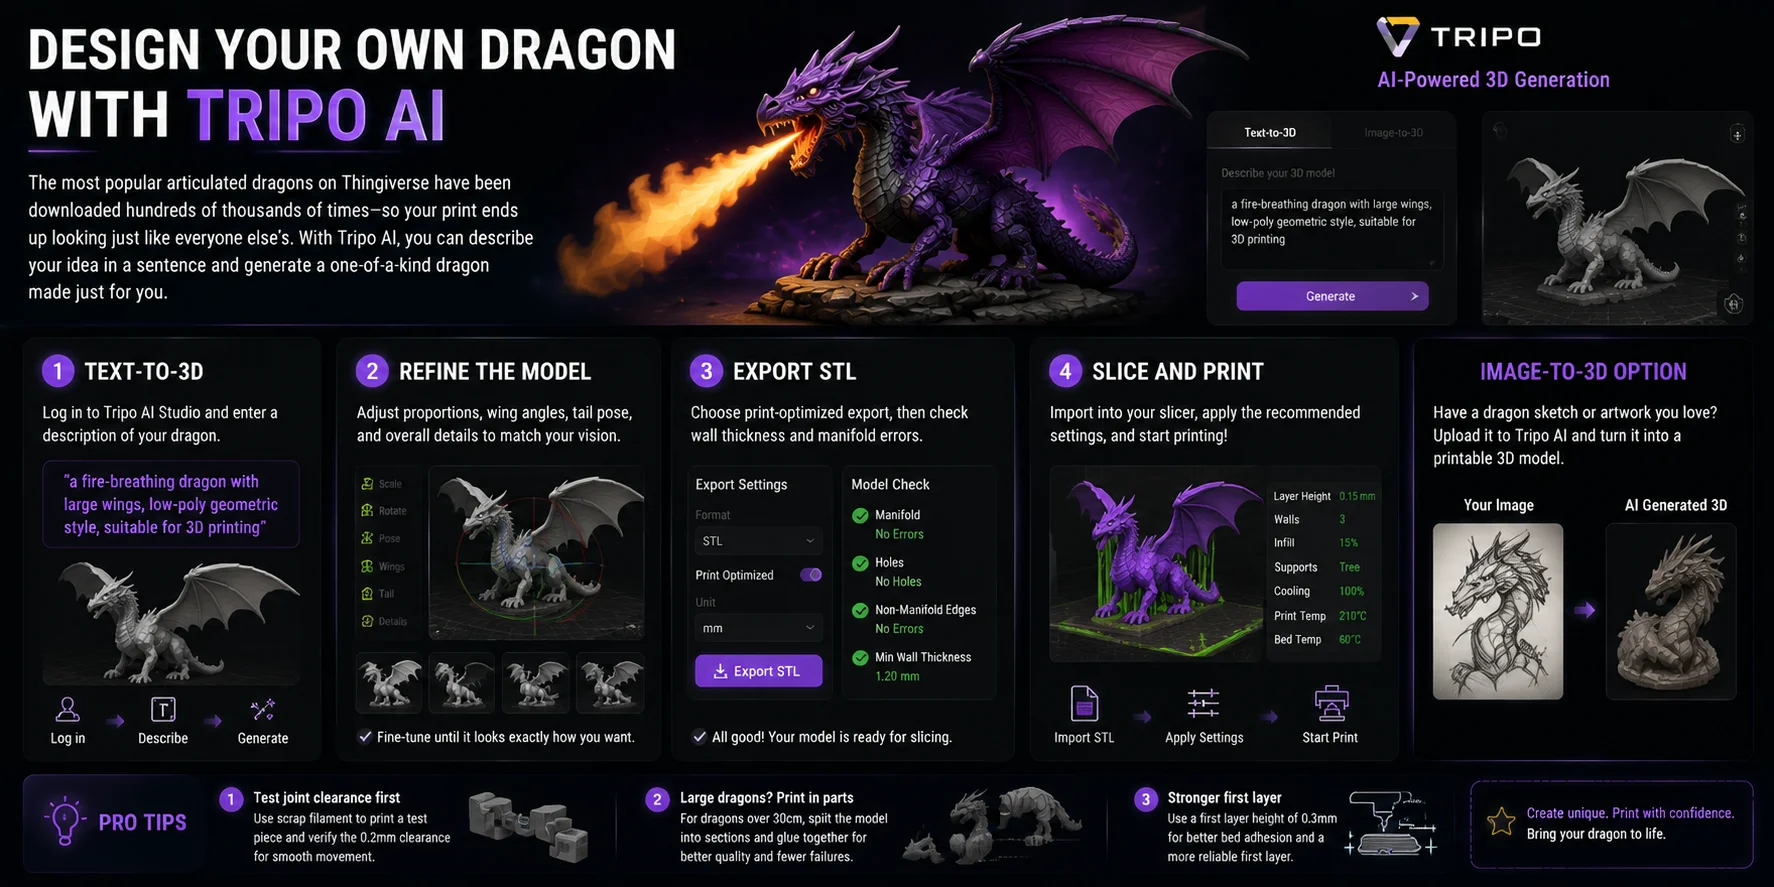
Popular dragon STL files from platforms like Thingiverse have been downloaded hundreds of thousands of times, which means the dragon you print may look exactly like countless others. If you want a design that feels truly unique, AI generation offers a different approach. With Tripo AI, you can describe your ideal dragon in a simple sentence and generate a custom 3D model instead of searching through existing libraries.
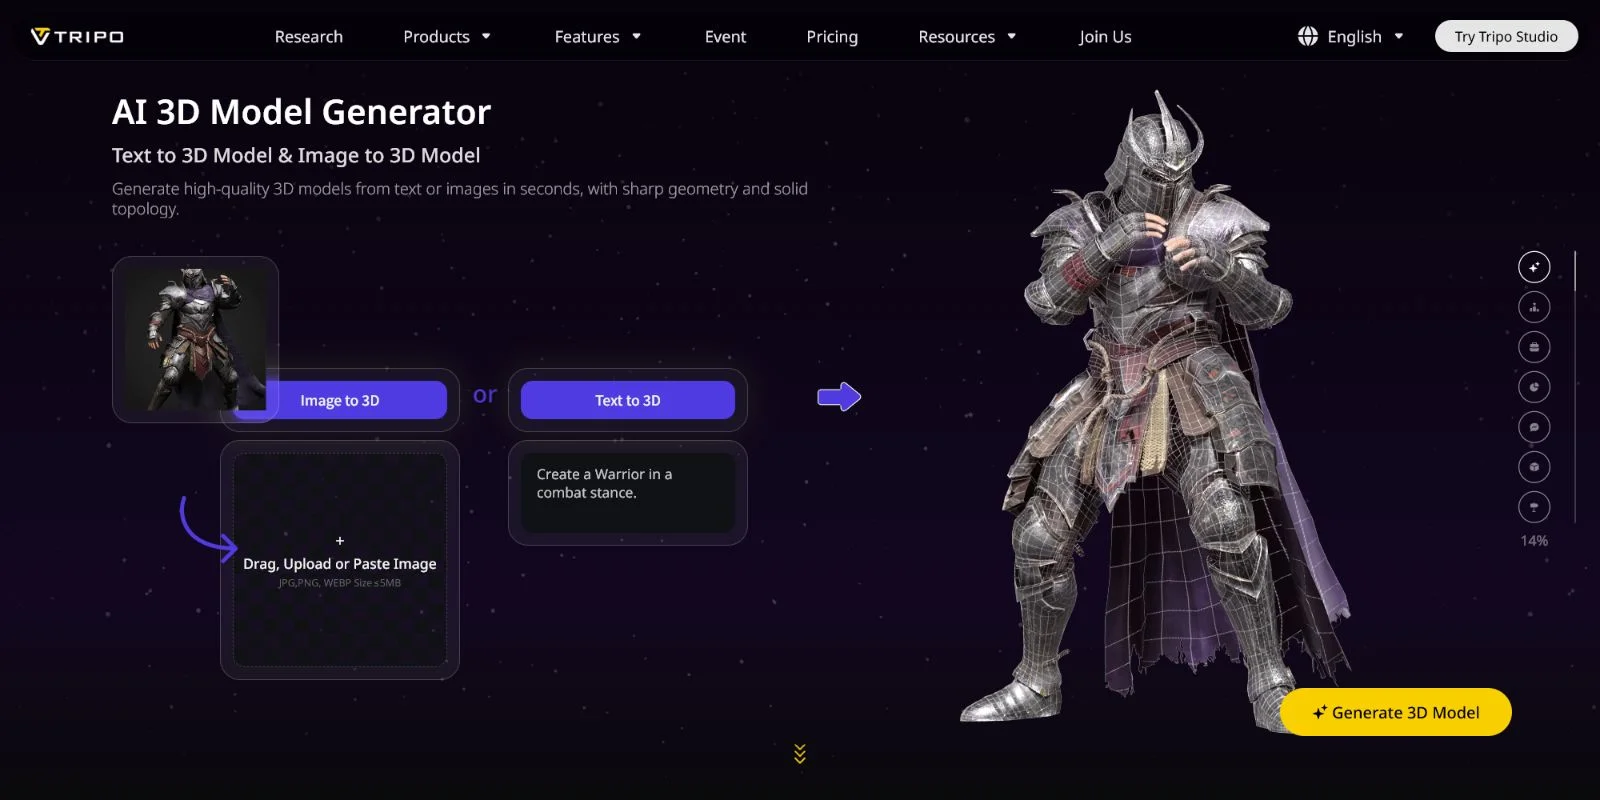
Step 1: Text-to-3D — Generate Your Dragon Concept
Start by opening Tripo AI Studio and selecting the Text-to-3D workflow. Describe the dragon you want with clear details about its appearance, style, and printing purpose.
Example prompt:
"A fire-breathing dragon with large wings, low-poly geometric style, suitable for 3D printing."
You can add more details such as armor, horns, body shape, pose, fantasy style, or scale patterns to guide the generated design.
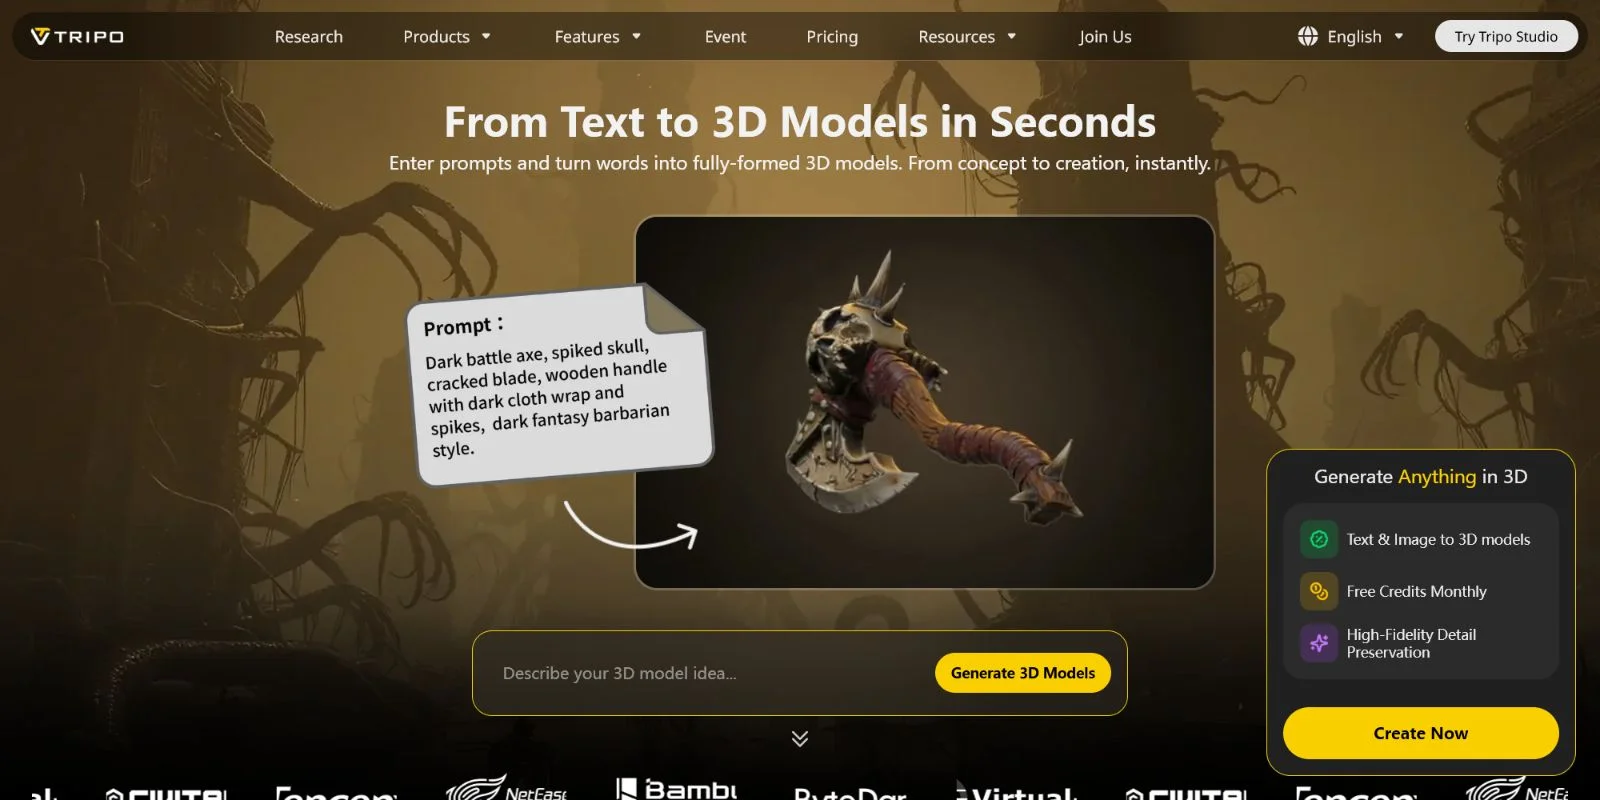
Step 2: Refine the Model
After generation, review the dragon from different angles and adjust the design if needed. Refine important features such as body proportions, wing opening angles, tail position, and overall pose to create a model that matches your vision.
Step 3: Export STL for Printing
Once the design is ready, export the model in an STL-compatible format for 3D printing. Before slicing, check important printing requirements such as wall thickness, manifold errors, and overall mesh quality. Making these checks early helps avoid failed prints caused by thin areas, holes, or non-printable geometry.
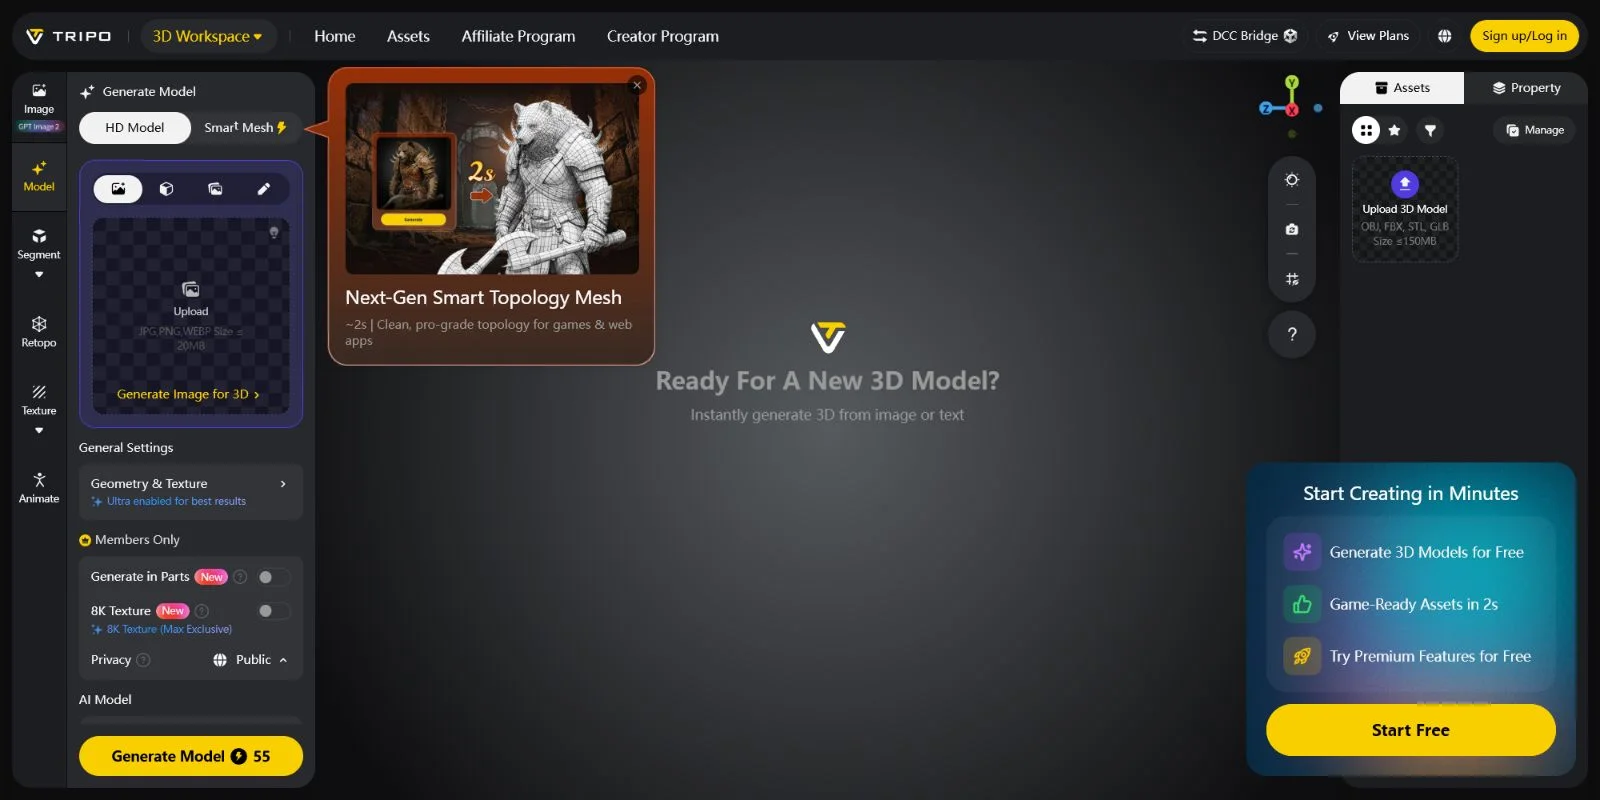
Step 4: Slice and Print
Import the STL file into your preferred slicing software and apply the recommended dragon print settings from the previous section. Adjust layer height, supports, infill, and other parameters based on whether you are printing an articulated or solid dragon.
If you already have a favorite dragon illustration, character sketch, or concept art, you can also use Tripo AI’s Image-to-3D workflow. Upload your image reference, and the AI can transform the artwork into a printable 3D dragon model while preserving the main visual characteristics.
Whether you download an existing STL file or create a completely original dragon with AI, the next step is the same: post-processing. Cleaning, sanding, painting, and finishing are what transform a printed model into a dragon that truly comes to life.
Post-Processing Your 3D Printed Dragon
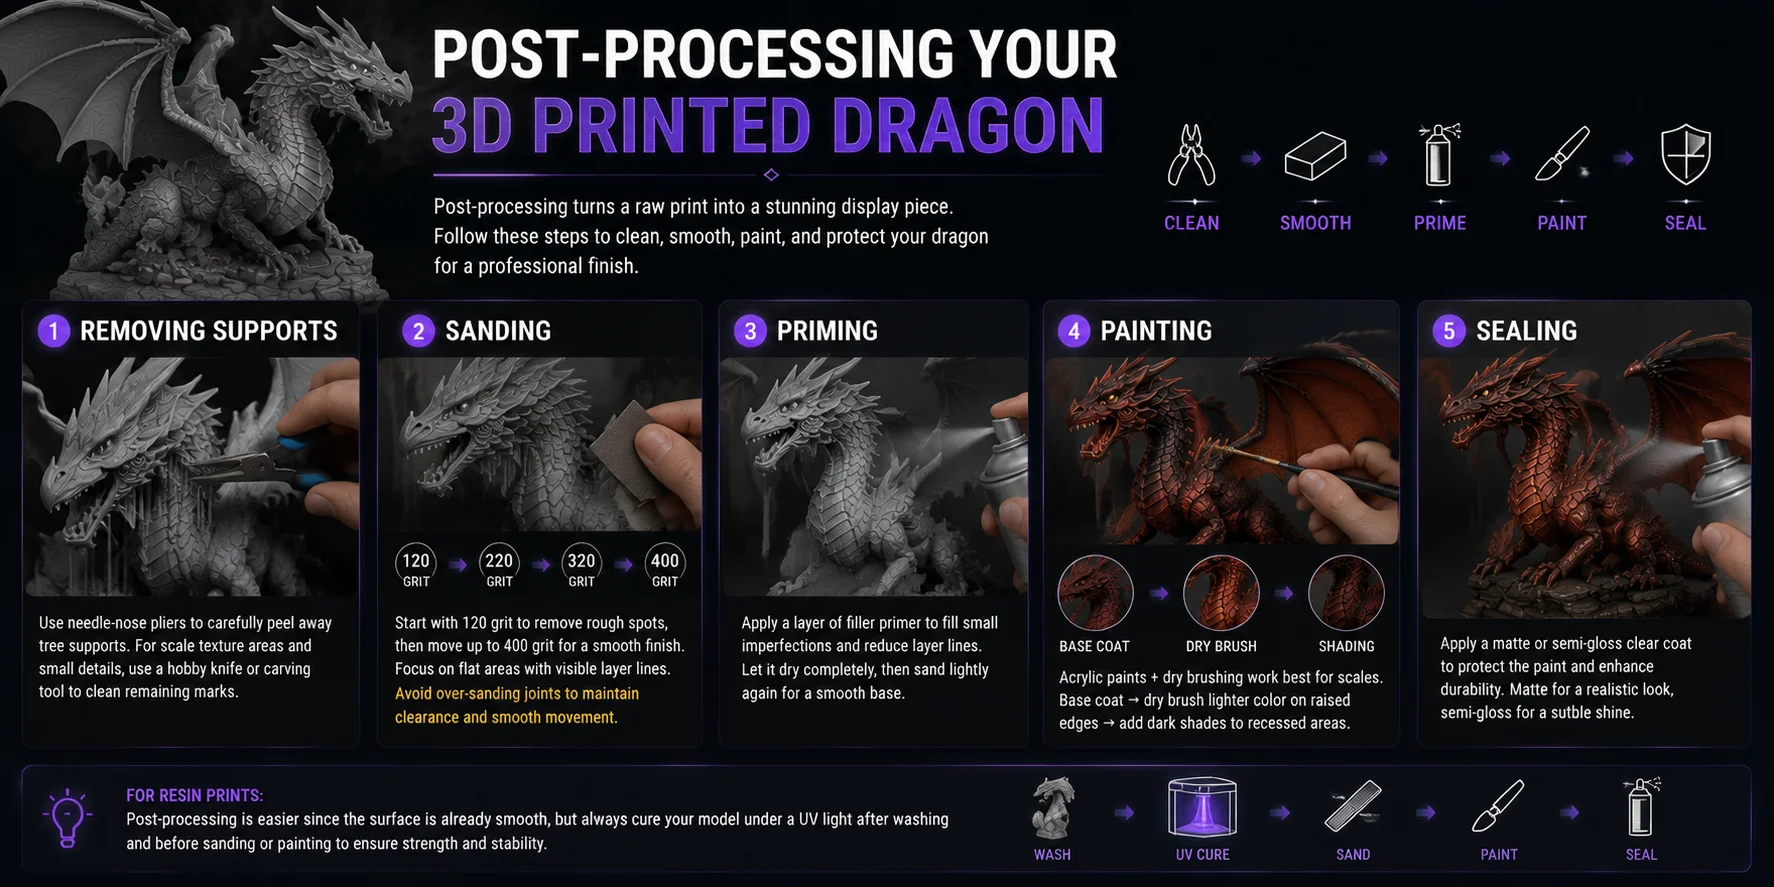
A raw 3D printed dragon is only the beginning. Post-processing can transform visible layer lines, rough surfaces, and support marks into a finished model with sharper details and a more realistic appearance.
Step 1: Removing Supports Start by carefully removing support structures, especially around wings, horns, and detailed scale areas. For models printed with tree supports, use needle-nose pliers to gently break away the supports without damaging the surface. Any remaining marks around scales or small details can be cleaned with a hobby knife or carving tool. Take extra care around thin parts such as claws, tails, and wing edges.
Step 2: Sanding the Surface After support removal, smooth visible layer lines through gradual sanding. Begin with around 120-grit sandpaper to remove rough areas, then move up to 400-grit for a cleaner finish. Focus mainly on large flat surfaces where layer lines are most noticeable. Avoid aggressive sanding on articulated dragon joints, because removing too much material can affect the clearance and prevent smooth movement.
Step 3: Applying Primer Spray a layer of filler primer to cover small imperfections and reduce the appearance of layer lines. Allow the primer to fully dry, then lightly sand the surface again to create a smoother base for painting.
Step 4: Painting the Dragon Acrylic paint combined with dry-brushing techniques works especially well for bringing out scale textures. Start with a base color across the entire model, then use a lighter shade with dry brushing to highlight raised scale edges. Finally, add darker colors into recessed areas to create shadows and improve depth.
Step 5: Sealing the Finish Once painting is complete, apply a matte or semi-gloss clear coat to protect the surface and improve durability. The final finish can also change the dragon’s appearance, with matte coatings creating a realistic fantasy statue look and semi-gloss coatings adding a slightly polished effect.
For resin-printed dragons, post-processing is usually simpler because the surface is already smoother, but the model still requires UV curing before sanding or painting.
Frequently Asked Questions
What is the best brand of 3D printed dragons?
For articulated print-in-place designs, models by creators like McGybeer (Thingiverse) and various designers on Printables are consistently top-rated for joint quality and print reliability. For premium display-quality dragons with fine scale textures, Cults3D and MyMiniFactory premium designers offer professionally optimized STL files. The "best brand" really depends on whether you want a fidget toy, a display piece, or a painting project.
Are 3D printed dragons safe?
FDM-printed PLA or PETG dragons are non-toxic once printed and pose no health risk as display or play items. During printing, adequate ventilation is recommended, especially with PETG or ABS, which emit more fumes than PLA. Articulated dragons with small segments are not suitable for young children due to potential choking hazards if parts break off.
What filament is best for 3D printing dragons?
PLA is the top choice for most dragon prints: it holds fine detail well, prints cleanly at lower temperatures, and produces the cleanest joint separation for articulated designs. PETG is a solid alternative if you need more durability or impact resistance. Resin (MSLA/SLA) delivers the highest surface detail for display dragons but requires more safety precautions and post-processing.
How long does it take to 3D print a dragon?
A small articulated dragon (≈15 cm) typically takes 6–12 hours at 0.15mm layer height on an FDM printer. A large display dragon (30+ cm) can run 20–40 hours depending on size, layer height, and infill. Resin printers can be faster for smaller models but slower for large prints due to build volume limits.
What is an articulated dragon, and how does it work?
An articulated (or flexi) dragon is a print-in-place model where the body segments are connected by built-in joints with a ≈0.2mm clearance gap. Because the joints print as one piece, the dragon is flexible straight off the build plate with no assembly required. The key to a successful print is precise tolerances — which is why 0.15mm layer height and 100% cooling are strongly recommended.
Do 3D printed dragons need supports?
Well-designed articulated dragons are built to print without supports, which is one of their defining features. Solid dragons with outstretched wings usually need tree supports under the wing tips and any large overhangs. When using supports on detailed models, tree supports are preferred over grid supports to minimize damage to scale textures when removing them.
What are the best free vs paid dragon STL files?
Free platforms like Thingiverse and Printables have hundreds of quality dragon models, especially articulated flexi designs — and many are excellent. Paid files on Cults3D and MyMiniFactory premium (typically 15) tend to offer more complex designs, better-tested print settings, and finer scale details. If you plan to print multiple dragons or want a truly polished result, the small investment in a paid file is usually worth it.
Can I 3D print a dragon with wings?
Yes, dragons with wings are very printable, but wing geometry requires some planning. Large, flat wings print best oriented vertically to minimize layer lines on the wing surface, and tree supports help handle the transition from body to wing tip. For articulated dragons, wings are usually solid (not jointed) and sized to balance the body weight so the model sits flat.
What size dragon can I 3D print?
Most desktop FDM printers (220×220mm bed or larger) can handle dragons up to ≈25–30 cm in a single print. For larger dragons, the standard approach is to split the model into sections, print each part separately, and bond them with superglue or a solvent adhesive. Many designers on Printables and Cults3D already offer pre-split versions of their large dragon models.
Can I use Tripo AI to create a custom dragon STL?
Yes — Tripo AI's text-to-3D feature lets you describe a dragon concept ("a low-poly dragon with folded wings, suitable for FDM printing") and generate a unique 3D model you can export as an STL and print at home. This is the fastest way to get a design that doesn't already exist on Thingiverse or Printables. You can also upload a reference image via the image-to-3D feature to generate a model based on a specific dragon artwork or sketch.
Conclusion
Printing a dragon is more than choosing an STL file and pressing start. The biggest takeaways are simple: first, articulated dragons are worth the challenge when you use the right material and settings. PLA, a 0.15mm layer height, and around 0.2mm joint clearance provide a strong foundation for successful print-in-place models. Second, free STL libraries are great for learning and testing, while premium designs and Tripo AI-generated models are better choices when you want unique, higher-quality creations. Third, post-processing is the step that transforms a basic printed dragon into a finished artwork through cleaning, sanding, painting, and sealing.
Ready to design a dragon nobody else has printed? Generate yours in Tripo AI Studio: https://studio.tripo3d.ai/
Explore Tripo AI plans to start creating custom 3D models: https://www.tripo3d.ai/pricing.