Tripo DCC Bridge for Roblox: Installation & Quick Start
Tripo DCC Bridge for Roblox connects Tripo Studio directly with Roblox Studio, so you can transfer generated 3D models and animations without manually exporting and importing files.
Built for artists, technical artists and game developers, the bridge streamlines asset delivery and helps you spend more time creating inside Roblox Studio.
Requirements
- Operating system: Windows or macOS on Apple silicon
- Roblox Studio: 0.73+
- Browser:
- Google Chrome 116+, Microsoft Edge 116+ or Opera 102+
- Other browsers are not currently supported
- Default Import Settings:
- Pivot: Center Bottom
- Auto Material Creation: Enabled
- Auto Asset Placement: Enabled
- Vertex Color: Enabled
Install and Connect Tripo DCC Bridge for Roblox
Step 1
Go to Tripo Studio and download the Tripo DCC Bridge for Roblox package.
Step 2
Extract the downloaded package. Inside the RobloxBridge folder, you will find:
Tripo3d_Roblox_Bridge.exe / Tripo3d_Roblox_Bridge.dmgREADME.md
Open Tripo Bridge and select Sign in with Roblox.
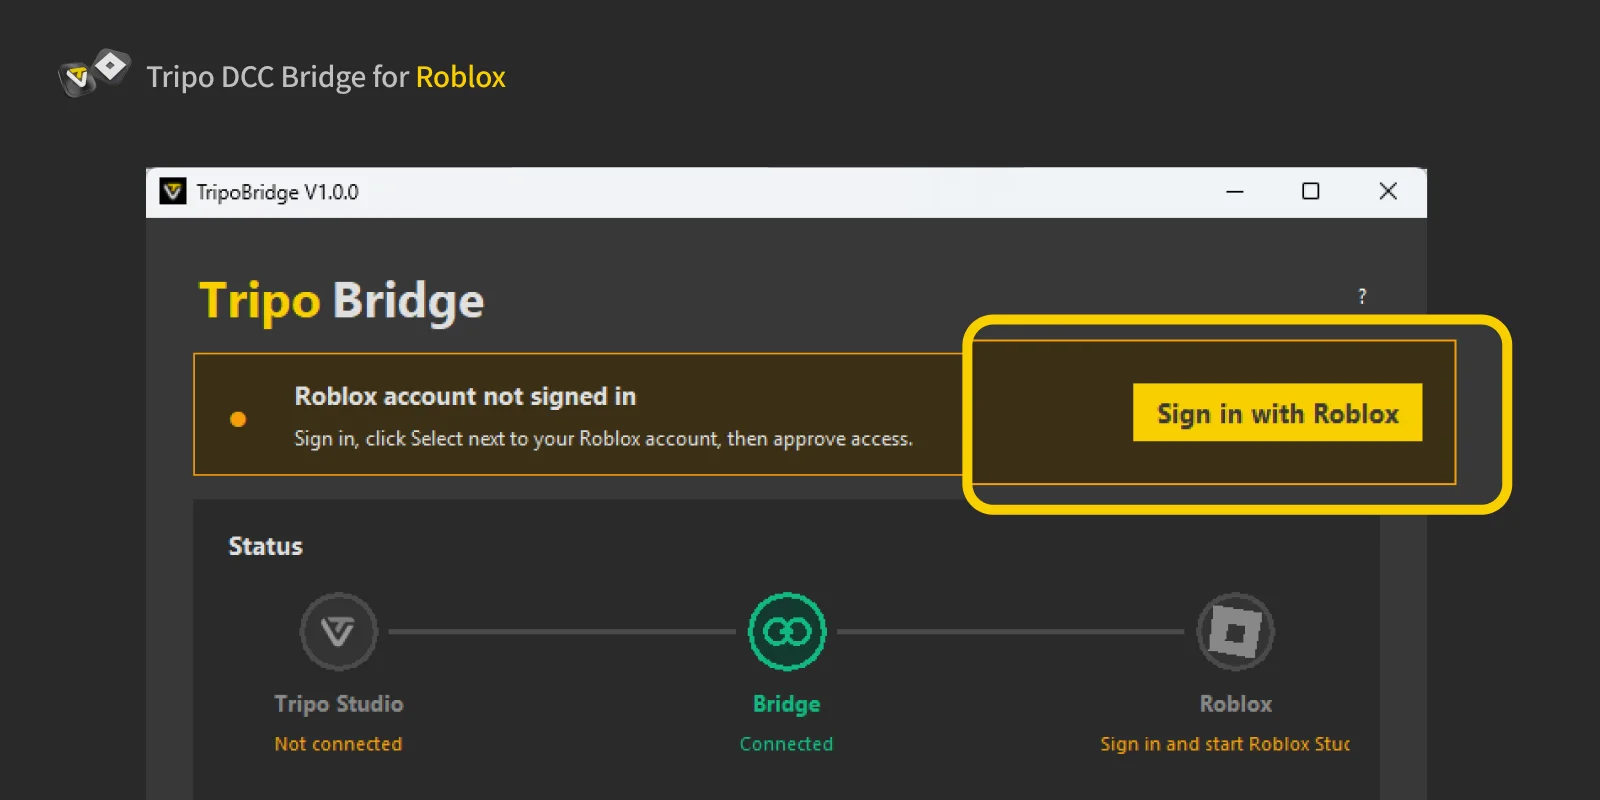
Select Login to open the Roblox sign-in page, then select Continue.
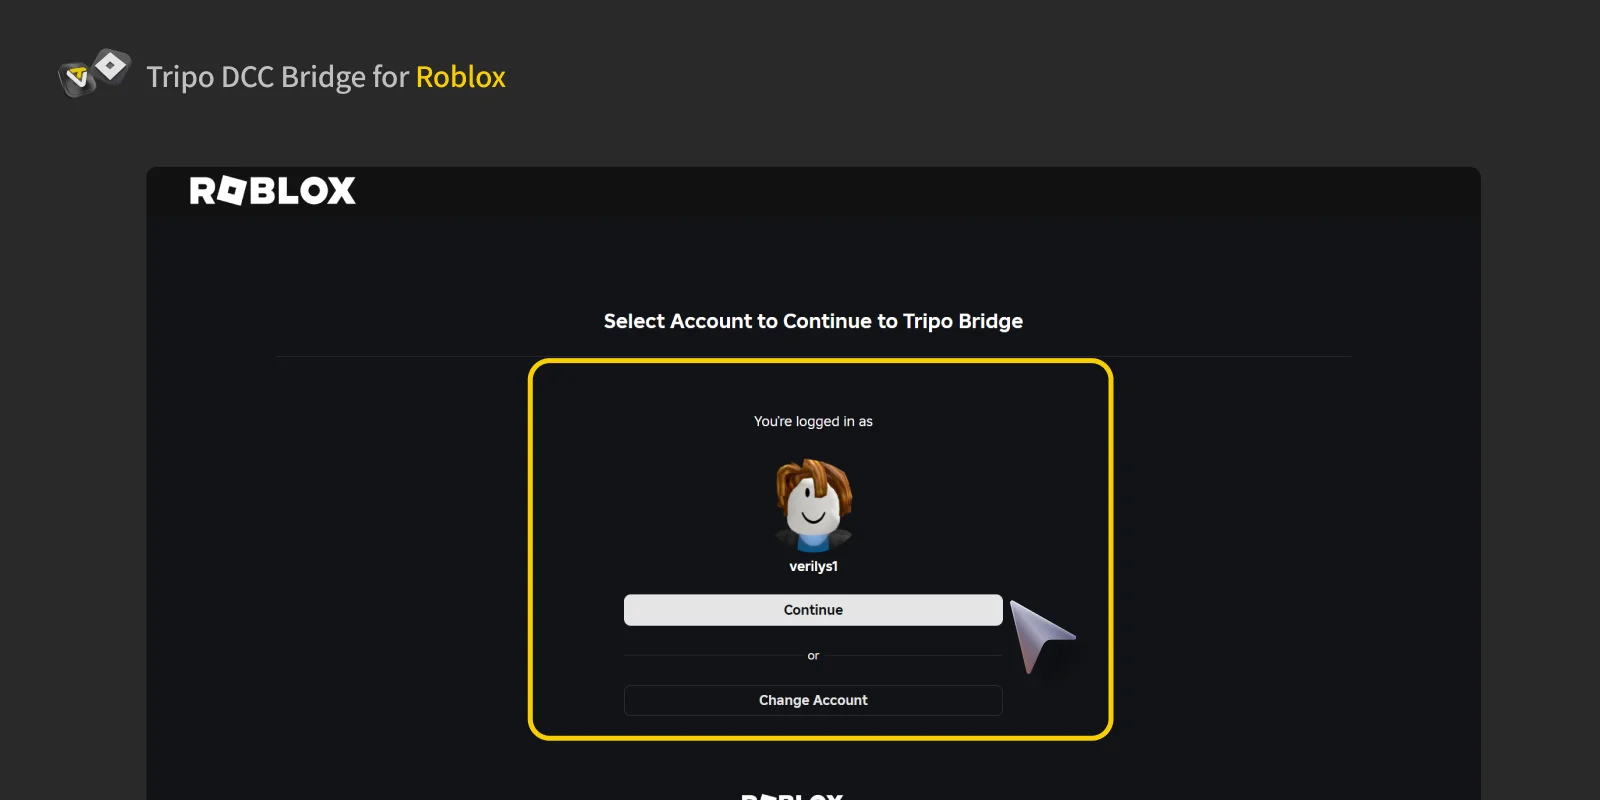
Select the same Roblox account you use in Roblox Studio. Using a different account may prevent the transfer from completing.
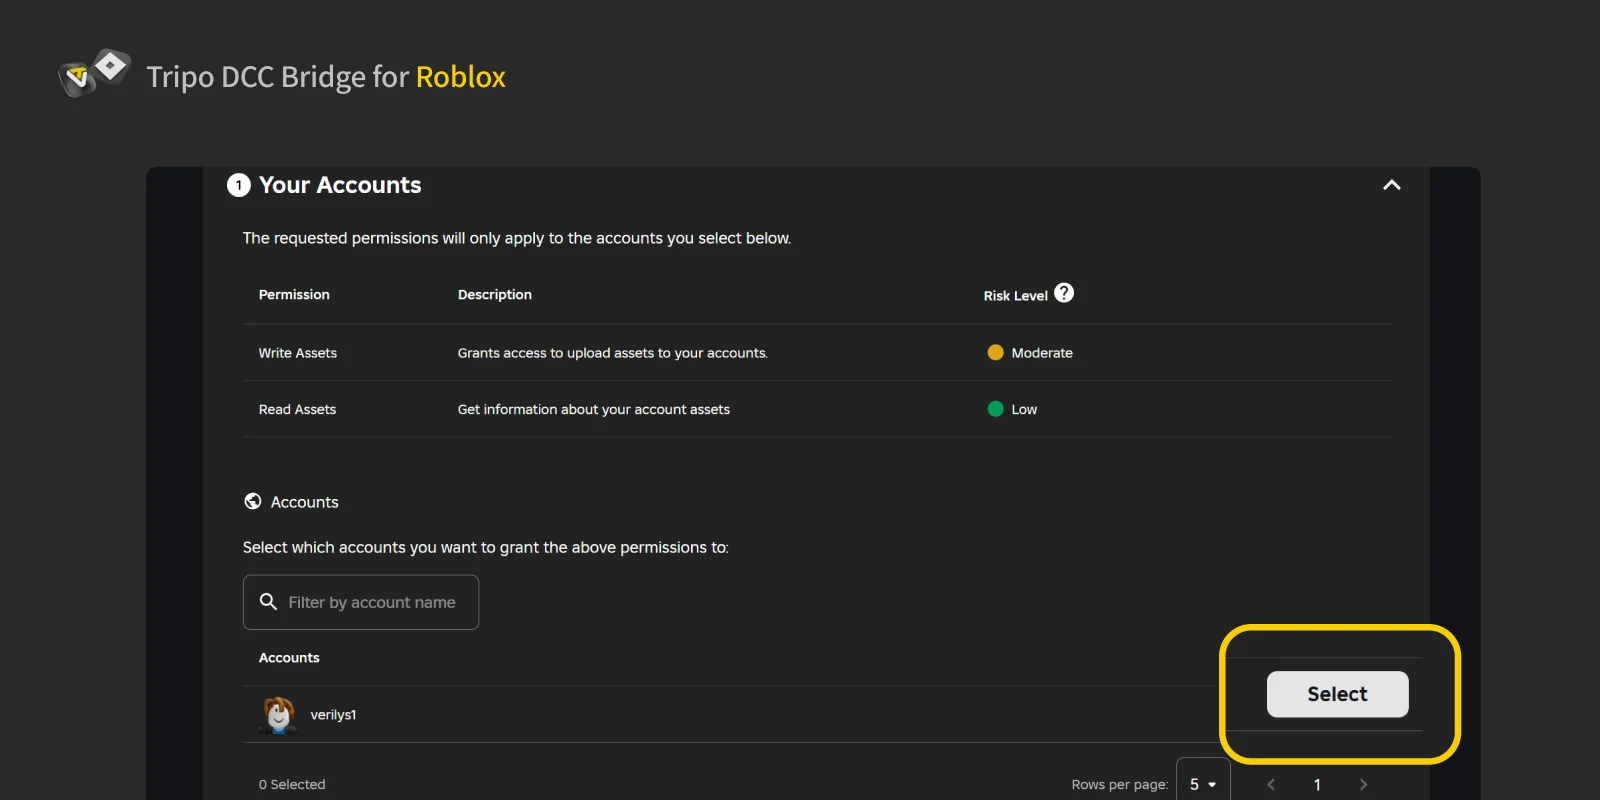
Select Continue to authorize access, then wait for the authorization result.
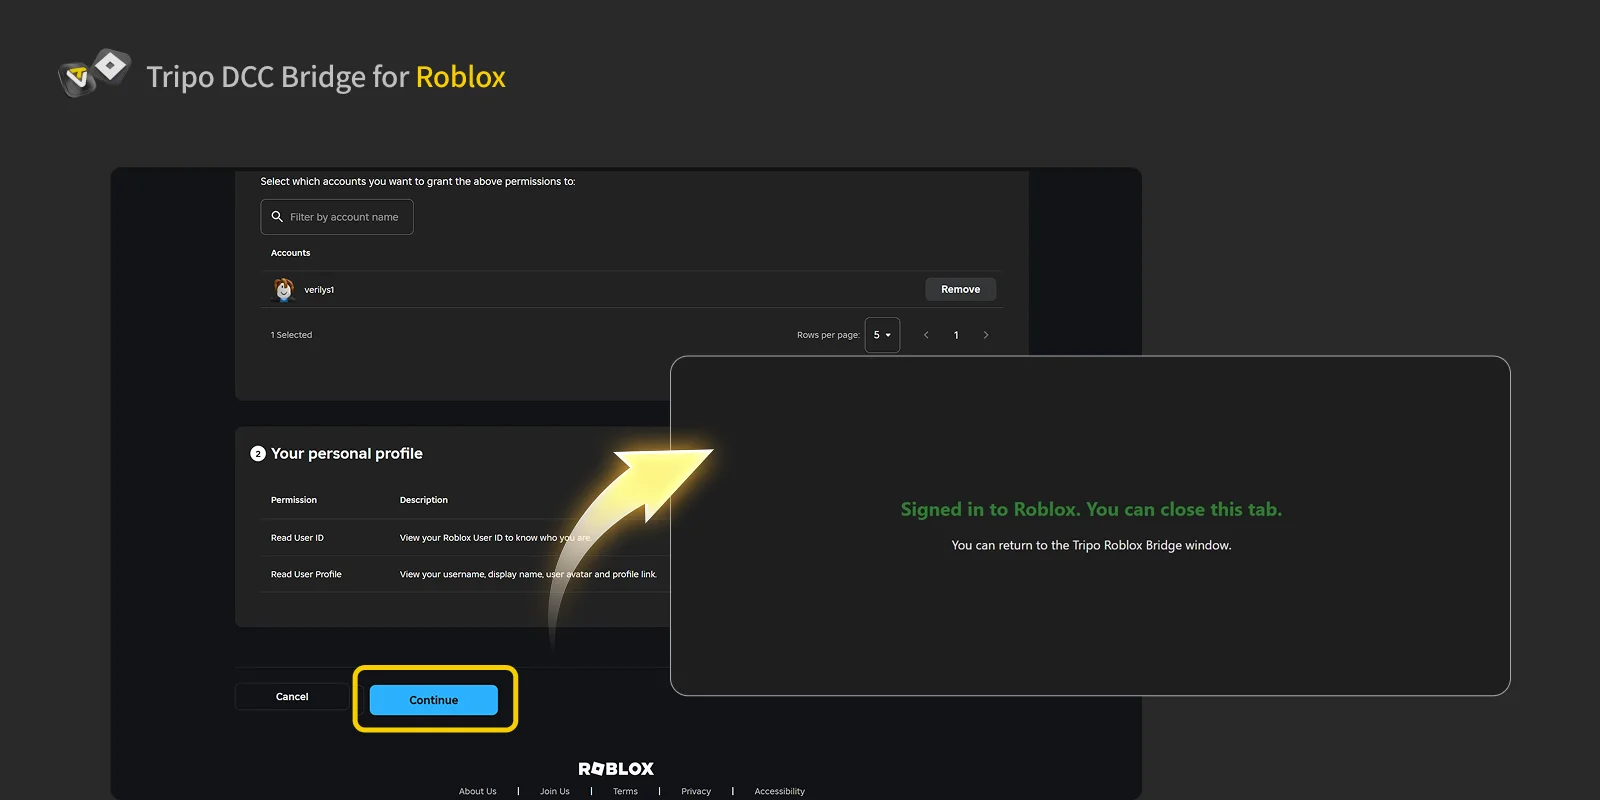
When the confirmation page appears, your Roblox account is connected. Close the browser tab and return to Tripo Bridge.
Step 3
In Tripo Bridge, select the Roblox icon to launch or restart Roblox Studio.
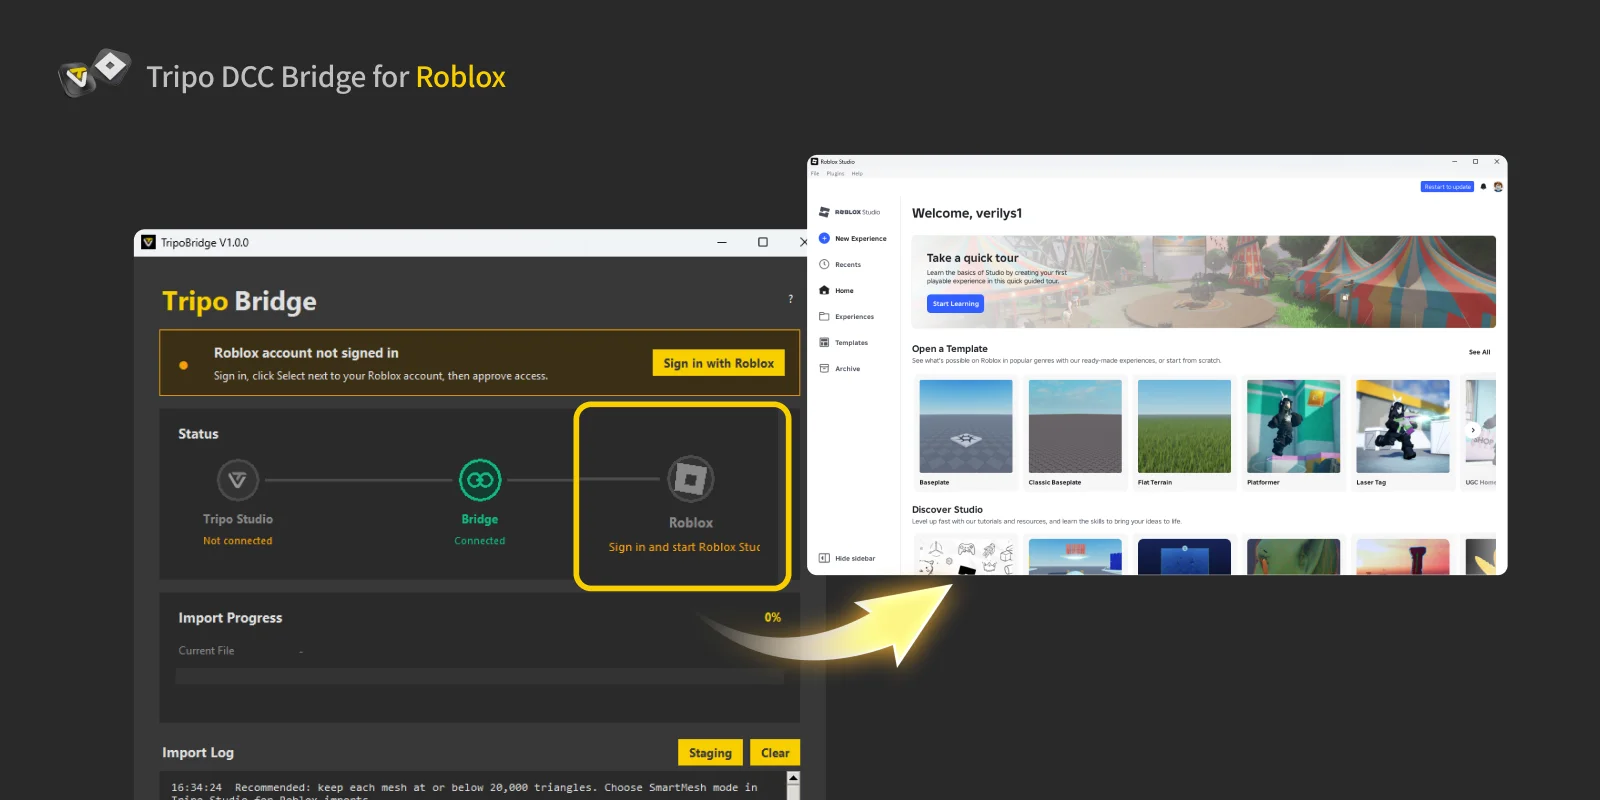
Open a Roblox project, then go to Plugins > Tripo Bridge.
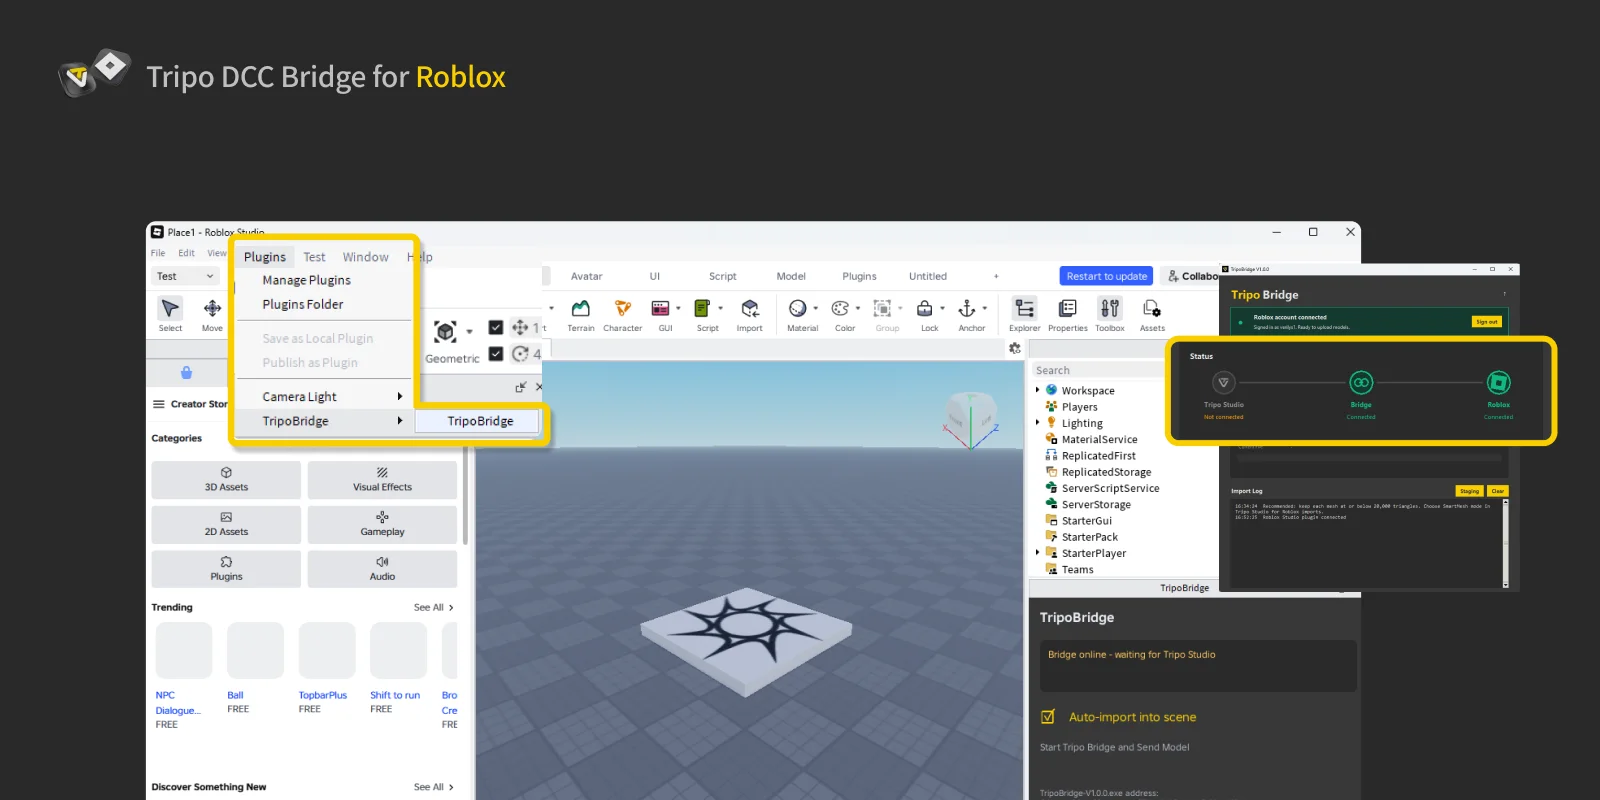
The plugin window in the bottom-right corner shows:
- Bridge connection status: Shows whether Tripo Bridge and Tripo Studio are connected. Green indicates that model transfers are available.
- Auto-import: When enabled, downloaded models are imported into the current scene automatically.
- Bridge application location: Shows the path to the Tripo Bridge application.
The panel below confirms the connection between Tripo Bridge and Roblox Studio.
Step 4
Open Tripo Studio, select DCC Bridge, then activate the Roblox connection.
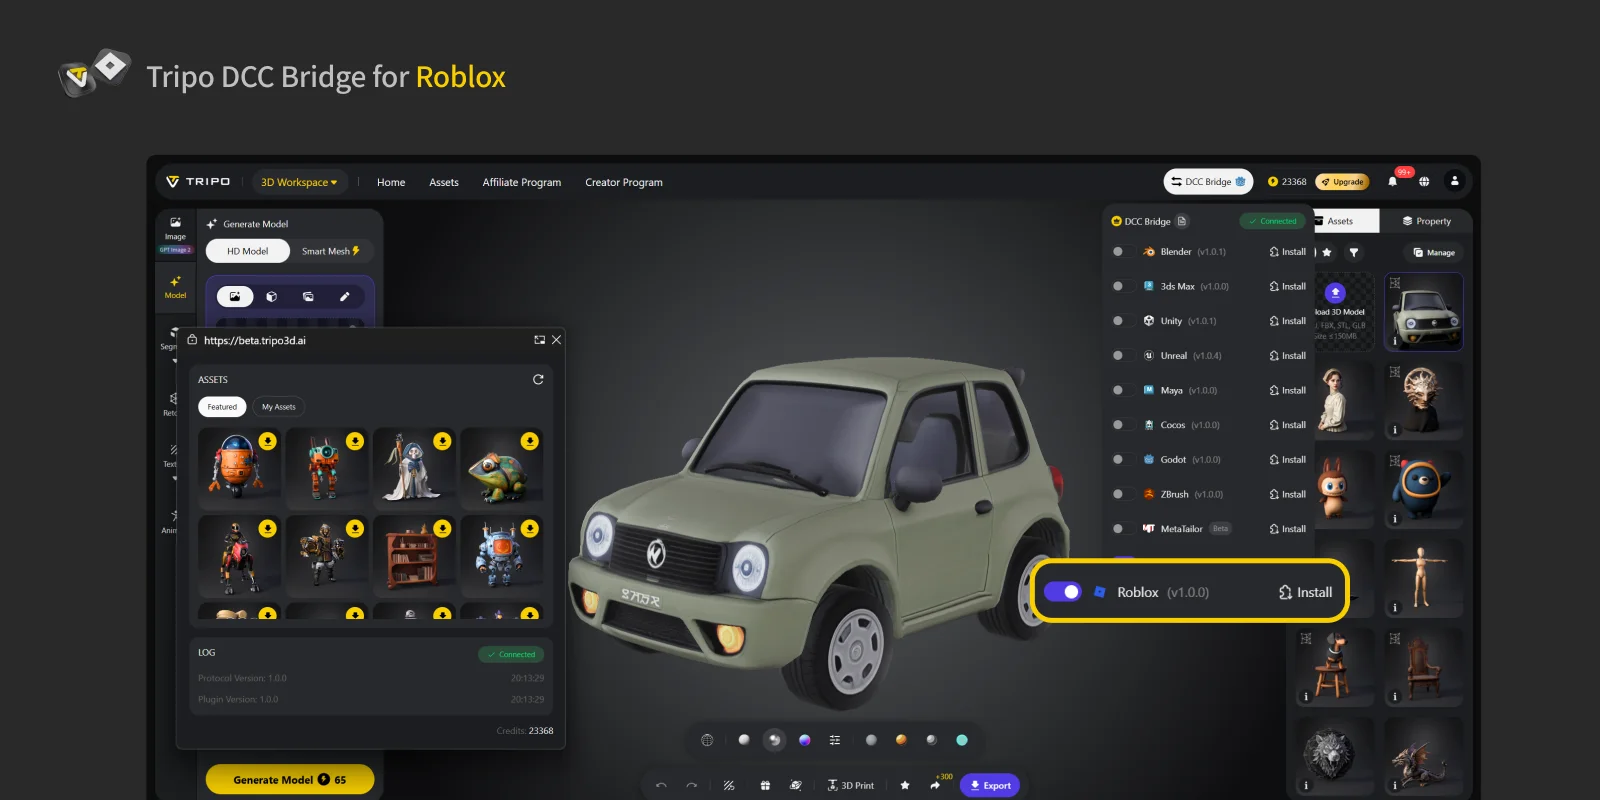
Return to Tripo Bridge. The status panel should show that Tripo Studio, Tripo Bridge and Roblox Studio are connected.
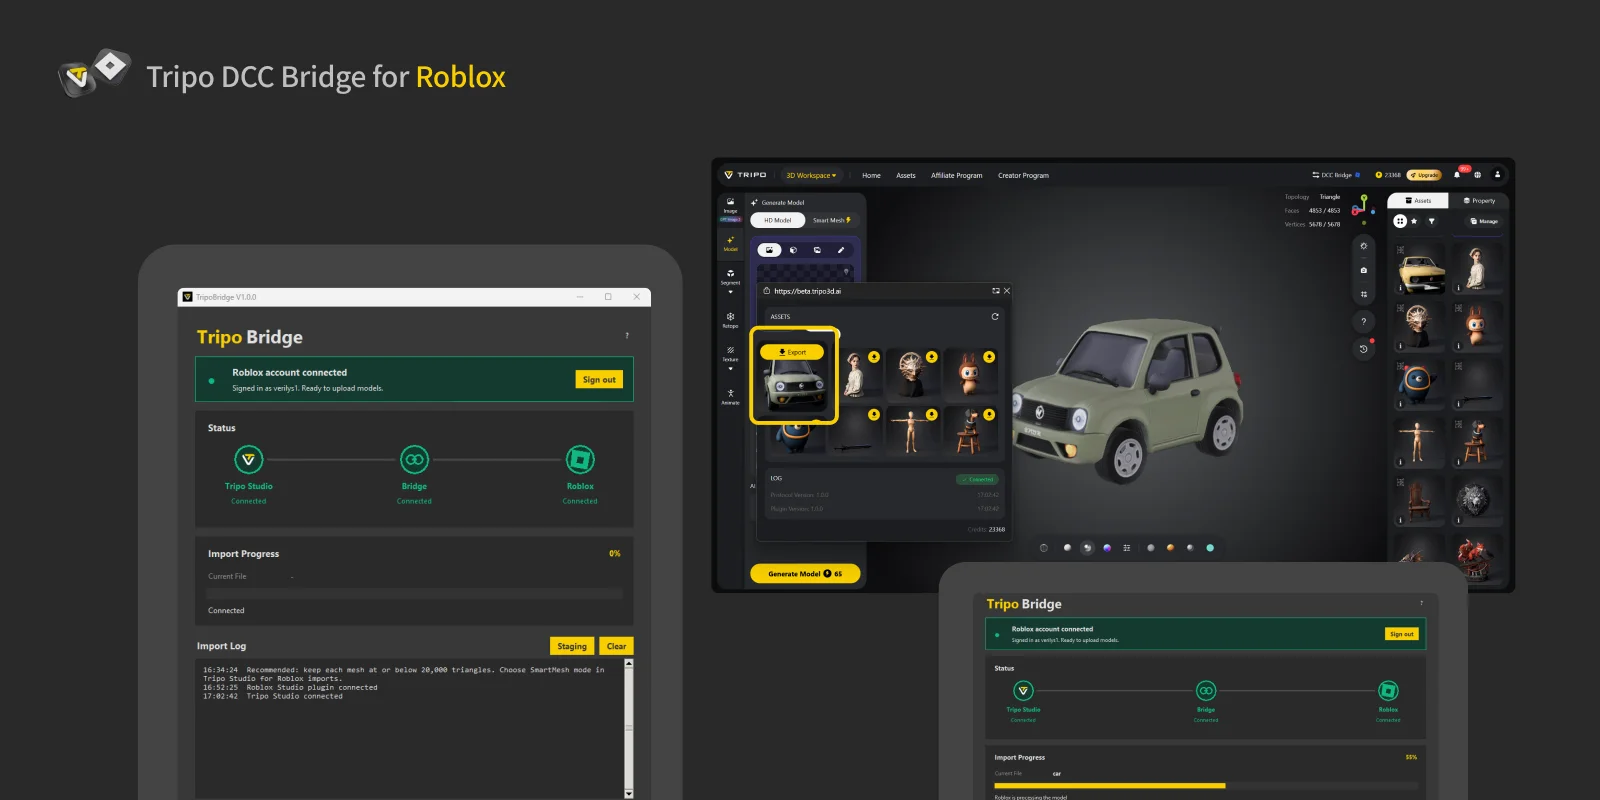
Before transferring a model, confirm that Tripo Studio, Tripo Bridge and the Roblox Studio plugin all show Connected.
Select a model, choose Export in the mini window, then select Send to Roblox Studio.
Keep Tripo Bridge and Roblox Studio open throughout the transfer, and leave the connection enabled in Tripo Studio.
To transfer an animated model, generate the animations in Tripo Studio, choose the animations you want in the Export panel, then send the asset directly to Roblox Studio.
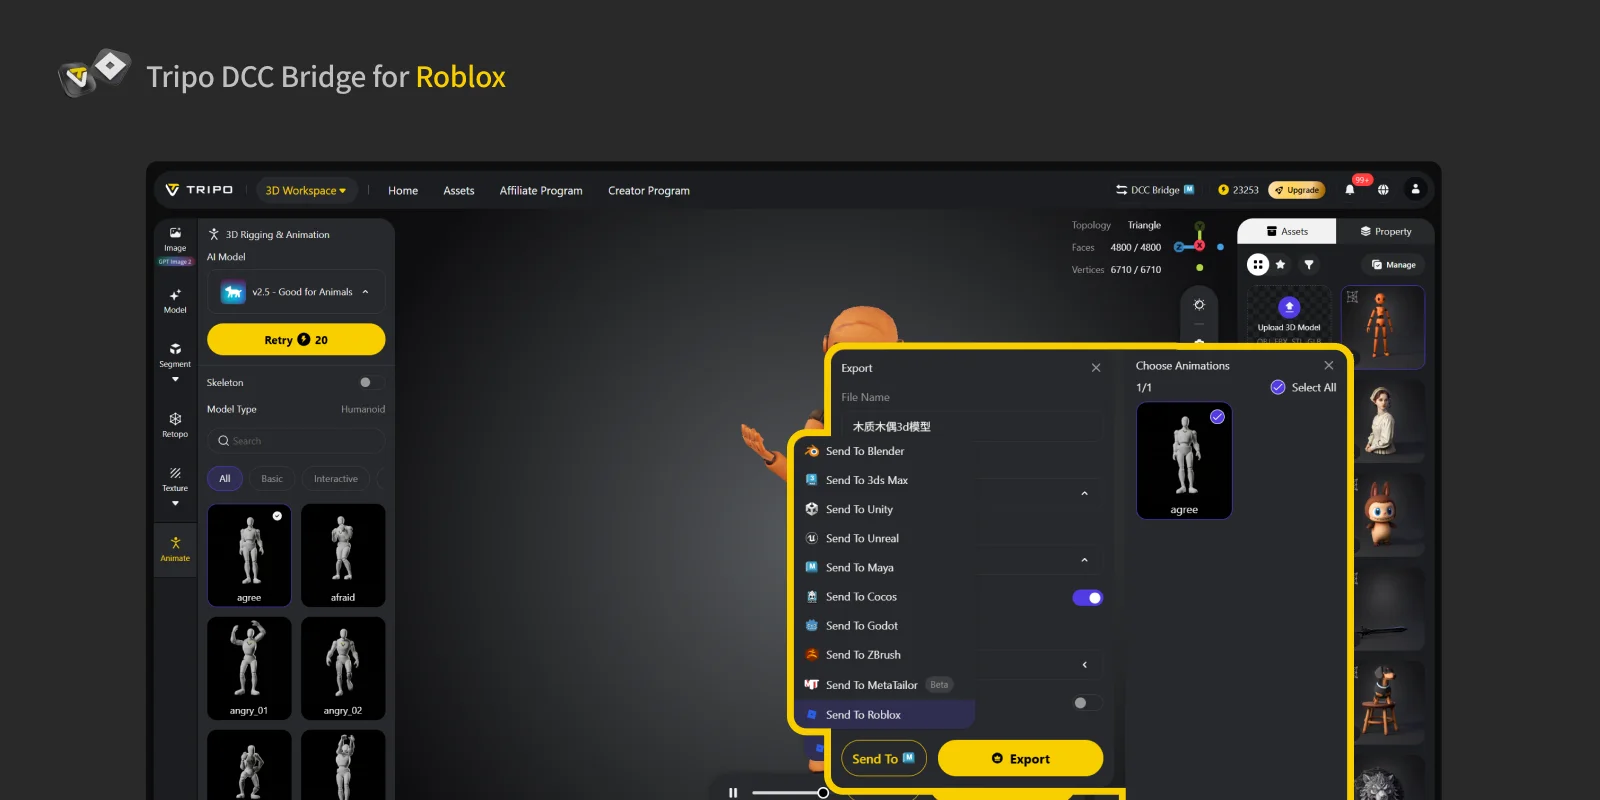
Roblox transfer limit: 20,000 triangles per model. Use Smart Mesh in Tripo Studio to optimize assets before transfer.
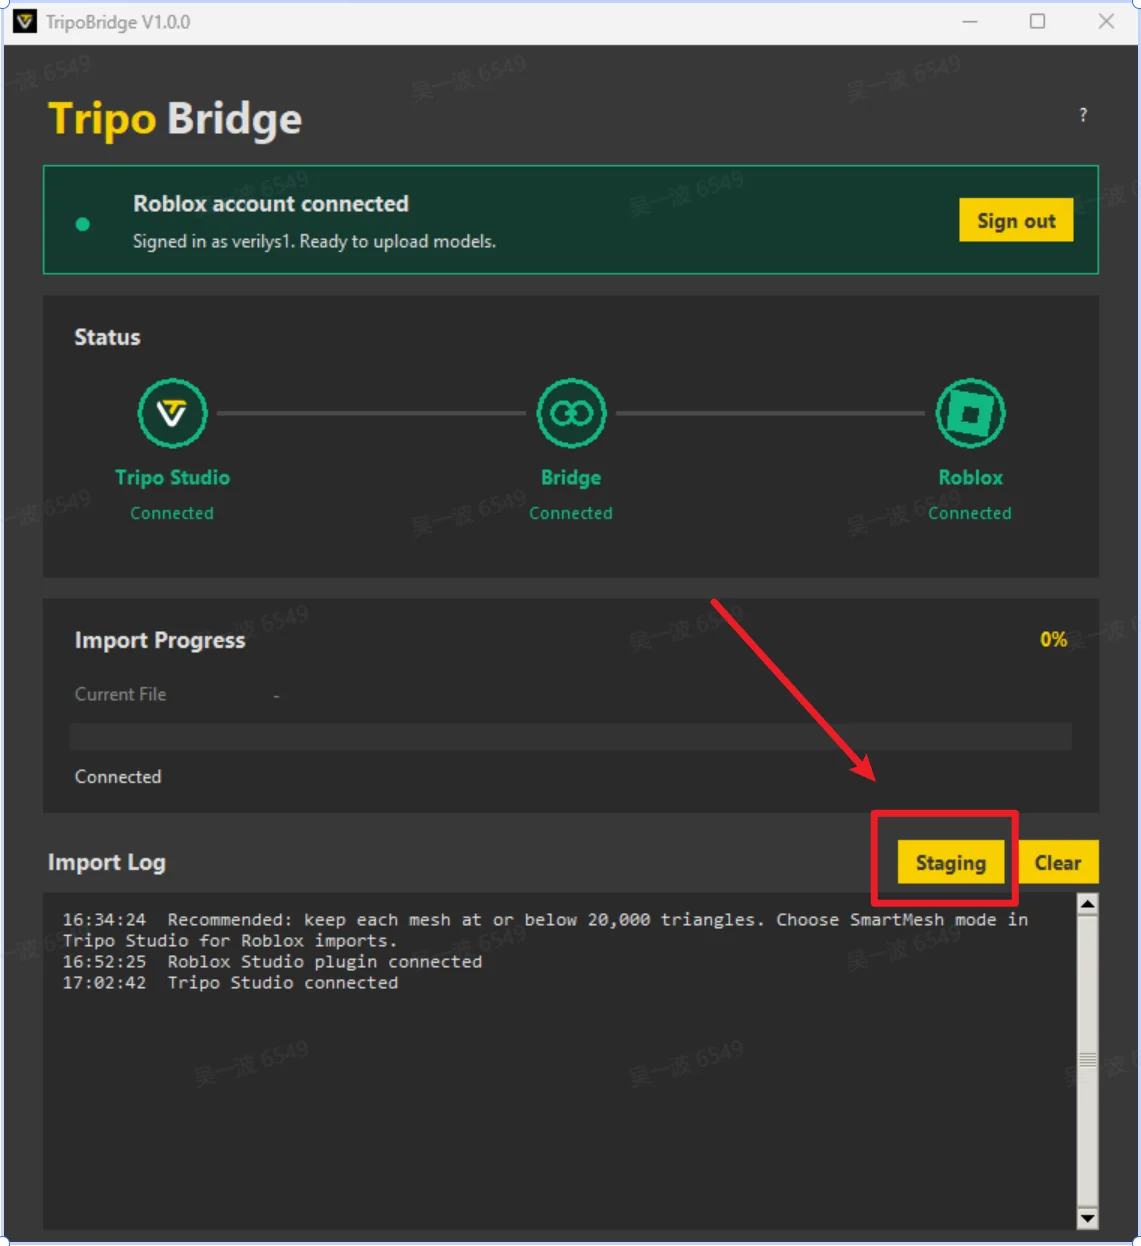
If a model exceeds the limit, Tripo Bridge moves it to the Staging folder instead of sending it to Roblox Studio. Select Staging to review pending assets, then optimize the model and retry the transfer.
Step 5
Your model is now available in Roblox Studio.
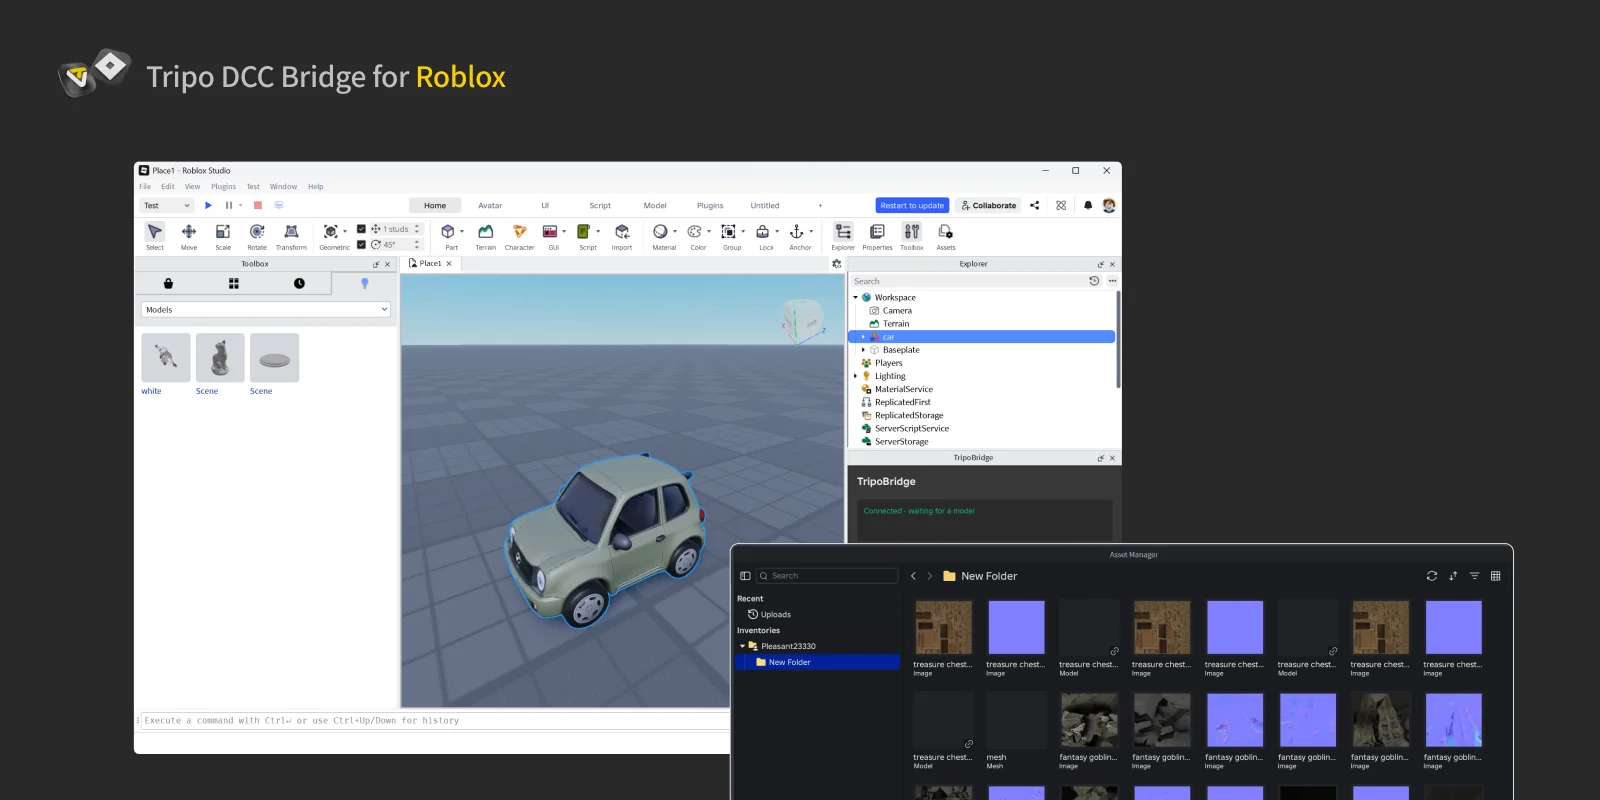
By default, the Roblox plugin imports transferred models into the current scene, where they appear in the editor viewport.
If auto-import is disabled, find the uploaded models and textures under Window > Asset Manager.
FAQs
Q: What happens if I import a high-poly model (with more than 20,000 triangles)?
A: When a model exceeds Roblox's 20,000-triangle limit, the system will display a clear notification in the status bar. The plugin will automatically save the failed model to a designated temporary location. Simply click the Staging button to navigate there and review your model.
Q: Can I transfer data to multiple Roblox Studio instances simultaneously?
A: No. The connection only recognizes the first Roblox Studio instance launched.
Q: Why is the resolution(8K) of the imported image different from my original image?
A: Due to Roblox's 8000×8000 pixel limit, any 8K texture (8192×8192) you import will be automatically compressed to 4096×4096. This compression has minimal impact on the visual quality of your model in Roblox.
Q: If I follow the steps above and everything connects properly, but the upload fails with an error, how do I resolve it?
A: Error details are usually shown in the logs. Please verify that you have followed all tutorial steps correctly. Roblox uploads may occasionally fail due to temporary network fluctuations; if this happens, try again. To prevent model loss, all models downloaded from Tripo Studio are saved in the staging folder.

.webp?x-oss-process=image%2Fresize%2Cw_720%2Fformat%2Cwebp%2Fquality%2Cq_80)
