Sand Texture: Types, Properties, and How to Apply or Generate It
TL;DR
- Sand texture can describe both a real granular surface and a digital material used in 2D or 3D work.
- For realistic renders, match grain scale, roughness, normal detail, moisture, and tiling to the scene.
- Use seamless PBR maps for large ground planes, then vary color and surface detail to reduce visible repetition.
- Sand materials can be applied in design software or generated for 3D models with AI texturing tools.
A 3D artist building a beach scene and a DIYer recreating a coastal wall finish may search for the same thing: sand texture. This guide covers its main types, digital use in Blender, Photoshop, and SketchUp, physical paint finishes, resource selection, and AI-assisted texturing. It then shows how grain size, tiling, and PBR maps affect the final result.
What Is Sand Texture?
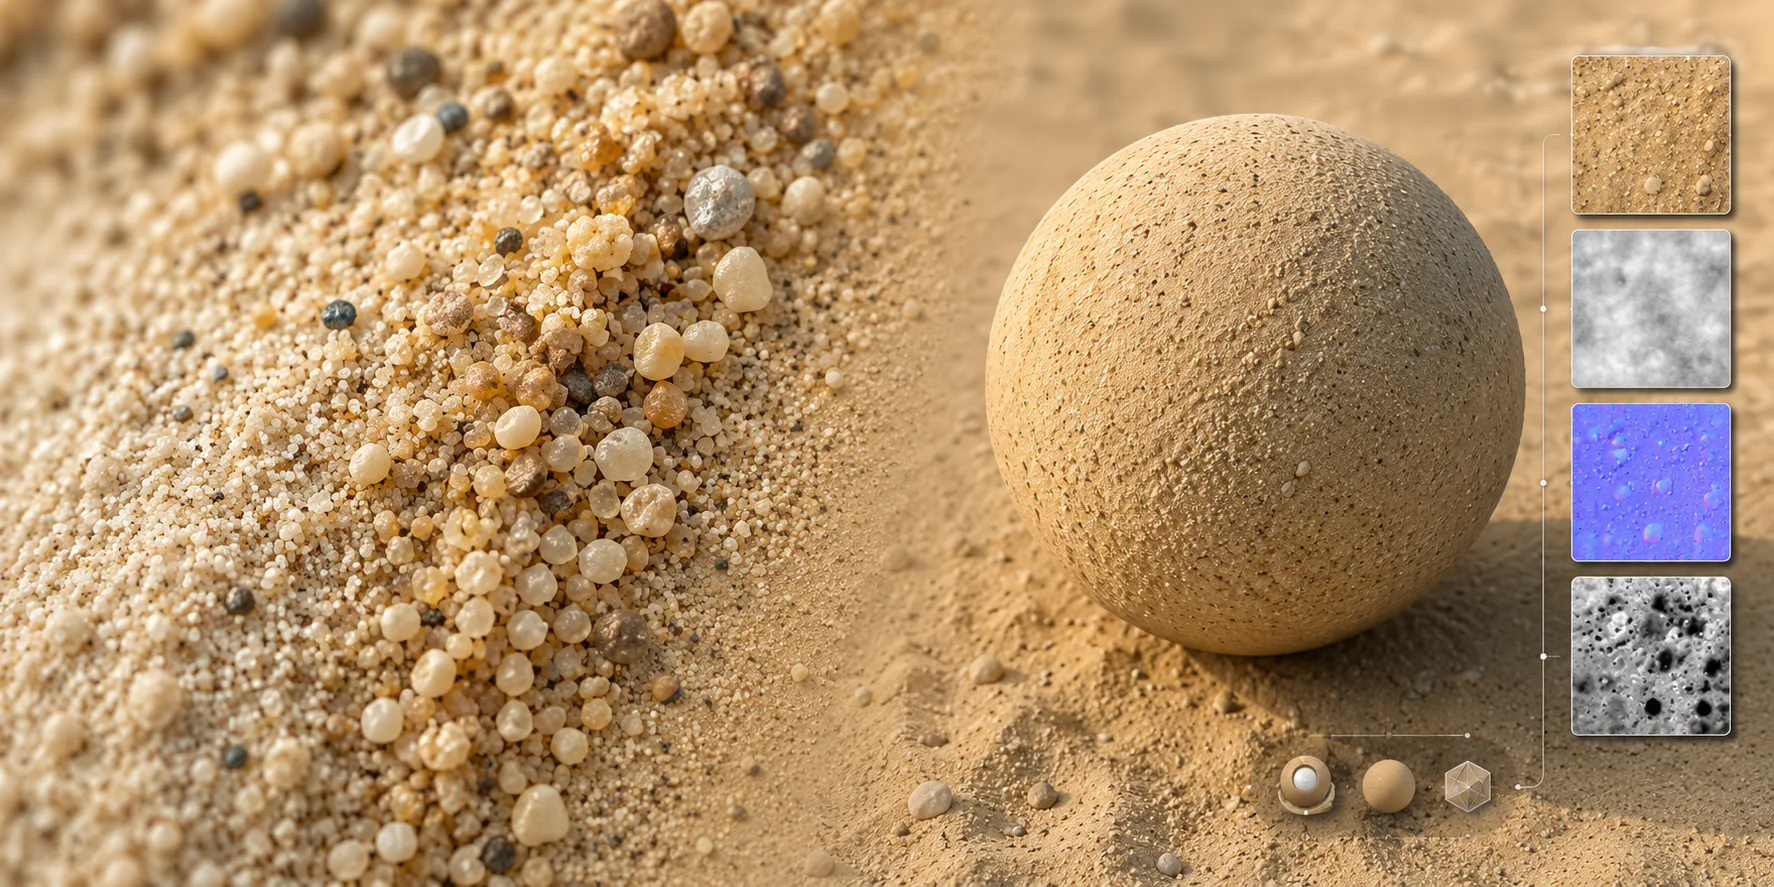
Physically, sand texture describes a loose, granular surface that can feel fine or gritty and scatter light across many particles. In the commonly used Wentworth grain-size scale, sand spans roughly 0.0625-2 mm; finer material is classified as silt or clay, while larger particles are gravel. Digitally, a sand texture is a repeatable image or PBR map set that simulates those grains on a 3D model or 2D canvas. The term therefore covers both the tactile material and the design asset used to reproduce it.
Types of Sand Texture
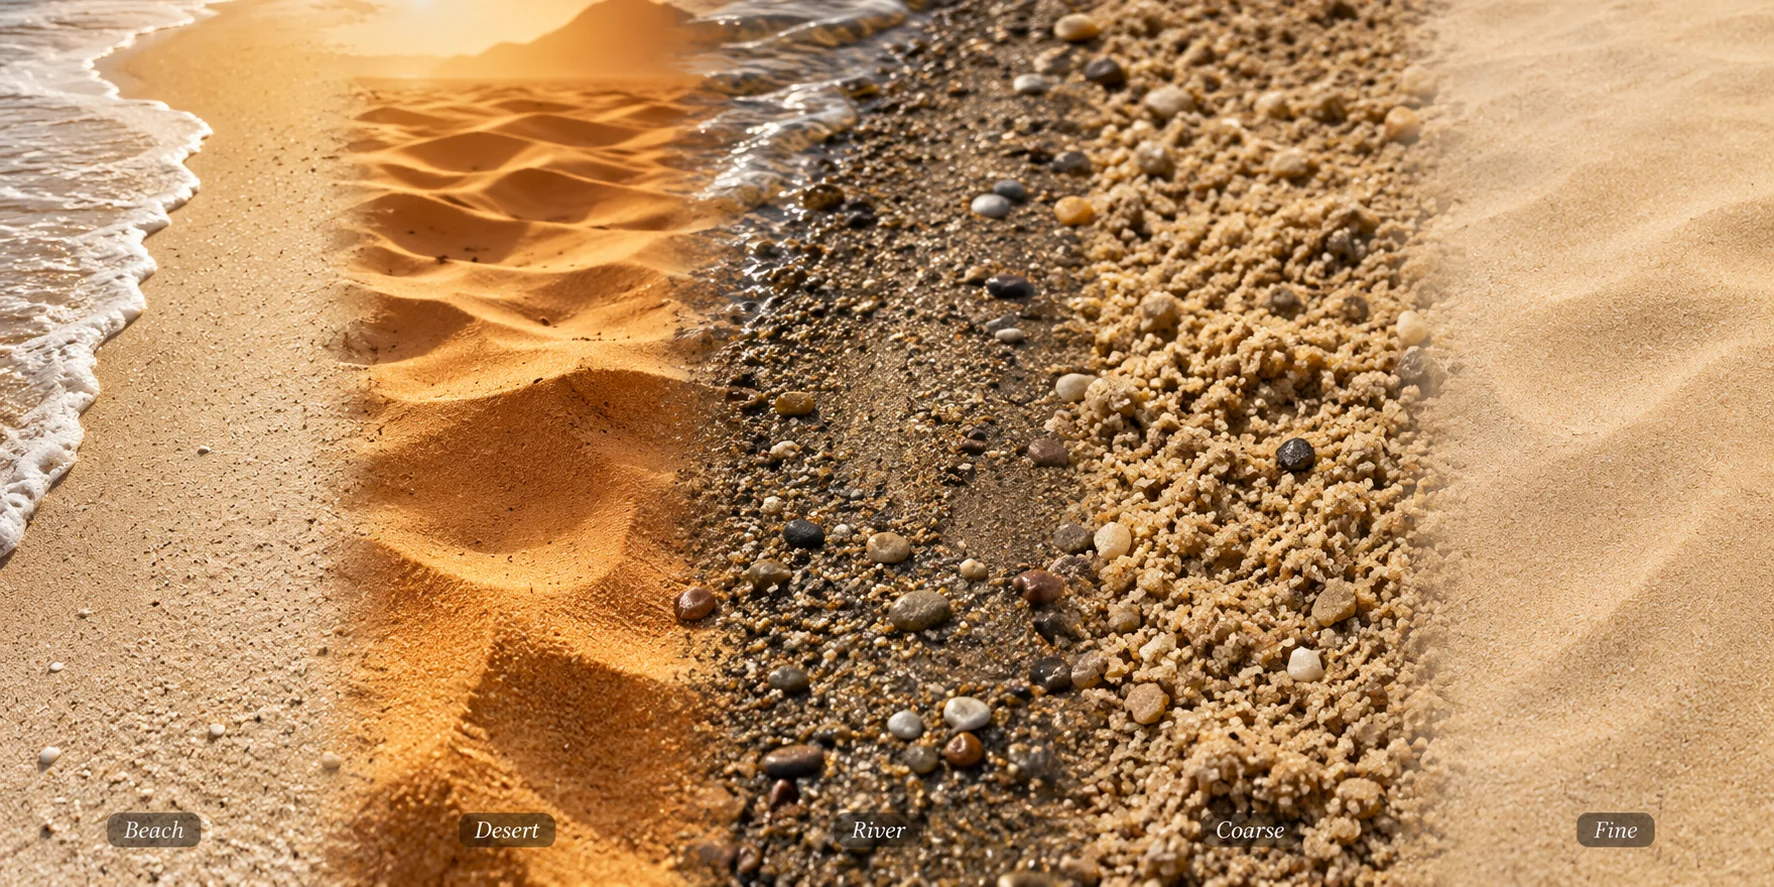
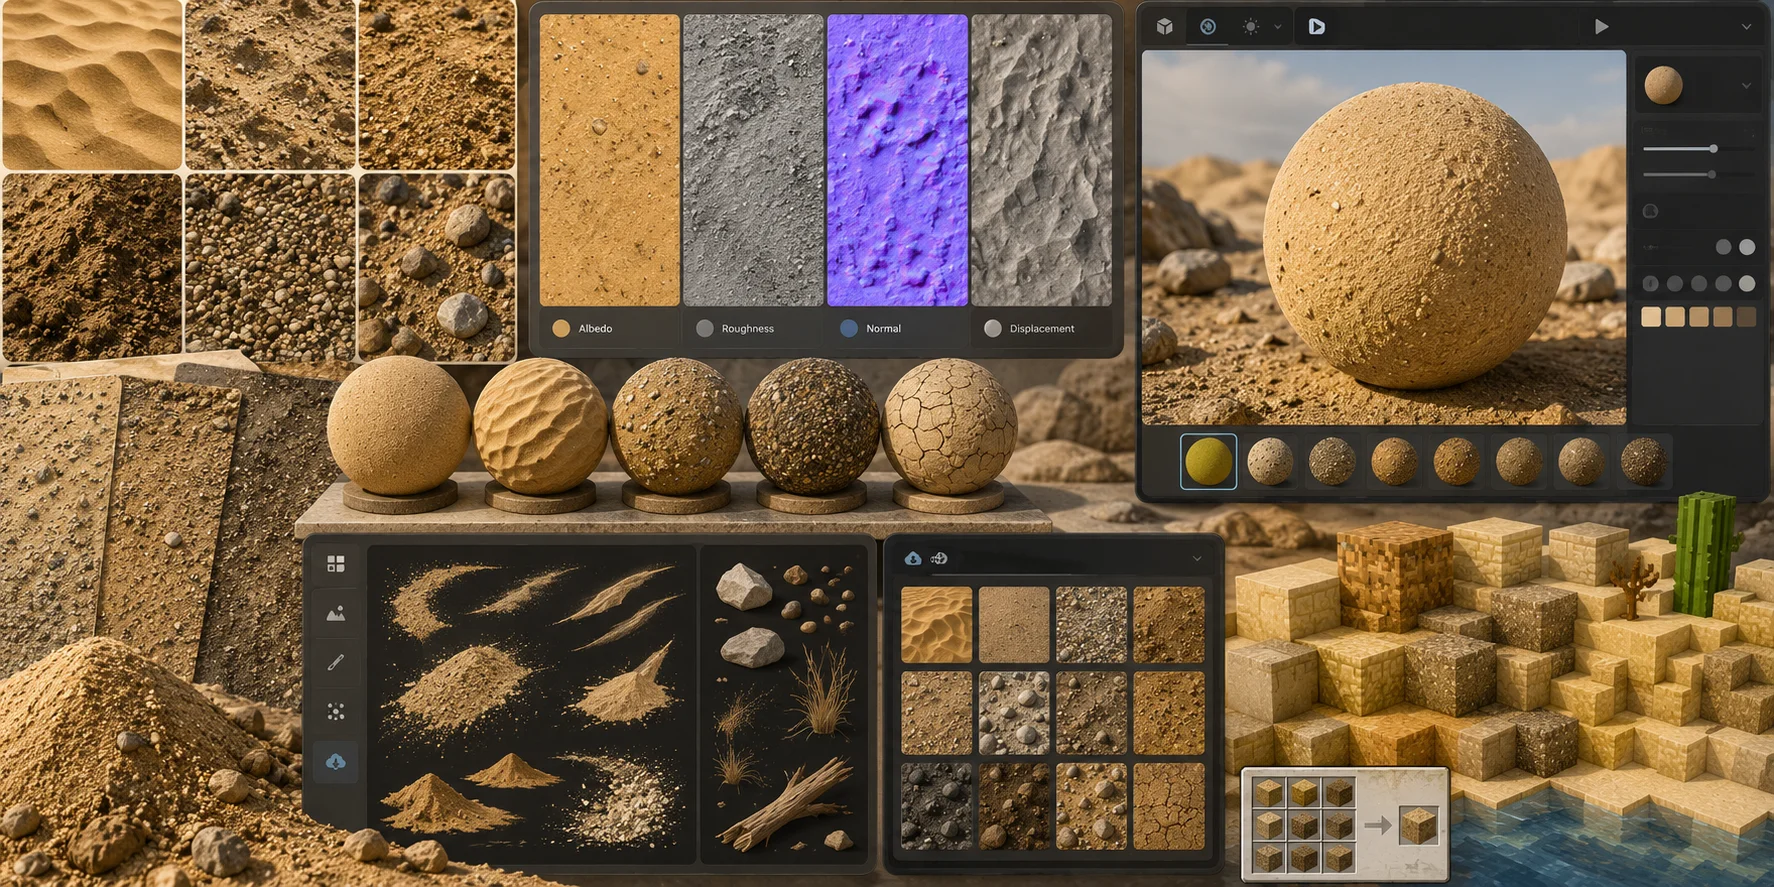
- Beach sand: Fine, pale, and often rounded by water movement. In renders, damp areas should look darker and less rough.
- Desert sand: Medium-fine grains in warm tan, orange, or red tones. Wind ripples suit cinematic, game, and stylized landscapes.
- River sand: Coarser and more varied, with grey, brown, mineral, or pebble inclusions. A darker surface can suggest moisture.
- Coarse sand: Visible grain clusters need stronger normal or displacement detail. It works for rough ground, pathways, and construction materials.
- Fine sand: Nearly smooth from a distance. Use subtle normal intensity while keeping dry sand matte.
Particle size should influence normal-map strength and displacement height: exaggerated relief quickly makes sand resemble gravel.
Seamless Sand Textures: Why Tiling Matters
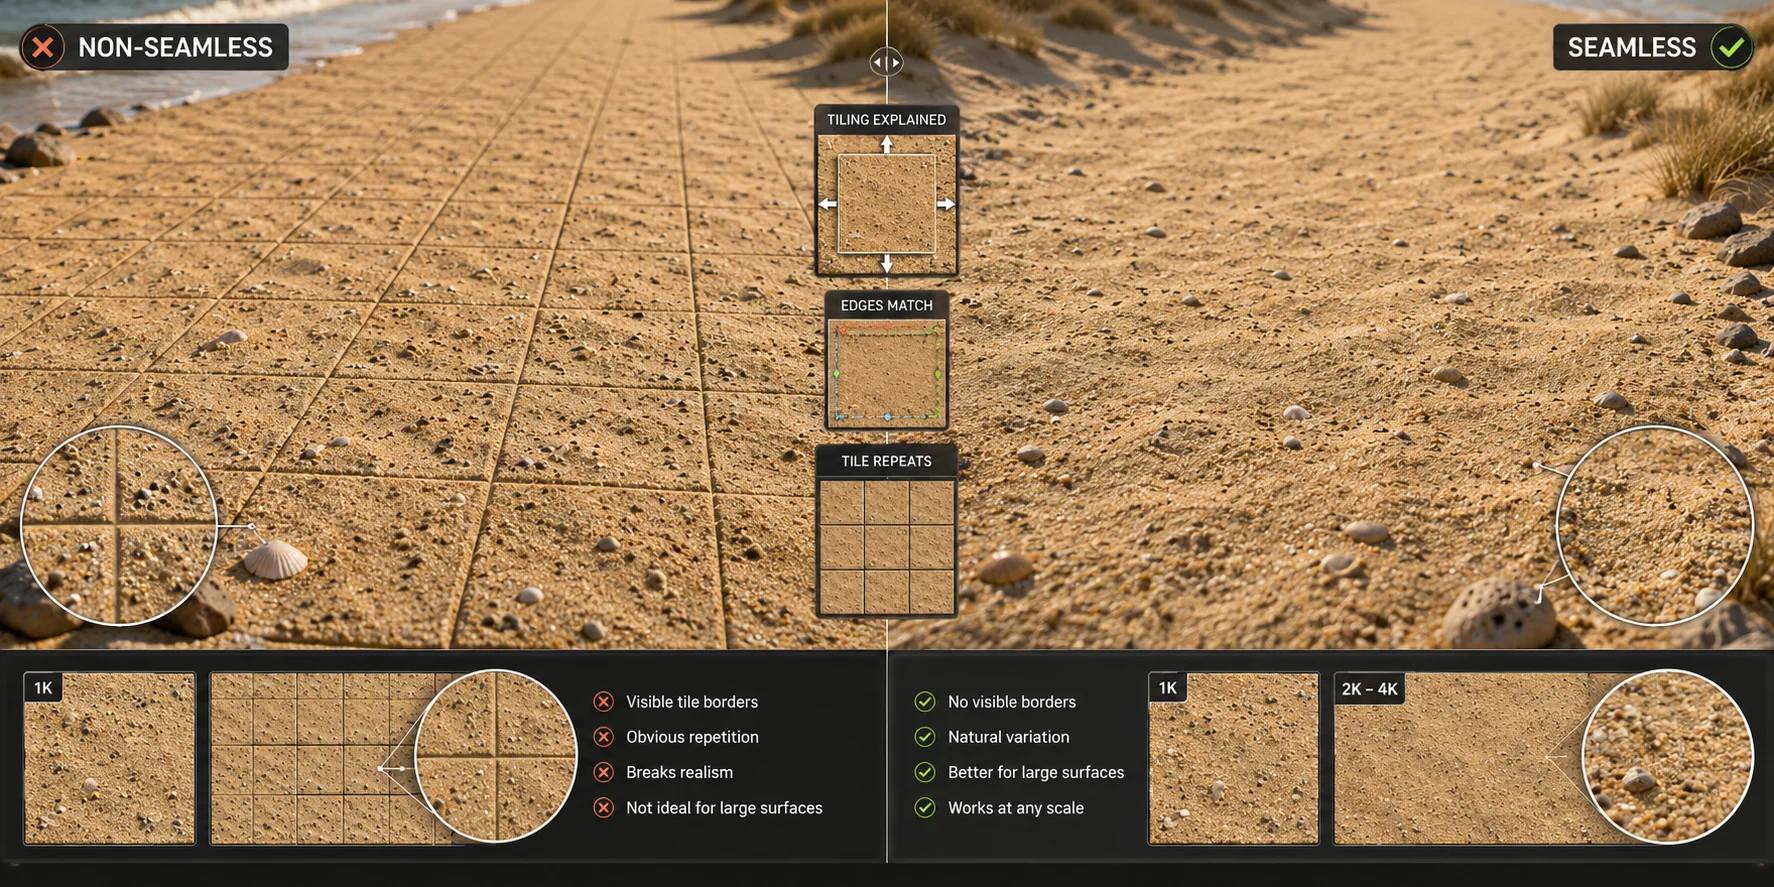
A seamless texture has matching edges on all four sides, allowing copies to tile without borders. This is essential for beaches and deserts, where a non-seamless image reveals a grid. Artists create seamless maps by offsetting the image, repairing the center seams, overlapping noise, and removing distinctive marks.
Use 1K maps for distant surfaces, 2K for general scenes, and 4K for close ground planes. Resolution cannot hide repetition, so add color variation, decals, or secondary noise.
PBR Maps for Sand: Roughness, Normals, and Displacement
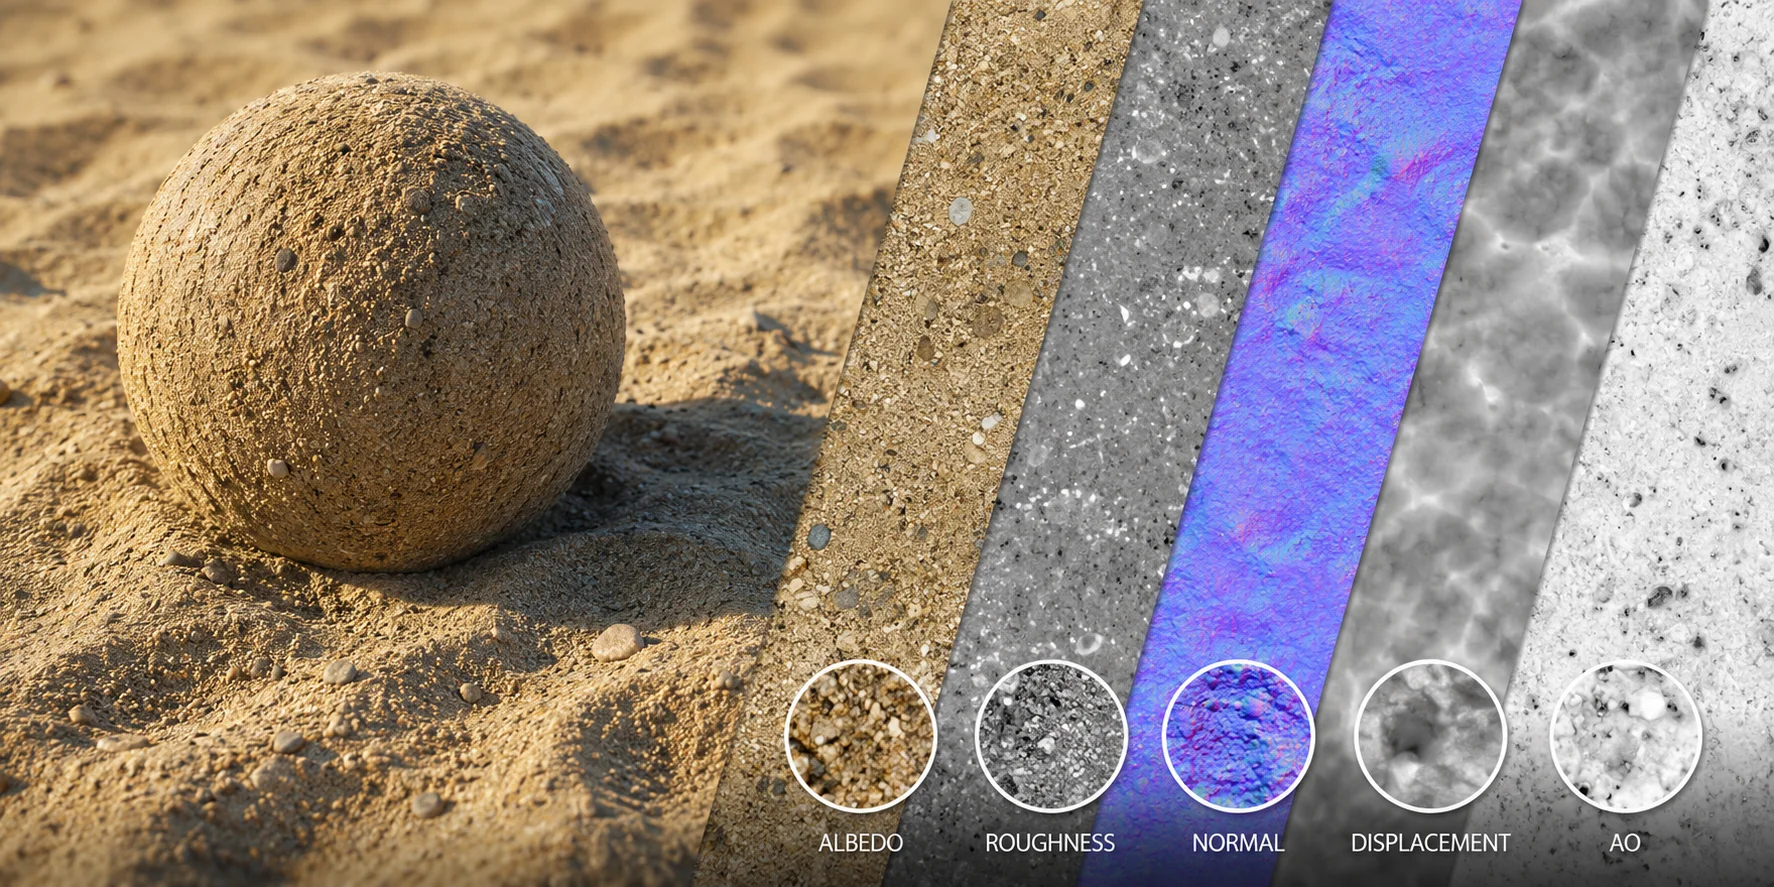
A practical sand material includes:
- Albedo / Color: Base tan, cream, grey, red, or brown color without strong baked lighting.
- Roughness: Controls reflection sharpness. For dry sand, 0.7–0.9 is a useful starting range; wet areas may fall near 0.4–0.5, depending on the renderer.
- Normal: Adds grain-scale lighting detail without extra polygons.
- Displacement: Changes geometry for dunes, footprints, and larger ripples.
- Ambient Occlusion: Optional shading between compacted grains and cracks.
For a model-based workflow, Tripo AI's AI Texturing can create PBR materials and standard maps such as Base Color, Roughness, Metallic, and Normal for supported workflows.
How to Apply Sand Textures in Blender, Photoshop, and SketchUp
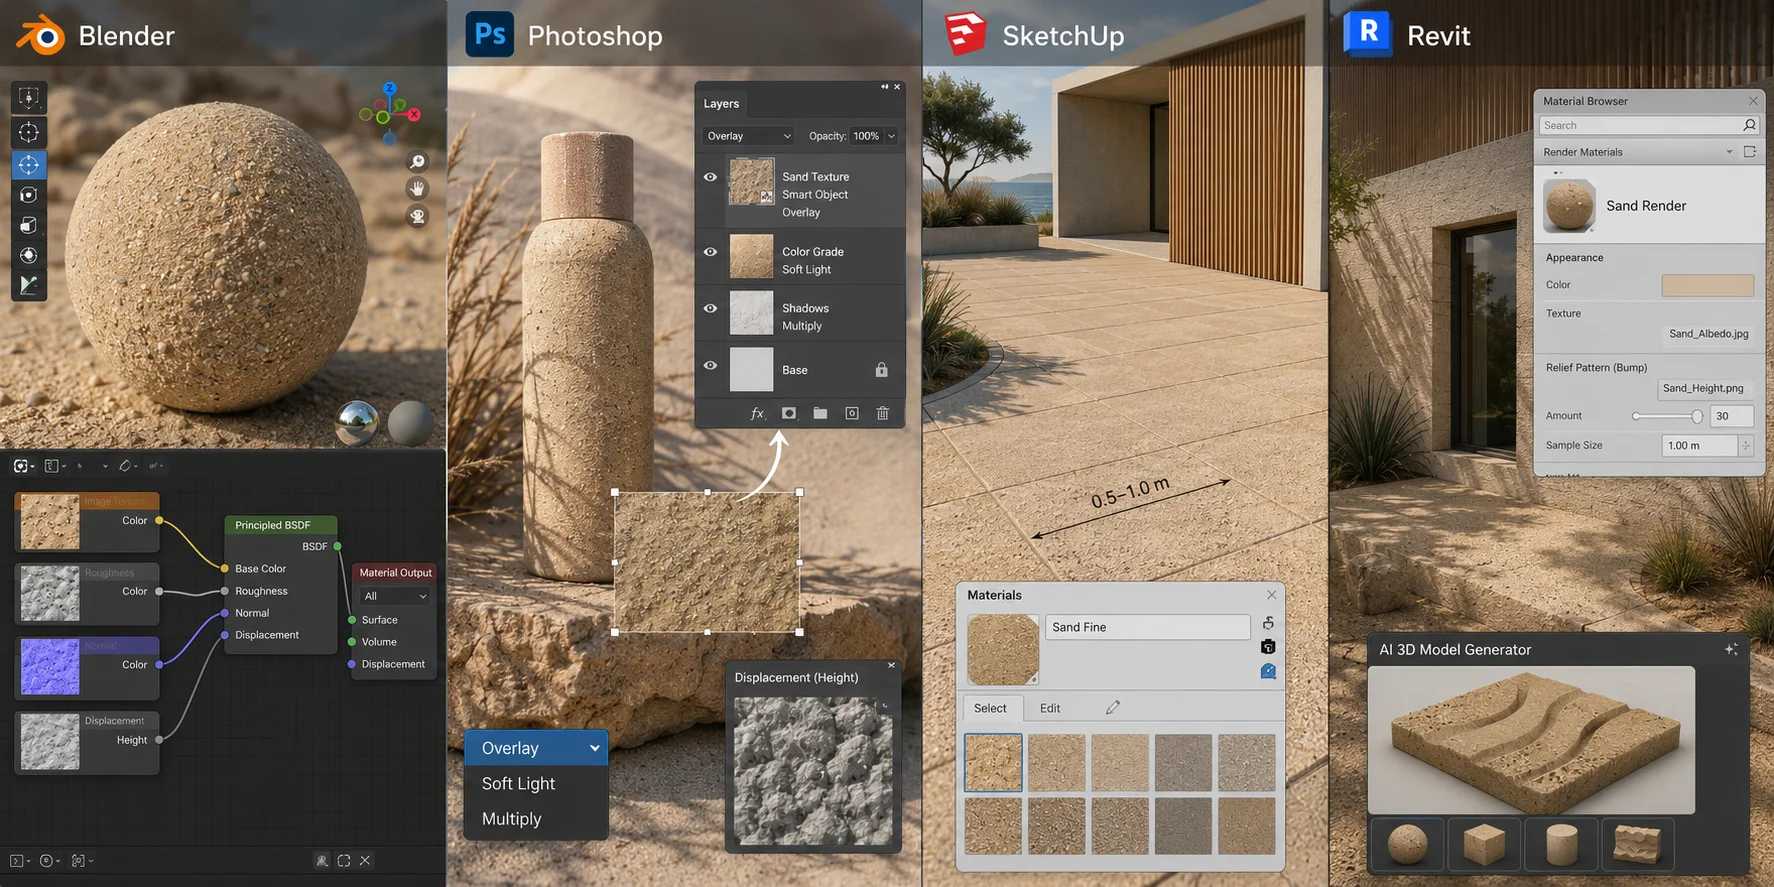
Blender: Load the albedo, roughness, and normal images in the Shader Editor. Connect albedo to Principled BSDF Base Color, roughness to Roughness, and route the normal image through a Normal Map node. Set data maps to Non-Color and keep every map on the same Mapping coordinates.
Photoshop: Place the texture as a Smart Object for nondestructive scaling. Use Overlay, Soft Light, or Multiply for compositing, then apply the Displace filter with a greyscale map when artwork should follow the surface relief.
SketchUp: Import the image as a texture through Materials, apply it, and set a believable tile size. For broad ground, one tile covering about 0.5–1 m is a useful starting point.
Revit: Add the image to a material’s Appearance asset and use bump or relief properties when supported.
For complete textured props or terrain elements, use Tripo AI’s 3D Model Generator.
Sand Texture Paint: Physical Surface Finishes
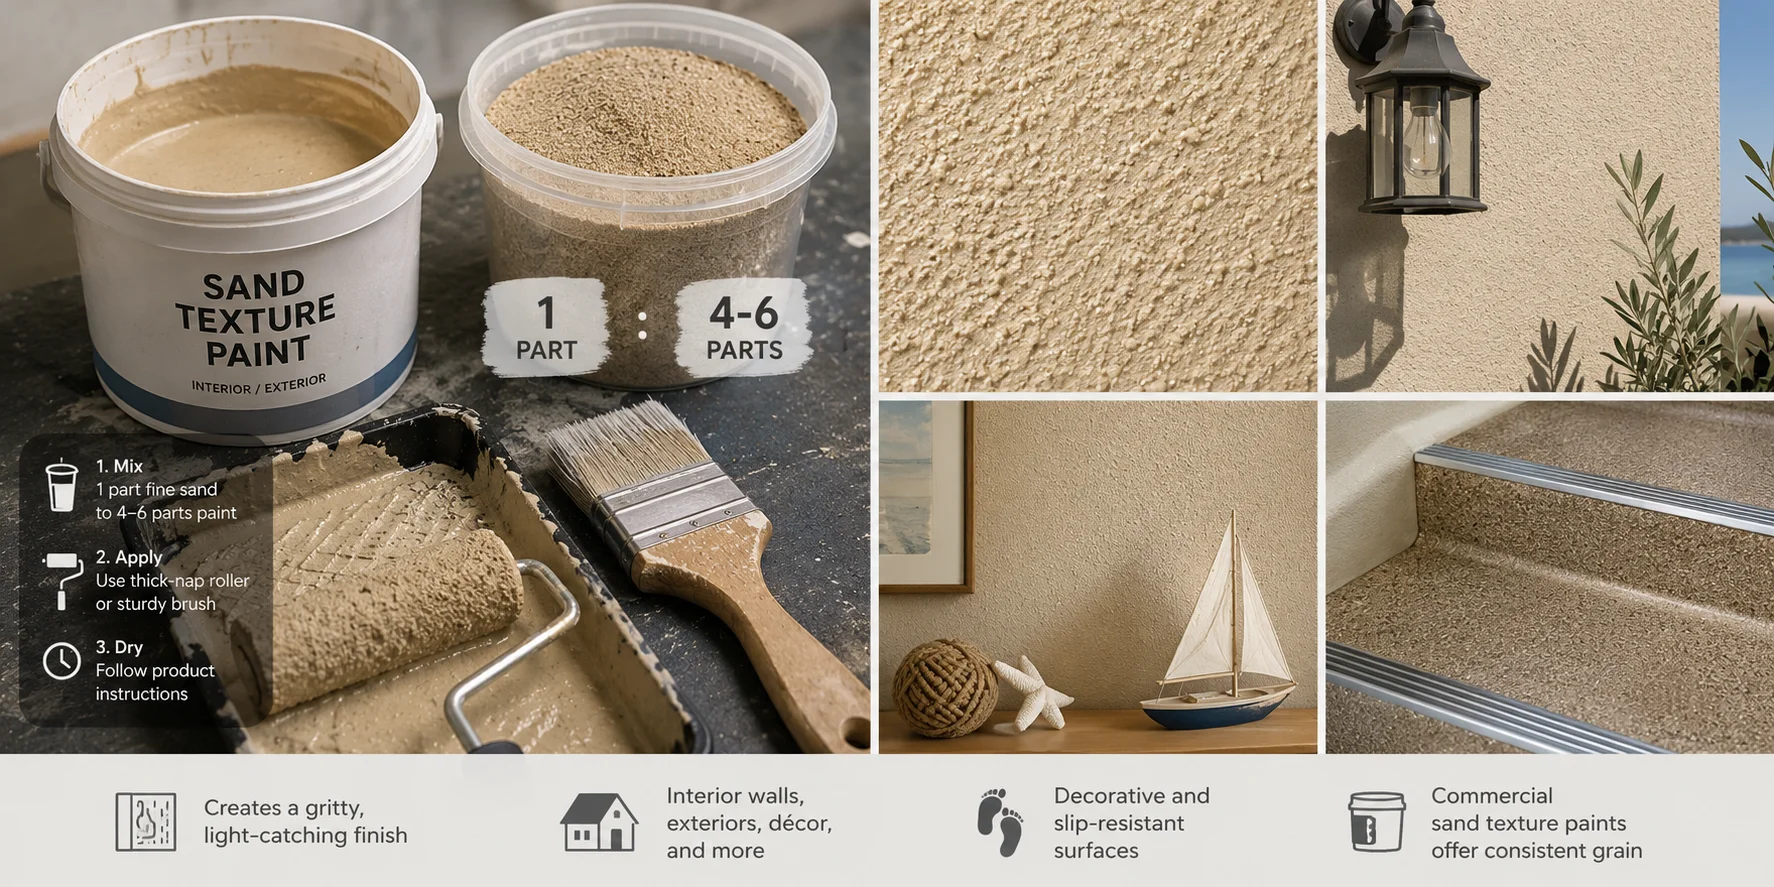
For a physical finish, start with a small test panel and use a texture additive or paint system intended for the surface you are coating. Sand grain size changes coverage, adhesion, and feel, so follow the coating manufacturer's preparation, drying, ventilation, and safety instructions before treating a larger area.
Commercial texture products can provide more consistent results than a homemade mix. Avoid breathing dry mineral dust, wear suitable protection, and follow the product label and safety data sheet.
How to Generate Sand Textures with AI
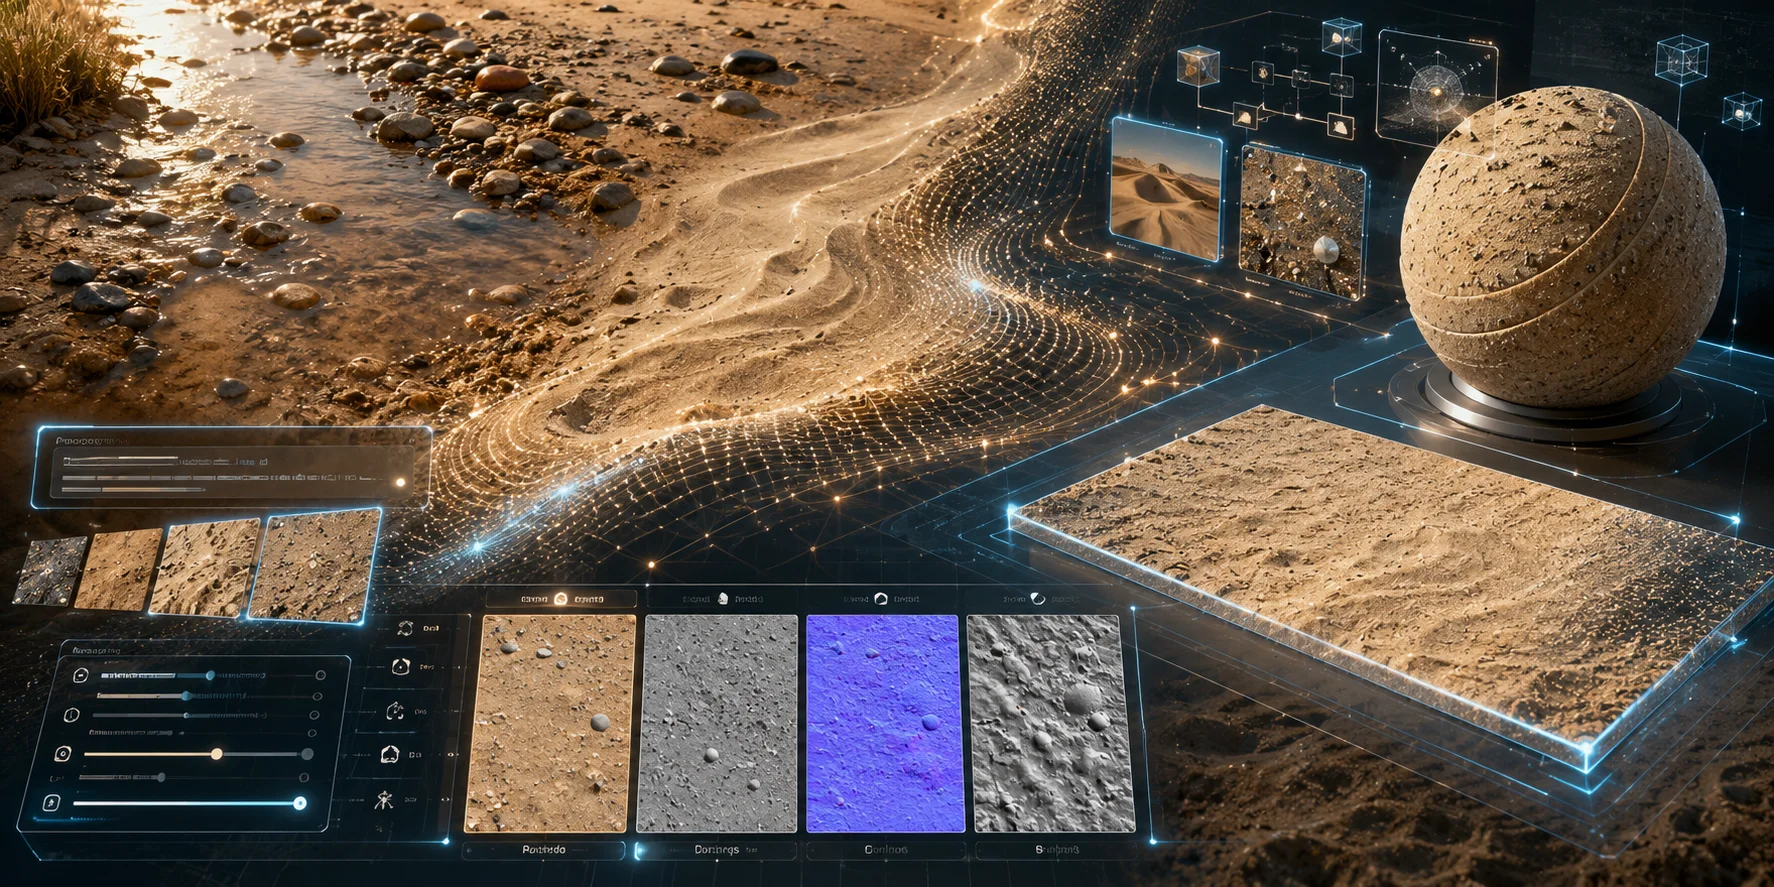
AI texture tools synthesize material appearances from prompts or reference images. A strong prompt defines grain size, moisture, color, viewing angle, style, and tiling:
- “Fine dry beach sand, pale beige, overhead view, seamless, subtle grains, 4K PBR.”
- “Wet river sand with small pebbles, dark grey-brown, close-up, detailed normal and roughness.”
- “Stylized orange desert sand, broad wind ripples, seamless game material.”
Depending on the tool and workflow, generated material sets can include maps such as albedo or Base Color, Roughness, Normal, Metallic, and displacement or height. AI is useful when you need a specific hue, grain density, or wetness reference rather than a generic download. Tripo AI's AI Texturing focuses on creating and editing PBR textures for 3D models in supported workflows.
Free Sand Texture Resources
- Poly Haven: Its texture assets are published under CC0; confirm that the specific asset meets your technical needs before using it.
- Poliigon: Offers free and paid assets. Check the license attached to the specific asset and your account plan before using it in a project.
- Textures.com and Freepik: Useful for JPG or PNG compositing. Review the current license, attribution requirement, and permitted use for each download.
- Tripo AI: Create or edit a material for a 3D model with AI Texturing, then inspect compatible 3D files in the 3D Viewer.
For Minecraft-style sand, use a resource pack that matches the target game version and review its license before installation or redistribution.
Frequently Asked Questions
What is the texture of sand?
Sand is fine, loose, granular, and slightly gritty. Its exact feel changes according to particle size, shape, moisture level, and mineral content.
What are the different types of sand texture?
Common categories include beach, desert, river, coarse, and fine sand. They differ in color, grain size, moisture, reflectivity, and the amount of visible surface relief.
How do you make a sand texture?
Digitally, you can download a seamless PBR set, photograph real sand and make the image tileable, or generate a custom material with AI. Physically, fine sand can be mixed into compatible paint to create a gritty finish.
Can I put sand in paint for texture?
Use a compatible texture additive or coating system, test it on a small panel, and follow the paint manufacturer's preparation and drying guidance. If you add any mineral aggregate, use appropriate ventilation and dust protection.
What is a seamless sand texture?
A seamless sand texture is an image whose opposite edges match. It can repeat across a large ground plane without showing obvious borders between individual tiles.
How do I make sand look realistic in digital art?
Use correctly scaled grain detail, varied roughness, a normal map for micro-detail, and displacement only for larger surface forms. Add wetness variation, footprints, wind ripples, scattered pebbles, or subtle color changes to avoid a uniform procedural appearance.
Conclusion
Sand texture is useful across 3D environments, architectural visualization, digital art, and physical wall finishes. Better results come from matching grain scale, roughness, normal strength, displacement, moisture, and tiling to the scene. You can start with a suitable PBR set, build a material manually, or create a customized material for a 3D model with AI. Create and texture assets in Tripo AI Studio, then see what is included in each plan at Tripo AI Pricing.
