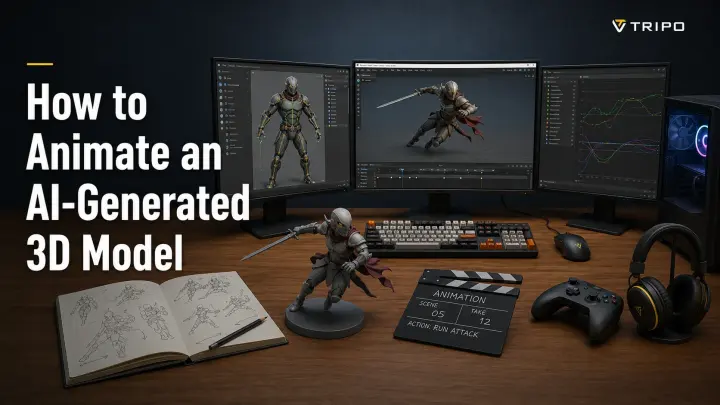
How to Animate an AI-Generated 3D Model (Full Workflow)
TL;DR
An AI-generated model is static geometry; it needs a rig before it can move.
Clean topology and a neutral T-pose make automatic rigging more reliable.
After rigging, apply a motion-library clip or use a separate AI mocap tool for custom movement.
Auto-rigging works best on T-pose humanoids and standard standing quadrupeds.
Export animations in GLB or FBX, then verify them in Blender or your target engine.
To animate an AI-generated 3D model, prepare the mesh, set a neutral pose, add a rig, apply motion, and export the clips to your target software. AI auto-rigging can accelerate the skeleton and skinning stage for supported characters.
Why You Can't Just Press Play (How AI Models Become Animatable)
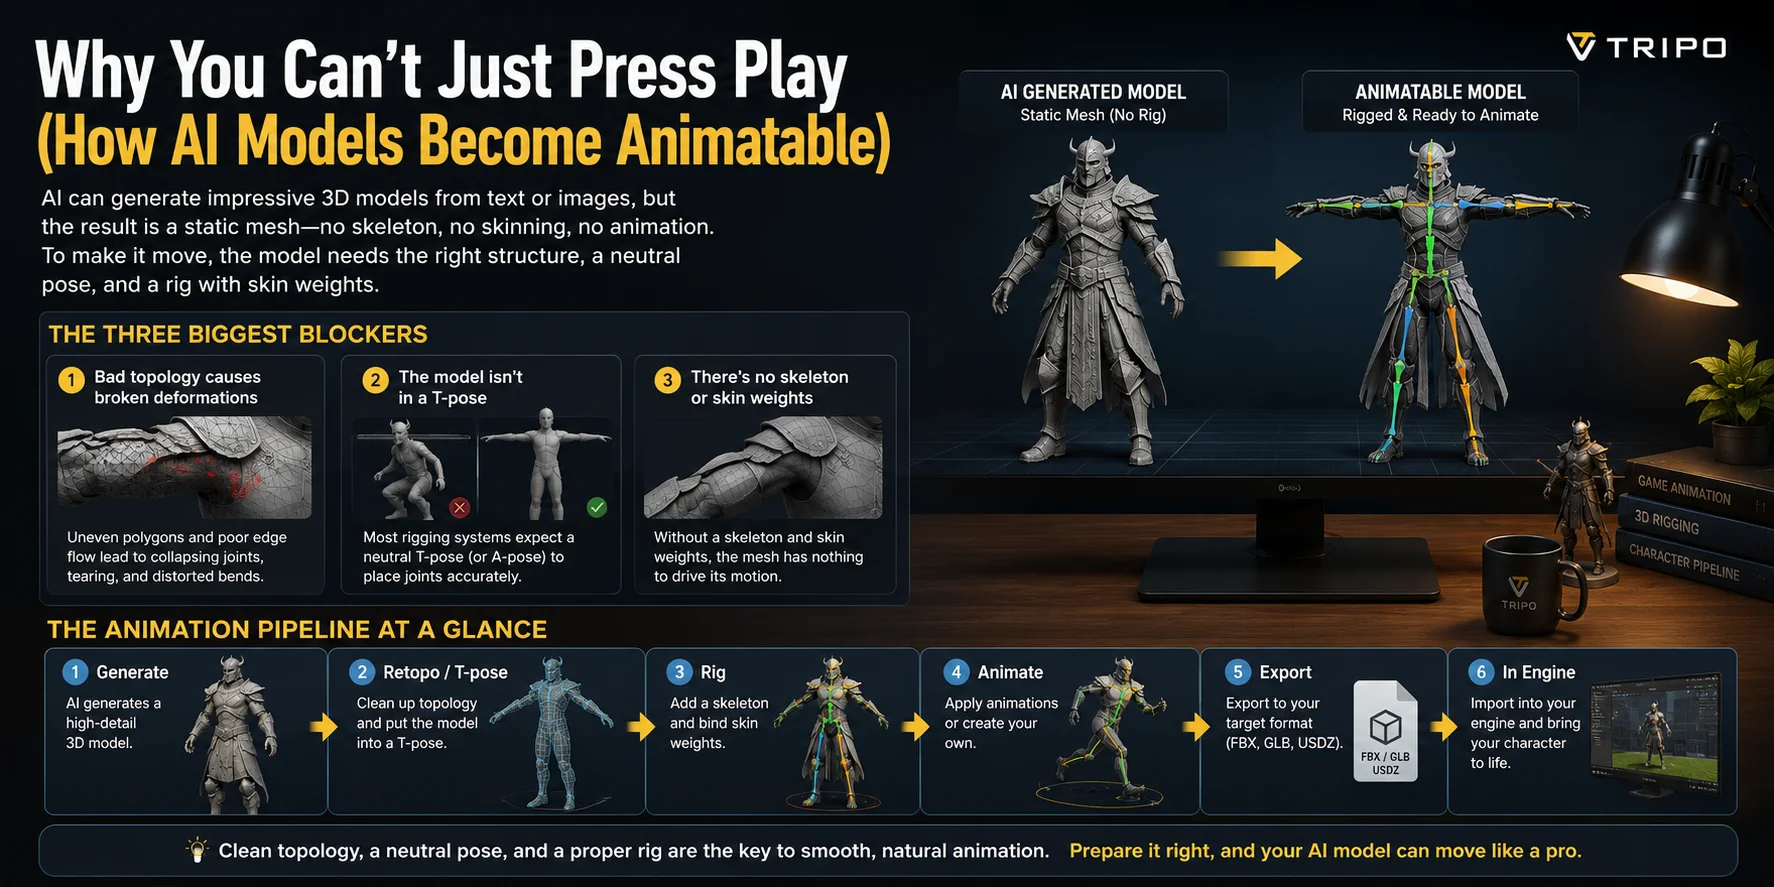
AI tools usually generate a static mesh: geometry without a skeleton, skin weights, or animation controls. Before it can walk or gesture, the model needs suitable topology, a neutral pose, and a rig that connects the mesh to bones.
The Three Biggest Blockers
1. Bad Topology Causes Broken Deformations
Uneven polygons, stretched triangles, intersecting parts, and poor edge flow can collapse or tear around shoulders, hips, elbows, and knees when the character bends.
2. The Model Is Not in a Neutral Pose
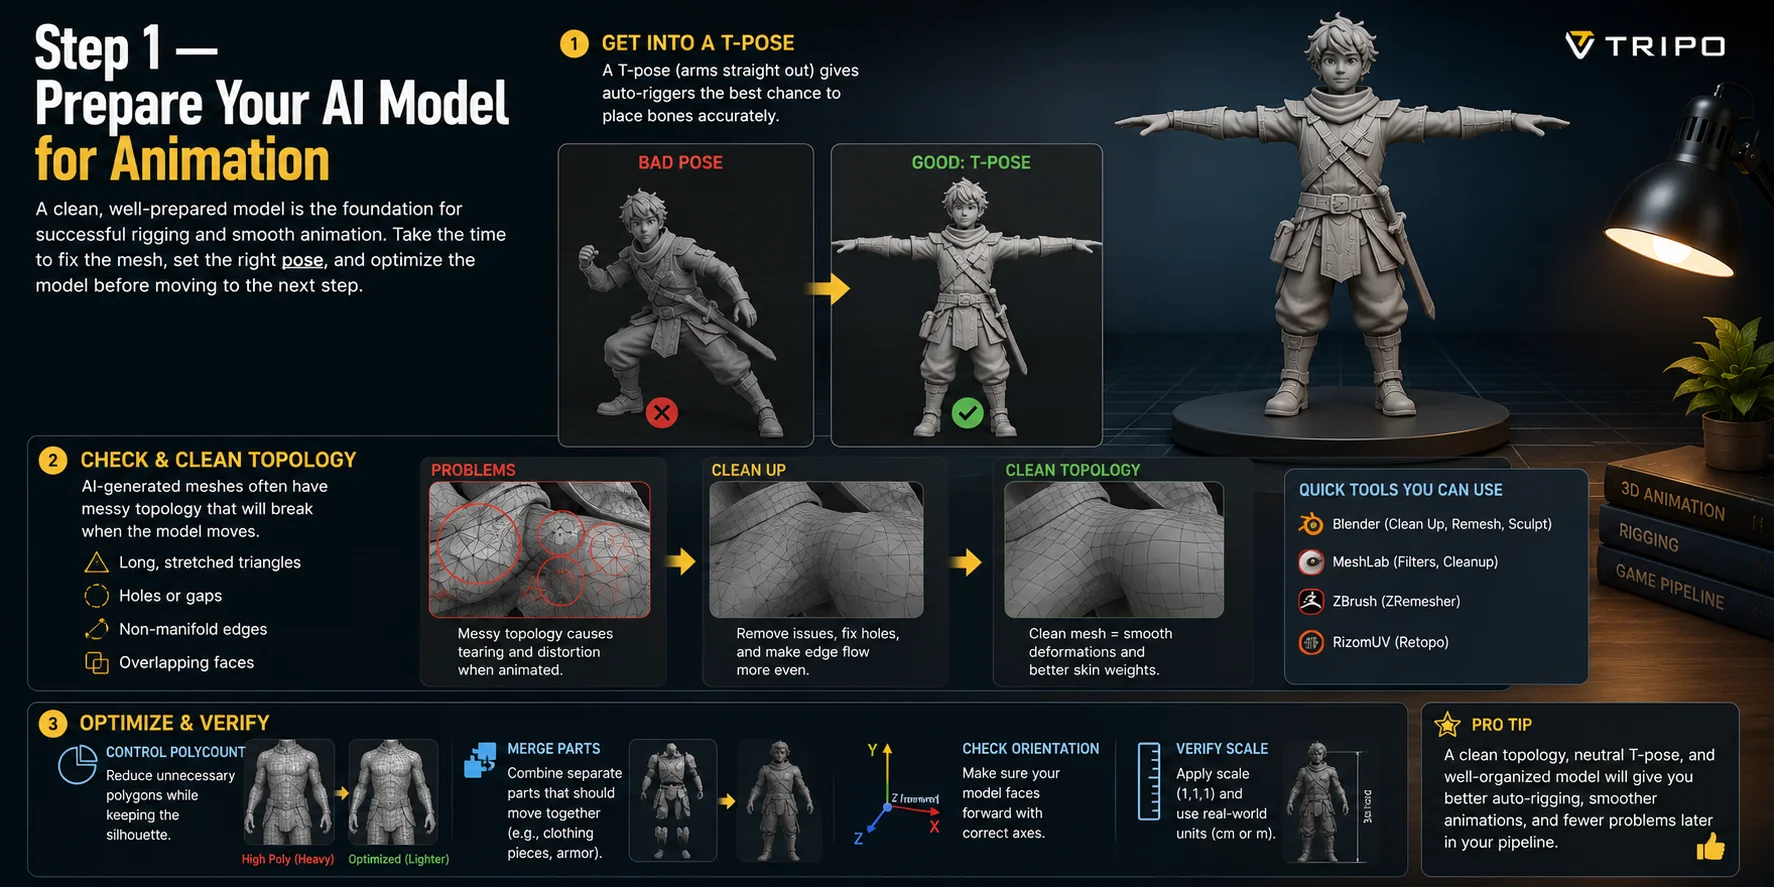
Automatic riggers identify limbs most reliably when a humanoid starts in a T-pose or A-pose. Sitting, crouching, crossed limbs, props, and dramatic poses can hide joints or confuse bone placement.
3. There Is No Skeleton or Skinning
A rig supplies the bone hierarchy, while skin weights define how strongly each vertex follows each bone. Without both, the mesh cannot deform with the character's movement.
The Animation Pipeline at a Glance
Turning an AI-generated mesh into an animatable character typically follows this workflow:
Generate → Retopology (if needed) → T-pose → Rig → Animate → Export
Retopology is optional only when the original mesh already deforms cleanly. Test the shoulders, elbows, hips, and knees before deciding to skip it.
Step 1 — Prepare Your AI Model for Animation
Prepare the mesh before uploading it to a rigger. Start with a neutral T-pose or A-pose, then inspect the model for non-manifold geometry, holes, floating pieces, intersecting parts, and disconnected body sections.
For a Tripo-generated game character, use the Game Characters workflow with T-pose and Smart Mesh when appropriate. Keep the silhouette while reducing unnecessary polygons, merge parts that should deform together, and confirm forward direction, scale, and ground contact.
Run a quick deformation test after rigging. If a joint collapses or tears, fix the local topology or weight painting before adding final animation clips.
Step 2 — Rig the Model (Add a Skeleton)
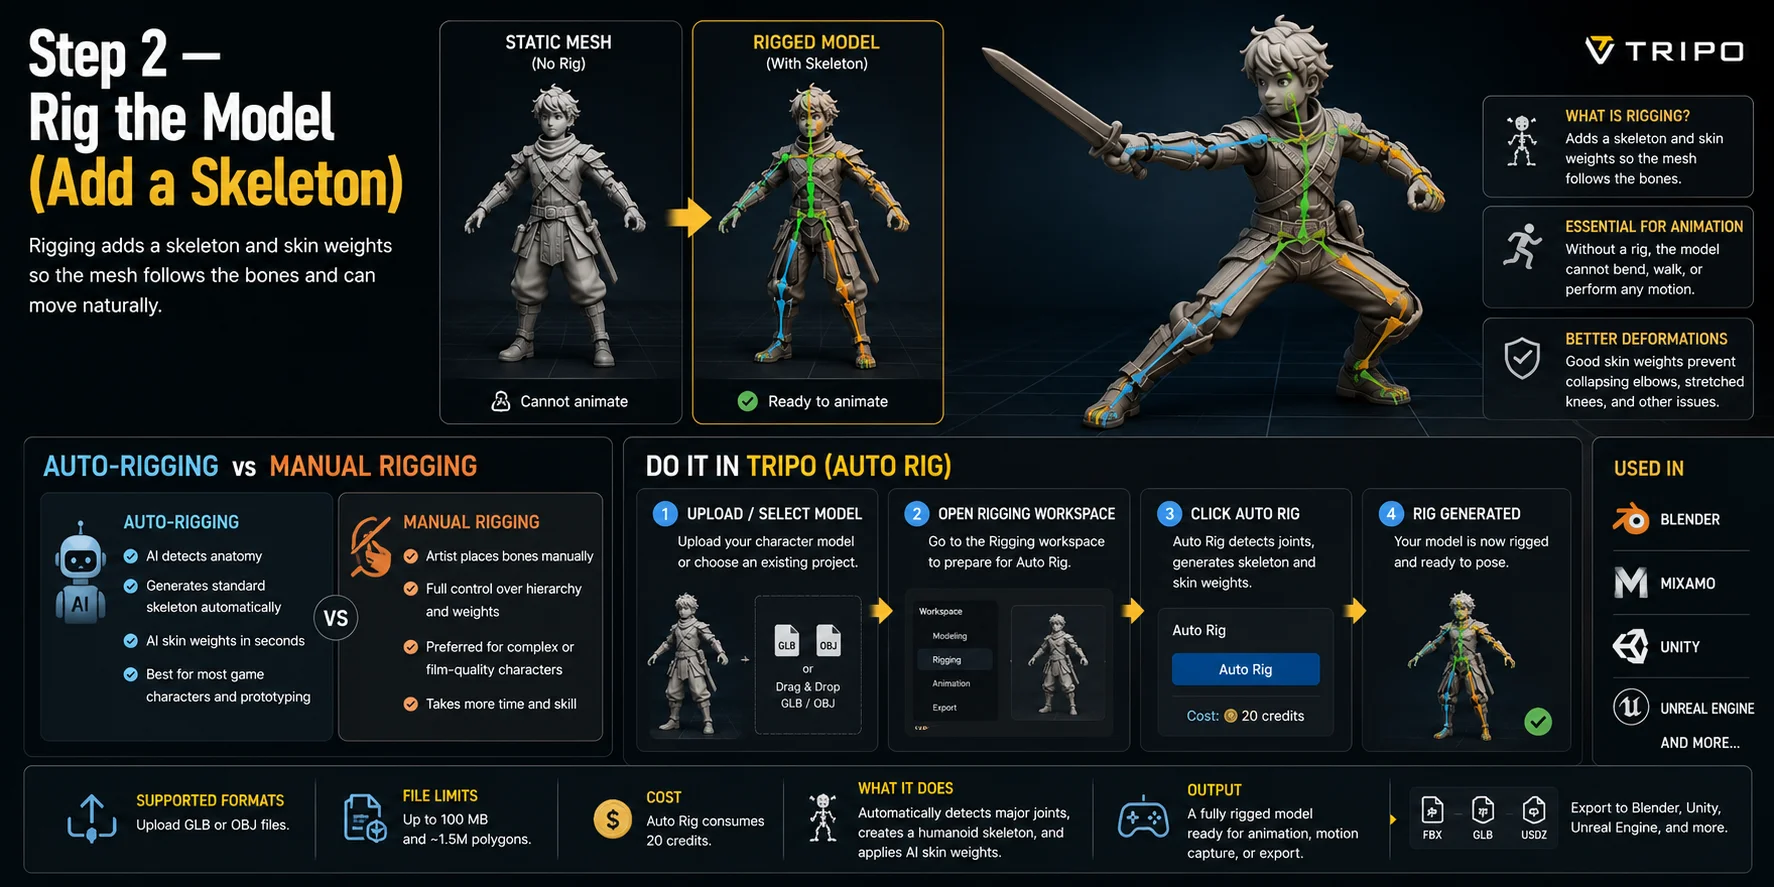
Rigging adds a skeleton and binds the mesh to it with skin weights. Auto-rigging is fastest for standard characters; manual rigging provides precise bone placement and deformation control for unusual designs.
Auto-Rigging vs. Manual Rigging
Choose auto-rigging for clean humanoids, standard standing quadrupeds, prototypes, and game assets that need a usable skeleton quickly.
Choose manual rigging when the character has non-standard anatomy, mechanical controls, multiple limbs, complex facial requirements, or deformation problems that automatic weights cannot solve.
Do It in Tripo (Auto Rig)
With Tripo AI Auto Rigging:
- Upload your character model or select an existing project.
- Open the Rigging workspace.
- Click Auto Rig to let AI detect the character's joints and generate a skeleton.
- Wait for the rigging process to complete, then preview the result by posing the character.
Tripo Auto Rig supports uploaded GLB and OBJ files up to 100 MB and approximately 1.5 million polygons. It detects major joints, generates a skeleton and skin weights, and consumes 20 credits per Auto Rig operation.
Step 3 — Add Motion (Animation Library or Mocap)
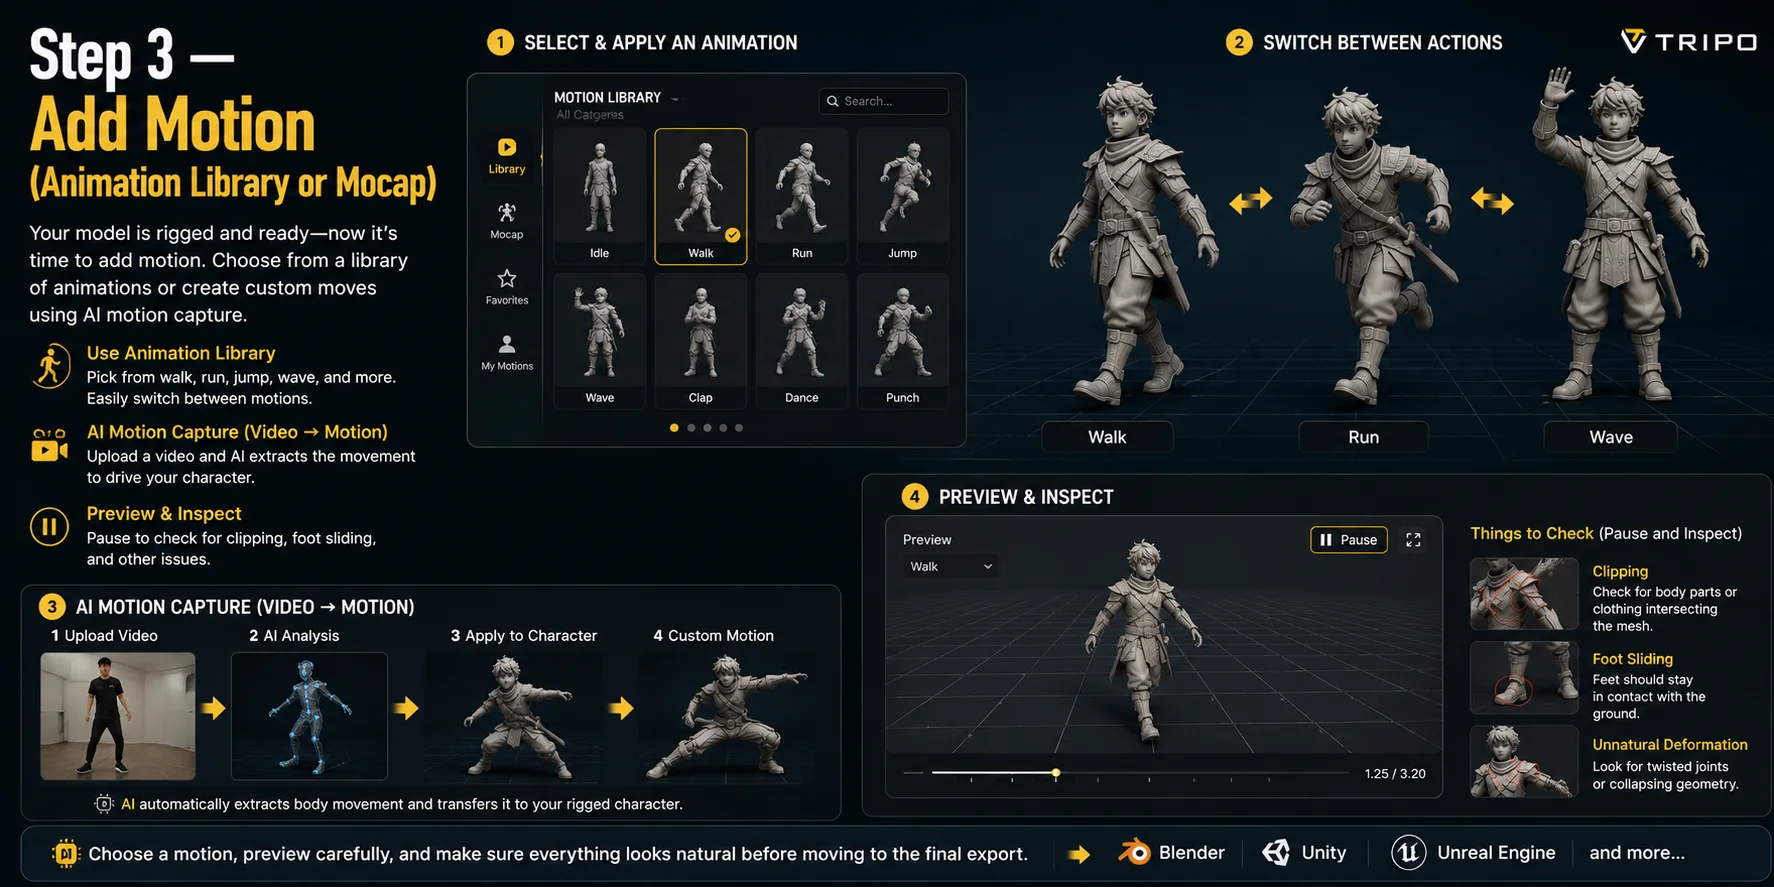
Once the skeleton deforms correctly, add motion. A motion library is the fastest option for common actions such as idle, walk, run, wave, or jump.
In Tripo, open the rigged character, choose an action from the Motion Library, switch between clips, and preview the result before export.
AI motion capture is a separate workflow category, not a confirmed Tripo feature in this guide. Third-party video-to-motion tools can extract movement from a performance and retarget it to a compatible rig when preset clips are not enough.
- Browse the Motion Library and select an animation such as walk, run, wave, or idle.
- Apply the animation and switch freely between different motions.
- Preview the animation before exporting.
Pause the preview at demanding poses. Check foot sliding, ground contact, limb intersections, clothing penetration, and collapsing joints; fix the rig or topology before export.
Step 4 — Export to Blender and Other Engines
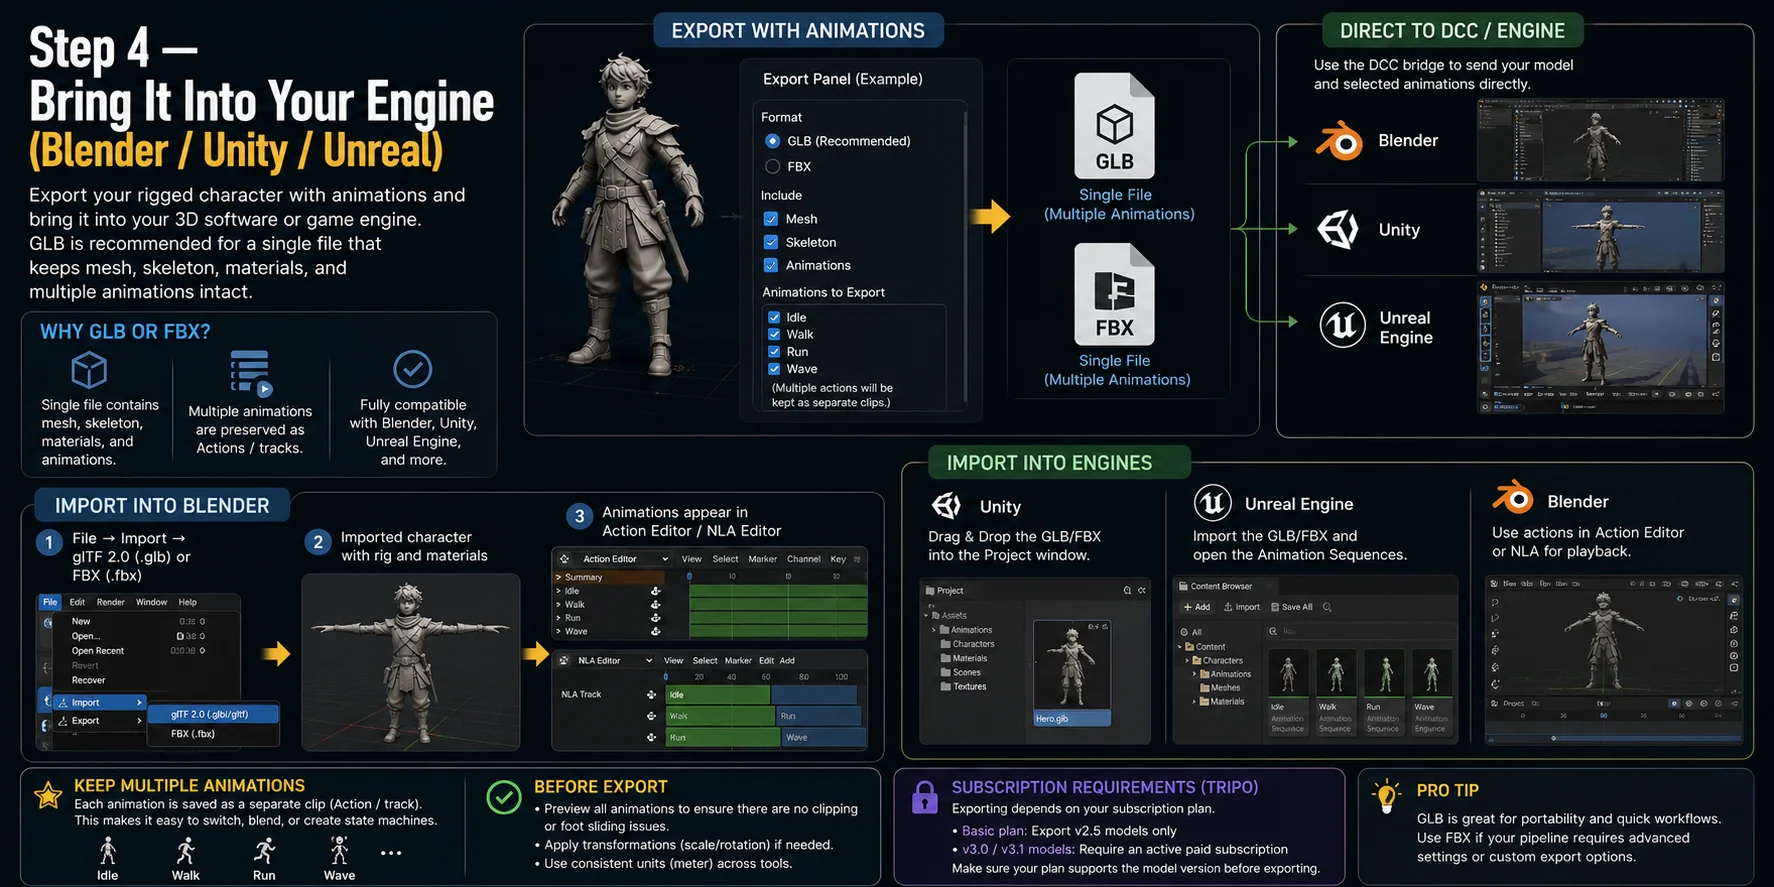
For the most portable workflow, export one GLB or FBX file with animations enabled. GLB keeps the mesh, skeleton, materials, and clips together; FBX remains useful in pipelines that require it.
Keep idle, walk, run, and other clips as separate animation tracks. In Blender, they should appear as separate Actions or NLA tracks instead of one long baked sequence.
Import into Blender
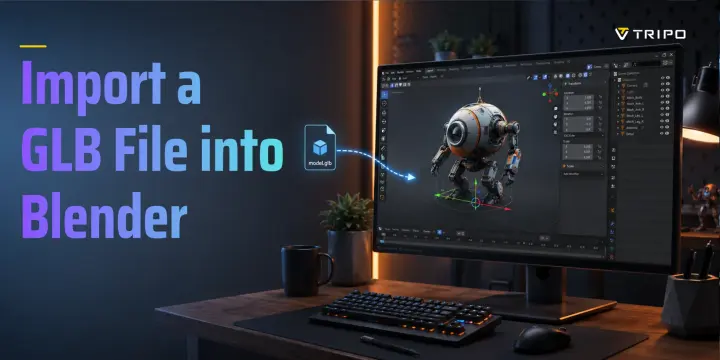
In Blender, import the exported file and verify the armature, materials, and every animation clip:
- Choose File → Import → glTF 2.0 (.glb/.gltf) or FBX (.fbx).
- Select the exported file and complete the import.
- Open the Action Editor or Nonlinear Animation (NLA) Editor.
- Play each clip and check the skeleton, materials, scale, and root motion.
Send to Blender, Unity, or Unreal with DCC Bridge
Tripo also provides DCC Bridge workflows for Blender, Unity, and Unreal Engine. Install and connect the relevant bridge, select the model and desired animations in the Export panel, then send the asset to the connected application.
This section is a bridge overview rather than a complete Unity or Unreal tutorial. After transfer, verify the imported skeleton, materials, scale, and clips inside the target engine.
Export requires an eligible subscription: the Basic plan supports exports for v2.5 models, while v3.0 and v3.1 model exports require an active paid subscription.
Auto-Rigging vs Mixamo vs Manual vs AI Mocap — Which Should You Use?
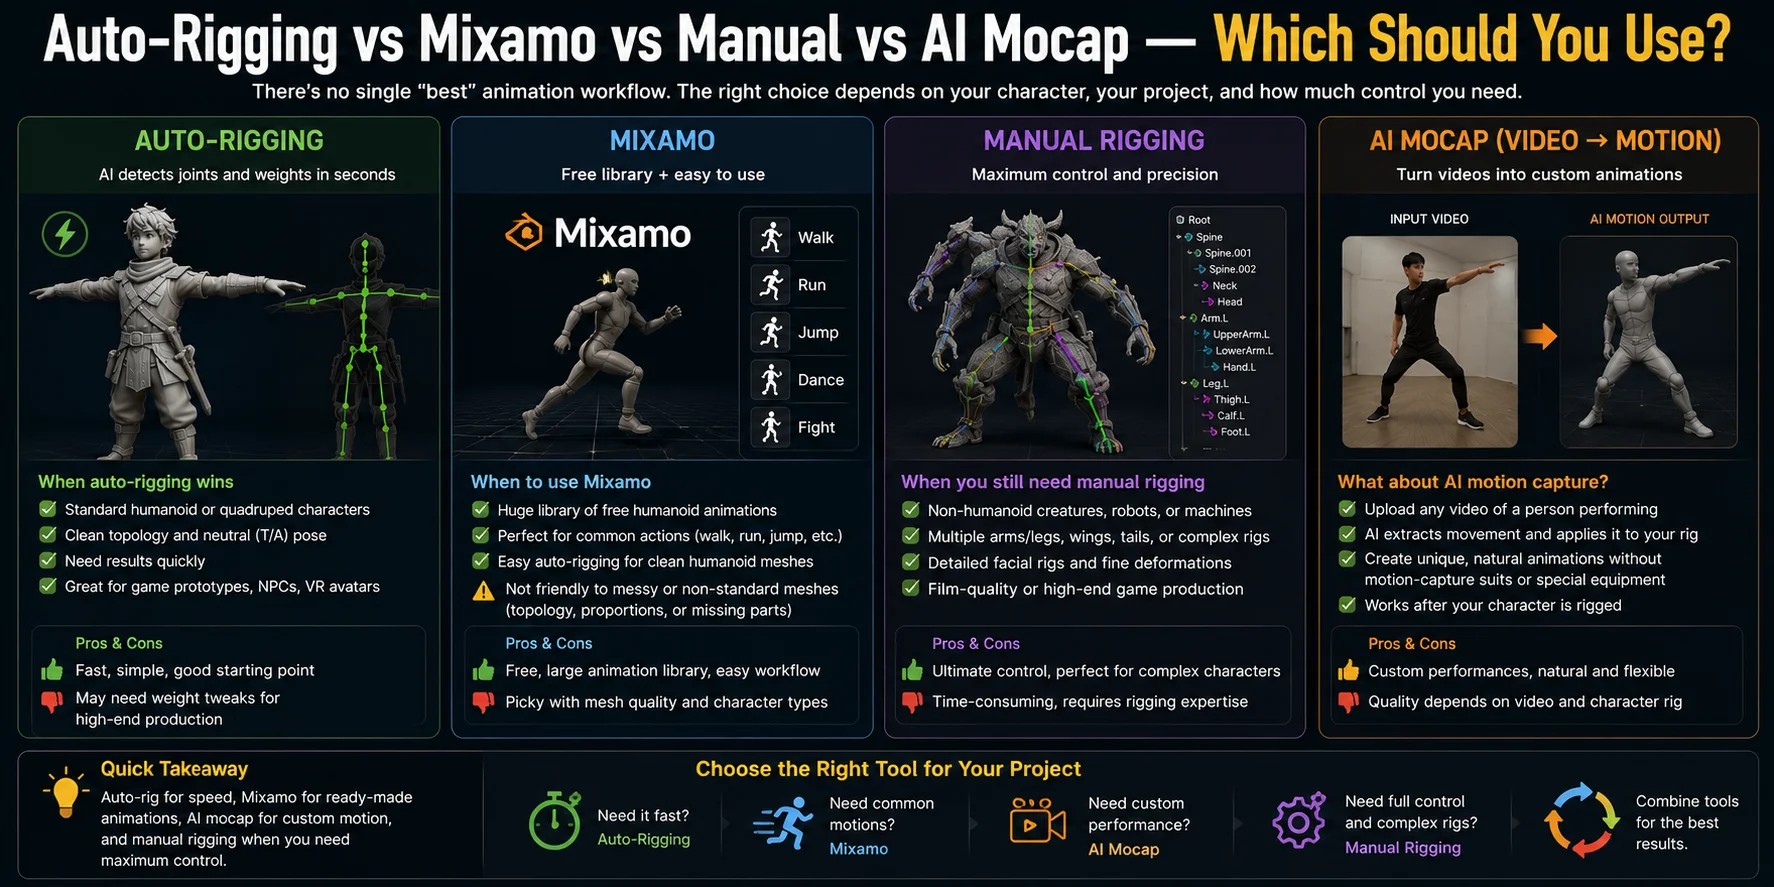
Choose the method based on anatomy, required control, and the source of the motion:
When Auto-Rigging Wins
Use auto-rigging for clean T-pose humanoids and standard standing quadrupeds when speed matters. Always test the generated weights at the major joints.
When to Use Mixamo
Use Mixamo for humanoid characters and its animation library. Upload an unrigged FBX, OBJ, or ZIP in a neutral pose and place the rigging markers; a character that is already rigged should be uploaded as FBX.
Mixamo is designed for bipedal humanoids. Extra limbs, wings, tails, large props, fused geometry, or heavily stylized proportions can prevent a clean result, so simplify and clean the character first.
When You Still Need Manual Rigging
Use manual rigging for non-humanoid anatomy, mechanical controls, multiple limbs, detailed facial rigs, or production work that needs exact deformation control.
What About AI Motion Capture?
Use a separate AI mocap tool when you need a custom performance from video. The character still needs a compatible rig before the captured motion can be retargeted.
When Animating an AI Model Doesn't Work (Limits)
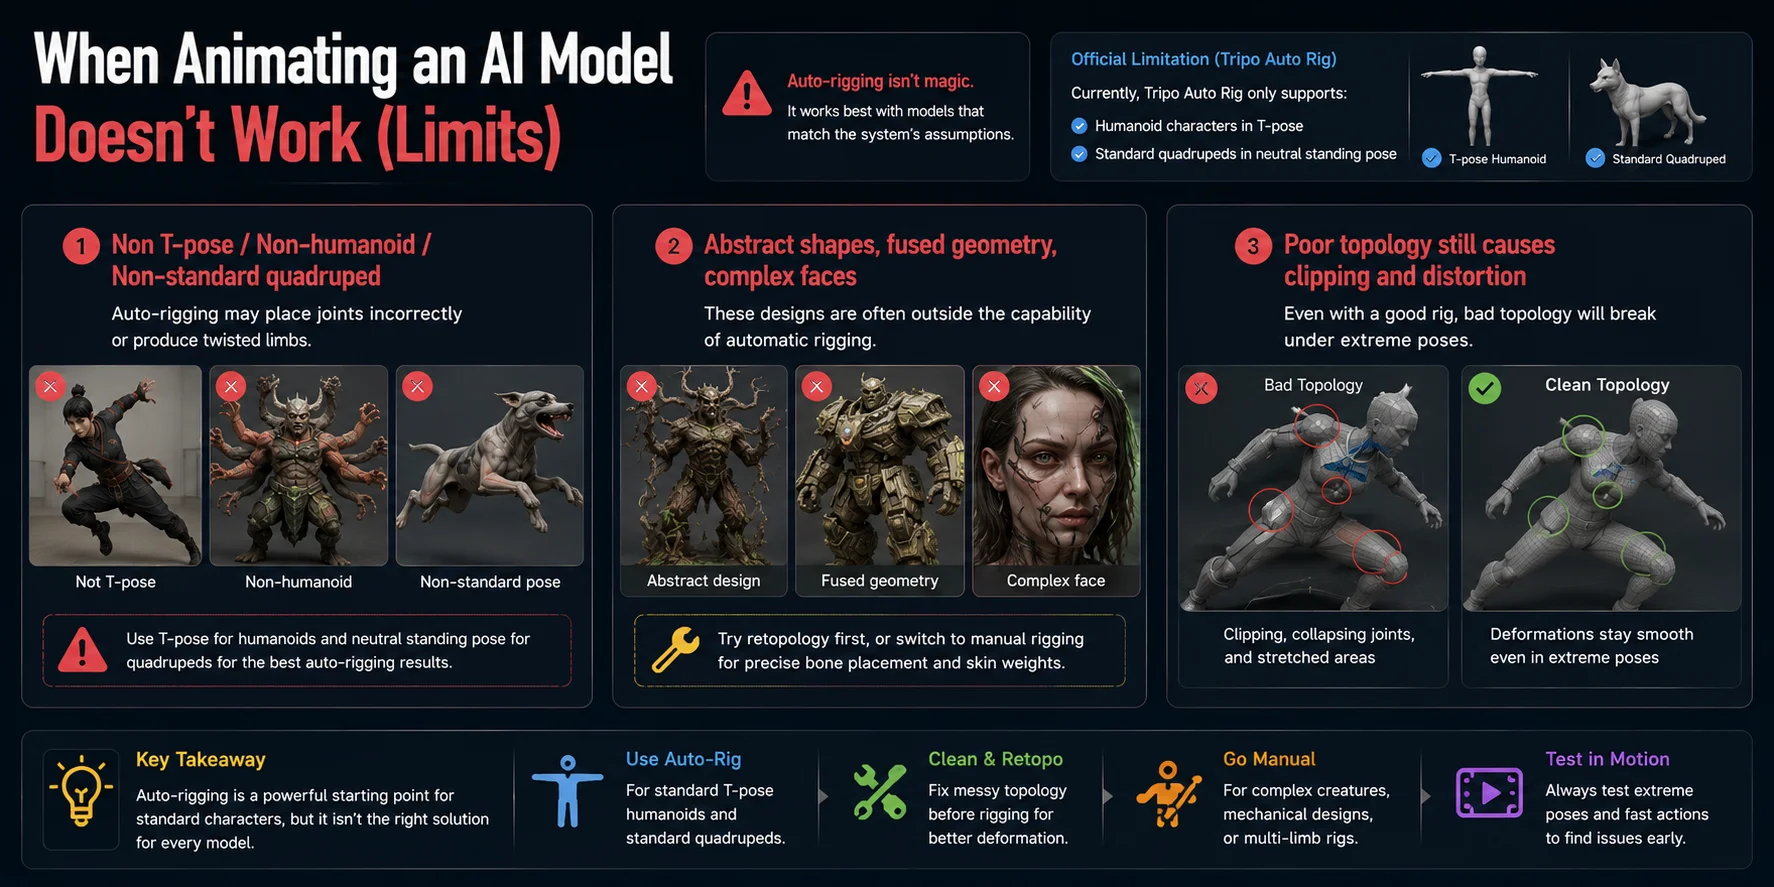
Automatic rigging can fail even when the upload succeeds. Diagnose the pose, anatomy, topology, and mesh organization before retrying.
Tripo Auto Rig currently supports T-pose humanoids and standard standing quadrupeds. Sitting, crouching, flying, or non-standard poses can produce incorrect joint placement.
Abstract shapes, fused geometry, unusual robots, multiple limbs, and complex faces often need retopology or manual rigging. If a standard character rigs but bends poorly, inspect local edge flow and skin weights rather than rerunning the same setup unchanged.
Frequently Asked Questions
How do you animate a 3D model made by AI?
Add a rig, test its skin weights, apply a motion-library clip or compatible mocap animation, and export the result as GLB or FBX. Verify the clips in Blender or the target engine before production use.
Can I Use Mixamo to Animate an AI-Generated 3D Character?
Yes, for bipedal humanoid characters. Mixamo can auto-rig an unrigged FBX, OBJ, or ZIP after you place its joint markers, so the character does not need to be rigged elsewhere first; use a neutral pose and remove problematic extra geometry.
Do I need to fix the topology before animating an AI model?
Not always, but it's recommended. If the AI model has messy topology, holes, or non-manifold geometry, fixing it before rigging and animation will produce smoother deformations and help prevent clipping or distorted joints.
What File Format Should I Export an Animated 3D Model In?
For most workflows, GLB is the best choice because it stores the mesh, materials, skeleton, and animations in a single file. FBX is also a great option, especially for Blender, Unity, Unreal Engine, and other professional animation pipelines.
Can I export multiple animations in one file for Blender?
Yes. GLB and FBX can preserve multiple clips in one file. In Blender, verify that they appear as separate Actions or NLA tracks after import.
Why won't my AI-generated model rig or animate correctly?
Common causes are non-manifold or intersecting geometry, disconnected body parts, an unsupported pose or body type, and poor skin weights. Clean the mesh, use a neutral pose, confirm scale and orientation, then retopologize or rig manually if the automated result still deforms badly.
Conclusion
The complete path is: prepare the mesh, rig it, add and test motion, then export the animation clips. Auto-rigging saves time on supported characters, but topology checks and deformation testing still determine whether the result is production-ready.
Ready to animate your own AI-generated model? Start in Tripo AI Studio and take it from creation to a fully rigged, animation-ready asset.