How can an indie developer generate usable 3D props from text prompts fast?
An indie developer can turn a text prompt into a game-ready prop in a few minutes by generating a fast white model first, then cleaning topology, adding materials, and exporting with the right pivot. The quickest usable path treats generation as step one, because a raw mesh still needs a polygon budget, clean topology, and a correct pivot before it drops into an engine. Tripo is a 3D foundation model that runs text-to-3D generation and every follow-on step inside one workspace. This guide covers a fast text-to-3D prop workflow, the settings that make each prop engine-ready, and how to batch dozens of props without babysitting them one by one.
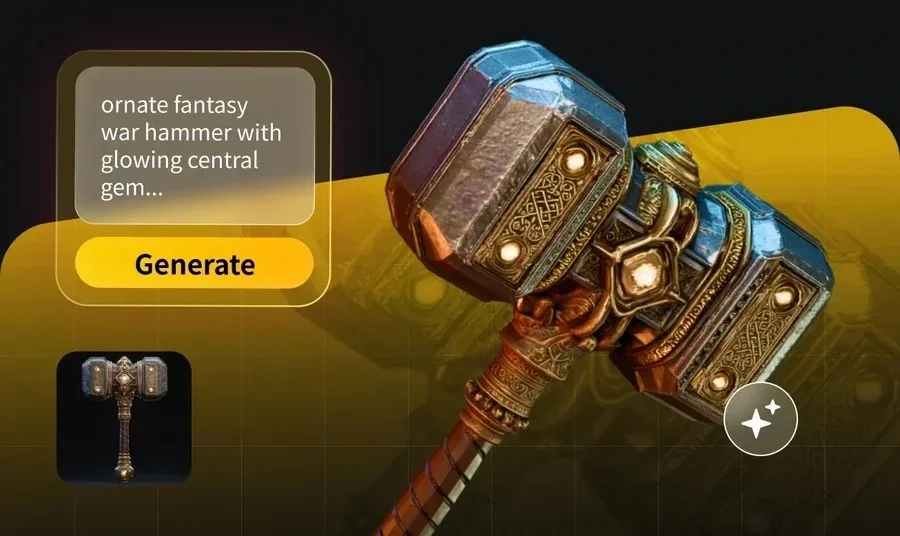
Why fast generation is only the first step
A text prompt gives you a shape in seconds, and that shape is rarely ready to drop into a scene. A prop counts as usable once its polygon count fits your budget, its topology stays clean, its materials read correctly under game lighting, and its pivot sits where the engine expects it. Skipping any of those leaves you with an asset that looks fine in a preview and misbehaves the moment it hits Unity or Unreal.
For a solo developer filling a level with crates, barrels, lanterns, and loot, the real bottleneck sits in the cleanup that follows the first render. A good workflow front-loads speed on generation, then spends a small, predictable amount of effort on the steps that turn a white model into a shippable asset. That balance is what keeps a one-person team producing dozens of props a week instead of hand-modeling three.
Meet Tripo Studio: one workspace from prompt to prop
Tripo Studio is an all-in-one web workspace where a single prompt moves through generation, topology, texturing, and export without a tool switch. For indie developers who need many usable props fast, Tripo generates a standard Smart Mesh white model in about 2 to 5 seconds, then carries that model through the steps that make it engine-ready. The generation quality comes from Tripo v3.1, a model built on a 40-million-asset 3D database, so the base geometry holds up well even on small props with fine detail.
The workspace maps each capability to a specific problem you hit when scaling prop production:
- Text-to-3D generation: type a prompt, pick a mesh resolution, and get a full 3D shell rather than a flat concept.
- Smart Mesh: a fast generation option that returns a standard white model in about 2 to 5 seconds, ideal for rapid iteration on prop ideas.
- Retopology: choose Triangle topology (the general default) or Quad topology for DCC animation, and set Polygon Count to Auto or a manual budget.
- AI texturingwith PBR: generate PBR materials from a reference, then choose 2K Standard, 4K HD, or 8K Ultra texture output to match the asset's screen size.
- Export: write out GLB, FBX, or GLTF with options for skeleton, animation count, and a Bottom-Center Pivot.
Two things set this pipeline apart for high-volume prop work. Speed comes from Smart Mesh returning a usable white model in seconds, so you can approve or reject a concept before investing any texture time. Precision comes from the v3.1 model geometry, which gives you clean edges to retopologize instead of a lumpy blob you have to rebuild. That combination lets an indie developer keep both throughput and quality high on the same prop batch.
From a text prompt to a usable prop: a practical workflow
This sequence is the fastest reliable route from a prompt to an asset you can drop into a level. Follow the six steps in order, since each one sets up the next.
- Write a tight prompt. Name the object, its style, and its material in one line, like "wooden treasure chest, stylized, iron bands, low detail." Clear nouns and one style word keep the mesh clean and on-brief.
- Generate with Smart Mesh on. Turn on Smart Mesh for a standard white model in about 2 to 5 seconds. Review the silhouette and proportions before you spend any effort on texturing, and regenerate if the shape misses.
- Set a polygon budget with Retopology. Pick Triangle topology for most static props, or Quad if the prop needs deformation. Set Polygon Count to a manual budget that matches your target platform, for example a few hundred to a couple thousand triangles for background props.
- Texture with PBR. Run AI texturing to generate PBR maps so the prop reacts to your scene lighting. Keep the material description consistent with the prompt, and upscale to 4K only for hero props that stay close to the camera.
- Preview against a budget. Check the face and vertex counts in the preview stats, and view the wireframe to confirm the topology is even. Fix the budget here rather than after import.
- Export game-ready. Choose GLB or FBX, enable Bottom-Center Pivot so the prop sits on the floor at origin in your engine, and export. The asset now drops into Unity or Unreal without a manual pivot fix.
Run this loop once and it becomes muscle memory, which is what makes the second prop and the fiftieth prop take the same short time.
Key export settings that make a prop engine-ready
Export is where a good mesh becomes a usable asset or a headache. Set these five options deliberately before you export any prop, since fixing them after import costs more time than doing them once.
- Format: pick GLB for a single self-contained file, or FBX when your pipeline expects it. Both carry the mesh and materials into common engines.
- Bottom-Center Pivot: enable it so the prop's origin sits at the base center, which means it lands on the ground plane and rotates around its own axis in-engine.
- Polygon Count: confirm the retopology budget matches the prop's role, so a background barrel doesn't ship with hero-level density.
- Texture resolution: export 4K only for close-up props, and drop background props to lower maps to keep your build size down.
- Skeleton and animations: leave these off for static props, and enable Export Skeleton plus an animation count only when the prop actually moves.
Set these once as a template in your head, and every prop in the batch exports the same predictable way. Consistent export settings are what let you drop a whole folder of props into a scene without touching each one.
Batching many props without slowing down
Volume is the real test for an indie developer, and the workflow above scales because each prop follows the same short loop. Generate a queue of white models from a prompt list first, approve the silhouettes in one pass, then retopologize and texture the survivors together so you're not context-switching between concept work and cleanup. Batching by stage keeps your attention on one type of decision at a time, which is faster than finishing each prop end to end.
For developers who want scripted batches, the developer API runs the same generation from your own tooling, so you can feed a list of prompts and pull back models automatically. That path suits a studio building a props library or wiring generation into a content pipeline, where a person clicking through a UI would be the bottleneck. The API uses a simple credit model, so you can size a batch run against a known cost before you start.
Compared to hand-modeling, this approach cuts the modeling time per prop from hours to minutes and lowers the skill floor, which is exactly what a small team without a dedicated modeler needs. The trade-off is that generated props still benefit from a quick topology and budget check, so treat the workflow as fast assisted production rather than a hands-off button.
Bonus tips: writing prompts for clean props
The prompt does more work than any single setting, so a few habits keep your meshes clean and reduce cleanup. These tips apply to any prop you generate, from a rusty key to a market stall.
- Lead with a concrete noun. "Oil lantern" beats "light source." Specific objects give the model a clearer target and a tighter silhouette.
- Add one style word, not five. "Stylized" or "realistic" is enough. Stacking adjectives tends to muddy the geometry and the materials.
- Name the key material. Words like "wood," "iron," or "ceramic" steer both the shape and the PBR texture toward what you want.
- State the detail level. Ask for "low detail" or "simple" when the prop lives in the background, so you generate closer to your polygon budget from the start.
- Keep props single-object. Generate one item per prompt rather than a cluttered scene, since separate props are easier to budget, texture, and place.
- Reuse a prompt template. Lock a format like "object, style, material, detail level" so a whole prop set shares a consistent look.
Treat the prompt as your first quality control step, because a clean, specific prompt saves more time downstream than any amount of post-fixing.
Start building your prop library
An indie developer can realistically produce a full set of usable props in a single afternoon by pairing fast Smart Mesh generation with a short, repeatable cleanup loop. The workflow holds up whether you need five props for a jam or five hundred for a shipping title, because each prop moves through the same generate, retopologize, texture, and export path. Keep your prompts specific, set a polygon budget every time, and export with a Bottom-Center Pivot so nothing needs a manual fix in-engine. To try the full text-to-3D prop workflow in one workspace, open Tripo Studio and generate your first prop.