How to Upscale or Sharpen Textures on an AI 3D Model: From Blurry to Brilliant in 2025
The AI revolution has transformed 3D modeling, with platforms like AI 3D model generators creating complex assets in minutes. Yet there's a critical challenge: while these tools excel at generating geometry, their textures often fall short—appearing blurry, low-resolution, and lacking the crisp detail needed for professional work.
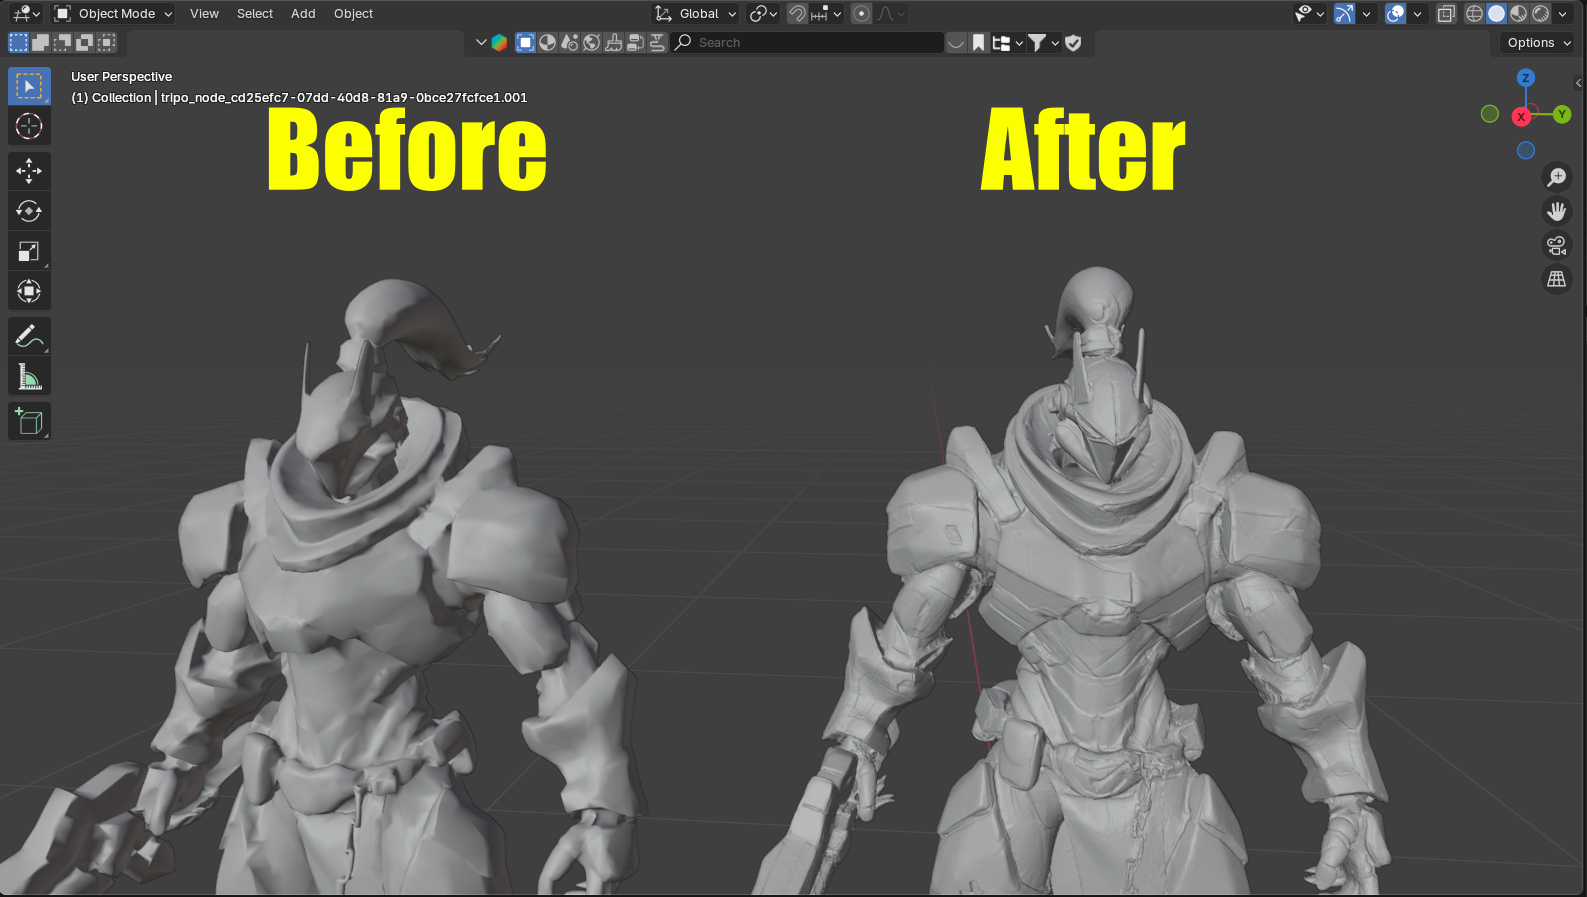
This comprehensive guide reveals multiple solutions to this problem, including a game-changing approach using Tripo AI's built-in texture enhancement tools. Whether you're using image to 3D converters or text prompts, you'll learn how to achieve production-ready results that rival traditionally created models.
Why AI-Generated Textures Need Enhancement
ai 3d model generation generators, which often rely on ai generated 3d models, prioritize speed and accessibility, often producing textures at 512x512 or 1024x1024 resolution—far below the 4K standard required for modern gaming, film, and product visualization, especially when using a 2d image to 3d model free tool. These textures frequently exhibit:
- Blurry, undefined surface details
- Lack of proper PBR (Physically Based Rendering) maps
- Missing fine-grain elements like scratches, wear, or material-specific properties
- Poor UV mapping efficiency, wasting texture resolution
The good news? With the right techniques—including powerful built-in tools in Tripo AI—you can elevate these textures to professional standards while maintaining the speed advantage of AI generation.
Section 1: The Tripo AI Advantage - Built-in Texture Enhancement
Before exploring external tools, let's start with the most efficient solution: Tripo AI's integrated texture enhancement features that many users overlook.
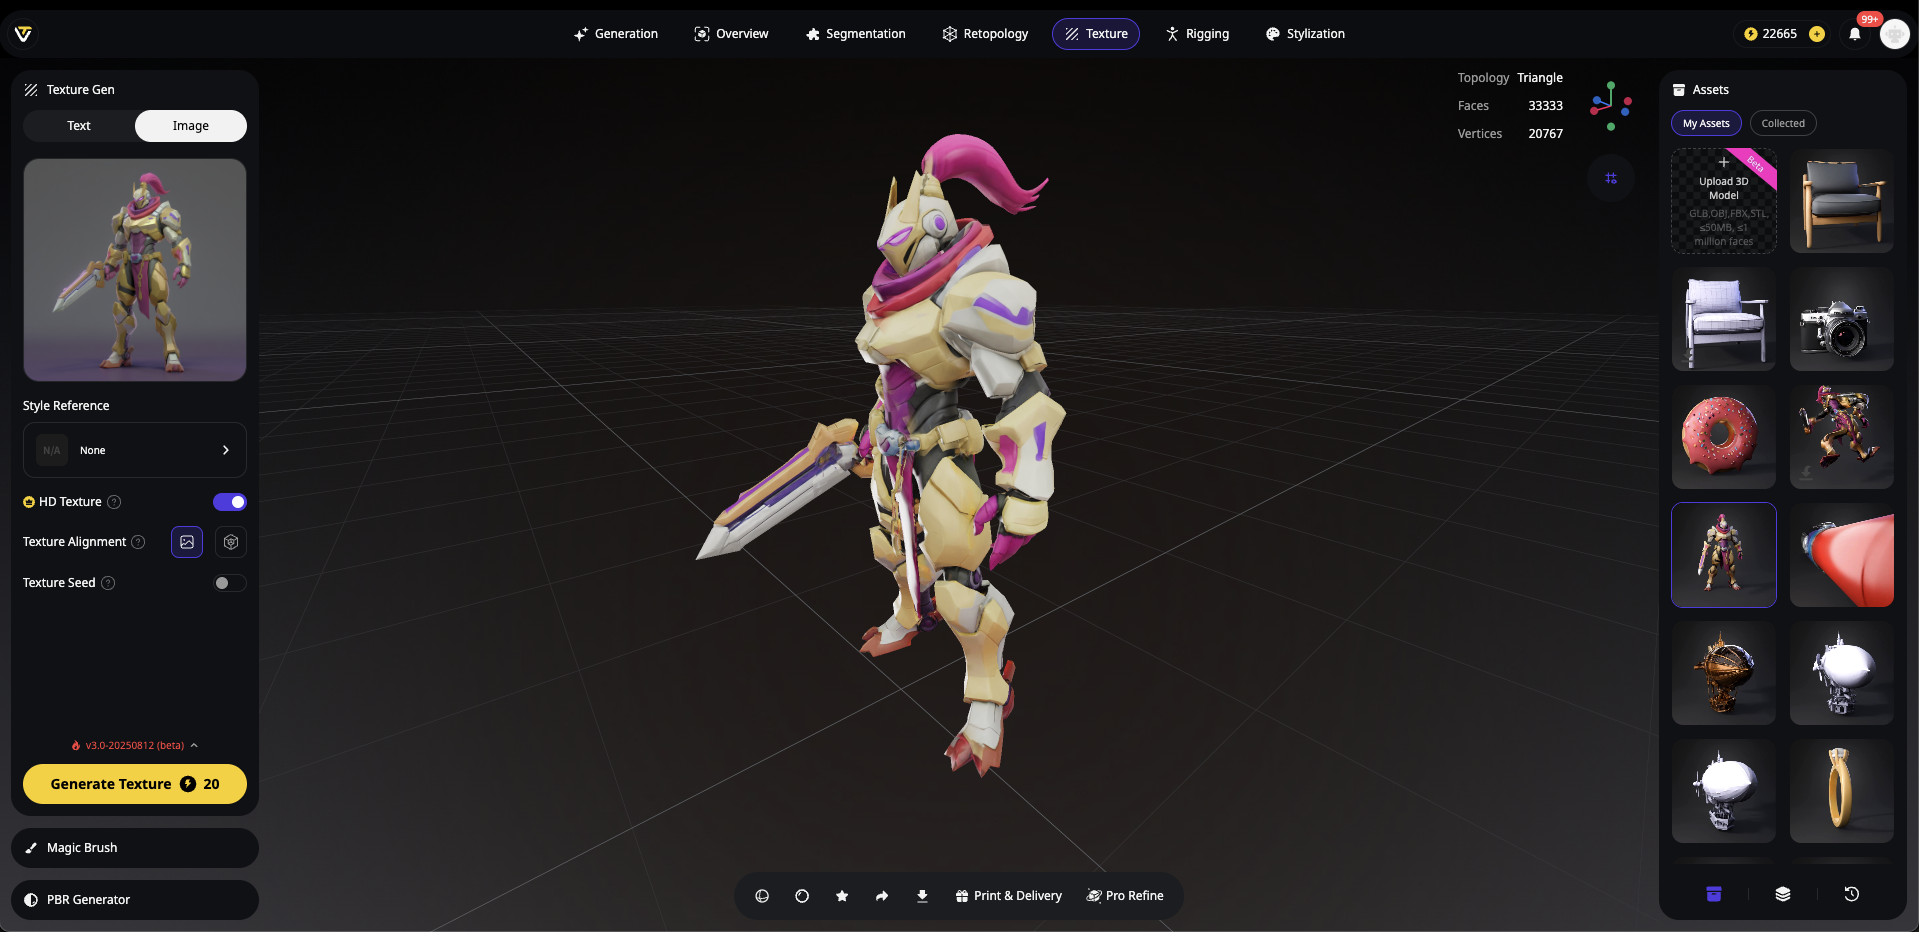
Texture Generation from Reference Images
Tripo AI offers a powerful texture generation system that goes beyond basic AI texturing:
- Upload Your Reference: Import a high-quality PNG or JPG image that represents your desired texture style
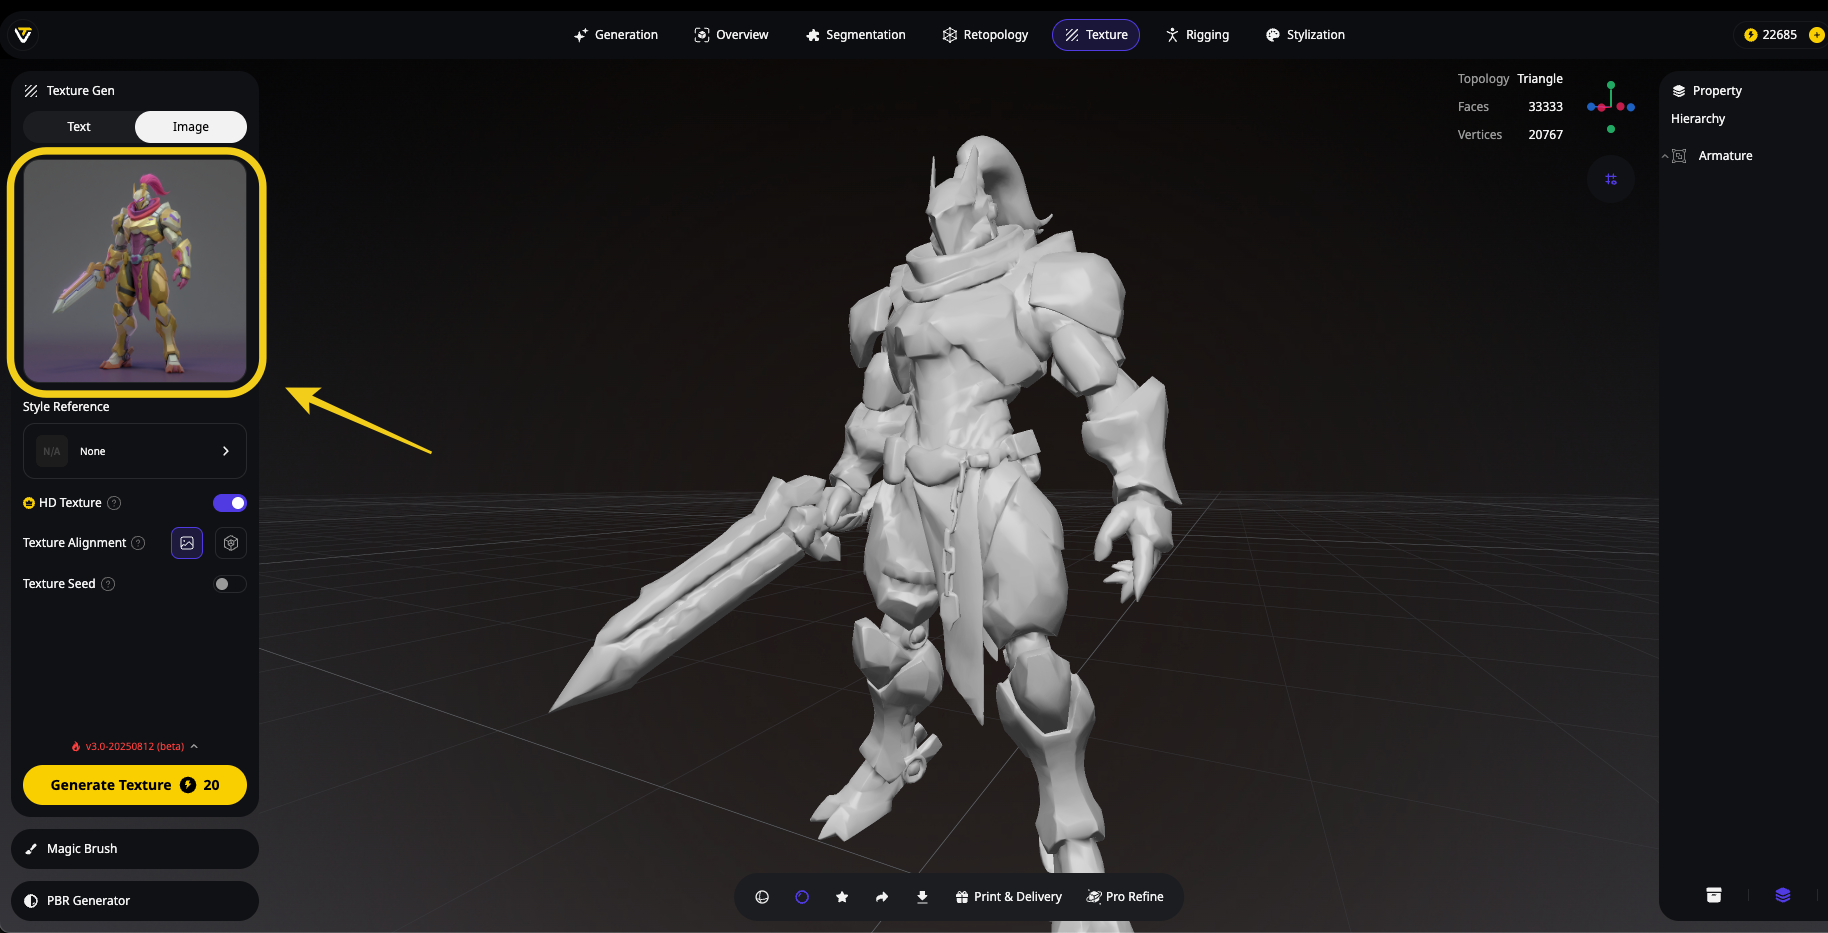
- Generate Enhanced Texture: Tripo AI analyzes your reference and generates a texture that matches your model's UV mapping
- Instant Quality Boost: This method often produces sharper, more detailed results than the default texture generation
The Game-Changer: Magic Brush
The Magic Brush feature in Tripo AI is a revolutionary tool for selective texture enhancement:
How Magic Brush Works:
- Position Your Camera: Set the camera angle to focus on the area needing enhancement
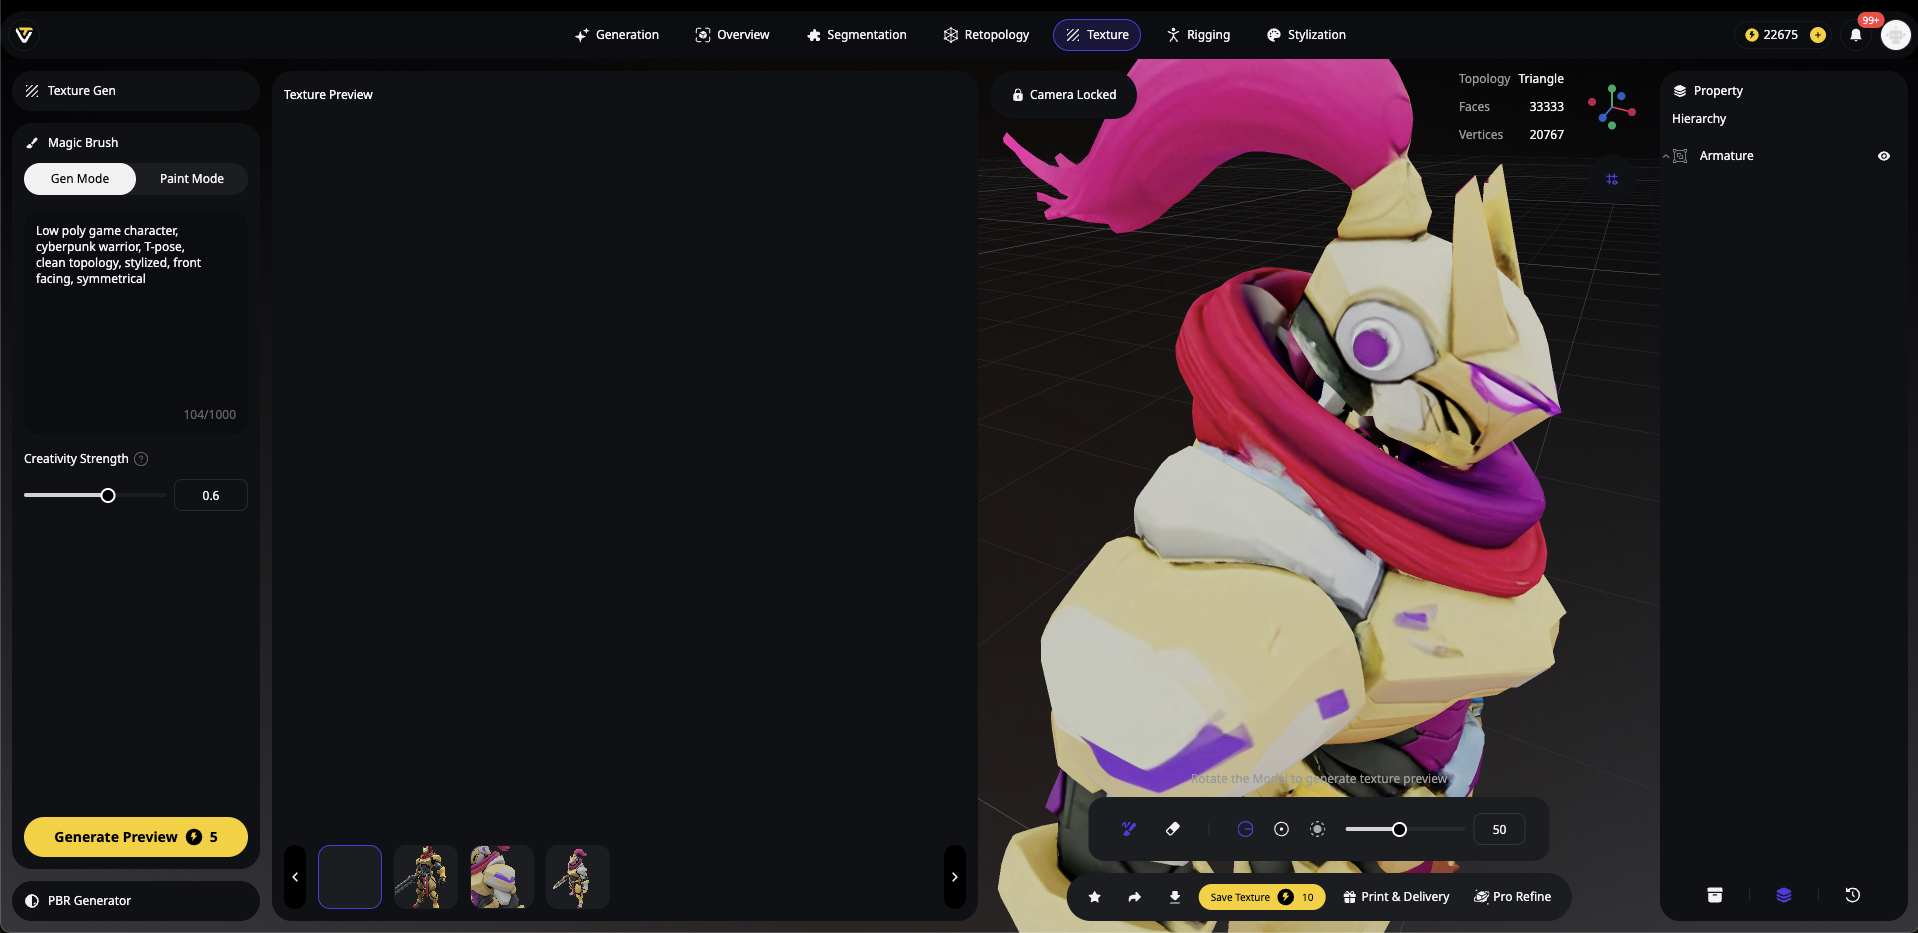
- AI Image Generation: Tripo AI generates a high-quality rendered image from that specific angle

- Selective Enhancement: Use the brush tool to paint over areas that need sharper detail
- Seamless Integration: The AI applies the same level of detail and sharpness from the generated image directly to your model's texture
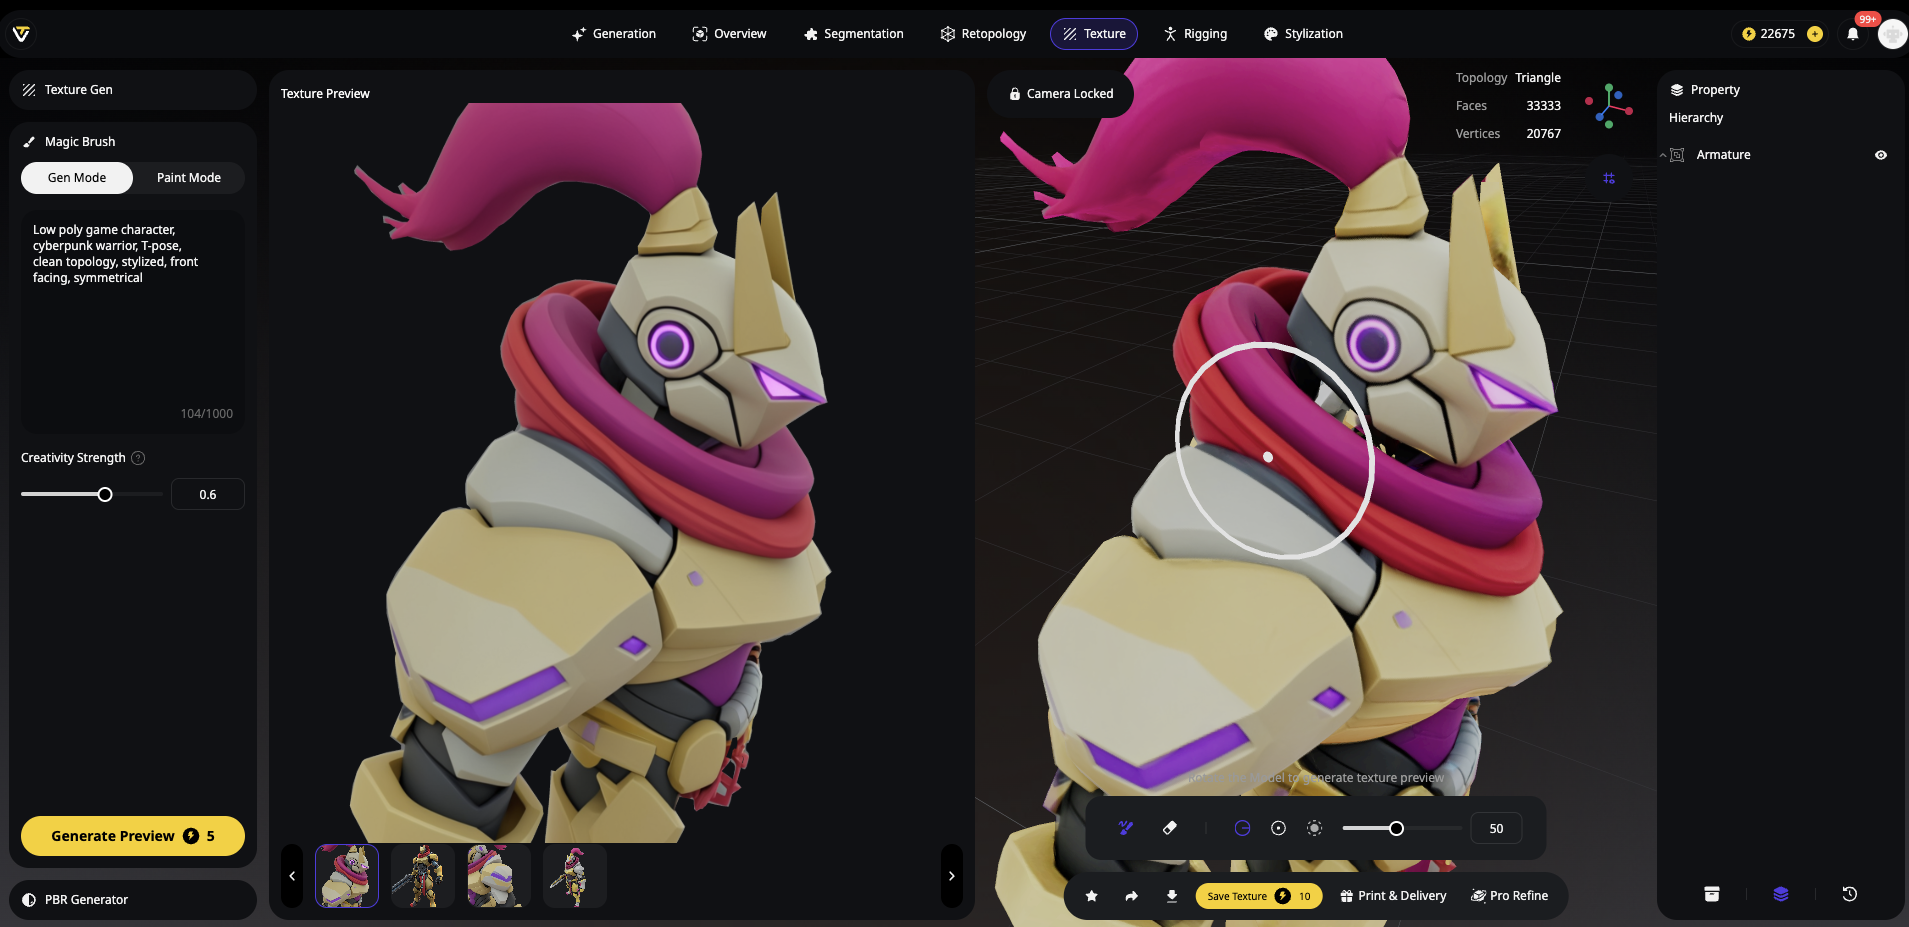
This feature is particularly powerful because it:
- Maintains consistency with the overall texture style
- Allows precise control over which areas receive enhancement
- Works in real-time within the Tripo AI interface
- Eliminates the need for external software for many projects
Section 2: Traditional Texture-to-Geometry Enhancement in Blender
Sometimes the most impressive results come from a clever traditional technique: converting texture details into actual 3D geometry. This method is particularly effective when your AI 3D model generator produces highly detailed textures but simpler geometry.
Understanding the Texture-to-Geometry Workflow
The concept is brilliantly simple: use the texture's color information as a displacement map to create real 3D details. This technique works exceptionally well with AI-generated models because:
AI often generates textures with more detail than the geometry
The texture already contains height information encoded in its colors
Results can be 3D printed or used in any application requiring geometric detail
Step-by-Step: Converting Texture Details to 3D Geometry
- Import Your Model
- Open Blender and delete the default objects
- File > Import > Choose your format (OBJ works best as it preserves UV information)
- Press Z and select "Material Preview" to verify the texture is loaded

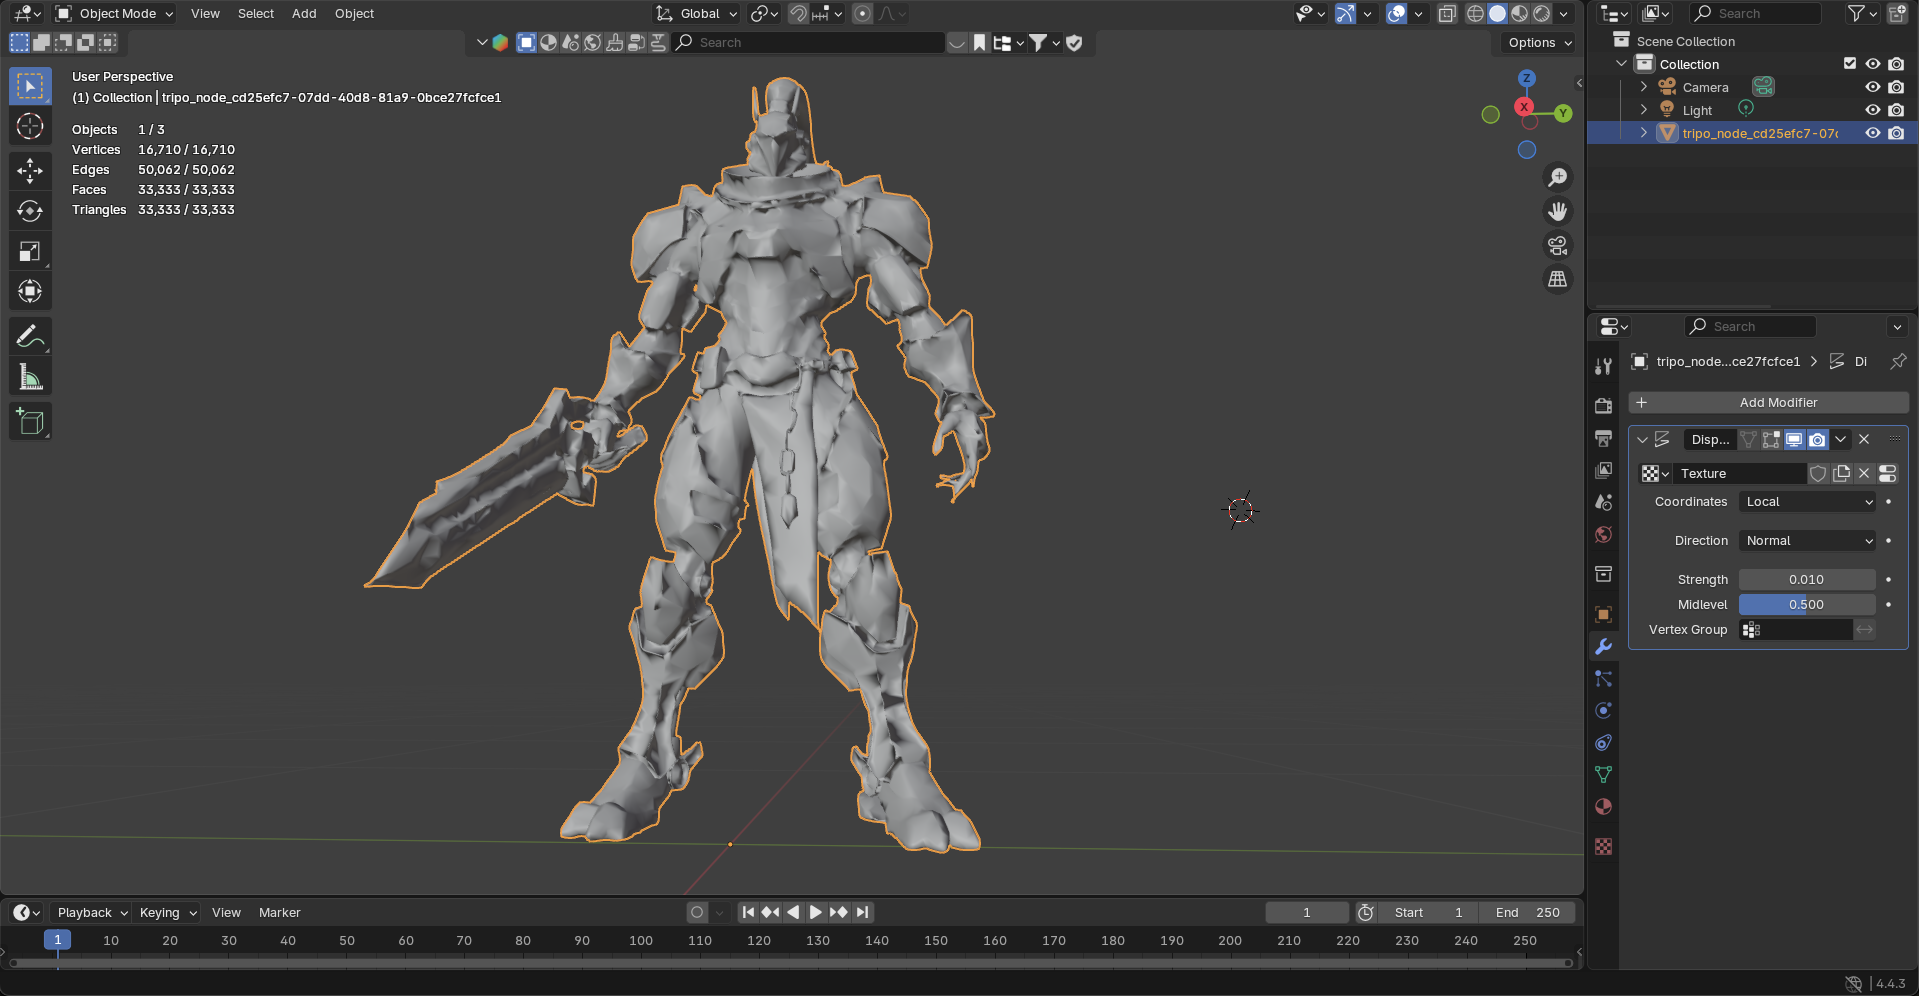
- Add Displacement Modifier
- Select your model
- Go to Modifier Properties (wrench icon)
- Add Modifier > Deform > Displace
- Click "New" to create a displacement texture
- Set initial Strength to 0.01 (you'll adjust this later)
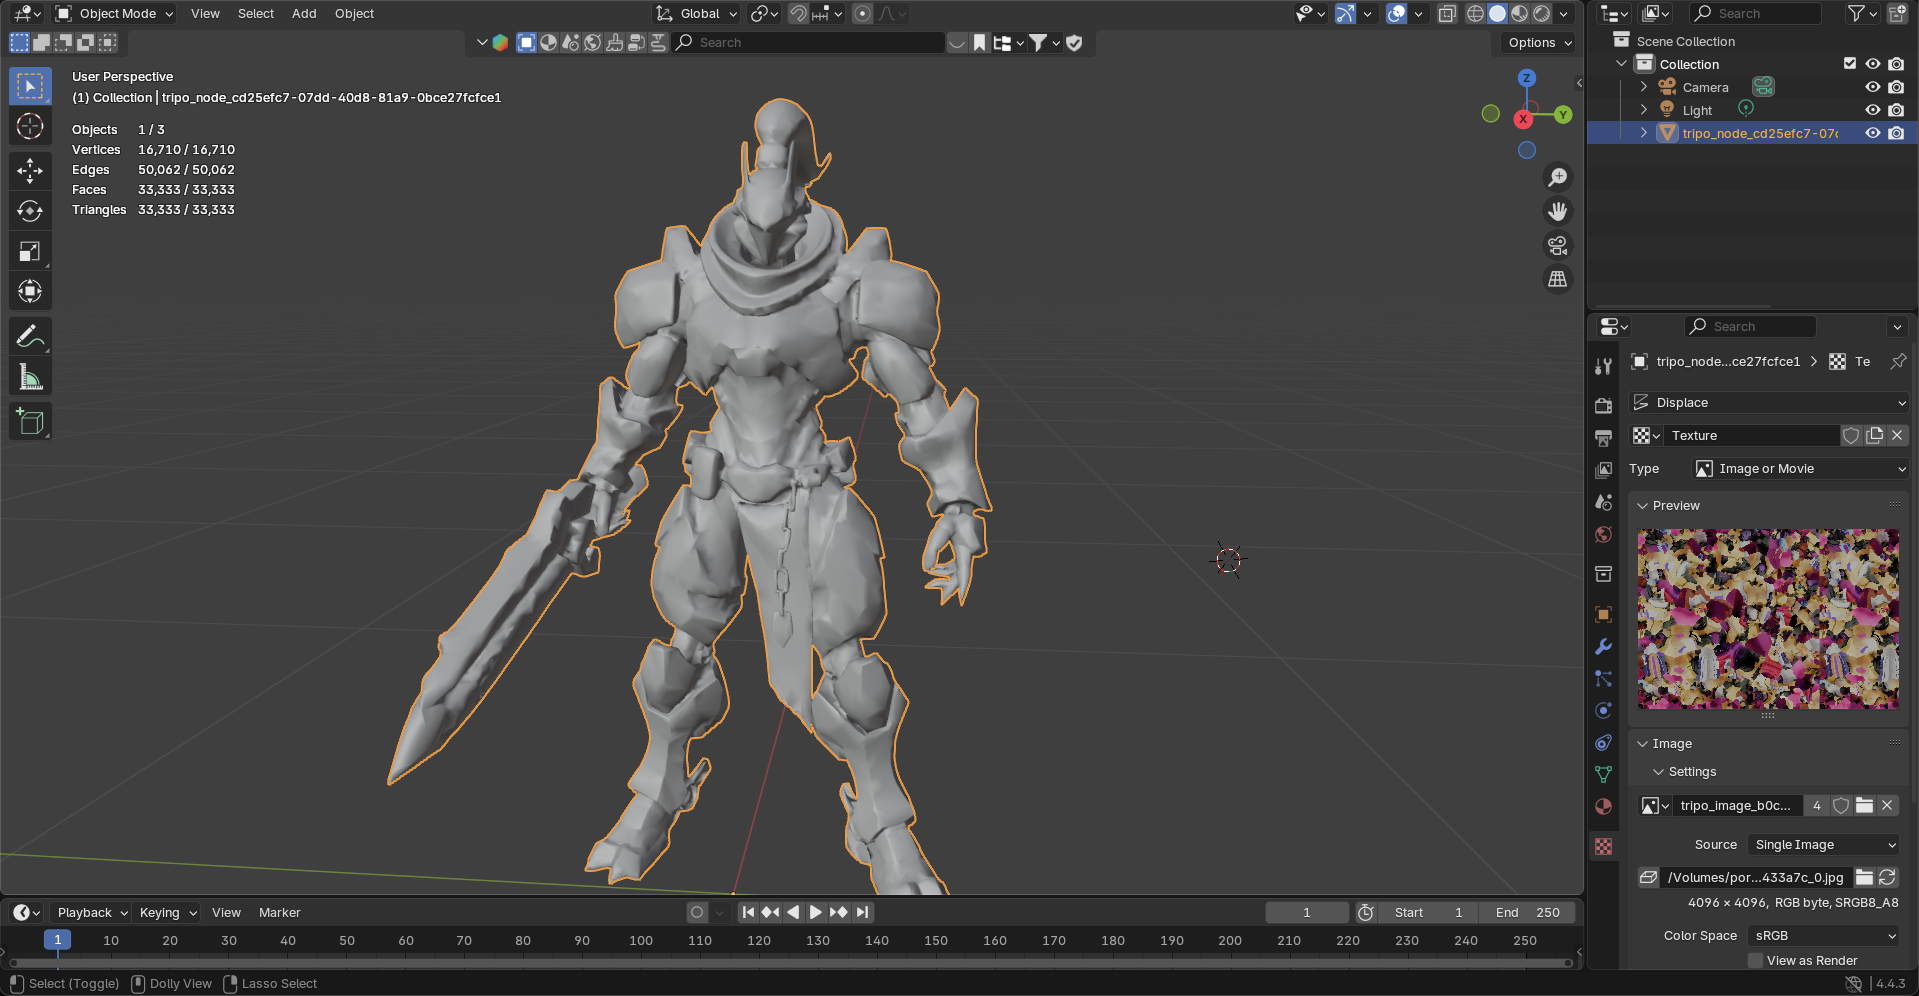
- Load Your Texture for Displacement
- Switch to the Texture Properties tab
- Click "Open" and select the same texture file used for your model
- Return to Modifier Properties
- Change Coordinates from "Local" to "UV" (this fixes texture island borders)
- Add Subdivision for Detail
- Add another modifier: Subdivision Surface
- Click the down arrow and select "Move to First" (crucial step!)
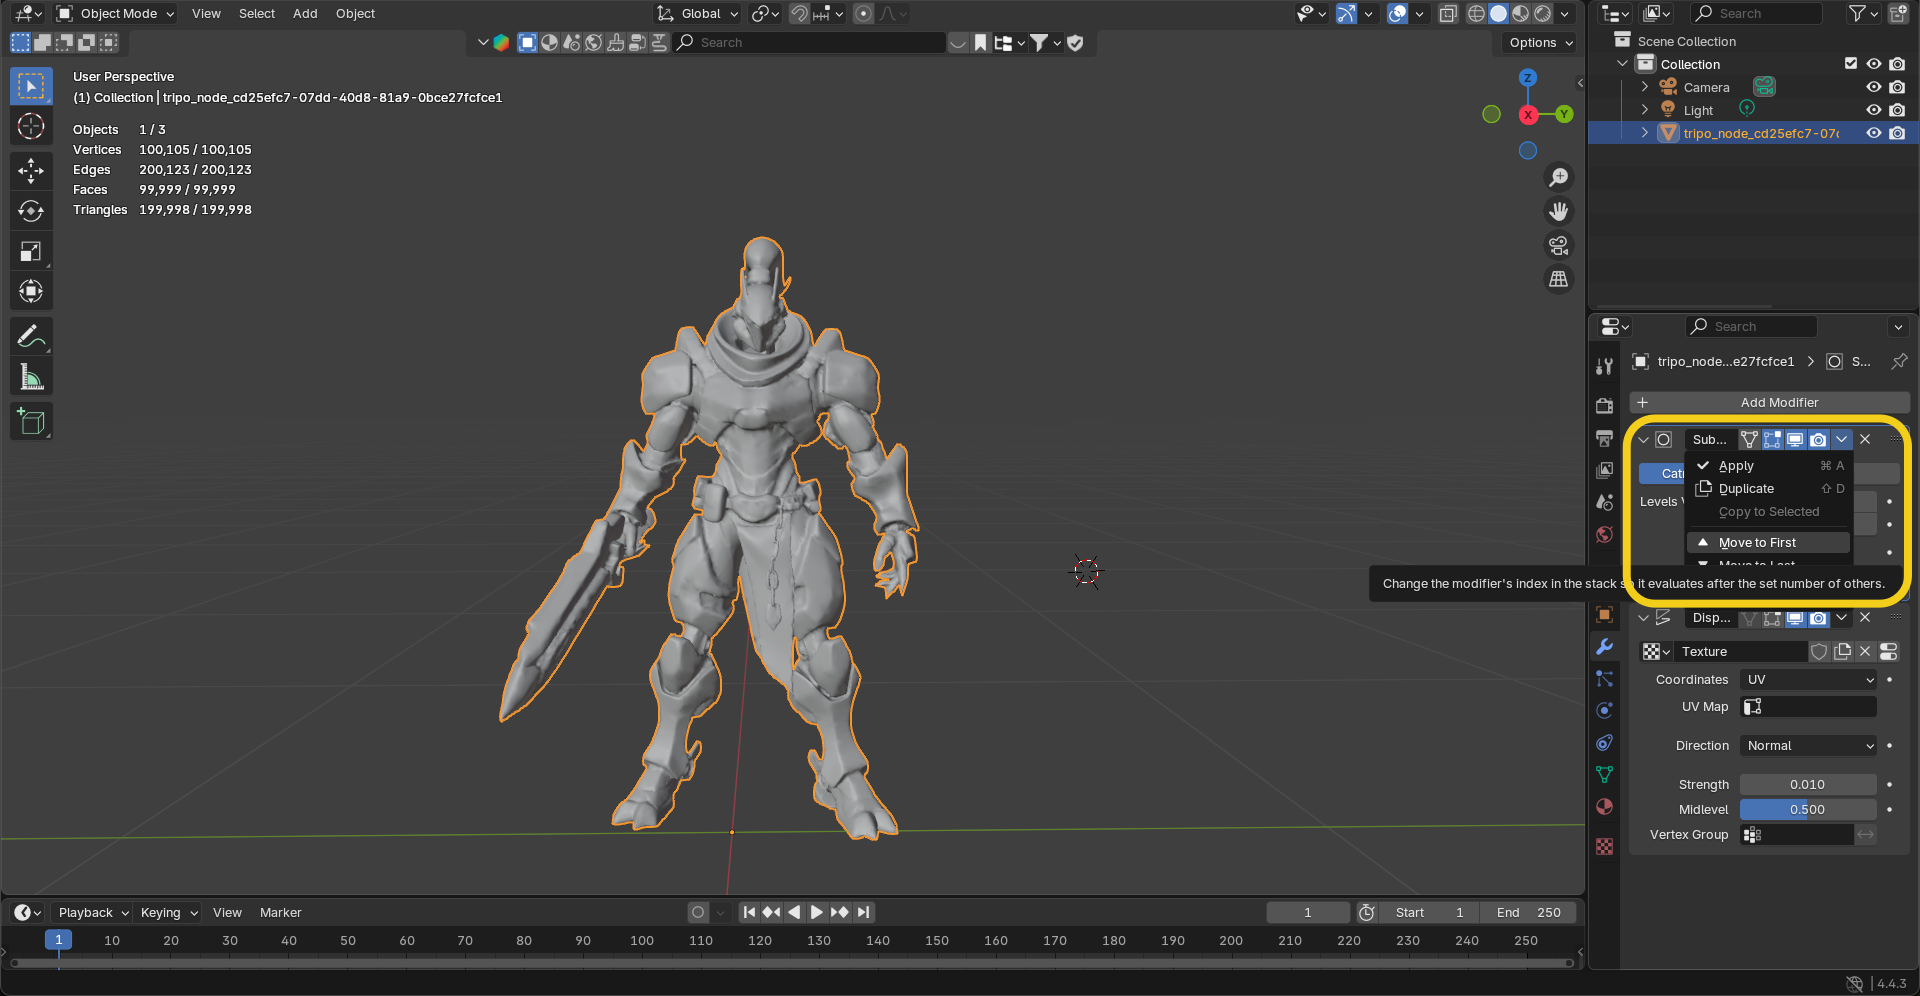
- Increase Viewport Levels gradually (2-4 is usually sufficient)
- Watch as texture details transform into real geometry
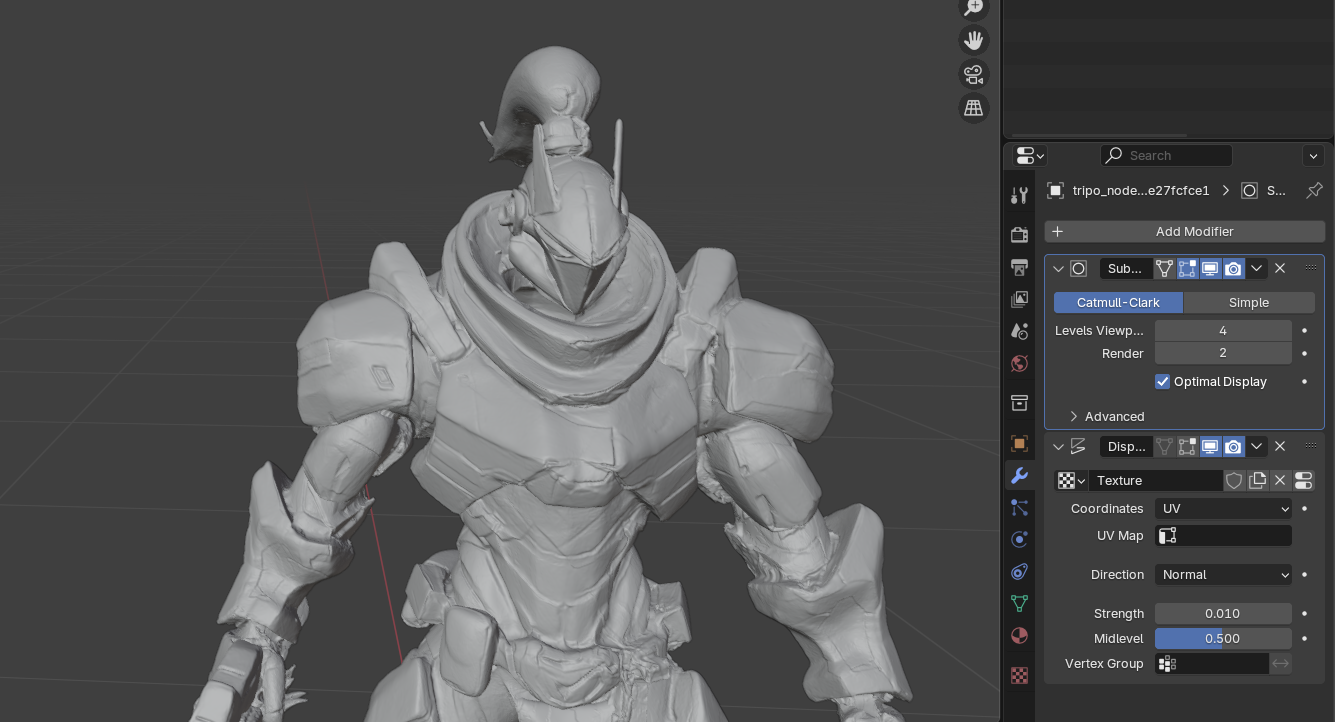
- Fine-Tune the Effect
- Adjust Displacement Strength (typically 0.01-0.1)
- Modify Midlevel (1.0 usually works best for AI models)
- Use negative strength values if details appear inverted
- Toggle modifier visibility to compare before/after
- Apply and Export
- Once satisfied, select "Apply All" to make changes permanent
- File > Export > STL (for 3D printing) or your preferred format
Pro Tips for Best Results
Warning: Don't over-subdivide! Each level quadruples polygon count. Start low and increase gradually.
Quick Sculpting Fixes
For models with texture imperfections causing geometry issues:
- Switch to Sculpting Tab
- Use Three Essential Tools:
- Draw (add material): Left mouse button
- Subtract: Ctrl + Left mouse button
- Smooth: Shift + Left mouse button
- Adjust Brush:
- F key: Change brush size
- Shift + F: Change brush strength
- This simple toolset can fix 90% of displacement artifacts in minutes.
For more Blender techniques, check out our Guide to Blender: Modeling Basics and Advanced Techniques.
Future Trends and Best Practices
The Evolution of AI Texturing
The integration of tools like Tripo AI's Magic Brush represents the future of 3D texturing:
Intelligent Enhancement: AI that understands material properties and enhances accordingly
Real-time Iteration: Instant feedback loops between generation and refinement
Context-Aware Detailing: AI that adds appropriate detail based on the model's purpose
Conclusion
The path from AI-generated model to professional asset has never been more streamlined. Tripo AI's built-in texture enhancement tools—particularly the Magic Brush—provide a powerful first line of defense against low-quality textures. When combined with external AI upscaling and traditional refinement techniques, you have a complete toolkit for creating stunning 3D assets.
The key insight is that the best workflow uses both AI-native tools and traditional methods. Start with Tripo AI's integrated features to maximize quality within the platform, then selectively apply external tools where additional enhancement adds value.
Ready to experience the future of texture enhancement? Try Tripo AI's Magic Brush and discover how AI 3D model generators are evolving beyond simple generation into complete creative platforms. Visit Tripo AI and transform your ideas into brilliantly textured 3D assets today.
For more texturing techniques and to stay updated with the latest features, explore our guide on How to Add Texture in Blender and join our growing community of AI-powered creators.
Advancing 3D generation to new heights
moving at the speed of creativity, achieving the depths of imagination.
 Text & Image to 3D models
 Free Credits Monthly
 High-Fidelity Detail Preservation