How to Add Textures in Blender 4.0: A Beginner-Friendly Guide
Adding textures is one of the most rewarding steps in 3D modeling. Whether you're making assets for games, rendering photorealistic products, or just experimenting, textures give your model personality and realism. In this guide, we'll walk through the basics of applying image textures to a 3D model using Blender 4.0.
Materials vs. Textures
If you're brand new to Blender, you might be mixing up the words "material" and "texture." While both affect how an object appears, they're not exactly the same thing. A texture typically refers to an image or pattern (like a JPEG or PNG) that adds visual detail. A material, on the other hand, is a set of parameters that control an object's overall look — including color, shine, transparency, or the way light interacts with its surface.
When you apply a material in Blender, you often include one or more image textures within it. For example, a single wood material might use:
- A color texture (for the wood grain),
- A roughness map (to control how shiny the surface is),
- A normal map (to add subtle 3D detail).
It's a powerful system, and once you get comfortable with it, you can make even simple geometry look convincingly complex.
Why Use Textures?
Texturing is a core skill for any 3D artist, whether you're creating assets for games, short animations, or visually stunning product renders. Applying detailed textures can make basic shapes look polished and realistic. If you want to showcase your 3D work effectively, good texturing is essential.
This tutorial focuses on Blender 4.0's workflow. You'll learn to:
- Create and manage materials,
- Add image textures in a couple of ways,
- Unwrap 3D objects for better texture placement,
- Make use of Blender's Asset Browser,
- Check out alternative methods (including add-ons) to streamline texturing.
1. Project Setup & Required Files
Before getting started, make sure you have:
- A 3D model
- At least one image file you want to use as a texture. Blender supports most common formats (JPEG, PNG, TIFF, etc.).
You can find free or paid textures on many websites. Here are some popular choices:
- Polyhaven (totally free, high-quality textures)
- Unsplash (free photos you can adapt into textures)
- The Blender subreddit often has user-posted texture packs.
For the demonstration, you might download a wood texture from Polyhaven or Unsplash. Keep it saved somewhere convenient on your computer.
2. Creating a Material in Blender
2.1 The Material Properties Panel
- Open Blender 4.0 and import your model.
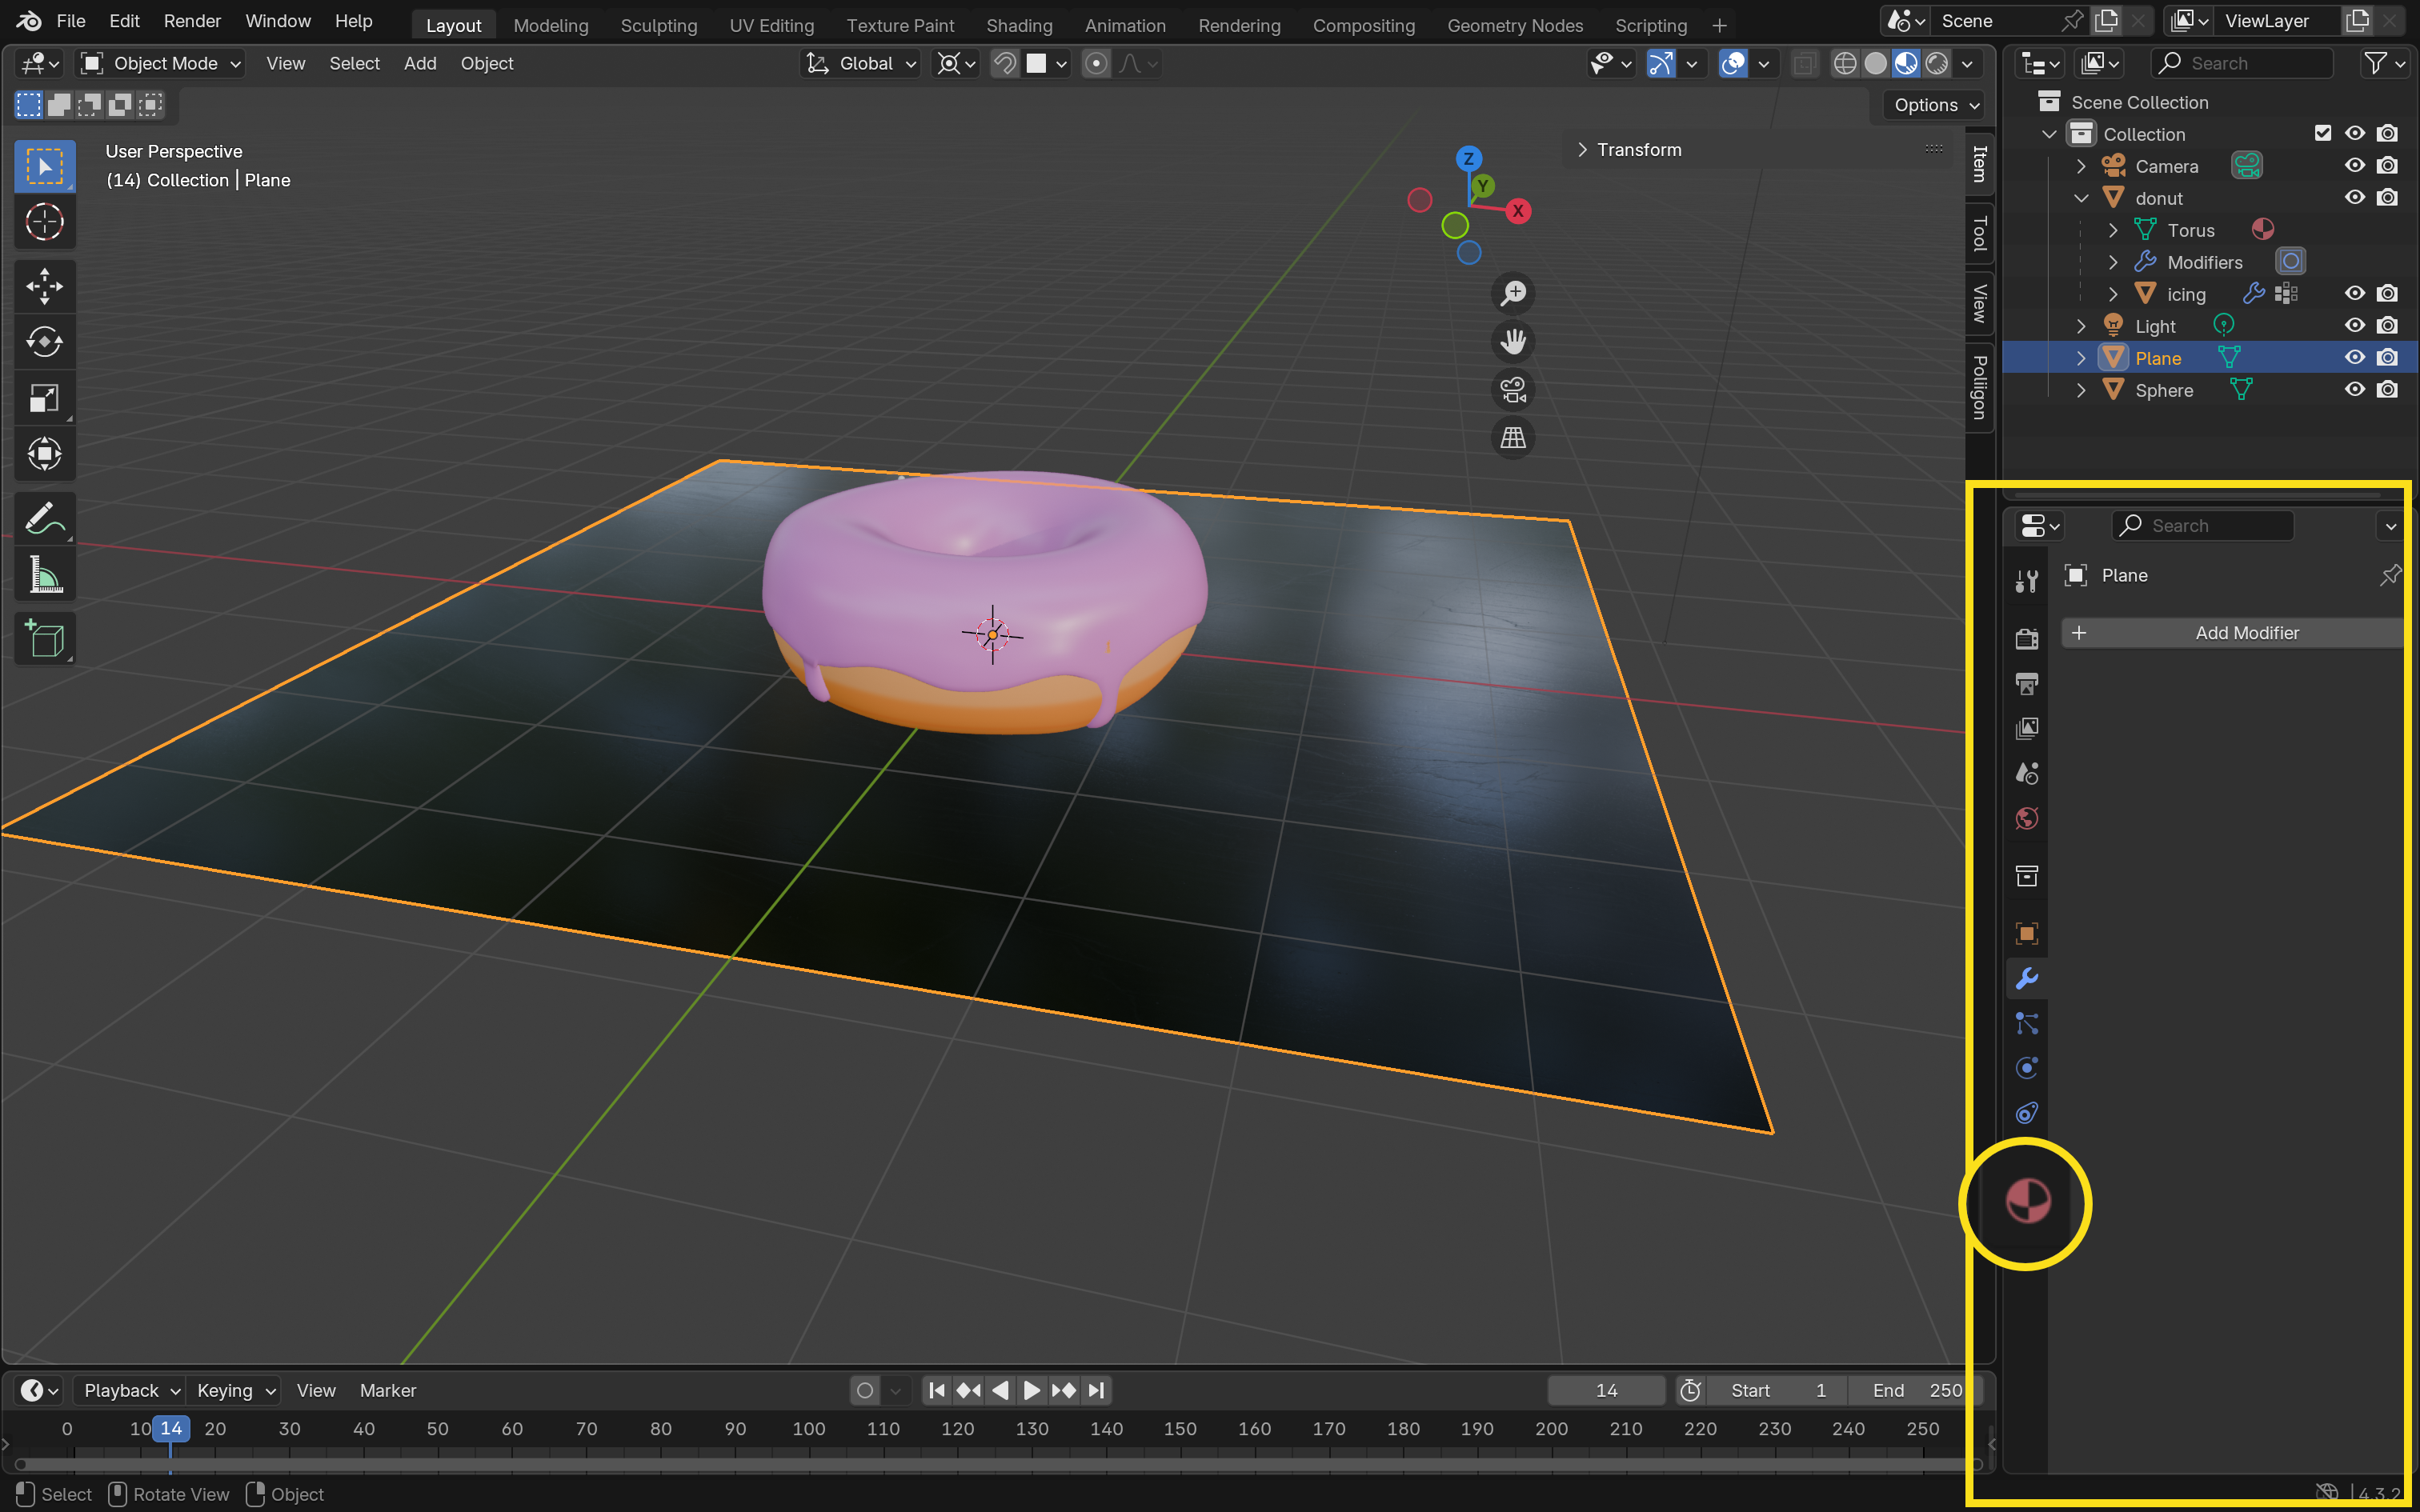
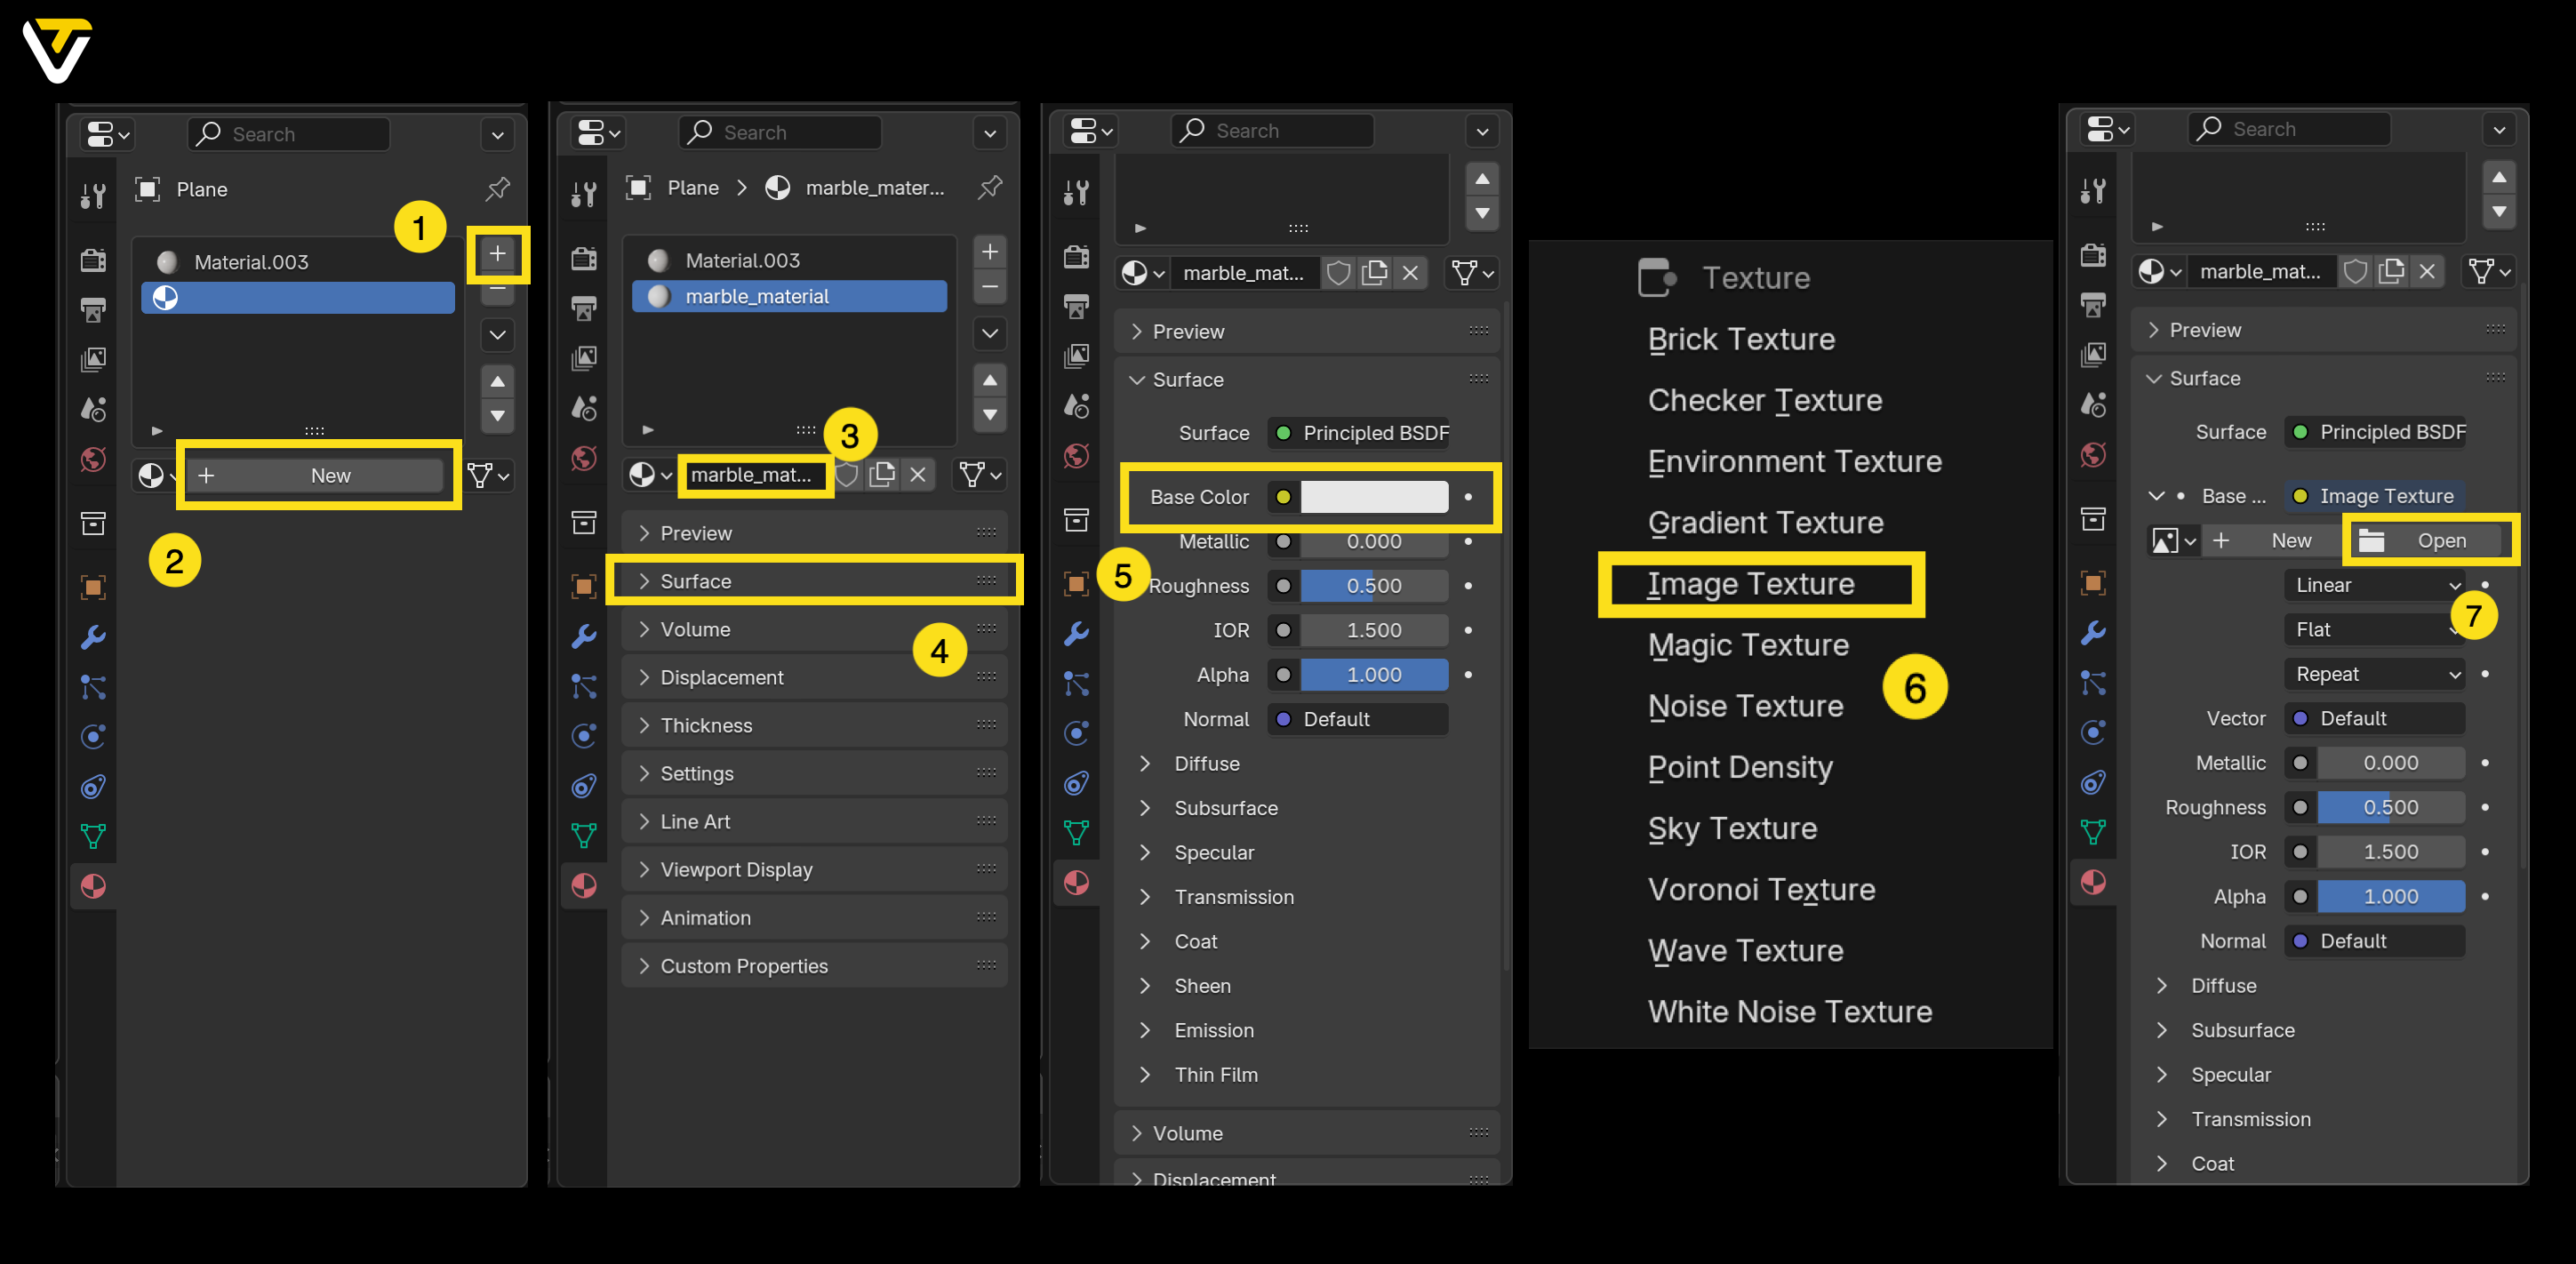
- In the Properties Editor (on the right side of the UI), find the Material Properties tab (it looks like a checkered sphere).
- By default, the object usually has a basic material. You can rename that "Material" to something more descriptive (e.g.,
Marble_Material) by clicking the text field.
2.2 Adding a Material
If you want multiple materials on one object:
- Click the plus (+) sign in the Material Properties panel to create an additional material slot.
- Choose New.
You've now set up two materials on the same object. Later, you can assign them to different faces.
3. Applying Image Textures
There are two main ways to link your images to a material in Blender: directly through Material Properties or by using nodes in the Shader Editor.
3.1 Method A: Material Properties
- In the Material Properties, expand the Surface section.
- Next to Base Color, click the small dot icon.
- From the pop-up menu, choose Image Texture.
- Click Open and navigate to the texture you downloaded.
- Select your image and confirm.
Initially, you might not see the texture displayed on your object. That's because you need to switch the Viewport Shading mode from Solid to either Material Preview or Rendered. Look in the top-right corner of the 3D Viewport for the shading icons and pick one of these.
3.2 Method B: Using the Shader Editor
For deeper control of your material setup:
- Switch to the Shading workspace from the menu at the top of Blender.
- In the Shader Editor (the node view), look for your material's node tree. By default, you'll see something like Principled BSDF plugged into Material Output.
- Press Shift + A (or click Add on the header) and choose Texture > Image Texture. A new node will appear.
- Connect the Color output of the Image Texture node to the Base Color input of the Principled BSDF node.
- In the Image Texture node, click Open, find your texture file, and confirm.
Again, switch your Viewport Shading to Material Preview or Rendered to see the change.
3.3 Assigning a Material to Specific Faces
If you want to apply that second material only on certain parts (faces) of an object:
- With the model selected, press Tab to enter Edit Mode.
- Press 3 on your keyboard's number row to enable face selection mode.
- Select the faces you want to use the second material on.
- In the Material Properties, click on the second material slot, and choose Assign.
Voila! Different faces can now display different textures or colors.
4. Using the Asset Browser
The Asset Browser is a handy feature introduced around Blender 3.0 that persists in 4.0. It allows you to store and reuse materials (and other assets) across multiple projects.
- Right-click on a material in the Outliner and select Mark as Asset.
- Next time you open the Asset Browser (often in the Shading or Layout workspace), your saved material can be dragged and dropped onto any object in your scene.
This workflow is especially useful if you frequently reuse materials like metals, fabrics, or stone.
5. Controlling Texture Mapping (UV Unwrapping)
A crucial step for more complex models is UV unwrapping, which flattens your 3D object into a 2D layout that's easier to map onto the image.
- Change to the UV Editing workspace from the top menu.
- Press Tab to enter Edit Mode, and press 2 to select edges.
- Mark a seam by selecting edges where you want Blender to "slice" the mesh open, then right-click and pick Mark Seam.
- Press U, then choose Unwrap to flatten the model into the UV Editor window.
- In the UV Editor, use standard transformations (move, rotate, scale) to adjust how the texture wraps around your model.
6. Rendering: Eevee vs. Cycles
Once your textures are set, it's time to see the final product!
- Eevee: Fast, ideal for real-time previews and stylized looks.
- Cycles: Path-tracing engine, great for realistic lighting and reflections, though it's slower.
You can pick your render engine in the Render Properties tab (the camera icon). After setting up your lights and camera, press F12 to produce a final render.
Bonus: Instantly Generate HD Textures with Tripo
If you want to skip the manual texture setup and still get stunning results, Tripo is a great tool to have in your workflow. Tripo is an AI-powered 3D model generator that not only creates models from text or images—it also automatically generates high-resolution textures for them.
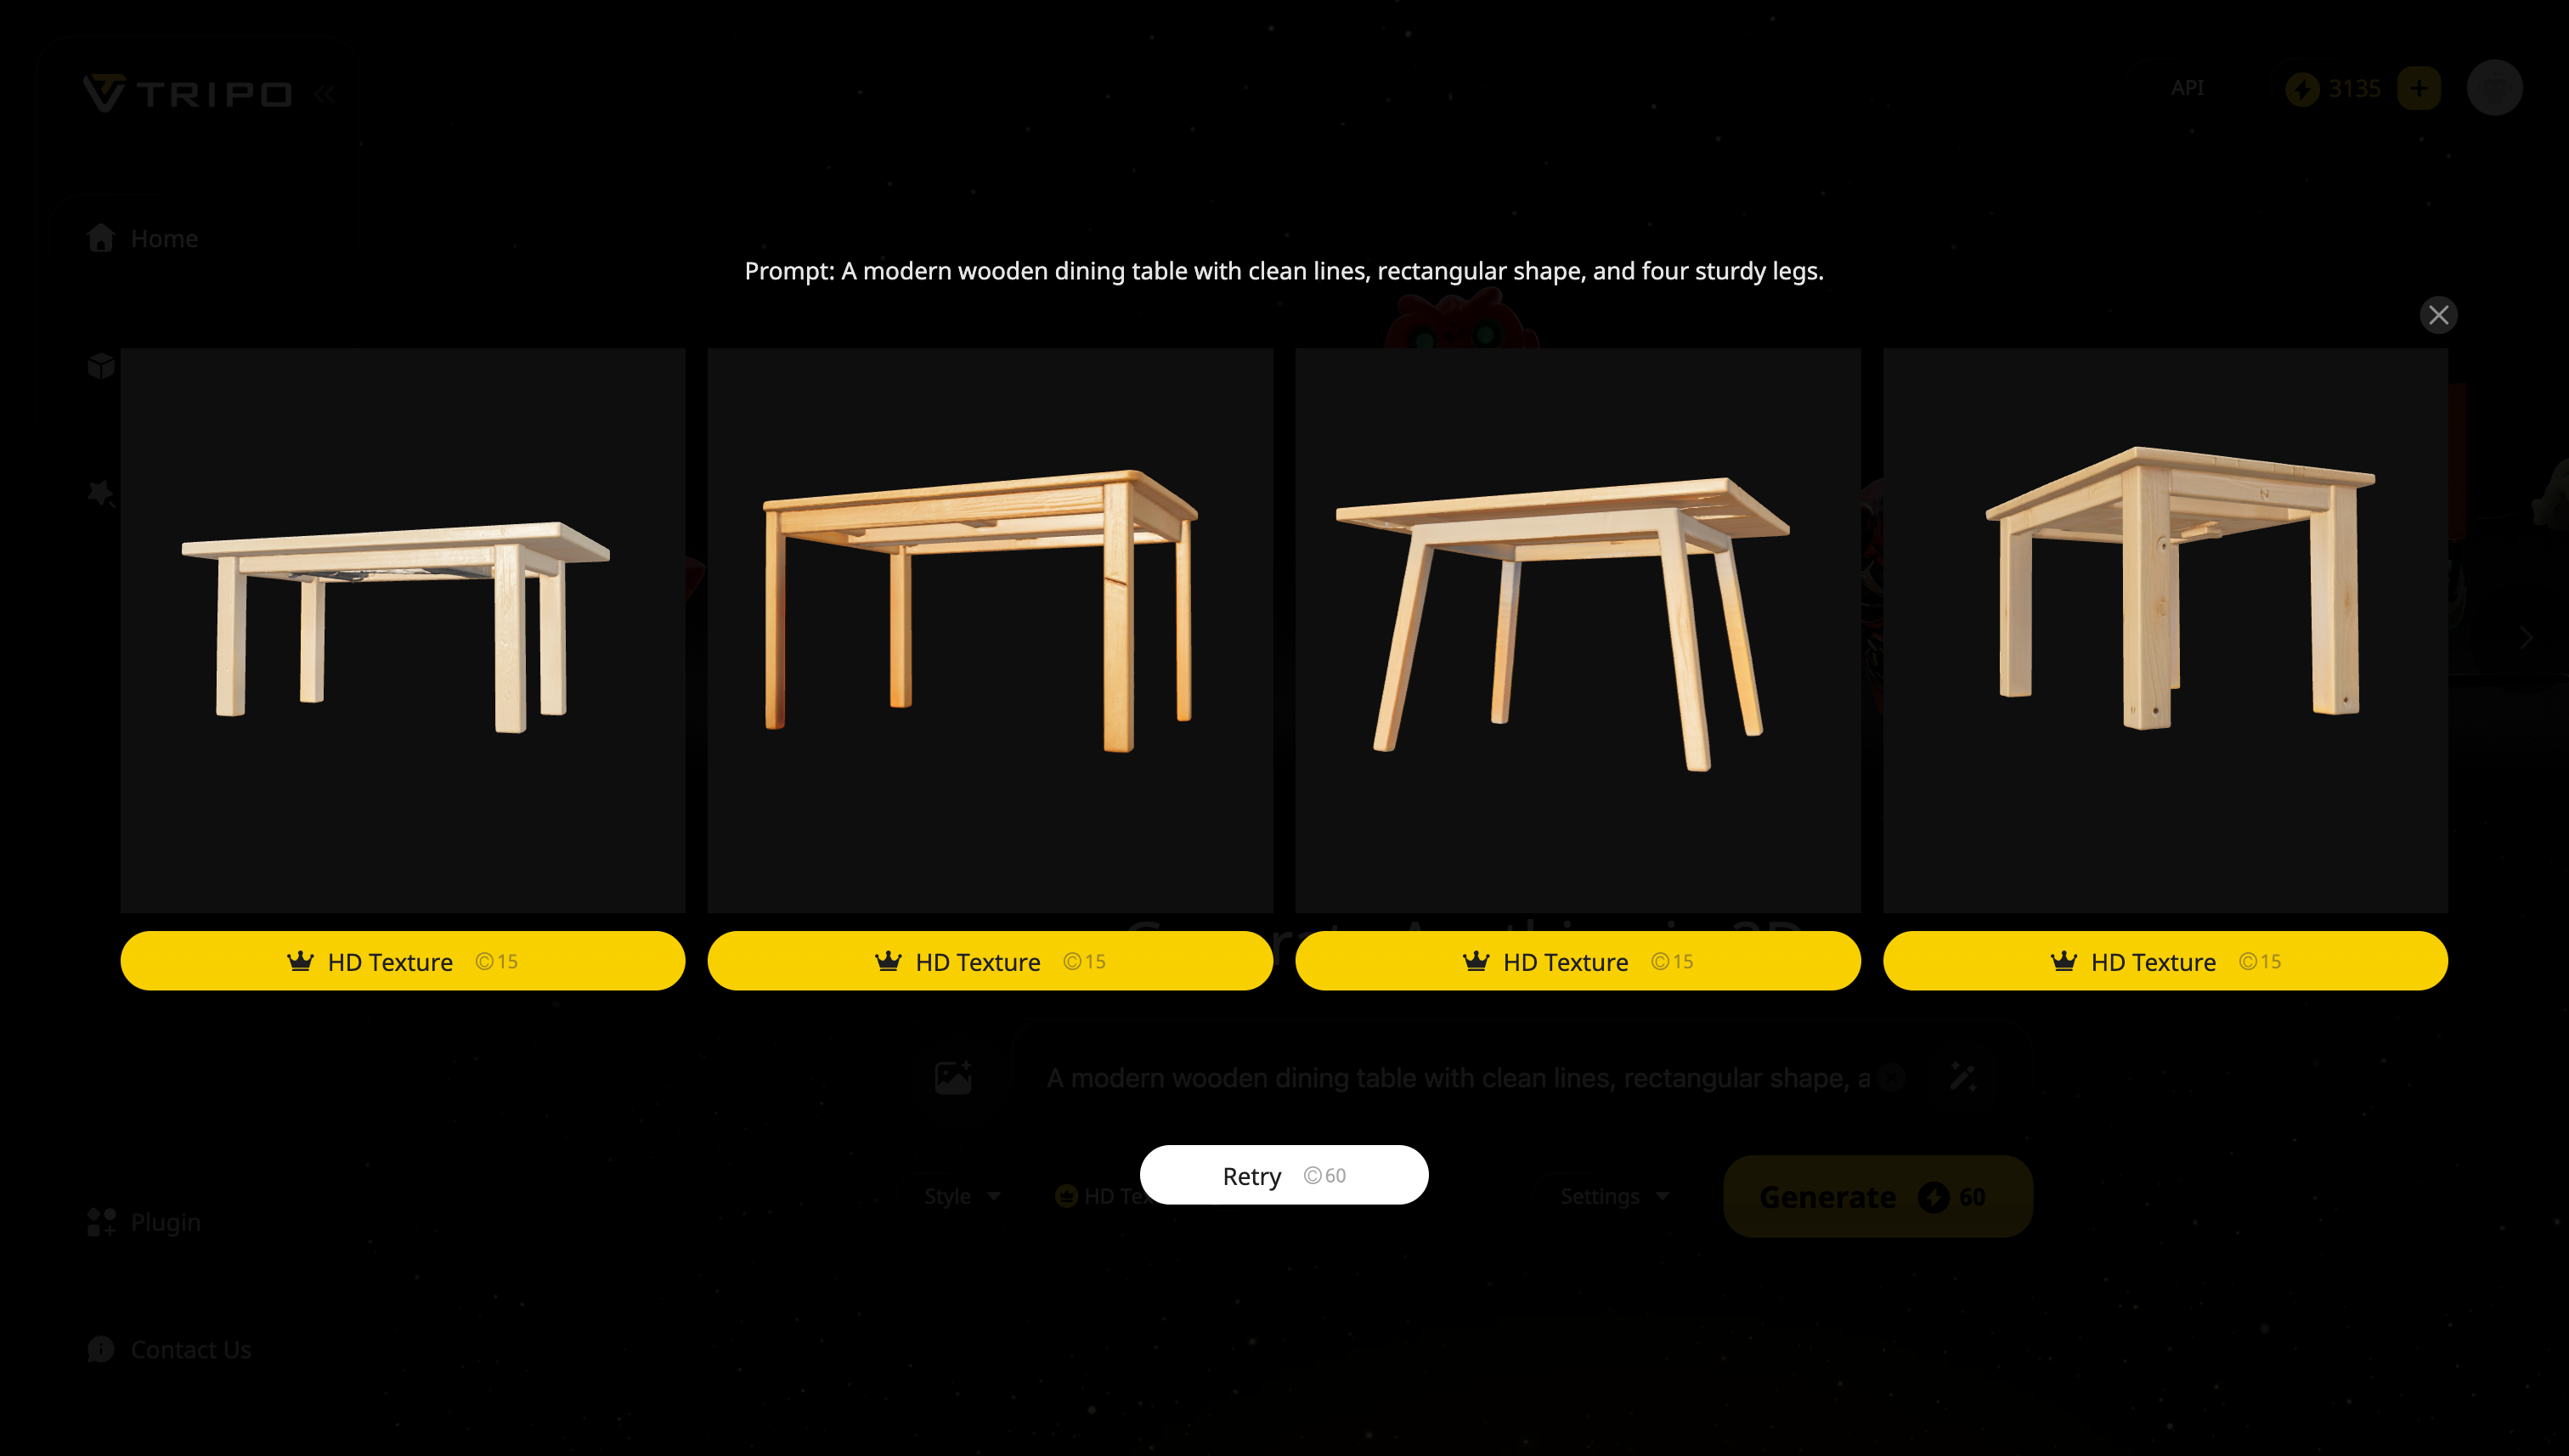
Step 1: Choose Input Method
Enter text prompts or upload images to generate high quality 3D model.
Example Prompt: A modern wooden dining table with clean lines, rectangular shape, and four sturdy legs.
Step 2: Tripo Generates Your Model
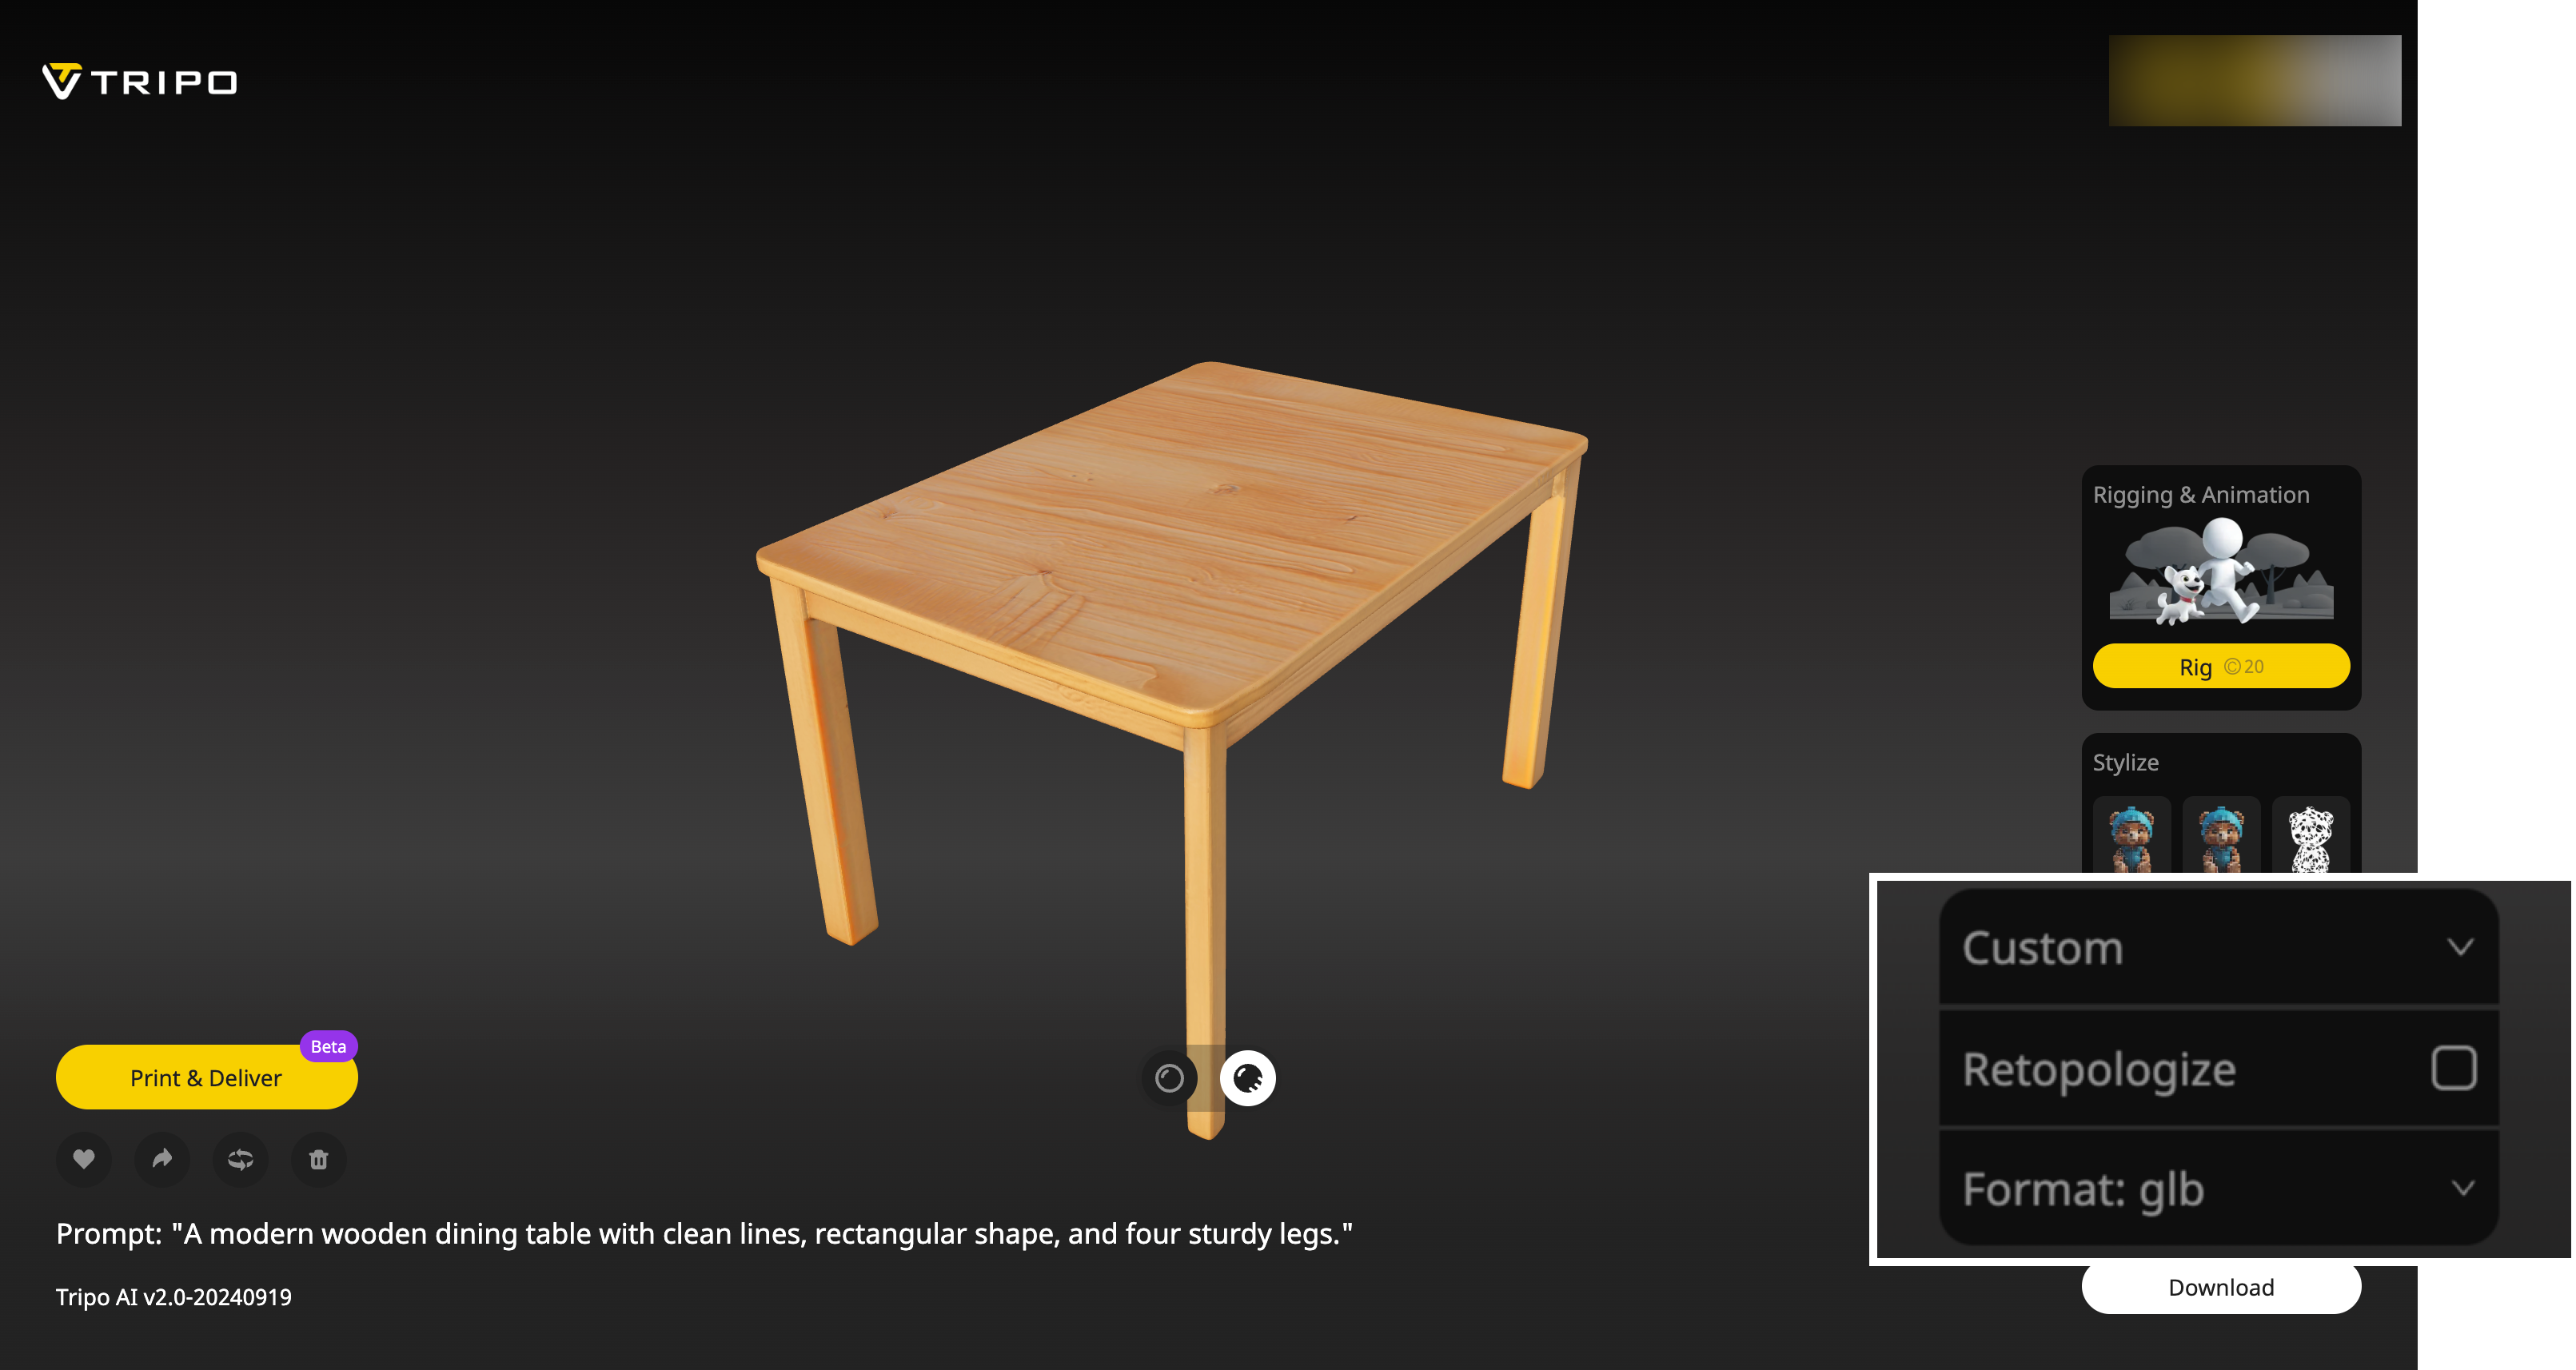
Step 3: Use HD Texture (Pro Feature)
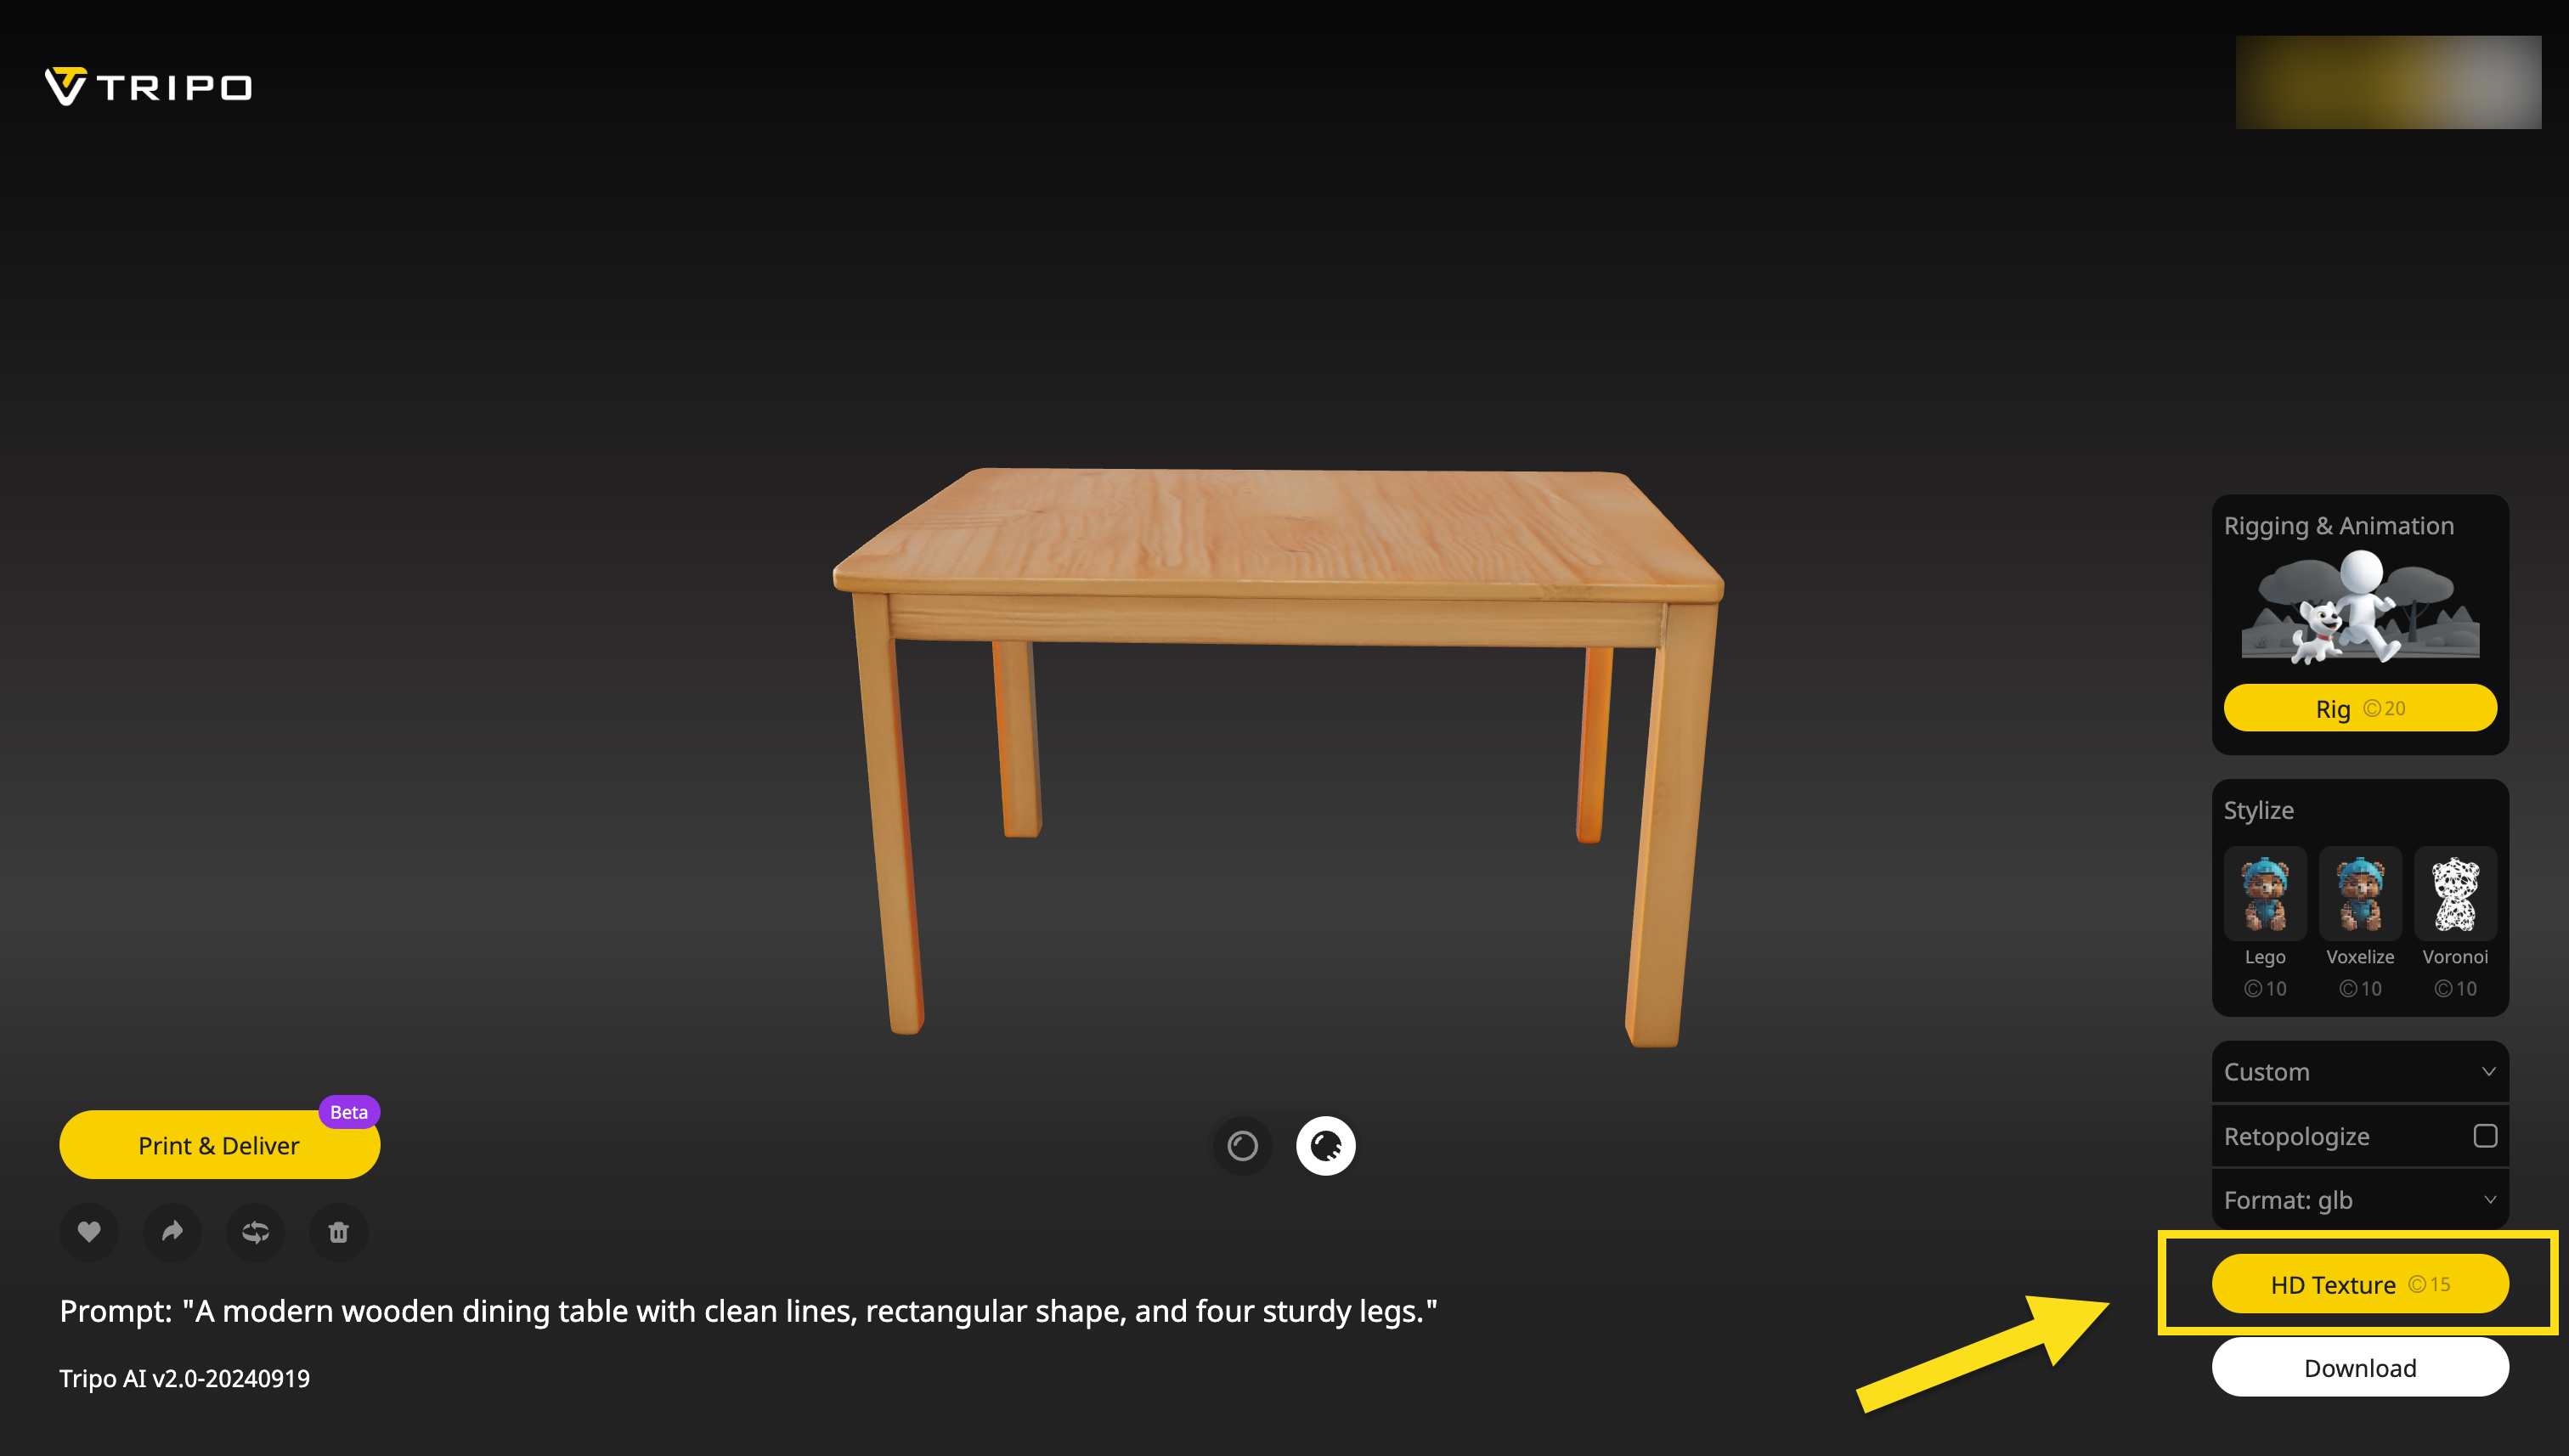
Step 4: Download & Customize
Export in various formats, tweak in your favorite software, and integrate seamlessly into your projects.
What Tripo Offers
- Auto-Textured Models: Once your model is generated, Tripo automatically applies realistic HD textures based on the object’s shape and category. No need to search for or manually apply image textures.
- High-Quality Material Details: From wood and metal to fabric and stone, Tripo delivers sharp, clean materials with realistic surface properties—right out of the box.
- Seamless Export: After generation, you can export your model and import it directly into Blender. The textures and materials are already applied, so you can jump straight into lighting, animation, or rendering.
Why Use Tripo?
Tripo is perfect for anyone who wants to speed up the creative process without sacrificing quality. Whether you're making game assets, prototypes, or visualizations, Tripo gives you a fast and easy way to generate fully textured 3D models—ready for Blender or any other 3D software.
Wrapping Up
Learning to apply textures in Blender is a huge step in making your 3D art look polished and professional. Here's what we covered:
- Materials vs. Textures: Distinct but closely related.
- Creating Materials: In both Material Properties and the Shader Editor.
- Managing Materials: Multiple materials per object, and how to assign them to selected faces.
- Asset Browser: Save and reuse materials across different projects.
- UV Unwrapping: Essential for proper texture placement.
- Rendering: Choose your engine based on realism vs. speed.
- Add-ons: Extend Blender's functionality and simplify tasks like texturing.
Explore various textures, experiment with UV maps, and play with shaders in the Shader Editor. In no time, you'll develop a library of materials you can use for everything from game assets to architectural visualization. Good luck, and enjoy your journey into the world of texturing in Blender 4.0!
