Creating and Optimizing Cyberpunk 2077 3D Models: My Workflow
скачать 3d модели для chicken gun
Creating high-quality Cyberpunk 2077 3D models requires a balance of creative vision, technical know-how, and efficient workflow management. In my experience, the key is to start with strong references, maintain consistent style, and leverage both manual techniques and AI-powered tools like Tripo to speed up production without sacrificing quality. This guide is for artists, game developers, and anyone aiming to produce optimized, visually striking cyberpunk assets for real-time environments.
Key takeaways:
- Gather detailed references and define your visual scope early
- Block out shapes first, then refine details to capture cyberpunk aesthetics
- Use PBR texturing and focus on neon, metal, and holographic material effects
- Optimize meshes with clean retopology and efficient UVs for real-time use
- Leverage AI tools like Tripo to accelerate modeling, texturing, and rigging
- Test models in-engine and iterate for best integration
Executive Summary and Key Takeaways

What I’ve Learned from Cyberpunk 2077 3D Projects
Working on Cyberpunk 2077-inspired models taught me the importance of planning and maintaining a cohesive aesthetic. Consistency in style and technical execution is critical for assets to blend seamlessly in the game world. I’ve found that integrating AI-powered tools can drastically reduce repetitive tasks, letting me focus more on creative decisions.
Essential Tools and Techniques Overview
My toolkit includes traditional DCC software for modeling and texturing, complemented by Tripo for rapid prototyping and batch processing. I rely on PBR workflows, real-time optimization techniques, and a mix of manual and automated methods for rigging and animation.
Planning and Reference Gathering for Cyberpunk 2077 Models
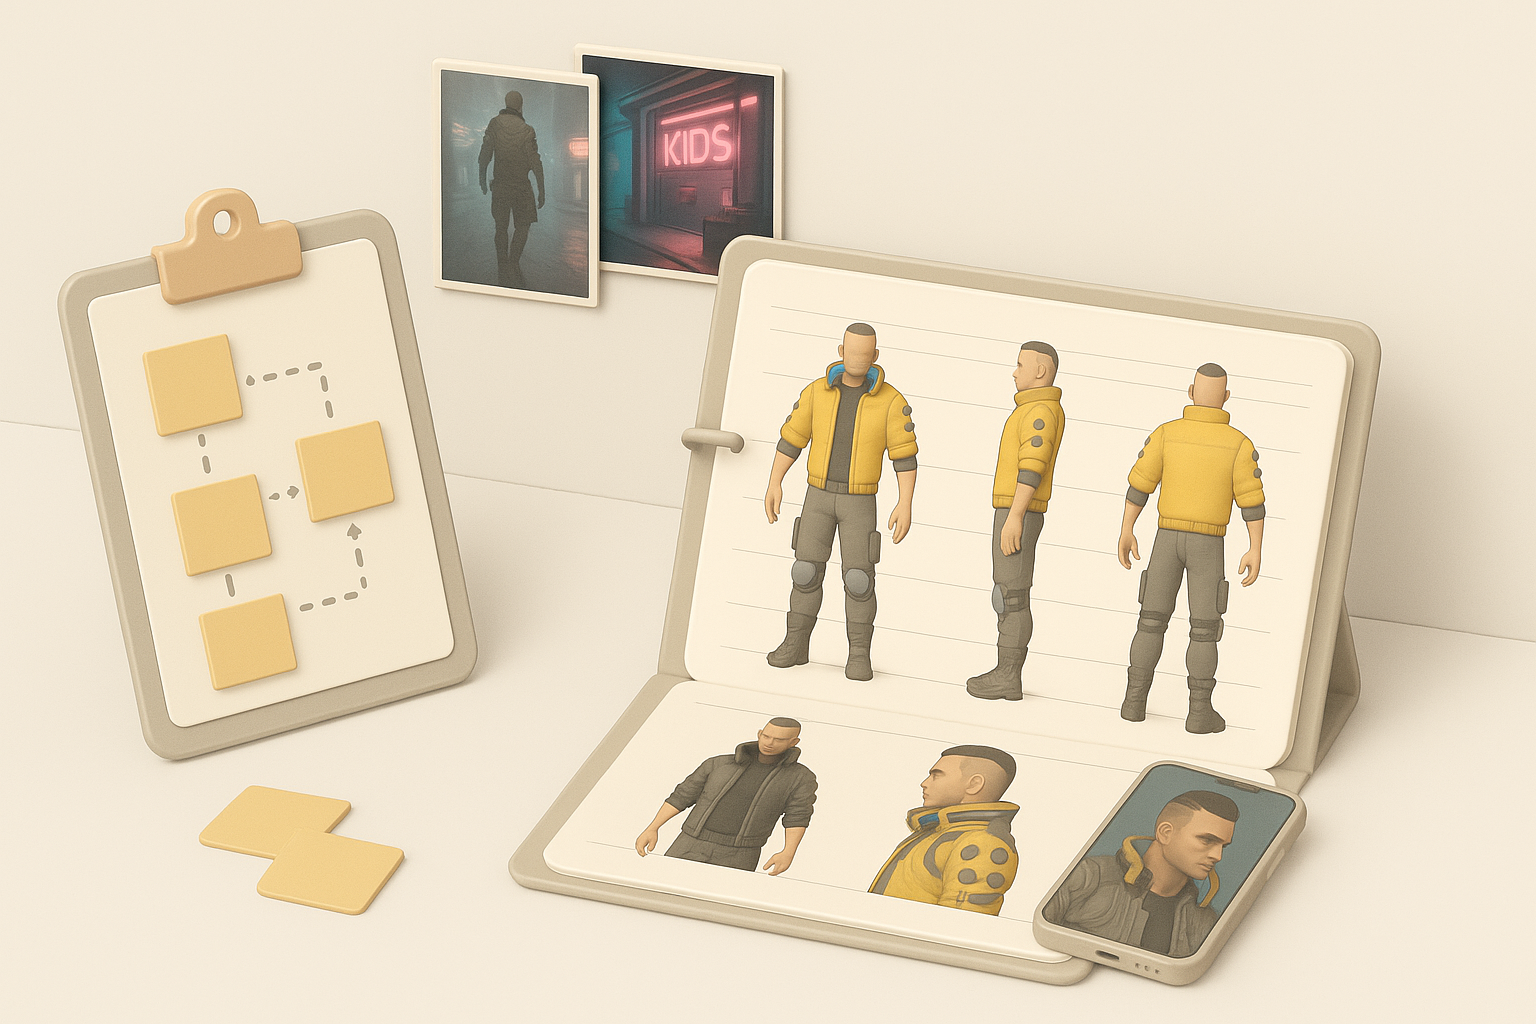
How I Collect Visual References
I start every project by building a comprehensive reference board. My approach:
- Pull concept art, screenshots, and artwork from Cyberpunk 2077 and related media
- Break down references by asset type (characters, props, environments)
- Annotate key design elements: color palettes, surface details, lighting
Pro tip: I use high-res images and in-game photomode shots to capture material details and lighting scenarios.
Defining Scope and Style Consistency
Before modeling, I define the scope and set visual guidelines:
- List required assets and their intended use (hero, background, modular)
- Establish a style guide for shapes, silhouettes, and material treatment
- Regularly compare WIPs to the reference board to avoid style drift
Checklist:
- Reference board complete
- Asset list scoped
- Style guide documented
3D Modeling Workflow: From Concept to Base Mesh
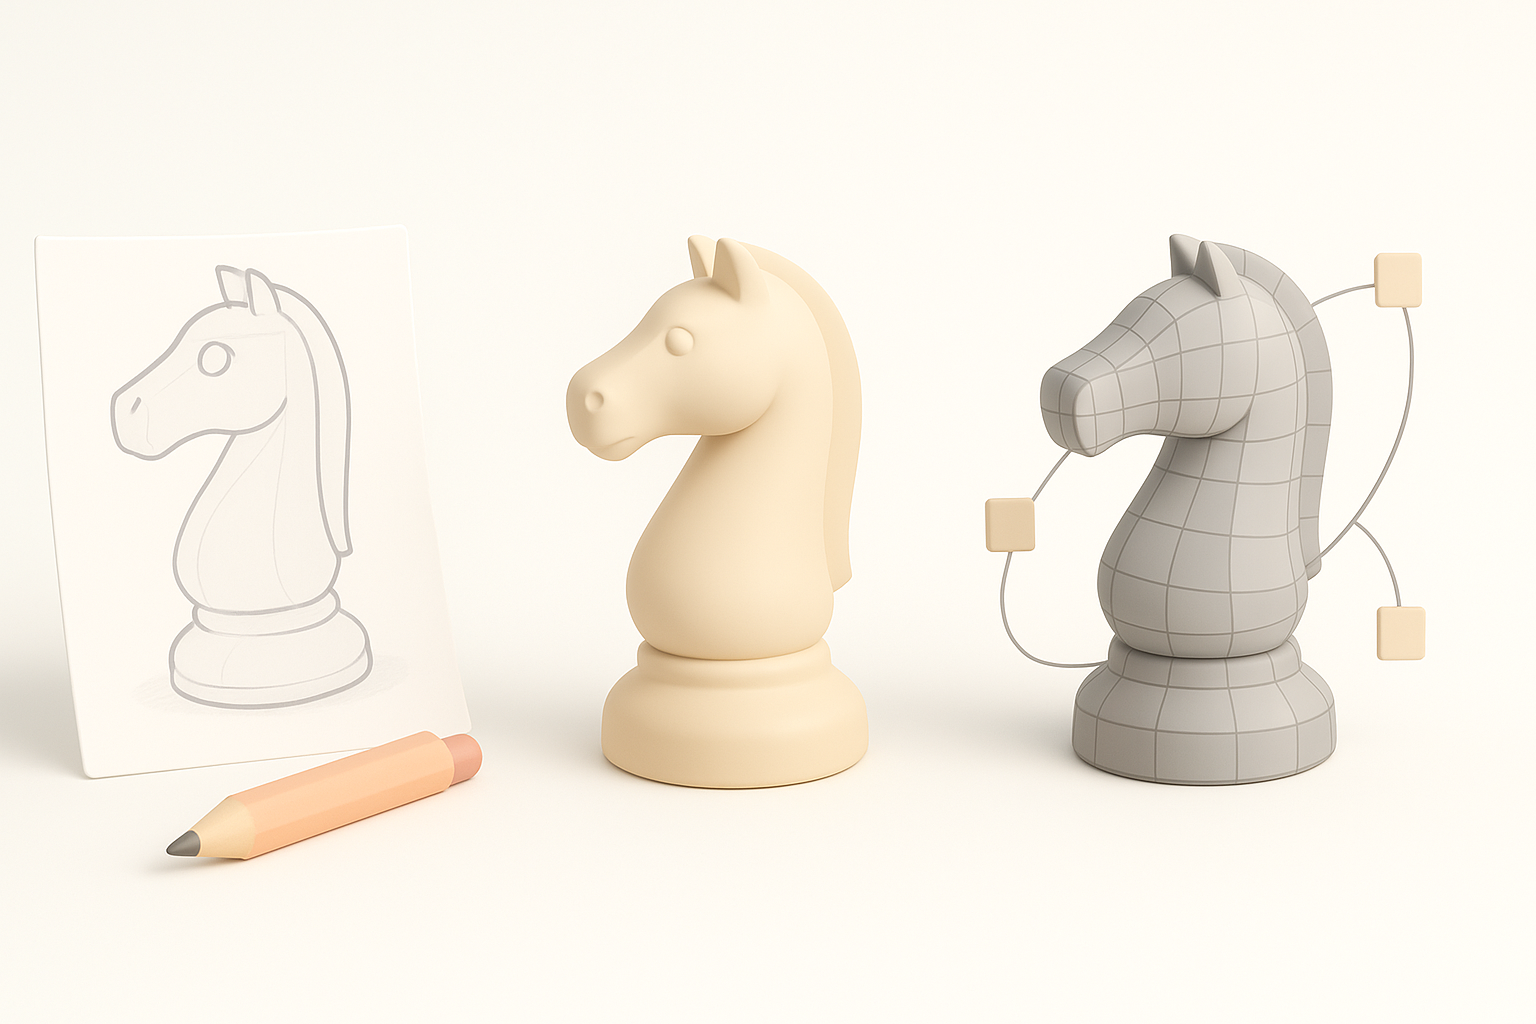
Blocking Out the Main Shapes
I always begin with simple blockouts to nail proportions and silhouette:
- Use primitives to establish main forms
- Focus on the overall massing and avoid detail overload
- Quickly iterate—Tripo helps me generate base meshes from sketches or text prompts for rapid exploration
Refining Details and Maintaining Cyberpunk Aesthetics
Once the base mesh feels right, I move to refinement:
- Add secondary details: panels, cables, hard surface elements
- Incorporate asymmetry and layered geometry for a lived-in look
- Regularly check the model against references for authenticity
Pitfall: Don’t get lost in micro-details too early—stay focused on the asset’s role and visibility.
Texturing and Materials: Achieving the Cyberpunk Look
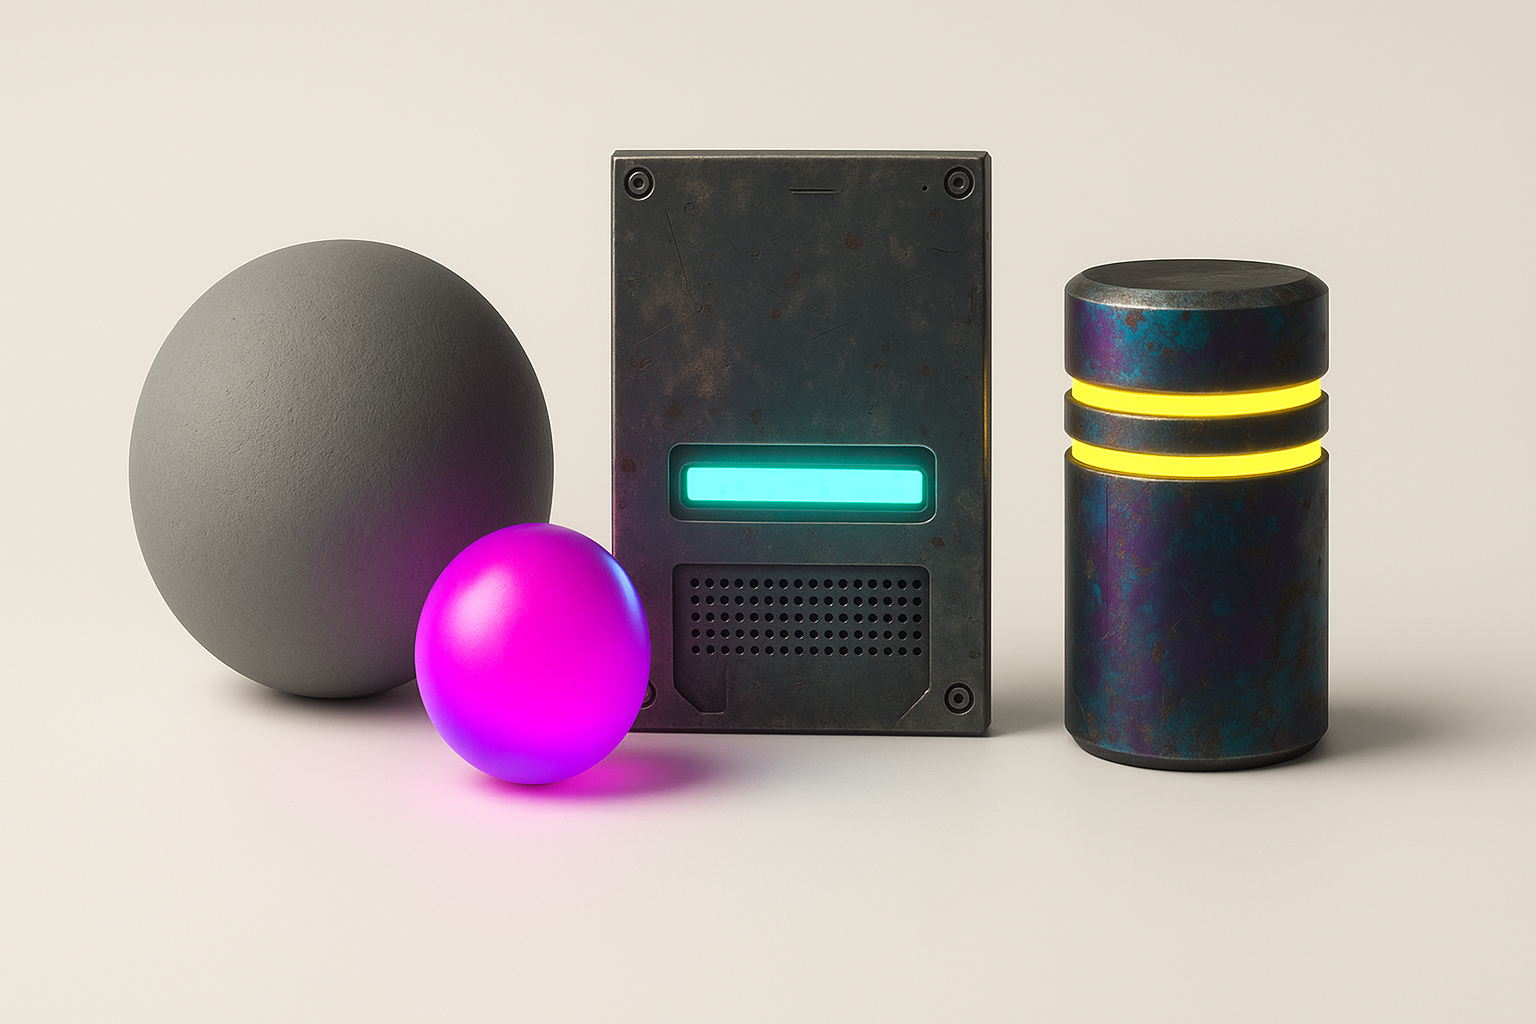
Best Practices for PBR Texturing
For cyberpunk assets, physically-based rendering (PBR) is essential:
- Bake high-to-low poly maps (normal, AO, curvature)
- Use smart masks and generators for edge wear, dirt, and grime
- Keep albedo, metalness, and roughness maps organized and consistent
Tip: I use Tripo’s auto-texturing as a starting point, then fine-tune materials manually for hero assets.
Tips for Neon, Metal, and Holographic Effects
Cyberpunk style demands bold material effects:
- Neon: Use emissive maps with careful color calibration (avoid over-brightening)
- Metal: Layer procedural scratches and fingerprints for realism
- Holograms: Combine additive transparency with animated textures for dynamic effects
Checklist:
- Emissive maps set up
- Metallic/roughness balanced
- Holographic shaders tested in-engine
Retopology, UVs, and Optimization for Real-Time Use
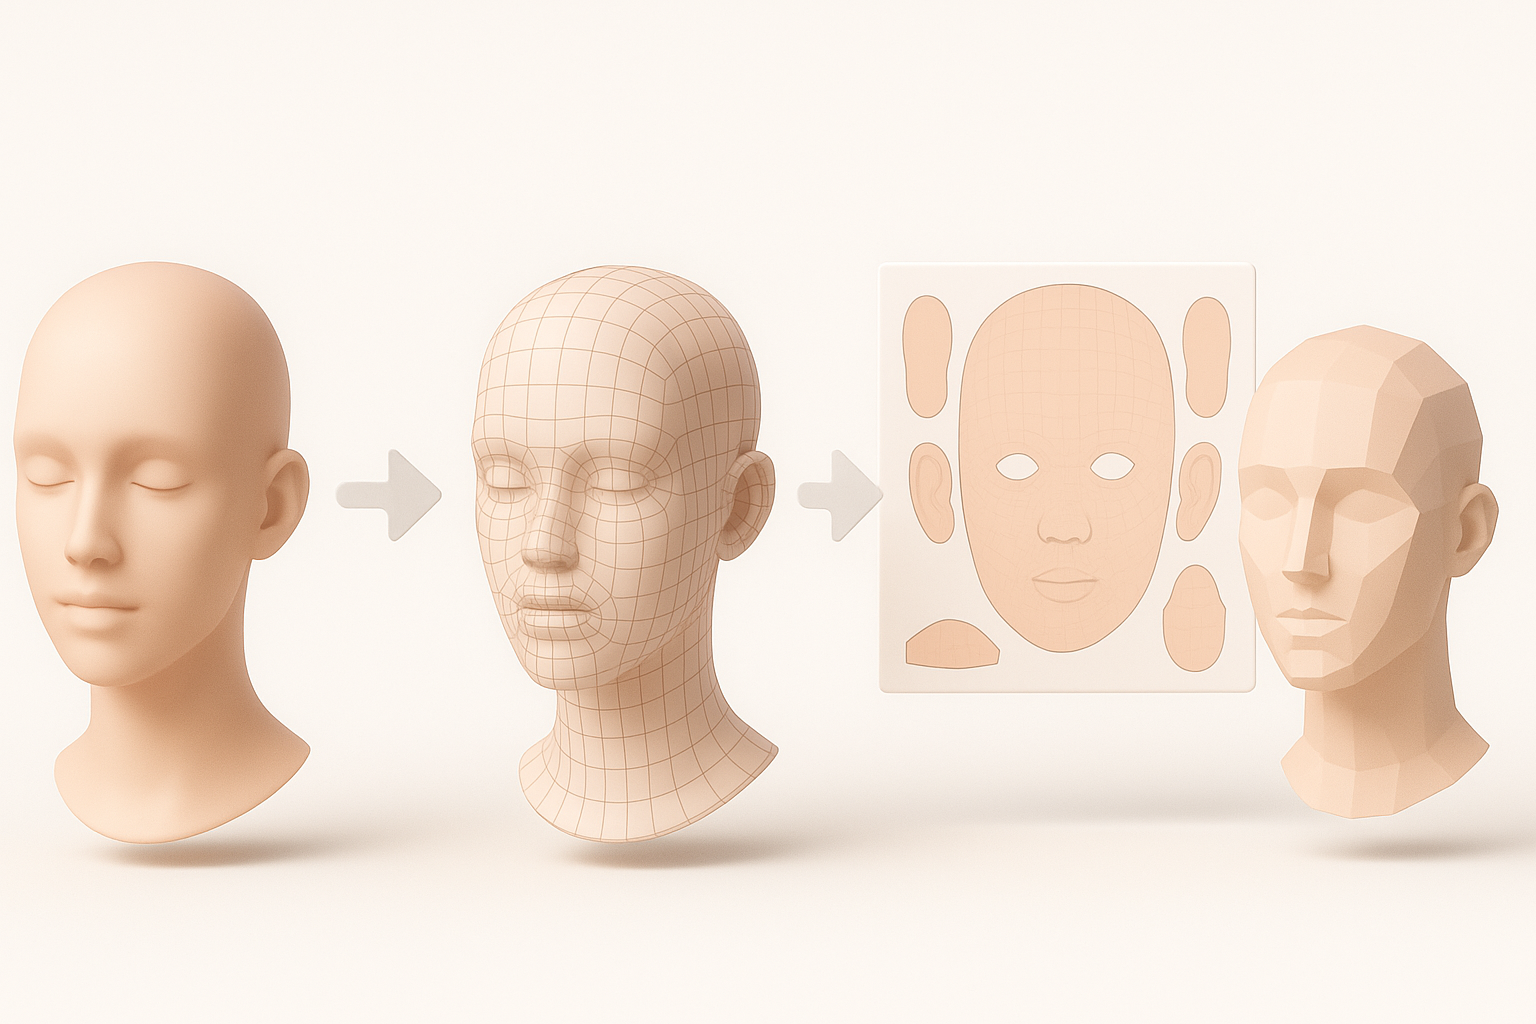
My Approach to Clean Retopology
Optimized topology is non-negotiable for real-time assets:
- Retopologize after sculpting or using Tripo’s auto-retopo for speed
- Prioritize edge flow in deformation zones (joints, faces)
- Target polycount based on asset importance (hero vs. background)
UV Unwrapping and Texture Optimization
Efficient UVs save memory and improve texture quality:
- Unwrap with minimal seams and distortion
- Stack UV islands for repeating elements when possible
- Pack UVs tightly, but avoid overlaps on unique surfaces
Pitfall: Overlapping UVs can cause lighting and texture artifacts—always check with a checker map.
Rigging and Animation for Cyberpunk Characters and Assets
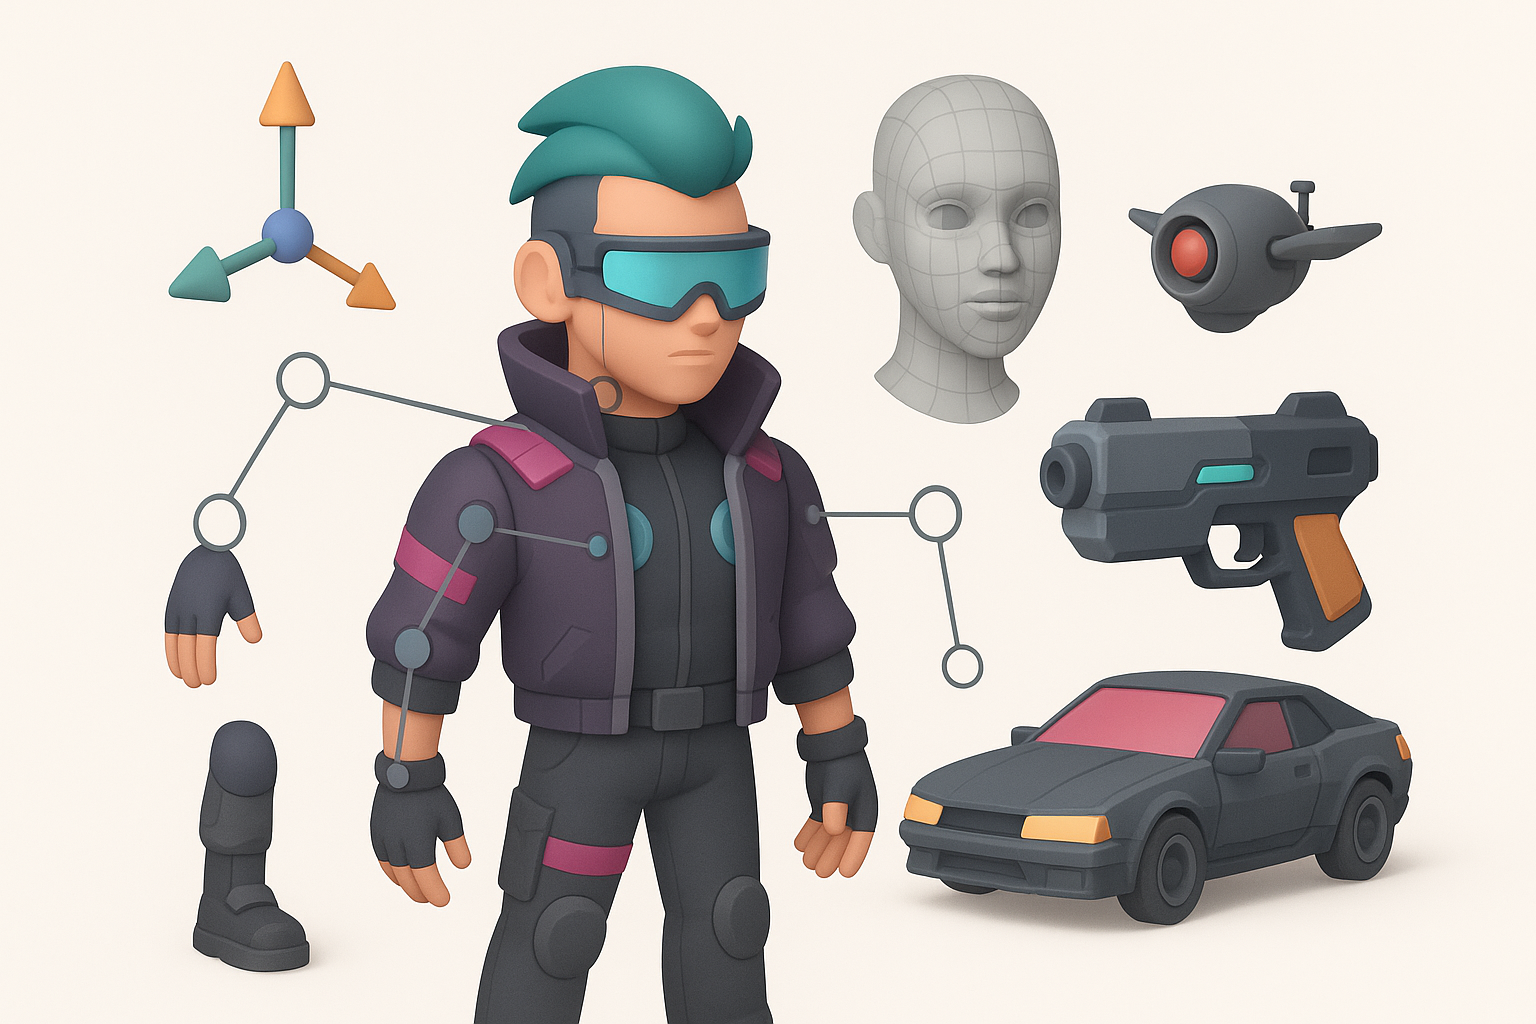
Efficient Rigging Techniques
For characters and moving assets, I favor modular, reusable rigs:
- Use auto-rigging tools in Tripo for quick setup
- Manually tweak weights and controllers for complex deformations
- Keep skeletons simple for props, more advanced for main characters
Animating with Style and Functionality
Cyberpunk animation is dynamic and expressive:
- Block out key poses, then refine timing and secondary motion
- Add subtle mechanical movements to props (e.g., pistons, screens)
- Preview animations in-engine for final adjustments
Exporting, Testing, and Integrating Models in Engines

Export Settings and Compatibility Tips
Exporting for game engines requires attention to detail:
- Use FBX or GLTF formats for compatibility
- Apply transforms and freeze scales before export
- Check naming conventions and material assignments
Tip: Tripo’s export presets help avoid common pitfalls.
Testing Models in Game Engines
Always test assets in their target environment:
- Import into Unreal, Unity, or your chosen engine
- Check for lighting, scale, and material fidelity
- Iterate based on in-engine performance and visual feedback
AI-Powered Tools and Alternative Methods in My Workflow

How I Use AI for Faster 3D Creation
AI tools like Tripo have become a core part of my workflow:
- Generate base meshes and materials from text or sketches
- Use auto-segmentation and retopology to save time
- Batch process props for rapid prototyping
Comparing Manual and AI-Assisted Approaches
While AI speeds up repetitive tasks, I still rely on manual methods for:
- Hero assets and final polish
- Custom topology and unique materials
- Creative problem-solving where AI falls short
Conclusion: The best results come from blending AI assistance with hands-on artistry.
Common Challenges and My Solutions
Troubleshooting Workflow Bottlenecks
Typical pain points and my fixes:
- Slow iteration: Use AI tools for base generation, then refine
- Style drift: Regularly review WIPs against references and style guides
- Texture issues: Test maps on simple shaders before complex setups
Quality Control and Final Polish
Before delivery, I always:
- Run through a final asset checklist (normals, UVs, materials, animation)
- Test in-engine under different lighting conditions
- Get peer feedback for fresh eyes on style and technical quality
Final tip: Never skip the last round of polish—small tweaks can elevate a good asset to great.
Keywords: cyberpunk 2077 3d model, 3d modeling workflow, game asset creation, texturing techniques, ai 3d tools, tripo ai
Meta Description: Discover my hands-on workflow for creating Cyberpunk 2077 3D models, covering planning, modeling, texturing, optimization, and AI-powered tools for best results.


