Creating and Optimizing an F-16 3D Model: Expert Workflow
скачать 3d модели для chicken gun
Building a production-ready F-16 3D model requires a blend of solid modeling fundamentals, careful attention to detail, and smart use of AI-powered tools. In my experience, the fastest path to high-quality results is a hybrid workflow: start with strong reference material, leverage AI for rapid shape generation, then refine manually for accuracy and realism. This guide is for 3D artists, game developers, and technical directors who want a streamlined, repeatable process for creating complex aircraft models, from concept to animation.
Key takeaways
- Gather high-quality references before modeling; accuracy starts here.
- Block out main shapes first, then refine details iteratively.
- Use AI tools like Tripo for fast prototyping and segmentation.
- Prioritize clean topology and efficient UVs for optimal results.
- Rig and animate with modular controls for flexibility.
- Always check export settings for your target platform.
Overview of F-16 3D Model Creation
Key features and reference gathering
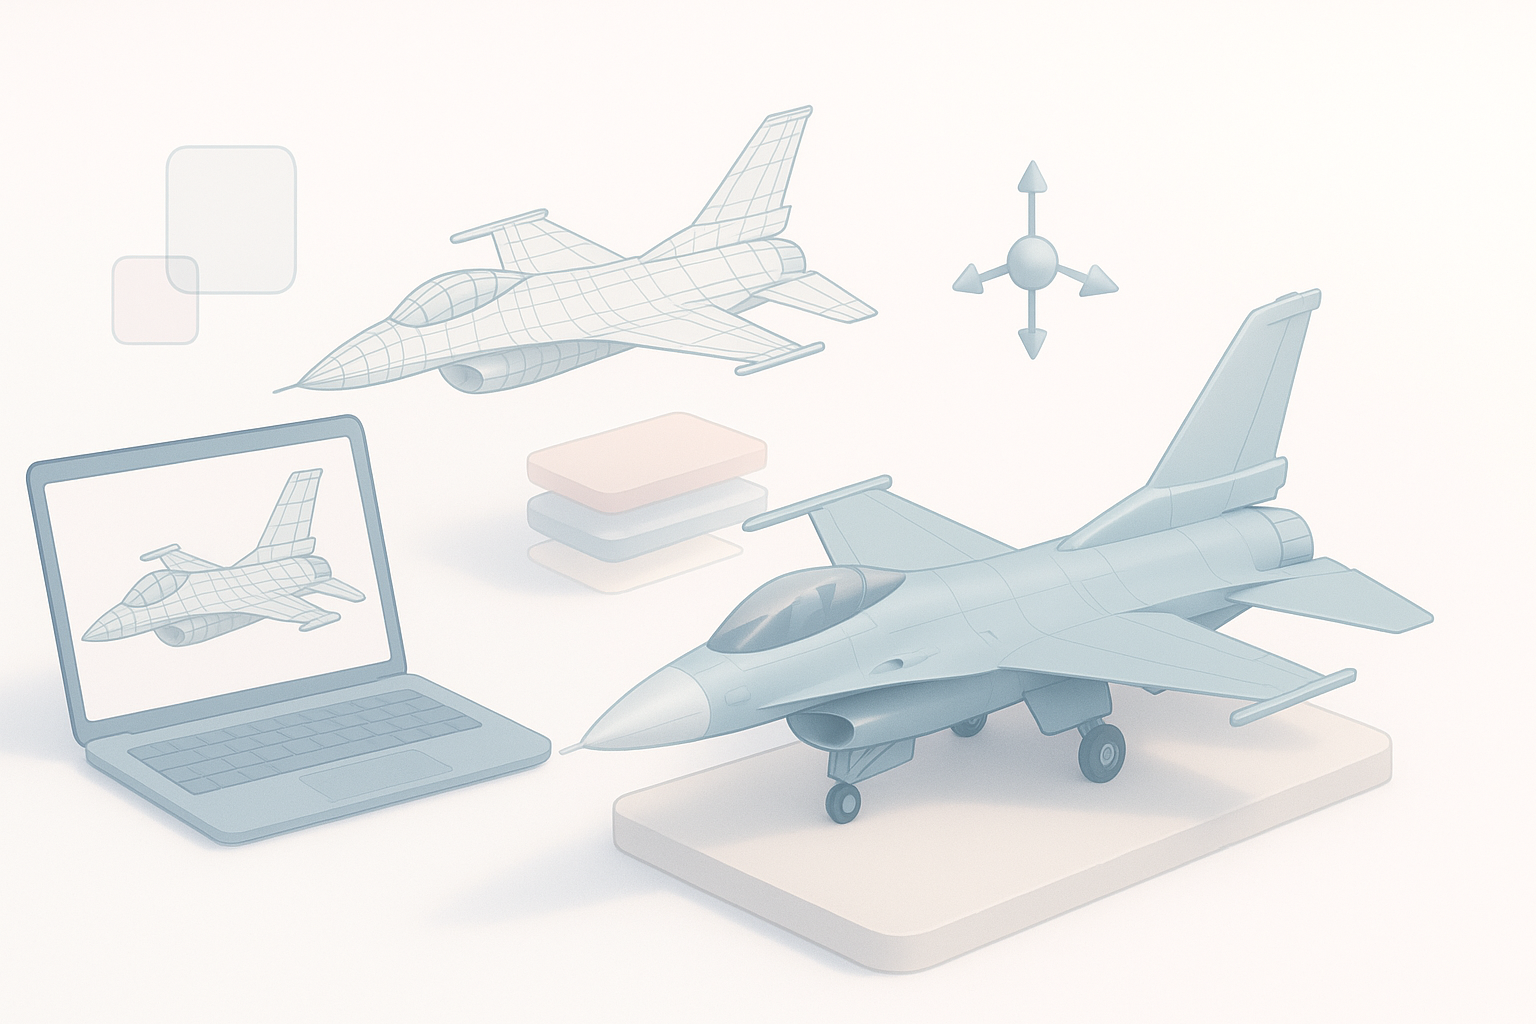
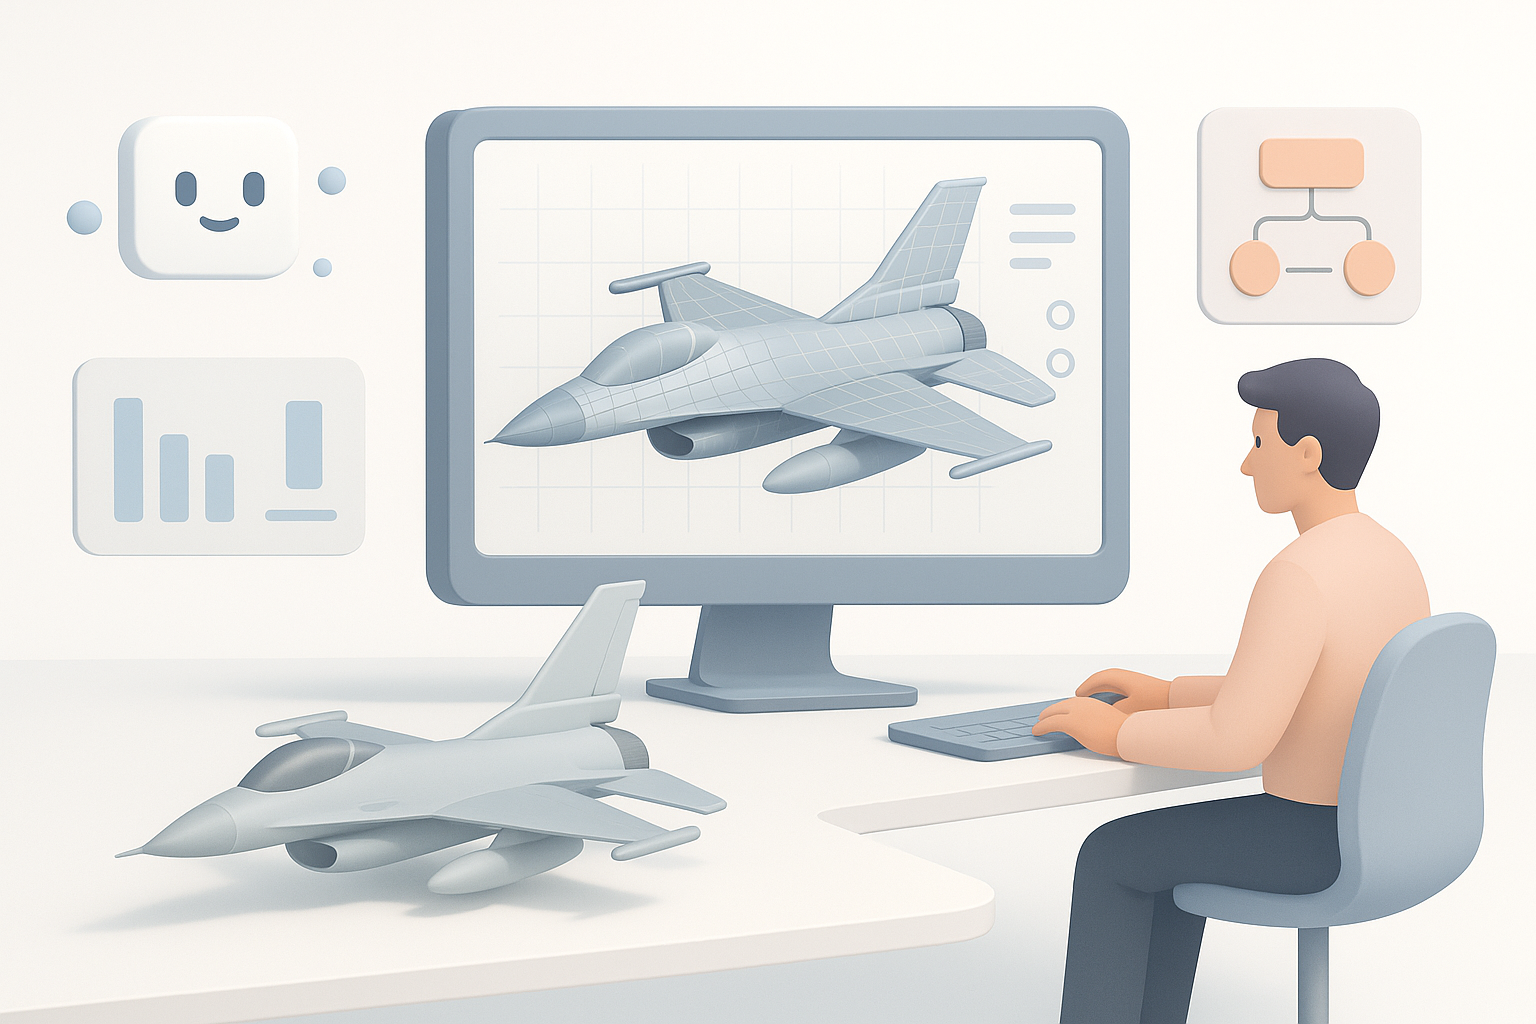
In my workflow, I always start with reference gathering. For the F-16, I collect blueprints, side/top/front views, and high-resolution photos—ideally from official sources or enthusiast forums. Focus on key features like the fuselage shape, cockpit canopy, wing profile, landing gear, and tail assembly. I organize these in a reference board for quick access during modeling.
Checklist:
- Orthographic blueprints (side, top, front)
- Close-up photos of cockpit, landing gear, intakes
- Paint schemes and decals for texturing
Executive summary: What works best
From experience, the most efficient F-16 builds combine rapid AI-assisted prototyping with hands-on refinement. AI tools help block out complex shapes and handle repetitive tasks (like segmentation and retopology), but manual passes are essential for accuracy and realism. I’ve found that a hybrid approach consistently delivers production-ready assets with less iteration.
Step-by-Step Guide to Modeling the F-16
Blocking out the main shapes
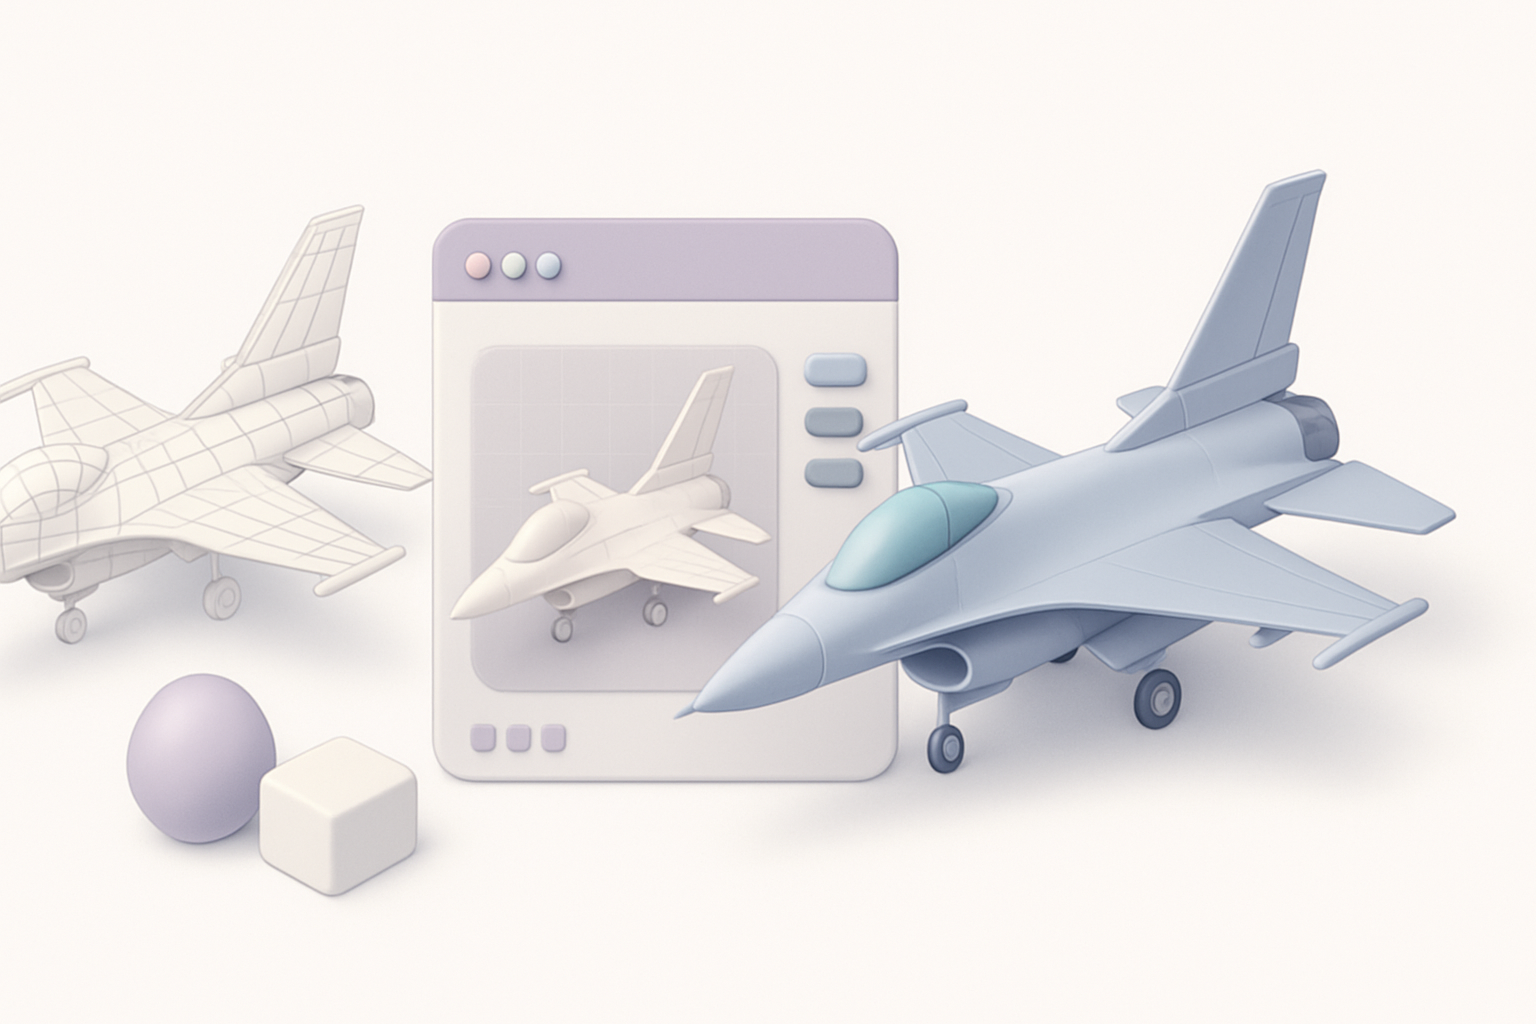
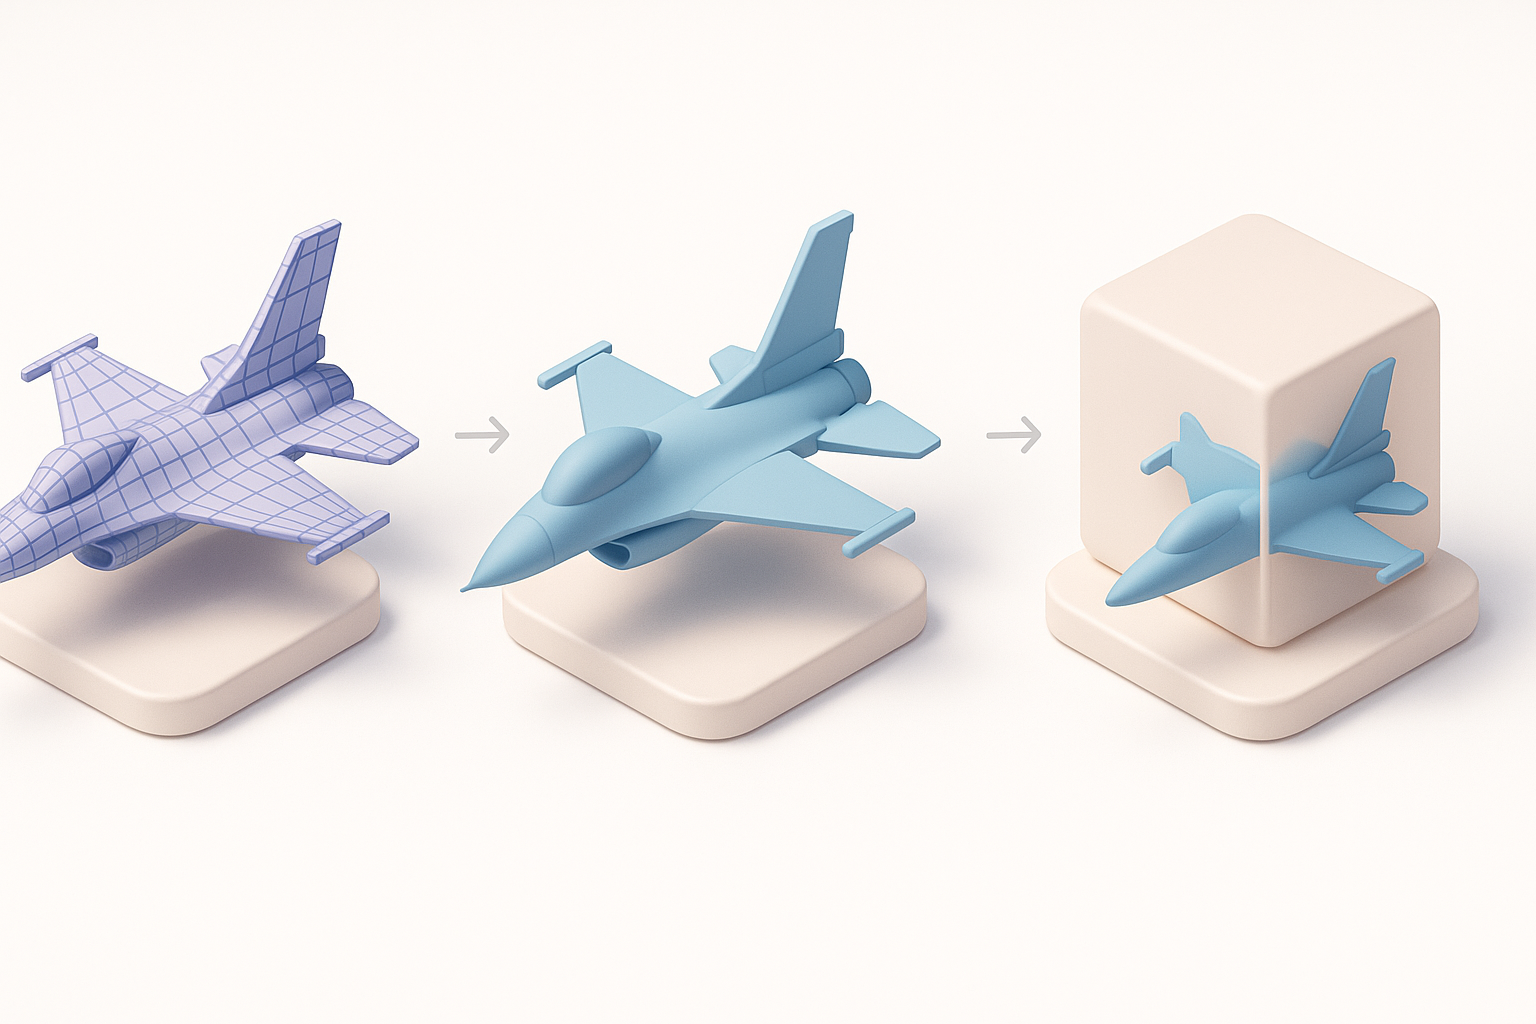
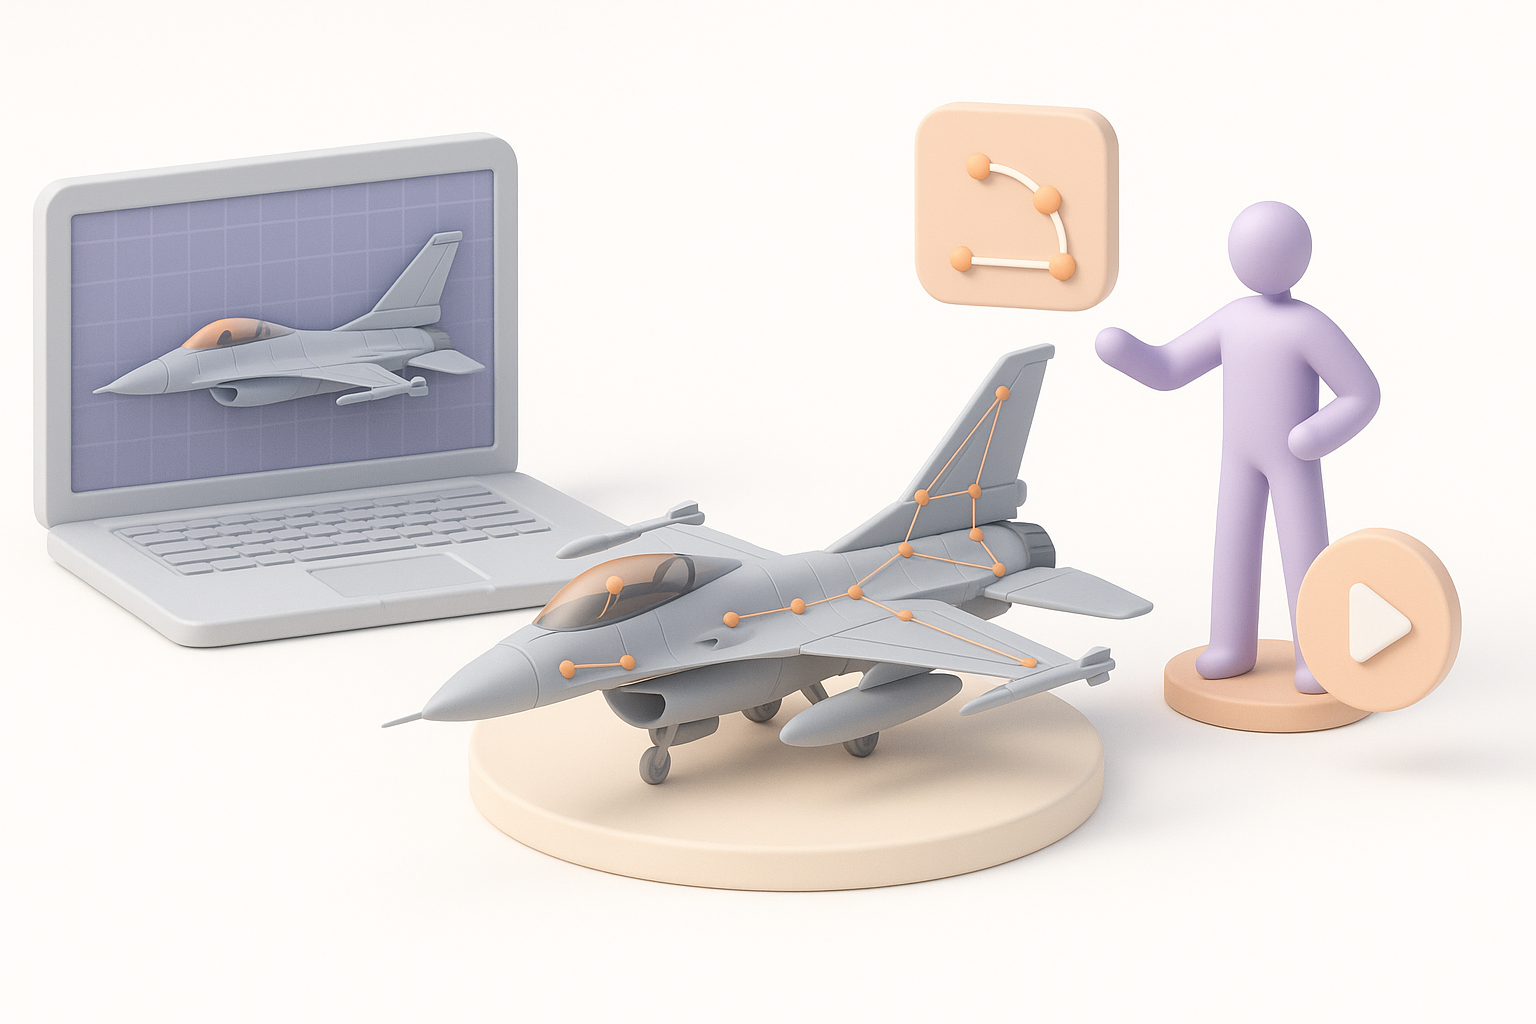
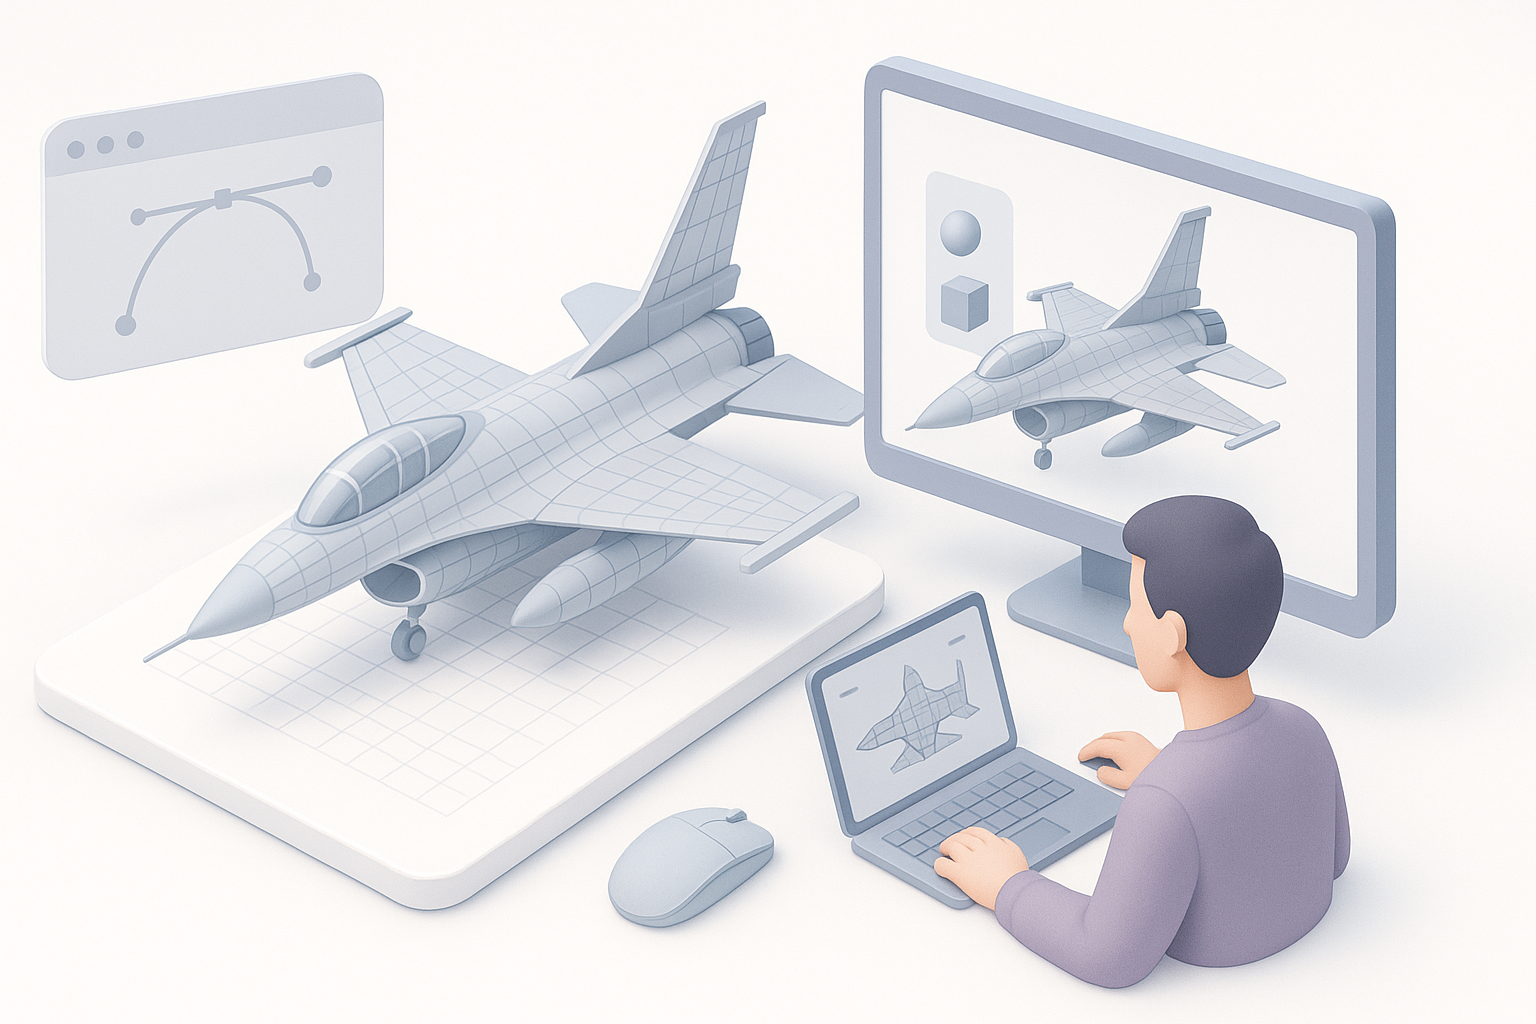
I start by blocking out the primary volumes: fuselage, wings, stabilizers, and canopy. Whether using traditional modeling or AI-generated base meshes, I focus on correct proportions before adding detail. When using Tripo, I input reference images and a brief text prompt to generate a rough base model, which I then adjust in my DCC tool.
Steps:
- Align reference images in the viewport
- Create simple primitives (cylinder for fuselage, planes for wings)
- Use AI tool for initial mesh generation (if desired)
Adding details and refining geometry
Once the blockout is solid, I incrementally add detail—intakes, panel lines, landing gear bays, and cockpit. I rely on subdivision modeling for smooth surfaces and edge loops for hard-surface definition. Small features, like antennas and pitot tubes, are modeled separately for control.
Tips:
- Work non-destructively (modifiers, layers)
- Frequently compare against references
- Use symmetry and instancing for mirrored parts
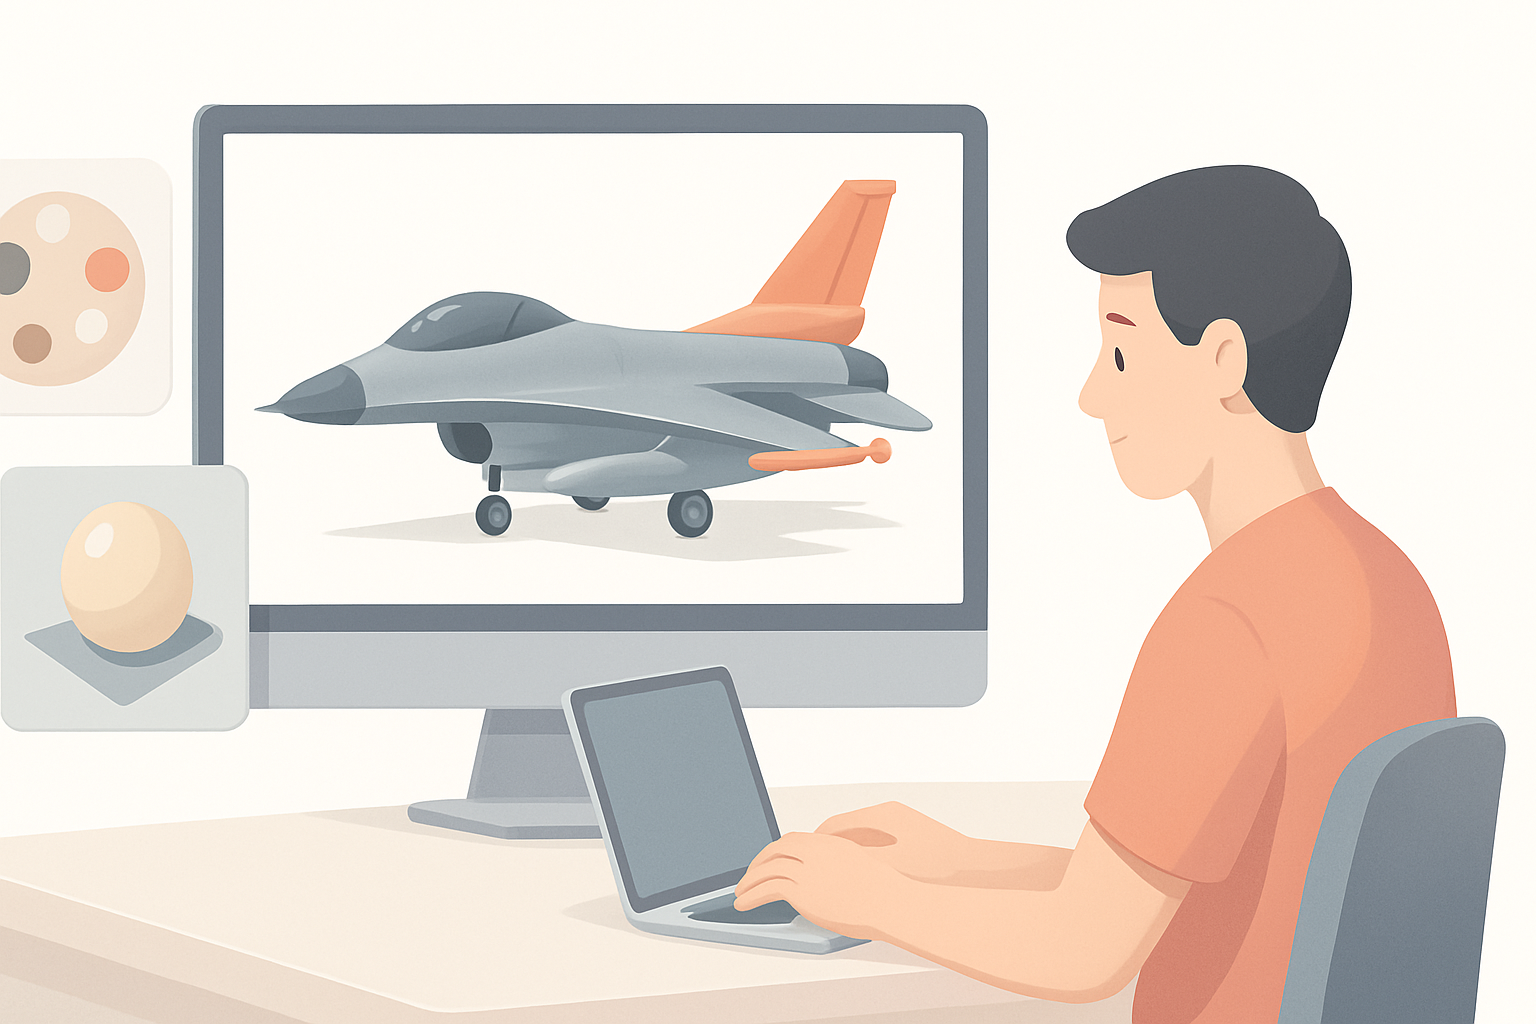
Texturing and Material Best Practices
UV unwrapping and texture painting
Clean UVs are critical for realistic texturing. I unwrap the model in logical sections (fuselage, wings, cockpit), minimizing seams in visible areas. I use AI-powered segmentation in Tripo to accelerate UV generation, then export UVs for painting in Substance or similar tools.
Checklist:
- Avoid stretching/distortion in UVs
- Pack UV islands efficiently
- Test with checker textures before painting
Applying realistic materials and decals
For realism, I create PBR materials—aluminum, glass, rubber—using photo references. Decals (insignias, warning labels) are applied as separate texture layers or geometry decals for flexibility. I pay special attention to roughness and metallic maps to capture the F-16’s varied surface finishes.
Tips:
- Use high-res decal textures
- Layer dirt and wear for authenticity
- Preview materials under different lighting
Retopology, Optimization, and Export
Efficient retopology techniques
After detailing, I retopologize for clean, animation-ready geometry. Tripo’s auto-retopology often gives me a strong starting point, but I always inspect and tweak edge flow around moving parts (e.g., landing gear, control surfaces). I target a balance between polycount and silhouette fidelity.
Pitfalls to avoid:
- Dense, uneven mesh flow (hard to animate)
- Ngons and poles in deformation zones
Export settings for different platforms
Before export, I triangulate the mesh if needed and bake normal/ao maps. I select export presets based on the target engine (FBX for Unity/Unreal, GLTF for web/XR). I check scale, orientation, and material assignments to avoid surprises downstream.
Checklist:
- Freeze transforms, apply scale
- Export with correct up-axis (Y or Z)
- Test import in target platform
Rigging and Animation for the F-16
Setting up control rigs for moving parts
I rig the F-16 modularly—separate controls for landing gear, flaps, rudder, and canopy. I use simple IK/FK setups for predictable animation and constrain pivots to match real-world movement. Tripo’s auto-rigging helps with initial setup, but I always fine-tune weights and pivots manually.
Tips:
- Name bones and controls clearly
- Test each moving part individually
- Build custom attributes for animation triggers
Animating flight sequences
For flight animations, I block out basic maneuvers (takeoff, banking, landing) with reference to real F-16 footage. I use animation curves for smooth transitions and add subtle secondary motion (wing flex, gear bounce) for realism.
Steps:
- Keyframe main flight poses
- Refine timing and spacing
- Add camera shake for dynamic shots
AI-Powered Tools and Workflow Enhancements
How I use Tripo for rapid prototyping
In my pipeline, Tripo accelerates the concept-to-blockout phase. I input a text prompt and reference images, and Tripo generates a base mesh with logical segmentation. This lets me skip repetitive setup and focus on creative decisions. I also use Tripo for quick retopology and initial UVs.
Practical tips:
- Use clear, specific prompts for best results
- Always review and clean up AI outputs
- Combine AI segmentation with manual refinement
Integrating AI with traditional modeling
I treat AI as a collaborator, not a replacement. After AI generates the base, I refine geometry, add hand-modeled details, and polish UVs/materials. This hybrid approach preserves accuracy and creative control while saving time on routine tasks.
Comparison: Manual vs. AI-Assisted F-16 Modeling
Speed, quality, and flexibility
Manual modeling offers full control and precision, but it’s time-consuming—especially for complex shapes like the F-16’s fuselage. AI-assisted workflows (like Tripo) dramatically speed up blockout and repetitive tasks, but may require more cleanup. For production, I prefer AI-assisted starts with manual refinement for best results.
Summary table:
| Approach | Speed | Quality | Flexibility |
|---|---|---|---|
| Manual | Slow | High | Maximum |
| AI-Assisted Hybrid | Fast | High | High |
When to choose each approach
For tight deadlines or large asset libraries, I lean on AI tools. For hero assets or projects demanding exact accuracy, I invest more time in manual refinement. I always evaluate the project’s needs and team skillset before choosing a workflow.
Tips, Troubleshooting, and Lessons Learned
Common pitfalls and how I avoid them
- Inaccurate references: Cross-check multiple sources.
- Messy topology: Always inspect AI-generated meshes.
- Texture seams: Plan UVs to hide seams in less visible areas.
- Rigging errors: Test all controls before animation.
- Export issues: Verify scale and axis orientation before delivery.
My top recommendations for creators
- Gather the best references you can find—accuracy starts here.
- Use AI tools to accelerate, not replace, your creative judgment.
- Always review and refine auto-generated results.
- Test your model in the target engine early.
- Save incremental versions—backtracking saves headaches.
By combining strong fundamentals with smart AI tool use, I consistently deliver high-quality, production-ready F-16 3D models with less wasted effort. This workflow has served me well across games, film, and XR—adapt it to your needs and keep iterating for even better results.
