How I Create a Spongebob 3D Model: Expert Workflow & Tips
Creating a Spongebob 3D model is a fun challenge that tests both technical skill and artistic interpretation. Over the years, I’ve refined my workflow to balance speed, quality, and production-readiness—especially when using AI-powered tools to streamline the process. This guide is for artists, game devs, and anyone needing a polished cartoon character fast. Below, I share my step-by-step workflow, practical tips, and lessons learned, so you can confidently build your own Spongebob model for games, XR, or film.
Key takeaways:
- Start with strong reference and clear style direction
- Block out shapes before detailing; prioritize clean topology
- Use AI tools for segmentation, retopology, and texturing to save time
- Rig and animate with simple setups for cartoon characters
- Export optimized models for your target platform (game, film, XR)
- AI-powered platforms can massively reduce manual labor and technical hurdles
Executive Summary: Key Takeaways for Spongebob 3D Modeling
What makes a successful Spongebob 3D model
A great Spongebob model captures his iconic proportions, expressive face, and signature textures. For production use, clean geometry, efficient UVs, and stylized materials are essential. In my experience, maintaining the character’s cartoon charm while ensuring technical readiness is the winning formula.
Summary of recommended tools and workflows
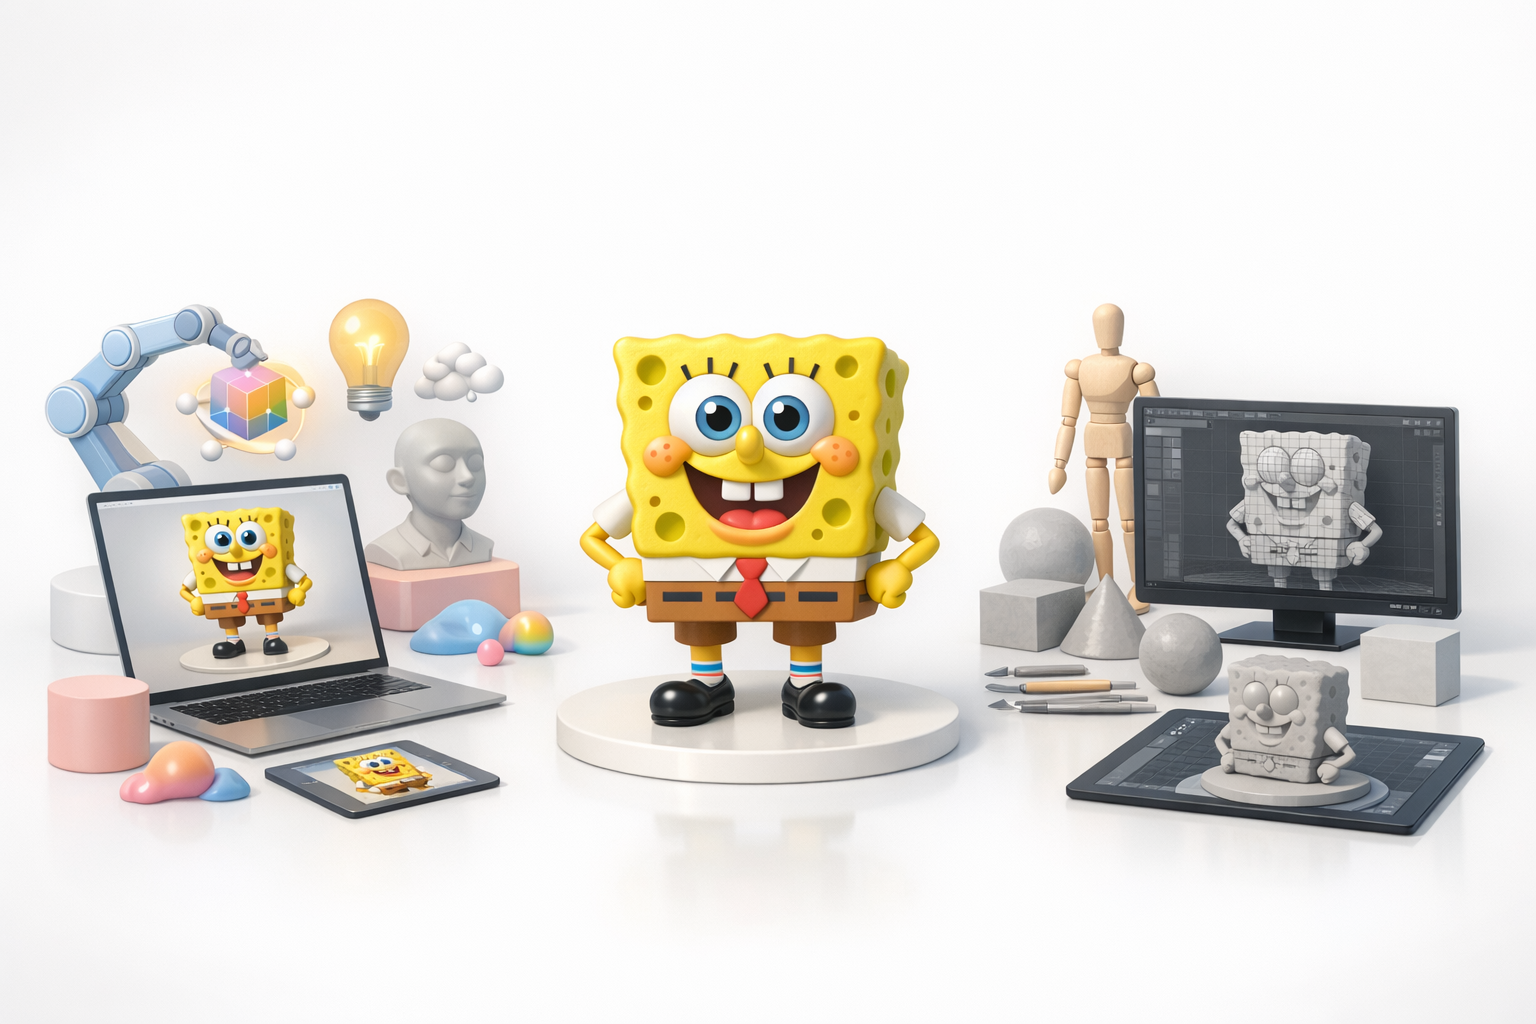
I rely on a mix of AI-powered platforms and traditional 3D software. For fast iterations and segmentation, I use Tripo AI. For manual tweaks, sculpting, and animation, I often supplement with conventional tools. This hybrid approach delivers both speed and control.
Planning and Reference Gathering for Spongebob 3D Models
Choosing the right references and concept art
I start by collecting high-quality images from official Spongebob media: front, side, and 3/4 views. I also grab turnaround sheets and screenshots for details (clothing, facial expressions, accessories). Good reference prevents guesswork and ensures accuracy.
Checklist:
- Front/side/back images
- Turnaround sheets
- Close-ups of face and hands
- Style guide for colors and proportions
Defining style: cartoon vs realistic approaches
Decide early if your Spongebob will be pure cartoon, semi-realistic, or hyper-realistic. For most projects, I stick to the classic cartoon style—simple shapes, flat colors, exaggerated features. Realistic approaches require more complex textures and shaders.
Pitfalls:
- Mixing styles can confuse the look
- Over-detailing can ruin cartoon appeal
Step-by-Step Workflow: Creating a Spongebob 3D Model
Blocking out the basic shape and proportions
I begin by roughing out Spongebob’s body as a box, then add limbs and facial features. Using AI-powered tools, I can quickly generate base meshes from sketches or text prompts, which speeds up the initial phase.
Steps:
- Input sketch or text prompt into AI tool
- Adjust generated mesh for correct proportions
- Add basic geometry for arms, legs, and face
Detailing, segmentation, and retopology best practices
Once the base is set, I segment parts (body, clothes, face) for easier texturing and rigging. AI-assisted retopology ensures clean, animation-ready geometry. I check edge loops around joints and facial features for deformation.
Tips:
- Use auto-segmentation for faster material assignment
- Manually tweak topology if needed for animation
- Keep polycount low for real-time use, higher for film
Texturing, Rigging, and Animation for Spongebob
Applying textures and materials for cartoon appeal
Cartoon characters need bold, clean textures. I use AI tools to auto-generate UVs and apply stylized materials—yellow sponge body, crisp clothing, expressive eyes. For extra polish, I hand-paint details in a 3D painting app.
Mini-checklist:
- Flat colors with subtle gradients
- Simple patterns for sponge holes
- Clean UV layout for easy edits
Rigging and simple animation tips for character models
Rigging Spongebob is straightforward: a basic skeleton with controls for arms, legs, and face. AI-assisted rigging speeds up setup, but I always test deformations manually. For cartoon animation, keep movements exaggerated and snappy.
Pitfalls:
- Overcomplicating rigs for simple characters
- Skipping deformation tests leads to broken poses
Production-Ready Export and Integration
Exporting for games, film, and XR
I export models in formats suited to the target platform—FBX for games, OBJ for film, GLTF for XR. AI tools help optimize mesh and textures for performance. Always check scale and coordinate systems before integration.
Checklist:
- Export in correct format
- Optimize mesh (decimate if needed)
- Test in game engine or XR viewer
Ensuring compatibility and optimization
I validate UVs, check texture sizes, and run models through automated QA tools. For real-time projects, I keep polycount and texture resolution in check. For film, I allow higher detail but still avoid unnecessary complexity.
Tips:
- Always preview in target platform
- Bake lighting and AO for extra realism
Comparing AI-Powered and Traditional 3D Modeling Tools
Benefits of AI-powered platforms for character creation
AI tools like Tripo AI automate segmentation, retopology, and texturing, saving hours of manual work. For rapid prototyping or tight deadlines, I rely on these features to get production-ready results fast.
Pros:
- Speed: Models in minutes, not hours
- Accessibility: No need for deep technical skills
- Consistency: Automated workflows reduce errors
When to use alternative methods and manual workflows
For highly customized models or unique styles, manual sculpting and texturing still have their place. If AI output needs refinement, I switch to traditional tools for detailed work.
Pitfalls:
- Over-reliance on AI can limit creative control
- Some edge cases require manual fixes
Personal Lessons Learned: My Best Practices for Spongebob 3D Models
Common challenges and how I solve them
- Proportion drift: I regularly check against reference images to keep shapes accurate.
- Texture stretching: I fix UVs early and use auto-unwrap features.
- Rigging errors: Always test deformations with extreme poses.
Tips for speeding up the workflow and improving quality
- Use AI tools for base mesh, segmentation, and retopology
- Batch process textures and materials
- Keep reference visible at all times
- Preview in the target engine before final export
Final thoughts:
Combining AI-powered platforms with manual tweaks delivers fast, high-quality Spongebob models. Stay organized, rely on strong references, and don’t skip testing—these habits keep my workflow efficient and my results production-ready.


