How to Create a Spaceship 3D Model: Expert Workflow & Tips
Creating a spaceship 3D model has never been more accessible, thanks to AI-powered tools and streamlined workflows. In my experience, the most efficient approach combines solid planning, the right mix of manual and automated tools, and a practical understanding of texturing, retopology, and animation. Whether you’re a game developer, concept artist, or hobbyist, this guide walks you through each stage—from concept to export—sharing real-world tips and pitfalls I’ve learned along the way. The aim: help you deliver production-ready spaceship models without getting bogged down in technical hurdles.
Key takeaways
- Start with strong references and a clear style/function brief.
- Use AI-assisted modeling and texturing tools to save hours.
- Block out shapes first; details come later.
- Clean topology and UVs are crucial for animation and rendering.
- Export settings should match your target platform’s requirements.
- Avoid overcomplicating early stages—iterate quickly.
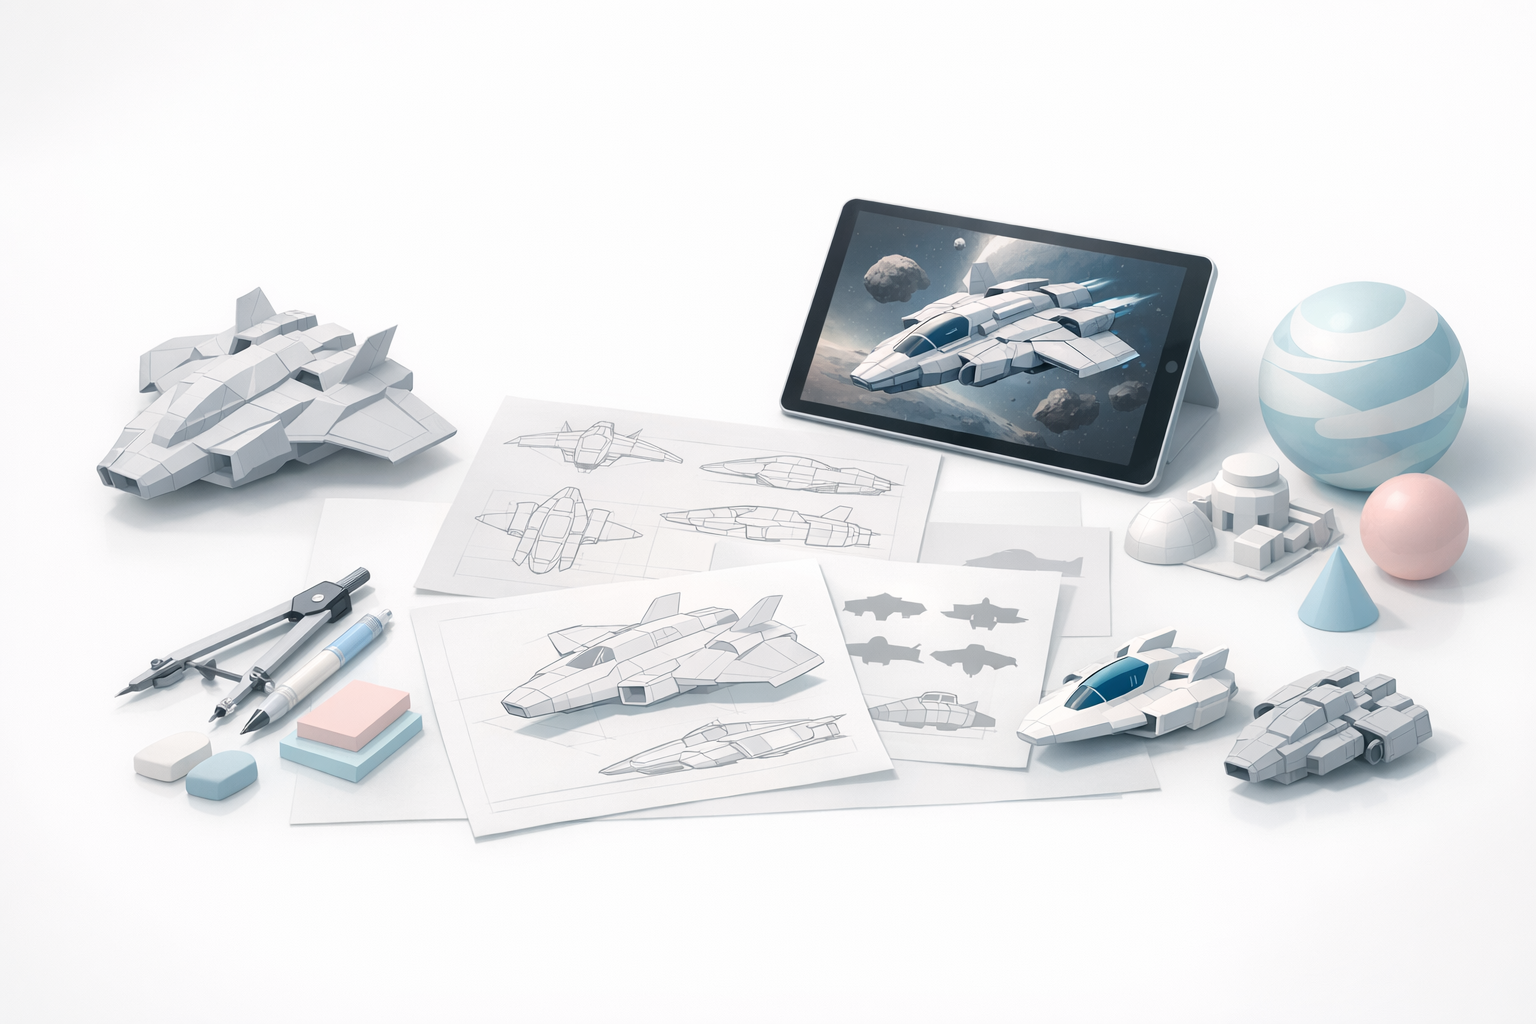
Planning and Conceptualizing Your Spaceship Model

Gathering References and Inspiration
In my workflow, I always begin by collecting a wide range of references—sci-fi art, real spacecraft, and industrial designs. I make mood boards using screenshots, sketches, and even quick AI-generated thumbnails. This phase is about exploring shapes, silhouettes, and visual themes.
Checklist:
- Pull images from movies, games, and concept art.
- Note down specific features (e.g., engines, cockpits).
- Sketch rough silhouettes to test ideas.
Defining Style, Scale, and Functionality
Before opening any 3D tool, I define the spaceship’s purpose (fighter, cargo, etc.), scale relative to a human, and the intended style (realistic, stylized, etc.). This clarity prevents endless revisions later.
Tips:
- Block out a human figure for scale reference.
- Write a one-line “mission statement” for the ship.
- Decide on a polygon budget if targeting games.
Choosing Tools and Setting Up Your Workflow
Selecting AI-Powered vs. Traditional 3D Tools
I typically use a mix of traditional DCCs and AI-powered platforms like Tripo for speed. For rapid prototyping, Tripo’s text/image/sketch input lets me generate a base mesh in seconds, which I then refine manually. For complex, custom shapes, I still rely on classic poly modeling.
When to use AI tools:
- Quick base mesh generation from concepts or sketches.
- Automatic texturing and retopology for time savings.
- Iterating on multiple design variations.
Optimizing Your Workspace for Efficiency
A well-organized workspace speeds up the process. I set up custom hotkeys, templates, and asset libraries (e.g., greebles, panels). Keeping tools and references within easy reach reduces friction.
Mini-checklist:
- Set up dual monitors: one for modeling, one for references.
- Organize project folders for textures, exports, and WIPs.
- Use version control for larger projects.
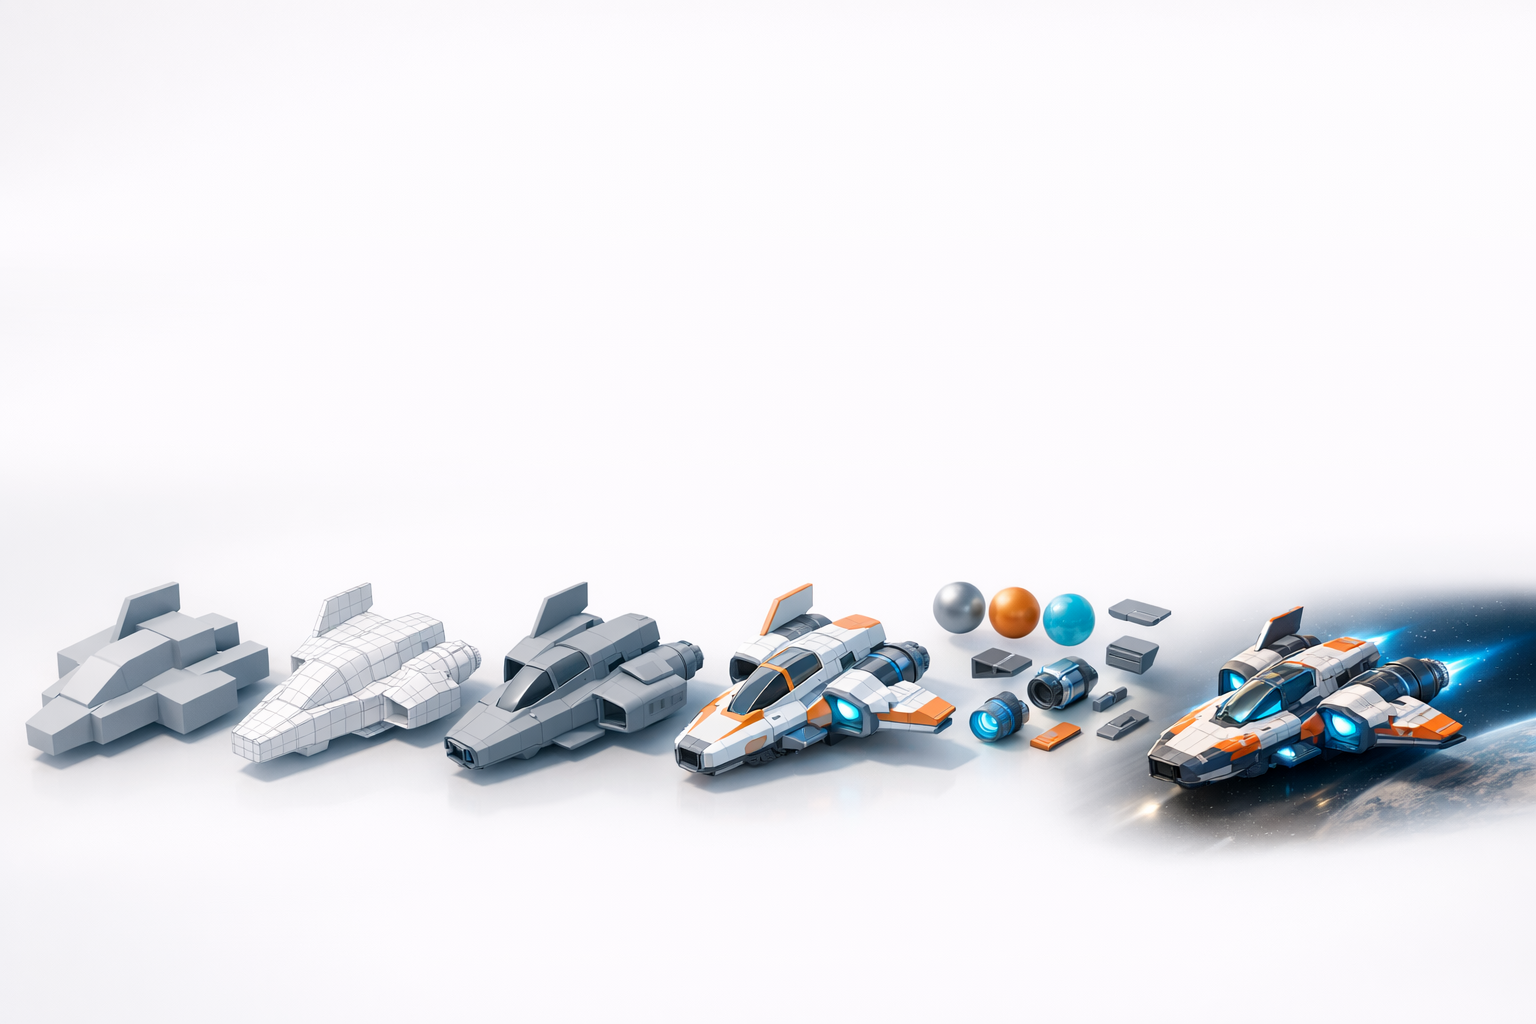
Step-by-Step Spaceship Modeling Process
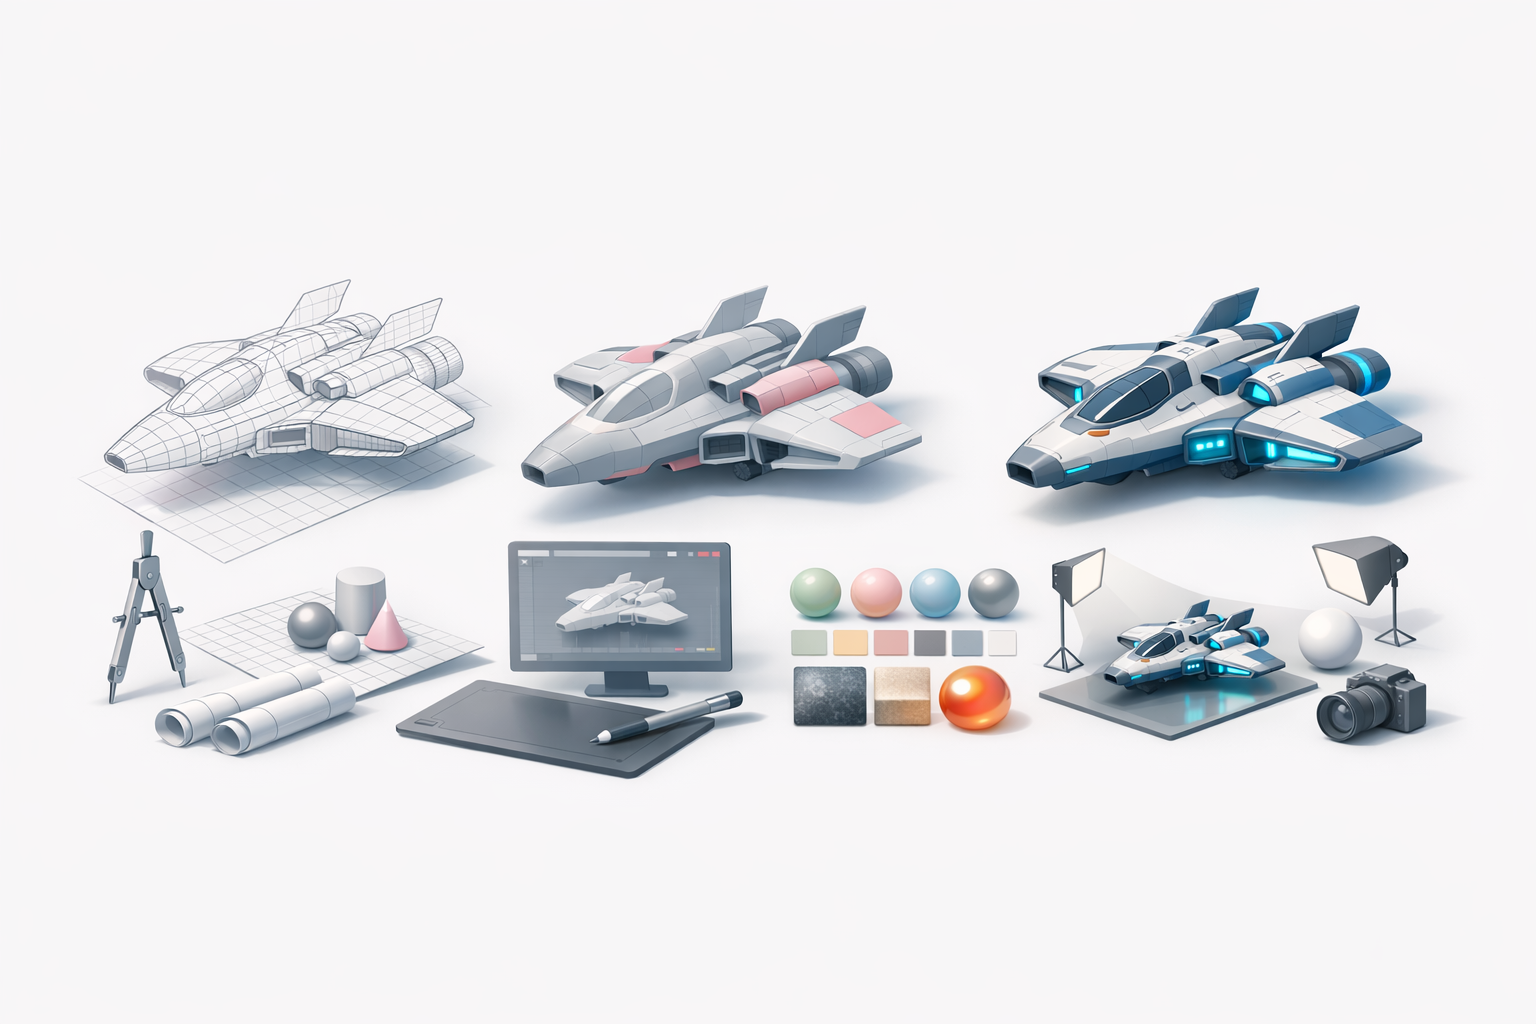
Blocking Out the Main Shapes
I always start with the broadest forms—fuselage, wings, engines—using simple primitives. If I’m using Tripo, I input a quick sketch or text prompt to get a base mesh, then adjust proportions and silhouette.
Blocking steps:
- Lay down major volumes with cubes/cylinders.
- Check silhouette from multiple angles.
- Don’t worry about details yet—focus on overall shape.
Adding Details and Refining Geometry
Once the main shape works, I move on to secondary forms: cockpit frames, intakes, and surface panels. I use bevels, insets, and kitbashing with asset libraries for speed. AI tools can auto-generate greebles or fine details, but I always check for geometry cleanliness.
Tips:
- Add detail only where it will be visible.
- Use non-destructive modifiers when possible.
- Regularly test smoothing and shading.
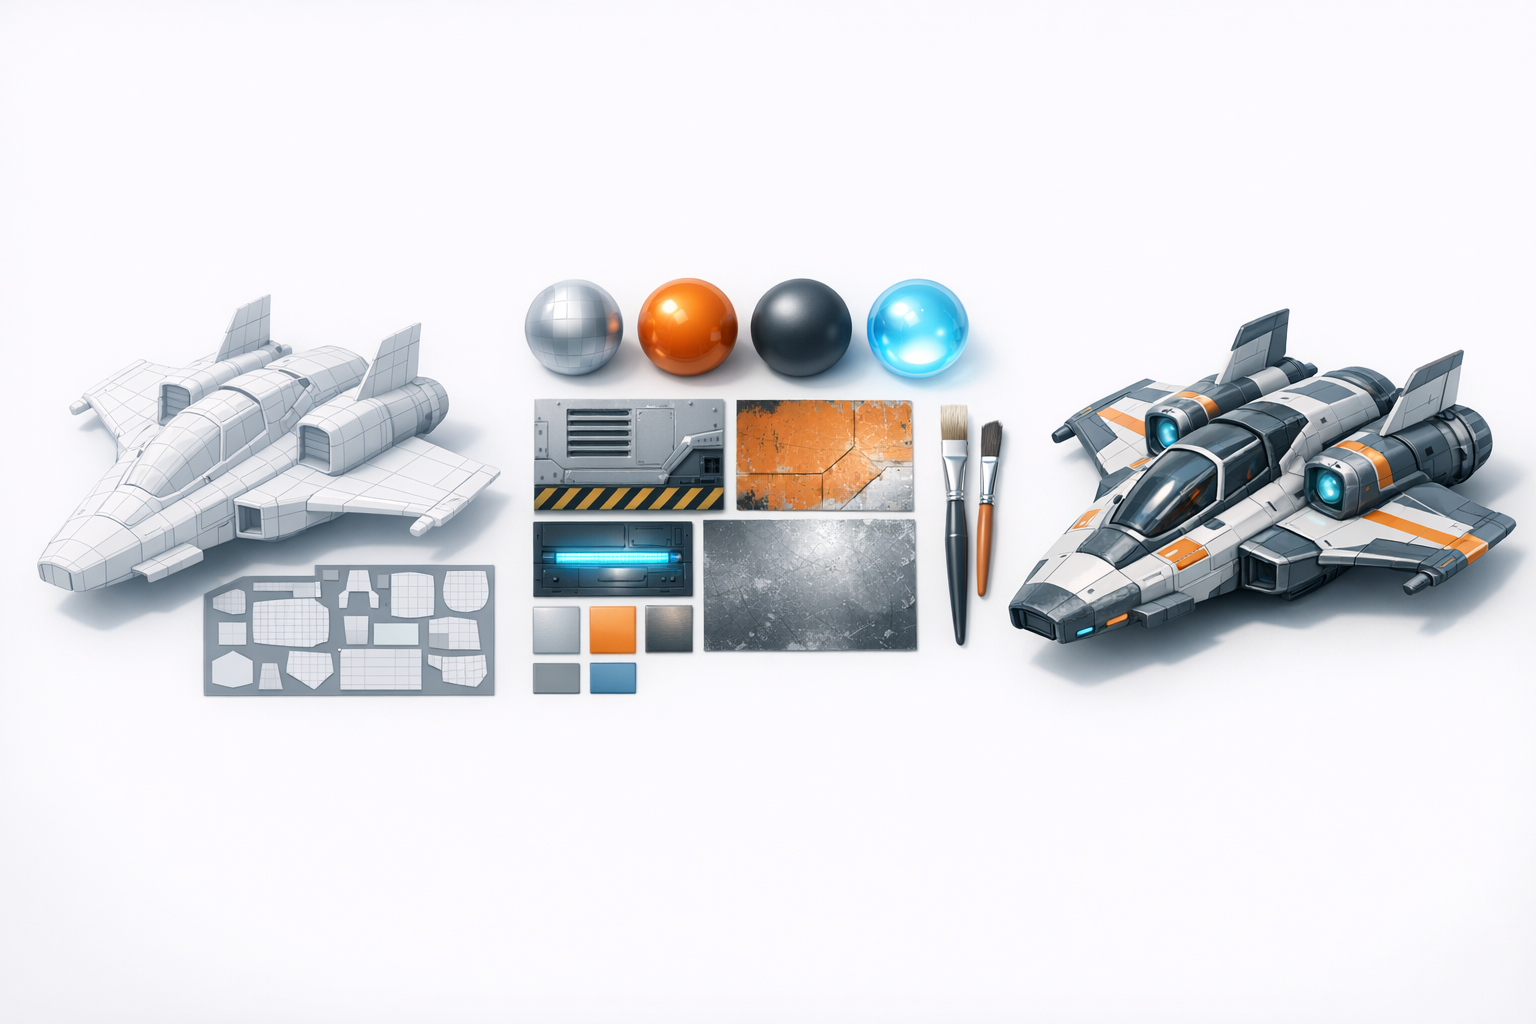
Texturing, Materials, and UV Mapping
Best Practices for Realistic Texturing
Good UVs are the foundation. I unwrap as I go, keeping seams hidden and texel density consistent. For texturing, I use physically based materials with layered wear, decals, and emissive elements.
Texturing checklist:
- Bake normal and ambient occlusion maps for depth.
- Use reference photos for material realism.
- Test materials under different lighting conditions.
Using AI-Assisted Texturing Tools
AI texturing tools, like those in Tripo, can auto-generate base materials and suggest detail passes. I use these to quickly iterate, then hand-paint or tweak for unique features.
Practical tip:
Let AI handle base textures, but always review and refine edge wear, logos, and custom elements for a unique finish.
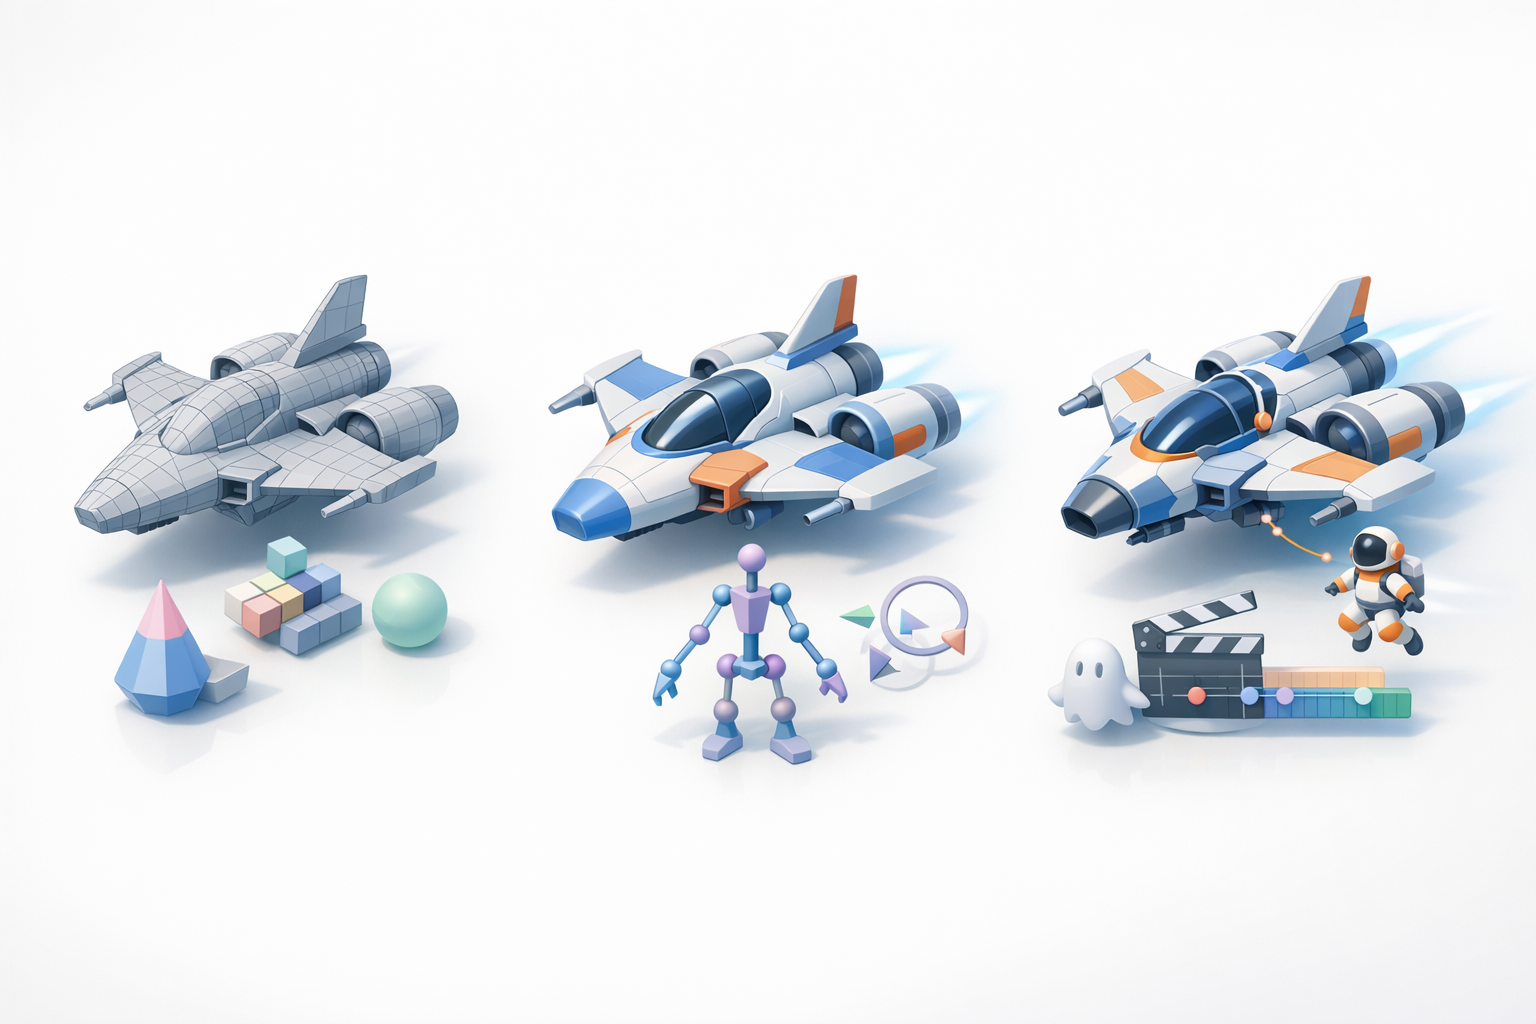
Retopology, Rigging, and Animation Essentials
Preparing Your Model for Animation
If animation is required (landing gear, turrets), I ensure the mesh is clean, with logical pivot points and separated elements. I avoid n-gons and overlapping faces, as these cause animation issues.
Pitfalls to avoid:
- Overly dense meshes (hard to rig/animate).
- Unnamed or unorganized mesh parts.
Streamlining with Automated Tools
I rely on automated retopology and rigging tools, especially for non-hero assets. Tripo’s intelligent retopology produces game-ready meshes, and its auto-rigging handles basic mechanical parts. I always check the results and manually adjust if needed.
Steps:
- Run auto-retopology, then inspect edge flow.
- Use auto-rigging for simple mechanical animations.
- Export test animations to catch issues early.
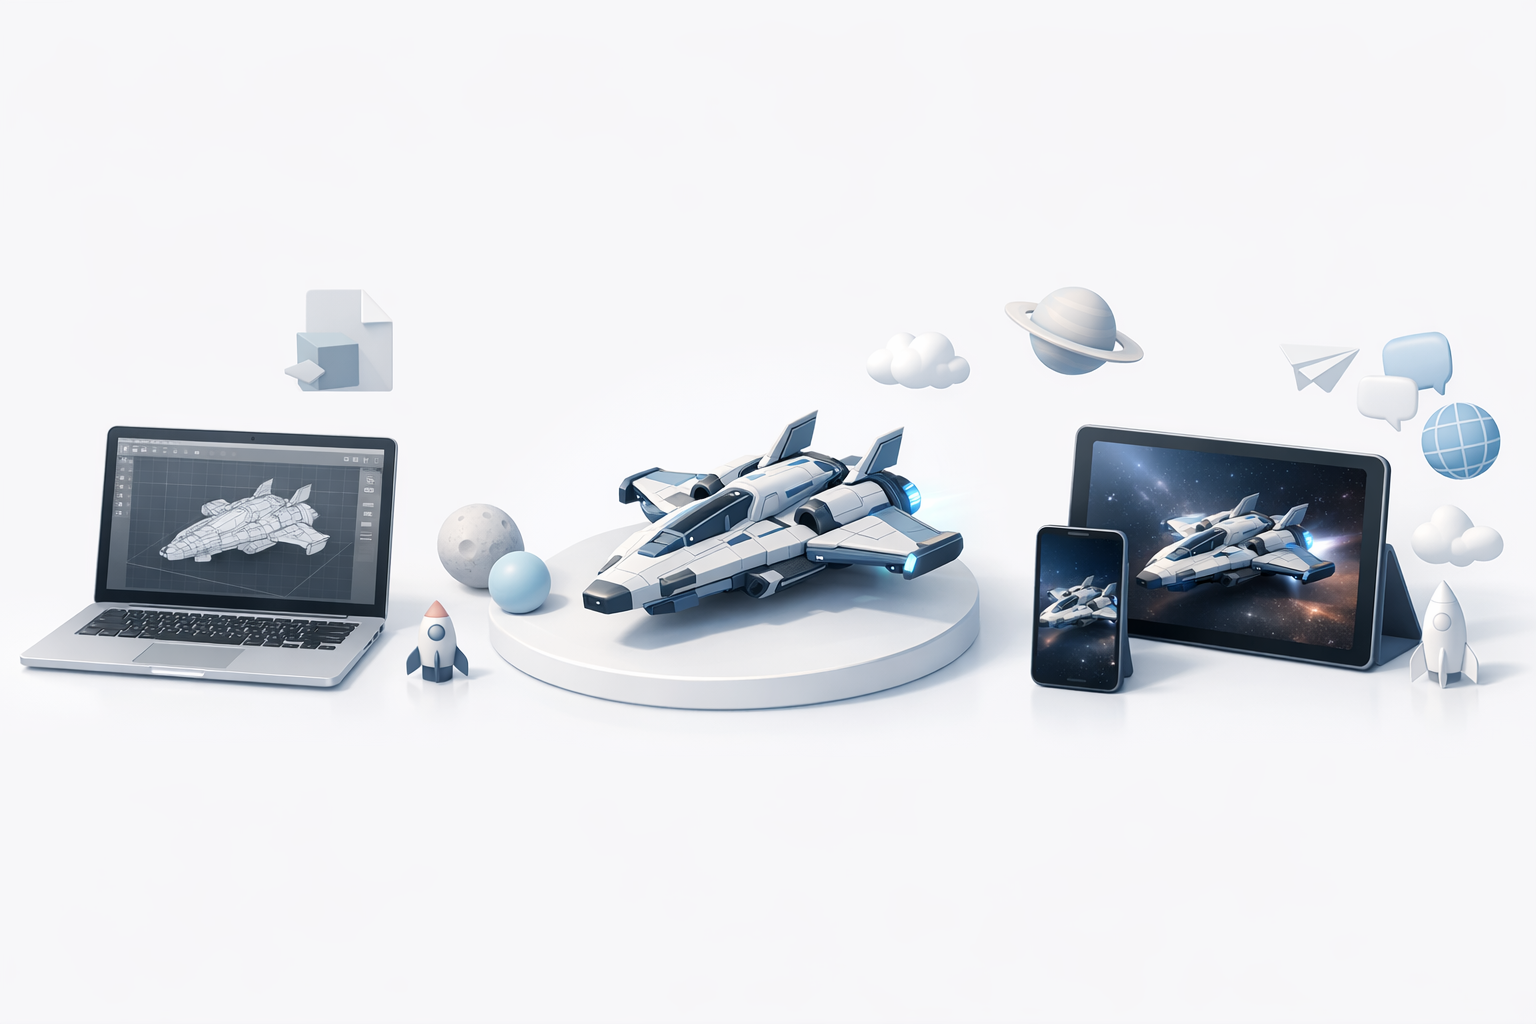
Exporting, Rendering, and Sharing Your Spaceship Model
Export Settings for Different Platforms
Export settings depend on the target platform (game engine, film, AR/VR). I double-check scale, orientation, and file format. Common exports: FBX for engines, OBJ for general use, GLTF for web/XR.
Checklist:
- Apply transforms and freeze scale.
- Pack textures or use embedded materials.
- Test import in the target platform.
Showcasing and Presenting Your Work
For portfolios, I set up simple turntables, dramatic lighting, and clean backgrounds. I include wireframe and texture shots to demonstrate technical quality. Sharing on platforms with 3D viewers helps attract feedback.
Tips:
- Render at 4K for close-ups.
- Use Marmoset or browser-based viewers for interactive presentations.
- Write a short project breakdown.
Lessons Learned and Expert Tips
Common Pitfalls and How to Avoid Them
What I’ve seen trip up many artists: skipping planning, over-detailing too early, and neglecting UVs. I always recommend regular saves and versioning, plus working in passes rather than perfecting each part before moving on.
Pitfalls:
- Not referencing real-world objects (results in floaty designs).
- Ignoring topology until the end.
- Forgetting to test exports.
What I’ve Learned from Real Projects
From shipping assets for games and XR, I’ve learned that speed comes from iteration, not perfection. AI tools accelerate the boring parts, but final polish and creative decisions are always manual. Collaboration is easier when you keep your files organized and document your workflow.
Final tips:
- Iterate fast, polish later.
- Use AI as a creative assistant, not a crutch.
- Stay curious—new tools can change your process overnight.
By following this workflow, you’ll save time, avoid common mistakes, and deliver spaceship models that stand up in both real-time and cinematic pipelines.


