Creating a Pokemon Prism Tower 3D Model: Expert Workflow & Tips
Building a 3D model of the Pokemon Prism Tower is a rewarding project for anyone in game development, XR, or digital art. In my experience, combining solid reference gathering, structured workflow, and advanced AI tools like Tripo AI dramatically accelerates the process while maintaining quality. This guide covers my end-to-end workflow, practical tips, and lessons learned from real-world projects—ideal for artists, developers, and teams aiming for production-ready results.
Key takeaways
- Reference gathering and planning are crucial for accuracy and efficiency.
- Blocking out major forms first prevents costly rework later.
- AI-powered tools like Tripo can generate high-quality base models in seconds.
- Manual refinement is essential for unique details and polish.
- Export settings must match your target platform (games, XR, animation).
- Collaboration and feedback loops improve both workflow and final quality.
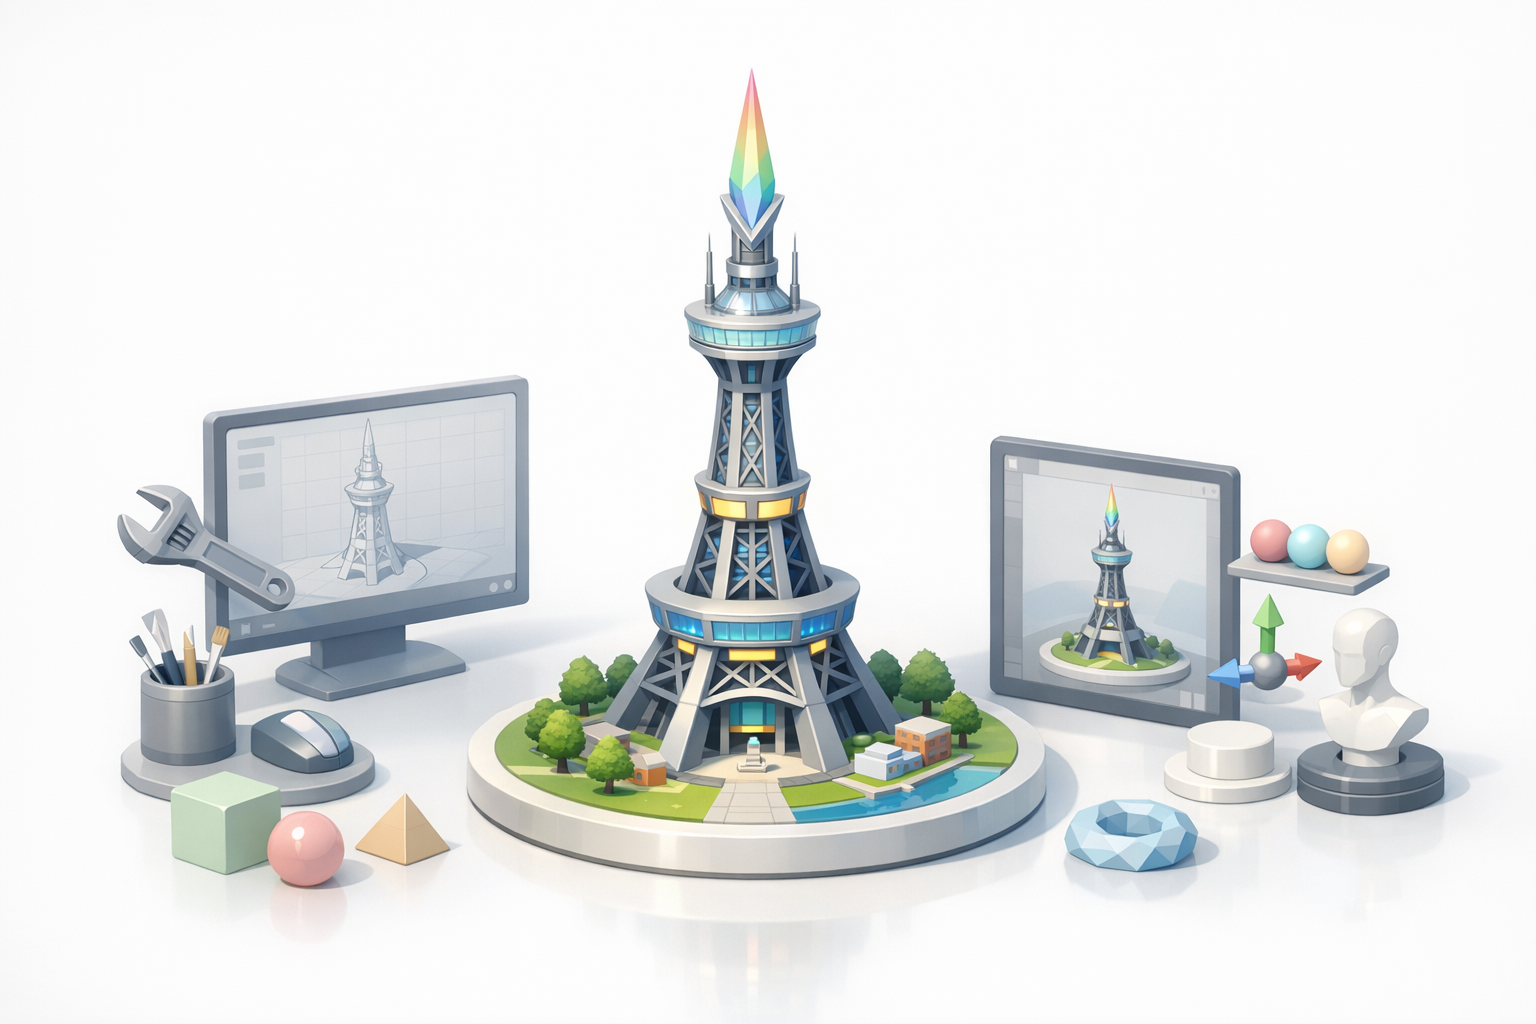
Overview of the Pokemon Prism Tower in 3D Modeling
Key Features and Design Elements
The Prism Tower is iconic for its Eiffel Tower-inspired silhouette, luminous panels, and futuristic details. In my workflow, I focus on:
- The tower's unique tapering structure and lattice framework
- Distinctive lighting elements and glass sections
- The base plaza and surrounding architectural features
I recommend breaking down these elements into primary forms and secondary details before modeling.
Reference Gathering and Concept Planning
Accurate references make or break a 3D project. I typically:
- Collect screenshots from games, anime, and official artwork
- Seek out blueprints or fan-made orthographic views
- Sketch over references to clarify proportions and key features
Checklist:
- Gather at least 5–10 high-quality images from multiple angles
- Annotate tricky areas (e.g., lighting, panel transitions)
- Define the model’s purpose: game asset, XR visualization, or animation
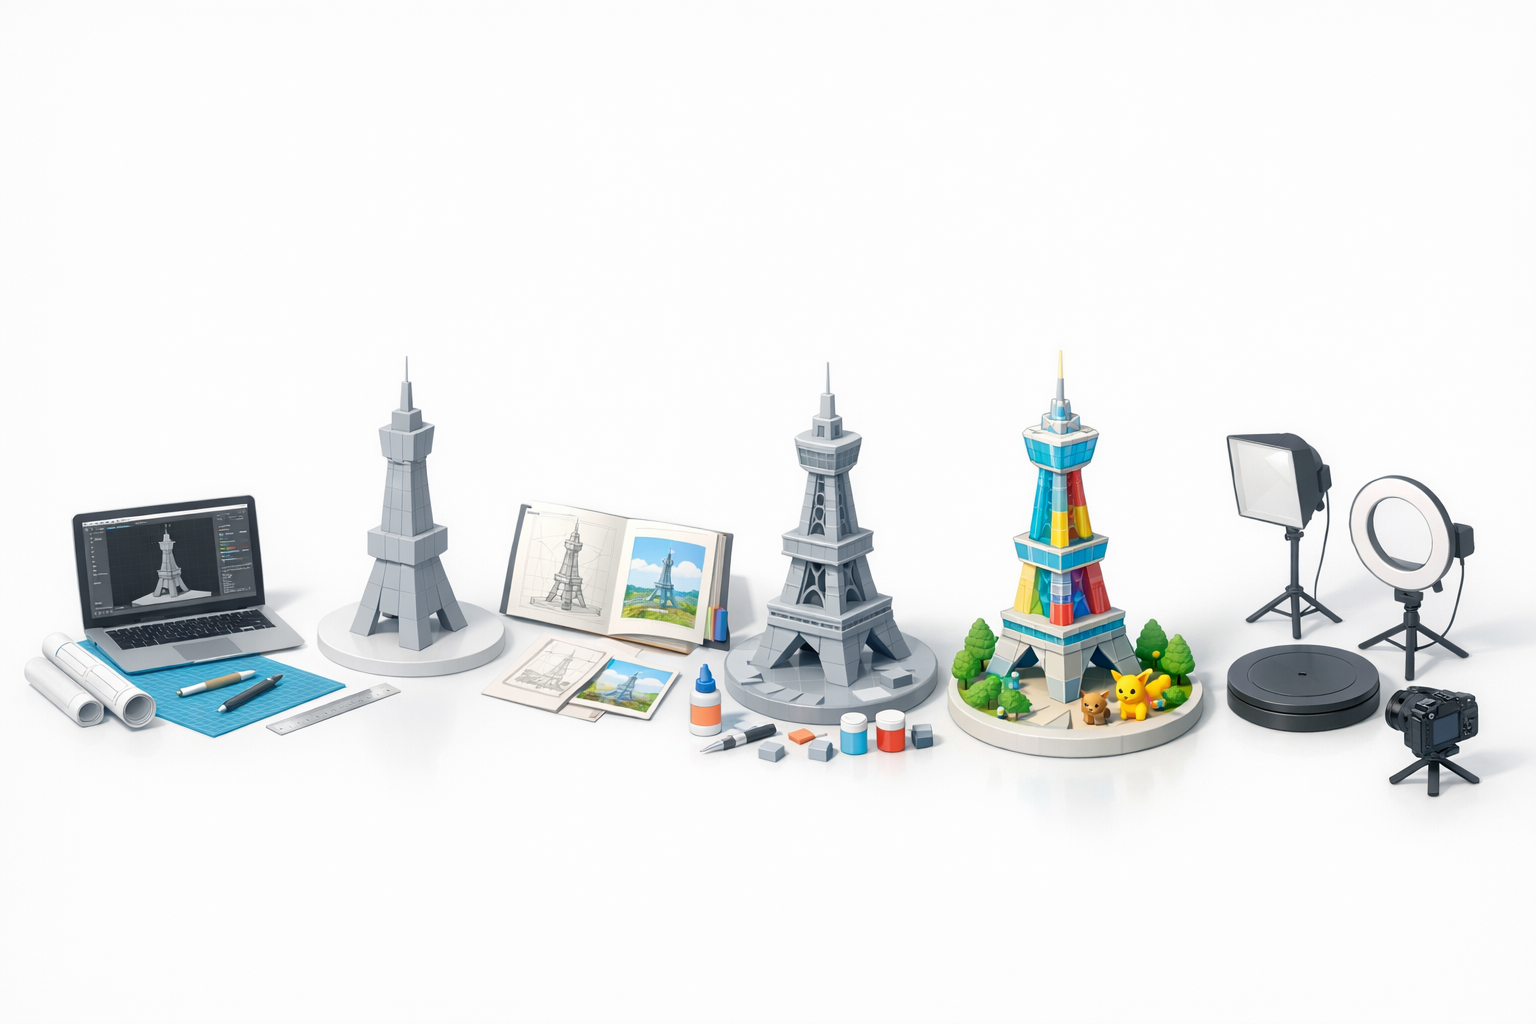
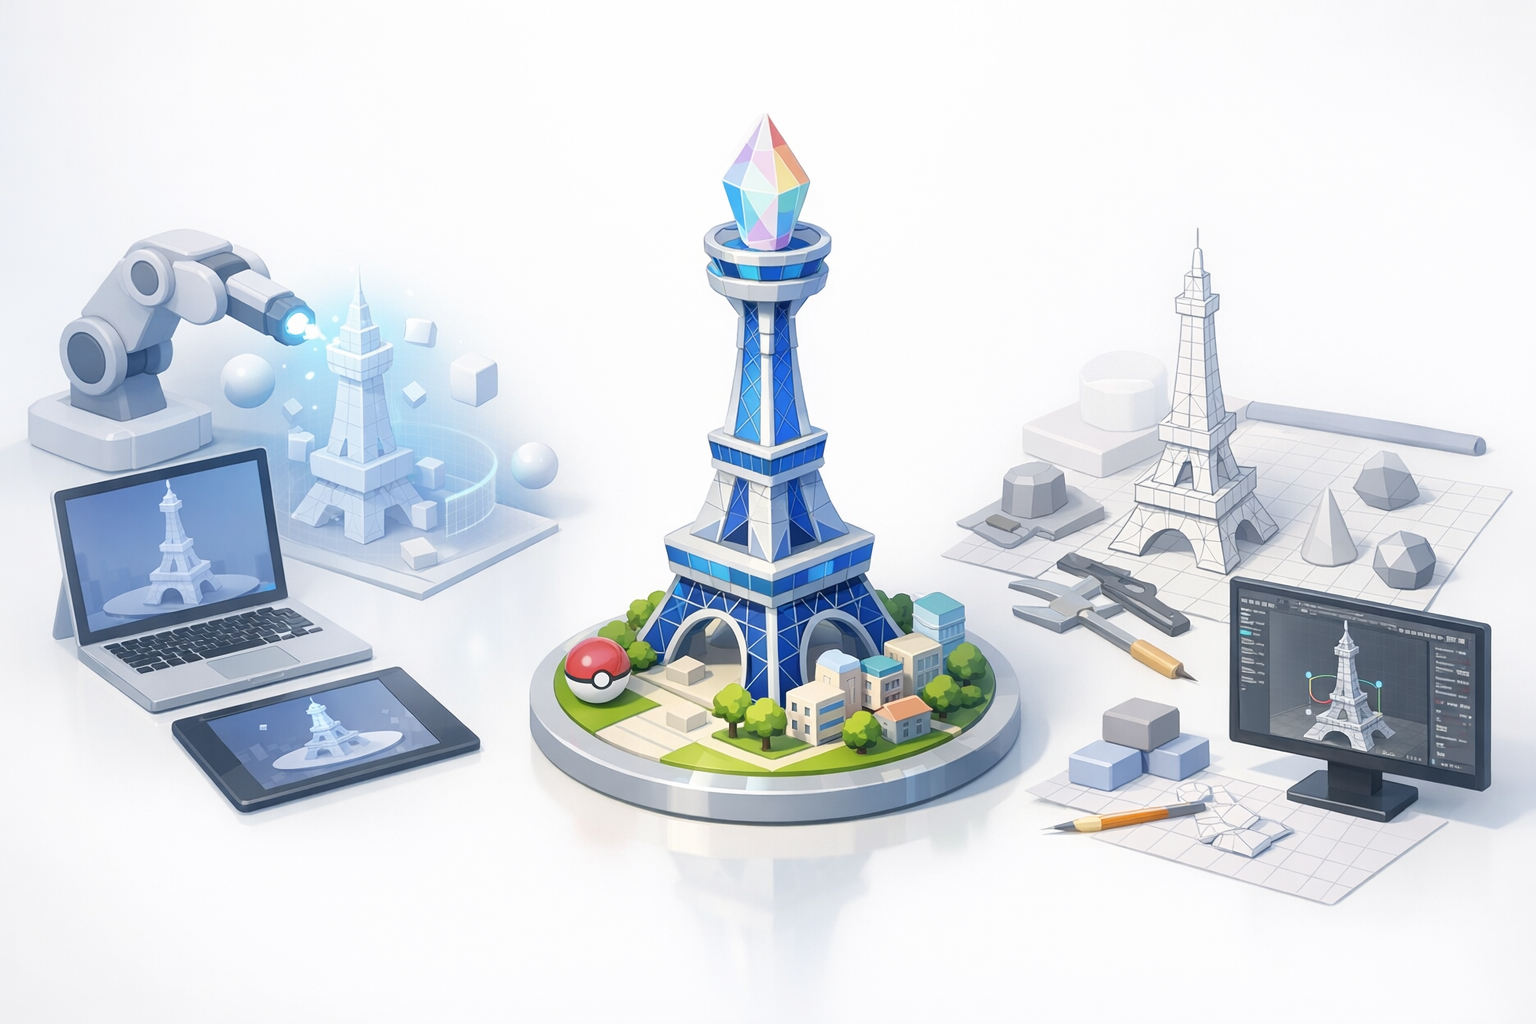
Step-by-Step Workflow for Building the Prism Tower Model
Blocking Out the Structure
I always start with a rough blockout to establish scale and proportions. My steps:
- Create basic primitives (cylinders, cubes) for the tower’s main segments
- Adjust proportions to match references
- Add placeholder geometry for major features (e.g., observation deck, base)
Tips:
- Keep geometry simple at this stage
- Use real-world scale units for easier integration later
Detailing, Texturing, and Optimization
Once the blockout feels right, I move on to:
- Refining lattice structures and adding secondary beams
- Modeling glass panels and light fixtures
- UV unwrapping and baking normal maps for details
- Texturing with PBR materials (metal, glass, emissive elements)
Optimization checklist:
- Remove hidden faces and merge duplicate vertices
- Use LODs (Levels of Detail) for game/XR performance
- Test the model in your target engine early
Leveraging AI Tools for Efficient 3D Creation
Using Tripo AI for Rapid Model Generation
AI tools like Tripo have streamlined my workflow by:
- Generating a solid base mesh from text prompts or sketches (e.g., “Eiffel-inspired tower with glowing panels”)
- Producing segmented models that are ready for retopology and texturing
How I use Tripo:
- Input detailed prompts and upload annotated images
- Review and edit the generated model before moving to manual refinement
Integrating AI Outputs with Manual Refinement
AI-generated models often need further work to meet production standards. I typically:
- Clean up topology and add missing structural elements
- Refine proportions based on my reference plan
- Apply custom textures and tweak materials for a polished look
Pitfalls:
- Don’t rely solely on AI for unique or stylized details
- Always check geometry for artifacts or non-manifold edges
Best Practices and Lessons Learned from Real-World Projects
Common Challenges and How I Overcame Them
Some frequent issues I’ve encountered:
- Inconsistent proportions: Solved by constant reference checks and using measurement tools
- Complex latticework: Simplified by focusing on silhouette first, then adding details modularly
- Lighting and glass materials: Required fine-tuning shaders and emissive textures
Tips for Achieving Production-Ready Results
- Always work in real-world units (meters or centimeters)
- Test your model under target lighting conditions early
- Solicit feedback from peers or the community before finalizing
Mini-checklist:
- Clean topology and UVs
- Optimized for engine performance
- Consistent texel density across all surfaces
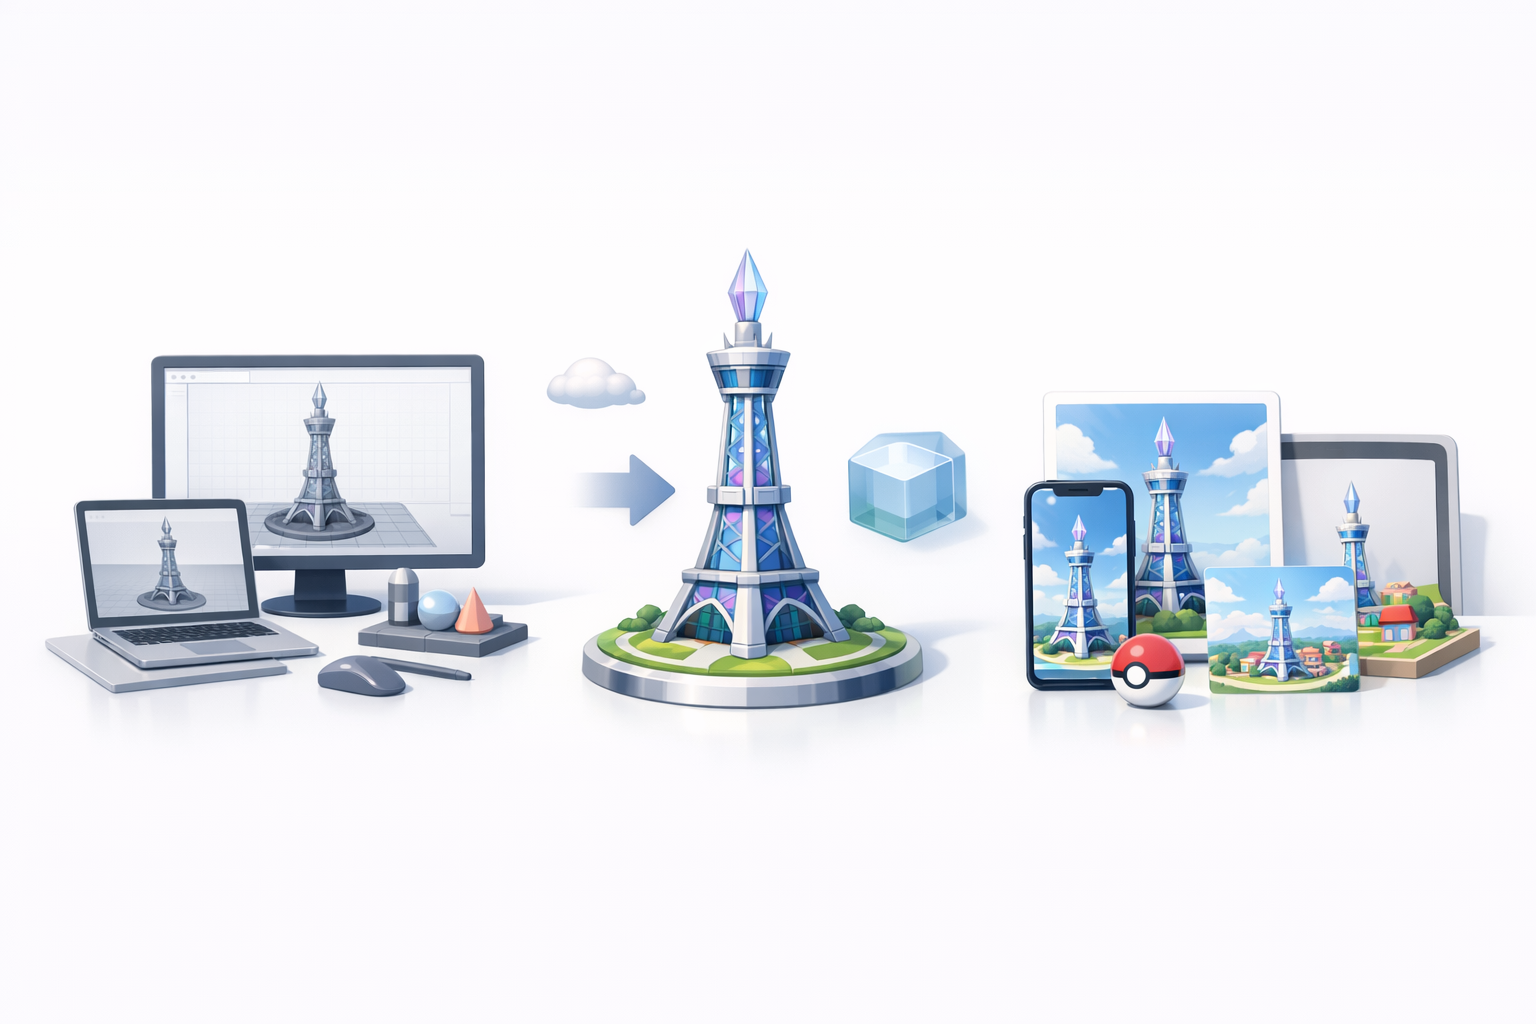
Exporting, Sharing, and Using the Prism Tower Model
Export Settings for Games, XR, and Animation
Export settings can make or break downstream usability. My recommendations:
- Use FBX or GLB for most engines and XR platforms
- Bake textures into standard PBR maps (albedo, normal, roughness, metallic, emissive)
- Check scale and orientation before export
Pro tip: Export a low-poly and a high-poly version for flexibility.
Showcasing and Collaborating with the Community
Sharing your work is key for feedback and improvement. I usually:
- Upload renders and turntables to portfolio sites or forums
- Share model files with clear documentation (naming, scale, usage notes)
- Encourage constructive critique and open collaboration
Comparing AI-Driven and Traditional 3D Modeling Approaches
Pros and Cons Based on My Experience
AI-driven workflow:
- Pros: Fast base mesh creation, great for iteration, lowers entry barrier
- Cons: May require significant cleanup, less control over fine details
Traditional workflow:
- Pros: Full creative control, higher fidelity for custom designs
- Cons: Time-consuming, steeper learning curve
When to Choose Each Workflow
- AI-first: When speed is critical, or for prototyping and concepting
- Traditional/manual: When precision, unique style, or technical constraints are paramount
In my practice, a hybrid approach—AI for initial generation, manual for refinement—delivers the best results for complex models like the Prism Tower.
In summary: Combining structured planning, AI-powered generation, and expert manual refinement is the most effective way I’ve found to create production-ready 3D models of complex landmarks like the Pokemon Prism Tower. This workflow balances speed, quality, and creative control—whether you’re working solo or as part of a larger team.


