Monster Hunter Wilds 3D Model: Expert Workflow & Best Practices
скачать 3d модели для chicken gun
Creating game-ready 3D models for Monster Hunter Wilds demands a blend of creative vision, technical precision, and efficient workflow management. Over years of production, I’ve honed a step-by-step approach that leverages AI-powered tools, streamlines traditional bottlenecks, and ensures assets meet the demanding standards of real-time environments. This guide is for artists and developers aiming to produce high-quality, animated monsters quickly—without sacrificing detail or performance. I’ll share practical checklists, common pitfalls, and lessons learned from hands-on experience.
Key takeaways:
- Reference-driven concepting is crucial for unique, believable monsters.
- Blocking, retopology, and texturing require iterative refinement and smart automation.
- Rigging and animation for complex creatures benefit from modular setups.
- AI-powered platforms can drastically reduce manual workload and speed up asset creation.
- Exporting for game engines demands attention to naming, scale, and material compatibility.
- Continuous learning and adaptation are essential for staying competitive.
Overview: Creating Monster Hunter Wilds 3D Models
Key considerations for game-ready assets
In my workflow, every asset starts with a clear understanding of its intended use: gameplay, cinematics, or promotional art. For Monster Hunter Wilds, models need to balance visual fidelity with performance. I focus on polycount targets, efficient UV layouts, and animation-readiness from the outset.
Checklist:
- Define polycount and texture resolution targets.
- Plan for rigging and animation requirements.
- Ensure silhouette clarity and unique features.
Summary of essential tools and workflows
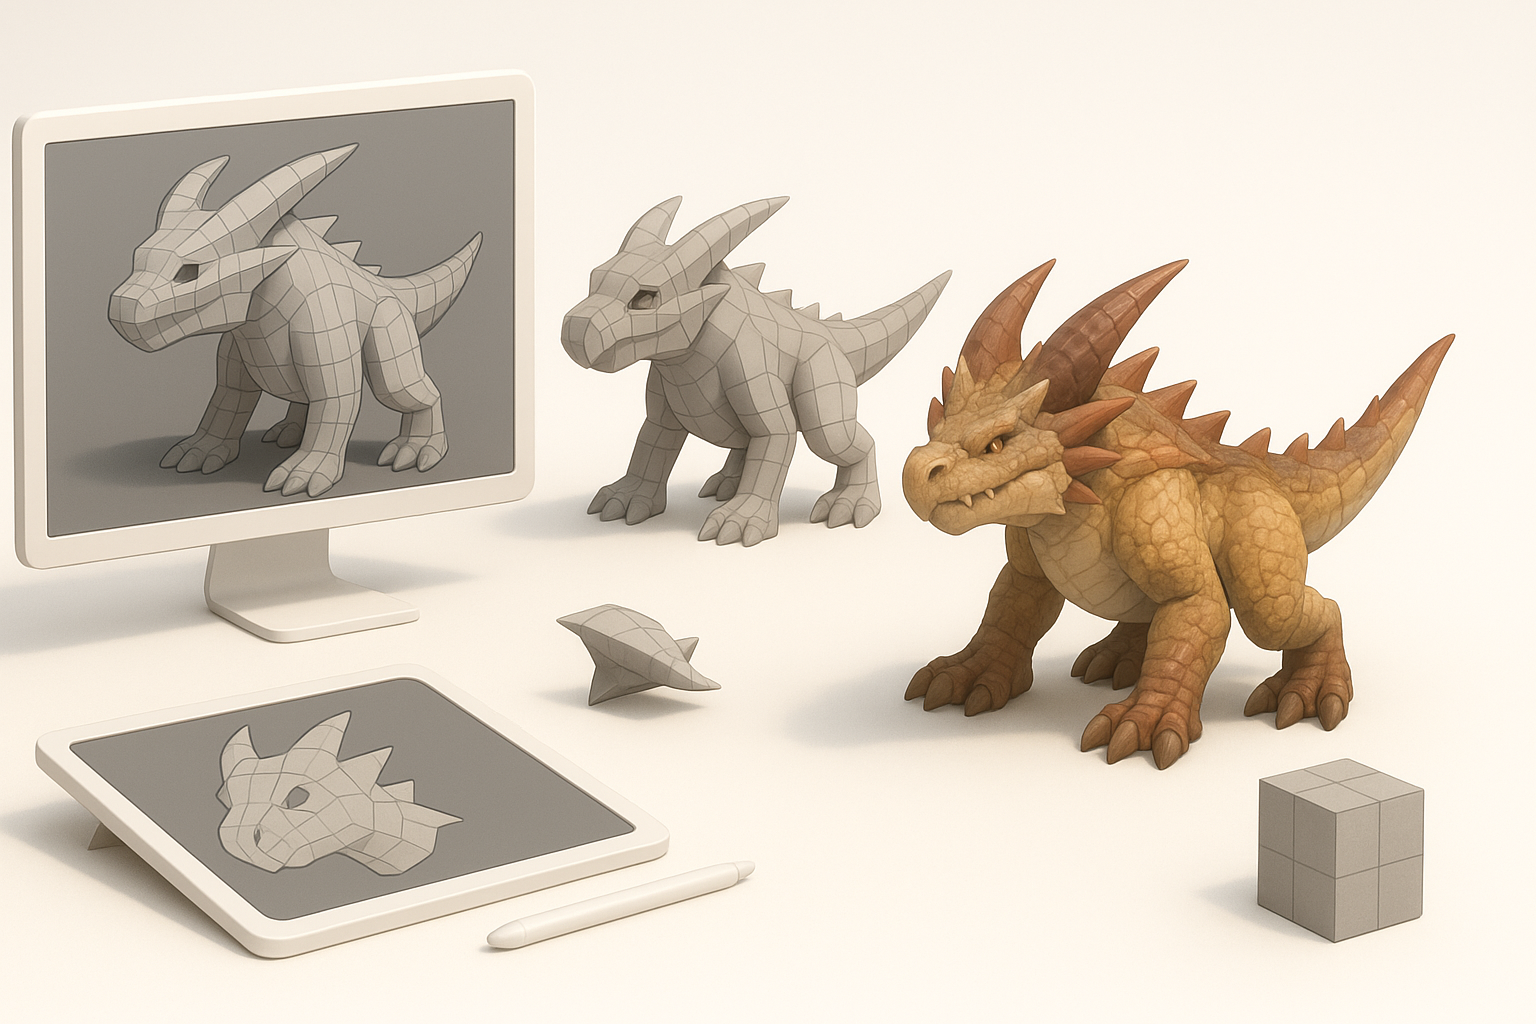
I rely on a mix of traditional modeling suites and AI-powered platforms like Tripo for rapid prototyping, segmentation, and retopology. Integrating these tools lets me iterate faster and focus on creative decisions rather than technical hurdles.
Workflow highlights:
- Sketch or reference input → AI model generation → manual refinement.
- Automated retopology and UV unwrapping.
- Texture baking and material setup for real-time engines.
Step-by-Step Workflow for 3D Model Creation
Concepting and reference gathering
I always start with a mood board—collecting references from Monster Hunter lore, real-world animals, and fantasy art. This helps nail down proportions, anatomy, and signature traits.
Steps:
- Gather visual references (screenshots, concept art, creature photos).
- Sketch thumbnails or rough silhouettes.
- Identify key features (horns, claws, scales) for uniqueness.
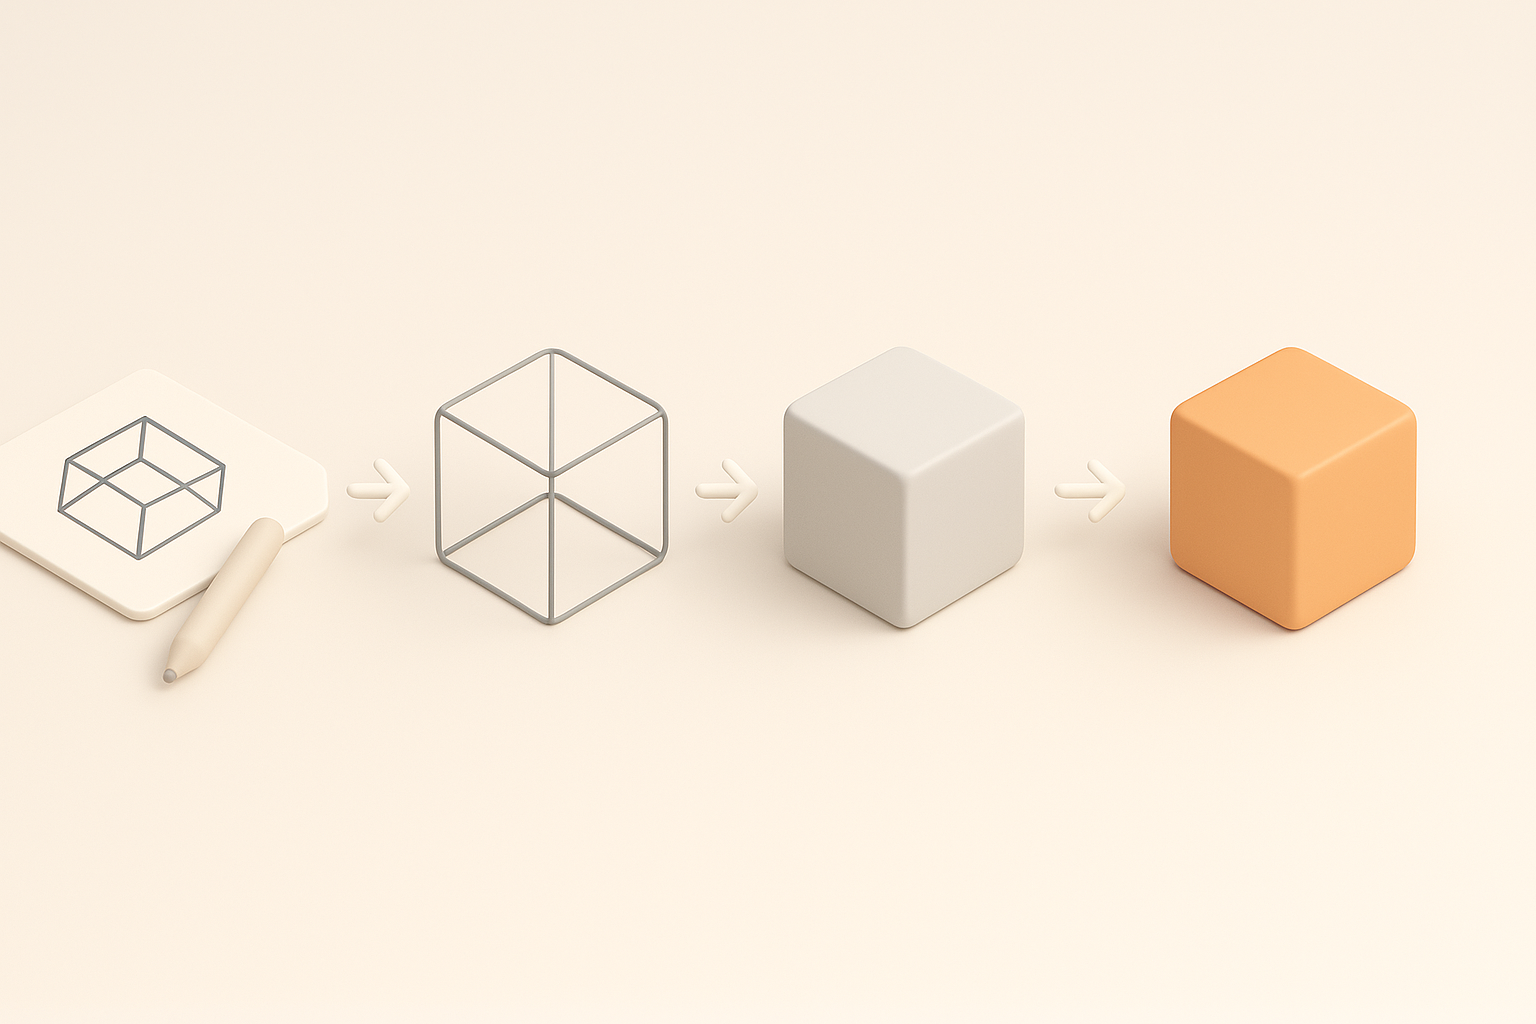
Blocking out forms and proportions
Blocking is about rough shapes, not details. I use simple geometry to establish the monster’s mass and pose. AI tools can generate base meshes from sketches or descriptions, which speeds up this phase.
Tips:
- Work in broad strokes; avoid early detailing.
- Check proportions against reference images.
- Iterate quickly—don’t be afraid to restart blocks.
Texturing, Retopology, and Optimization
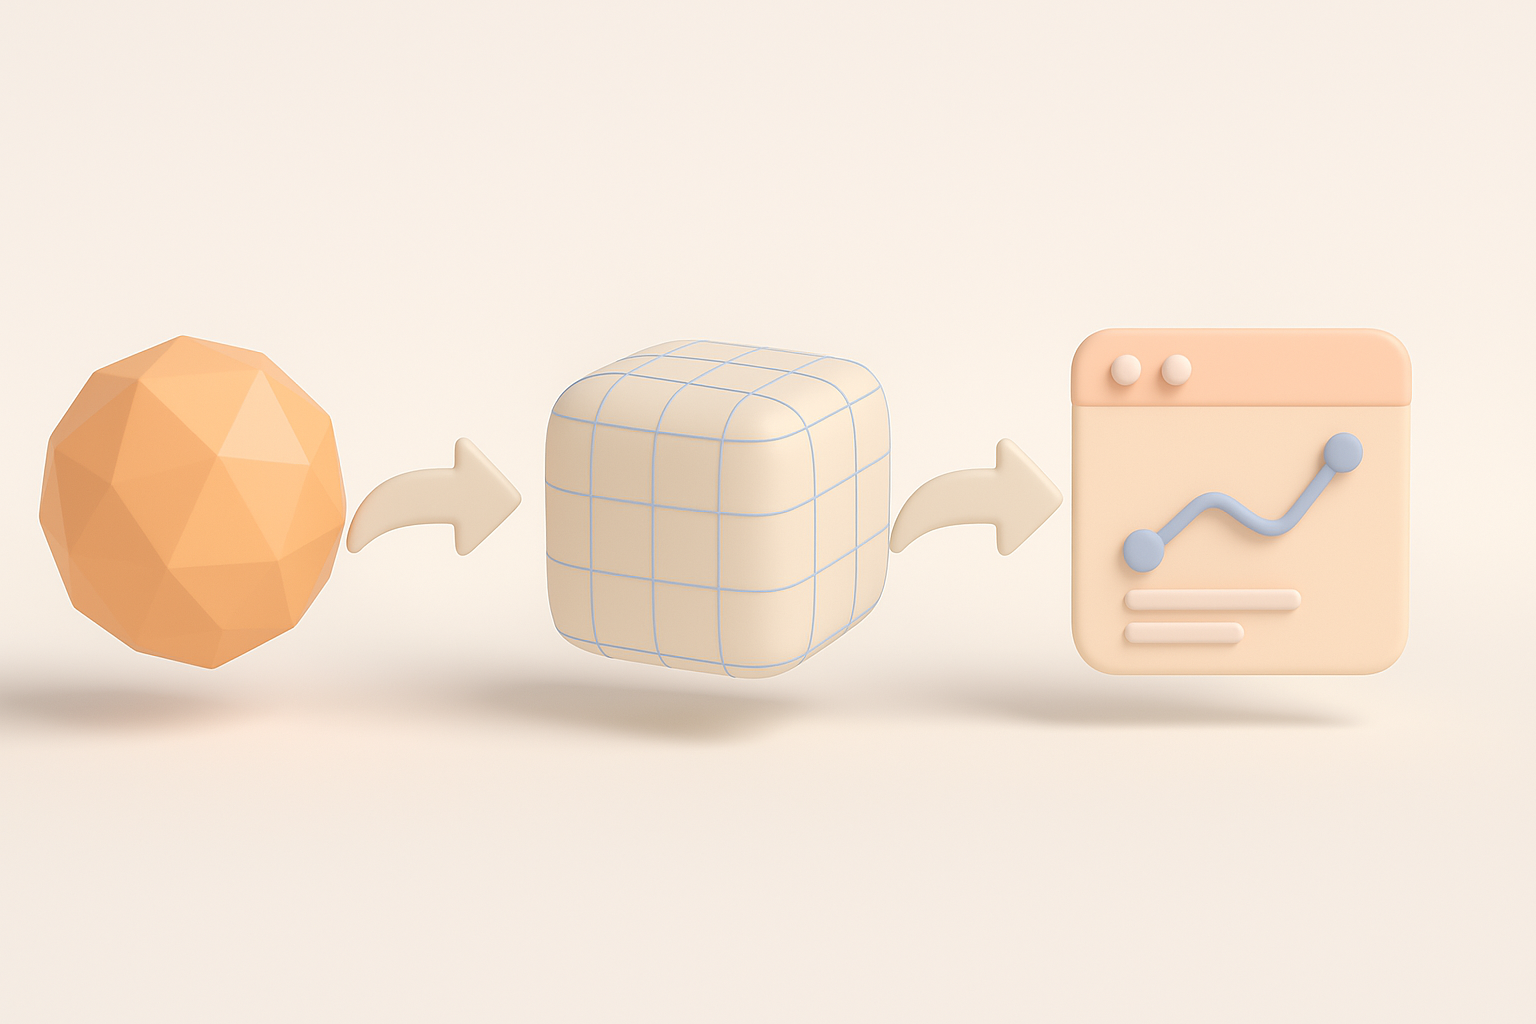
Efficient retopology techniques
Retopology is crucial for animation and performance. I lean on AI-driven retopology tools for initial passes, then manually tweak edge flows around joints and deforming areas.
Pitfalls:
- Neglecting edge loops near limbs/joints can cause animation issues.
- Overly dense meshes slow down real-time rendering.
Checklist:
- Use automated retopology for base mesh.
- Adjust topology around elbows, knees, wings, etc.
- Optimize for target polycount.
Best practices for texturing and UV mapping
Texturing starts with clean, non-overlapping UVs. I use AI-assisted UV tools to unwrap complex shapes, then hand-paint or bake textures for detail.
Steps:
- Generate UVs with intelligent tools.
- Bake normal, AO, and curvature maps.
- Texture in layers—base color, details, wear.
Tips:
- Keep UV islands organized for easy editing.
- Use reference materials for realistic surface detail.
Rigging and Animation for Monster Hunter Wilds
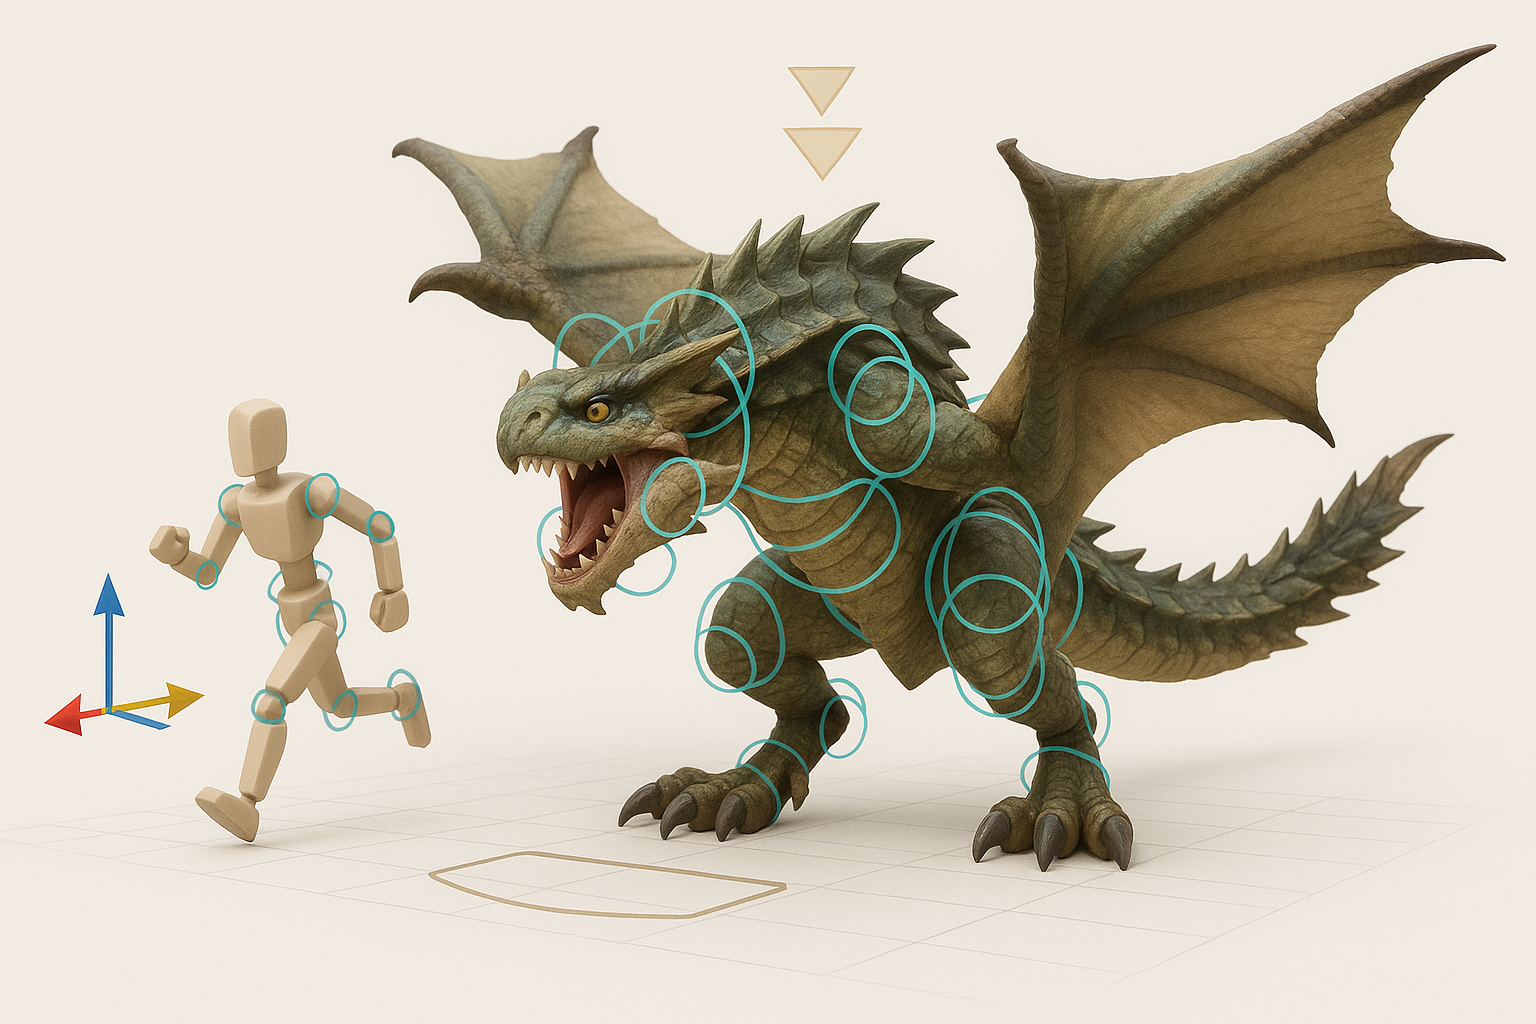
Setting up rigs for complex creatures
Monster rigs are often modular. I build skeletons with extra controls for wings, tails, and facial expressions. Automated rigging tools save time, but manual adjustments ensure animation flexibility.
Checklist:
- Create main skeleton (spine, limbs, tail).
- Add extra bones for unique features (horns, jaws).
- Test deformation with quick poses.
Animating dynamic monster movements
For animation, I block key poses first, focusing on weight and movement arcs. AI-assisted animation can generate cycles, but I always refine by hand to match Monster Hunter’s style.
Tips:
- Use reference videos for animal motion.
- Layer animations (idle, attack, roar).
- Test in engine for timing and transitions.
Leveraging AI Tools for Faster 3D Production
Integrating AI-powered platforms into your workflow
AI tools like Tripo streamline segmentation, retopology, and texturing. I use them to generate base meshes, unwrap UVs, and automate repetitive tasks, freeing up time for creative work.
Steps:
- Input concept (text/image/sketch) into AI platform.
- Refine output—adjust geometry, topology, materials.
- Export for further manual tweaks.
Tips for maximizing efficiency with intelligent automation
What I’ve found: automation works best when combined with manual oversight. I always validate AI outputs—especially topology and UVs—before moving to the next stage.
Tips:
- Use AI for initial passes; refine manually for critical areas.
- Batch process similar assets for consistency.
- Keep backups of original outputs for troubleshooting.
Exporting and Implementing Models in Game Engines
Preparing assets for real-time environments
Exporting is more than just saving a file. I check scale, naming conventions, material setups, and animation compatibility. Tripo’s export tools help ensure assets are engine-ready, but I always double-check in-engine.
Checklist:
- Apply correct scale and orientation.
- Name meshes, materials, and bones consistently.
- Export with proper texture formats (PNG, TGA).
Troubleshooting common export issues
Common issues: flipped normals, missing textures, or broken rig hierarchies. I run quick tests in the engine and fix problems before final submission.
Tips:
- Check for missing or corrupted textures.
- Verify animation playback and bone weights.
- Re-export if errors persist—sometimes a fresh export solves hidden issues.
Lessons Learned: My Experience and Recommendations

What I do differently now
Early in my career, I spent too much time on manual tasks. Now, I integrate AI tools for repetitive steps and focus my energy on creative challenges. Iterative testing in-engine saves headaches later.
What I’ve changed:
- Automate where possible, but always review outputs.
- Start animation tests earlier in the process.
- Maintain detailed checklists for each stage.
Advice for aspiring 3D artists
For newcomers: prioritize learning workflows over chasing software features. Use AI tools to speed up production, but invest time in understanding anatomy, motion, and game engine requirements.
Tips:
- Build a strong reference library.
- Practice blocking and iteration—don’t get stuck on details.
- Stay curious; experiment with new tools and techniques.
Slug suggestion: monster-hunter-wilds-3d-model-workflow
Meta description: Discover expert workflows, best practices, and AI-powered tips for creating Monster Hunter Wilds 3D models, from concept to game-ready asset.
Keywords: monster hunter wilds 3d model, 3d workflow, game asset creation, ai 3d tools, texturing and rigging, tripo ai


