Creating a Cult of the Lamb 3D Model: Expert Workflow & Tips
Creating production-ready 3D models in the style of Cult of the Lamb demands a blend of stylized artistry and technical efficiency. In my experience, nailing the game’s signature look means focusing on bold shapes, expressive silhouettes, and painterly textures—while keeping assets optimized for real-time use. In this guide, I’ll break down my practical workflow from planning and reference gathering to final export, including how I leverage AI-powered tools like Tripo for rapid iteration. If you’re a game artist, designer, or developer aiming for high-quality stylized models, these are the strategies and pitfalls I’ve learned from hands-on projects.
Key takeaways:
- Prioritize strong shapes and clear silhouettes for stylized appeal.
- Gather targeted references before modeling—don’t skip this step.
- Use blockout-to-detail workflows to stay efficient and flexible.
- Hand-painted textures and simple shaders define the Cult of the Lamb look.
- Optimize topology and exports for your target platform from the start.
- AI tools like Tripo can speed up prototyping, but manual refinement is still key.
Executive Summary: Key Takeaways for 3D Modeling Cult of the Lamb Assets

What makes Cult of the Lamb models unique
The charm of Cult of the Lamb assets lies in their simplified, almost toy-like forms and their bold, readable silhouettes. In my workflow, I focus on exaggerating proportions and using minimal surface detail, letting textures and color do most of the heavy lifting. The characters and props often feature oversized heads, stubby limbs, and expressive faces, which makes them both appealing and instantly recognizable.
Summary of recommended workflows
For these assets, I recommend starting with a strong blockout in your preferred 3D package, keeping the mesh simple and easy to adjust. I then move to detail passes and stylized texturing, using a combination of hand-painting and smart material layering. Rigging is kept intentionally simple to match the animation style, and I always optimize the final mesh for the platform—whether it’s for games, XR, or animation.
Planning and Reference Gathering for Cult of the Lamb 3D Models
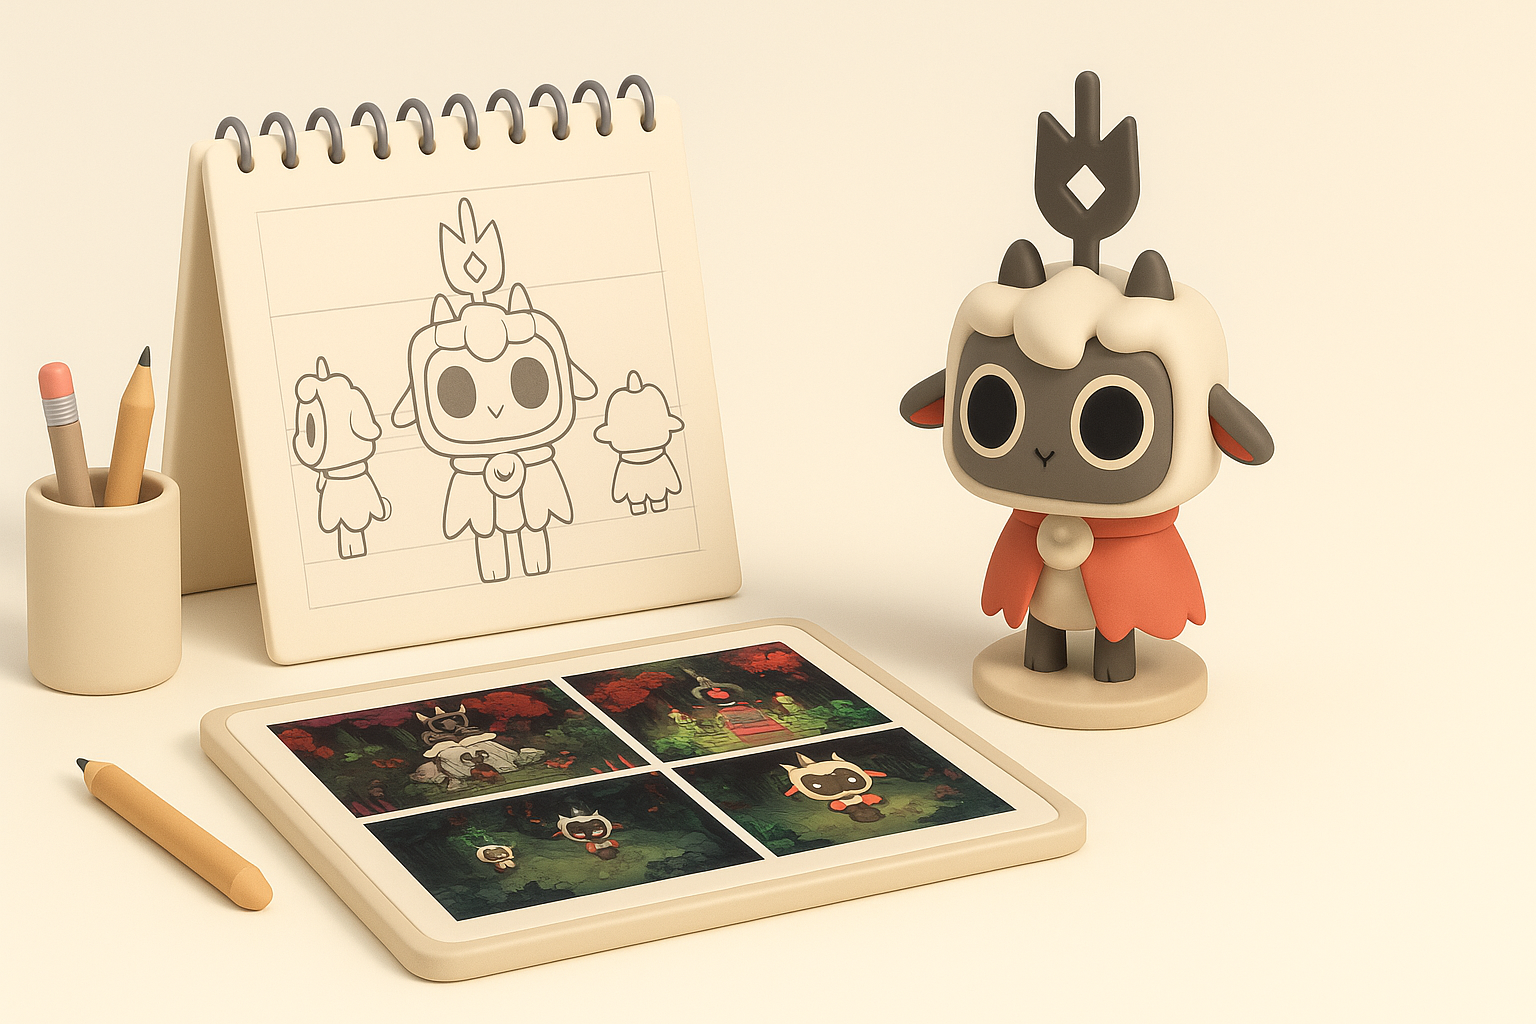
Identifying essential character and prop features
Before touching any modeling tools, I list out the defining features for each asset. For Cult of the Lamb, this means:
- Exaggerated heads and eyes
- Minimal but expressive facial features
- Chunky, simplified limbs
- Iconic props (e.g., staves, hats, altars) with clear shapes
I also check what needs to move or deform—this informs my topology and rigging decisions later.
Collecting and organizing visual references
I gather official artwork, gameplay screenshots, and fan art, then organize them by asset type. I use reference boards (like PureRef or in-app pinboards) to keep style guides and close-up details handy. Having a visual checklist right next to my modeling viewport saves time and keeps my work on-model.
Reference checklist:
- Front/side/back views of characters or props
- Close-ups of textures and material transitions
- Animation references (e.g., walk cycles, idle poses)
Step-by-Step Workflow: From Concept to Production-Ready Model
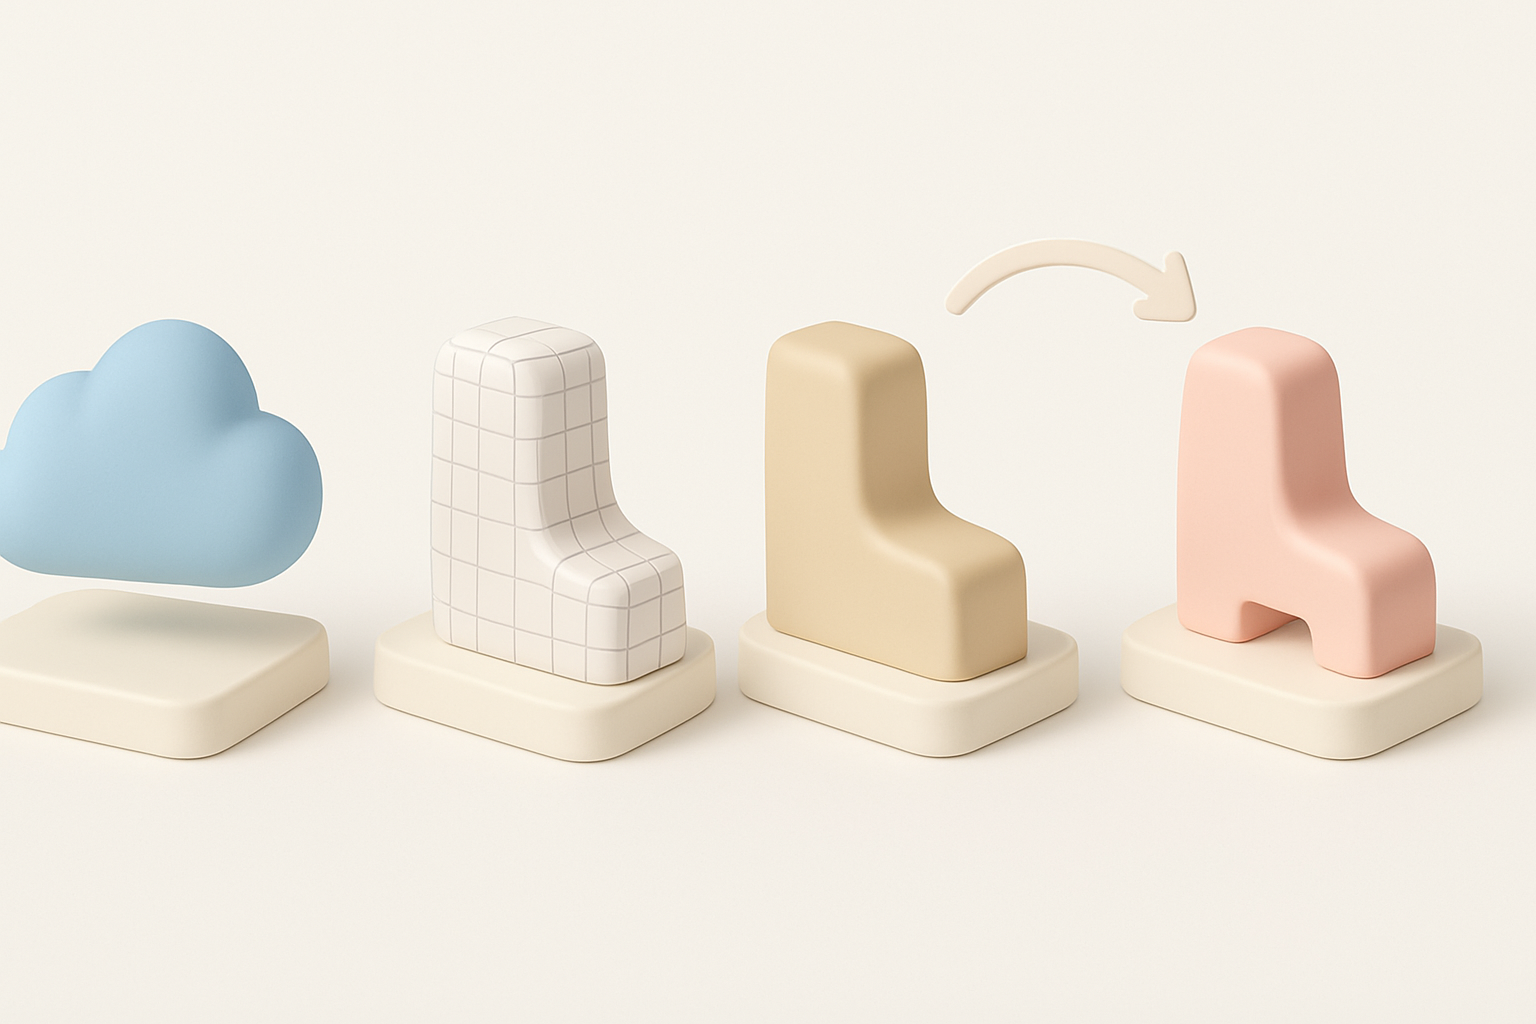
Blocking out shapes and proportions
I always start with a rough blockout using basic primitives. This lets me quickly test proportions and overall silhouette without getting bogged down in details. For Cult of the Lamb assets, I:
- Use spheres and cubes for heads and bodies
- Establish the pose and gesture early
- Check the silhouette in orthographic views
I iterate on the blockout until the character or prop feels “right” before moving on.
Refining topology and adding details
Once the blockout is approved, I refine the mesh:
- Retopologize for clean, animation-friendly edge flow
- Add loops around joints and facial features
- Model essential details (e.g., horns, clothing folds) sparingly
I keep polycount low and avoid unnecessary subdivisions, since stylized assets don’t need dense geometry.
Texturing and Stylization: Achieving the Cult of the Lamb Look
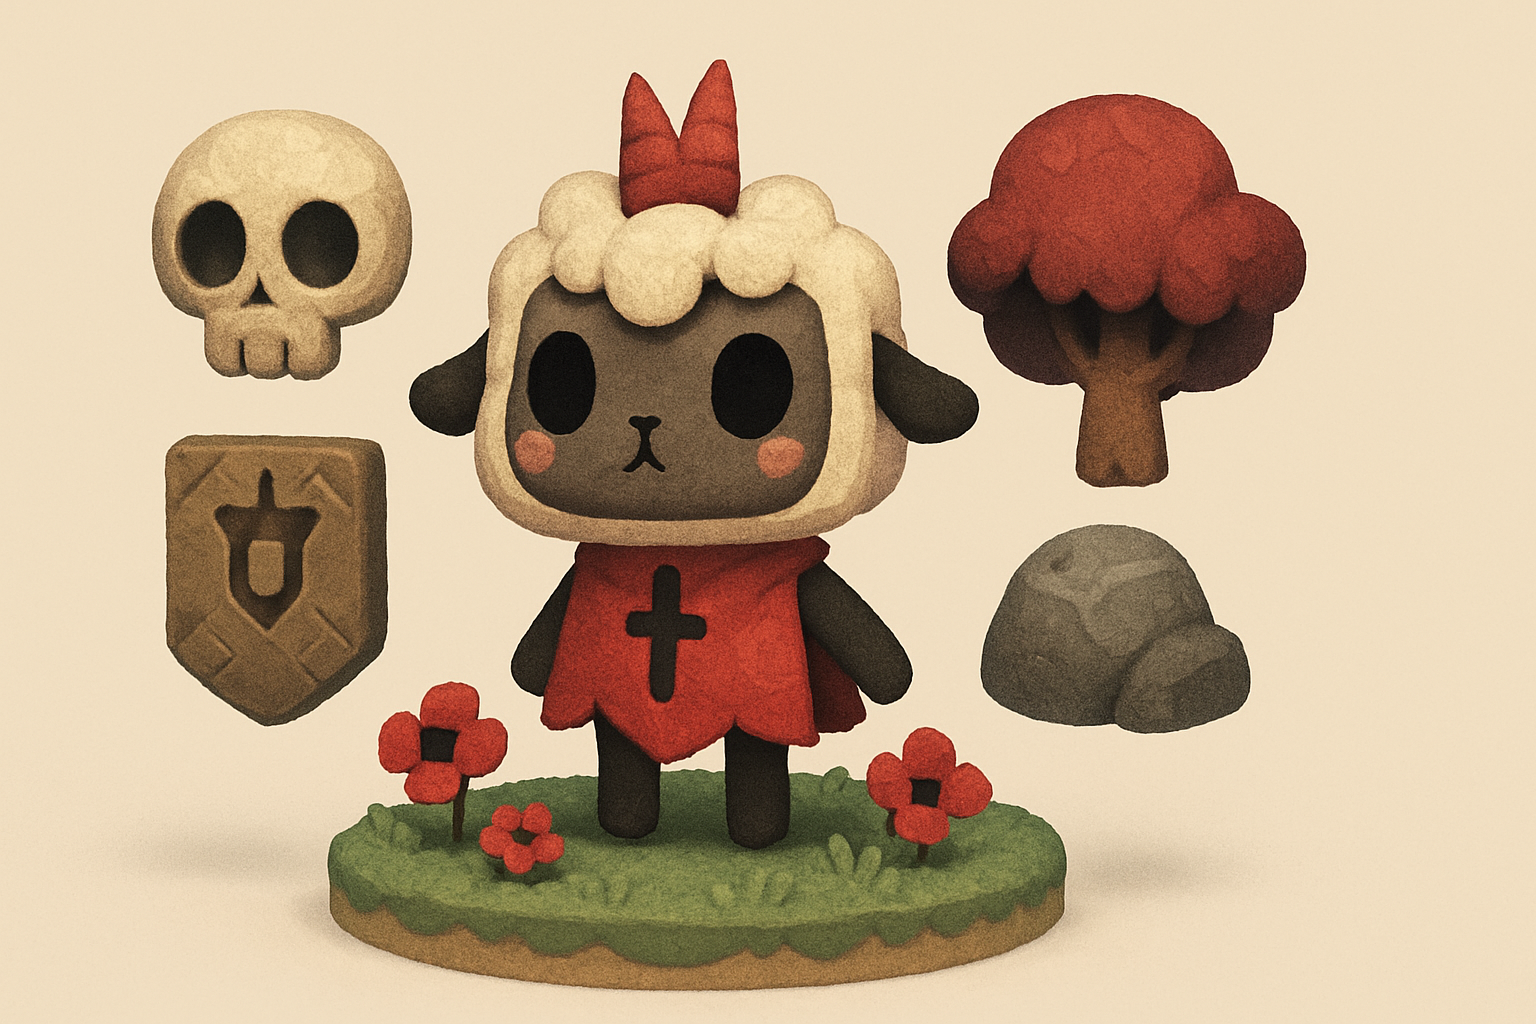
Best practices for stylized textures
Hand-painted textures define the style. In my process:
- I bake simple ambient occlusion and curvature maps for guidance.
- Base colors are laid in broad, flat shapes.
- I add soft gradients and subtle brushwork for depth—avoiding photorealistic detail.
I always preview textures in-engine or with final shaders to ensure colors and values read well.
Tools and techniques for hand-painted effects
I use 3D painting tools for direct feedback (e.g., Substance Painter, Blender’s texture paint). My tips:
- Use a limited palette—too many colors break the style.
- Emphasize edge highlights and shadow shapes for a “toon” effect.
- Layer brushstrokes to mimic the painterly look seen in Cult of the Lamb.
Pitfall: Over-detailing textures. Simplicity is key for this style.
Rigging and Animation Considerations

Preparing models for animation
I keep rigs simple and robust. My steps:
- Place joints only where deformation is needed (e.g., shoulders, elbows, knees).
- Add extra bones for expressive faces if required.
- Weight paint with broad gradients for smooth, cartoony movement.
Tips for expressive, game-ready rigs
Expressiveness comes from squash/stretch and exaggerated poses. I:
- Use blendshapes or simple bone-based facial rigs for emotive eyes and mouths.
- Test rigs with basic animations early to catch deformation issues.
- Keep controllers intuitive—animators should be able to create big, readable poses quickly.
Optimizing and Exporting for Games and XR

Retopology and polygon count management
Stylized assets don’t need high polycounts. My approach:
- Keep characters under 5–8k tris for real-time use.
- Use retopology tools or AI-assisted workflows (like Tripo’s segmentation and retopo) for fast, clean results.
- Remove hidden faces and merge overlapping geometry where possible.
Export settings for different platforms
I tailor exports based on the engine or platform:
- Use FBX or GLTF for most game engines and XR.
- Apply scale and orientation corrections before export.
- Pack UVs efficiently and use texture atlases if possible.
Checklist:
- Freeze transforms
- Apply clean naming conventions
- Double-check normals and smoothing groups
AI-Powered Tools and Alternative Methods

How I use Tripo AI for rapid prototyping
For quick blockouts or variations, I often use Tripo’s text/image/sketch input to generate base meshes. This helps me:
- Jumpstart the modeling process with a stylized base
- Quickly explore alternatives before committing
- Use the built-in retopology and texturing to save manual steps
I still refine and texture manually to match the Cult of the Lamb aesthetic, but AI tools speed up the early phases.
Comparing manual and AI-assisted workflows
Manual modeling gives me full control over style and topology, which is crucial for hero assets. AI-assisted workflows shine when I need:
- Fast concept iterations
- Background or secondary assets
- Quick retopology and UV unwrapping
Tip: Always review and clean up AI outputs—don’t rely on them for final, production-ready assets without manual checks.
Lessons Learned: My Best Practices and Common Pitfalls

What I’ve learned from real-world projects
- Stylized models benefit from clear planning and reference gathering.
- Blockout and silhouette are more important than fine details.
- Consistency in texture style is critical for a cohesive look.
- Early optimization saves headaches at export and integration stages.
Mistakes to avoid when modeling stylized assets
- Overcomplicating geometry or textures—simplicity is your friend.
- Skipping the reference phase or working from memory.
- Ignoring topology flow, leading to poor deformations.
- Relying solely on AI outputs without manual refinement.
My advice: Stay focused on the fundamentals—shape, silhouette, and style. Use AI tools to boost productivity, but always finish with a human touch. That’s how I’ve consistently delivered high-quality, stylized assets for games like Cult of the Lamb.


