How to Create a High-Quality Cow 3D Model: Expert Workflow
Creating a production-ready cow 3D model requires a blend of artistic skill, technical know-how, and the right tools. In my experience, the most efficient workflow combines solid reference gathering, precise modeling, realistic texturing, and thoughtful rigging, all streamlined by AI-powered platforms like Tripo. This guide distills my hands-on process for building cow models suitable for games, XR, or film—whether you’re a beginner or a seasoned 3D artist looking to speed up your pipeline. You’ll find actionable steps, common pitfalls, and pro tips based on real-world projects.
Key takeaways:
- Start with strong references and clear model goals for accuracy and efficiency
- Block out major forms before refining details to avoid proportion issues
- Proper UV unwrapping and texture work are crucial for realism
- Use retopology and rigging best practices for animation-ready models
- AI tools like Tripo can dramatically reduce manual workload
- Always test exports in the target engine or platform before final delivery
Executive Summary and Key Takeaways
What to Expect from This Guide
This guide walks you through my full workflow for creating a high-quality cow 3D model, from initial planning to final export. I’ll cover each stage in detail—reference gathering, modeling, texturing, retopology, rigging, and exporting—sharing practical advice and lessons learned from real projects.
Top Insights from My 3D Modeling Experience
- Reference quality and purpose definition are foundational—skimping here leads to rework later.
- Blocking and proportion checks save hours compared to jumping straight into detail.
- AI-powered tools can handle repetitive tasks, freeing up time for creative decisions.
- Iterative testing in the target environment is essential for production-ready results.
Planning and Reference Gathering for Cow 3D Models
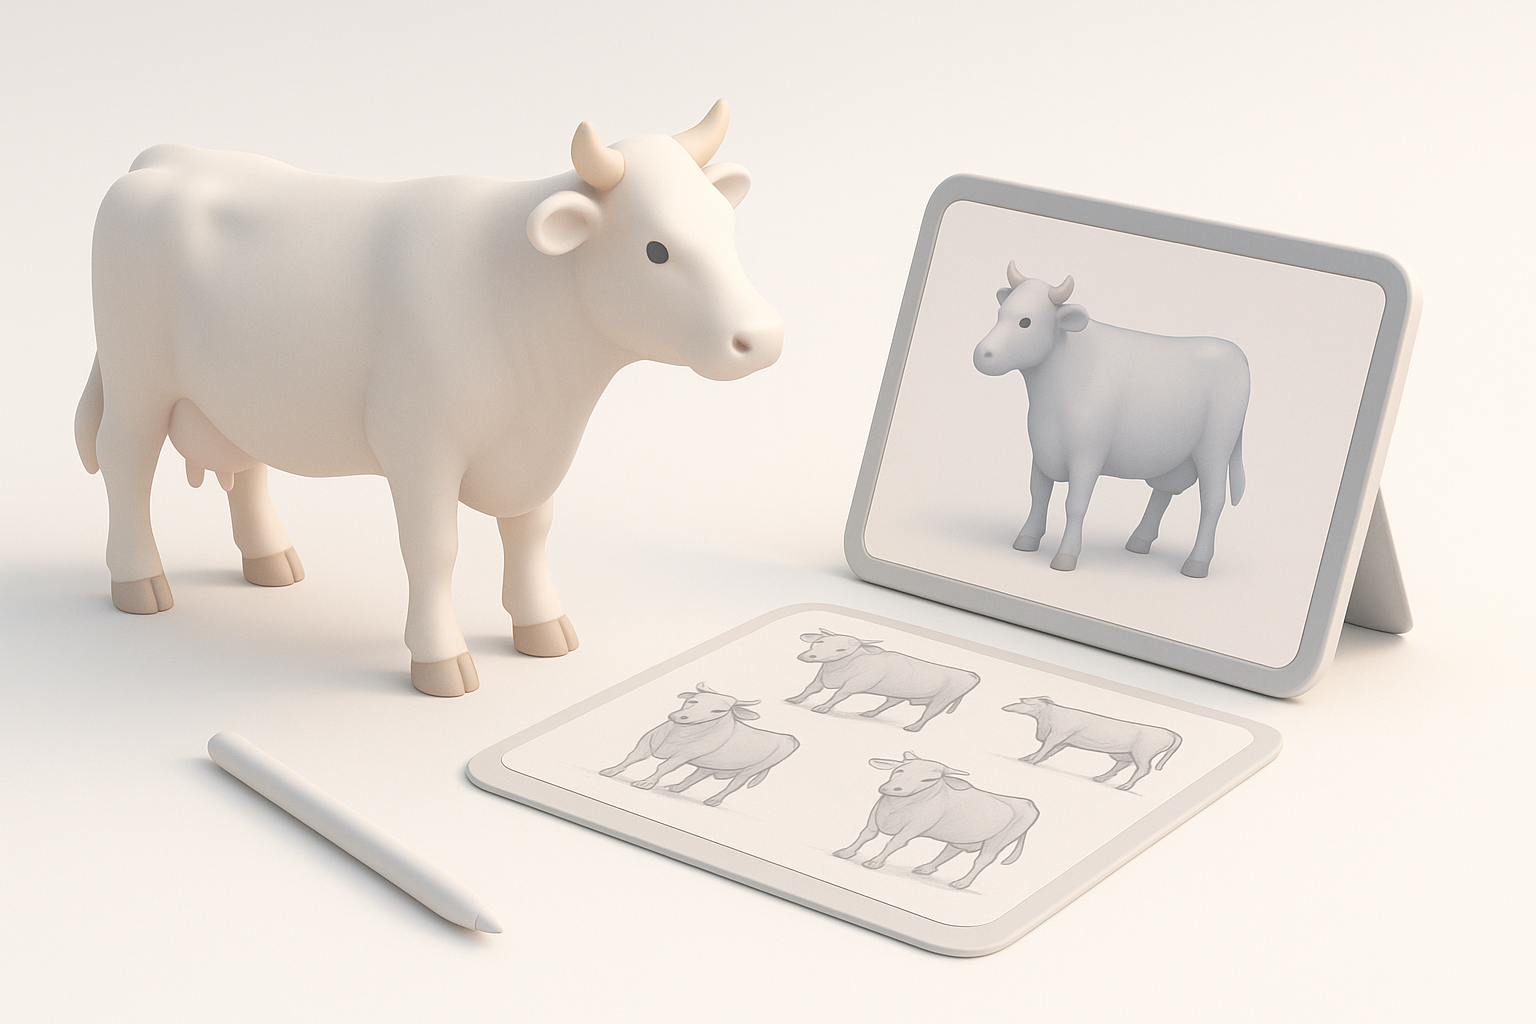
Choosing the Right References
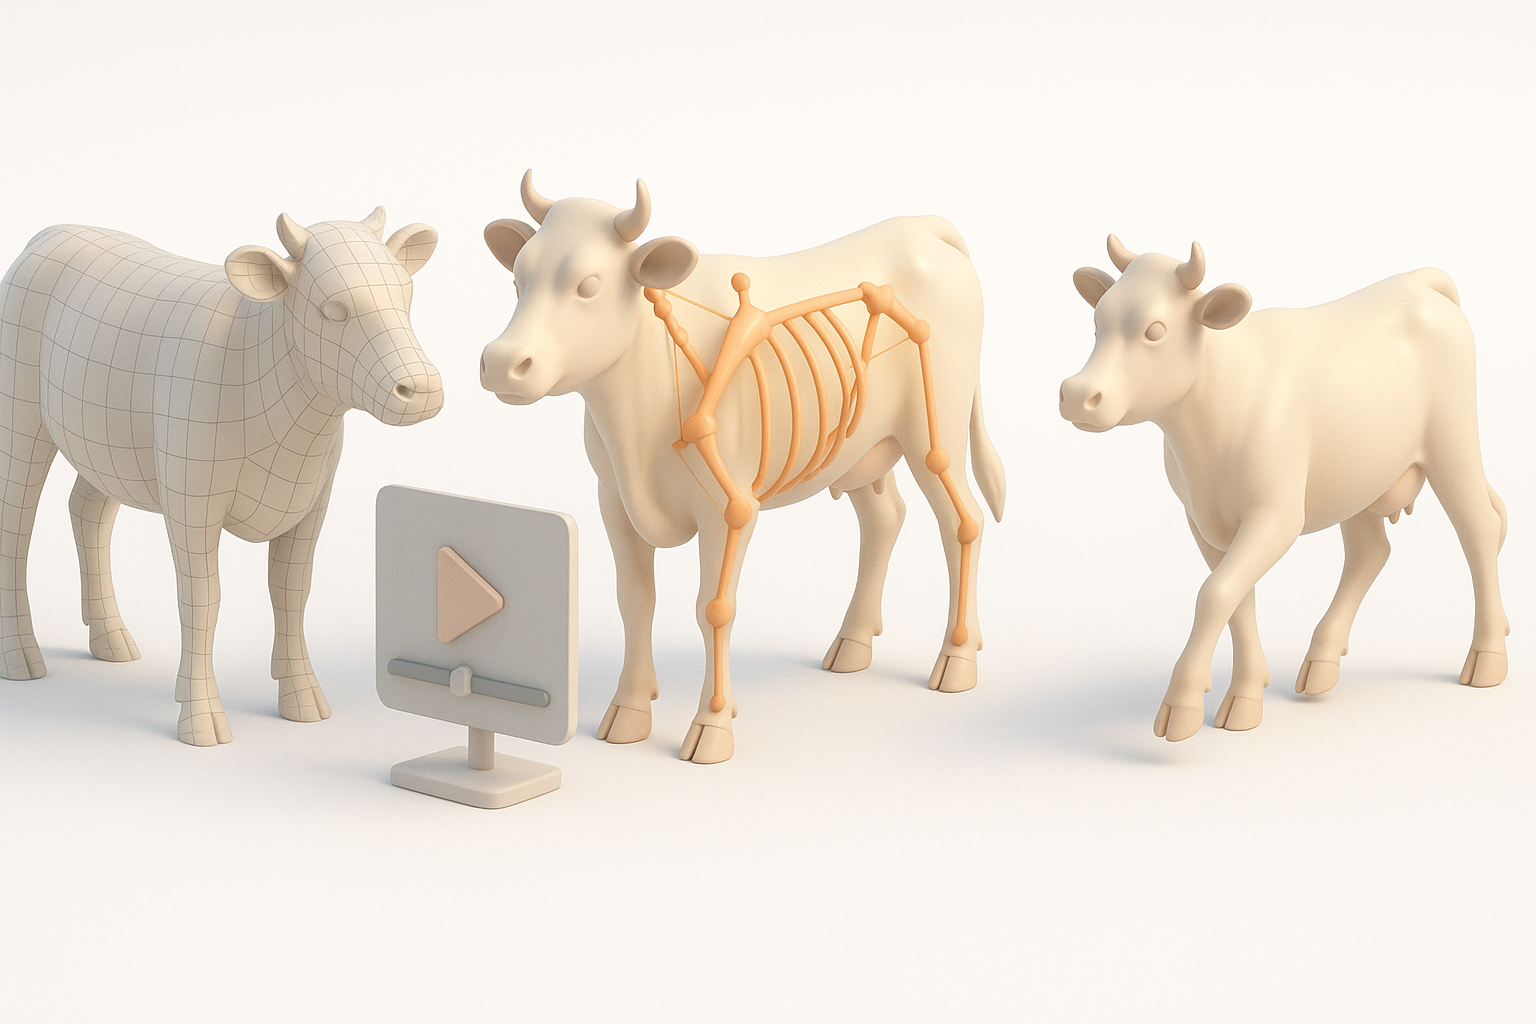
In my workflow, reference images are non-negotiable. I collect high-resolution photos from multiple angles—side, front, top, and close-ups of anatomy details (hooves, head, udder, etc.). I also look for skeletal diagrams and, if possible, 3D scans for anatomical accuracy.
Checklist:
- Gather at least 4–6 clear photos (side, front, back, top)
- Include anatomical diagrams for muscle and bone structure
- Use real-world color and pattern references for texturing
Defining Model Purpose and Level of Detail
Before opening any 3D software, I define the model’s end use: is it for a game, animation, AR/VR, or static render? This determines polygon count, texture resolution, and rigging needs. For real-time applications, I target a lower poly count and optimized textures; for film, I allow higher detail.
Pitfall: Not clarifying the model’s purpose early often leads to wasted effort—redoing topology or downscaling textures later.
Step-by-Step Workflow: Modeling a Cow in 3D
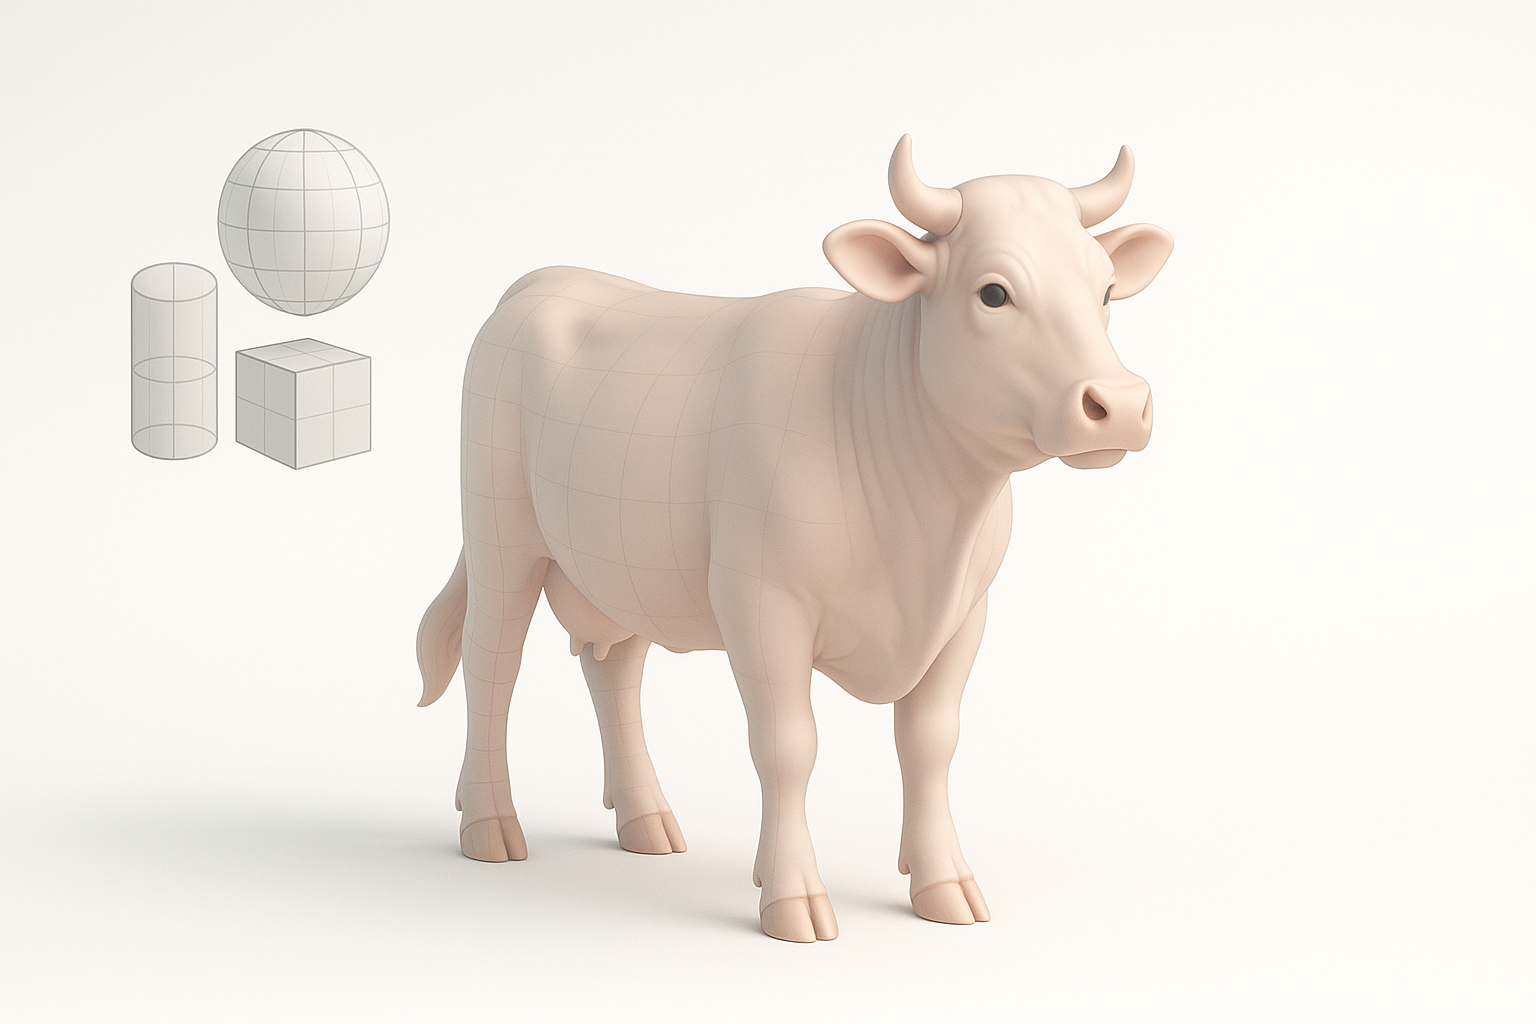
Blocking Out the Base Shape
I start by blocking out the cow’s main volumes using simple shapes—boxes and cylinders for the torso, legs, and head. This lets me quickly check proportions against my references before committing to details.
Steps:
- Import reference images into the viewport
- Block out major forms with primitives
- Adjust scale and silhouette until proportions match references
Refining Anatomy and Proportions
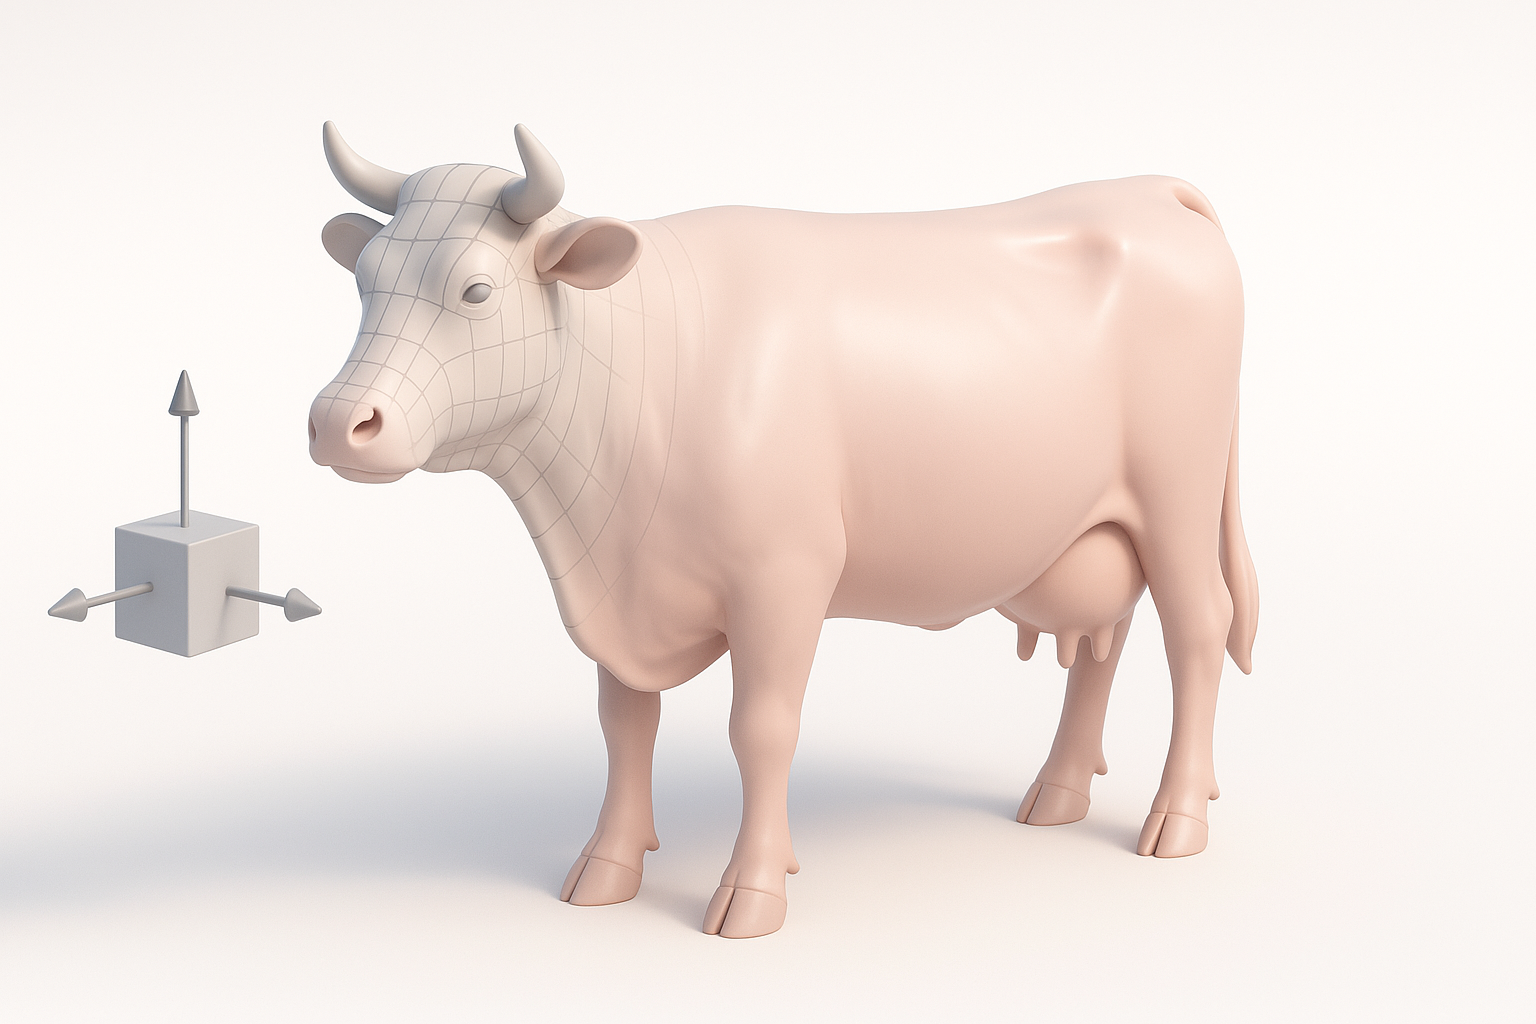
Once the blockout feels right, I move on to refining the shapes. I pay special attention to muscle flow, joint placement, and characteristic features like the head shape and hooves. I often use sculpting tools at this stage to smooth transitions and add anatomical landmarks.
Tips:
- Frequently toggle between orthographic and perspective views for accuracy
- Use symmetry tools to speed up modeling, then break symmetry for realism
Texturing and Materials: Bringing the Cow to Life
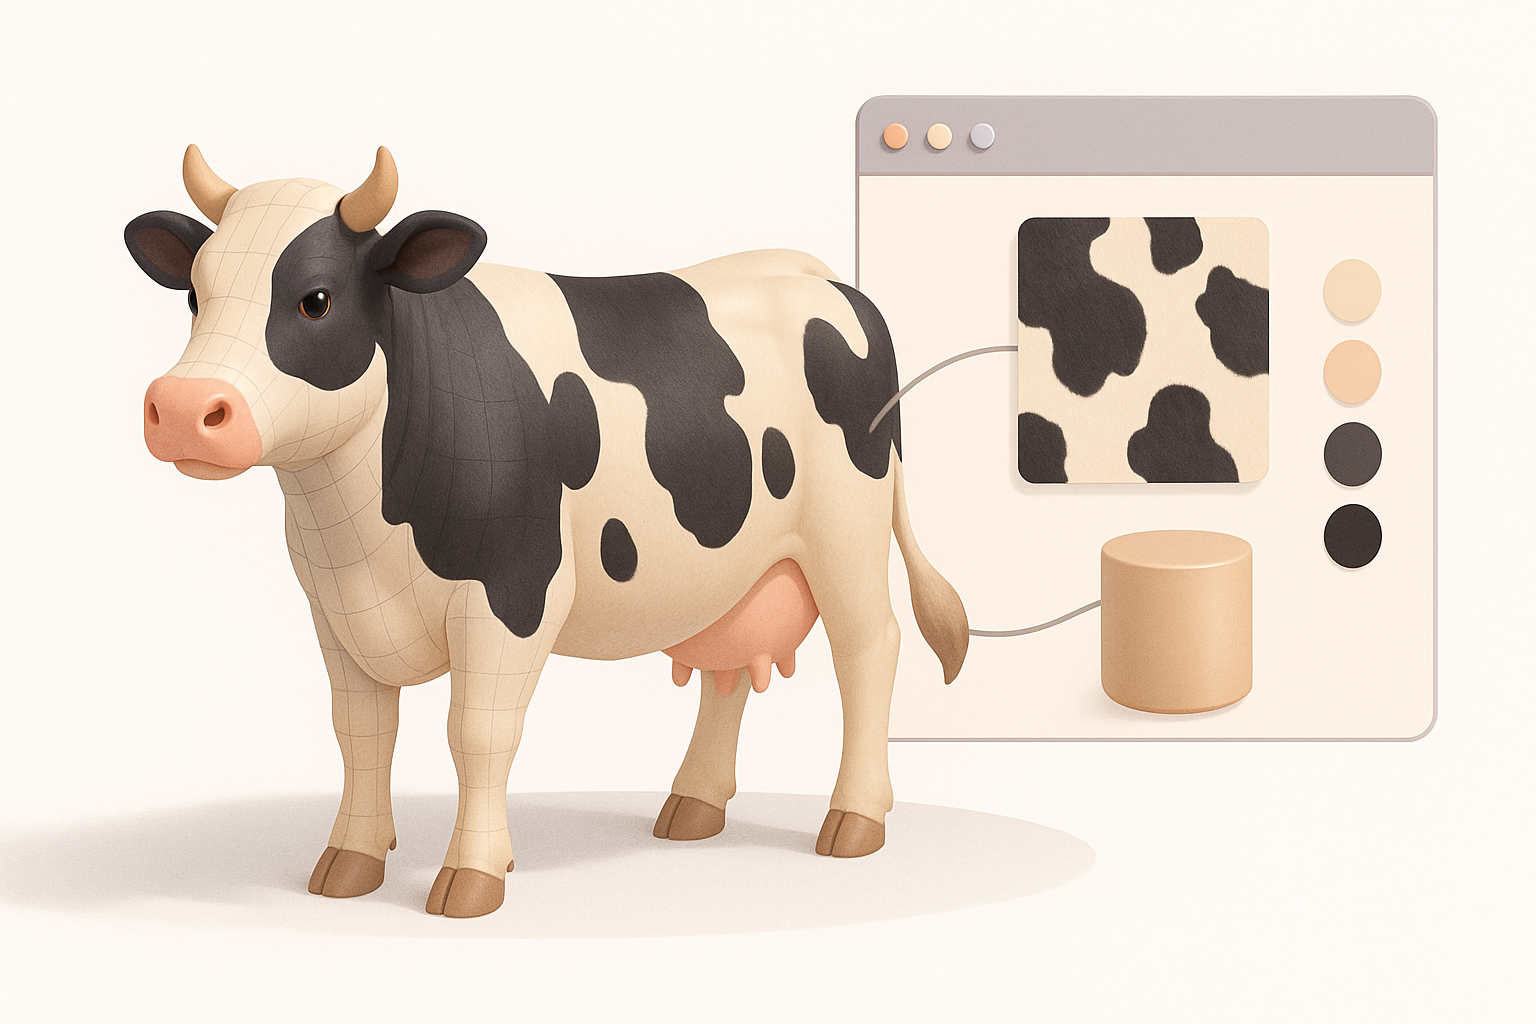
UV Unwrapping Best Practices
Good UVs are key to seamless texturing. I aim for even texel density and minimal stretching, laying seams along less visible areas (inside legs, belly). Automated UV tools can help, but I always check and tweak manually.
Best practices:
- Keep islands logically organized (head, body, legs separate)
- Minimize seams on the most visible surfaces
- Use checker patterns to spot stretching before texturing
Applying Realistic Cow Textures
With UVs ready, I create base color, roughness, and normal maps. For realism, I use high-res photos for skin and fur patterns, then hand-paint adjustments for unique markings. I often use Tripo’s AI texturing features to generate base textures, then refine them in my painting tool of choice.
Workflow:
- Project photo textures onto the mesh
- Adjust color, add dirt and wear for realism
- Test in different lighting setups to ensure consistency
Retopology, Rigging, and Animation Essentials
Optimizing Geometry for Animation
Even if the model looks great, bad topology can ruin animation. I retopologize with edge loops around joints (knees, shoulders, hips) for smooth deformation. Automated retopology tools in Tripo speed this up, but I always review and tweak critical areas manually.
Checklist:
- Maintain quad-based topology for deformation
- Add extra loops at bending points
- Remove unnecessary edge loops to keep poly count efficient
Setting Up Basic Cow Rigs
For basic animation, I add a skeleton with primary bones: spine, legs, head, tail. I weight-paint influences, testing with simple walk or idle animations. Tripo’s auto-rigging can get you 80% there; manual adjustments ensure correct limb movement and prevent skinning artifacts.
Tip: Test rig with exaggerated poses to catch weight-painting issues early.
Exporting and Integrating Cow 3D Models
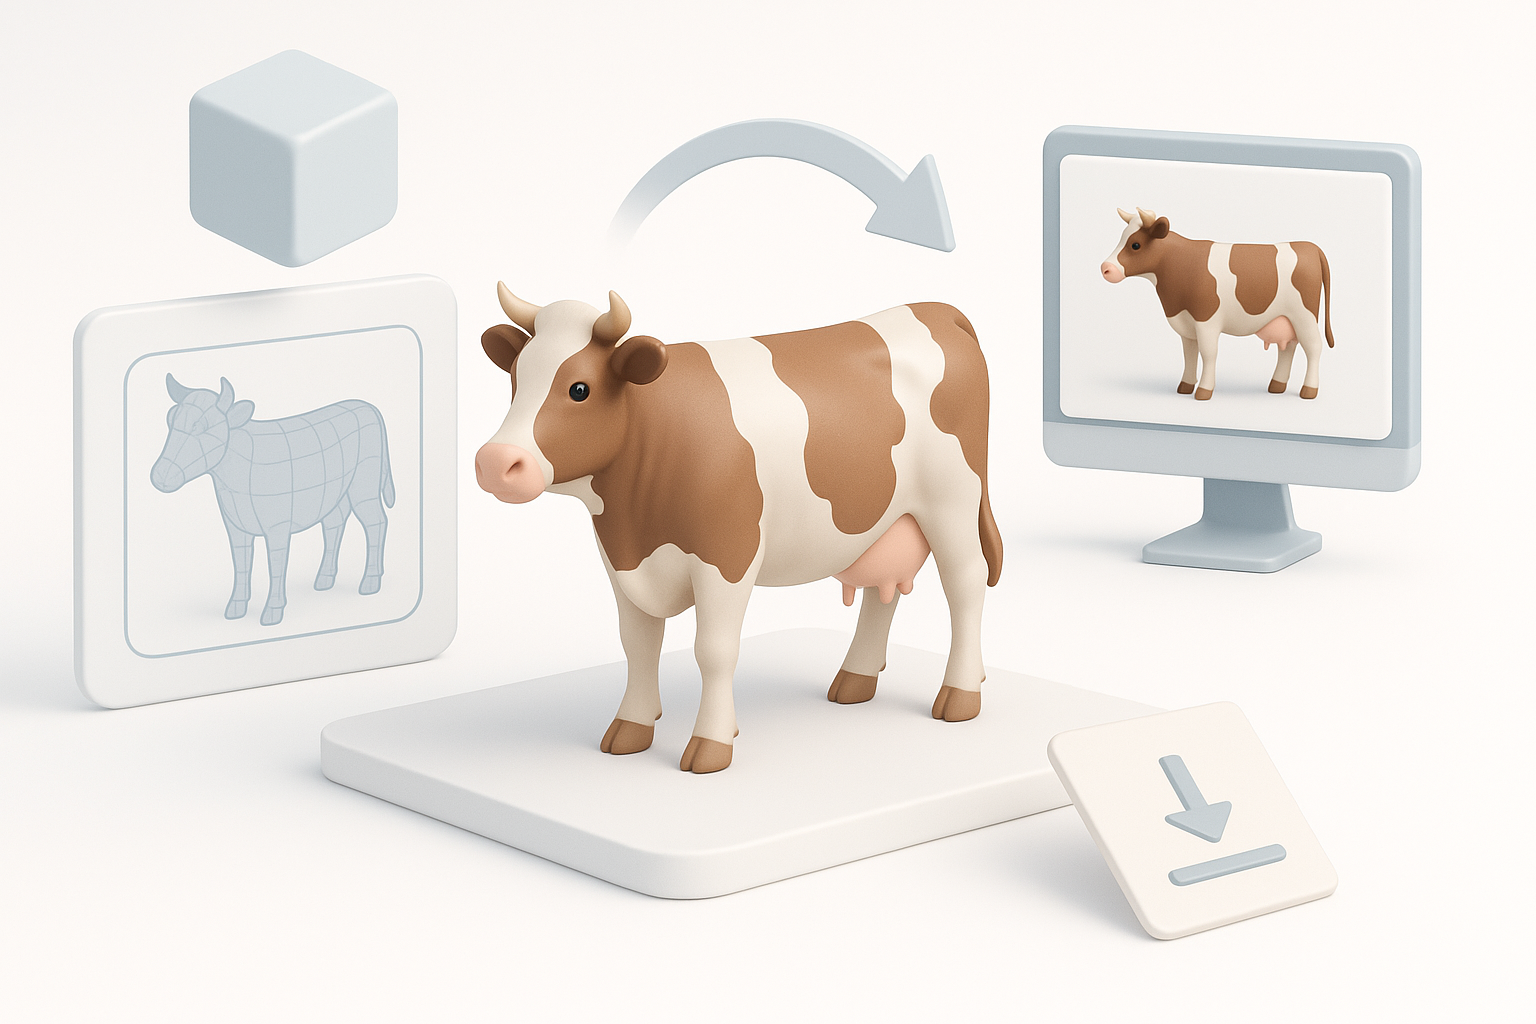
Export Settings for Different Platforms
Export requirements vary: for games, I use FBX or glTF with embedded textures and animations; for AR/VR, I check for compatibility and optimize file size. I always double-check scale and orientation before export.
Checklist:
- Apply transformations (rotation, scale) before export
- Bake animations if needed
- Compress textures for real-time applications
Testing in Game Engines and XR
I import the model into my target engine (Unity, Unreal, or an XR platform) and test for shading, rigging, and performance. I look for lighting issues, texture seams, and animation glitches.
Pitfall: Skipping this step can result in last-minute surprises, especially with normals and transparency.
AI-Powered Tools and Workflow Enhancements
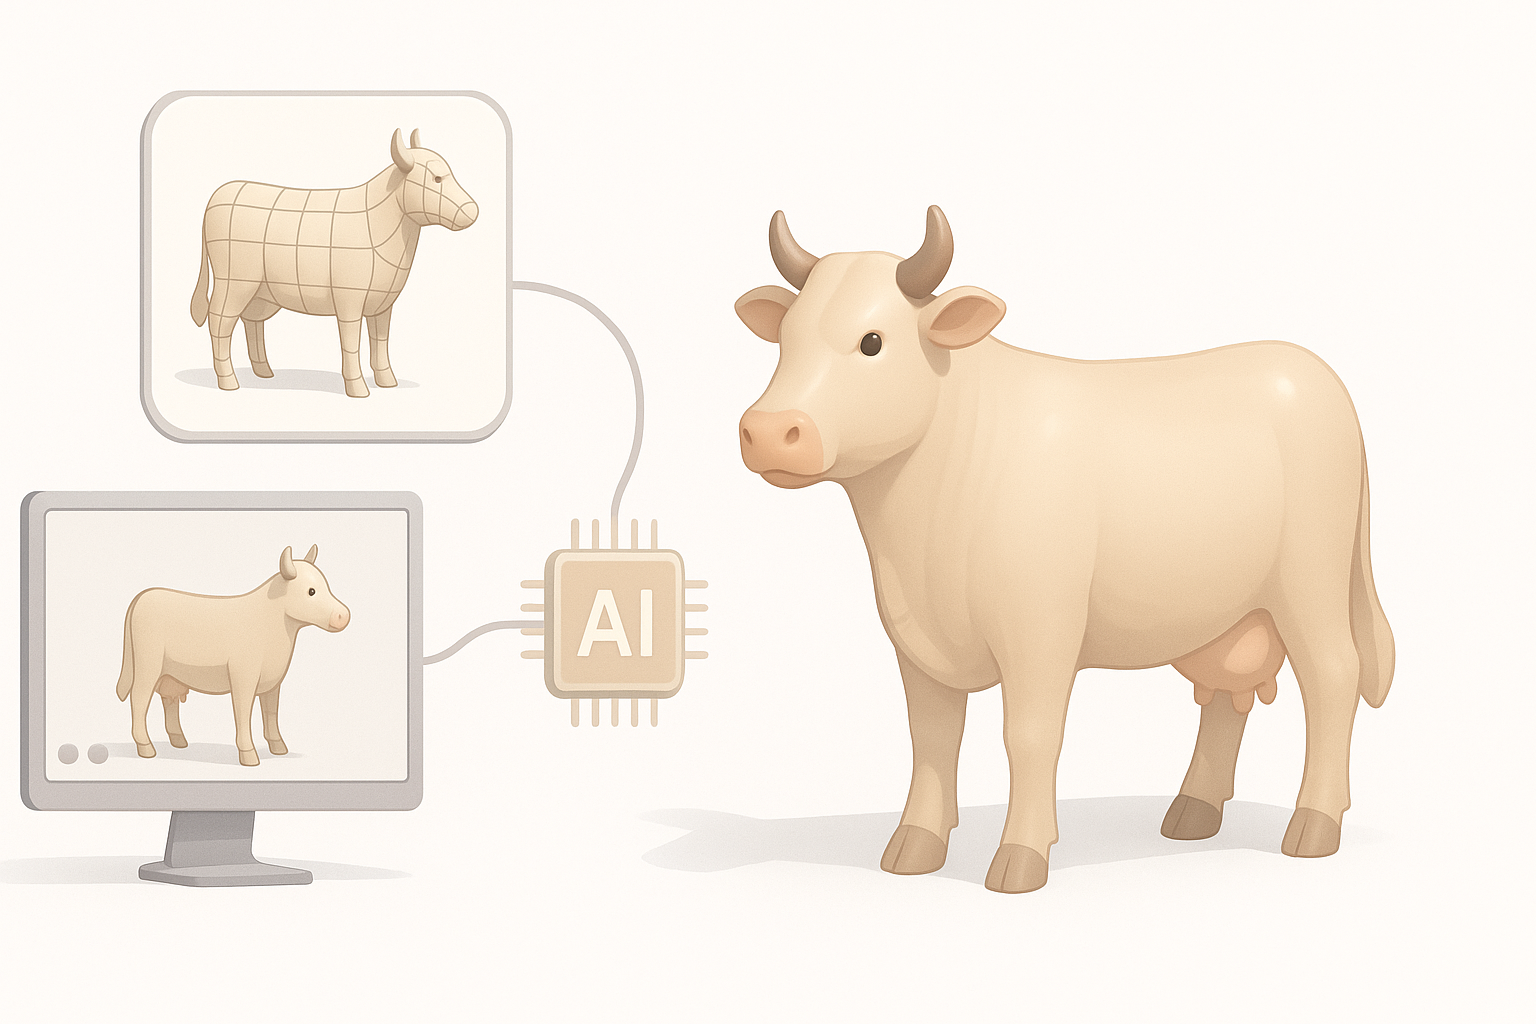
How I Use Tripo AI for Faster Results
Tripo AI streamlines several steps: I generate a base mesh from a text prompt or reference image, then use built-in segmentation and retopology to get a clean, animatable model. The texturing AI provides a solid starting point, which I refine for project-specific needs.
Practical tip: Use AI-generated models as a foundation, not a final product—manual tweaks are still necessary for production quality.
Comparing Manual and AI-Assisted Approaches
Manual modeling offers maximum control but is time-consuming. AI-assisted workflows with Tripo allow for rapid iteration and bulk asset creation. For hero assets, I still invest manual time; for background or prototyping, AI is a huge time-saver.
Summary:
- Use AI for speed and prototyping
- Rely on manual skills for polish and customization
Common Challenges and My Solutions
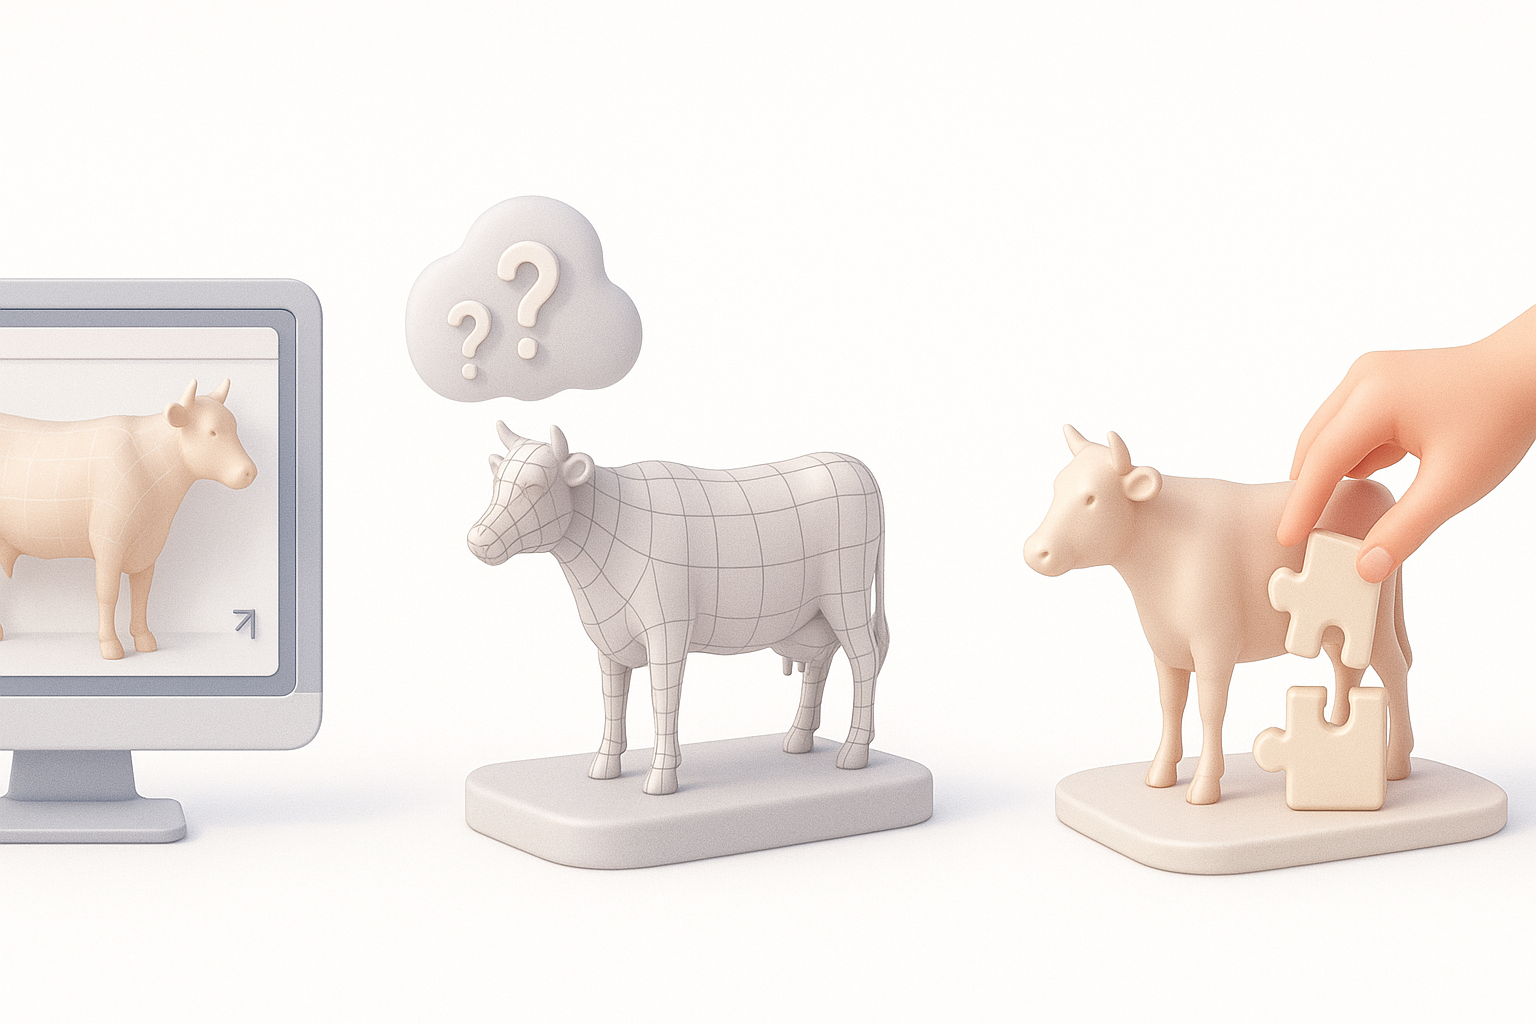
Fixing Anatomy Mistakes
It’s easy to misjudge proportions or muscle placement, especially in stylized models. I constantly cross-check with references and use silhouette checks. If something feels off, I step back and compare to anatomy diagrams.
Solution: Don’t be afraid to redo blockouts—fixing early is faster than patching later.
Improving Texture Realism
Flat or blurry textures kill realism. I layer photographic details, hand-paint highlights/shadows, and use normal maps for fur and wrinkles. Testing in various lighting helps catch issues before final delivery.
Tip: Subtle color variation and dirt add life—avoid perfectly clean textures.
Best Practices and Pro Tips for Cow 3D Modeling
What I’ve Learned from Real Projects
- Always clarify the model’s purpose and constraints upfront
- Invest time in blockout and proportion checks—it pays off
- Use AI tools to handle repetitive tasks, but always review the results
- Test early and often in the target environment
Recommended Resources and Next Steps
- Study real-life anatomy and movement—visit a farm or watch videos if possible
- Explore online libraries for reference images and anatomy diagrams
- Experiment with Tripo’s latest features for faster iteration
- Practice by modeling different breeds or poses to build versatility
In summary: High-quality cow 3D modeling is about combining solid fundamentals with efficient workflows. With careful planning, the right references, and smart use of AI tools like Tripo, you can create production-ready assets quickly—without sacrificing quality.


