How to Create and Use Brawlhalla 3D Models: Expert Workflow
Creating Brawlhalla-style 3D models efficiently is all about blending stylized aesthetics with production-ready techniques. In my workflow, I leverage AI-powered tools to quickly generate and refine assets, focusing on game-ready topology and consistent style. This guide is for game artists, animators, and developers aiming to speed up asset creation without sacrificing quality. I’ll walk you through my proven process—from concept to animation-ready model—highlighting practical steps, common pitfalls, and expert tips.
Key takeaways
- Use AI-driven platforms to accelerate base mesh creation and texturing for Brawlhalla-style models.
- Gather strong references and define style guides early to ensure visual consistency.
- Optimize topology and UVs for real-time engines to avoid performance issues.
- Always retopologize and check scale, especially for animation and rigging.
- Export models in formats compatible with your target engine or XR platform.
Understanding Brawlhalla 3D Models
What Makes Brawlhalla Models Unique
Brawlhalla models are instantly recognizable for their stylized, cartoon-like proportions and bold, readable shapes. In my experience, they rely on exaggerated silhouettes, simplified geometry, and hand-painted textures to stand out in fast-paced gameplay. The models are optimized for clarity at a distance and low system overhead.
Key features:
- Chunky, expressive forms with minimal detail noise
- Clean, efficient topology for fast rendering
- UV layouts suited for hand-painted or stylized textures
Common Use Cases in Games and Animation
I’ve used Brawlhalla-style models not just for fighting games, but also for mobile titles, animation shorts, and XR experiences. Their simplicity makes them versatile and easy to animate, which is essential for rapid prototyping and iteration.
Common scenarios:
- Character and weapon assets for 2D/3D hybrid games
- Animation rigs for cutscenes or promotional content
- Quick mockups for gameplay testing and design pitches
My Workflow for Creating Brawlhalla-Style 3D Models
Concepting and Reference Gathering
Every project starts with strong references. I collect official Brawlhalla art, screenshots, and fan creations to nail down proportions, color palettes, and surface details. I also sketch or gather pose references to guide modeling and rigging later.
Checklist:
- Gather 3–5 reference images for style and proportions
- Define a color palette and material references
- Sketch or outline key poses and expressions
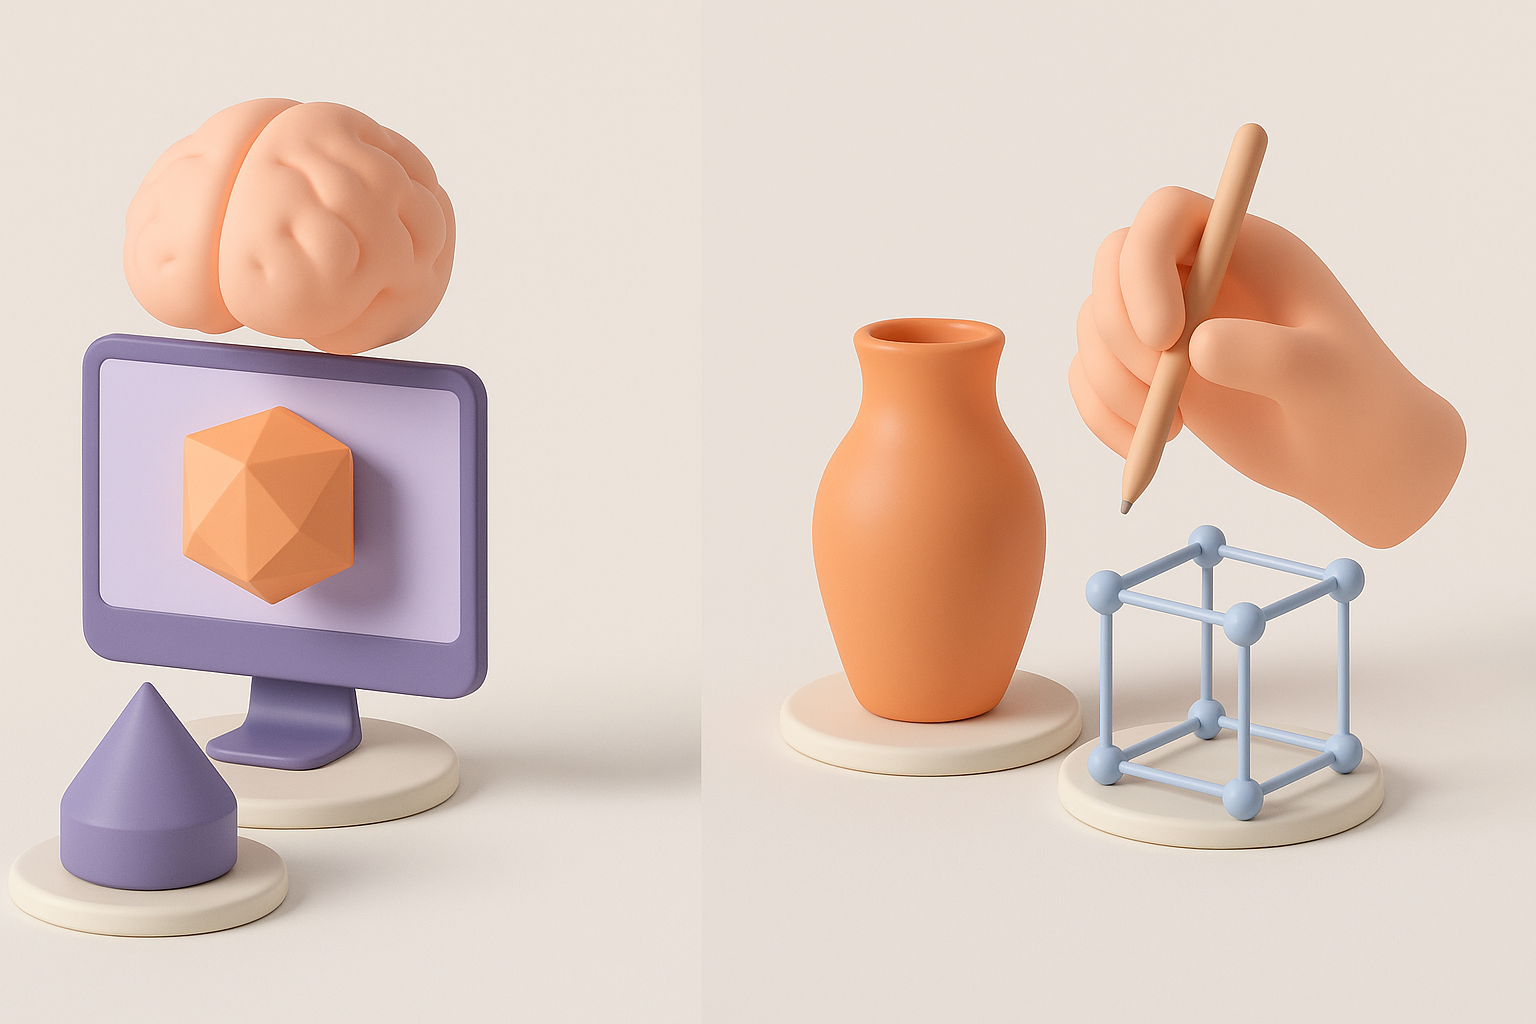
Choosing the Right Tools and Platforms
For speed and flexibility, I rely on AI-powered platforms like Tripo AI to generate base meshes and initial textures. These tools save hours compared to manual sculpting, especially for stylized forms. I supplement with traditional modeling software when fine-tuning or handling unique requirements.
My tool stack:
- Tripo AI for base mesh, segmentation, and texturing
- 3D suite (e.g., Blender, Maya) for retopology and UVs
- Texture painting tools for hand-painted details
Step-by-Step Guide: From Idea to Production-Ready Model
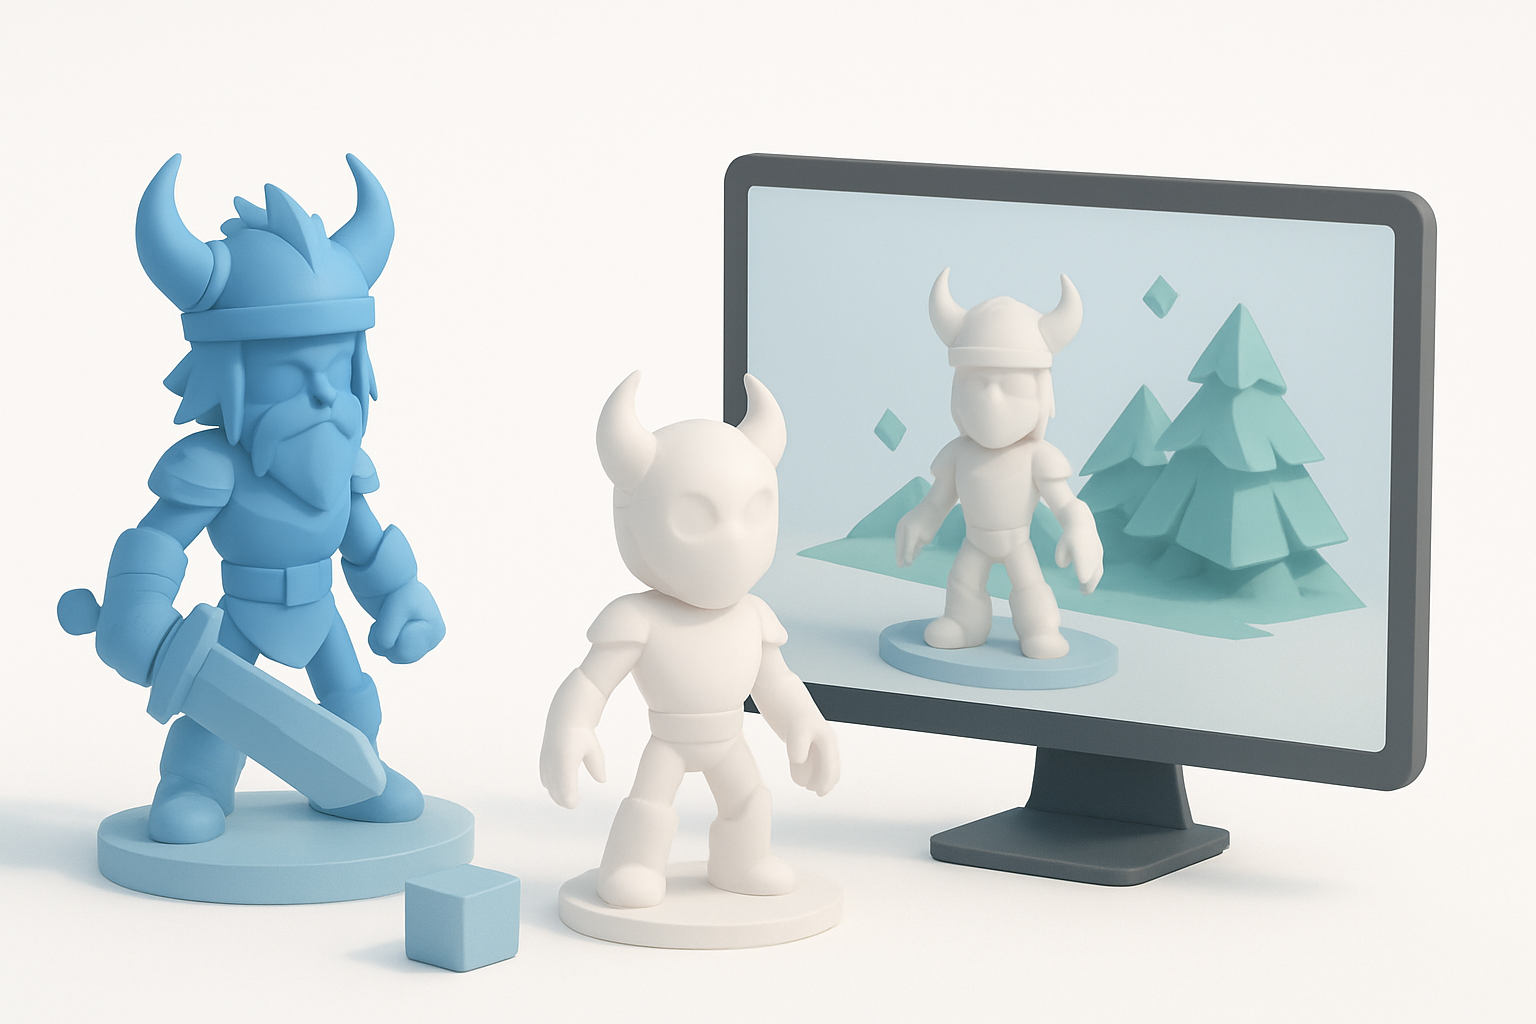
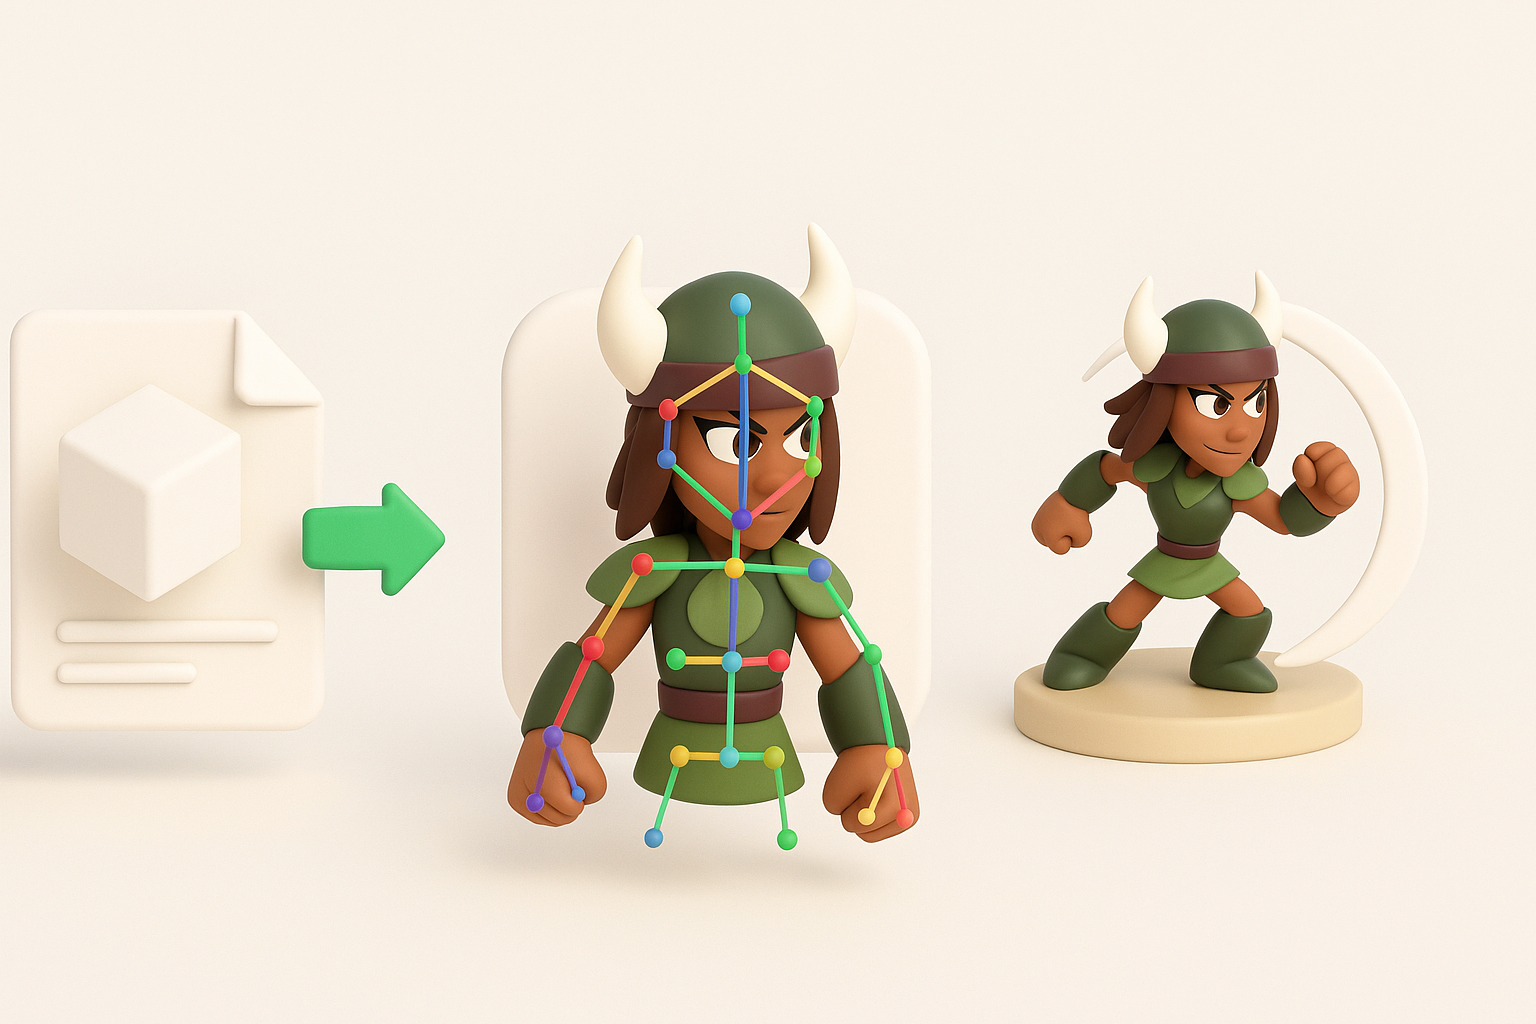
Generating the Base Mesh with AI Tools
I start by inputting a text prompt, reference image, or sketch into Tripo AI. The platform generates a base mesh with segmented parts, which I review for accuracy and style alignment. This step is crucial for quickly iterating on different designs.
Steps:
- Input prompt or image into Tripo AI
- Review generated mesh for silhouette and proportions
- Make quick edits or regenerate if needed
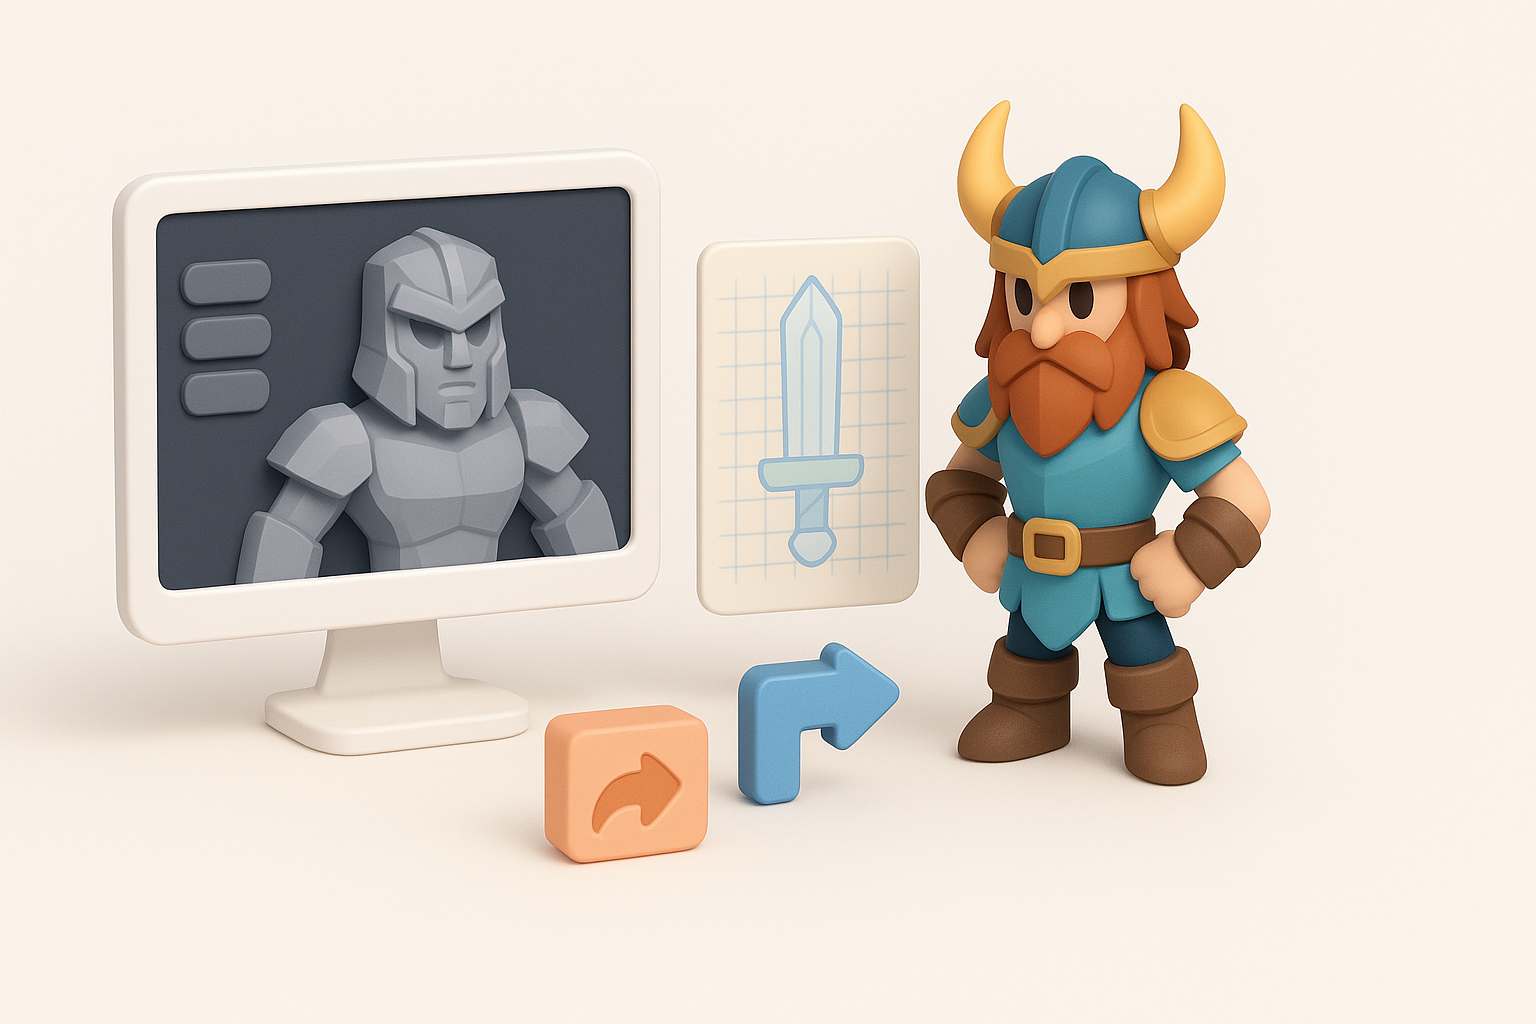
Refining, Retopologizing, and Texturing
Once I have a solid base, I import the mesh into my 3D software for retopology—ensuring clean edge flow and manageable polycount. I unwrap UVs and use Tripo’s texturing tools, then refine further with hand-painting for highlights and shadows.
Key steps:
- Retopologize: Clean up geometry for animation and engine compatibility
- UV unwrap: Optimize for texture painting
- Texture: Use AI-assisted and manual painting for final look
Pitfall: Skipping retopology can lead to shading and deformation issues during animation.
Best Practices and Tips I’ve Learned
Optimizing for Game Engines
I always check polycount and texture size to match engine requirements. Exporting in FBX or GLTF ensures compatibility. I test the model in a basic scene to spot any lighting or shading issues.
Tips:
- Target 5–10k triangles for main characters
- Use 1024x1024 or 2048x2048 textures for clarity
- Check normals and pivots before export
Ensuring Consistent Style and Quality
Consistency is key with stylized assets. I keep a style guide handy and regularly compare new models against my reference set. Using the same toolchain and texturing approach helps maintain uniformity.
Checklist:
- Cross-check new assets with reference models
- Use standard shaders and lighting setups for previews
- Document color values and material settings
Comparing AI-Driven and Traditional 3D Modeling Methods
Speed, Quality, and Flexibility
AI-powered tools like Tripo AI drastically reduce modeling and texturing time. I can go from concept to usable mesh in minutes instead of hours. However, manual methods still offer more control for unique designs and intricate details.
Pros of AI-driven:
- Fast iteration and prototyping
- Good for stylized, segmented assets
- Built-in texturing and UVs
Pros of traditional:
- Maximum control over topology and detail
- Better for highly custom or complex models
When to Use Each Approach
I use AI-driven methods for early-stage concepts, background characters, or when speed is critical. For hero assets or when I need precise control, I switch to traditional modeling.
Decision guide:
- Use AI for rapid asset generation and iteration
- Use manual modeling for unique, high-importance assets or when you need pixel-perfect control
Exporting, Rigging, and Animating Brawlhalla 3D Models
Preparing Models for Animation
Before rigging, I double-check topology—especially around joints—to prevent deformation issues. I use Tripo’s built-in rigging tools for simple skeletons, then refine weights in my 3D suite. I test basic animations to catch problems early.
Steps:
- Check edge flow around elbows, knees, and shoulders
- Apply auto-rigging tools, adjust weights as needed
- Export test animations (walk, jump, attack) for review
Integrating with Game or XR Projects
I export models in engine-friendly formats (FBX, GLTF) and ensure textures are packed correctly. I import into Unity or Unreal, set up materials, and test in a simple scene. For XR, I optimize further for performance and check scale in headset previews.
Tips:
- Use engine-specific export presets
- Double-check material assignments and texture paths
- Test in-engine for lighting and animation playback
By following this workflow, I consistently produce Brawlhalla-style 3D models that are ready for game or animation pipelines—fast, consistent, and production-ready.


