Creating a Bendy and the Ink Machine 3D Model: Expert Workflow
скачать 3d модель для chicken gun
Bringing Bendy from Bendy and the Ink Machine to life in 3D requires a blend of creative intuition and technical workflow. Over the years, I’ve refined a process that leverages AI-powered tools to quickly generate, texture, and rig stylized characters like Bendy—without sacrificing quality. Whether you’re a game developer, digital artist, or hobbyist, this guide walks through my hands-on approach from reference gathering to export-ready assets, highlighting practical tips and lessons learned.
Key takeaways:
- Reference and style analysis are critical for capturing Bendy’s unique look.
- AI-driven 3D tools can drastically speed up base mesh creation and texturing.
- Clean topology and rigging are essential for smooth animation.
- Optimization for real-time use (games/XR) should be considered early.
- Iterative feedback and testing prevent costly rework.
Executive Summary and Key Takeaways

What to Expect from This Guide
In this article, I break down my end-to-end process for creating a 3D Bendy model, focusing on practical steps and tool choices. You’ll get a clear overview of how I approach stylized character modeling, texture creation, and animation setup, with an emphasis on workflow efficiency and asset quality. My goal is to help you avoid common pitfalls and adopt proven techniques for game-ready assets.
My Top Insights for 3D Bendy Models
- Always start with a strong understanding of the character’s visual language.
- Leverage AI-powered tools for rapid iteration, but don’t skip manual refinement.
- Keep your workflow modular—each stage should feed cleanly into the next.
- Test your model in context early (e.g., in-engine previews) to catch issues.
Understanding Bendy’s Design and Reference Gathering
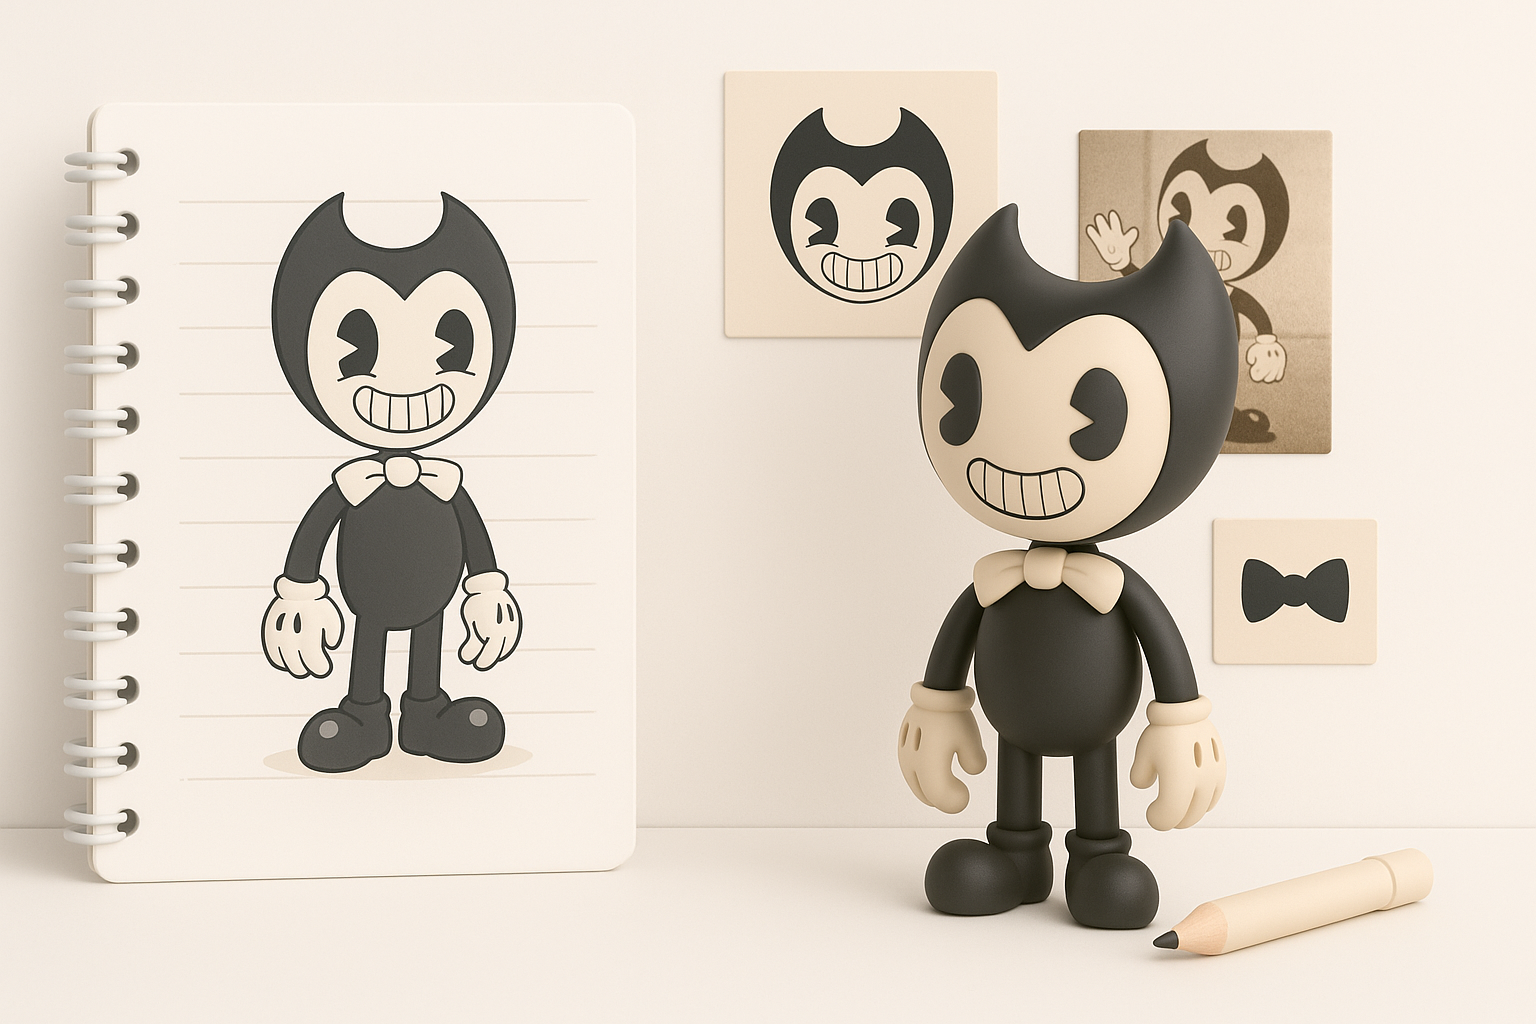
Analyzing Bendy’s Visual Style
Bendy’s design is deceptively simple: vintage cartoon curves, bold silhouettes, and high-contrast “ink” shading. I always start by breaking down these elements:
- Exaggerated features (big eyes, rounded gloves, bowtie)
- Smooth, simplified forms—avoid unnecessary detail
- Strong black/white contrast with minimal color
I recommend sketching or annotating reference images to highlight proportions and key shapes before modeling.
Collecting and Organizing Reference Material
A well-organized reference board saves hours later. My approach:
- Gather official art, in-game screenshots, and fan models.
- Sort references by angle (front, side, 3/4) and detail (face, hands, props).
- Use a digital moodboard or folder structure for quick access.
Checklist:
- Multiple views of Bendy (front, side, back)
- Close-ups of hands, face, and bowtie
- Screenshots of in-game lighting and materials
Choosing the Right Tools and Platforms
Why I Use AI-Powered 3D Creation Tools
For stylized characters like Bendy, I find AI-driven platforms (like Tripo) invaluable for:
- Rapid base mesh generation from text prompts, sketches, or images
- Automated segmentation and retopology, saving manual cleanup time
- Quick preview of textures and materials for stylized looks
This lets me focus on creative tweaks and style matching, rather than repetitive technical steps.
Comparing Traditional and AI-Driven Workflows
Traditional workflows rely on manual sculpting, retopology, and texturing—great for total control but time-consuming. AI-powered tools streamline:
- Base mesh creation (minutes, not hours)
- Automated UV mapping and texturing
- Built-in export settings for game engines
Pitfall: Over-reliance on automation can lead to generic results. I always review and refine outputs to ensure the model matches my vision.
Step-by-Step: Modeling Bendy in 3D
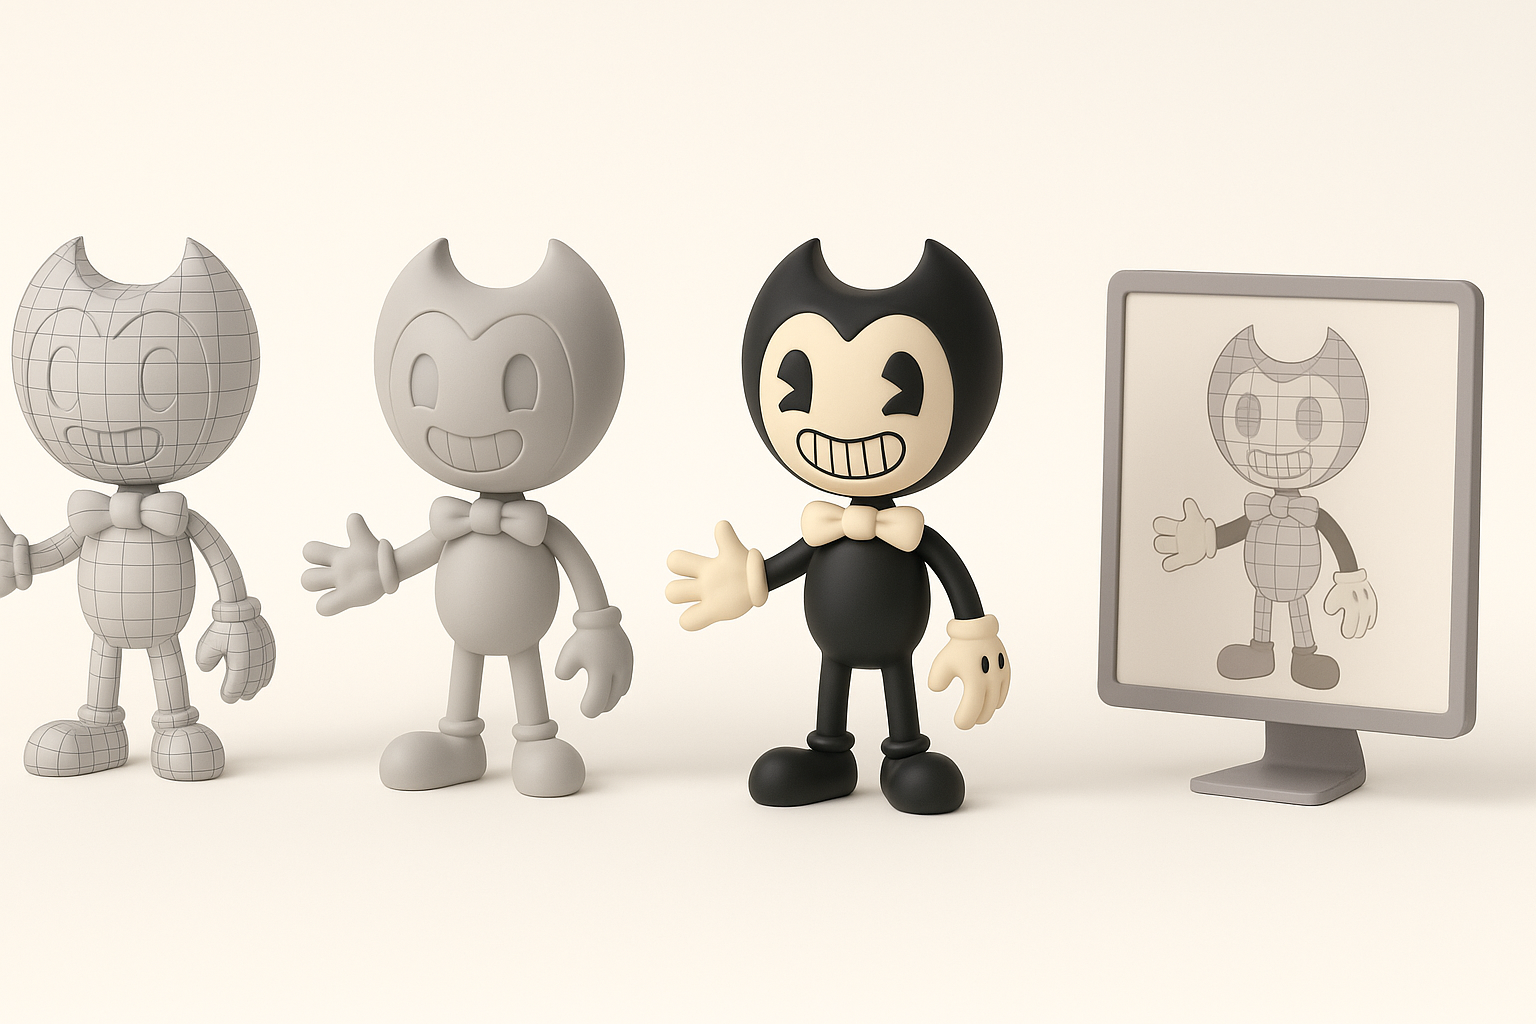
Blocking Out the Base Mesh
I start by generating a rough base mesh using Tripo, feeding in annotated sketches or reference images. This step captures overall proportions quickly.
Steps:
- Input references or sketches into the AI tool.
- Review the generated mesh for silhouette accuracy.
- Make manual adjustments to major forms (head, body, limbs).
Refining Shapes and Adding Details
With the base mesh in place, I move to secondary forms and stylized features:
- Sculpt or model facial features, gloves, and bowtie.
- Simplify geometry—Bendy’s style is clean, not hyper-detailed.
- Keep edge loops clean for easier rigging later.
Tip: Constantly check your model against reference images from multiple angles.
Texturing and Shading for the Ink Machine Look
Creating Stylized Textures
Bendy’s “ink” look relies on hand-painted or procedural textures with strong contrast. I often:
- Use AI tools to auto-generate base textures, then refine in a 2D editor.
- Paint exaggerated shadows and highlights to mimic the game’s toon shading.
Checklist:
- Black and white palette with subtle gradients
- Painted linework for cartoon outlines
- Minimal surface noise
Applying Materials and Shaders
For shading, I use toon/cel shaders to replicate the in-game feel:
- Assign materials with sharp shadow transitions.
- Tweak specular and rim lighting for a “wet ink” effect.
- Preview in a real-time engine to match the intended look.
Retopology, Rigging, and Animation Tips

Efficient Retopology for Animation
Clean topology is essential for smooth deformations. I use built-in retopology tools to:
- Reduce polycount while preserving silhouette
- Ensure edge flow follows joints (shoulders, elbows, knees)
- Create simple UVs for easy texturing
Tip: Test basic deformations early to catch problem areas.
Setting Up Rigs and Simple Animations
For Bendy, a basic biped rig works well. My steps:
- Use auto-rigging features to place joints.
- Skin weights manually for tricky areas (hands, face).
- Animate simple idle or walk cycles to test the rig.
Pitfall: Overcomplicating the rig can slow you down—keep it simple unless advanced animation is needed.
Exporting, Optimization, and Integration

Export Settings for Games and XR
Export settings depend on target platforms. I typically:
- Export as FBX or glTF for compatibility.
- Set texture sizes to balance quality and performance (e.g., 1024x1024).
- Check scale and orientation to match engine requirements.
Optimizing for Real-Time Performance
Optimization is non-negotiable for games and XR. My process:
- Limit polycount (target under 10k for stylized characters).
- Bake normals and ambient occlusion to enhance detail.
- Test in-engine for frame rate and visual fidelity.
Checklist:
- Remove hidden geometry
- Compress textures as needed
- Verify LODs if supported
Best Practices and Lessons Learned
Common Pitfalls and How I Avoid Them
- Rushing reference gathering: Always invest time upfront.
- Ignoring topology: Leads to animation headaches—clean up early.
- Over-texturing: Bendy’s style thrives on simplicity.
My Workflow Improvements Over Time
- Integrating AI tools for base mesh and texturing has cut my turnaround time by 70%.
- Regular in-engine previews catch scale and shading issues before they compound.
- Modular workflow: I now save each stage (model, texture, rig) as separate files for easy iteration.
By following this structured, AI-accelerated workflow, I consistently deliver stylized 3D characters like Bendy—ready for games, XR, or animation—without getting bogged down in technical bottlenecks.


