Tripo DCC Bridge für ZBrush: Installation & Schnellstart

Tripo3D ZBrush Bridge ist ein leichtgewichtiges Plugin, das ZBrush direkt mit Tripo Studio verbindet. Mit dieser Bridge können Sie generierte Modelle mit minimalem Aufwand direkt aus dem Browser an ZBrush senden – ganz ohne manuelle Downloads. Sobald ZBrush die Datei empfängt, müssen Sie nur noch klicken, um sie zu importieren, und das Modell wird automatisch in Ihrer Lightbox gespeichert. Dieser optimierte Prozess hilft Künstlern und Designern, sich auf die Modellierung und den Szenenaufbau zu konzentrieren, anstatt sich mit der Dateiverwaltung zu beschäftigen.
Systemanforderungen
- Betriebssystem: Windows, Mac
- ZBrush: 2026+
- Browser:
- Unterstützt Google Chrome 116+, Edge 116+, Opera 102+
- Andere Browser werden nicht unterstützt
- Standard-Importeinstellungen:
- Pivot: Center Bottom (Mitte Unten)
- Auto Material Creation: Aktiviert
- Auto Asset Placement: Aktiviert
- Vertex color: Aktiviert
Schritt-für-Schritt-Installation
Schritt 1:
Gehen Sie zu Tripo Studio und laden Sie das Tripo3D ZBrush Bridge-Paket herunter.
Schritt 2:
Entpacken Sie das heruntergeladene Paket. Im Ordner Tripo3D_ZBrush_Bridge finden Sie:
Tripo3DBridgeData(Ordner)Tripo3DBridge.zsc(Datei)
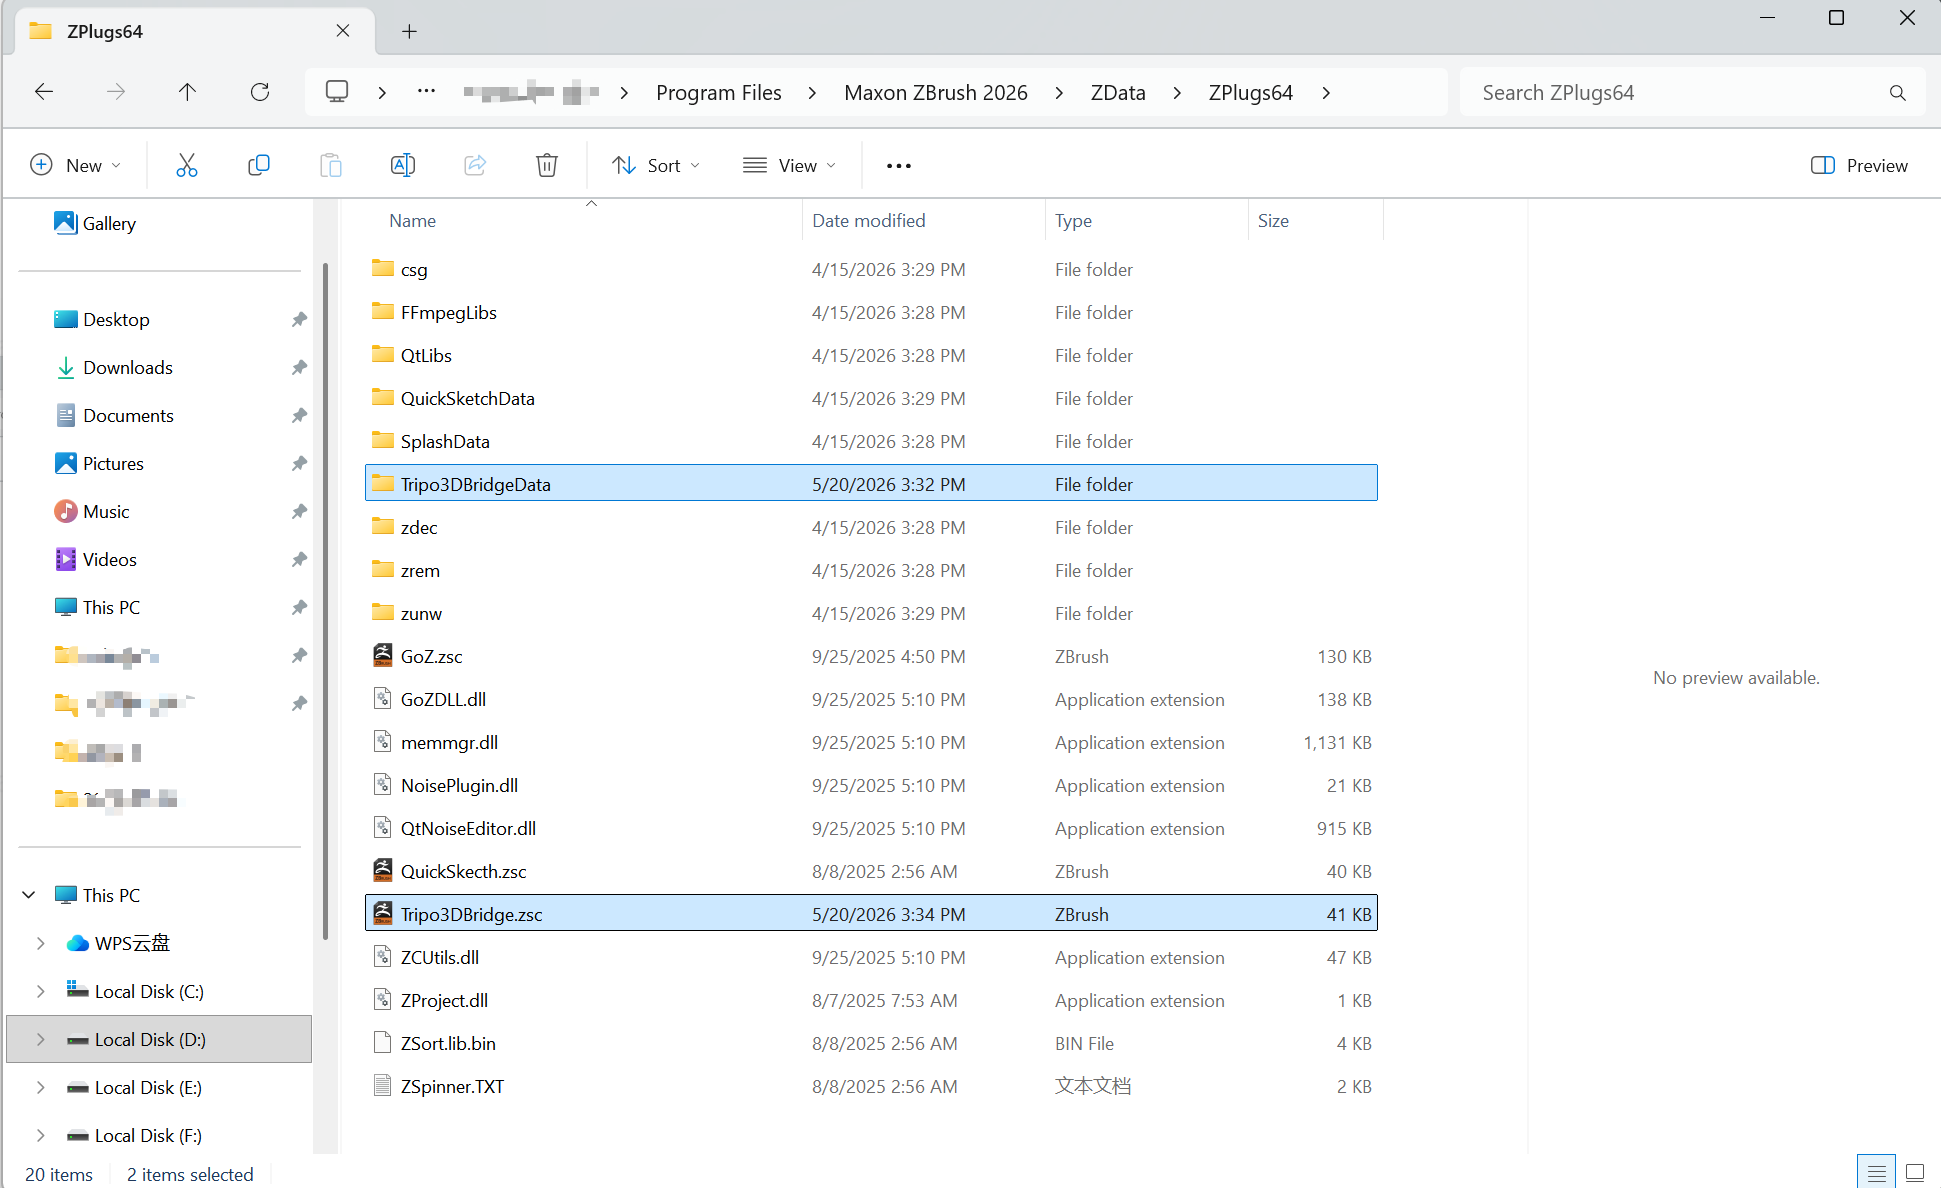
Kopieren Sie sowohl den Ordner als auch die Datei in das Plugin-Verzeichnis von ZBrush und fügen Sie die kopierten Elemente direkt in das Plugins-Verzeichnis ein:
(Beispiel)
- Windows:
C:\Program Files\Maxon ZBrush 2026\ZData\ZPlugs64 - macOS:
/Applications/Maxon ZBrush 2026/ZData/ZPlugs64
Schritt 3:
Starten Sie ZBrush (neu), um das neu installierte Plugin zu laden. Die Tripo Bridge sollte nun im Menü ZPlugin in ZBrush angezeigt werden.
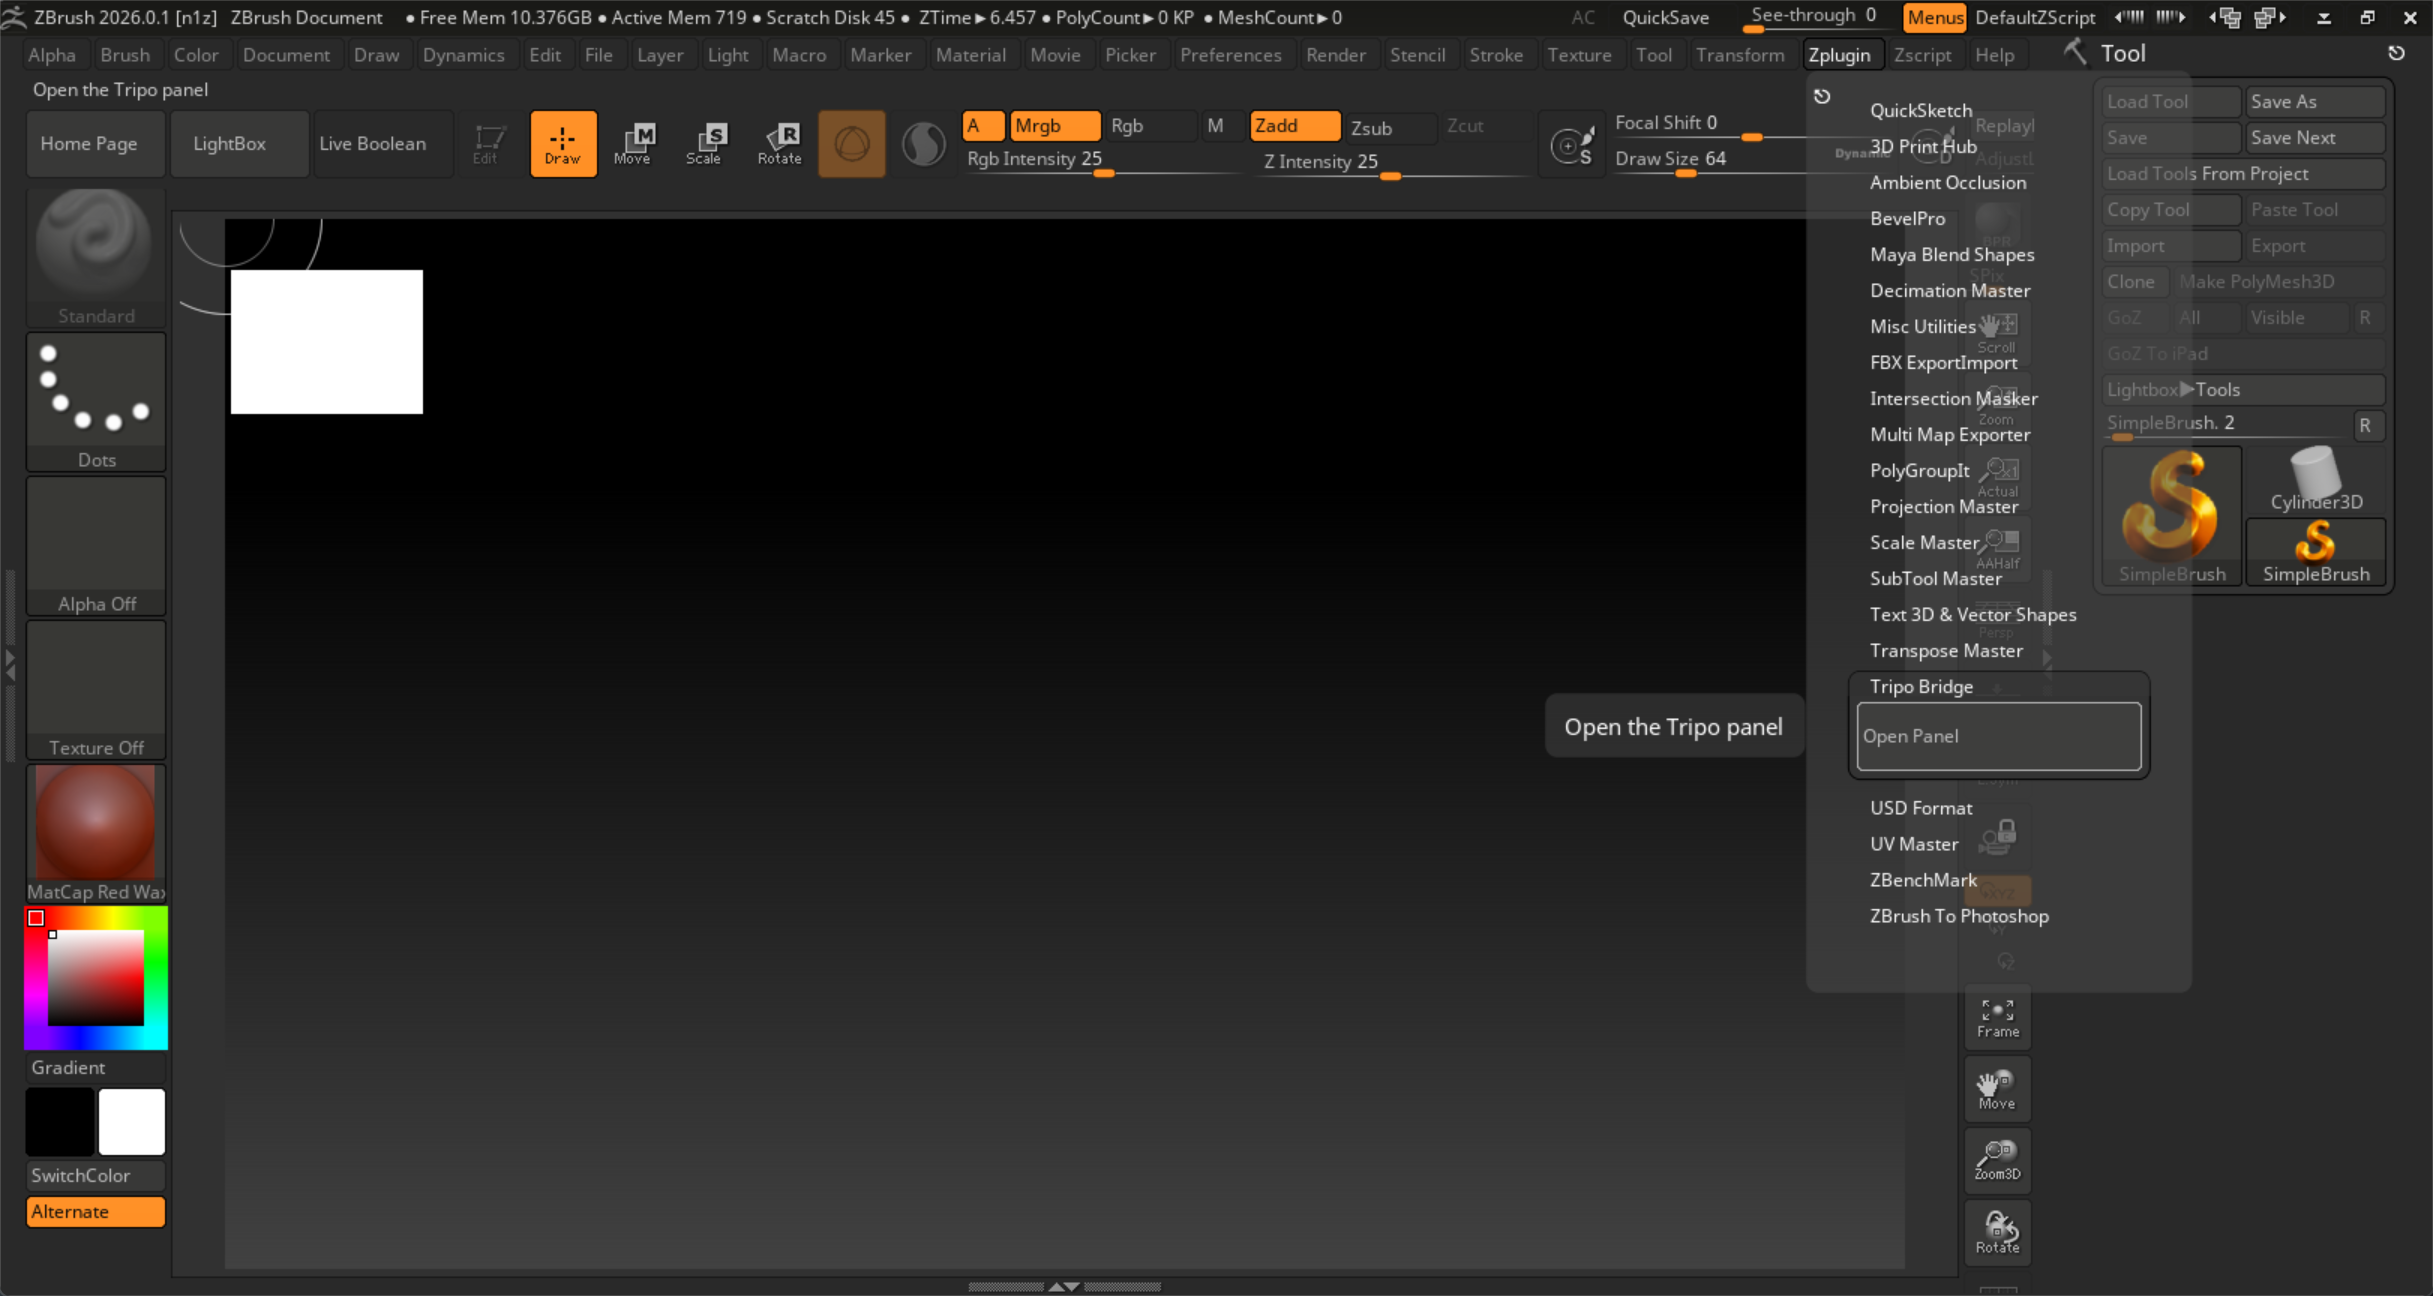
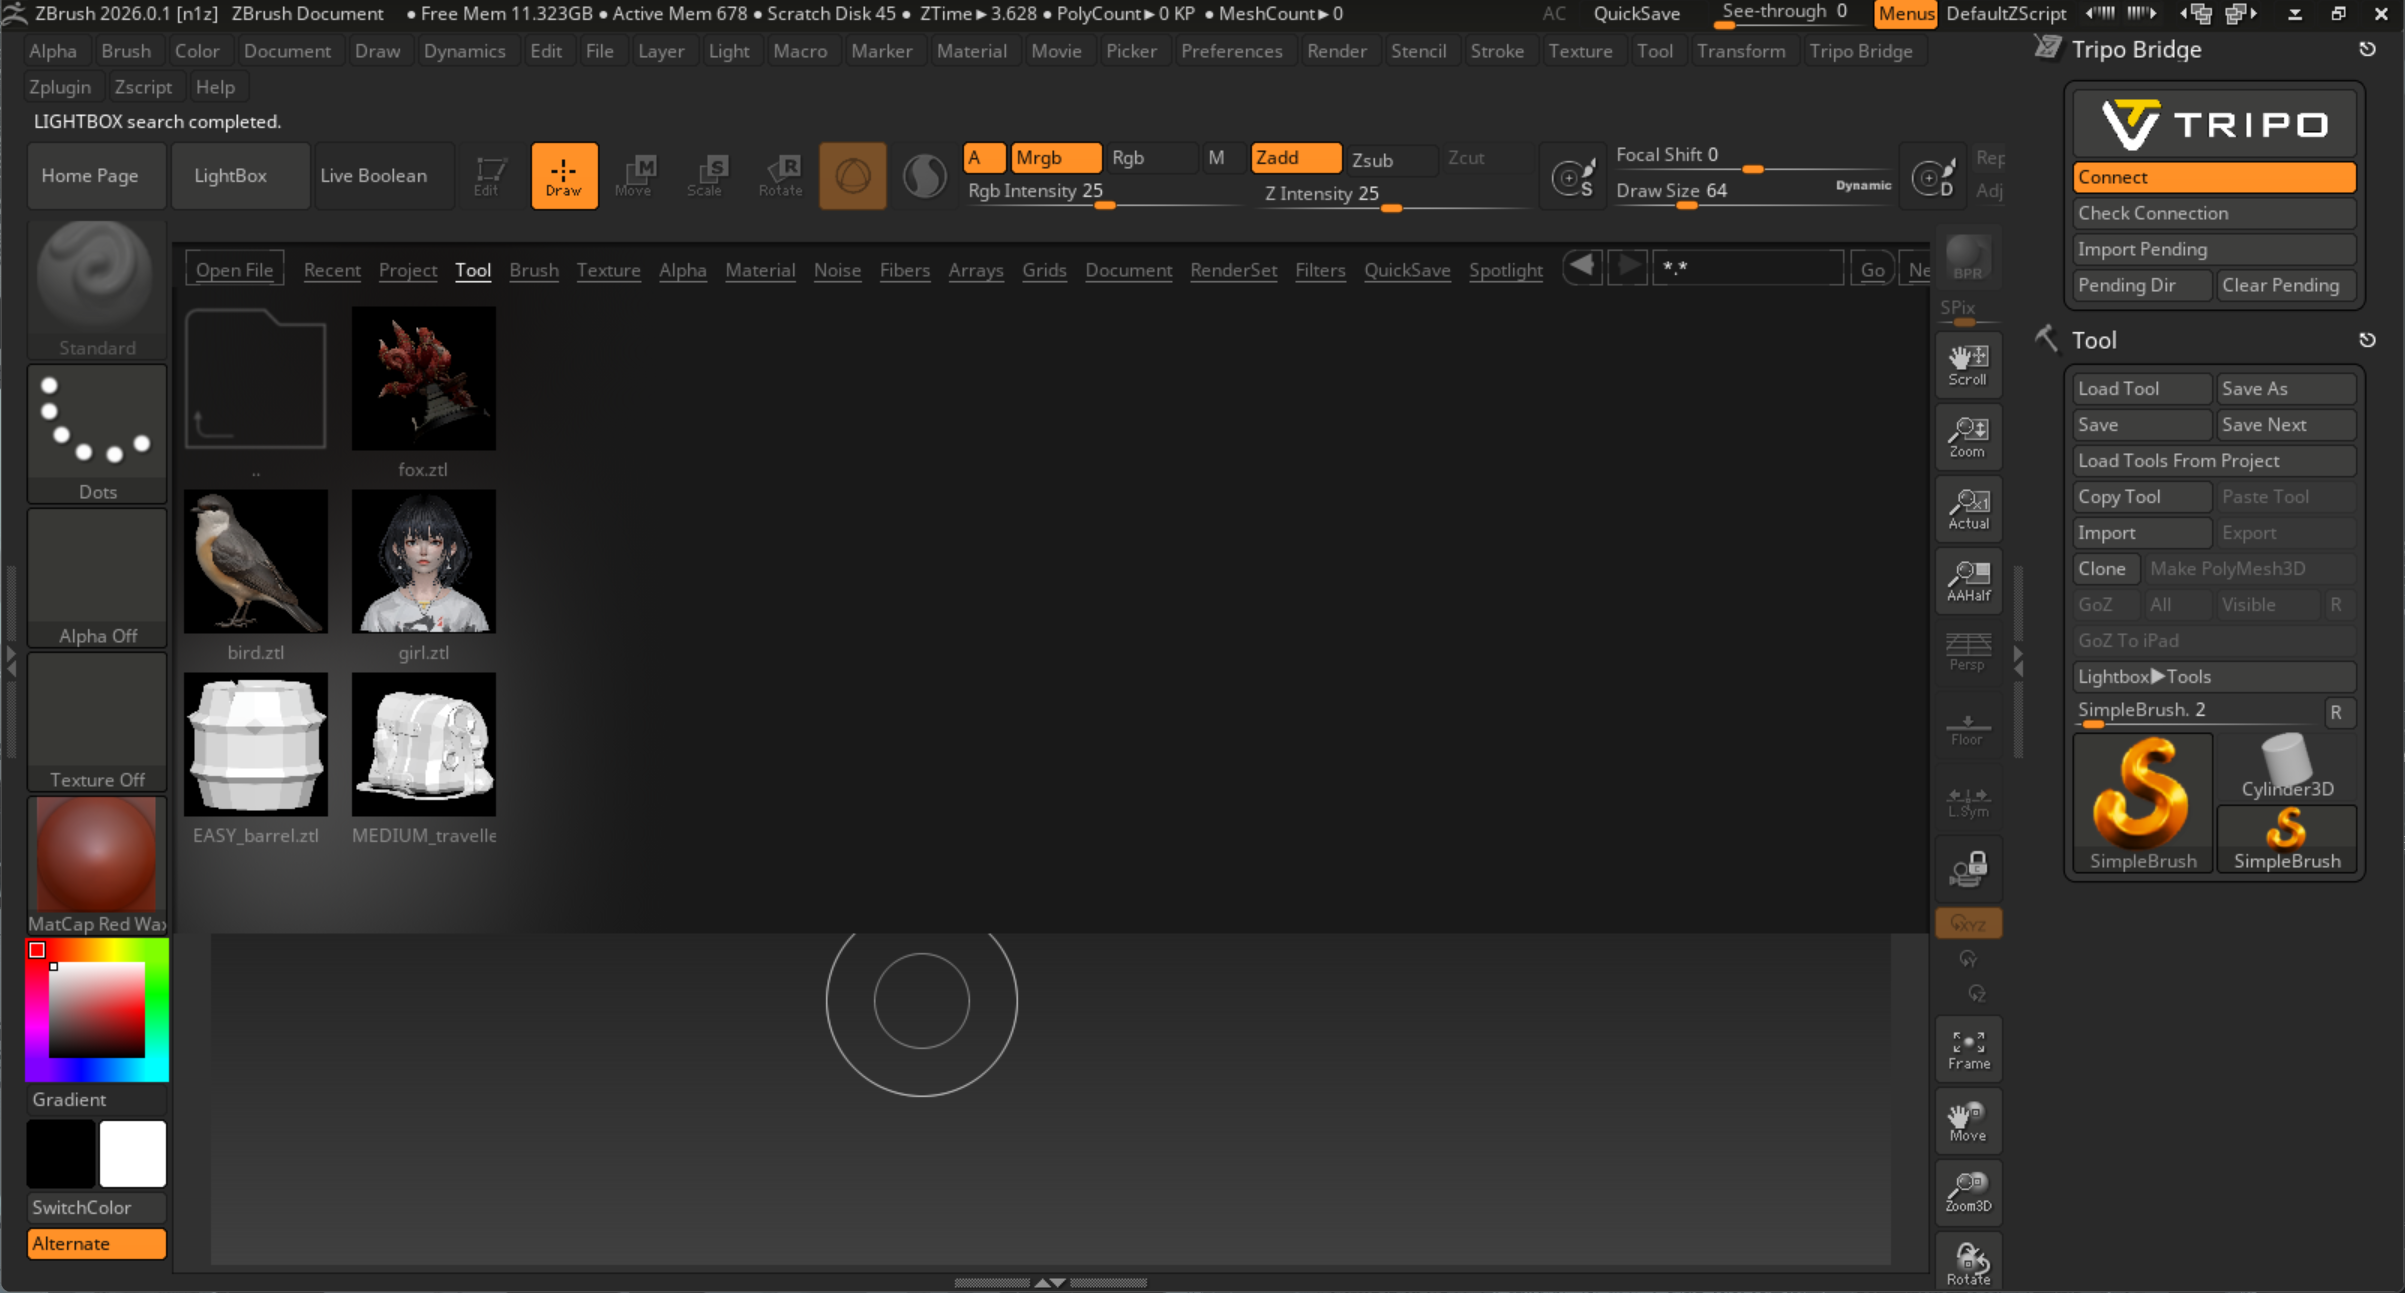
Klicken Sie auf Open Panel. Wenn das Panel geöffnet wird, startet der Bridge-Dienst automatisch. Sobald die Schaltfläche Connect aktiv wird, bedeutet dies, dass der ZBrush-Bridge-Dienst auf der ZBrush-Seite gestartet wurde.
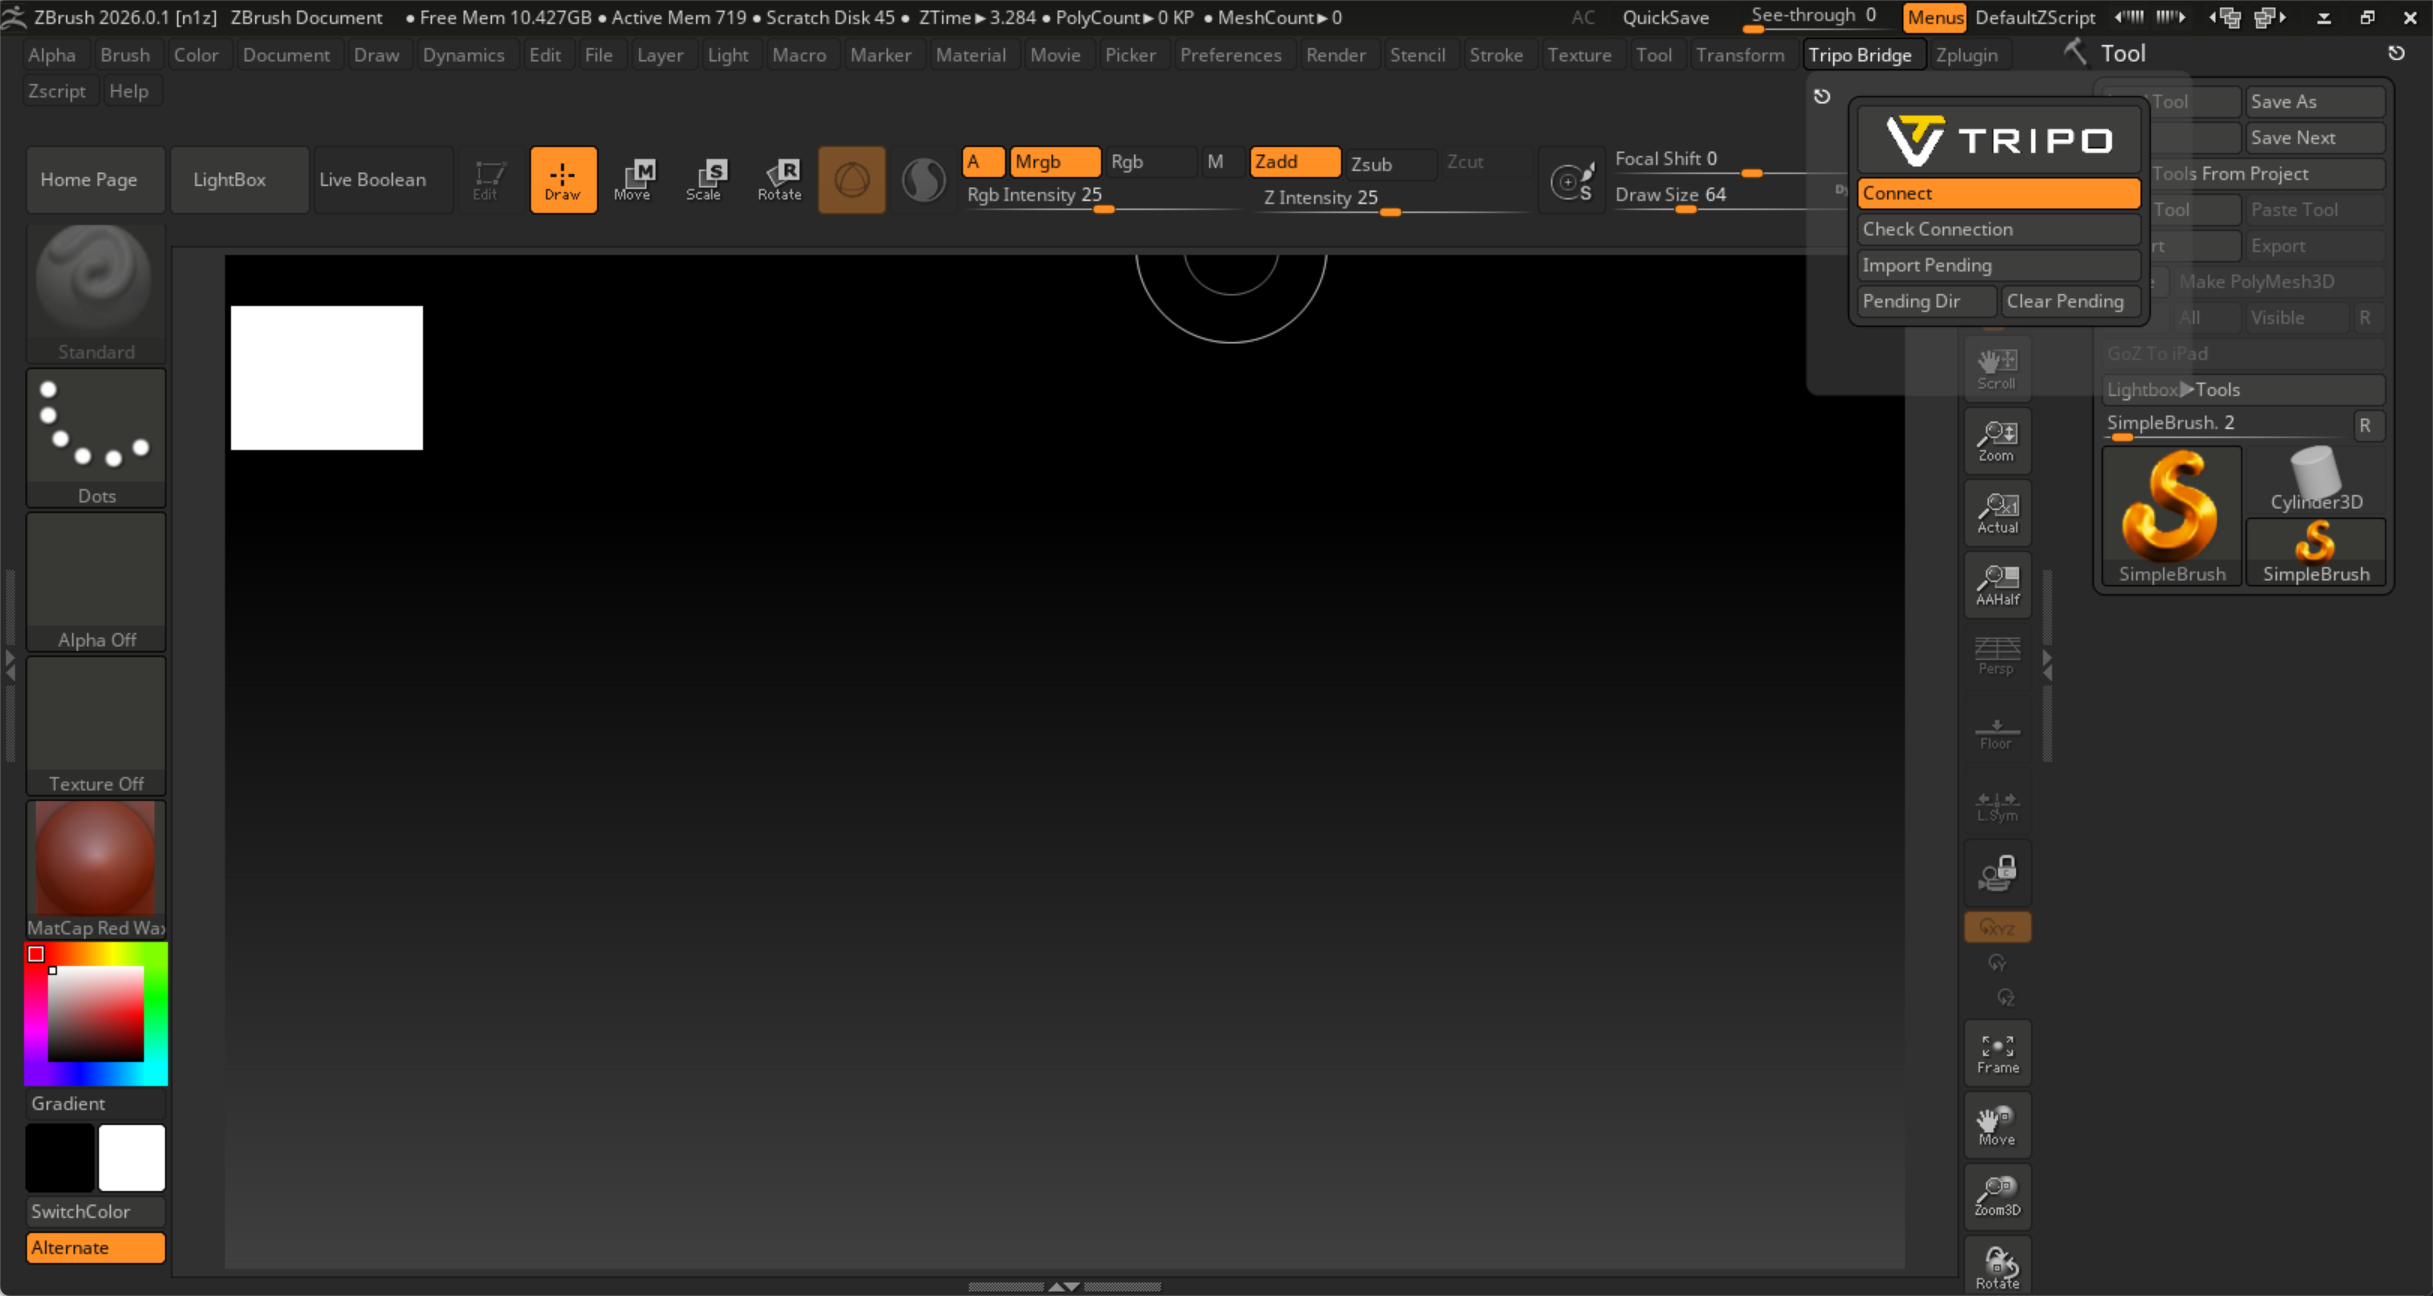
Klicken Sie auf die Pin-Schaltfläche (oben links im Panel), um die Benutzeroberfläche an der rechten Seite der Anwendung anzudocken.
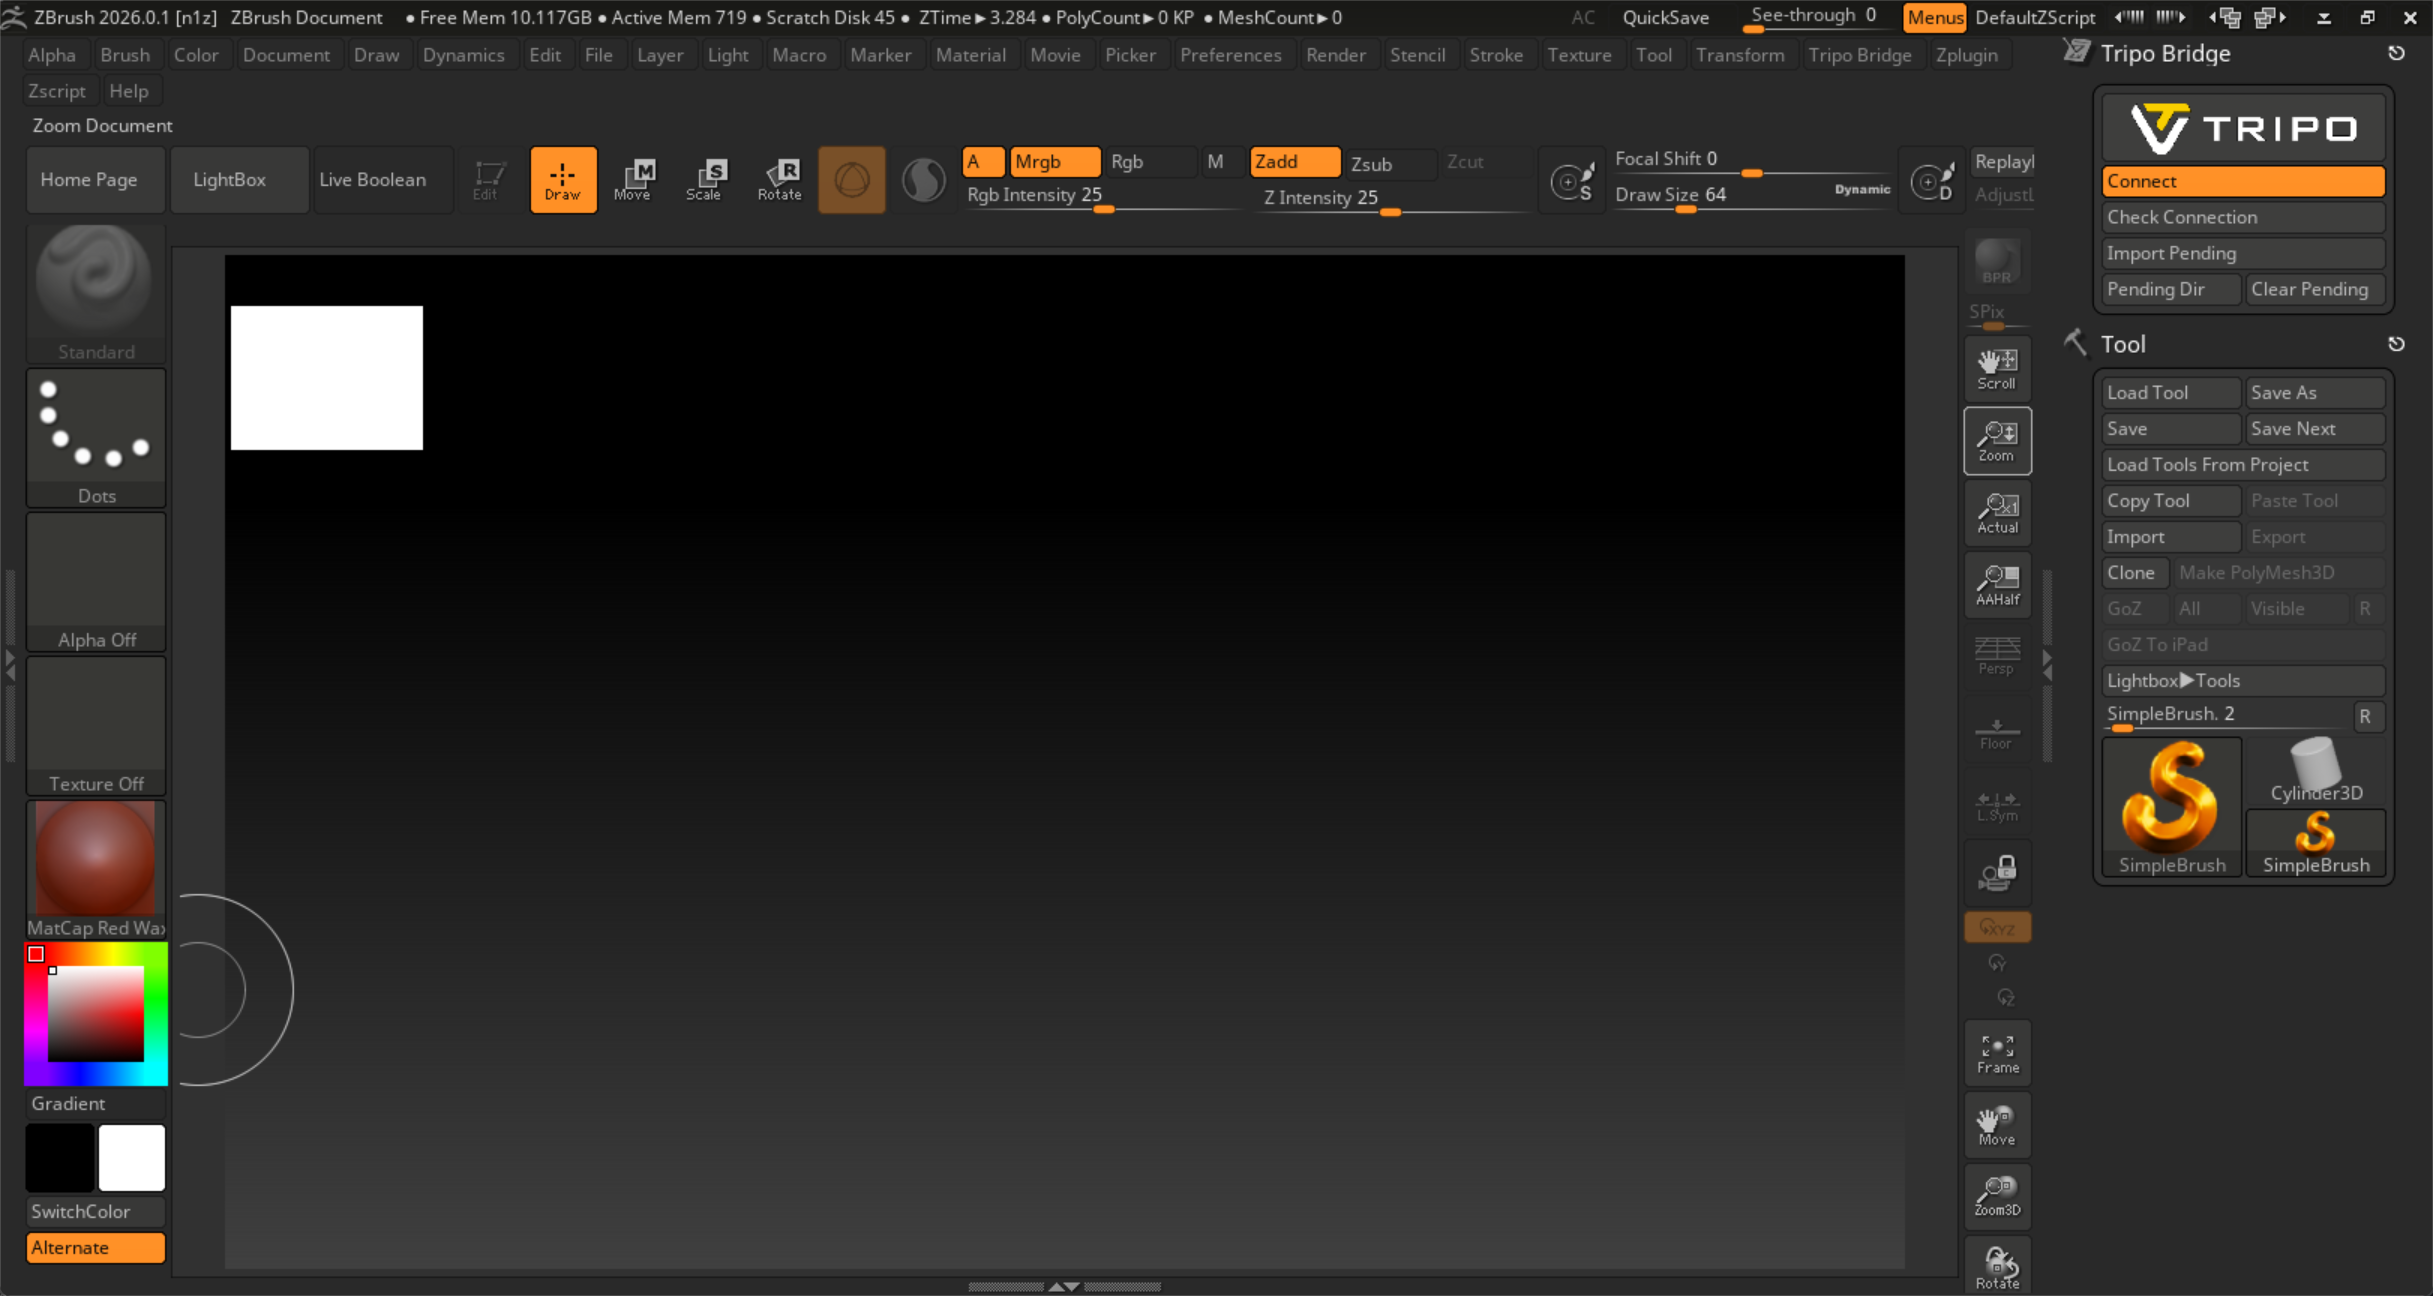
Der Bridge-Dienst muss während der Verbindung mit dem Webbrowser im Hintergrund laufen. Schließen Sie ZBrush nicht und lassen Sie die Connect-Schaltfläche während der Modellübertragung aktiv.
Schritt 4:
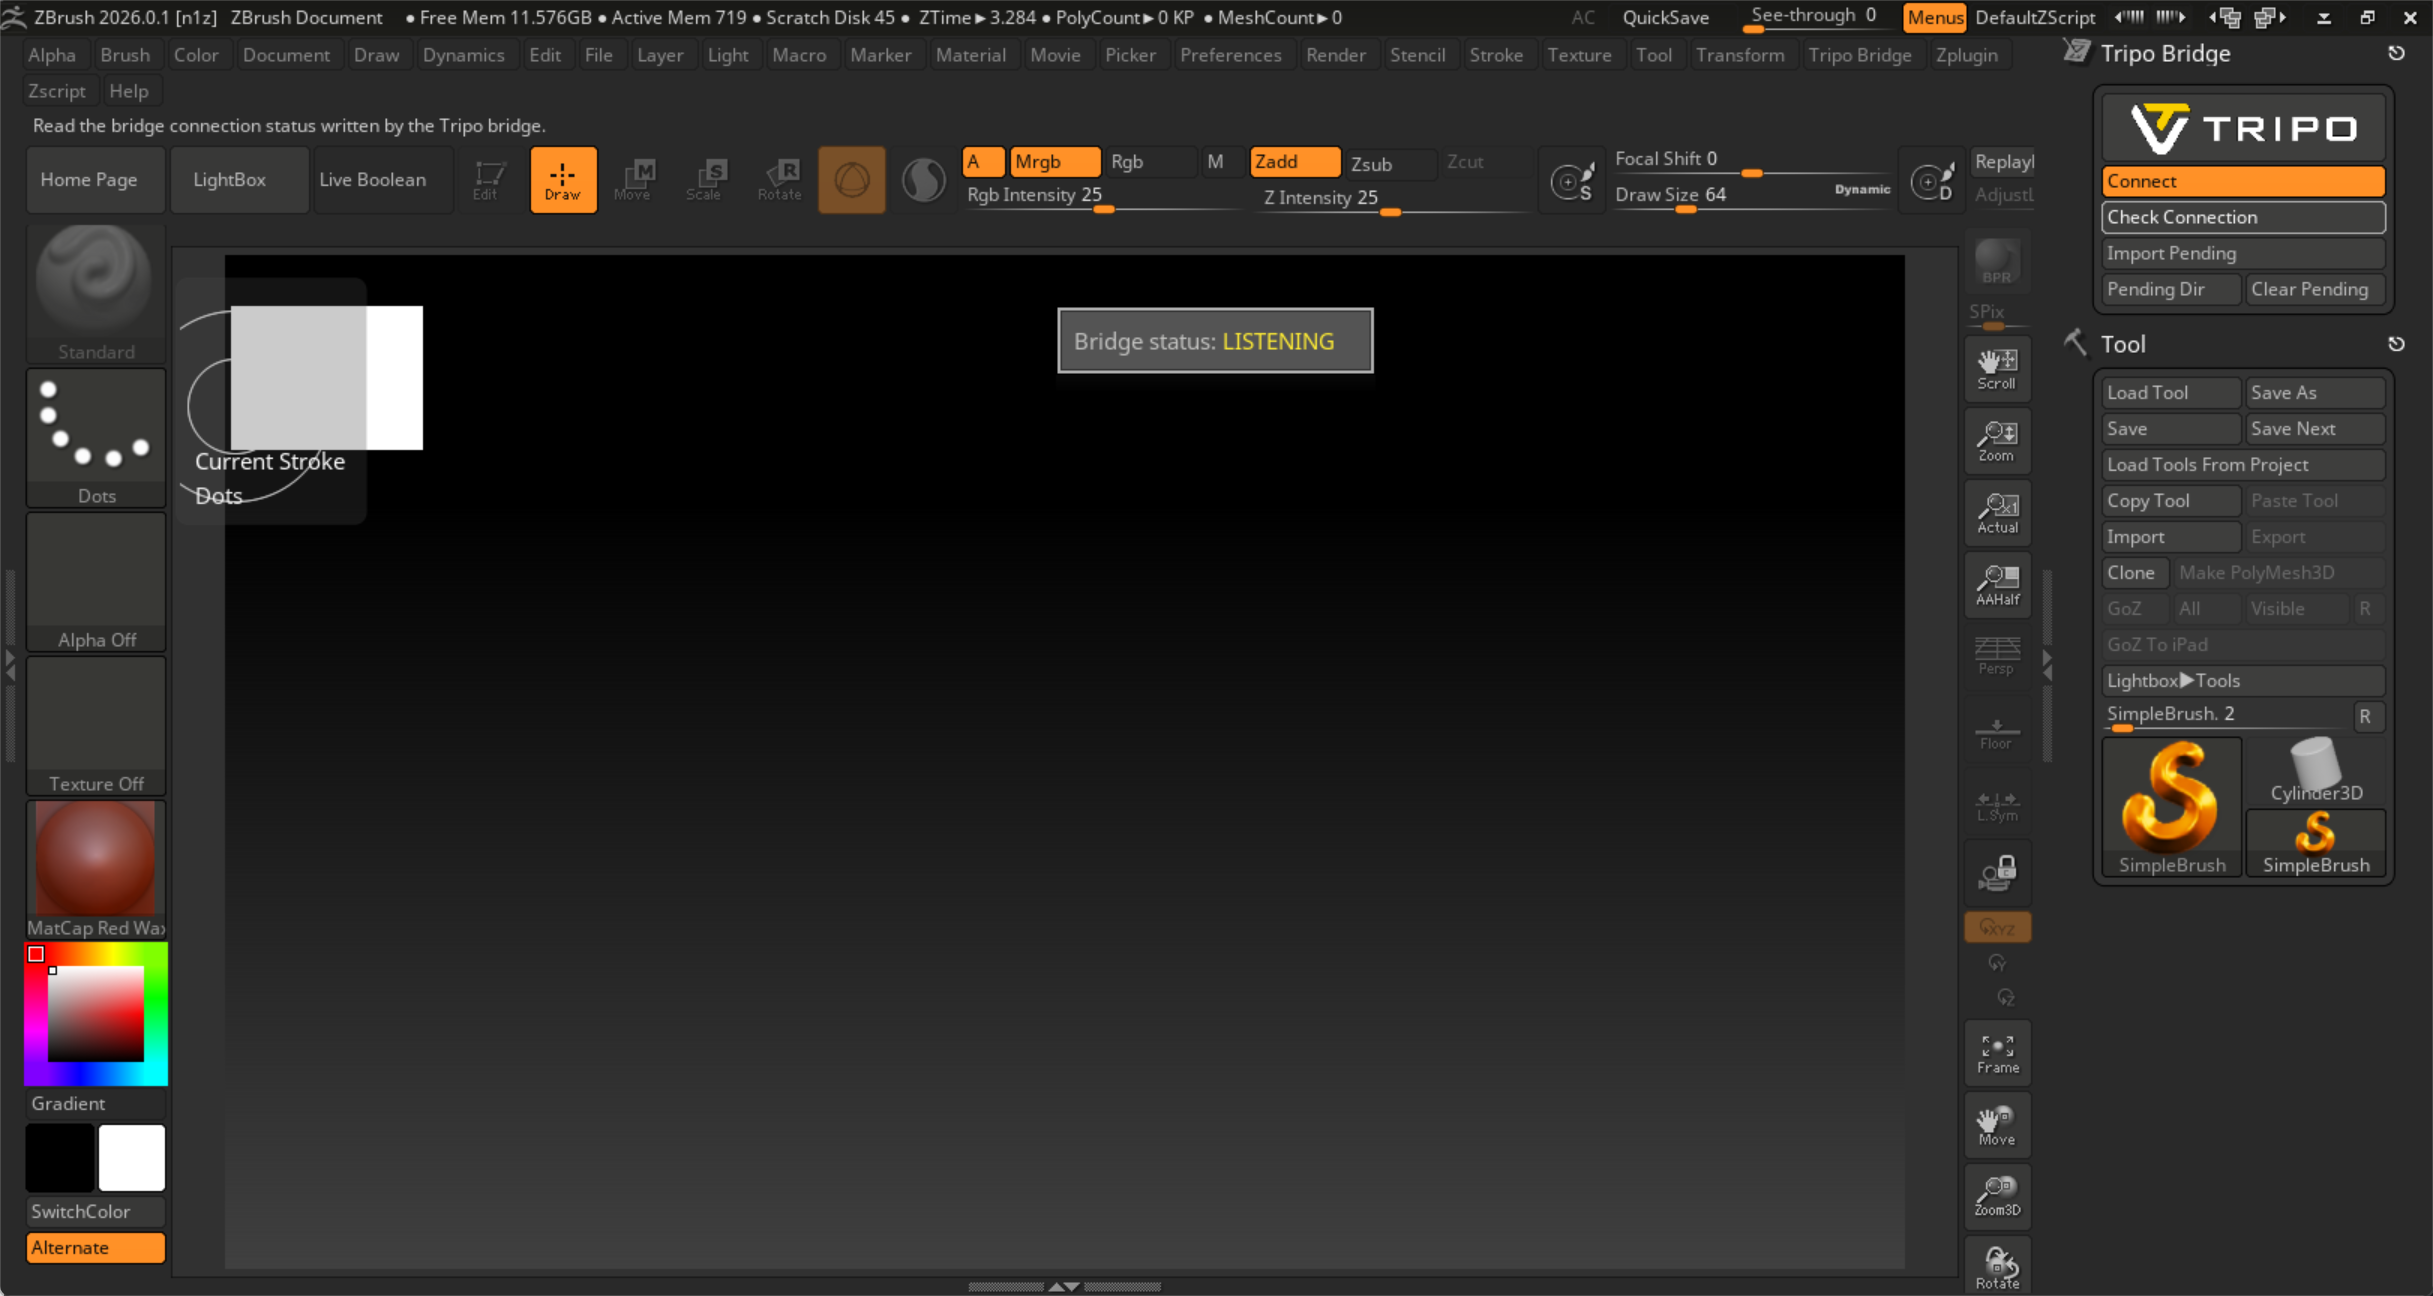
Klicken Sie auf die Schaltfläche Check Connection, um die Verbindung zwischen der ZBrush Bridge und der Tripo Studio-Webseite zu überprüfen.
Wenn ein Popup-Fenster mit der Meldung „Bridge status: listening“ angezeigt wird, bedeutet dies, dass die Web-Seite den Bridge-Dienst noch nicht gestartet hat.
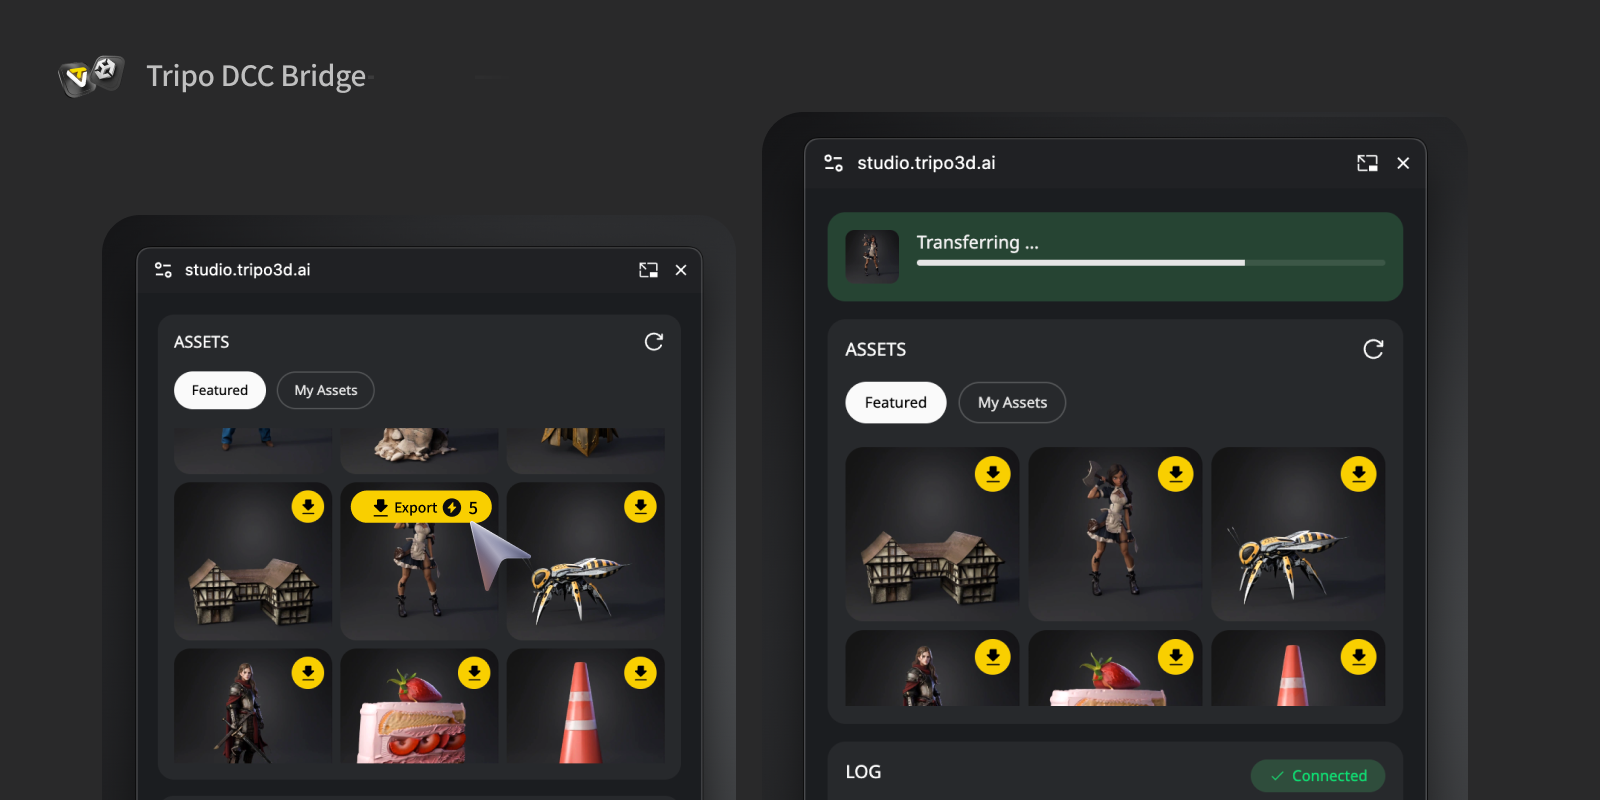
Öffnen Sie die Tripo Studio-Website in Ihrem Browser, klicken Sie auf die Schaltfläche DCC Bridge und aktivieren Sie das ZBrush-Plugin.
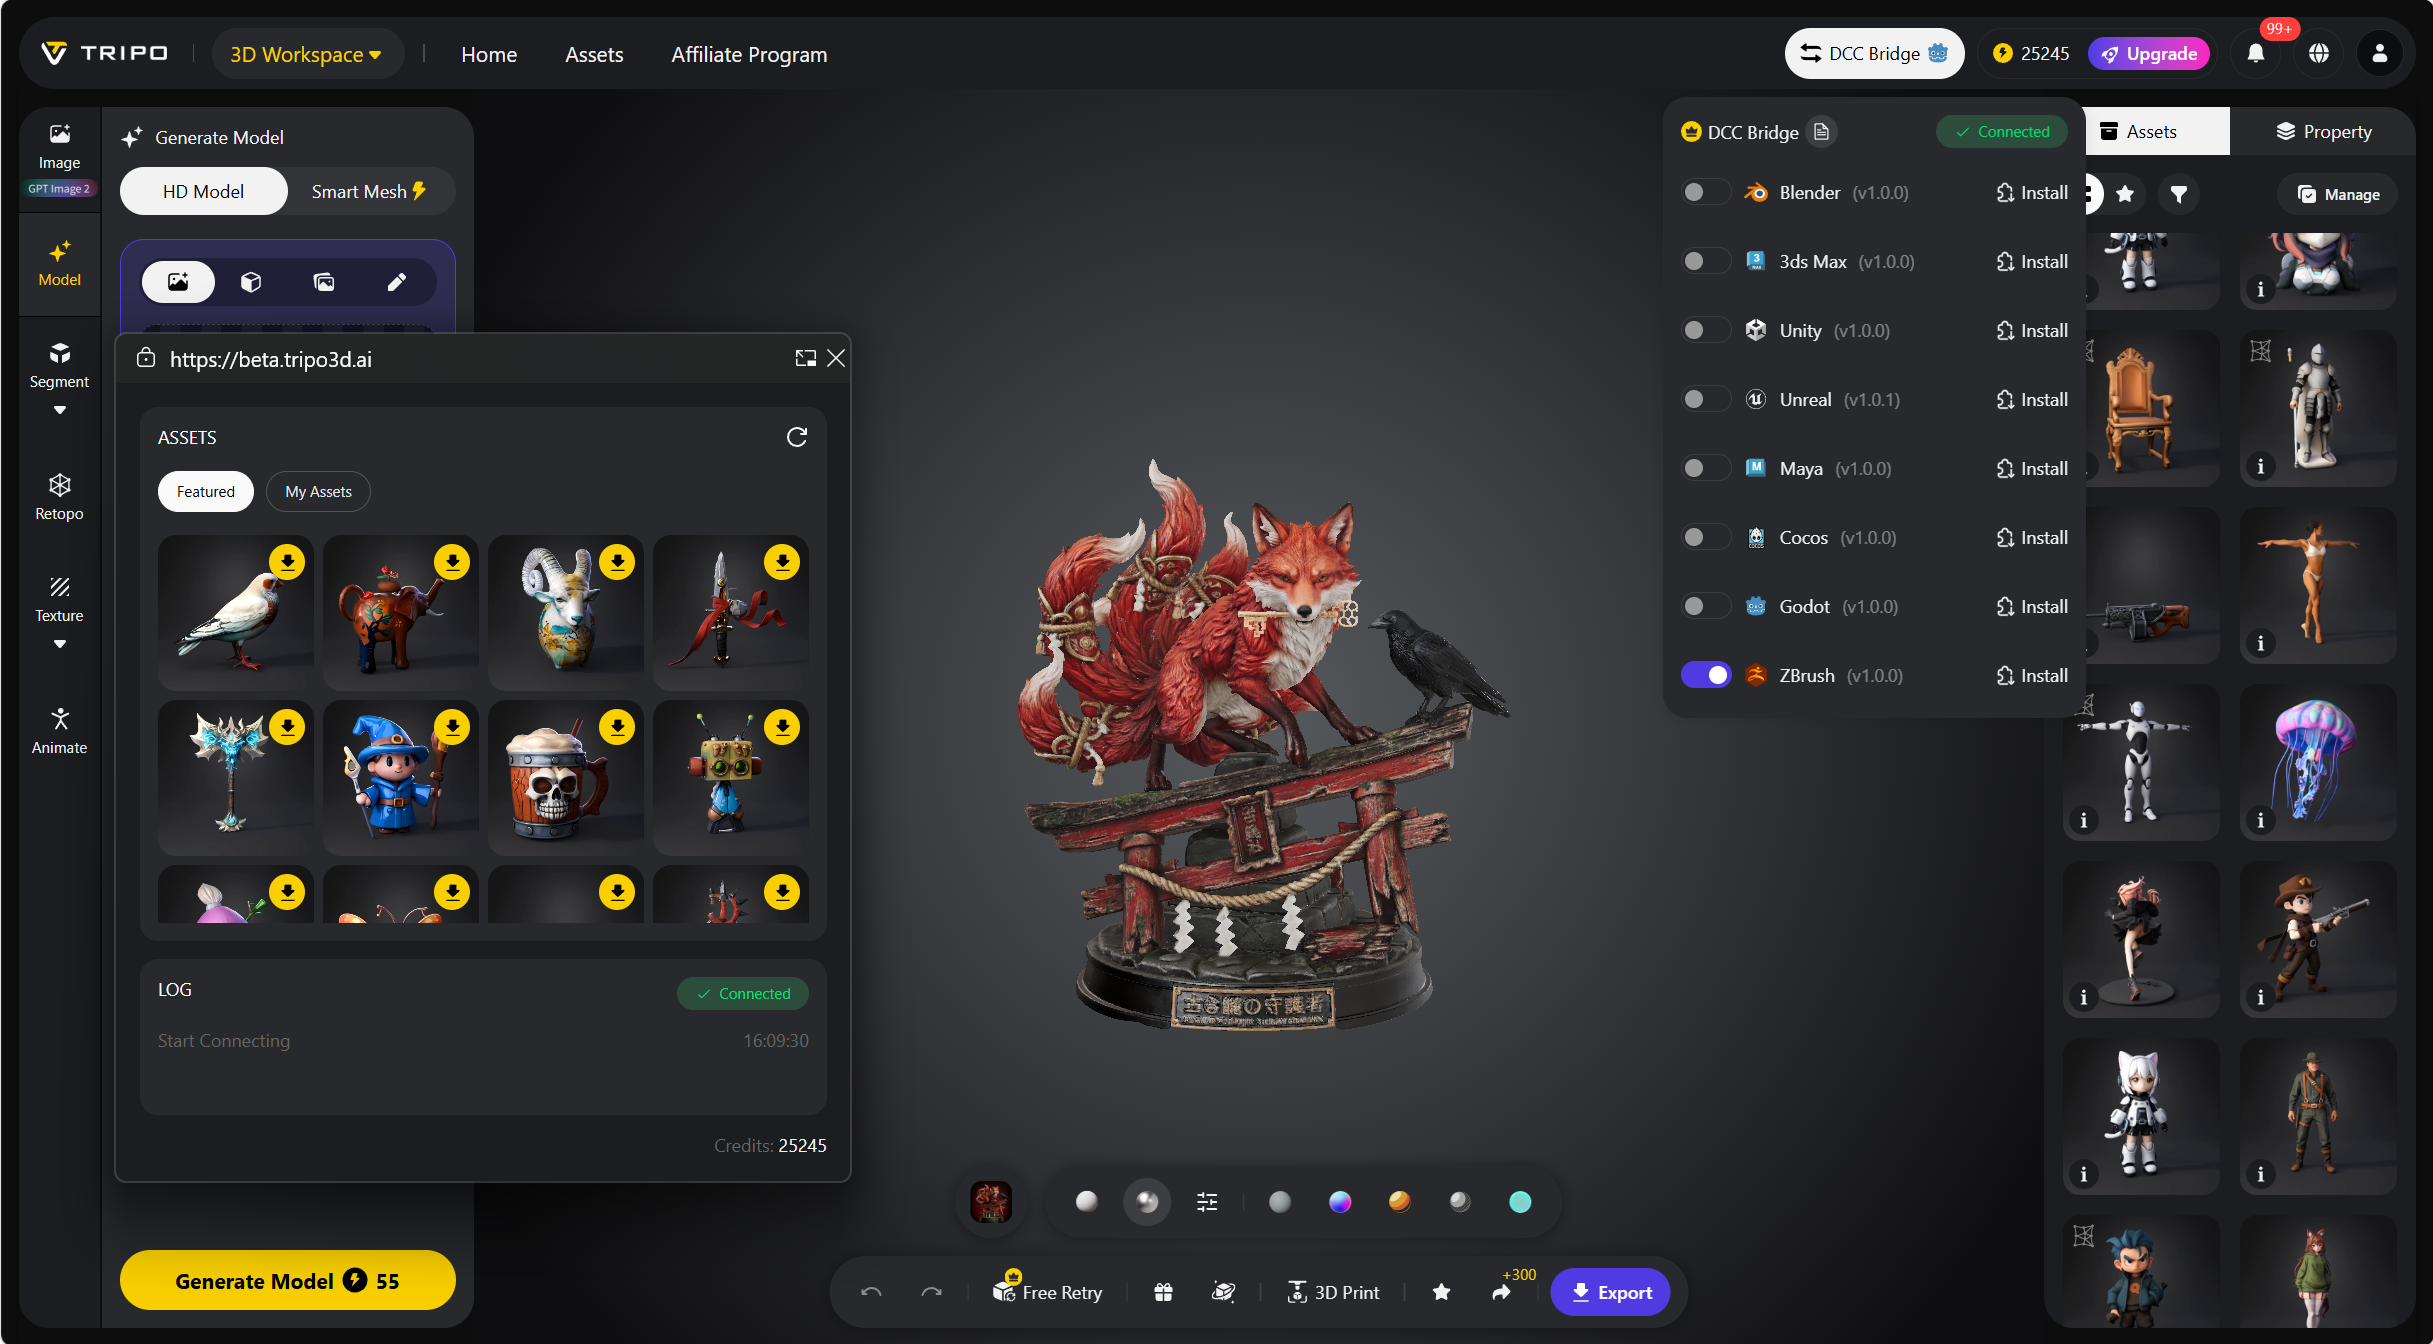
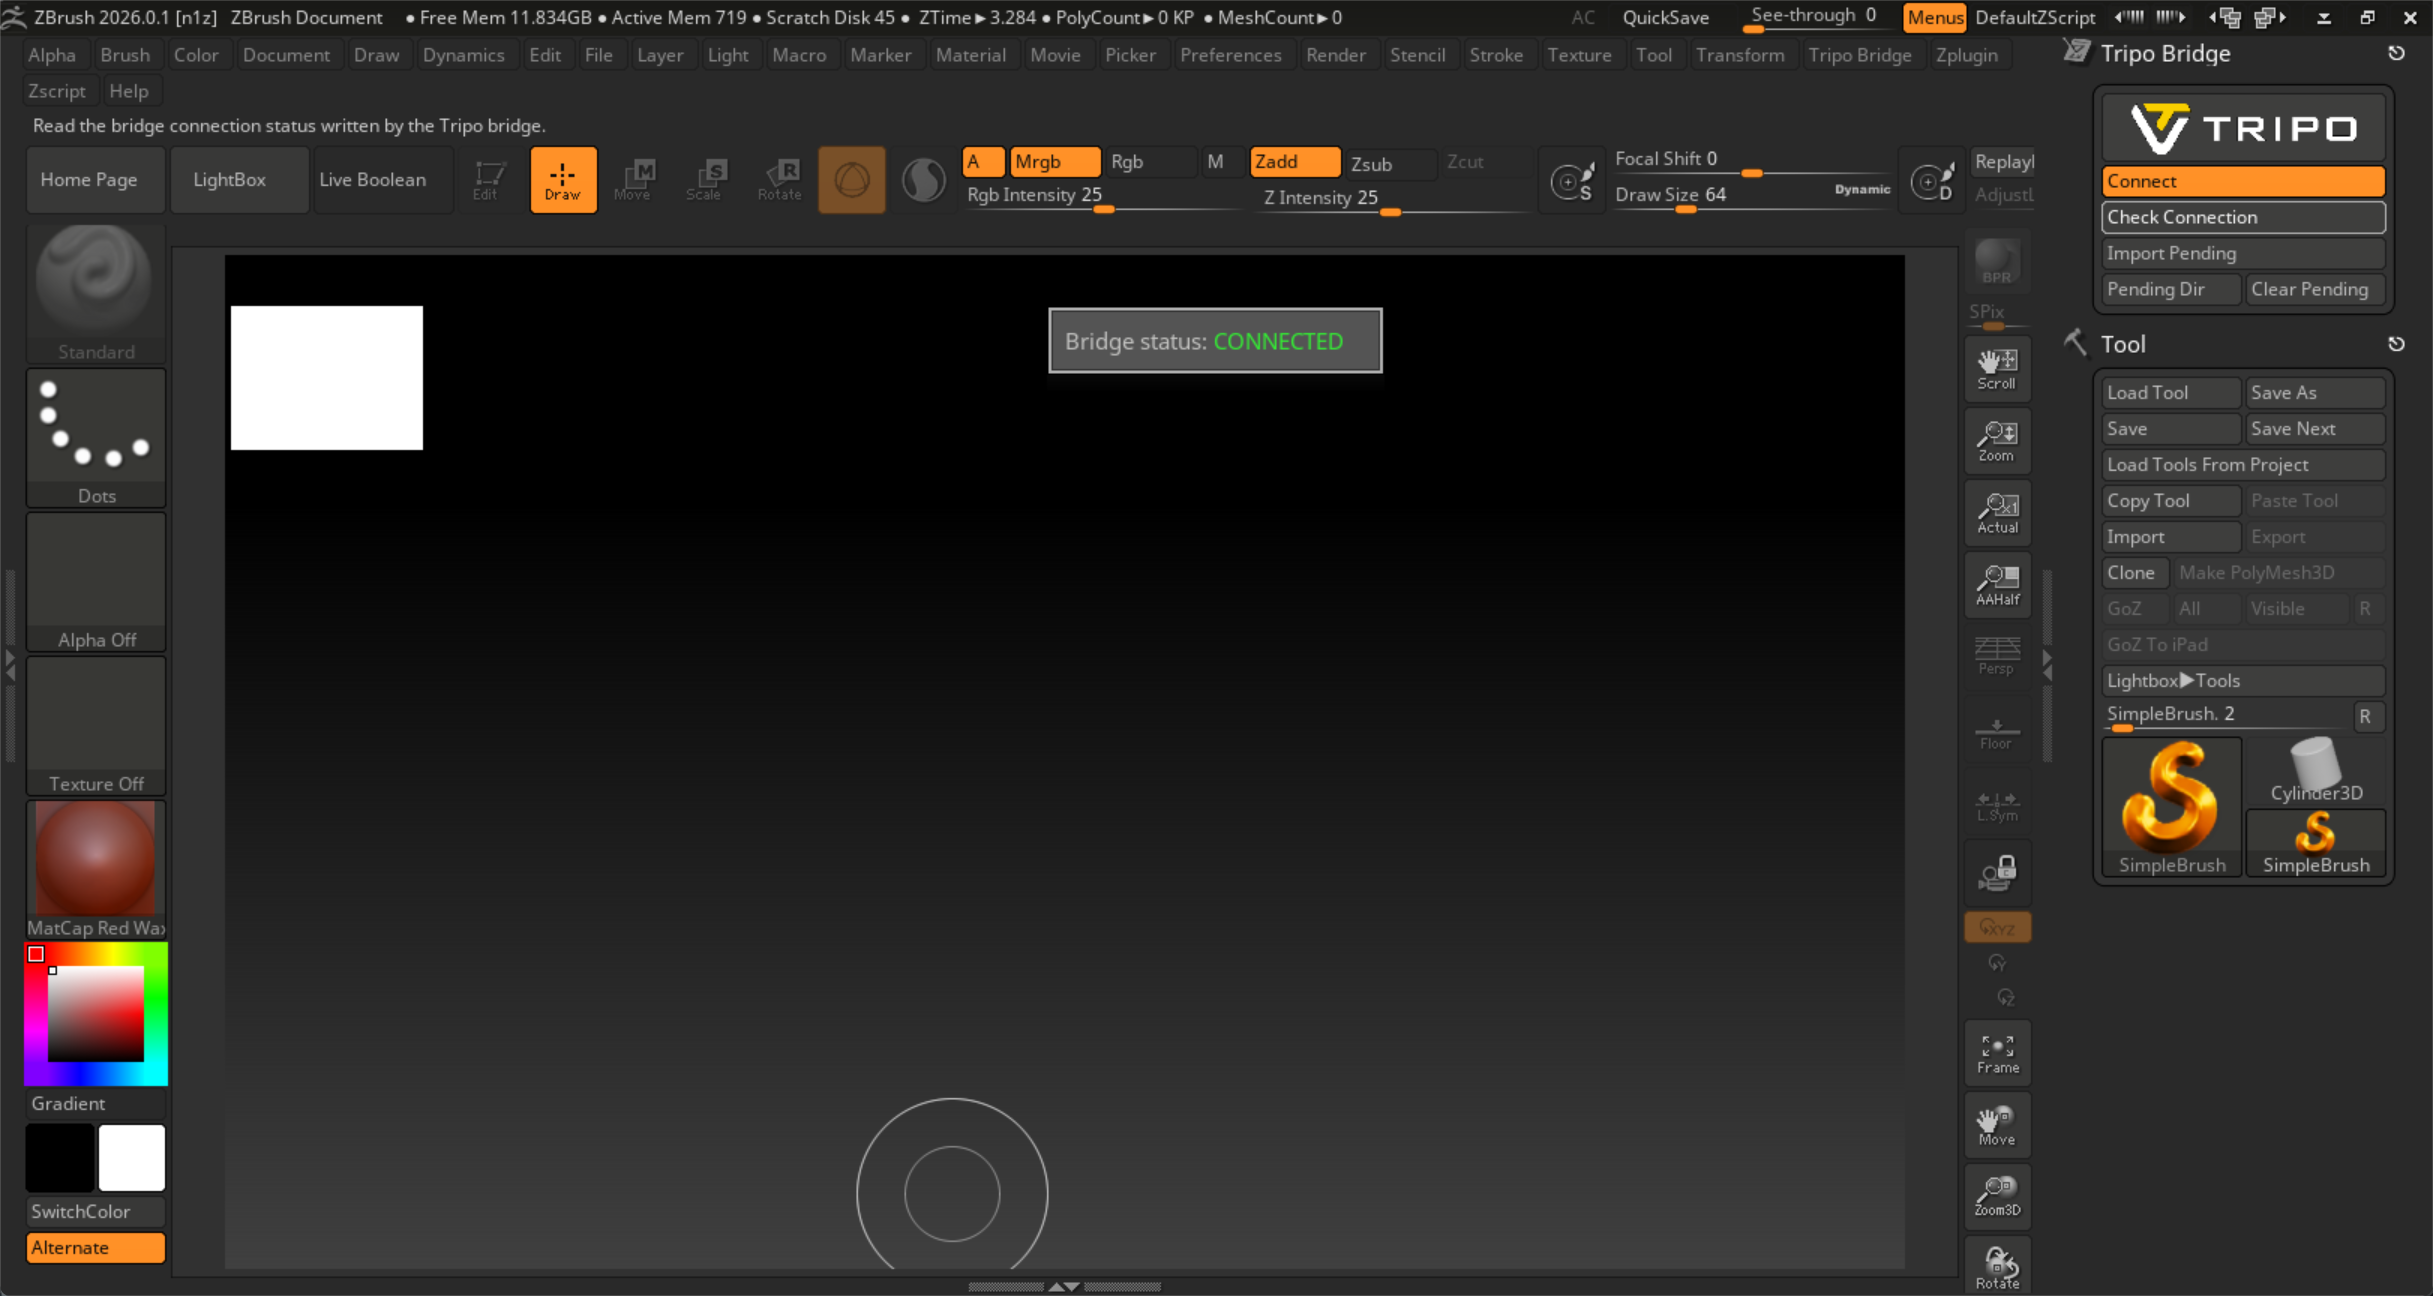
Überprüfen Sie an diesem Punkt den Verbindungsstatus. Er sollte „Bridge status: connected“ anzeigen.
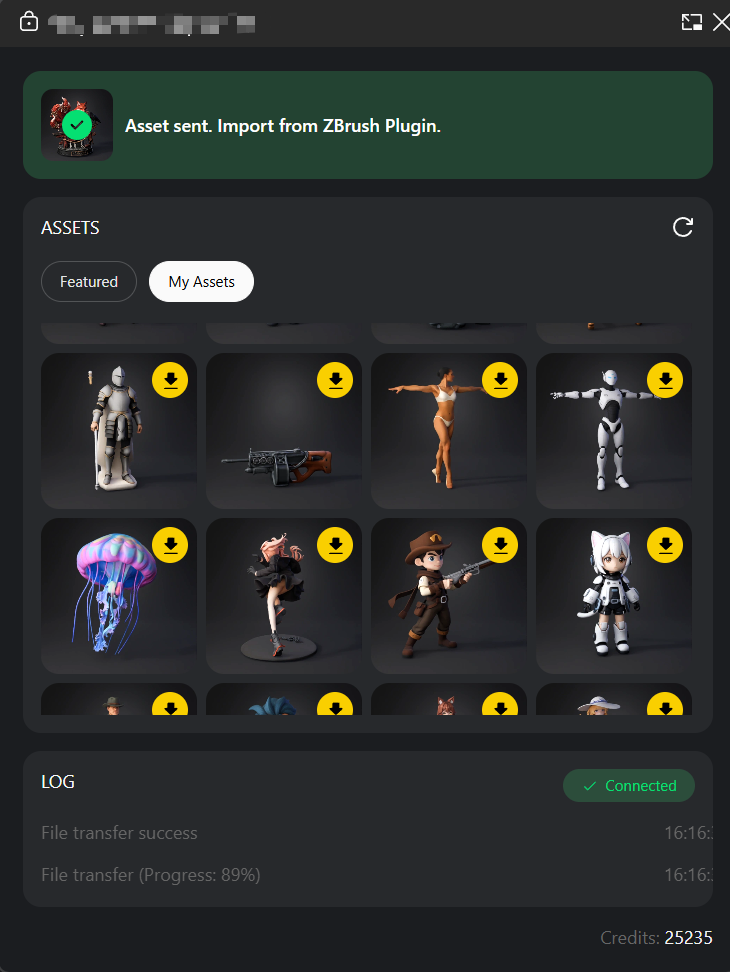
Wählen Sie ein Modell aus. Drücken Sie die Schaltfläche Export im Minifenster. Sobald die Übertragung abgeschlossen ist, werden Sie aufgefordert, das Modell-Asset im ZBrush-Plugin zu empfangen.
Schritt 5:
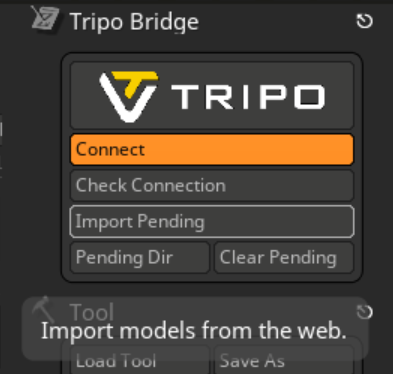
Sobald die Übertragung von Tripo Studio abgeschlossen ist, wird das Modell an einen temporären Ordner für ausstehende Dateien gesendet. Klicken Sie im Tripo Bridge-Panel auf die Schaltfläche Import Pending, um das Modell in ZBrush zu importieren.
Sie können das Modell nun in der Tool-Palette und LightBox von ZBrush sehen.
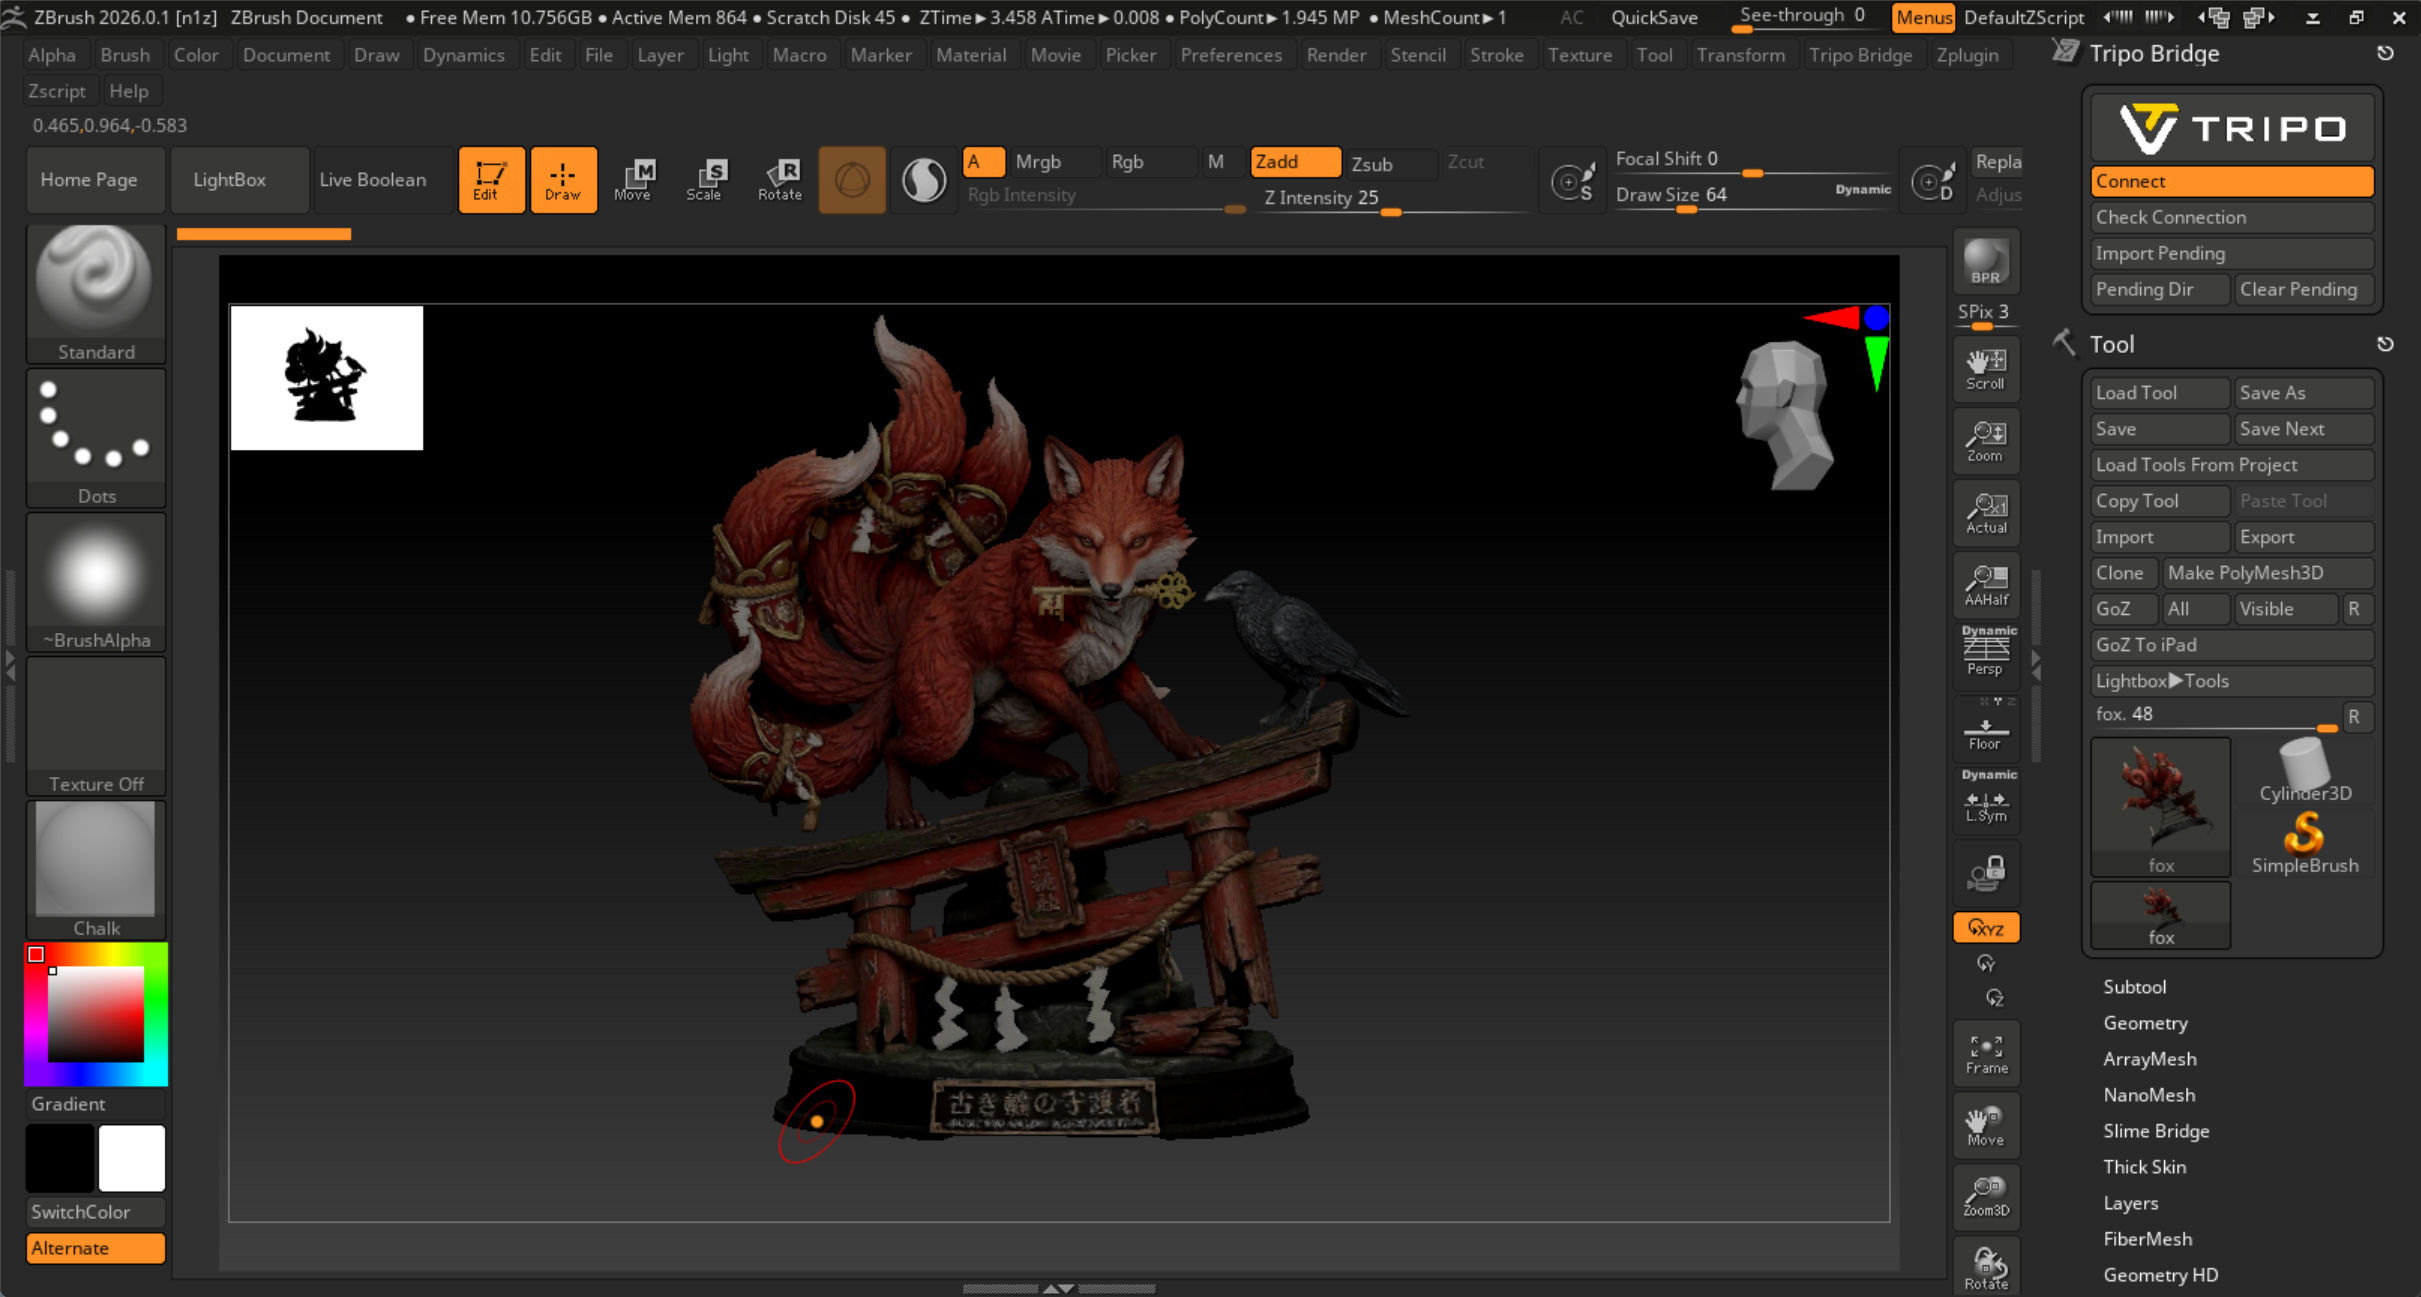
Sie finden das importierte Tripo-Modell unter LightBox/Tool/Tripo.
Häufig gestellte Fragen (FAQs)
F: Was passiert, wenn ich das ausstehende Modell nicht sofort nach dem Senden von der Website importiere?
A: Das Modell wird vorübergehend lokal gespeichert. Sie können jederzeit die Schaltfläche Import Pending drücken, um es zu importieren. Sie können auch die Schaltfläche Pending Dir im Plugin drücken, um den temporären Ordner auf Ihrem lokalen Laufwerk zu finden.
F: Wie ändere ich die Sprache von Tripo Bridge?
A: Navigieren Sie zum Plugin-Verzeichnis und öffnen Sie den Ordner Tripo3DBridgeData. Suchen Sie die Datei lang.txt und ändern Sie den Text in den gewünschten Sprachcode: en, fr, jp, es, de, zn oder ko. (Wenn Sie beispielsweise Chinesisch möchten, geben Sie einfach zn in die Datei ein.) Speichern Sie und starten Sie ZBrush neu.
F: Kann ich Daten gleichzeitig an mehrere ZBrush-Instanzen übertragen?
A: Nein. Die Verbindung erkennt nur die zuerst gestartete ZBrush-Instanz.