The Ultimate Guide to the Tripo-ComfyUI Plugin: From Installation to Full Usage
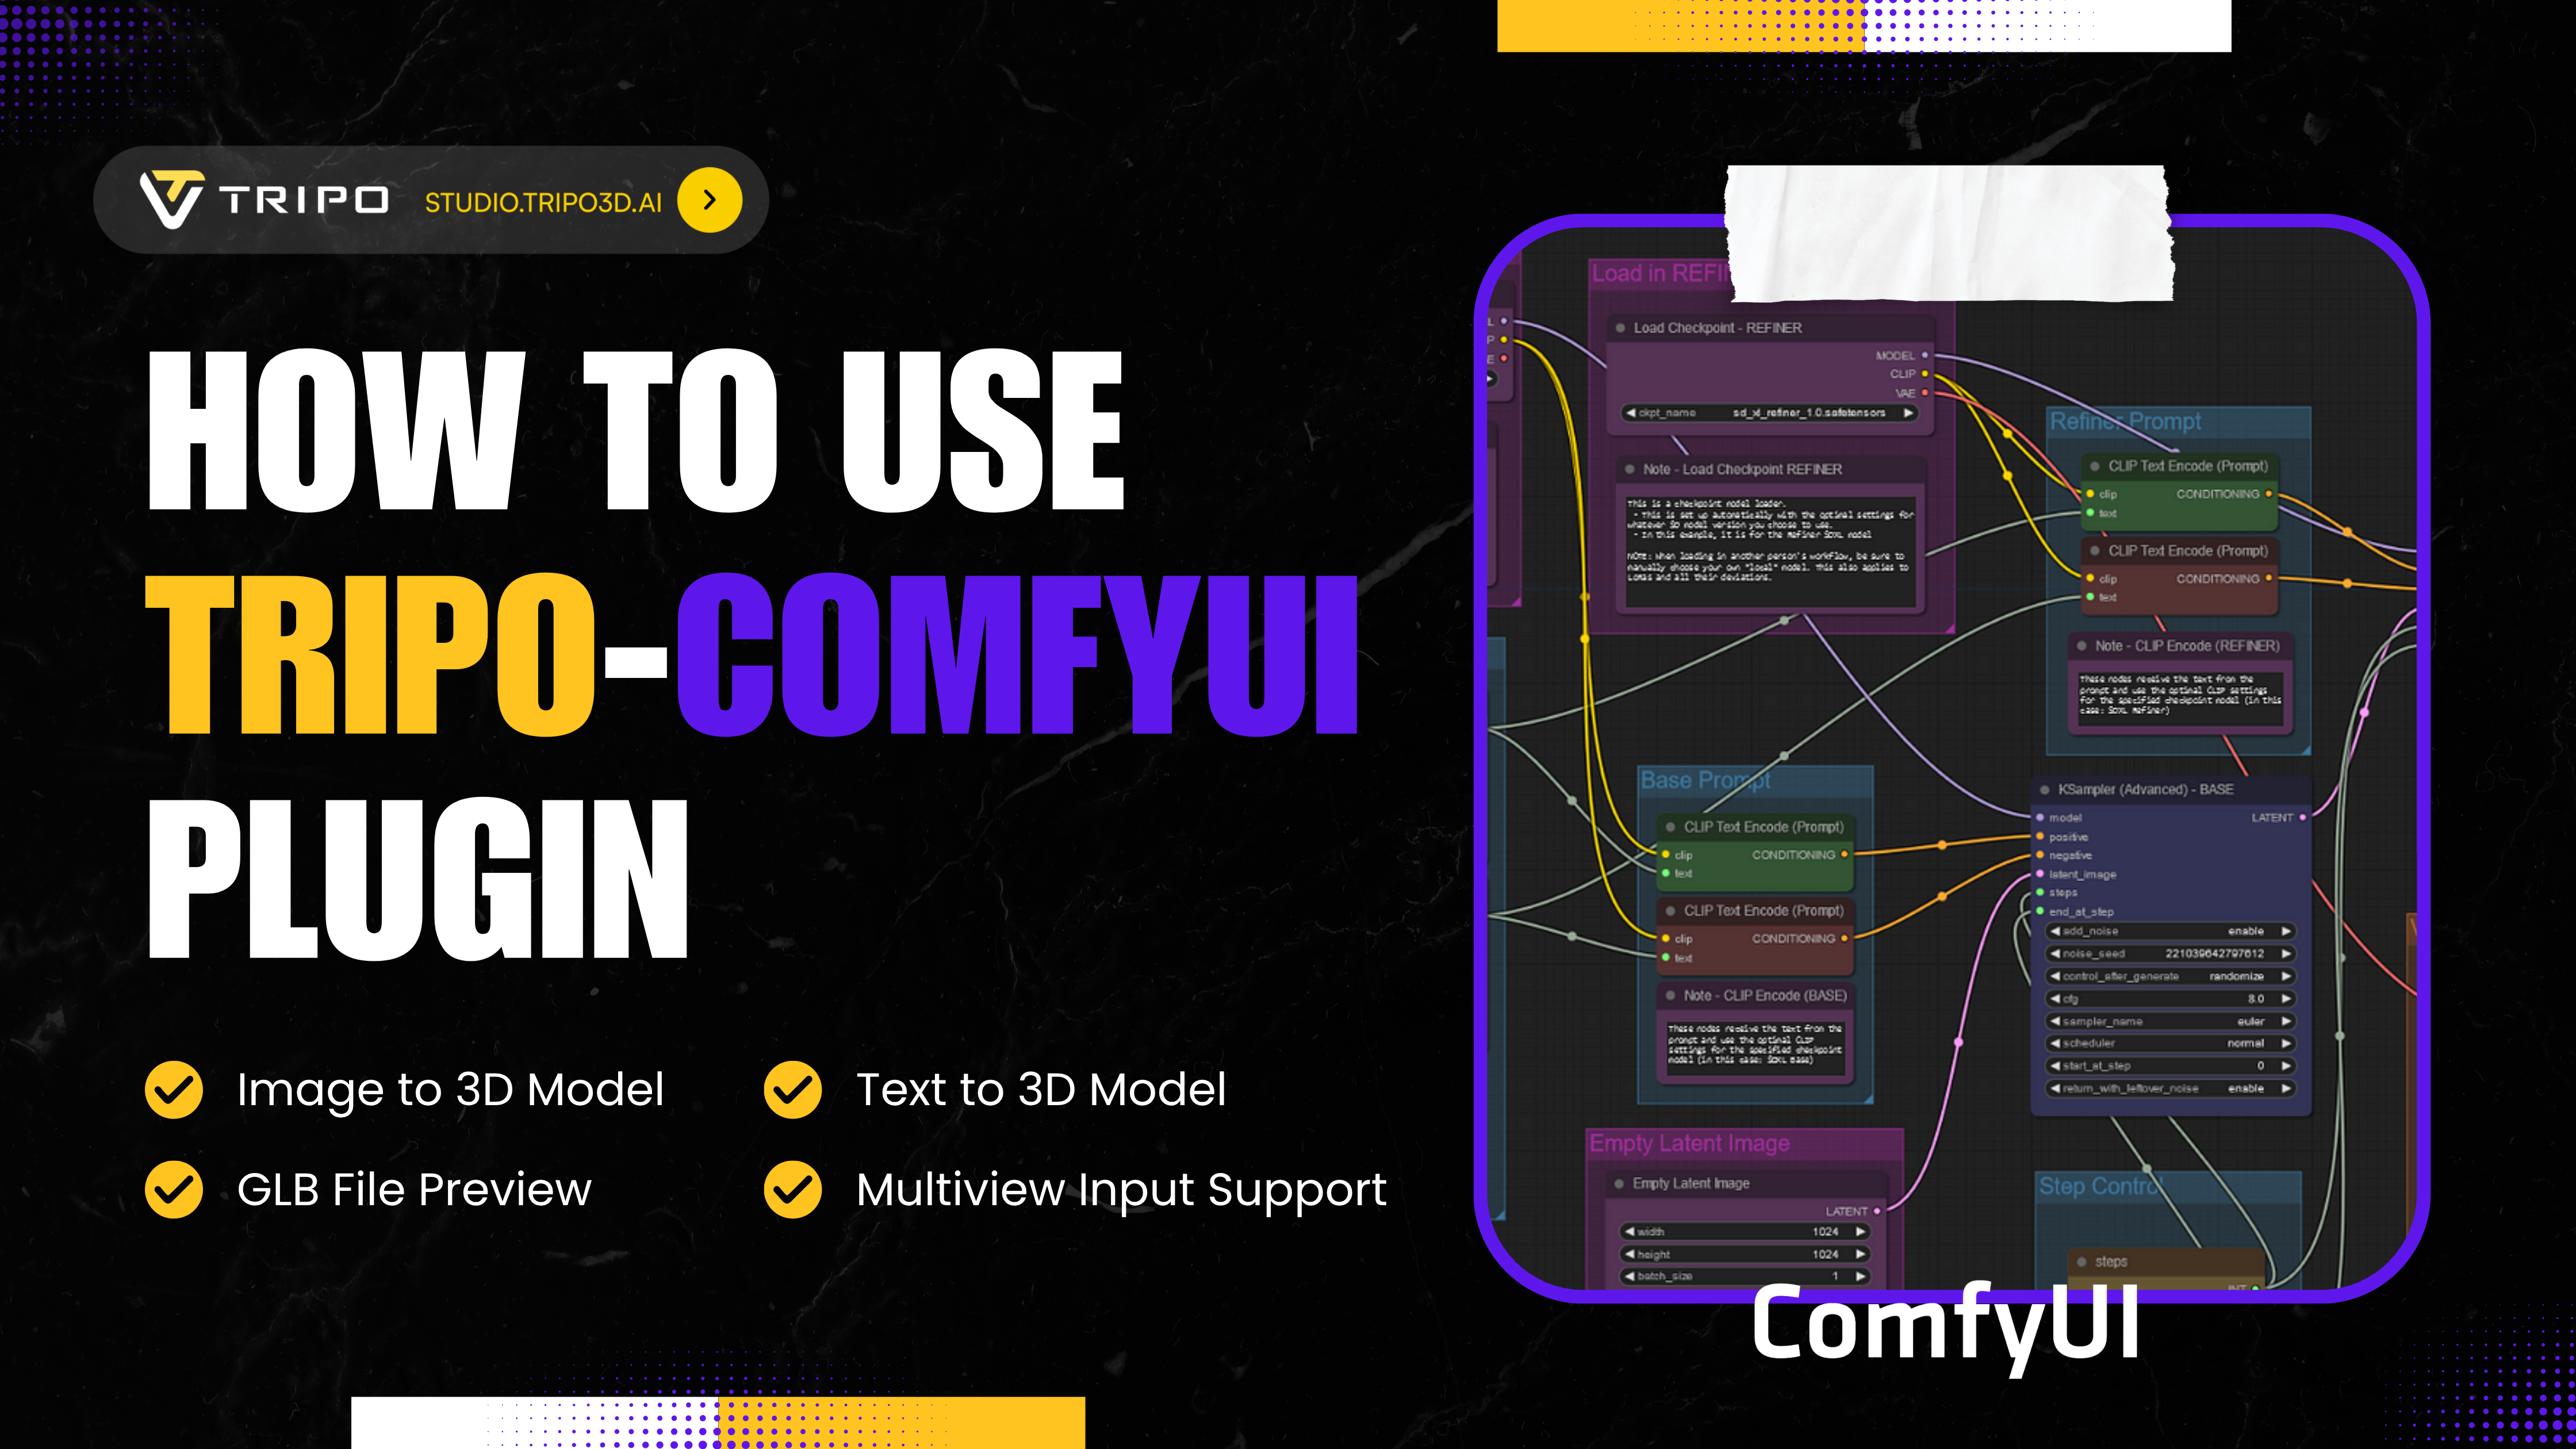
Are you ready to revolutionize your 3D modeling workflow? The Tripo-ComfyUI plugin brings powerful AI 3D model generation capabilities directly into the versatile ComfyUI environment, creating an end-to-end production studio that transforms how you create 3D assets.
In this comprehensive guide, we'll explore everything from basic setup to advanced workflows, empowering you to generate professional-quality 3D models with unprecedented speed and flexibility.
A New Era for 3D Creation
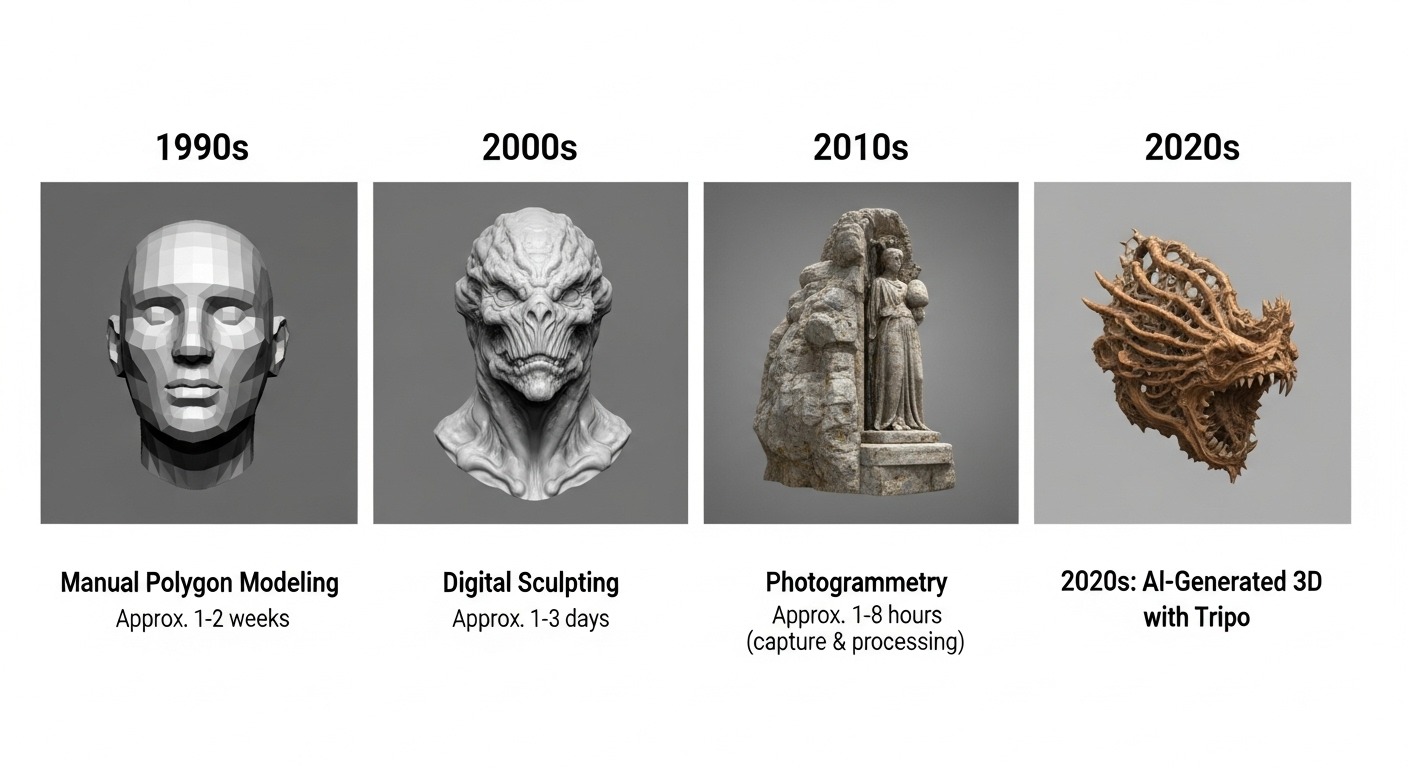
The world of 3D content creation is experiencing a dramatic transformation, with AI 3D model generators at the forefront of this revolution. Tools that once required years of specialized training are now becoming accessible to everyone. Tripo AI has emerged as a leader in this space, offering a powerful platform for generating high-quality 3D models from simple text prompts or images.
When this groundbreaking technology integrates into ComfyUI's versatile, node-based environment, something truly special happens. The Tripo-ComfyUI plugin creates a complete, end-to-end 3D production studio right inside your favorite workflow tool. This powerful combination lets you go from concept to finished asset without ever leaving your creative flow.
What You Can Do with the Tripo-ComfyUI Plugin

At its core, the plugin adds a suite of powerful 3D tools to your ComfyUI toolbox. These nodes can be chained together to create sophisticated pipelines, allowing you to go from a simple idea to a fully realized 3D asset. Here are the core capabilities at your disposal:
Generate 3D Models from Any Input
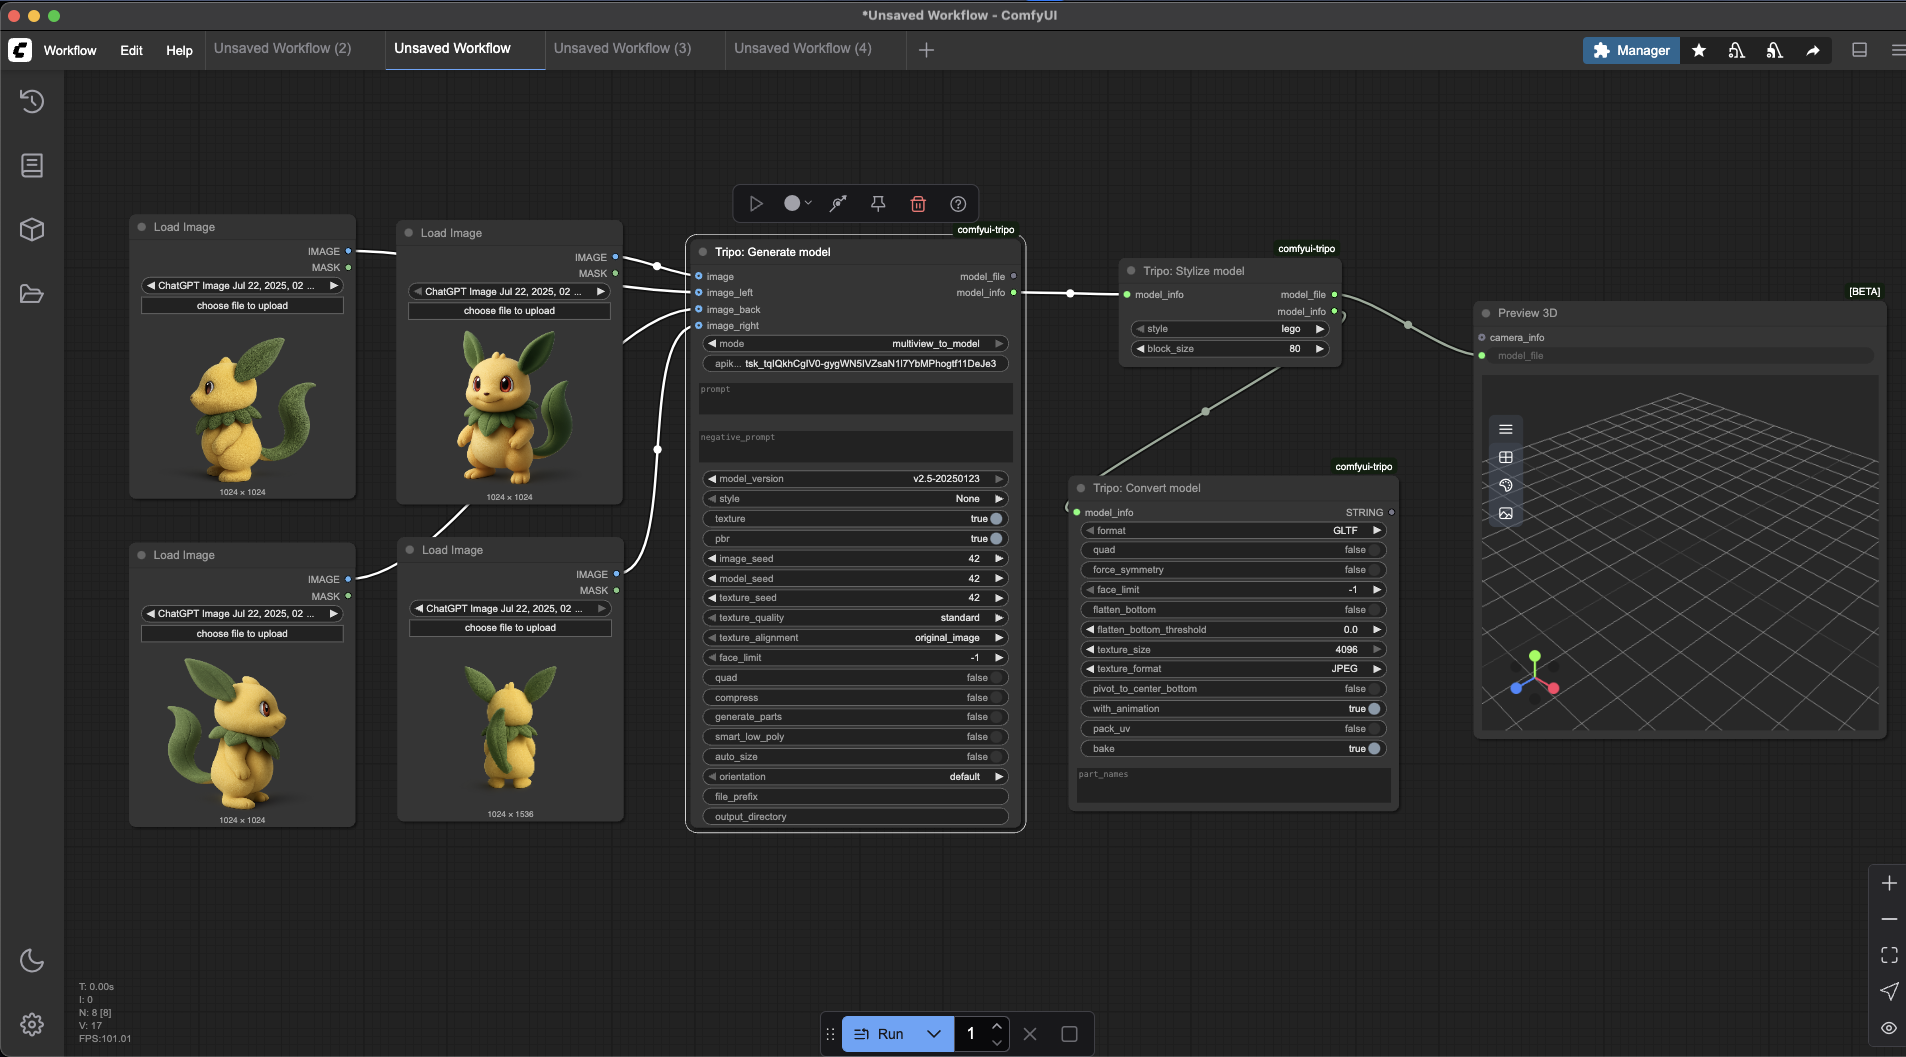
Go from concept to 3D in seconds. You can create models from a text description (text to 3D), reconstruct one from a single reference image to 3D, or achieve higher fidelity by providing images from multiple angles (multiview to 3D).
Refine and Enhance Geometry
Your first generation doesn't have to be your last. With dedicated refinement nodes, you can take a basic "draft" model and automatically improve its detail, smooth its surfaces, and enhance its overall quality.
Create and Apply Advanced Textures
Breathe life into your models with high-quality textures. The plugin allows you to generate and apply materials from text prompts or style images, and even supports PBR (Physically-Based Rendering) textures for hyper-realistic surfaces that react properly to light.
Automate Rigging and Animation
The traditionally time-consuming process of creating a character skeleton ("rigging") is now automated. You can generate a functional rig for your model and even apply preset animations like "idle" or "walk" with just a few clicks.
Achieve Any Look with Stylization and Conversion
Your creativity isn't limited to a single style. Transform your model's appearance to look like it's made of Lego bricks, clay, and more. When you're done, the Convert model node lets you export your work to any industry-standard format, including OBJ, FBX, GLTF, and the 3D printing favorite, STL.
Intelligently Segment and Edit Models
For ultimate control, the plugin can automatically analyze a model and break it into logical parts—like separating a character's helmet, armor, and clothing. This allows you to apply different materials or make edits to individual sections with surgical precision.
Now that you know what's possible, let's dive into how you can get this powerful toolkit set up and start creating.
Getting Started: Installation and Setup Guide
This section will walk you through the entire process, from installing the plugin to building your first advanced workflow.
Step 1: Installing the Tripo-ComfyUI Plugin
The recommended method for installation is using the ComfyUI-Manager, as it handles dependencies automatically:
- In your ComfyUI interface, click the "Manager" button
- Select "Install Custom Nodes"
- Use the search bar to find ComfyUI-Tripo
- Click the "Install" button next to it
- Completely restart ComfyUI to ensure the new nodes are loaded
Alternative Installation Methods:
If you prefer a manual approach or don't have ComfyUI-Manager installed, you can:
Method A: Direct Installation
- Navigate to your ComfyUI installation folder
- Locate the
custom_nodes/directory (create it if it doesn't exist) - Clone the repository using:
git clone https://github.com/tripodesko/ComfyUI-Tripo.git
- Enter the plugin directory:
cd ComfyUI-Tripo
- Install dependencies:
pip install -r requirements.txt
Method B: Via Comfy Register
If you use comfy-cli, this one-line command will handle the installation:
comfy node registry-install comfyui-tripo
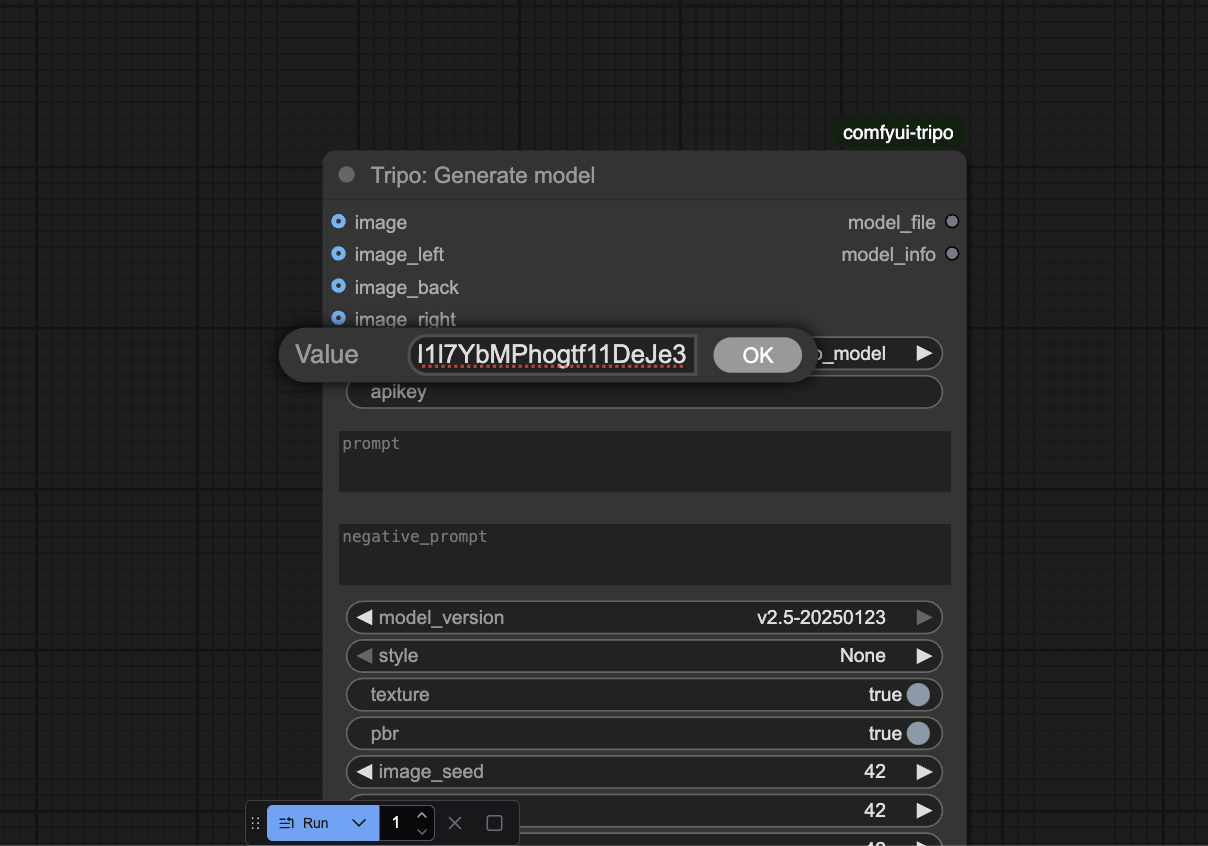
Step 2: Configuring Your API Key
To use the plugin, you need to connect it to your Tripo AI account:
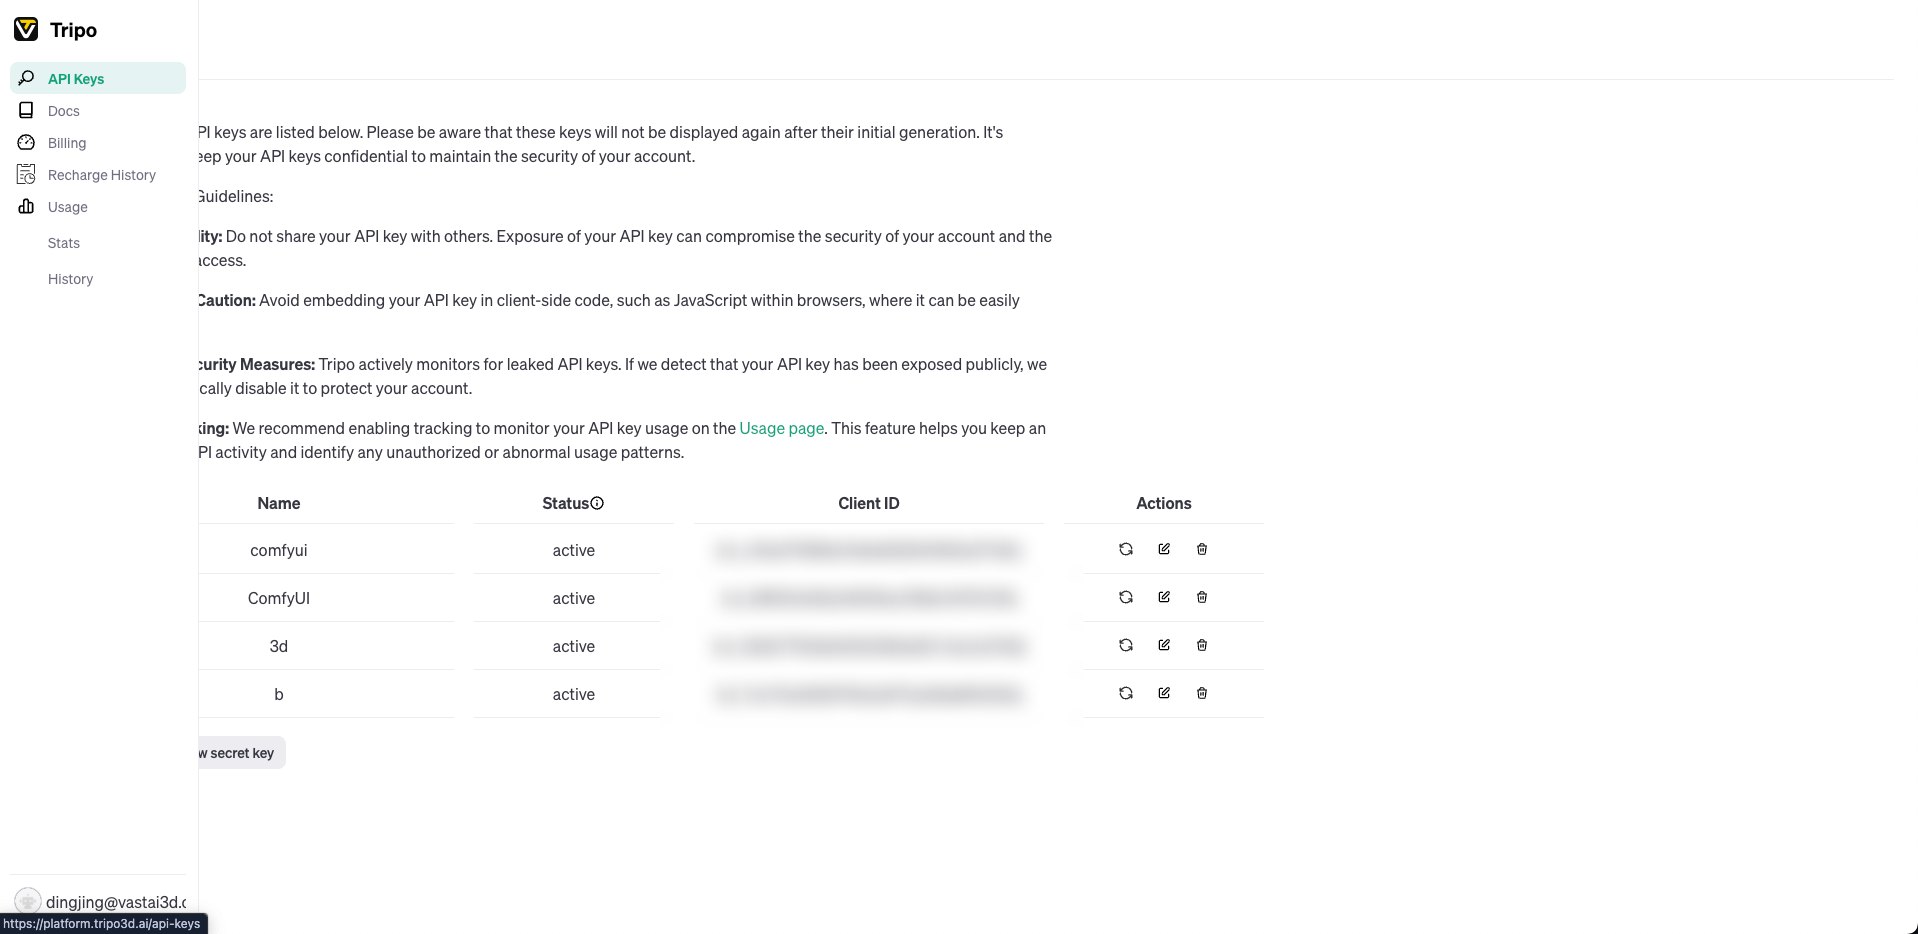
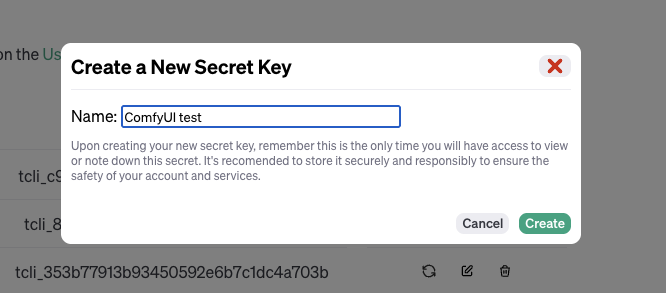
- Log in to the Tripo AI website and navigate to your account or developer section to generate and copy your API key
- In ComfyUI, add any Tripo node (e.g., Generate model) to your canvas
- Paste your copied key into the
api_keyinput field on the node
Pro Tip: To avoid entering your API key repeatedly, you can add it as an environment variable named TRIPO_API_KEY or include it in a configuration file in the plugin directory.
Understanding and Using the Tripo Nodes
The Tripo-ComfyUI plugin is a modular toolkit. Here are the key nodes and what they do:
Core Nodes:
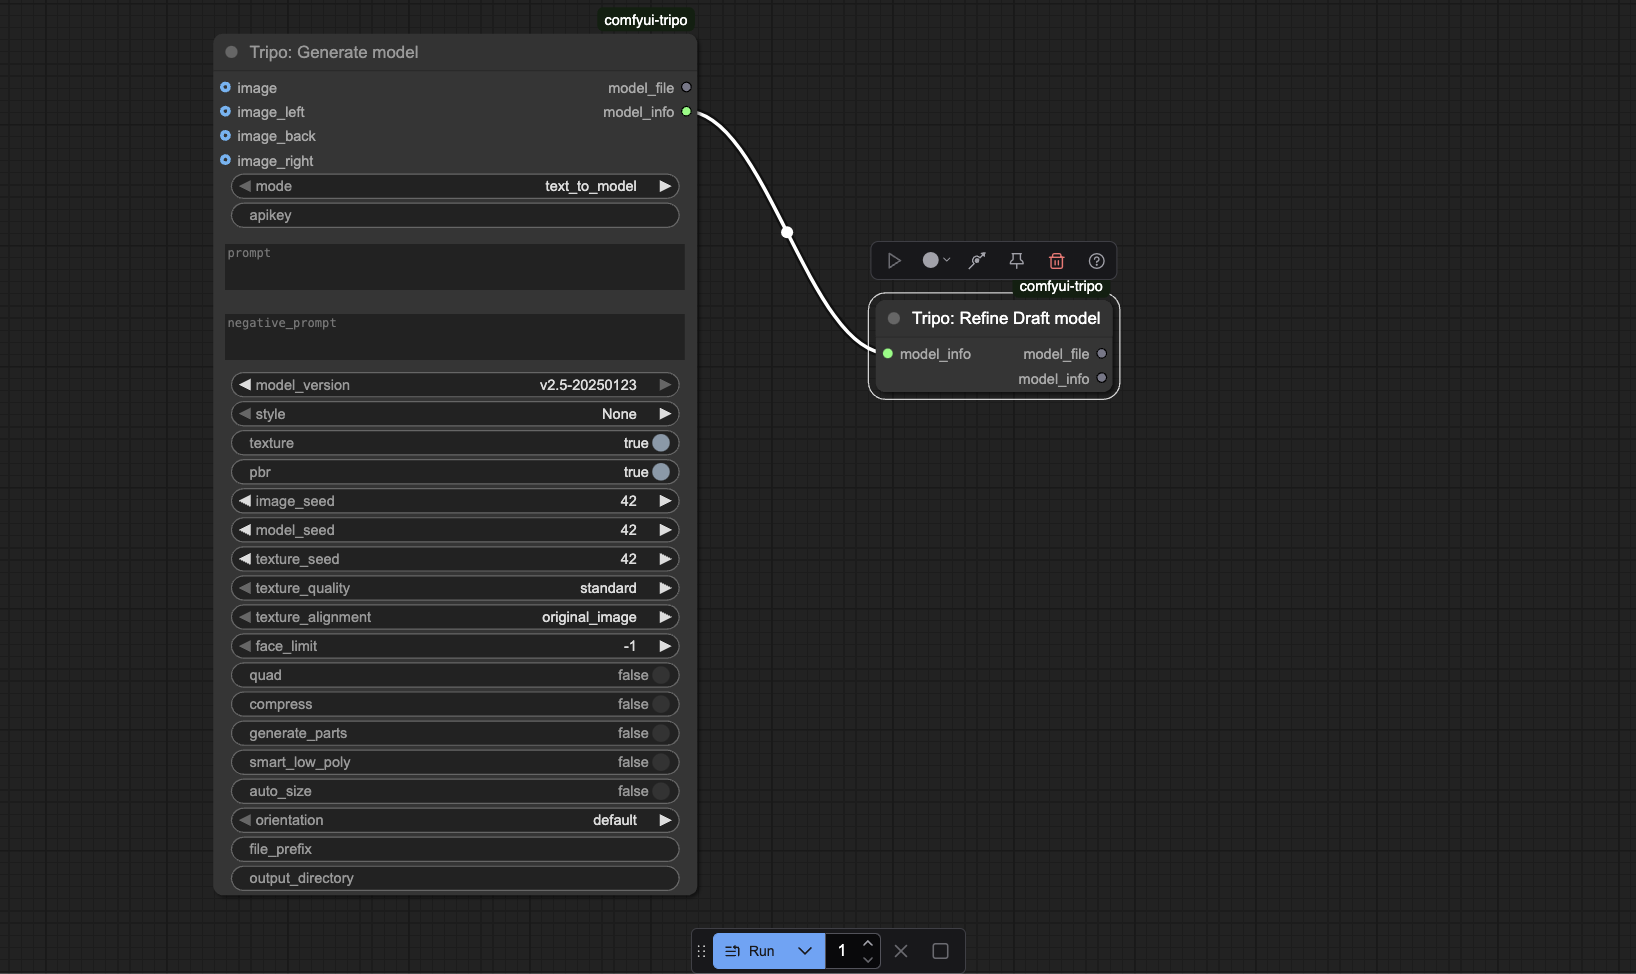
- Generate model: The starting point. Creates a 3D model from a text prompt or image.
- Refine Draft model: Improves the quality of a basic model.
Optimization & Style Nodes:
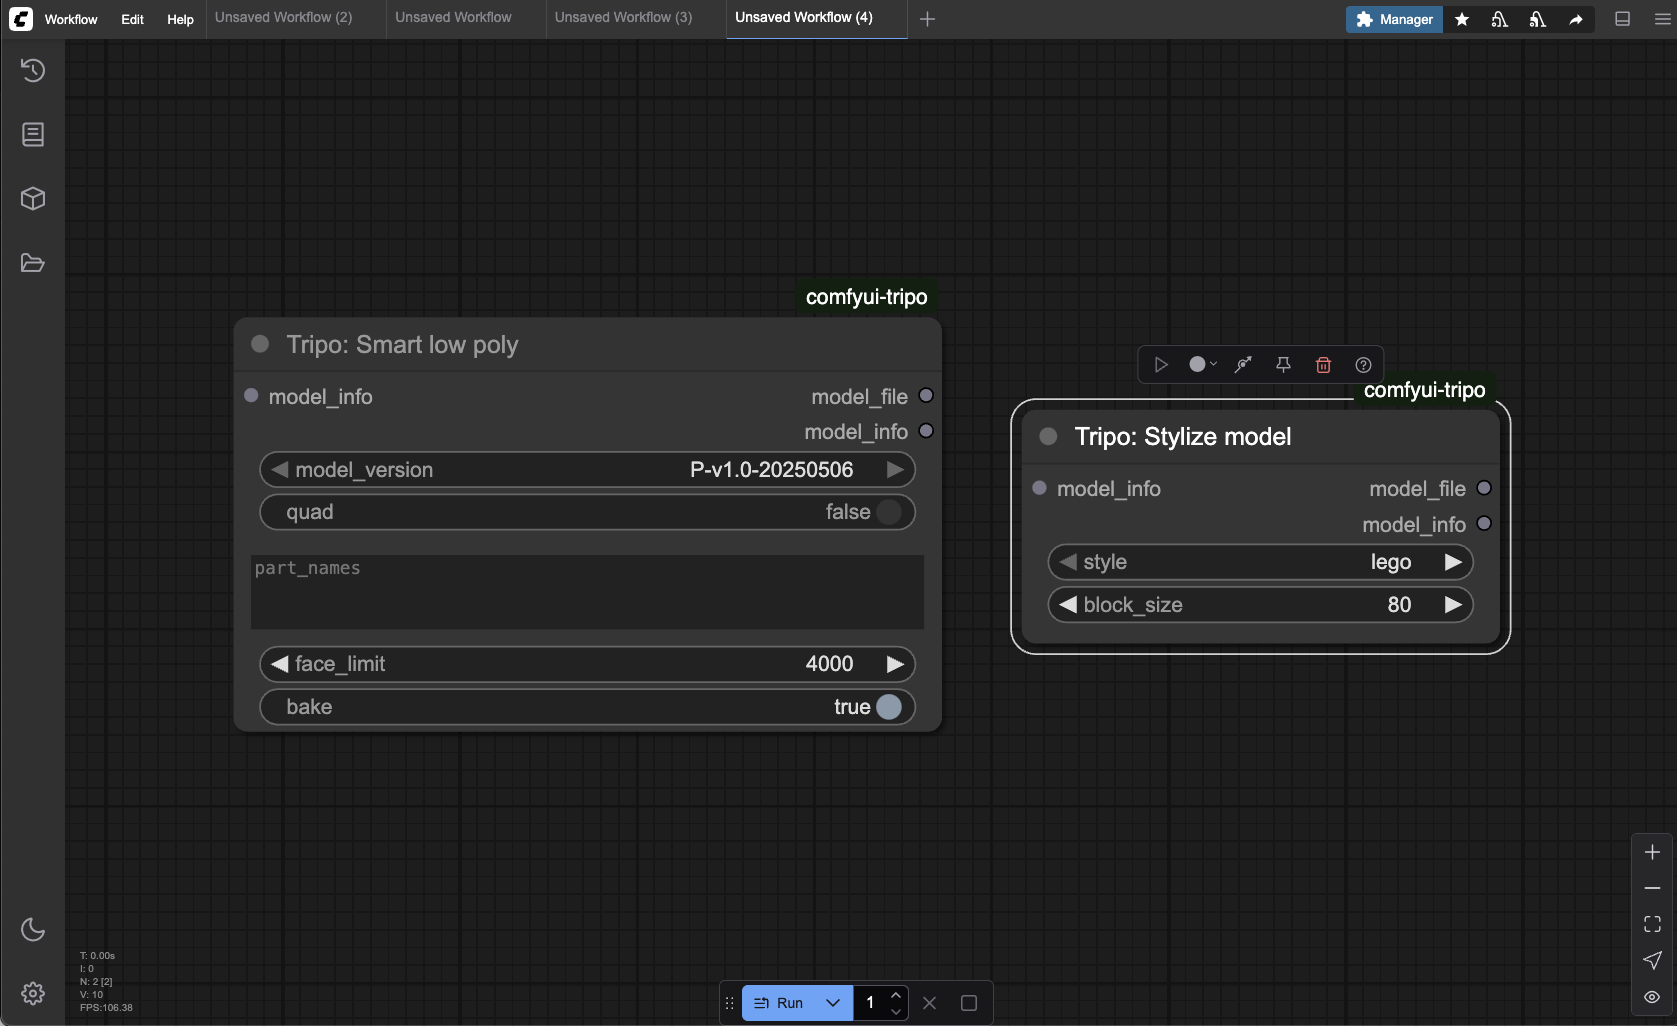
- Smart low poly: Performs automatic retopology to create a lightweight, game-ready mesh.
- Stylize model: Applies artistic styles like "Lego" or "clay" to your model.
Texturing Nodes:
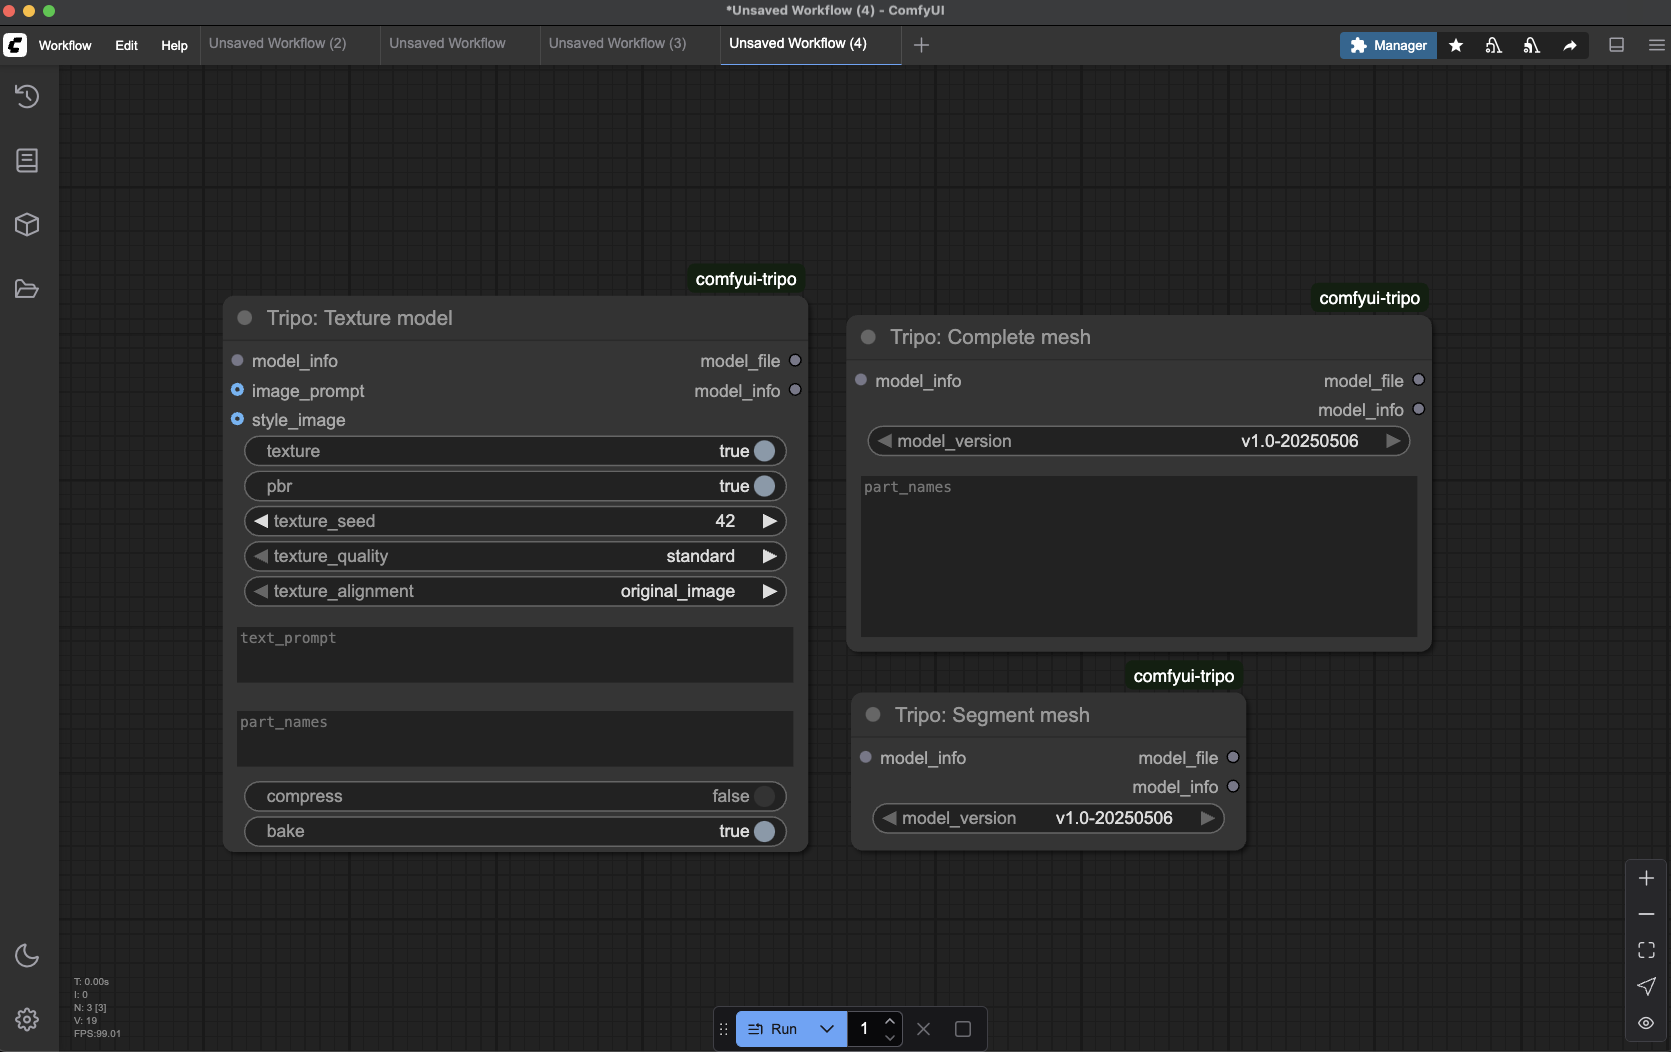
- Segment mesh: Breaks a model into logical parts for individual editing.
- Texture model: Applies textures to a whole model or to specific, pre-segmented parts.
- Complete mesh: Reassembles a model after its parts have been worked on.
Finalizing Nodes:
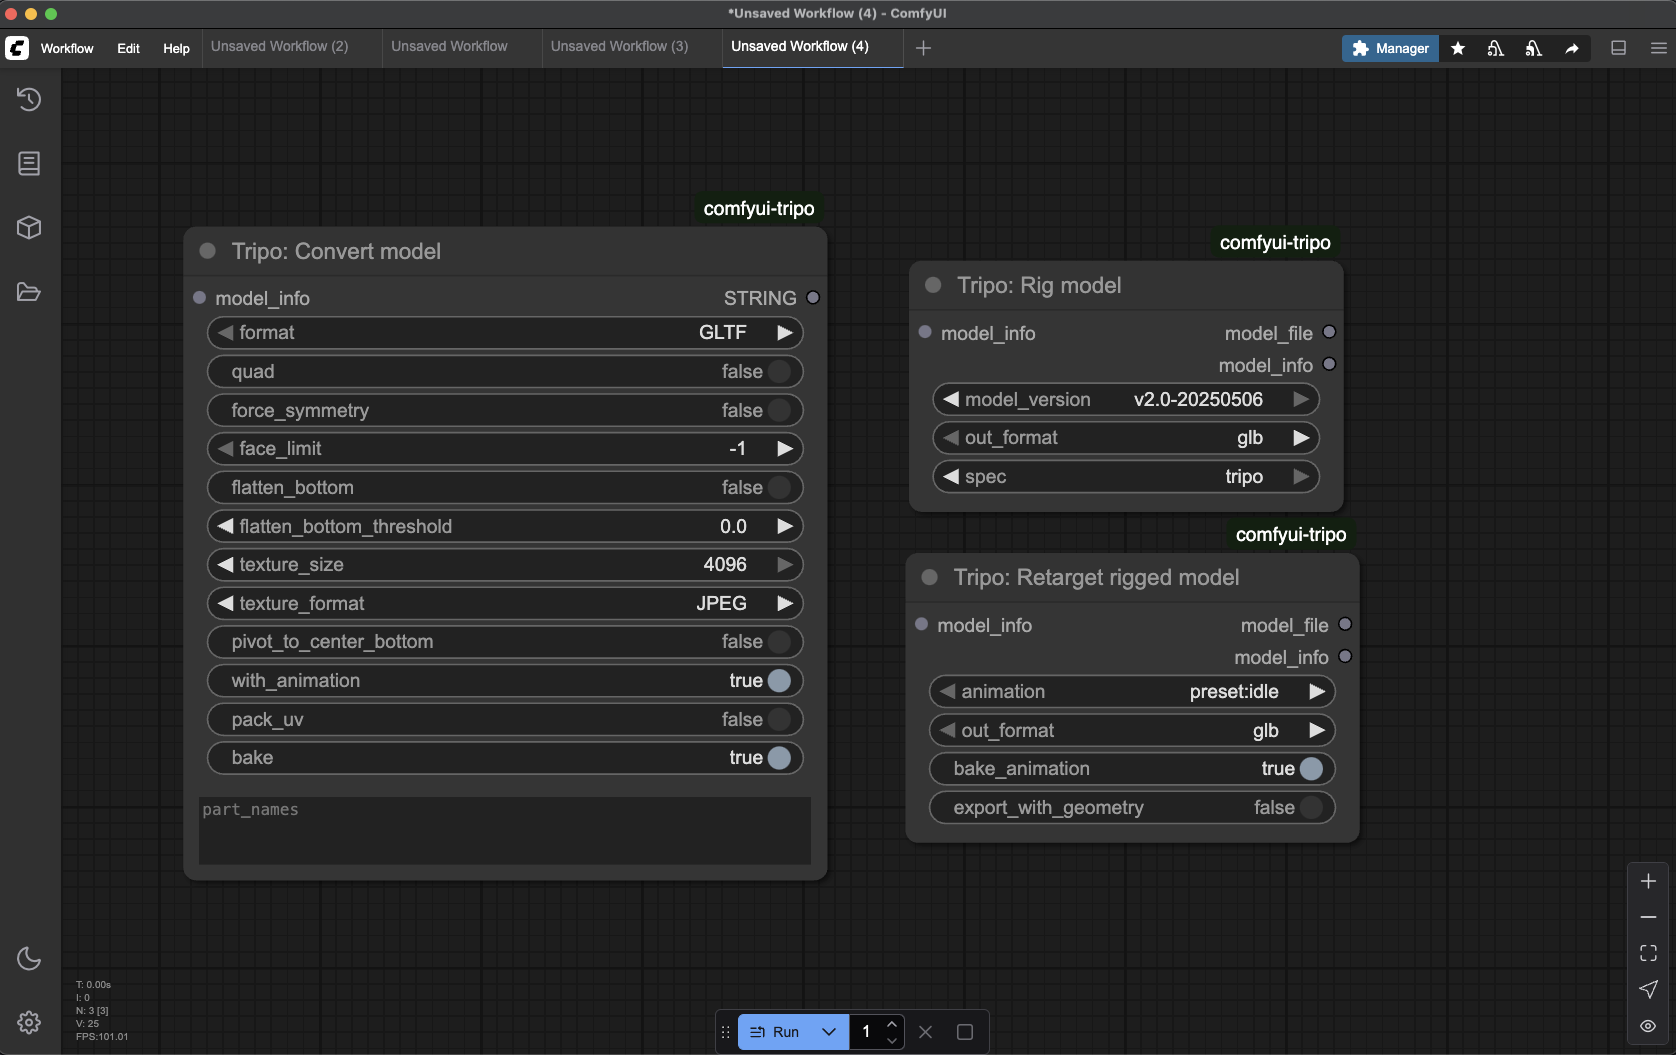
- Rig model: Automatically creates a skeleton for animation.
- Retarget rigged model: Applies a preset animation to a rigged model.
- Convert model: The final step. Saves your model in your chosen format (OBJ, STL, FBX, etc.).
Powerful Workflows in Action
The true power of this AI 3D model generator plugin is chaining these nodes together. Here are three practical workflows you can build right now.
Workflow 1: Creating a Game-Ready Animated Character
Goal: To take a text prompt and produce a fully optimized, rigged, and animated character ready for a game engine like Unity or Unreal.
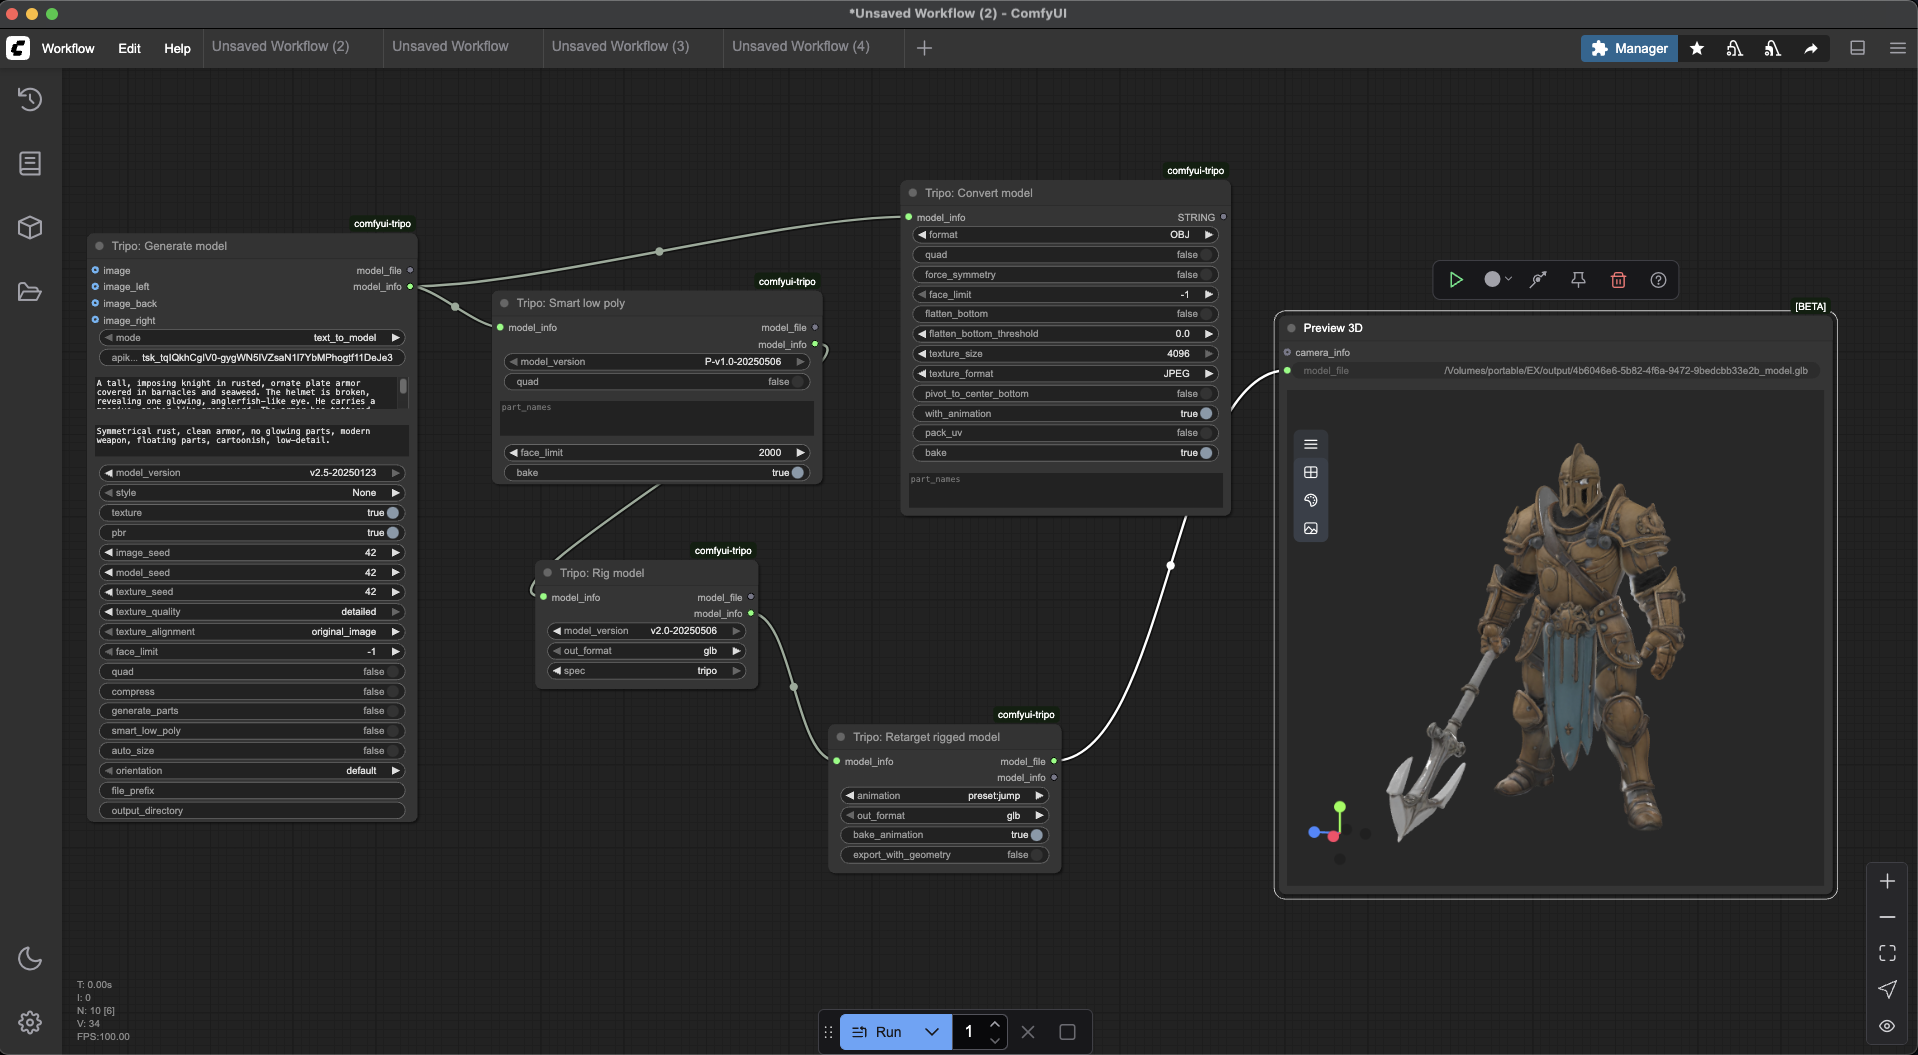
Model Idea: "The Sunken Paladin"
Positive Prompt: A tall, imposing knight in rusted, ornate plate armor covered in barnacles and seaweed. The helmet is broken, revealing one glowing, anglerfish-like eye. Humanoid posture, optimized for game animation.
Negative Prompt: Symmetrical rust, clean armor, modern weapon, floating parts, cartoonish, low-detail.
Node Connections:
- Start with Generate model. Create your character with textures enabled.
- Connect Generate model → Smart low poly. Drag the
model_infooutput from the generation node to themodel_infoinput of the Smart low poly node. Set aface_limit(e.g., 15,000) to create the game-ready mesh. - Connect Smart low poly → Rig model. This will add the animation skeleton.
- Connect Rig model → Retarget rigged model. Select a preset animation like "idle."
- Connect Retarget rigged model → Convert model. Set the format to GLTF or FBX to save your final animated character.
Workflow 2: Designing a Model for 3D Printing
Goal: To create a solid, static, and printable model with a stable base.
Model Idea: "Art Deco Fox Statue"
Positive Prompt: A stylized Art Deco statuette of a sitting fox, composed of sharp, clean geometric shapes. The model should be a single, solid, manifold mesh with a wide, flat base for stability.
Negative Prompt: Realistic fur, organic shapes, thin parts, hollow model, detailed textures.
Node Connections:
- Start with Generate model. Textures are not necessary.
- (Optional) Connect Generate model → Stylize model to apply a unique artistic finish.
- Connect to Convert model. Drag the
model_infooutput from the previous node to the Convert model node. In this node's settings, make sure to setformatto STL andflatten_bottomto true.
Workflow 3: Advanced Multi-Part Texturing
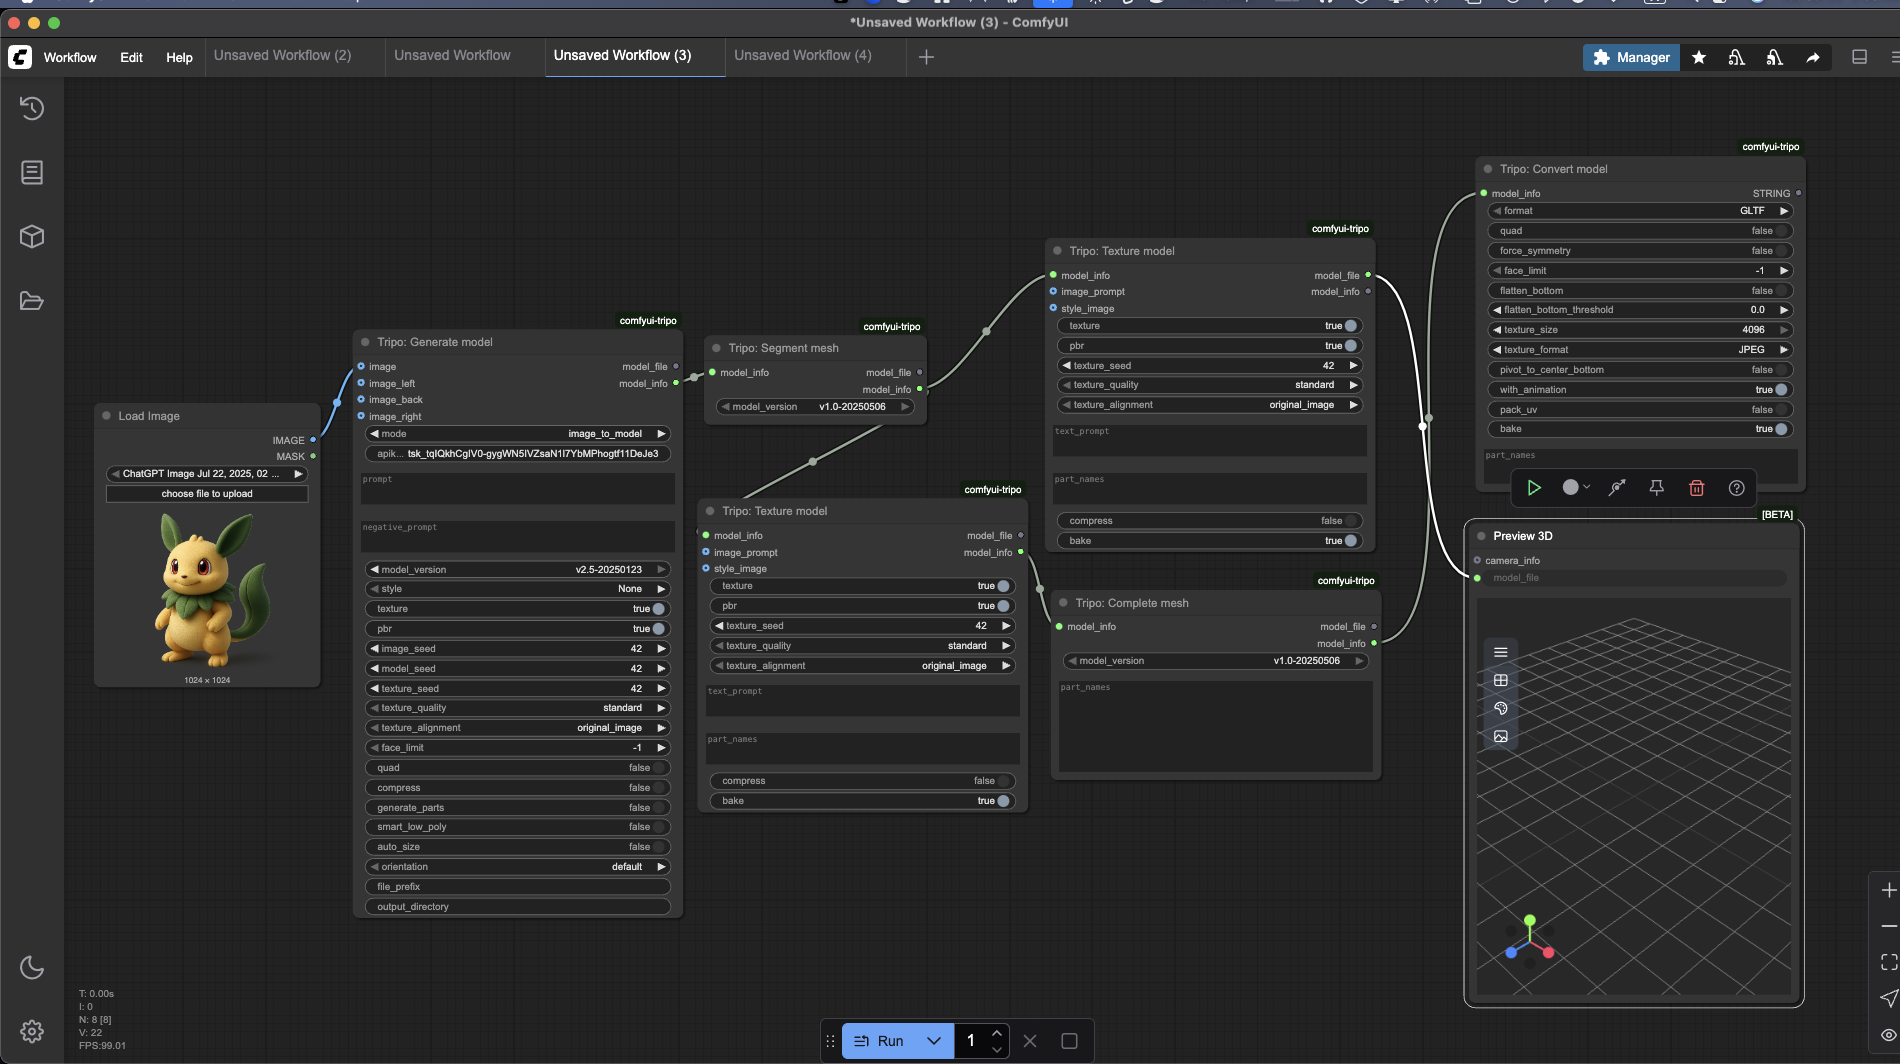
Goal: To achieve maximum realism by applying different, high-quality textures to different parts of the same complex model.
Model Idea: "The Dwarven Astrolabe"
Prompt for Generate model: An intricate, complex Dwarven astrolabe device. Features multiple rotating brass rings, a solid dark oak base carved with runes, and a central crystal held by a metal claw.
Node Connections:
- Start with Generate model.
- Connect Generate model → Segment mesh. This will identify the different parts of the astrolabe (rings, base, crystal, etc.).
- Create Parallel Branches:
Branch A: Connect Segment mesh → a new Texture model node. In this node, target the brass parts by entering "rings, claw" into the part_names field and describe a "weathered brass" texture in the prompt.
Branch B: Connect Segment mesh → a second Texture model node. Target the wooden parts by entering "base" in part_names and describing a "dark, polished oak" texture.
- (Merge) Connect Both Texture model nodes → Complete mesh. This reassembles the model with its new, distinct textures.
- Connect Complete mesh → Convert model to save your final, highly-detailed model.
Troubleshooting Common Issues
Even the best AI 3D model generator can encounter issues. Here are solutions to common problems:
API Key Errors
If you see "Invalid API key" or authentication errors:
- Verify your key is correctly entered without extra spaces
- Ensure your subscription is active on Tripo's platform
- Try entering the key directly in the node instead of using environment variables
Generation Timeouts
For "Request timed out" errors:
- Check your internet connection
- Try generating at a lower quality setting first
- Ensure your Tripo subscription limits haven't been reached
Model Quality Issues
If models lack detail or accuracy:
- Use more specific, detailed text prompts
- For Image to 3D, ensure your reference image has good lighting and contrast
- Try the Multi-View approach for complex objects
- Experiment with different quality settings
Best Practices for Optimal Results
To get the most from the Tripo-ComfyUI plugin:
- Craft detailed prompts - Instead of "car," try "sleek red sports car with aerodynamic design and detailed chrome wheels"
- Use clear reference images - Choose images with good lighting, minimal background distraction, and clear object boundaries
- Iterate and refine - Start with draft quality for quick tests, then increase quality once you're satisfied with the concept
- Think in modular components - Break complex models into logical parts for easier texturing and manipulation
- Optimize for your end use - Consider your target platform (game engine, 3D printing, rendering) when configuring export settings
Your Turn to Create
These workflows are just the beginning. The true power of the Tripo-ComfyUI plugin lies in its modularity. You can mix and match these nodes in countless ways:
- Try adding a Refine step before you retopologize
- Stylize a model after you texture it
- Generate multiple variations of the same concept by adjusting prompts
- Combine Tripo nodes with other ComfyUI capabilities for even more creative possibilities
Experiment, break things, and build workflows tailored perfectly to your own creative tasks. With the Tripo-ComfyUI plugin, the future of AI 3D model generation is in your hands.
The traditionally time-consuming process of 3D modeling has been transformed into an intuitive, accessible creative medium through the power of AI. By combining Tripo's image to 3D and text to 3D capabilities with ComfyUI's flexible node system, you can now bring your imagination to life faster than ever before.
