工作室流程案例:一天内从概念设计到游戏引擎
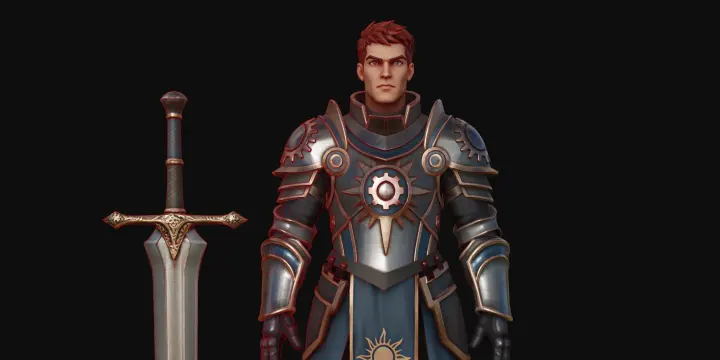
game industry character workflow

1. 项目概览

项目概览详情
项目主题从概念设计到 Unreal Engine 的完整游戏角色制作流程
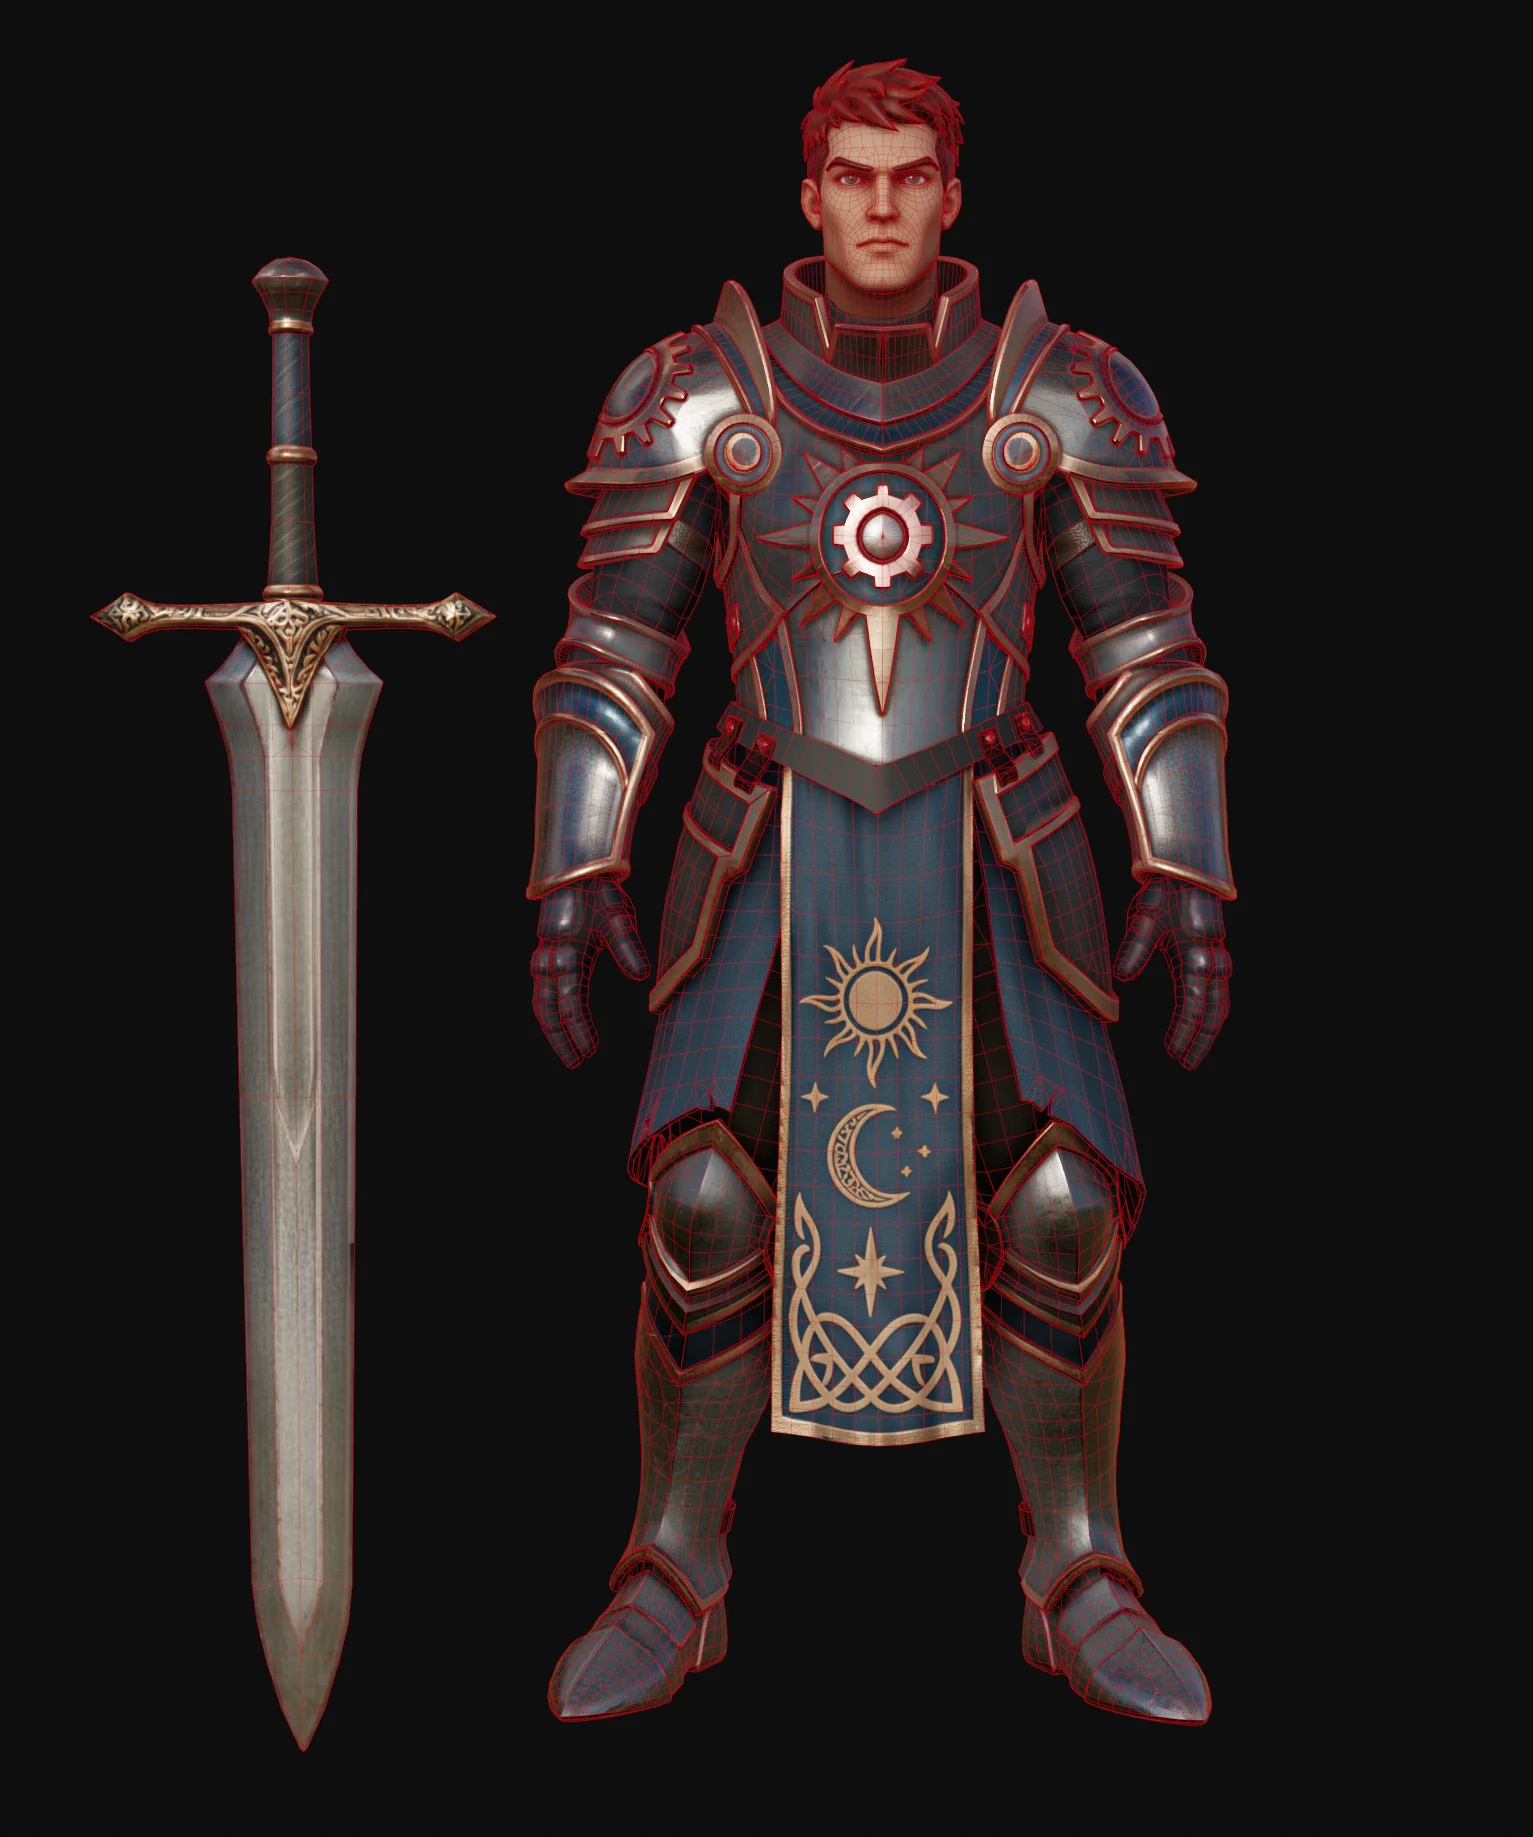
展示资产风格化骑士角色、模块化盔甲套装
总制作周期1 个工作日,由一名艺术家完成
传统流程耗时数天至数周,需要多名专业人员并行协作
最终面数预算总三角面数低于 30K,采用四边面拓扑
使用的 Tripo 模块Image Generation(Asset Extraction、Head Extraction、3D Enhance)· Smart Mesh P2.0(Quad)· Texture Generation(4K / 8K)· Texture Edit · PBR Processing · DCC Bridge
DCC 工具栈Maya(组装、UV)· Marmoset(烘焙)· Substance Painter(精修)· Unreal Engine(集成)
核心价值缩短从概念设计到完成贴图资产的制作周期,让资深艺术家把时间投入艺术精修,而非重复搭建基础体块和制作基础贴图
积分消耗600+

定位说明:Tripo 不会取代角色艺术家。它接手基础网格、规范布线和首轮贴图等重复性的中间环节,把宝贵时间还给真正影响作品质量的创作工作。
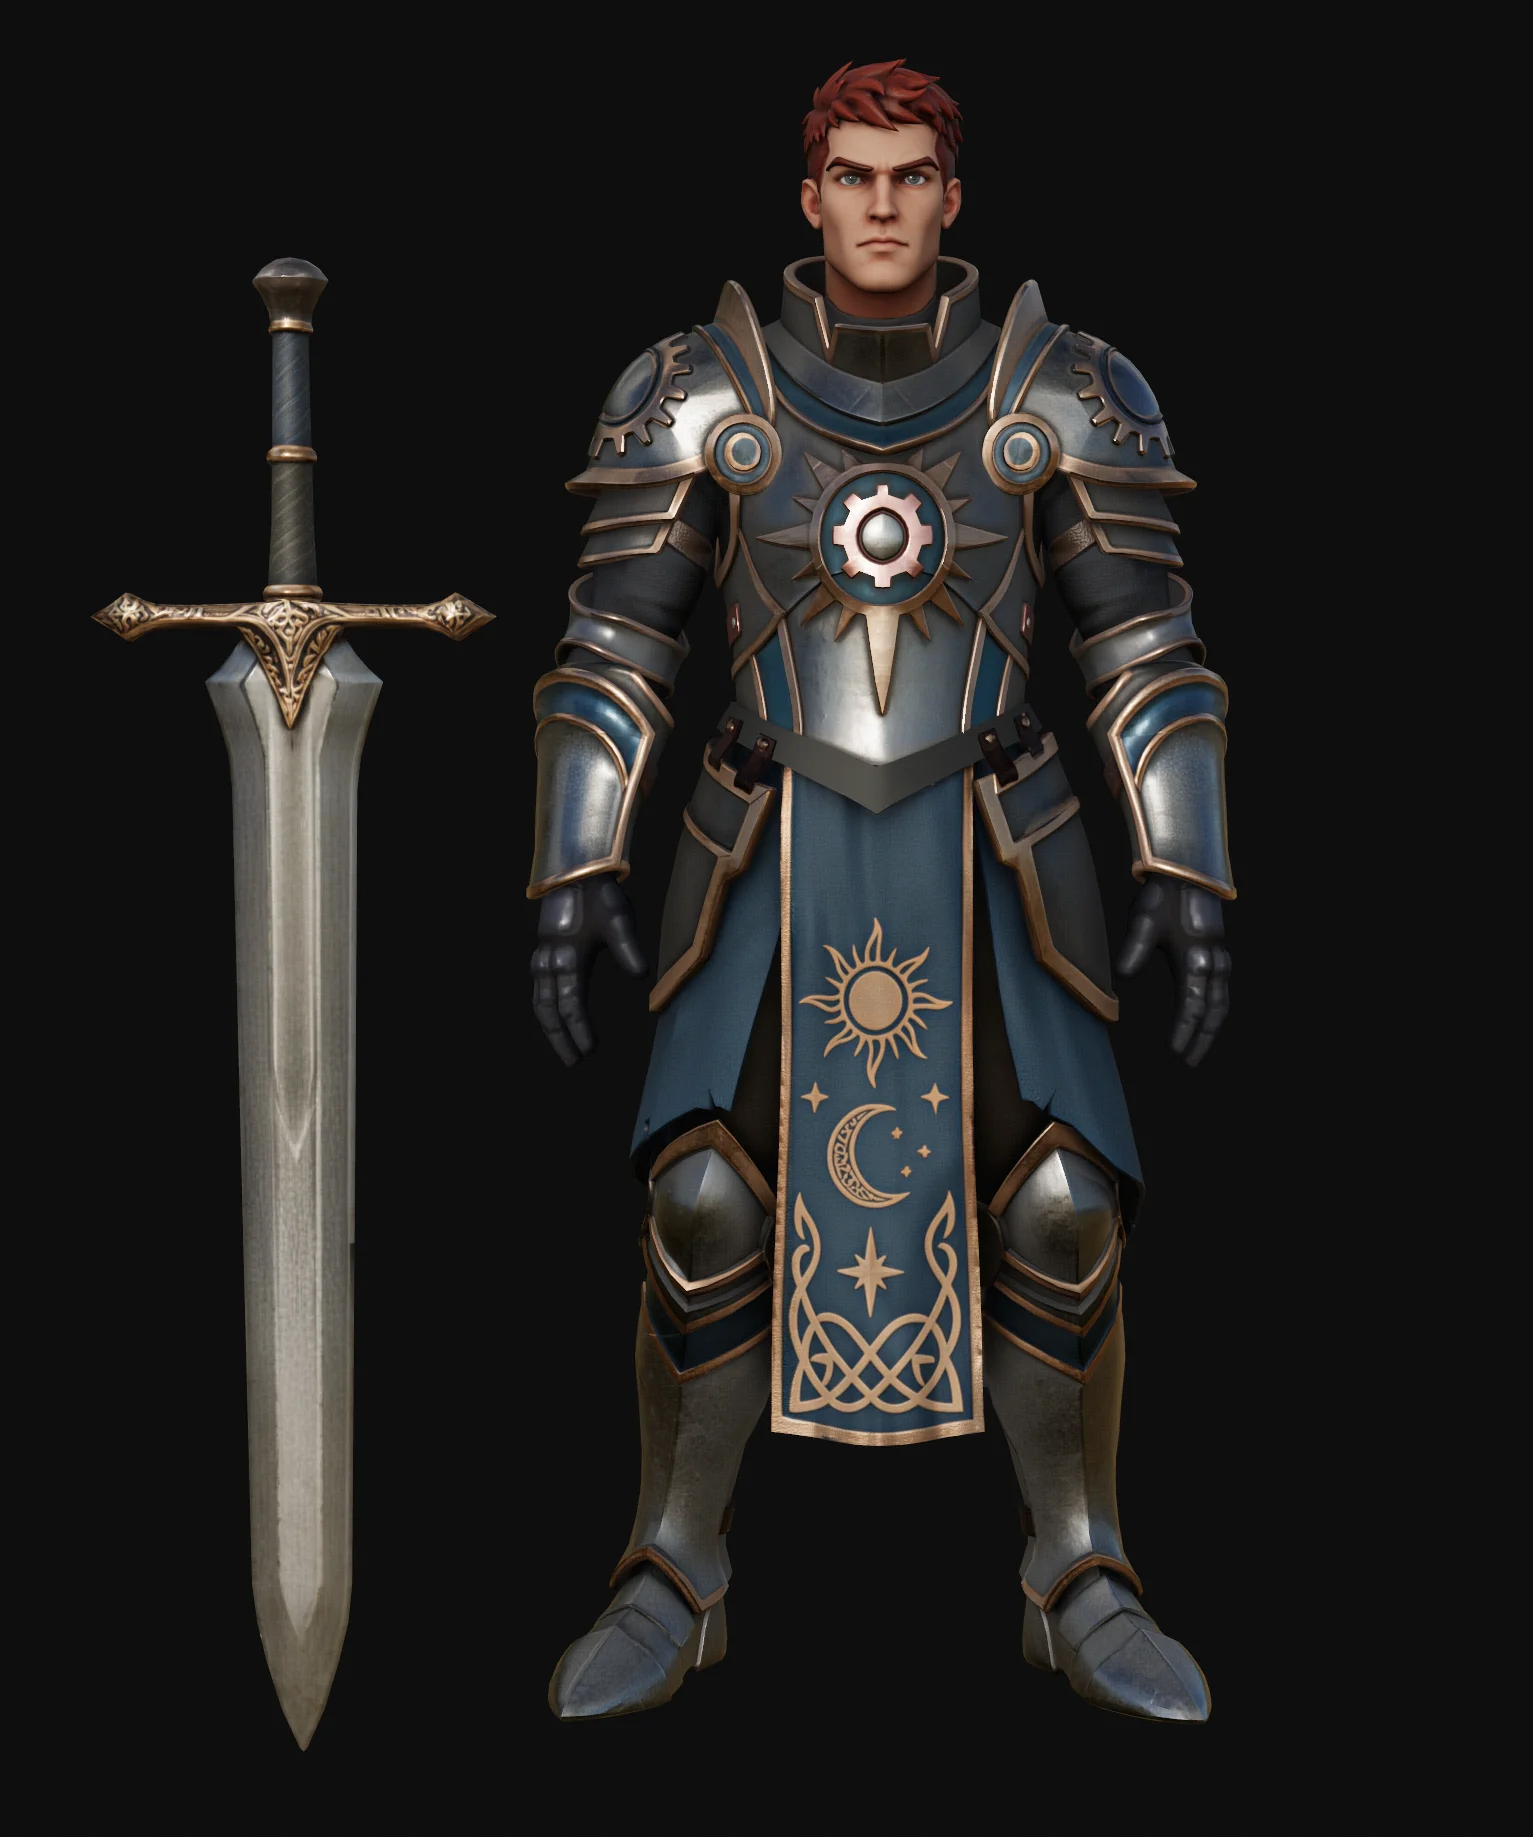
01 a stylized armored knight character with blue and silver armor celestial motifs a gear like chest em
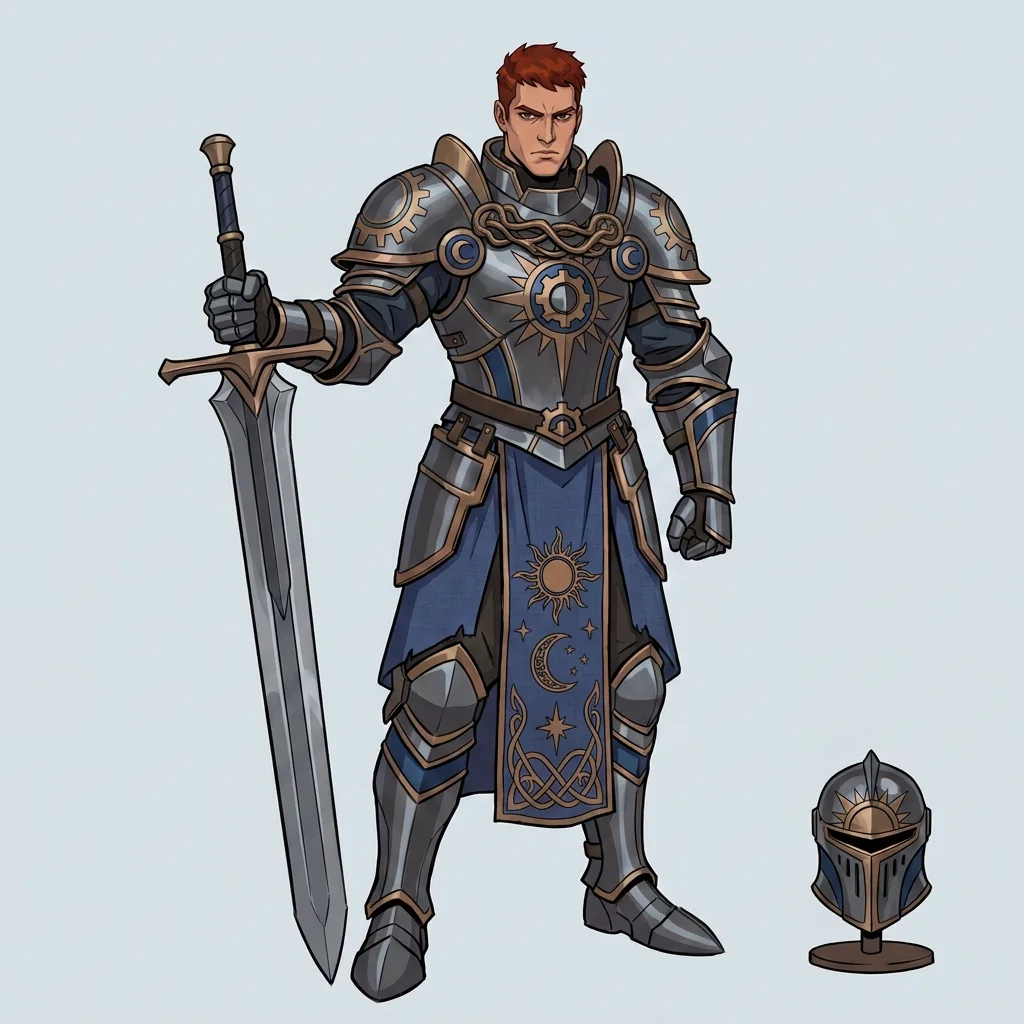
02 a full body view of the armored knight and sword showing the blue armor red and gold details and coo

2. 挑战

传统角色制作流程漫长且环环相扣,几乎每个环节都可能需要专门人员参与。
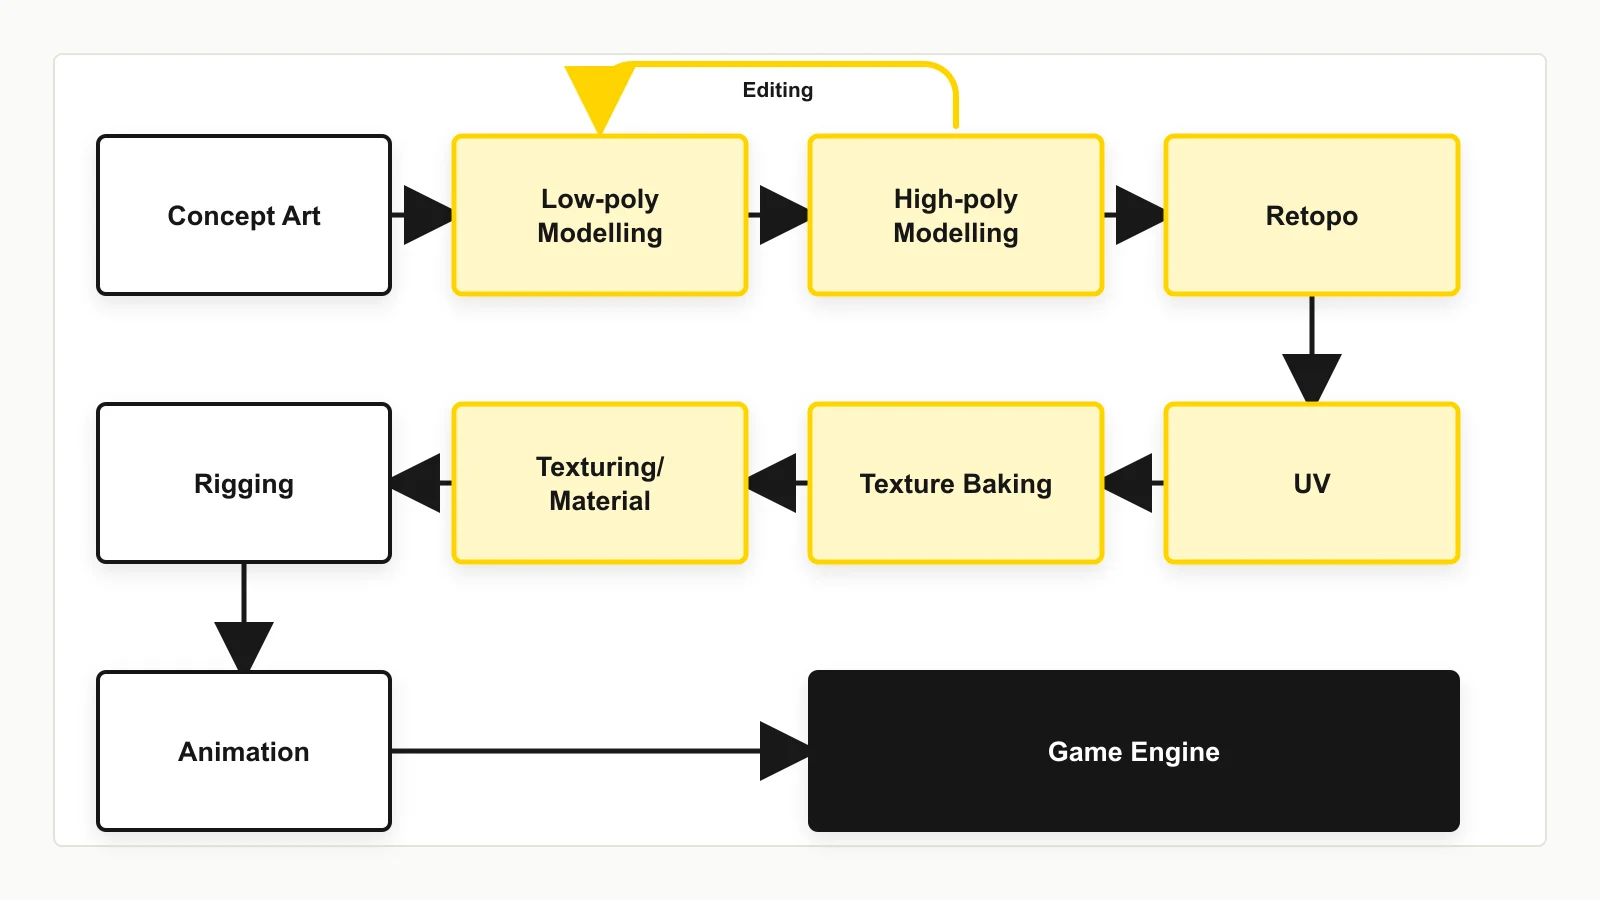
Game character production workflow

概念设计 → 基础体块搭建 → 高模雕刻 → 拓扑重建 → UV →

烘焙 → 贴图制作 → 材质设置 → 绑定 → 引擎集成

这种流程结构会带来三个问题:

大量前期成本耗在创意含量最低的工作上。 基础形体雕刻和拓扑重建占据了过多制作时间,却并非真正体现艺术价值的环节;它们只是后续工作的必要前提。

前后依赖限制了迭代空间。 贴图必须等 UV,UV 又必须等拓扑重建;到了后期,只要美术方向对轮廓或材质提出一处修改,就可能推翻下游数天的工作。久而久之,团队会倾向于回避改动,而不是大胆探索。

扩充人手成了唯一的扩产手段。 按传统方式压缩周期,就要增加概念设计、高模和贴图等岗位的人手。这不仅提高沟通成本,也让小团队很难在资产产量上与大团队竞争。

本案例要回答的是:对于已经掌握完整制作流程的专业艺术家,AI 3D 生成工具究竟能在哪些环节真正节省时间、创造价值?
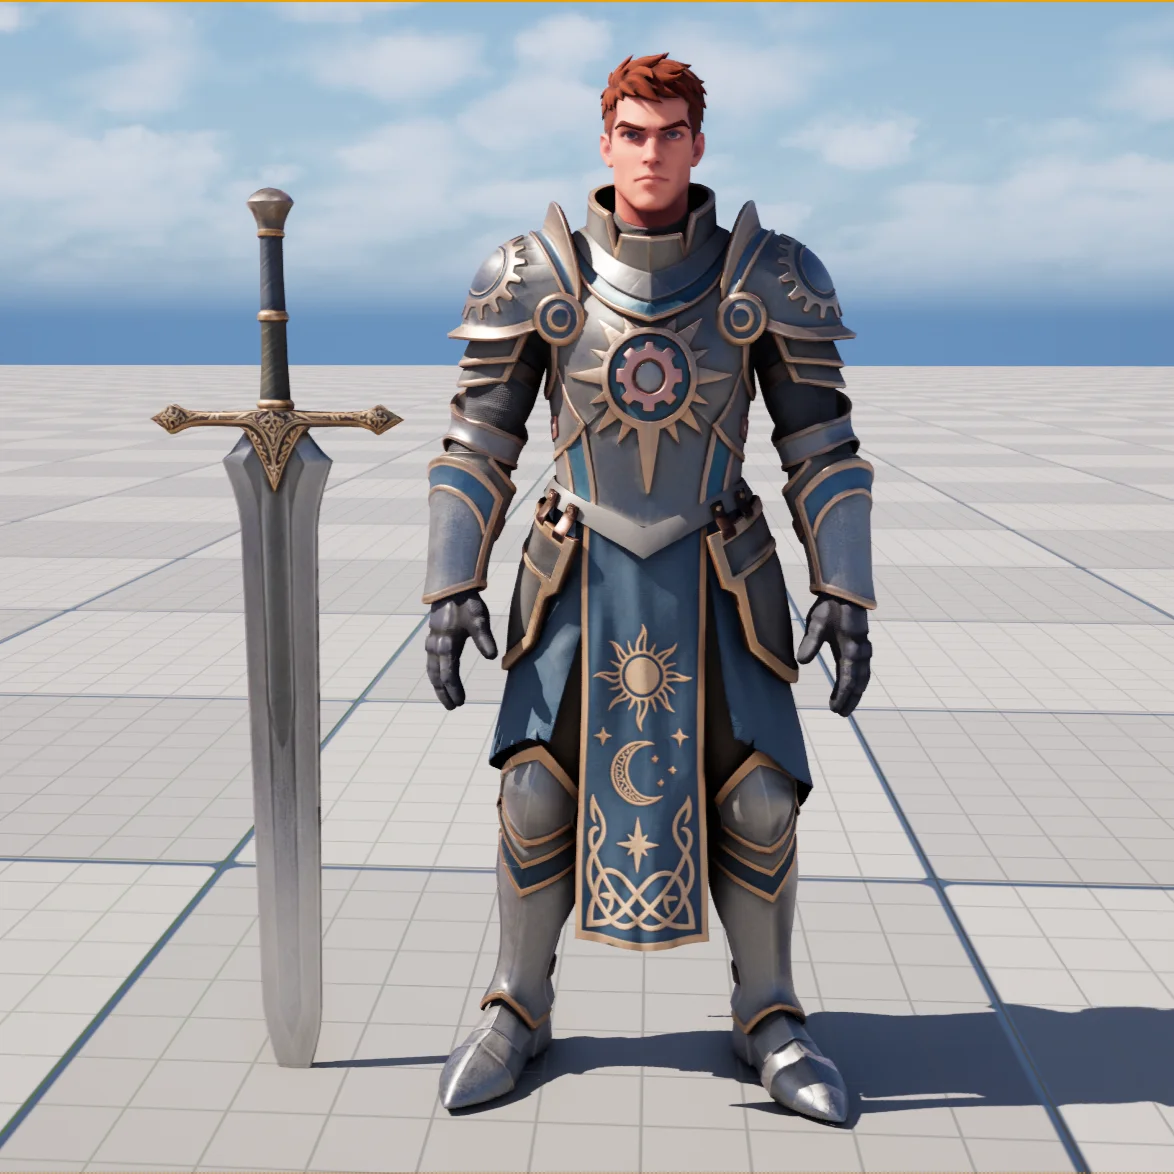
03 a silver armored male character with blue accents holding a sword on a gridded ground plane the imag

3. 技术方案

3.1 调整后的制作流程

Tripo 将基础体块搭建、高模制作、拓扑重建和基础贴图合并到一次生成流程中,让艺术家把精力集中在流程两端:前期的美术方向把控,以及后期的精修与技术收尾。
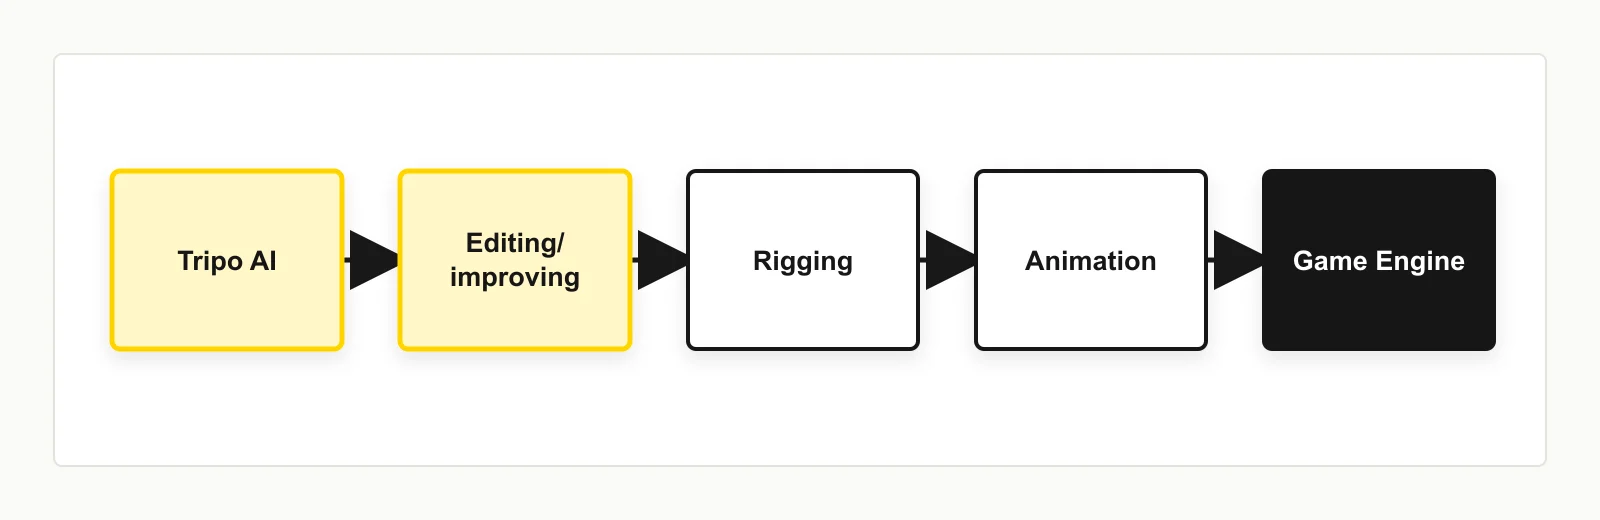
Revised character production pipeline

3.2 流程背后的设计原则

优先分部件生成,而非整模一次生成。 从单张图生成单个网格速度快,用于道具已经足够。但角色通常包含不同材质区域,各部位的细节要求也不相同。生成前先拆分部件,通常能显著提升效果,因为每个部件都可以单独分配面数、贴图和迭代次数。

参考图质量决定输出质量。 生成的网格和贴图会继承参考图中的几何与材质信息。因此,花时间优化参考图,确保轮廓清晰、细节明确,并提供接近 PBR 的材质特征,是整个流程中回报最高的一步。

四边面拓扑是后续制作的交接标准。 对艺术家而言,三角面模型很难继续高效编辑、进行对称处理或重新展开 UV。只有具备行业标准布线的四边面模型,才能顺利从 AI 流程进入 DCC,并为阶段 C 的所有工作打下基础。

阶段 A · 概念与参考

步骤 1 — 准备概念设计图

概念图既可以由艺术家绘制,也可以由 AI 生成;本流程不限制来源。关键在于画面信息必须清晰,便于生成模型准确识别。

最佳实践

  • 轮廓清晰、易于识别
  • 避免遮挡形体的大片阴影
  • 避免模糊不清或尚未定稿的细节
04 a front view concept design of an armored knight with silver armor blue fabric gold ornamentation a

步骤 2 — 拆分部件

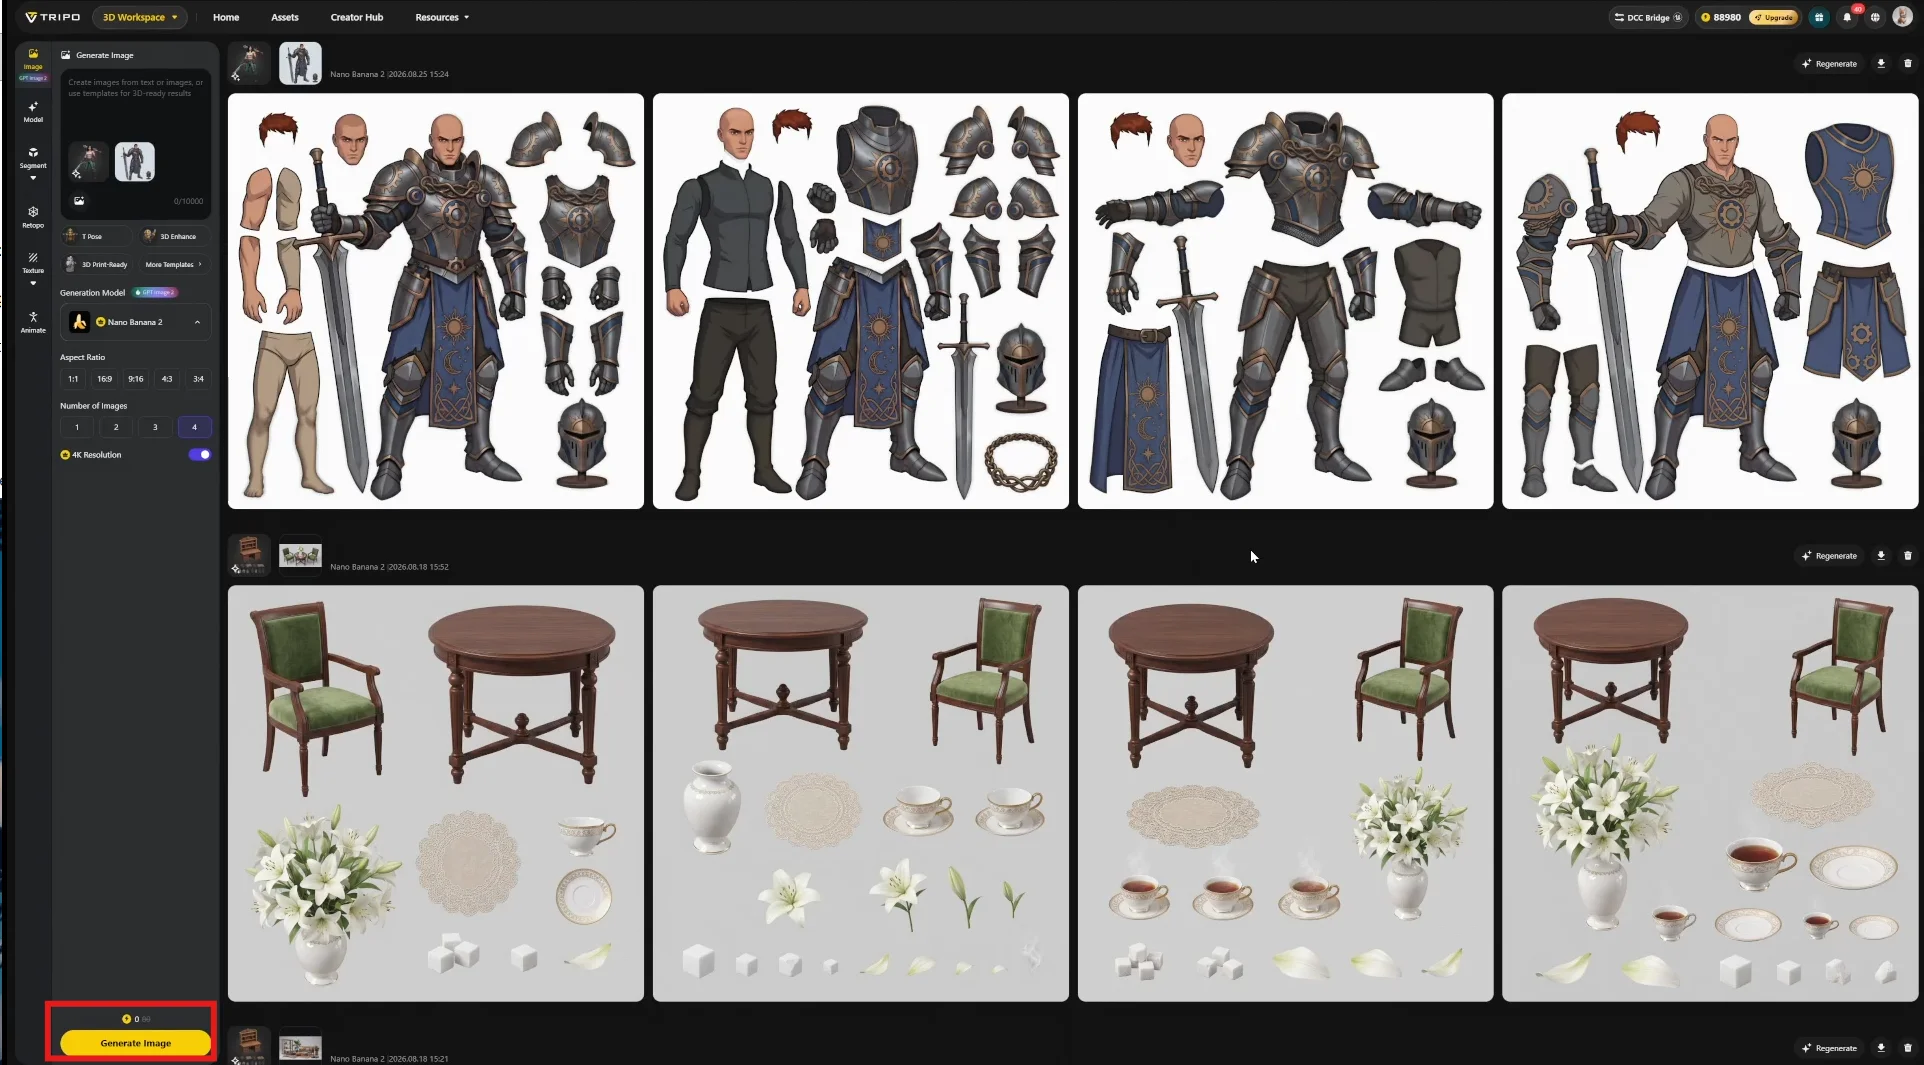
简单角色和道具可以直接使用单张图生成。若要获得更高质量,建议先将概念图拆分成多个部件。

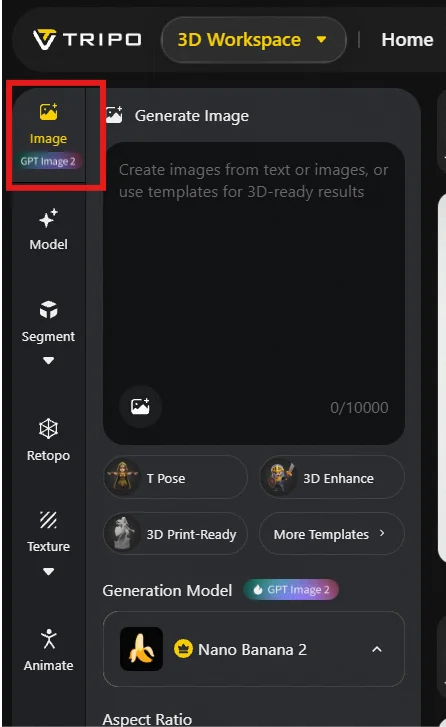
登录 tripo3d.ai,在页面左上角选择 Generate Image。
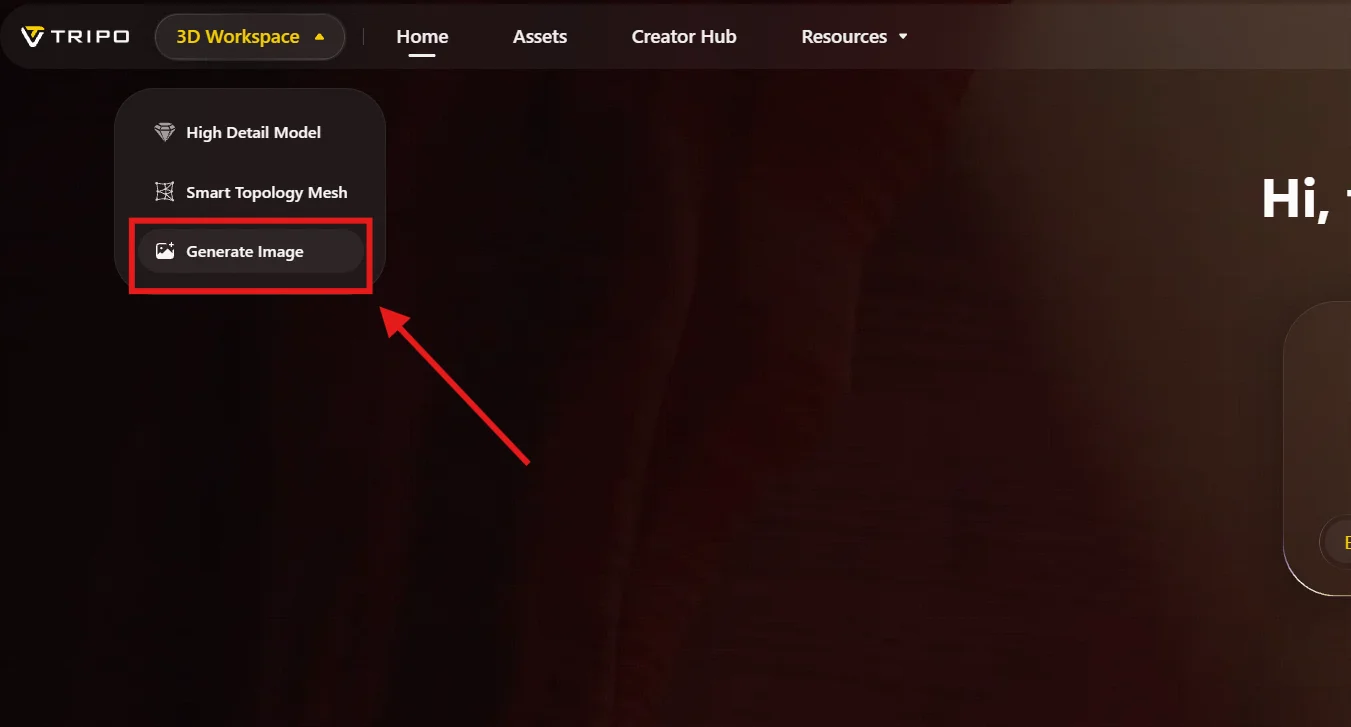
05 the tripo 3d workspace with generate image selected in the upper left area the highlighted entry sho

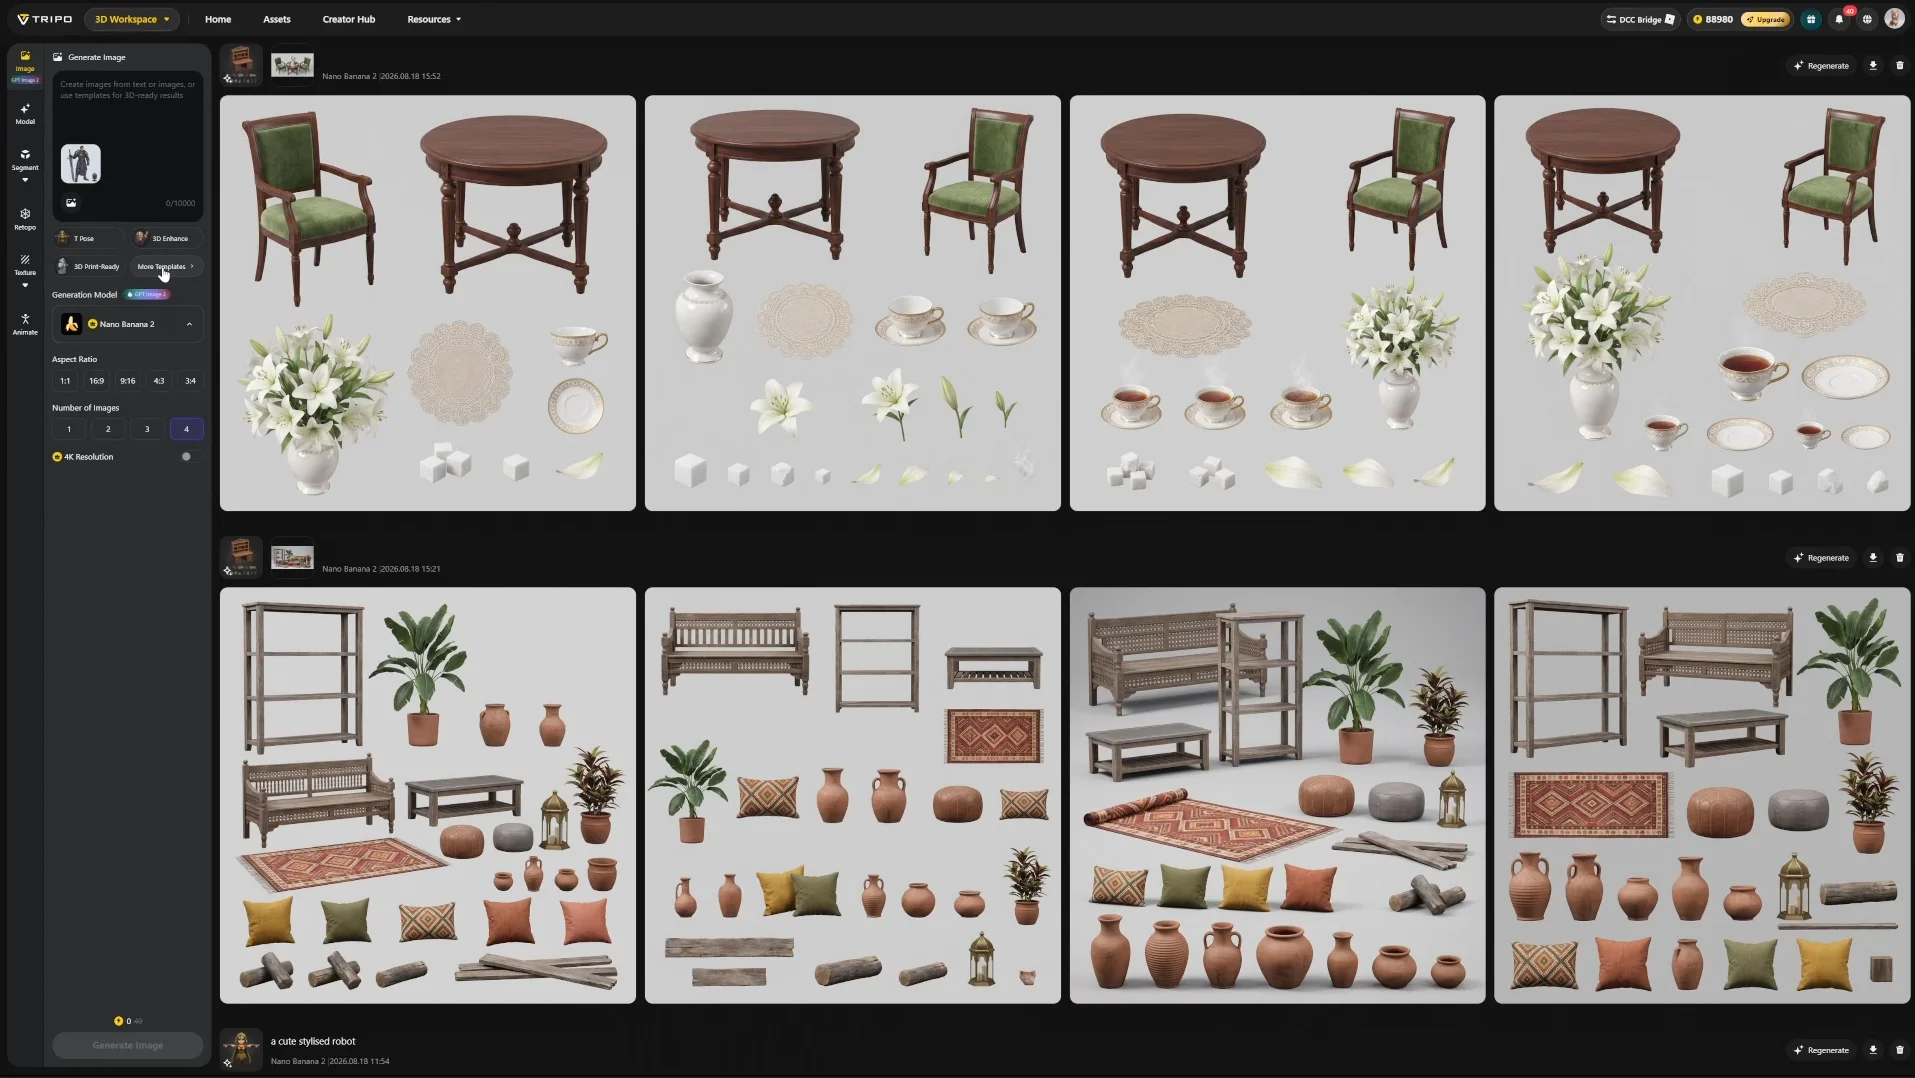
在工作区左上角打开 Image 面板,在这里创建或编辑概念图。

06 the tripo 3d workspace with the image panel open the panel provides image generation and editing opt
07 character extraction results in tripo showing separate character components and grouped elements acr

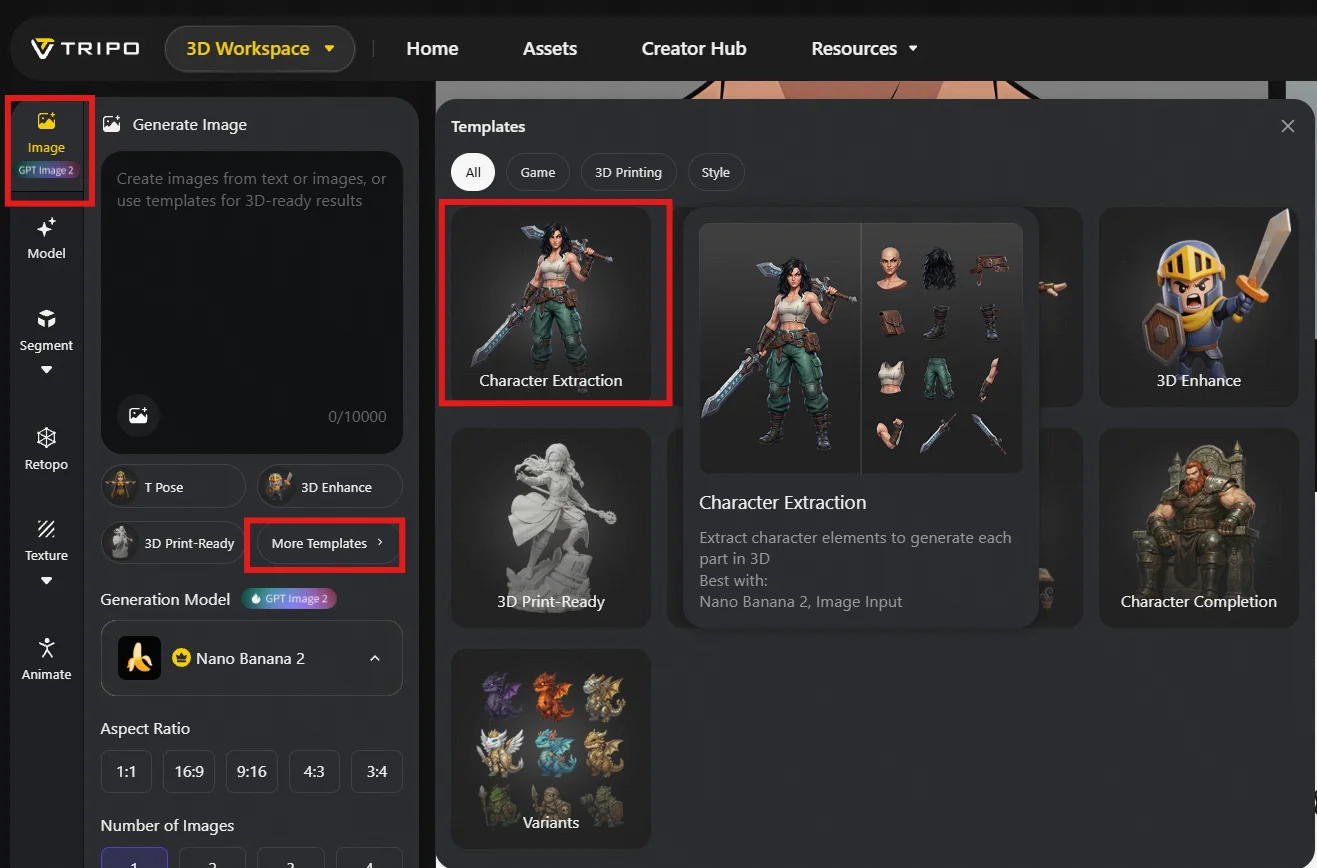
进入 More Templates → Character Extraction。
08 the tripo 3d workspace with the character extraction template highlighted under more templates this

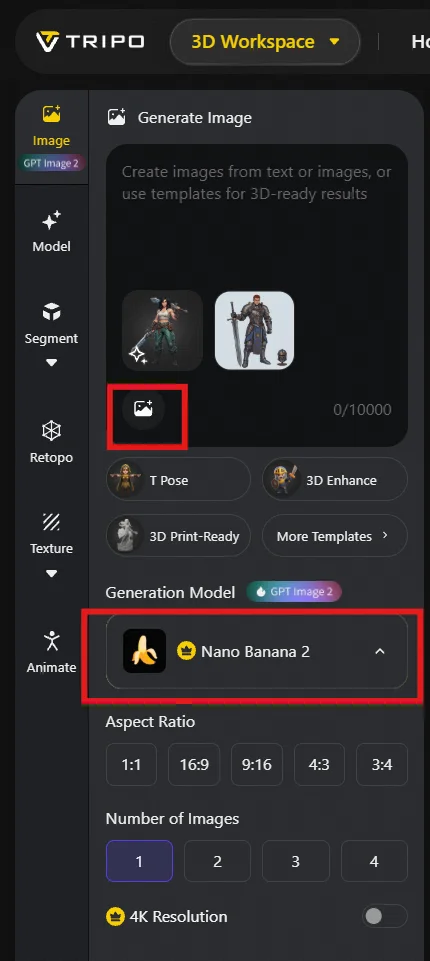
上传概念图。设置可按需调整,大多数情况下使用默认值即可。

你可以自行选择生成模型。目前如需生成或编辑图像,推荐使用 Nano Banana Pro。

点击 Generate 后,系统会返回四个候选结果。
09 tripo image generation settings with the generation model set to nano banana pro alongside aspect ra
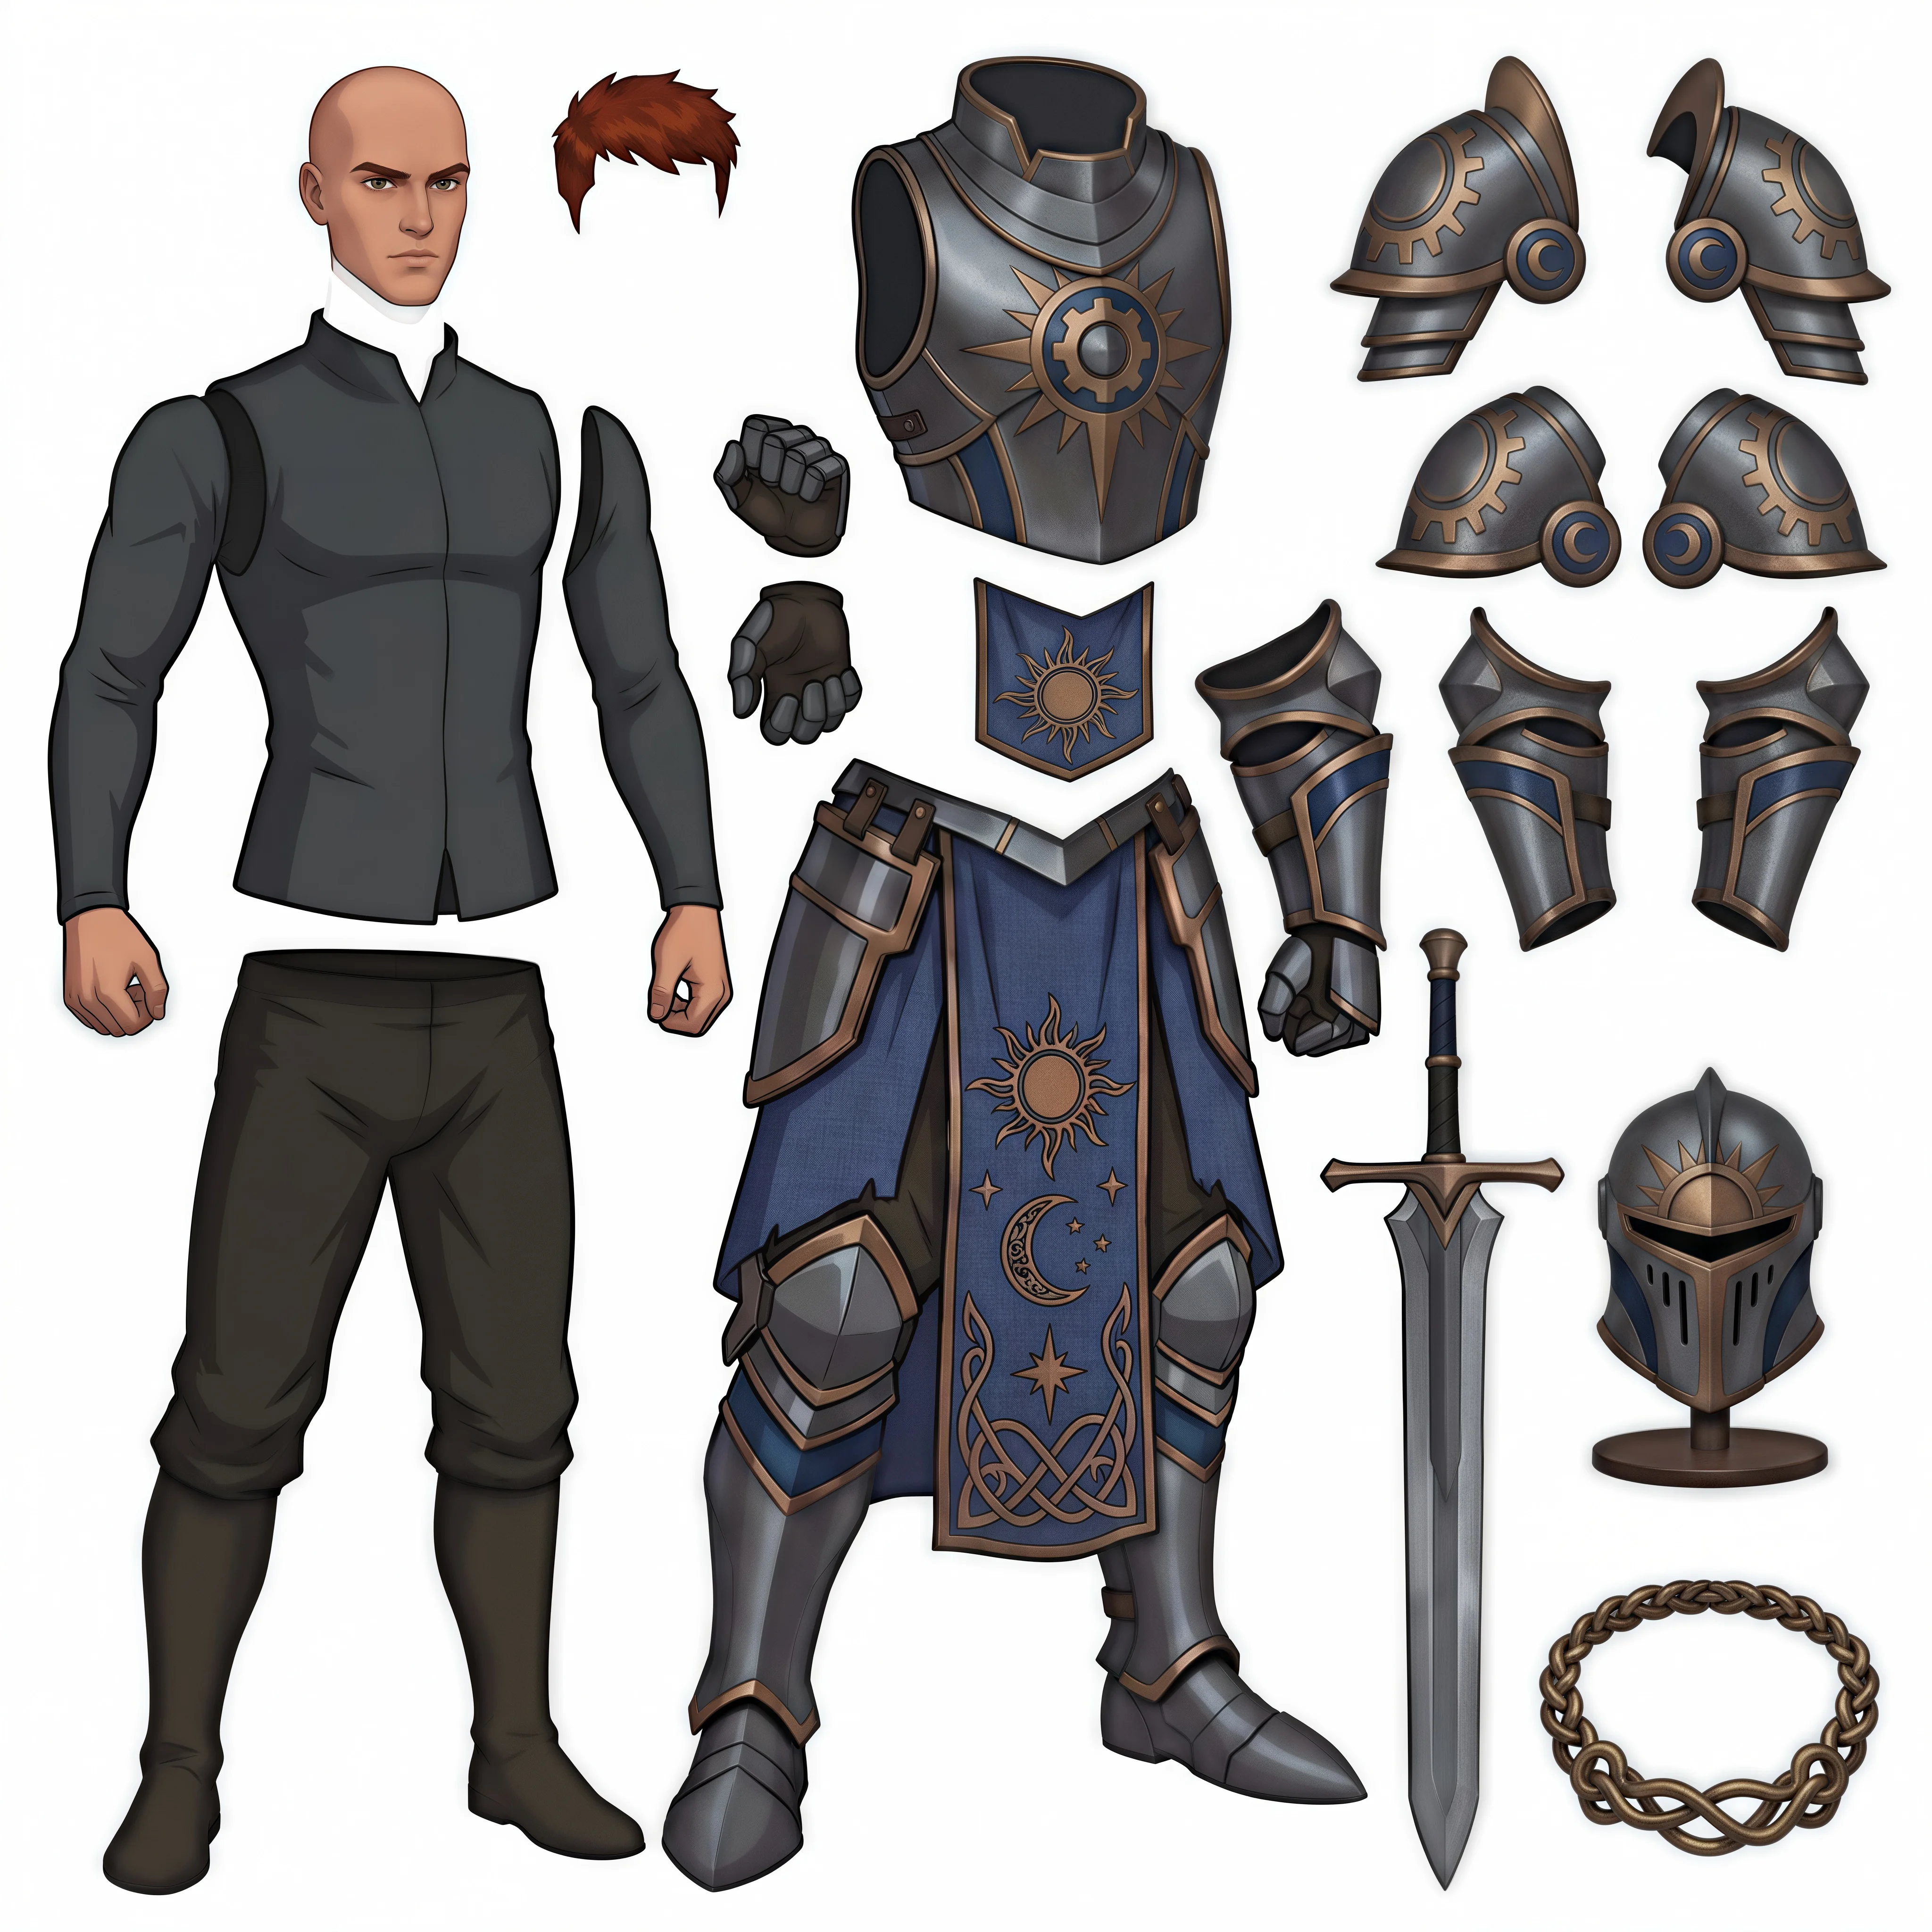
10 a tripo character extraction result showing separated clothing weapons and other character component

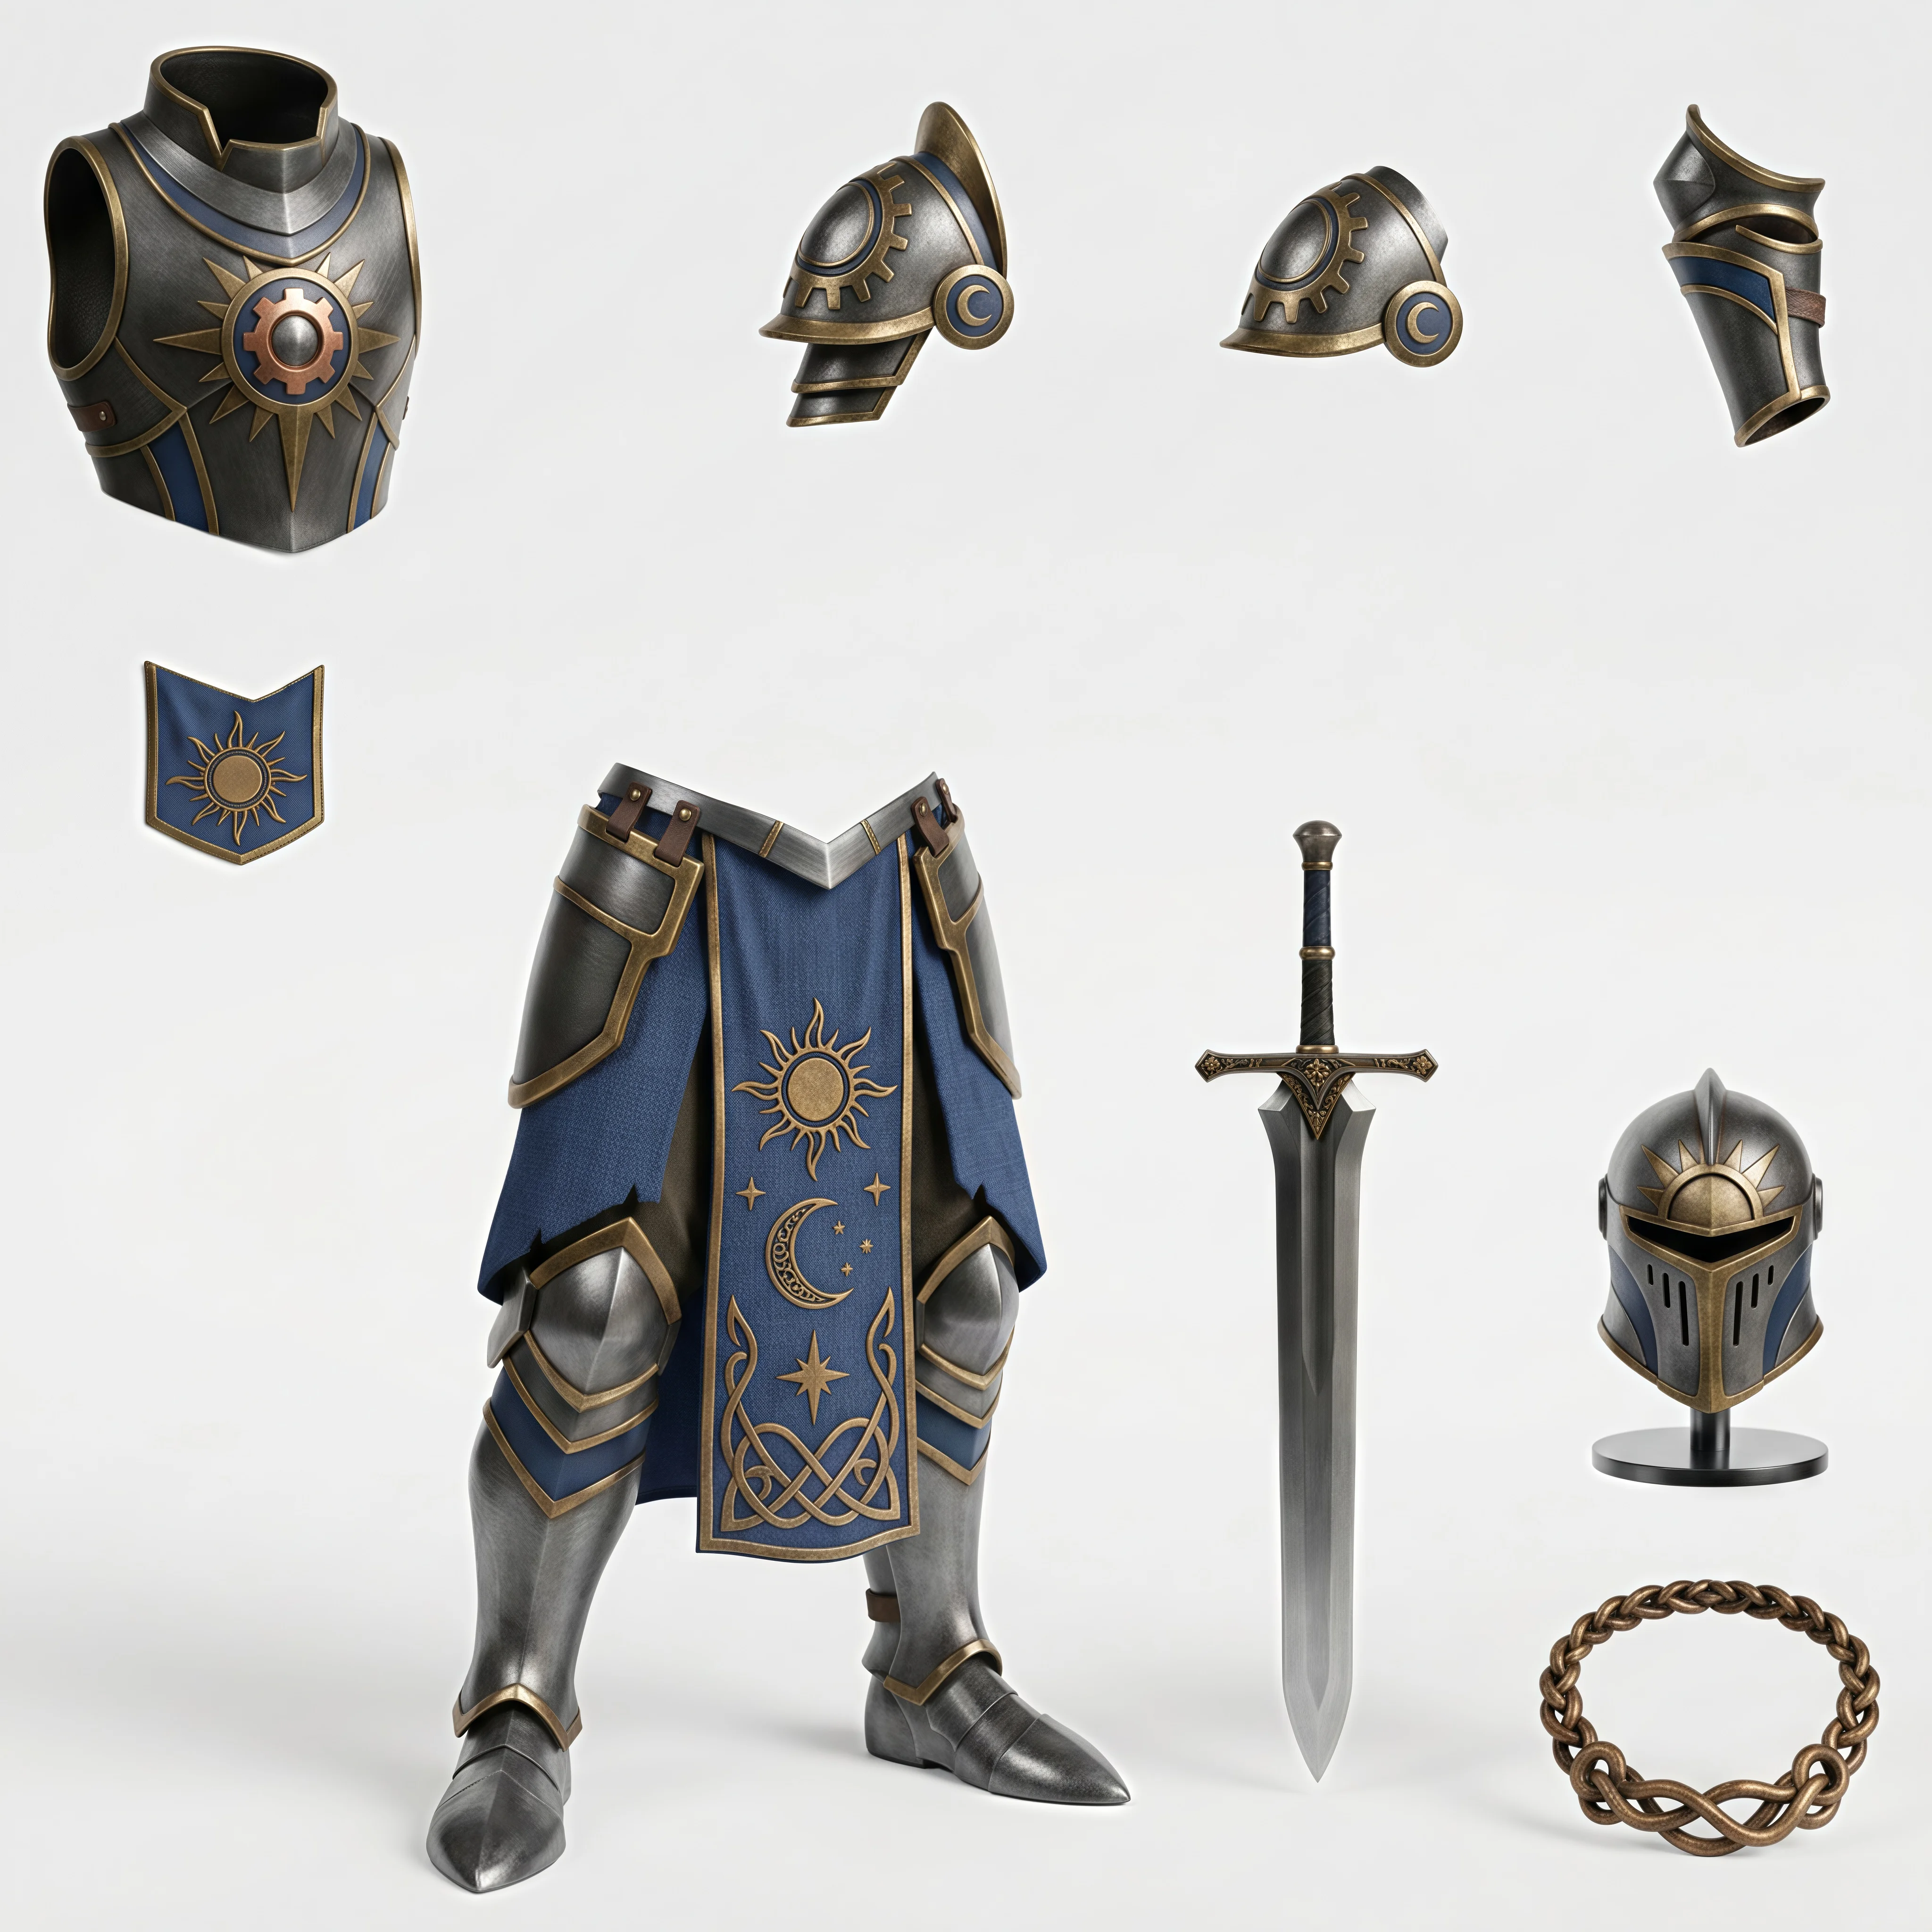
选择包含所有待制作部件的结果。如果四个结果都不合适,请重新生成;这里的选择将决定后续要制作的完整部件清单。
11 a component breakdown of a character showing the full figure alongside separate armor helmet cape sw

步骤 3 — 单独提取关键部件

不同部件的重要程度并不相同。以下两种情况值得单独生成。

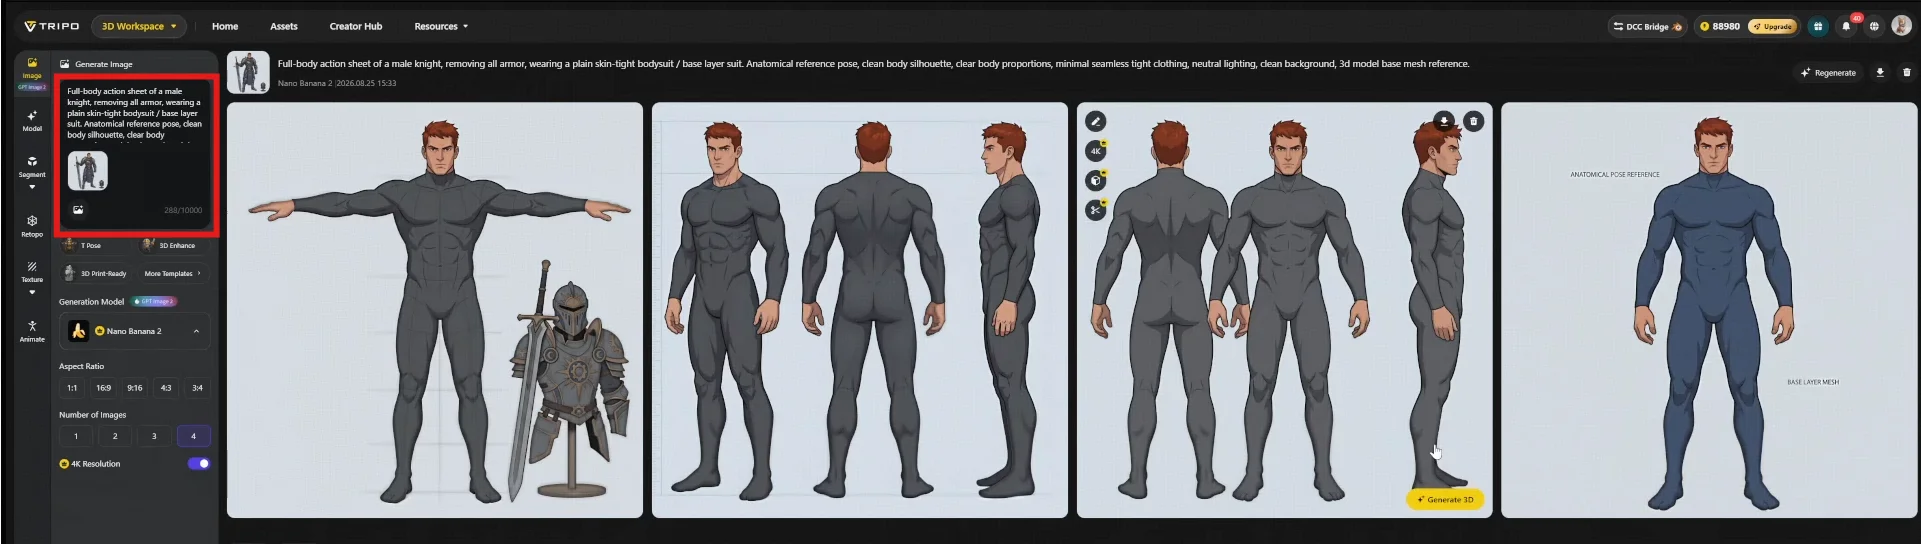
将全身作为一个独立部件。 如果自动拆分把身体切得过于零散,可以在左侧面板输入提示词,单独生成完整身体。
12 the tripo 3d workspace with the head extraction template highlighted the template is used to isolate

本案例选用的参考图是清晰的正面 A-pose,便于调整盔甲位置。如果优先考虑后续绑定,T-pose 通常更合适。 姿势应在生成前确定,不要留到生成后再补救。
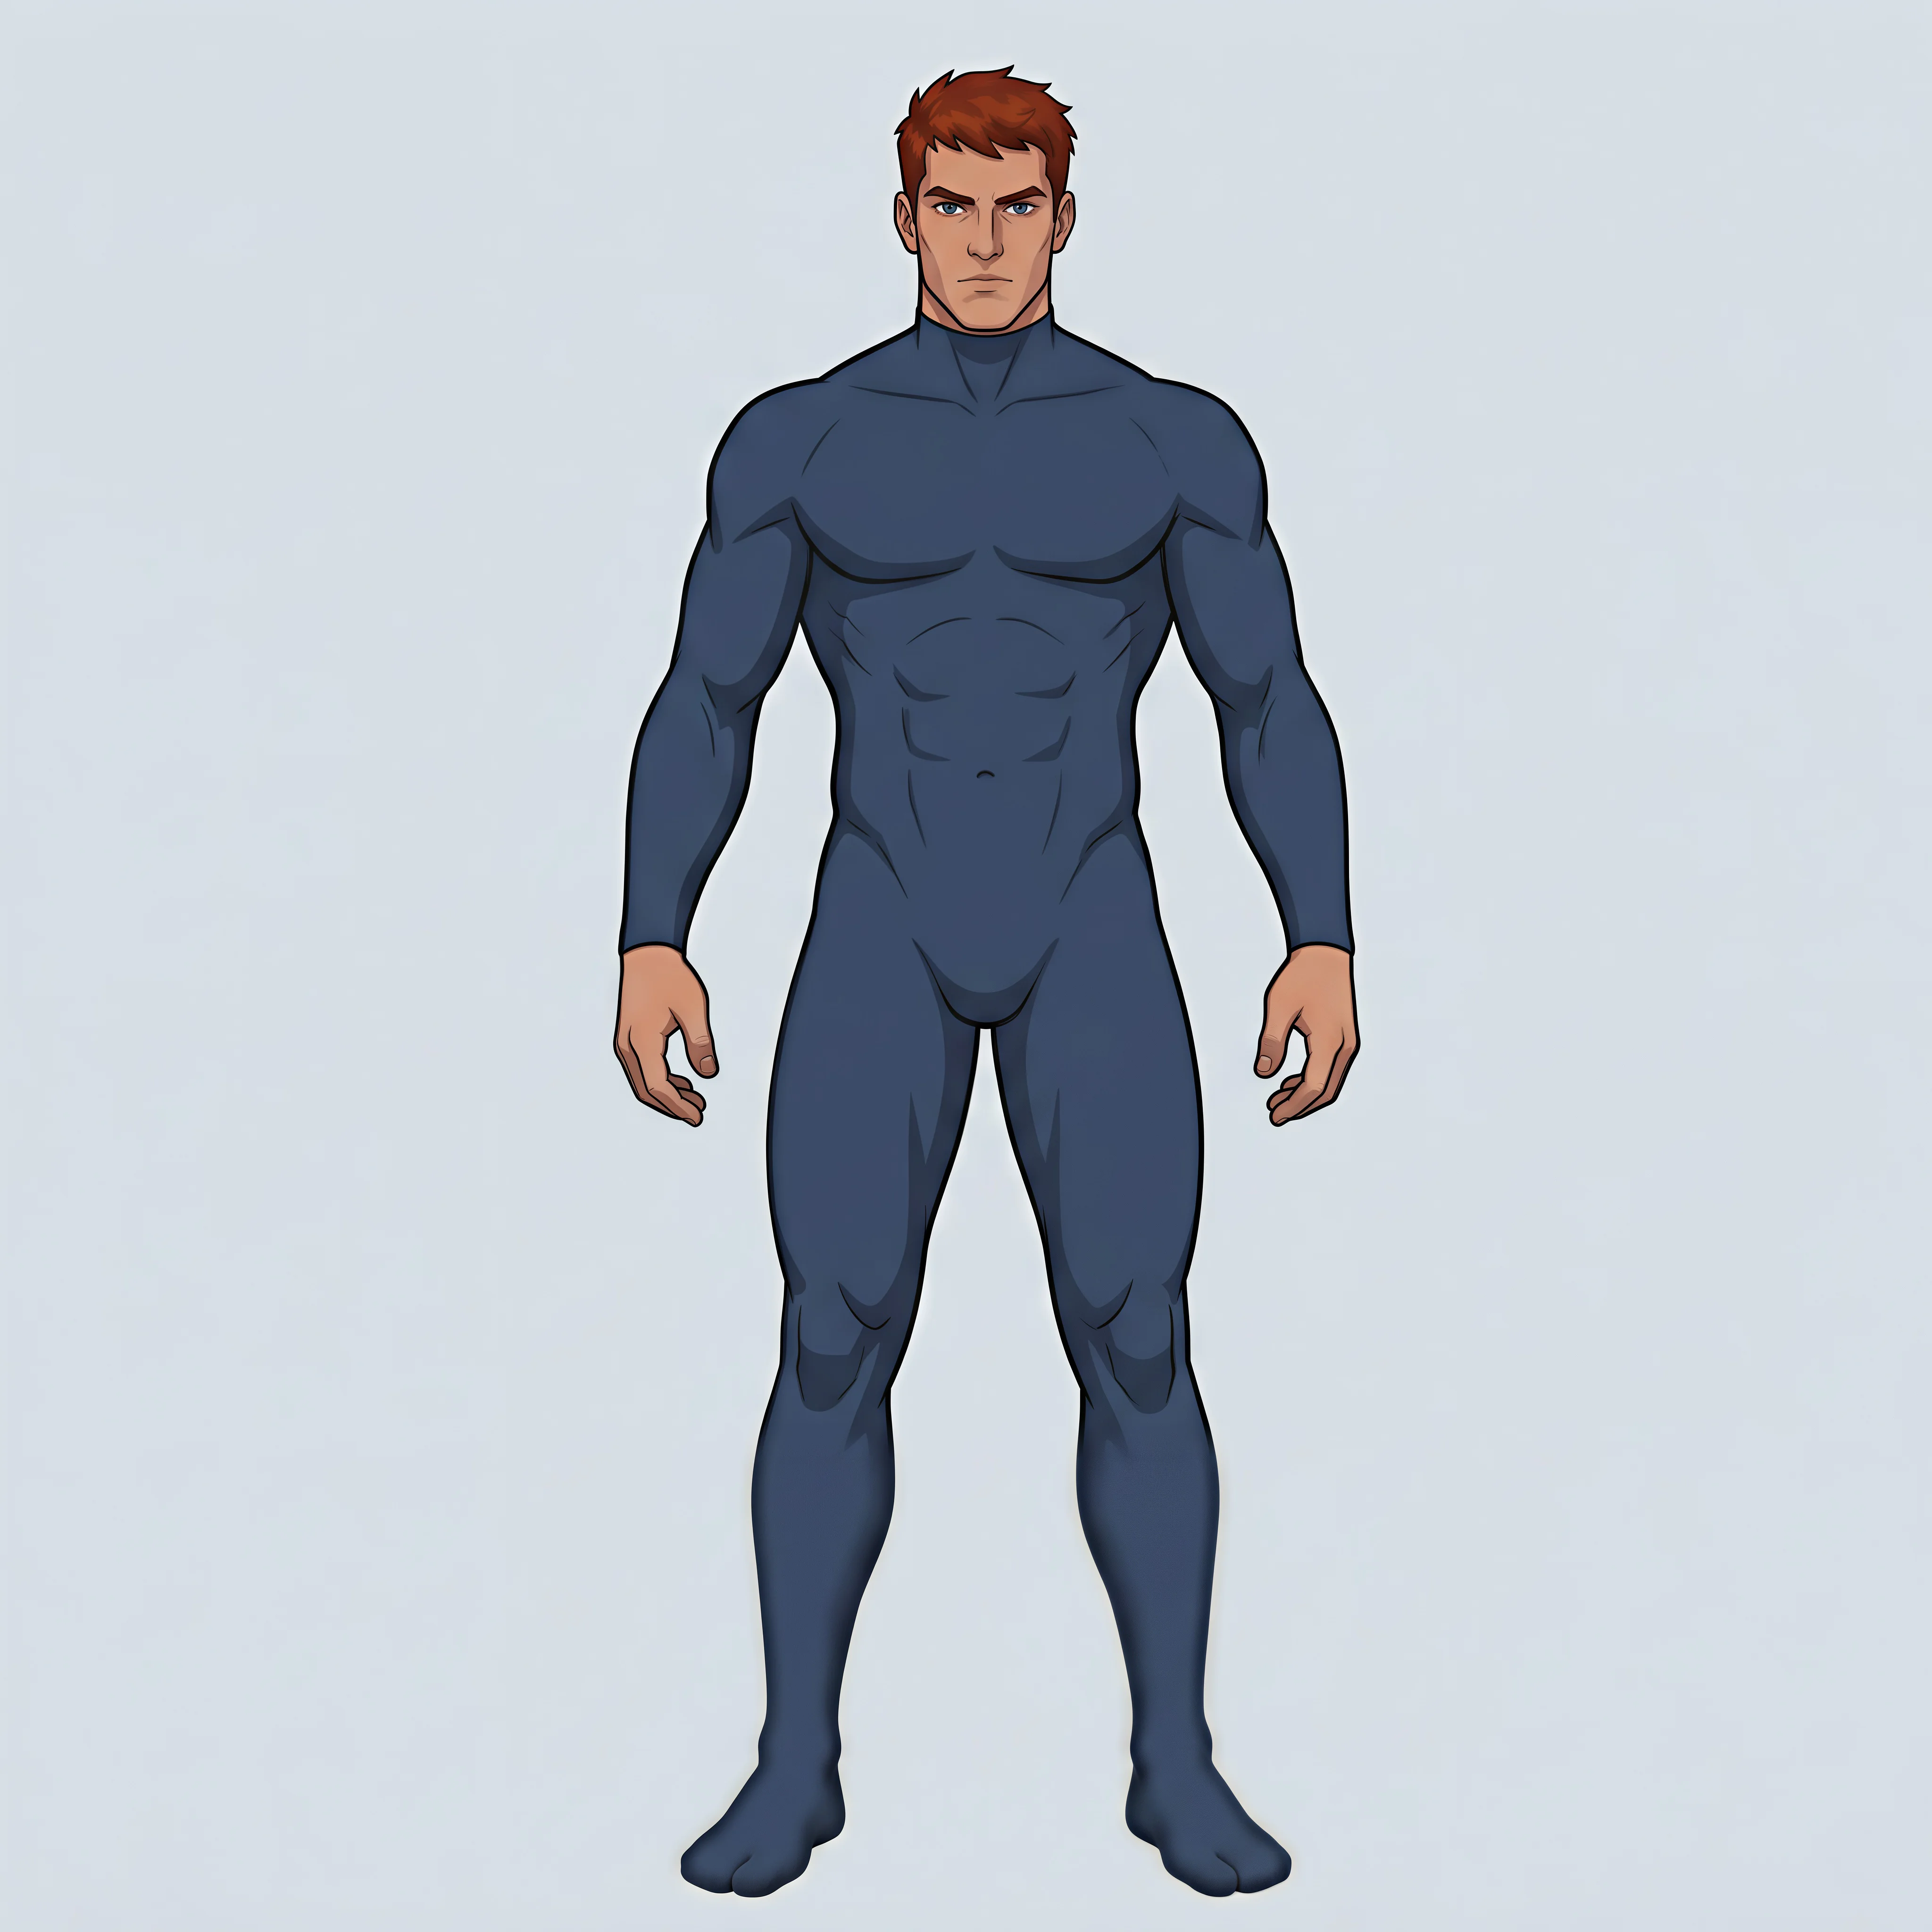
13 a separately generated male character body in a blue suit illustrating the fallback workflow when au

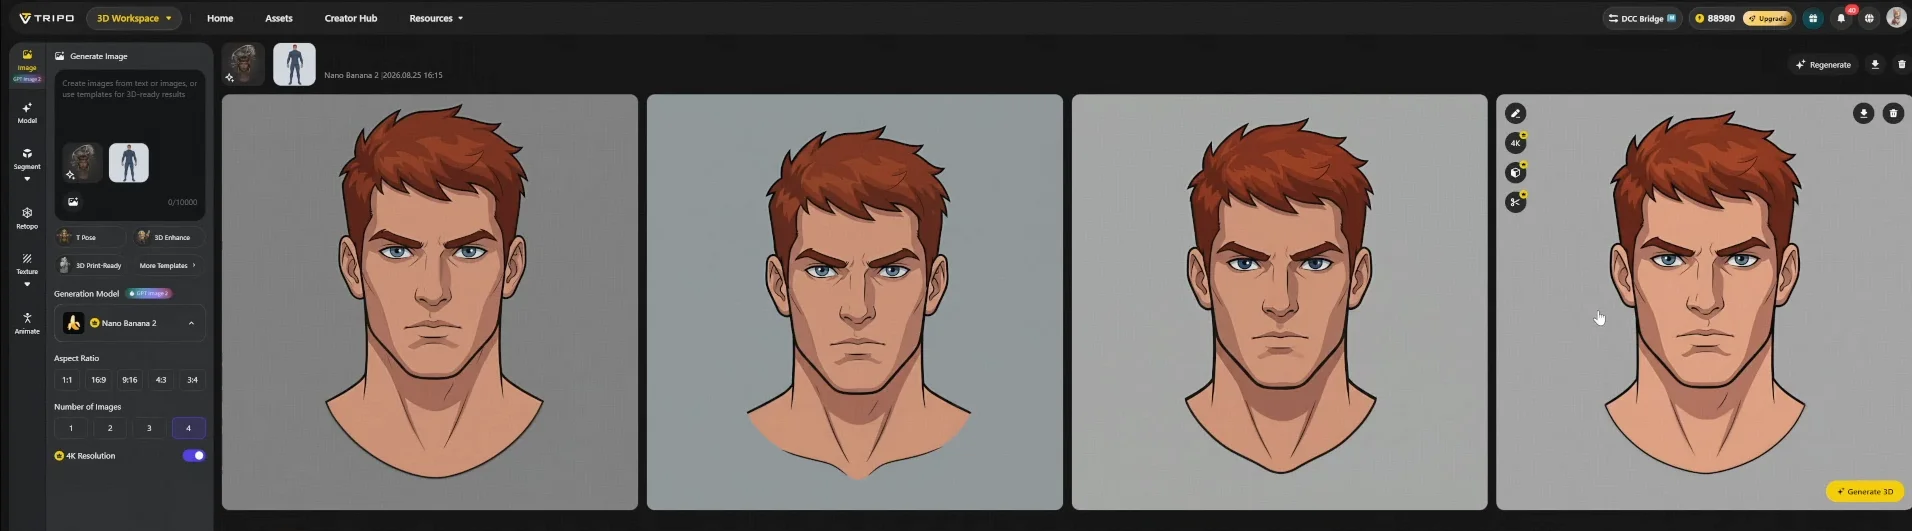
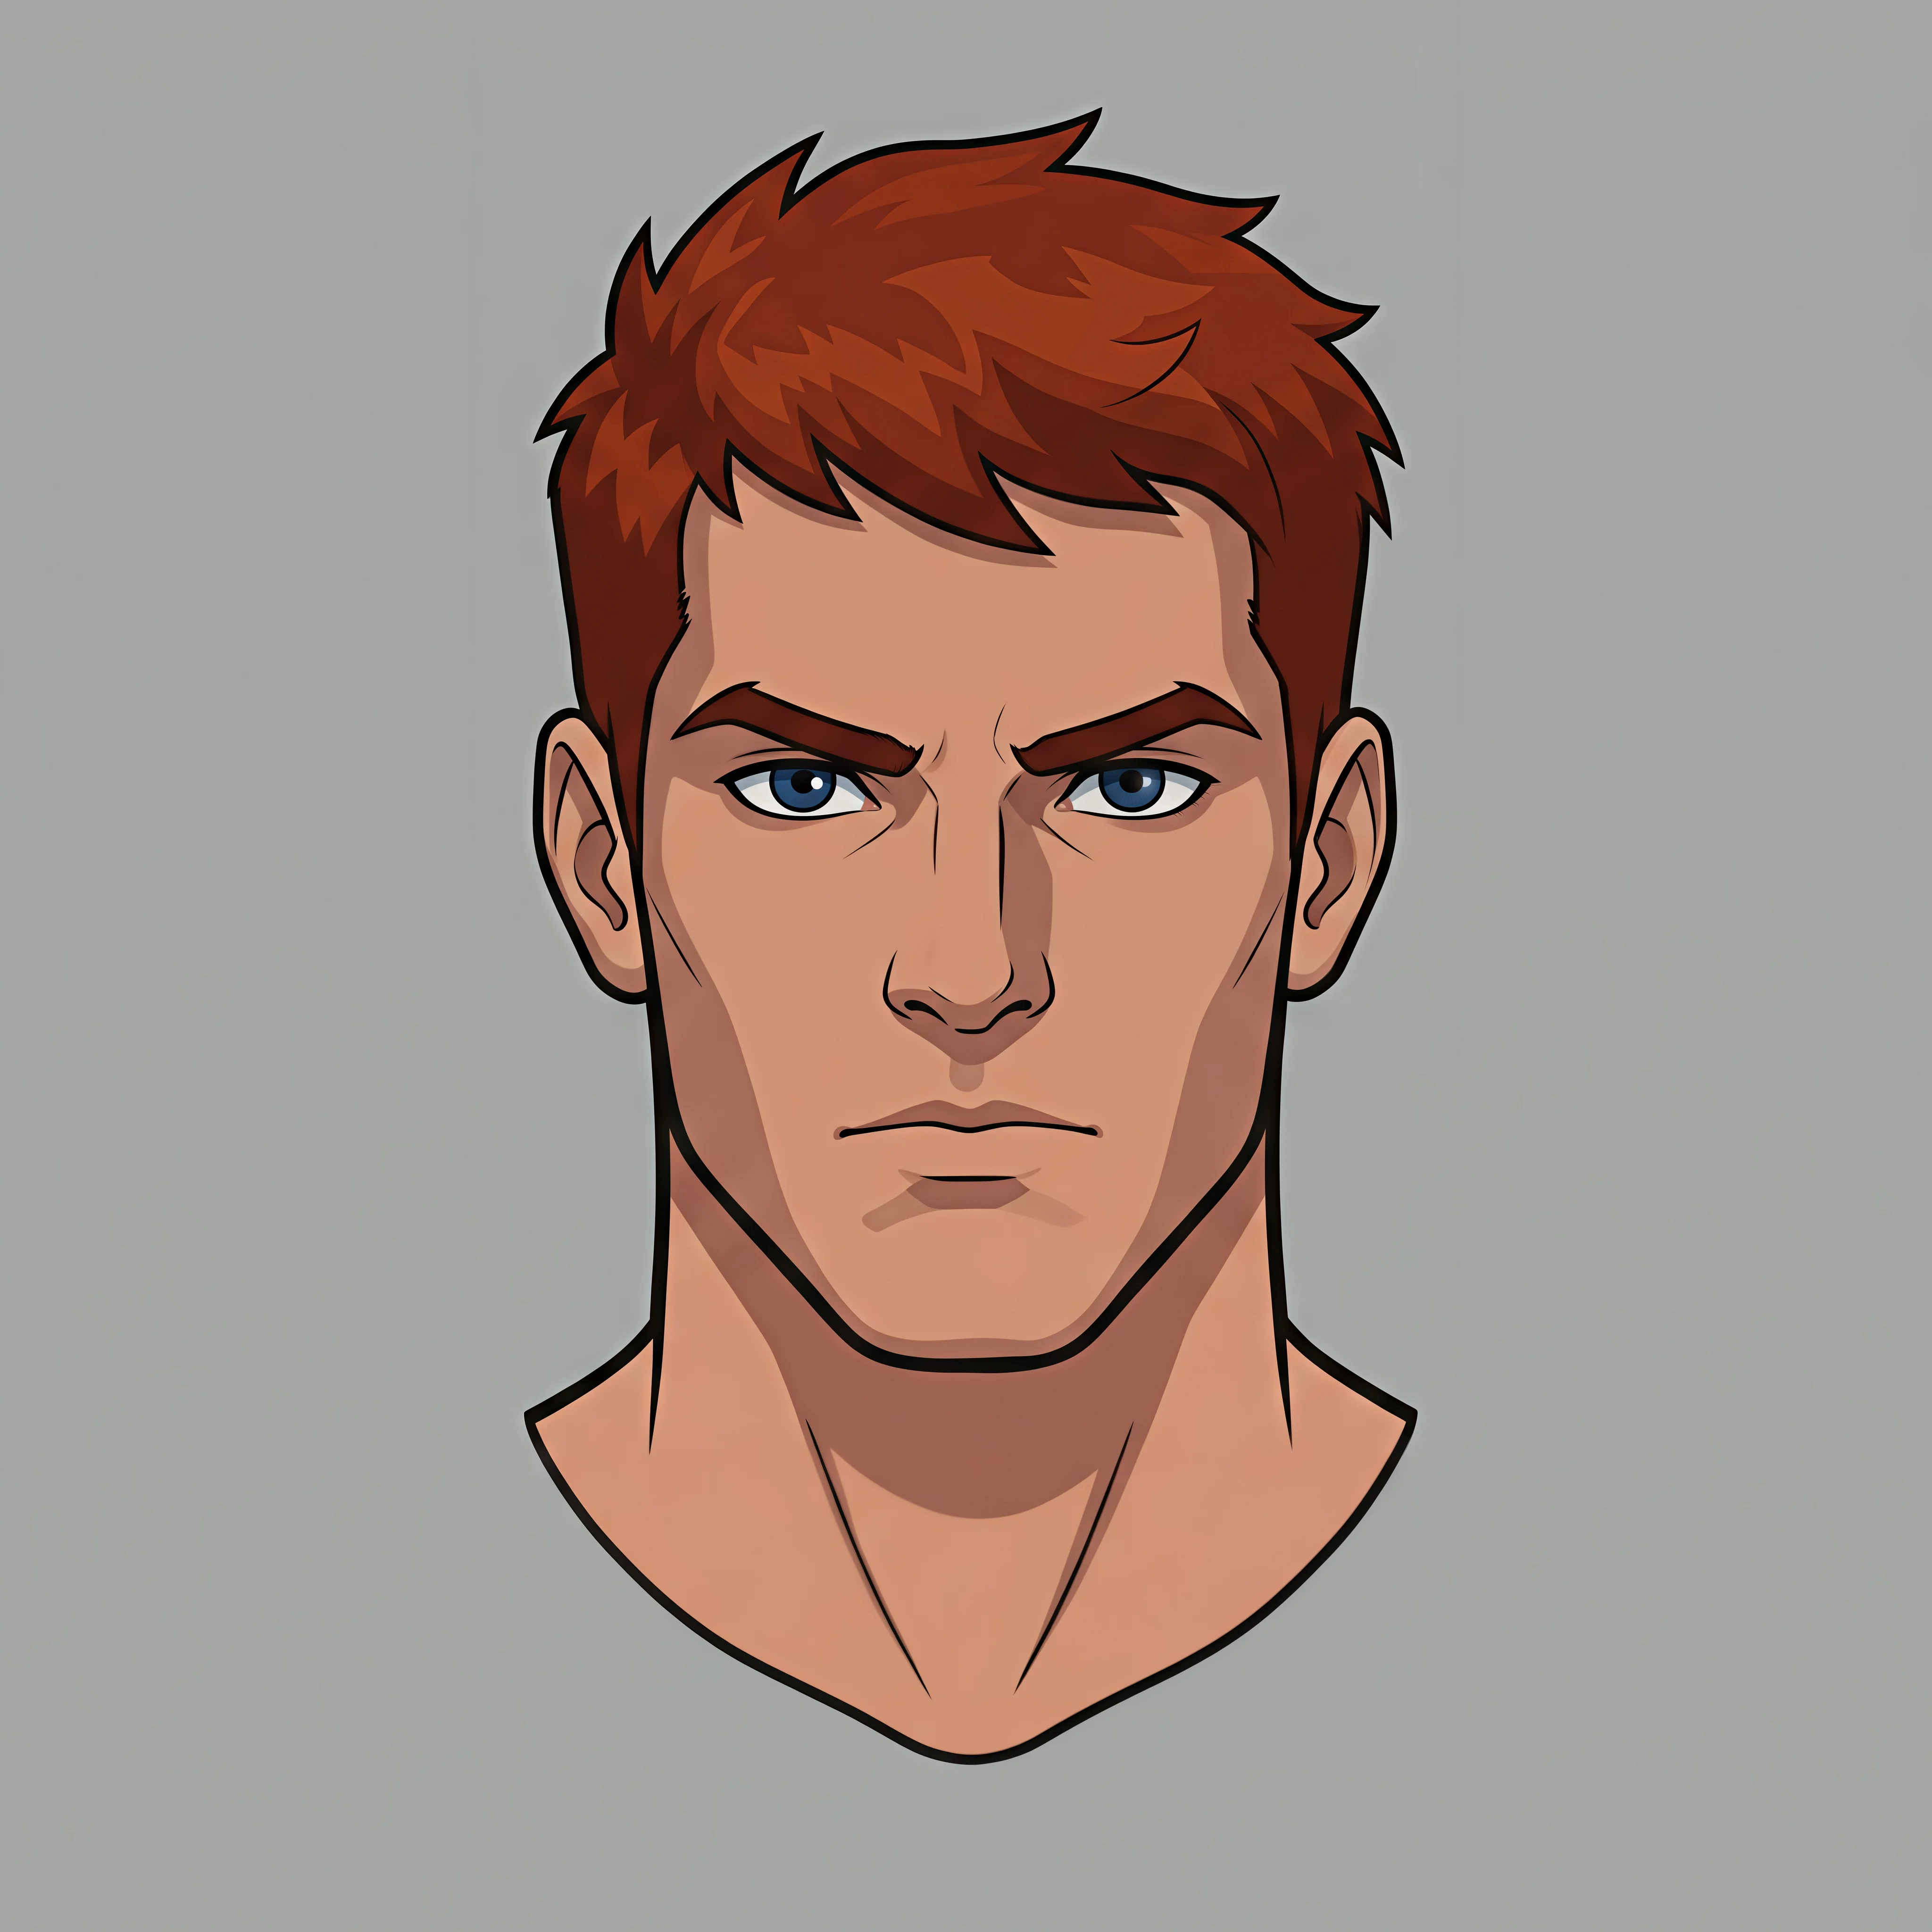
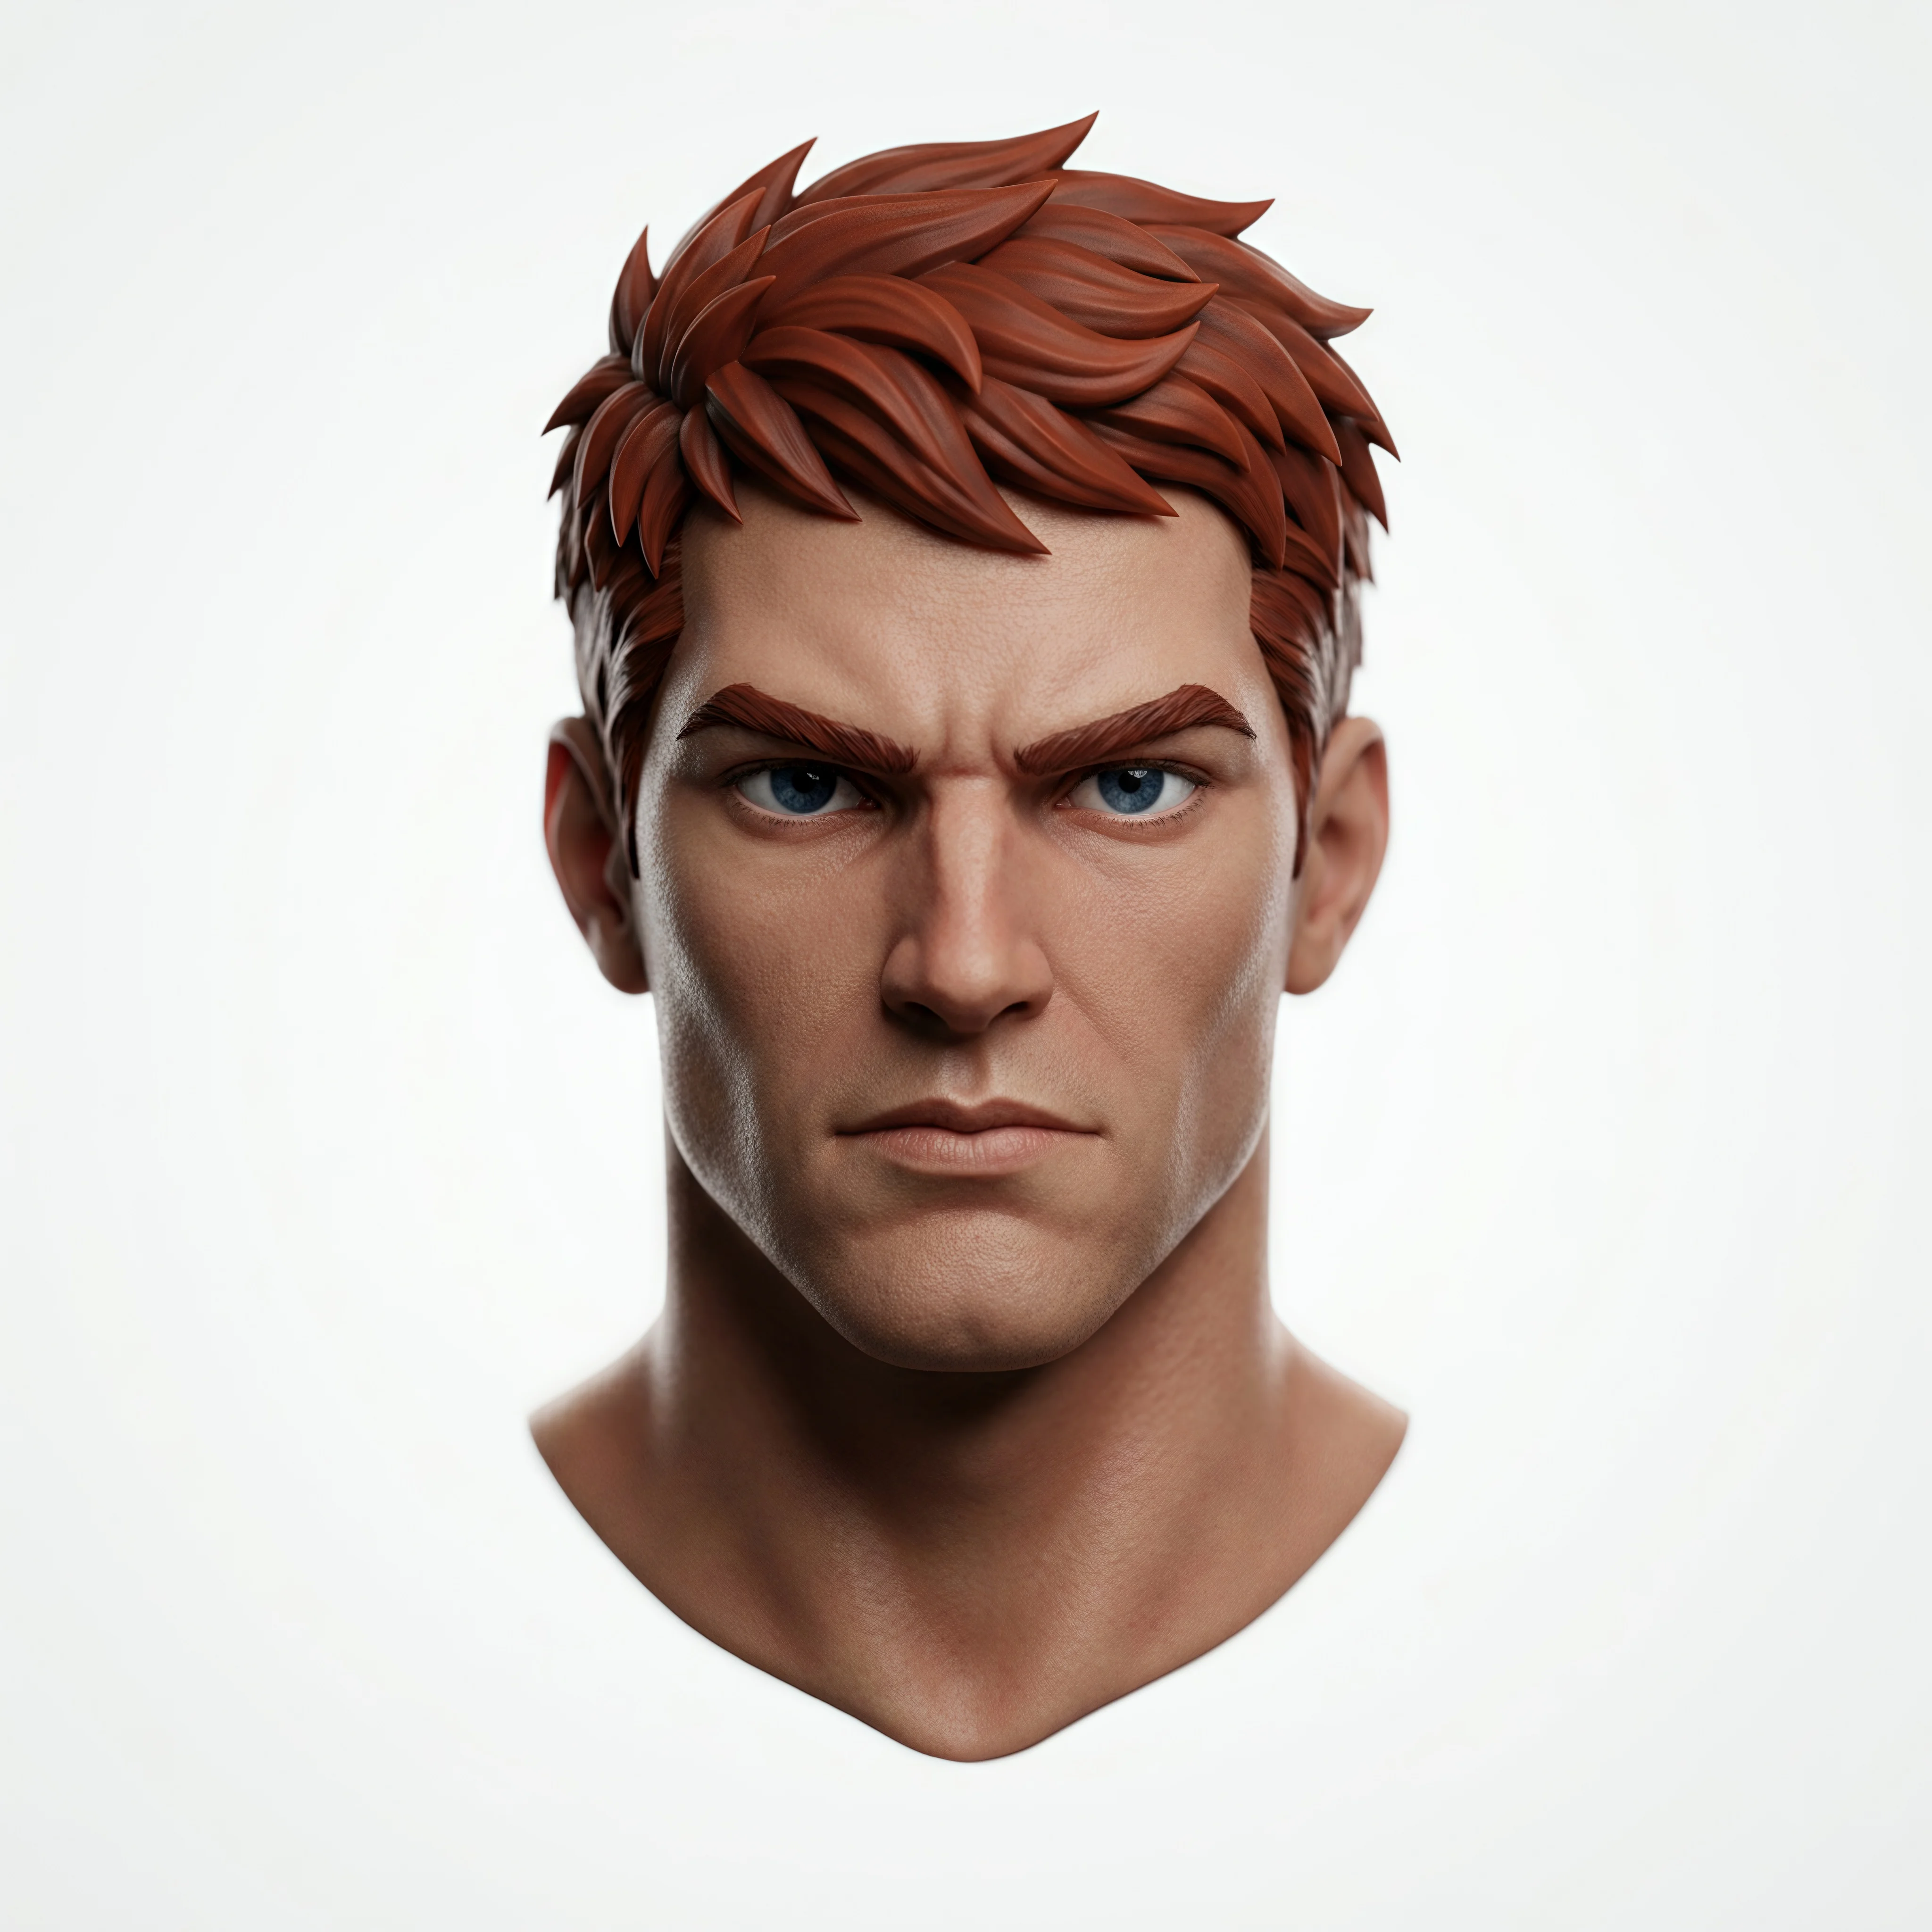
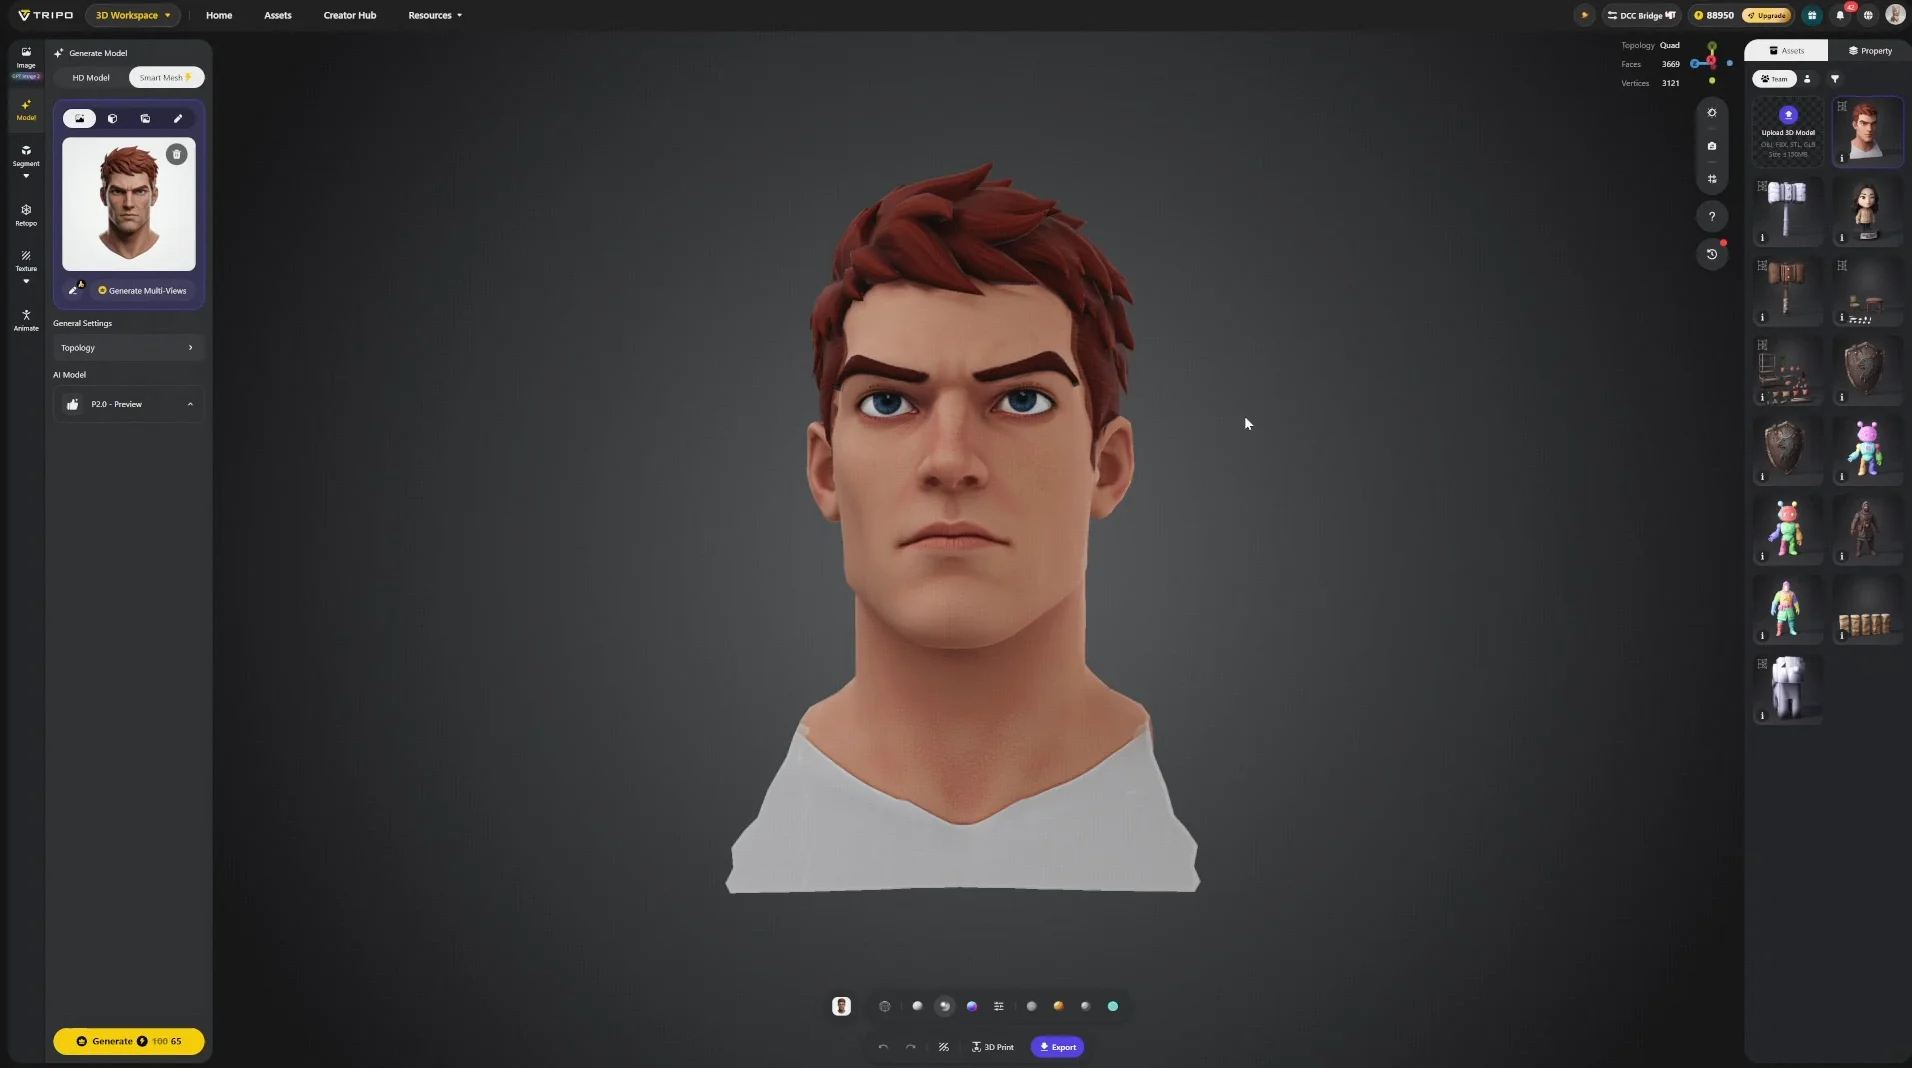
将头部作为独立资产。 头部最容易吸引观众注意,因此应比其他部件获得更高的面数和贴图预算。使用 Head Extraction 模板将头部单独提取出来。
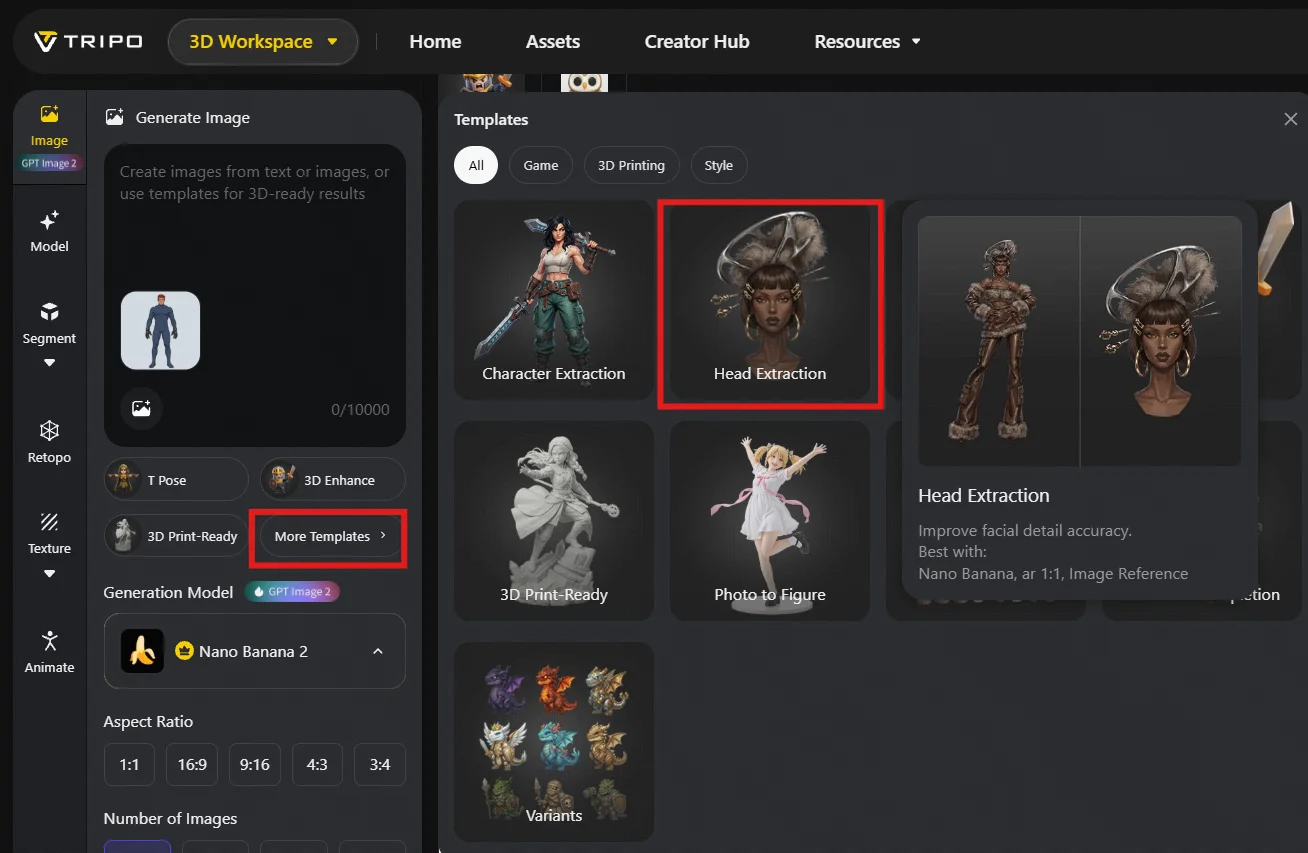
Tripo Head Extraction template
15 a tripo character modeling workspace showing a character model and reference image settings
16 a front view head and shoulders reference of a red haired blue eyed male character in an a pose prep

步骤 4 — 优化参考图

生成前,应先把每张参考图调整到更接近最终效果的状态,尽可能为模型提供充分的几何与材质信息。

一般建议将参考图处理成 PBR 风格,本案例使用 3D Enhance 模板完成。具体效果仍应服从项目的美术方向:你希望模型最终呈现什么质感,参考图就应尽量接近什么质感。
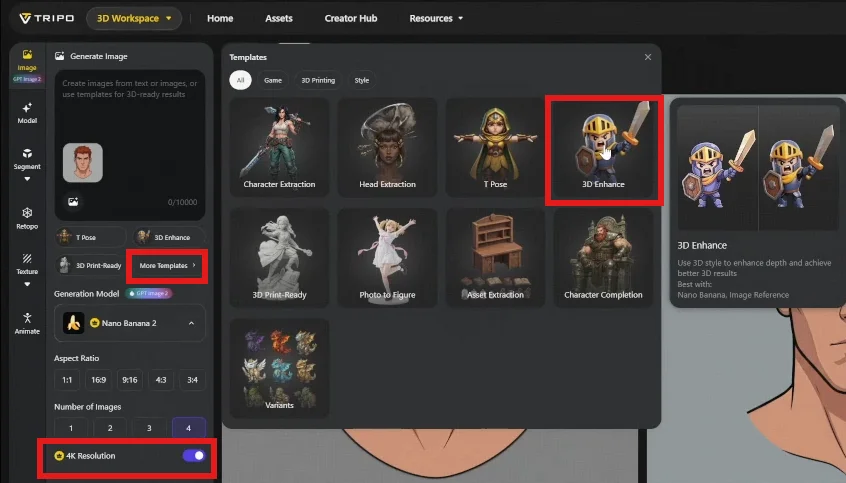
17 the tripo 3d workspace with the 3d enhance template and 4k resolution control highlighted the interf
18 a collection of separated knight armor components including chest armor helmets bracers skirt armor
19 a detailed 3d head model with red hair and defined facial features illustrating a refined character

阶段 B · 在 Tripo 中生成

步骤 5 — 生成网格

可以直接从 Image 工作区生成 3D 模型。
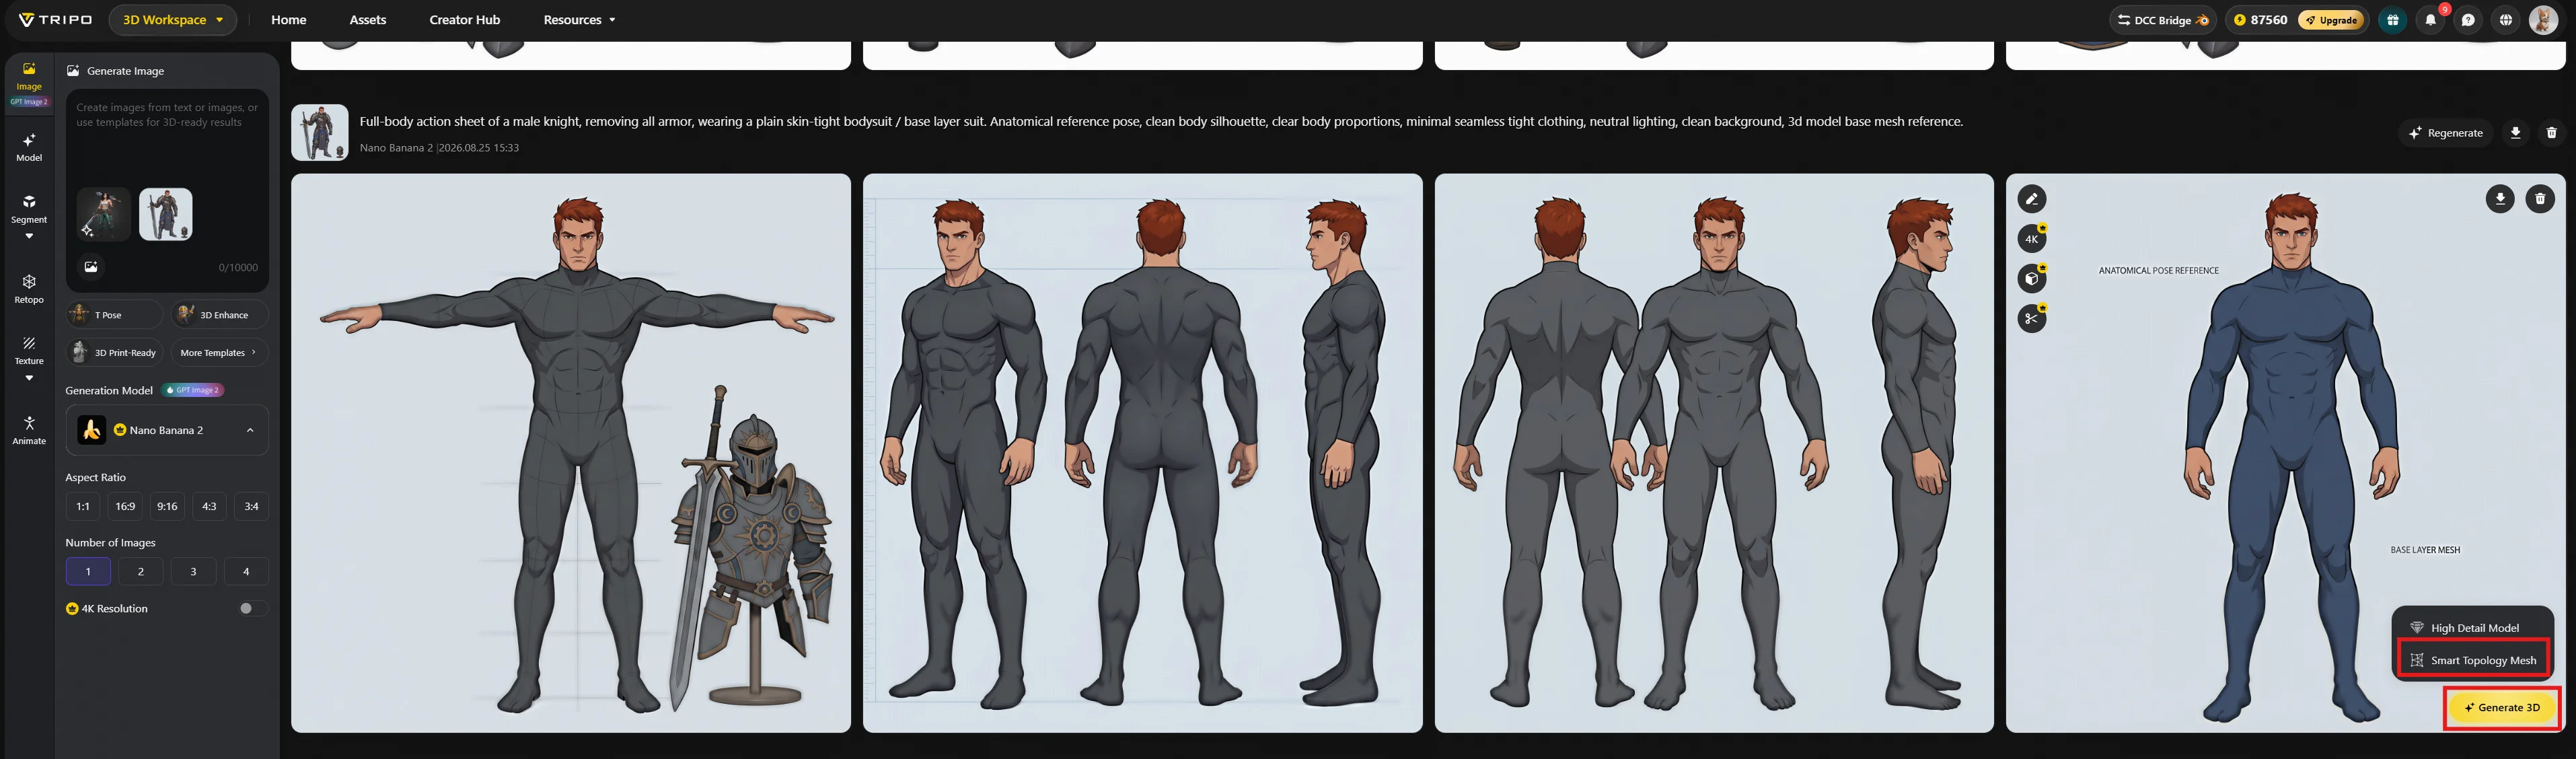
20 a tripo character generation view showing a full body reference from multiple angles alongside high

也可以进入 Navigate Model → Smart Mesh,再上传优化后的参考图。
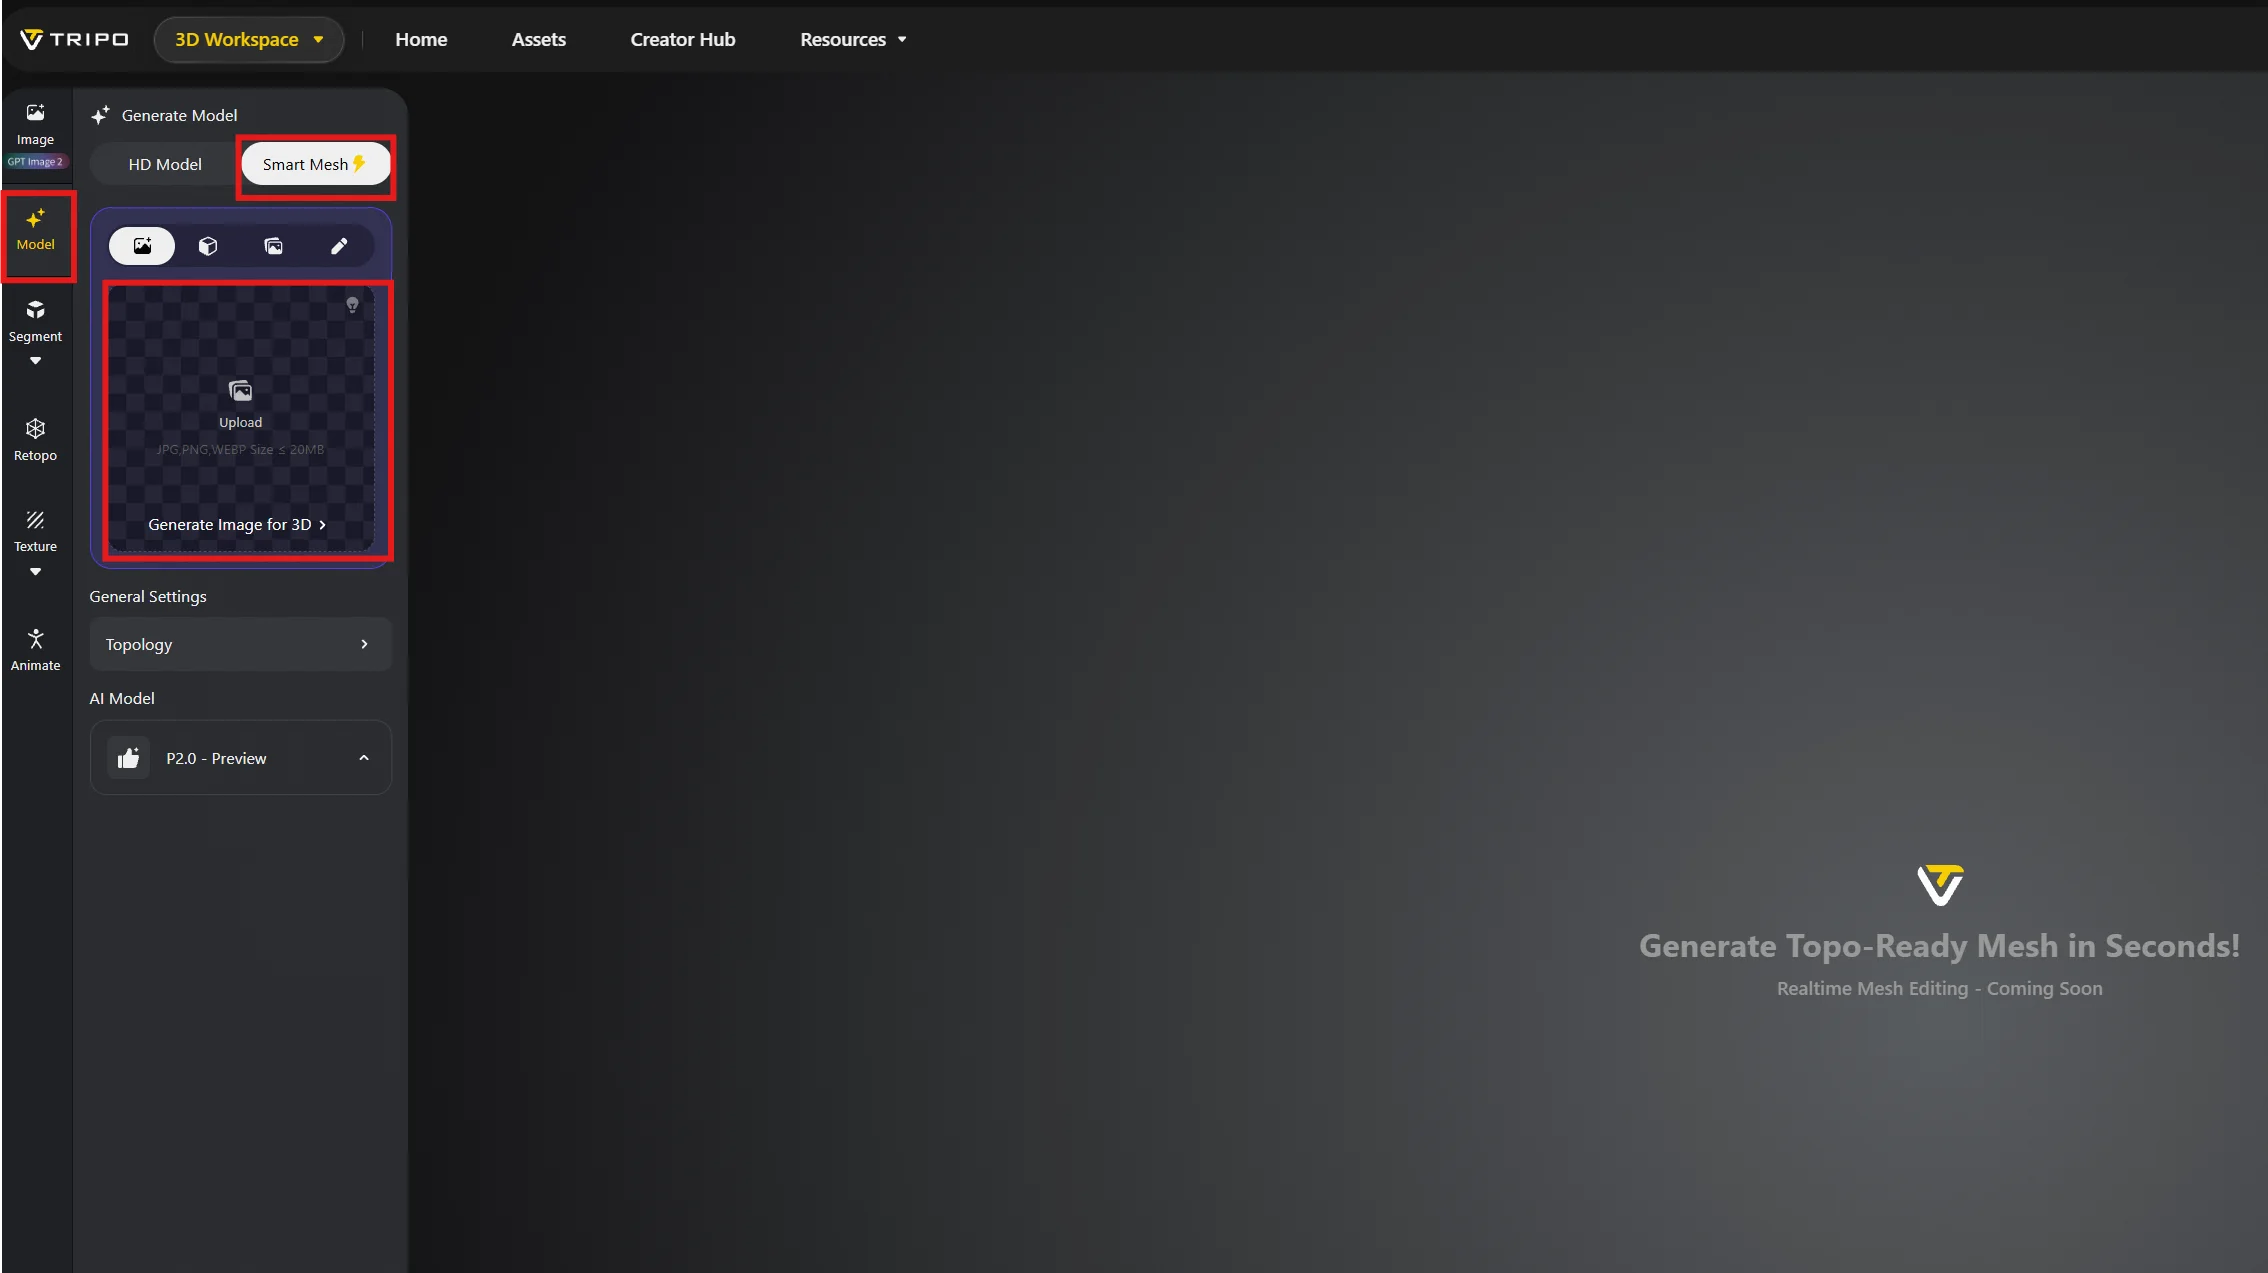
21 the tripo 3d workspace with asset and smart mesh highlighted showing the upload area for generating

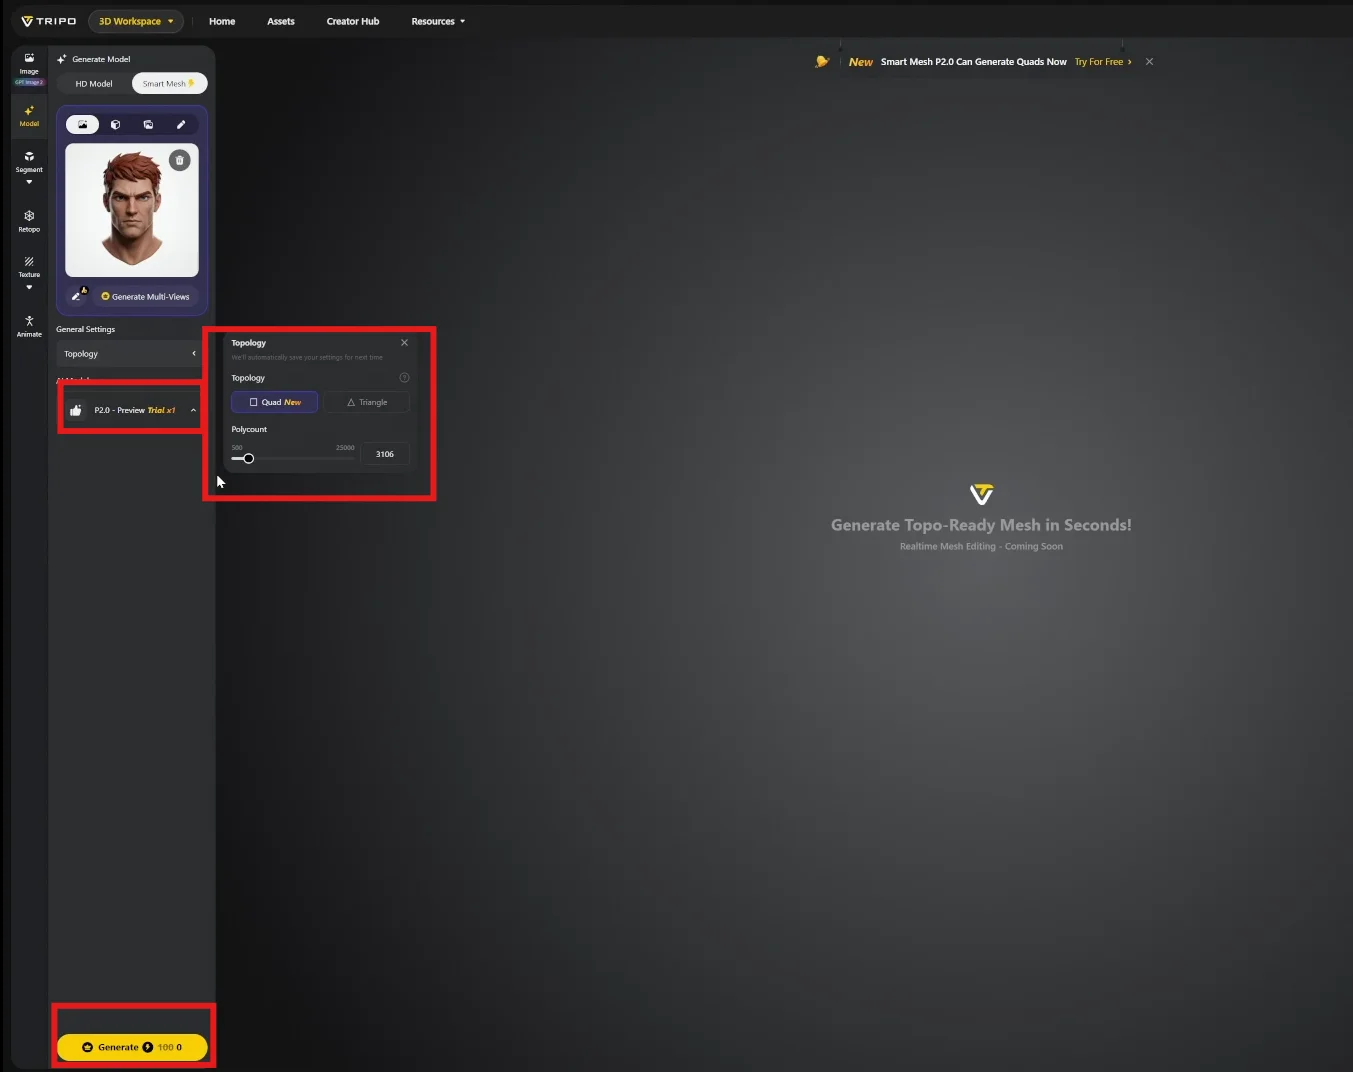
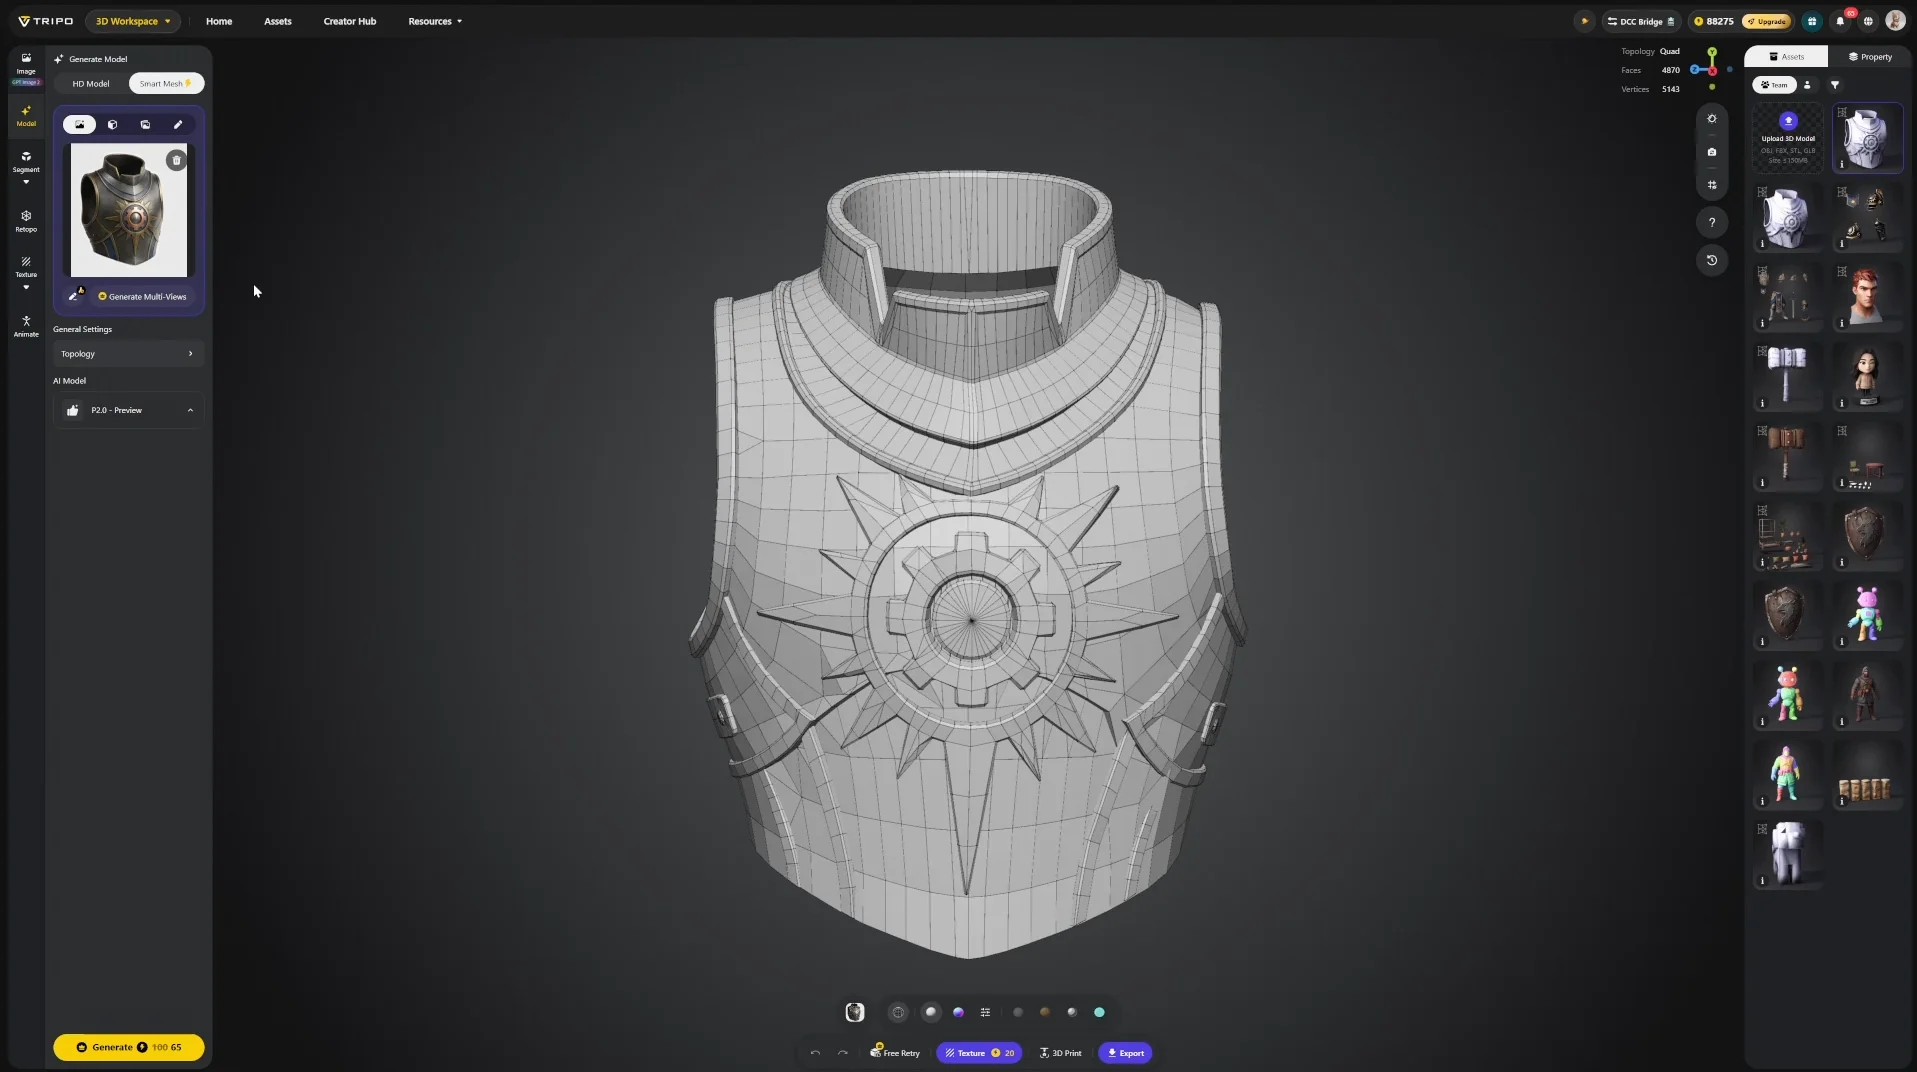
Topology 中选择 Quad,并设置面数预算。本案例为头部设置 3,000 个多边形,组装后角色的总三角面数目标为 30K 以下

当前使用的生成模型为 P2.0,能够生成符合行业标准的布线。

22 the tripo mesh generation interface with p2 0 preview result selected quad and tri topology options

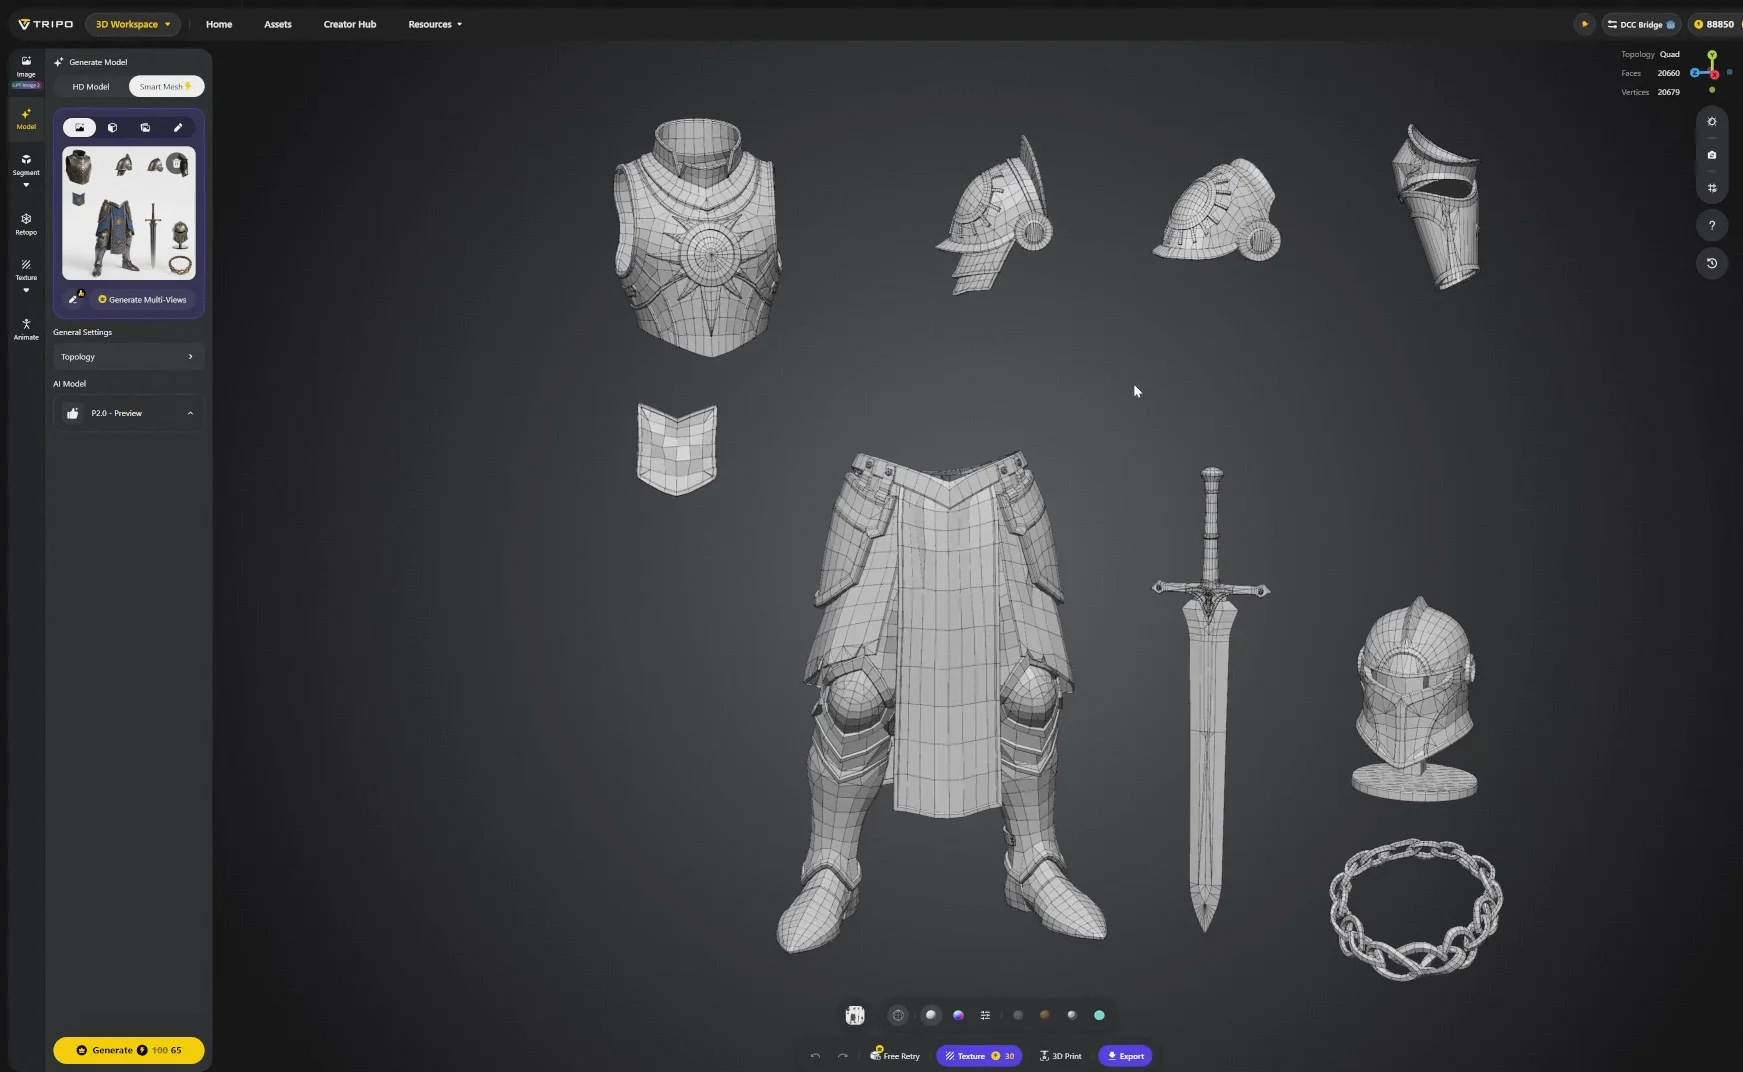
生成可在 一分钟内完成。通过视口底部的线框显示开关检查布线;如果结果无法使用,可以免费重试。

实际使用中,生成的网格通常已有 90% 以上达到可投入制作的状态,只需修正少量局部拓扑问题。
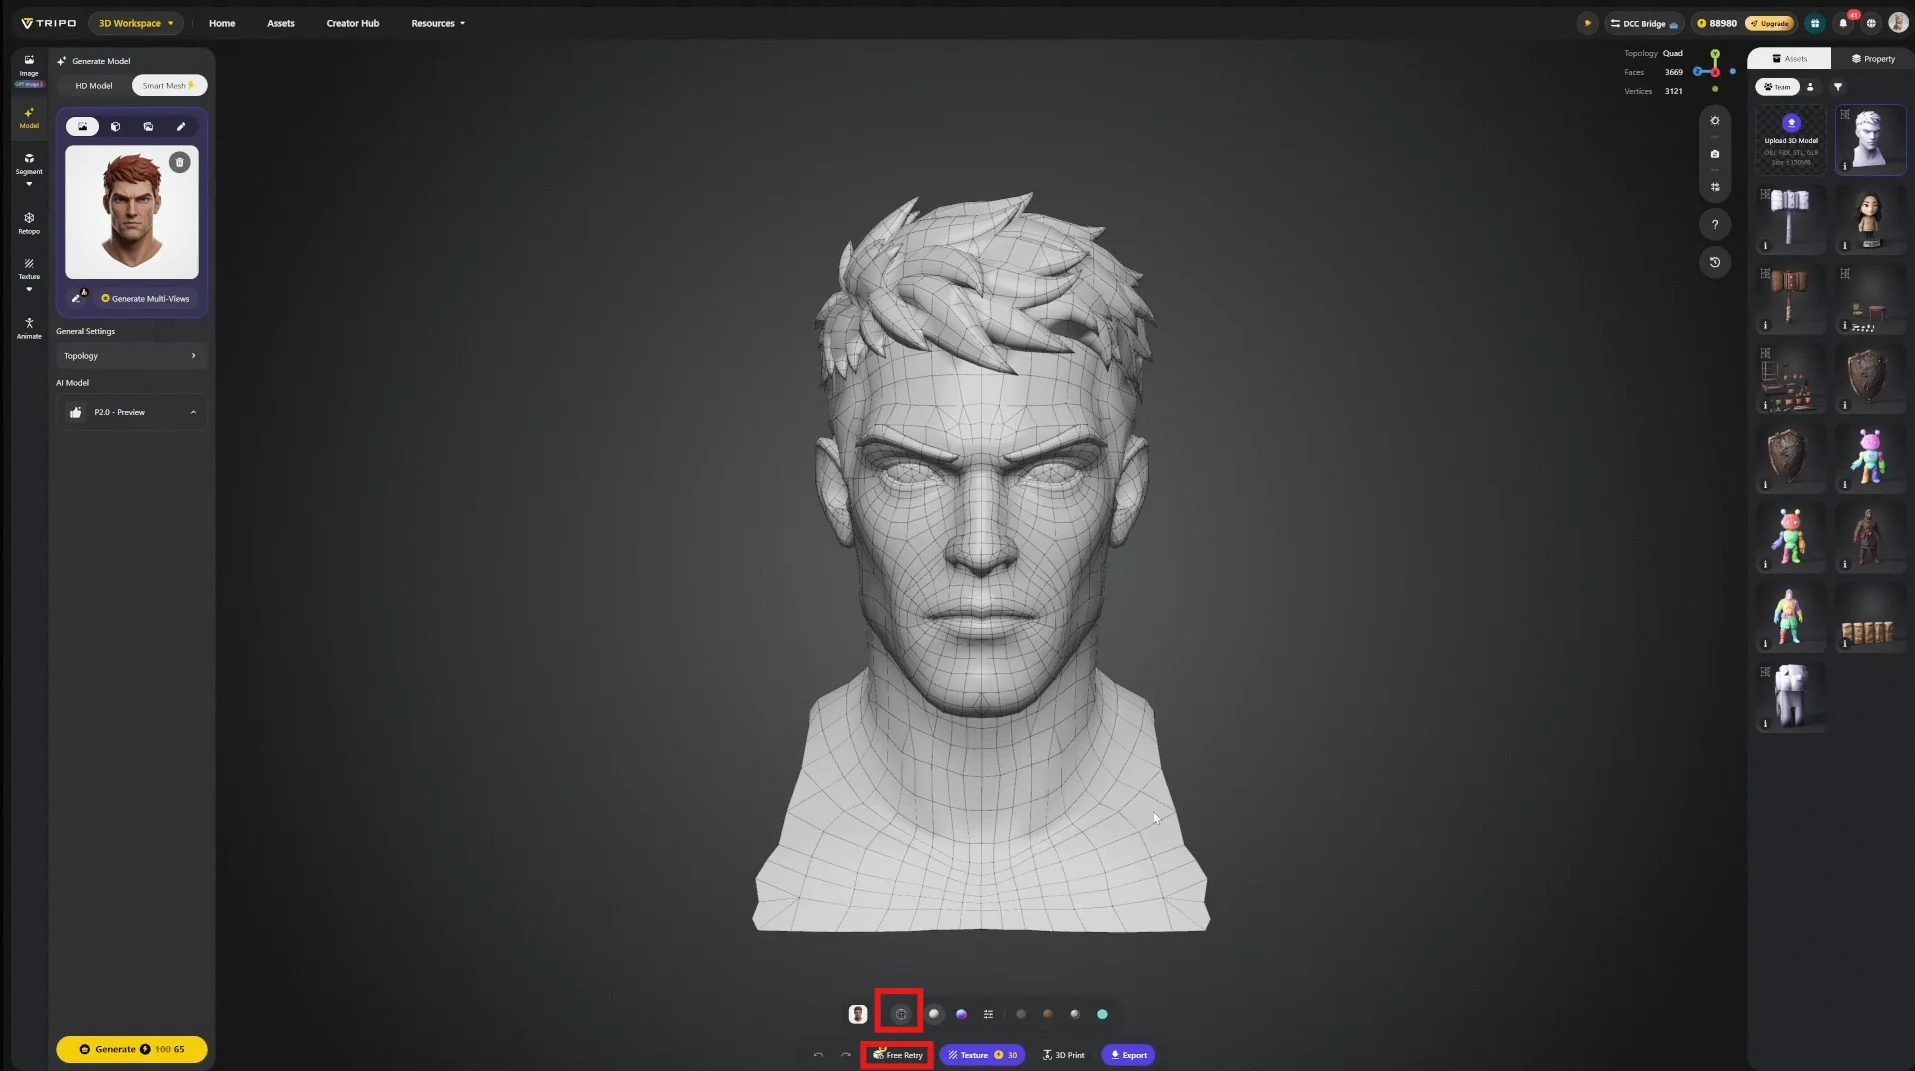
23 a tripo viewport showing a generated head model with wireframe topology generate and retry controls

批处理策略:成本与质量

一次生成全部部件
一次生成全部部件
一次生成全部部件
一次生成全部部件
一次生成全部部件
一次生成全部部件

步骤 6 — 生成贴图

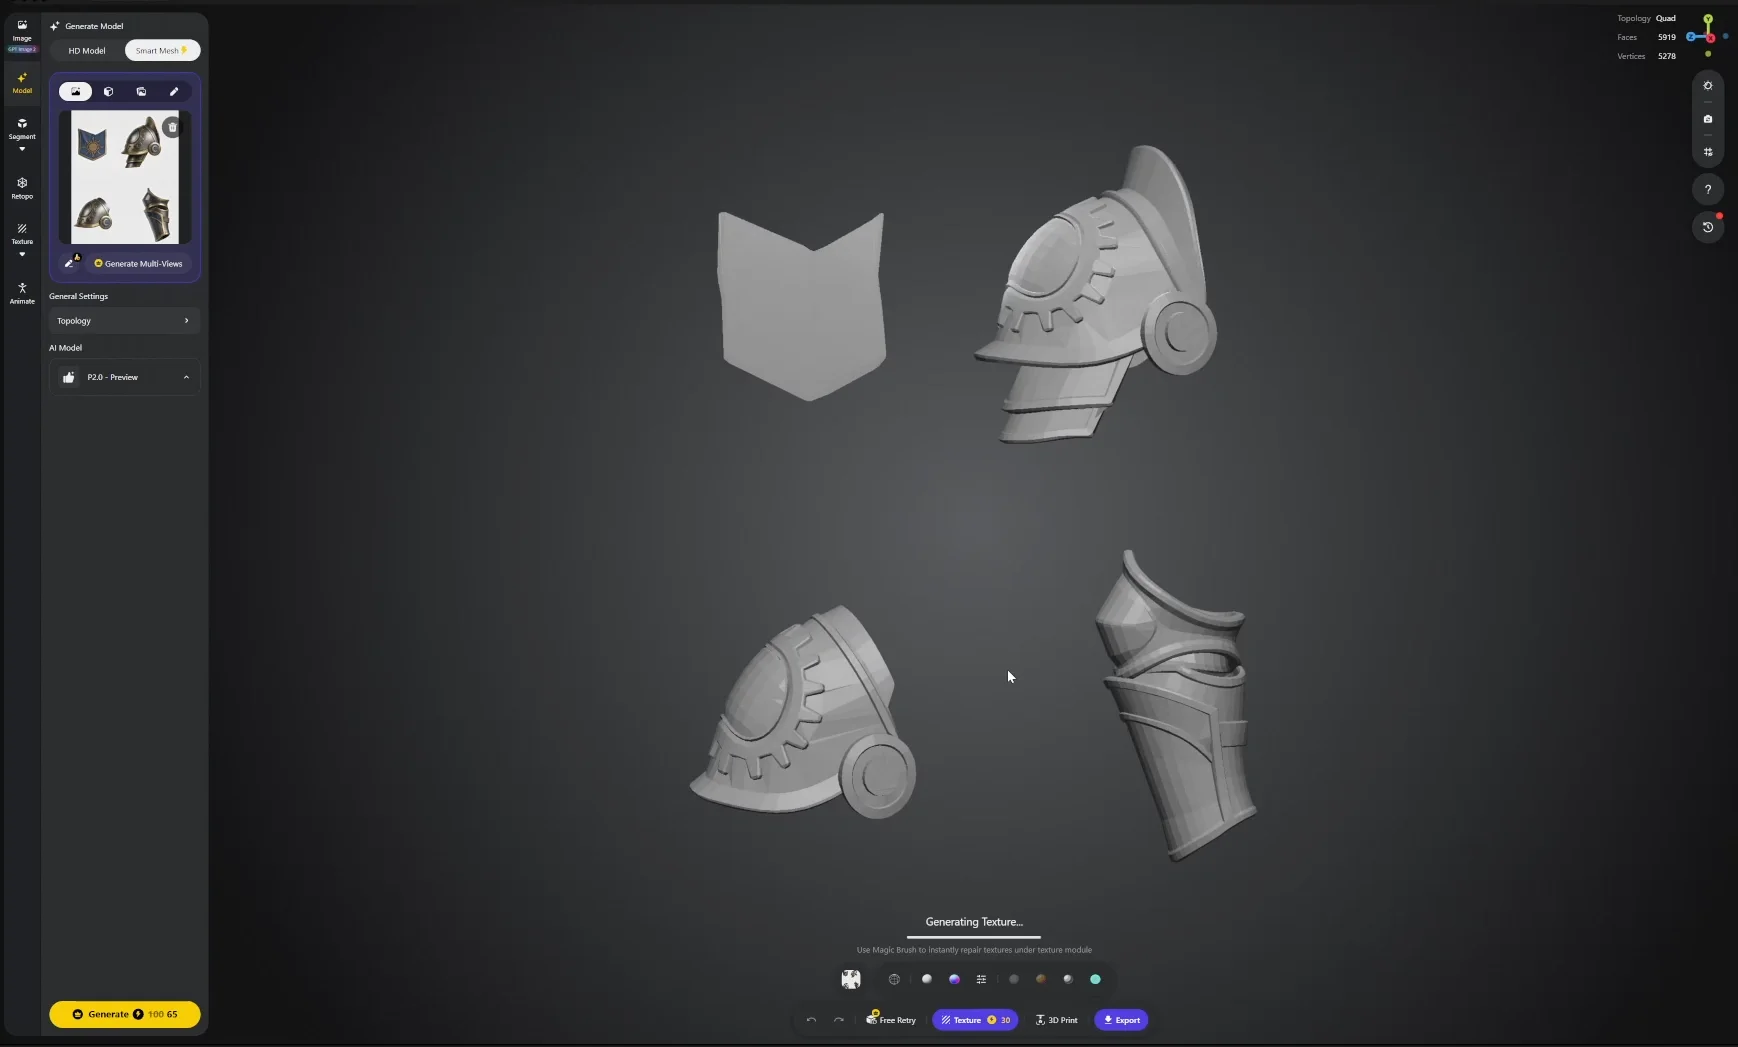
可以从底部工具栏生成贴图,也可以从左侧面板进入更多选项。生成需要几分钟。
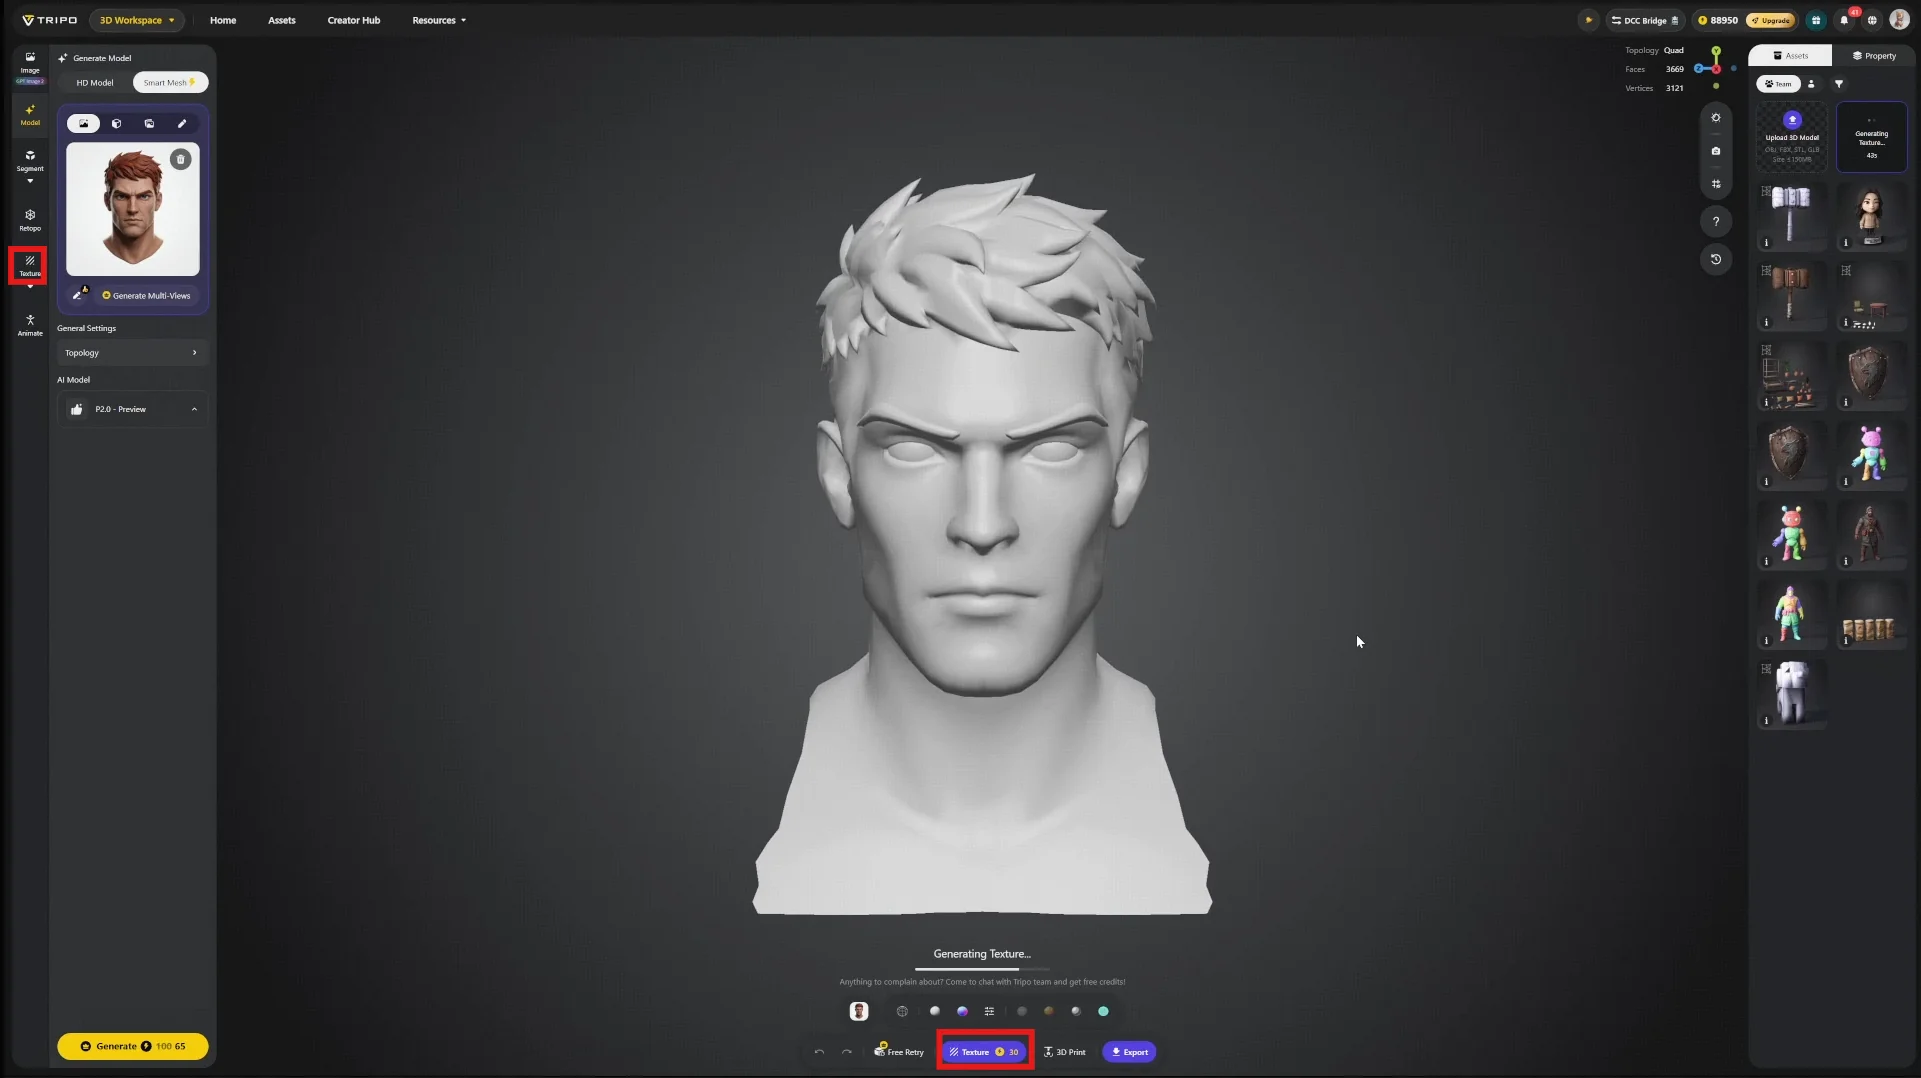
27 the tripo texture generation interface with the texture option highlighted and the generate control
28 a character model displayed in tripo s generation workspace illustrating the interface context for t

本案例还通过左侧面板生成了一套 8K 贴图。8K 并非游戏资产的最终交付分辨率,本案例也不会直接使用;它将作为步骤 13 精修时的源素材,为后续处理保留更多细节空间。
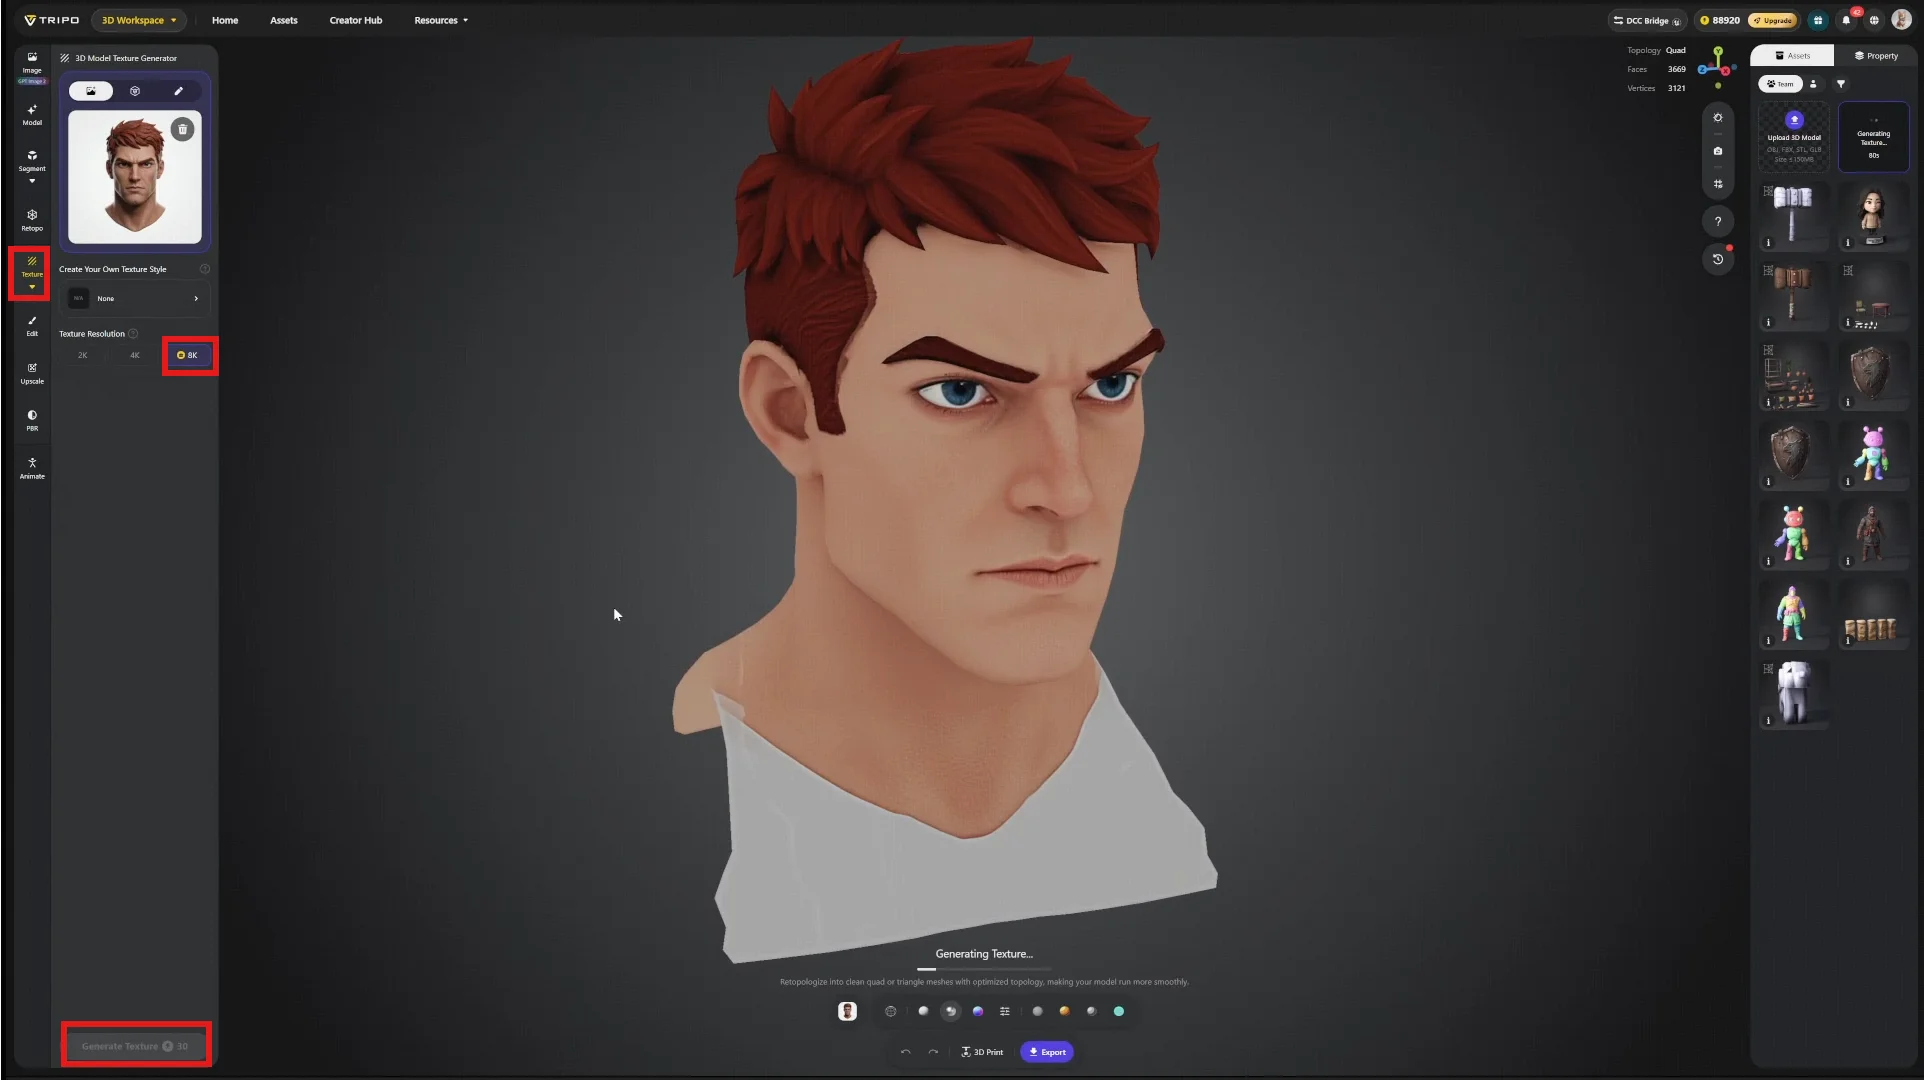
29 the tripo texture generation interface with the texture generation and 8k options highlighted along
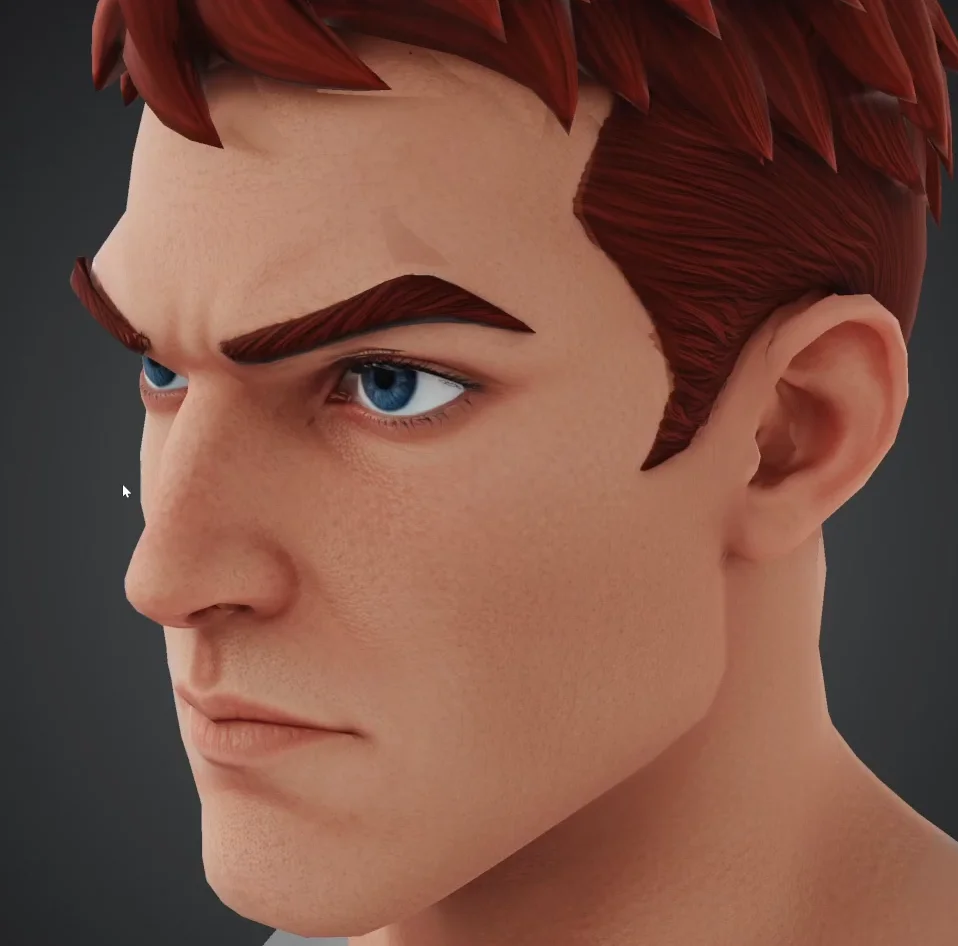
30 a side profile close up of a generated character head with red hair and detailed facial features ill

8K 贴图能够直接提供质量更高的初始素材。

步骤 7 — 编辑贴图

首轮生成的贴图未必完美。贴图选项下方的 Edit 工具可用于局部修正。
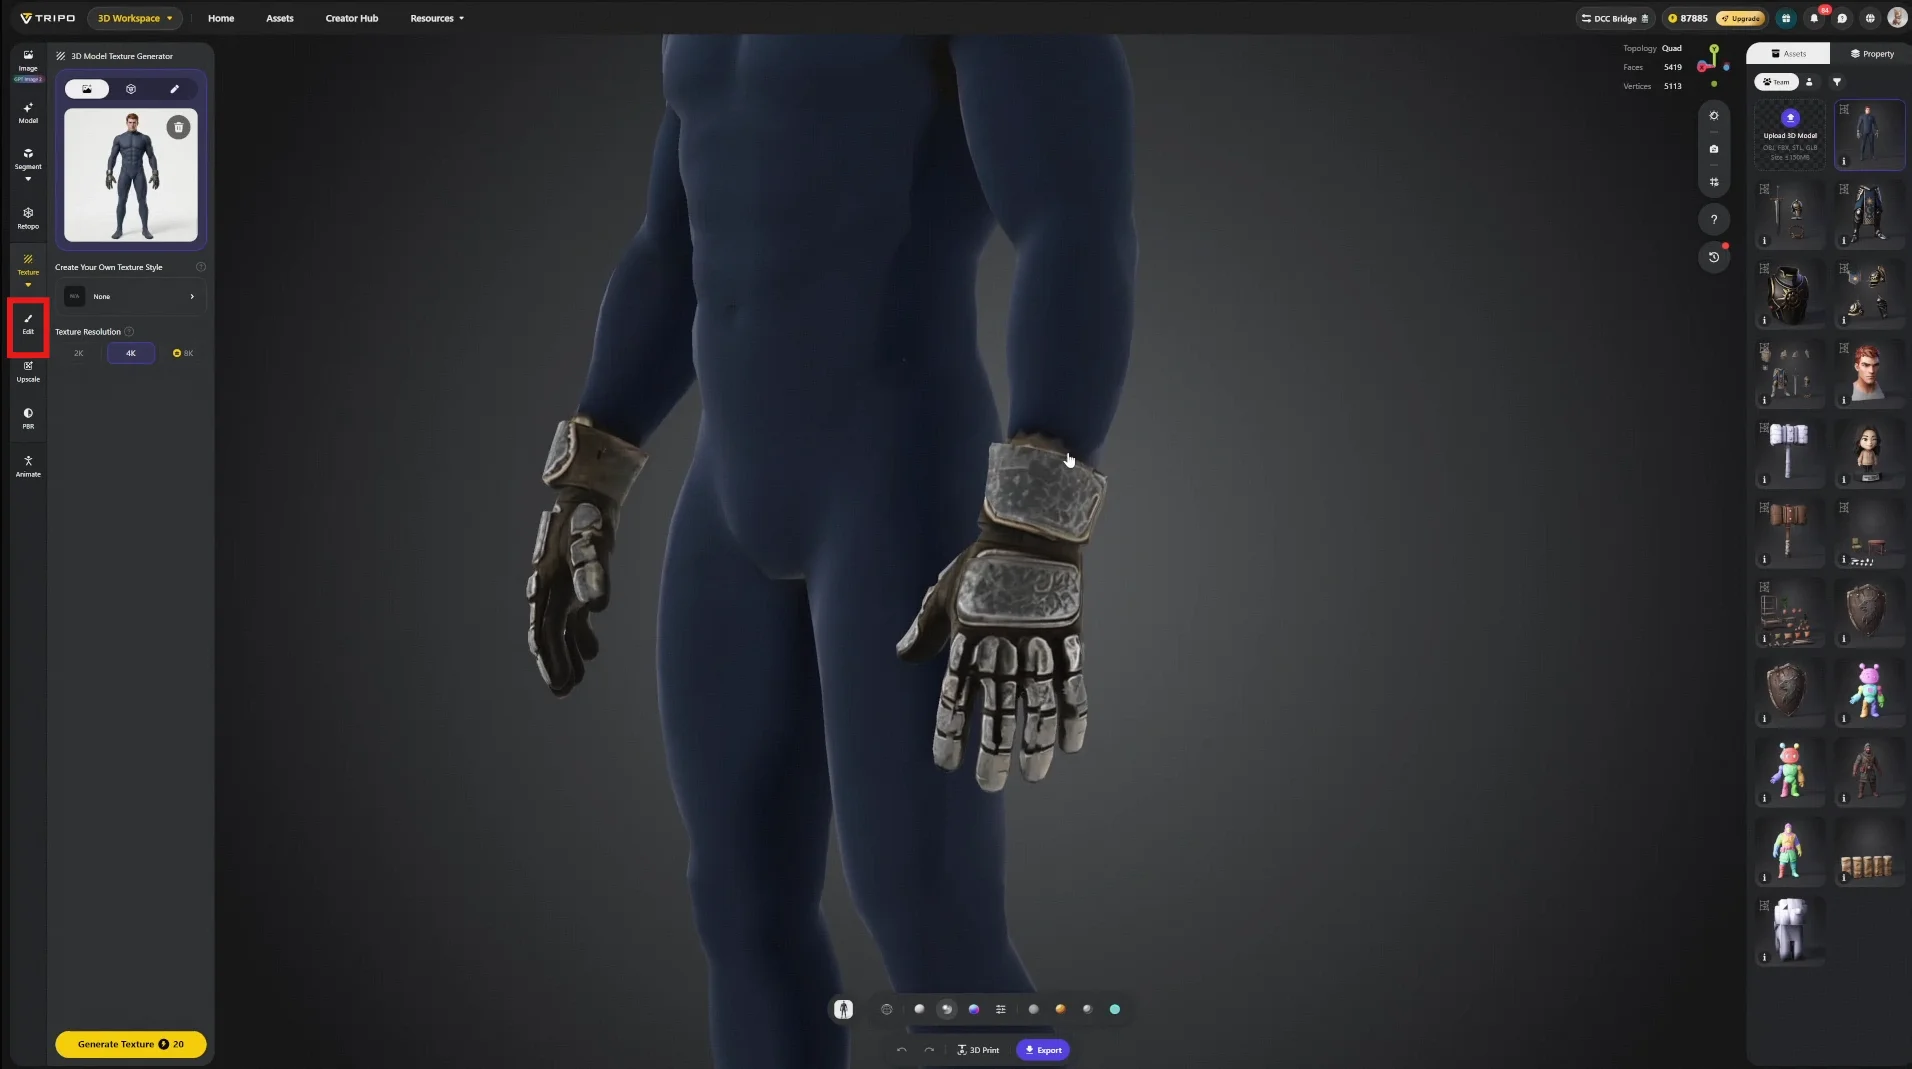
31 the tripo texture editing interface with the edit tool highlighted beside a character model and mode

描述需要重绘的区域,然后点击 Generate Preview。结果会以投影预览层显示在左侧面板中,并像传统投影绘制一样投射到模型表面。

重要:Edit 工具的作用范围

编辑操作只作用于当前视角。从正面绘制不会同步更新背面,因此应把它用于局部定点修复,而非整套表面重绘。
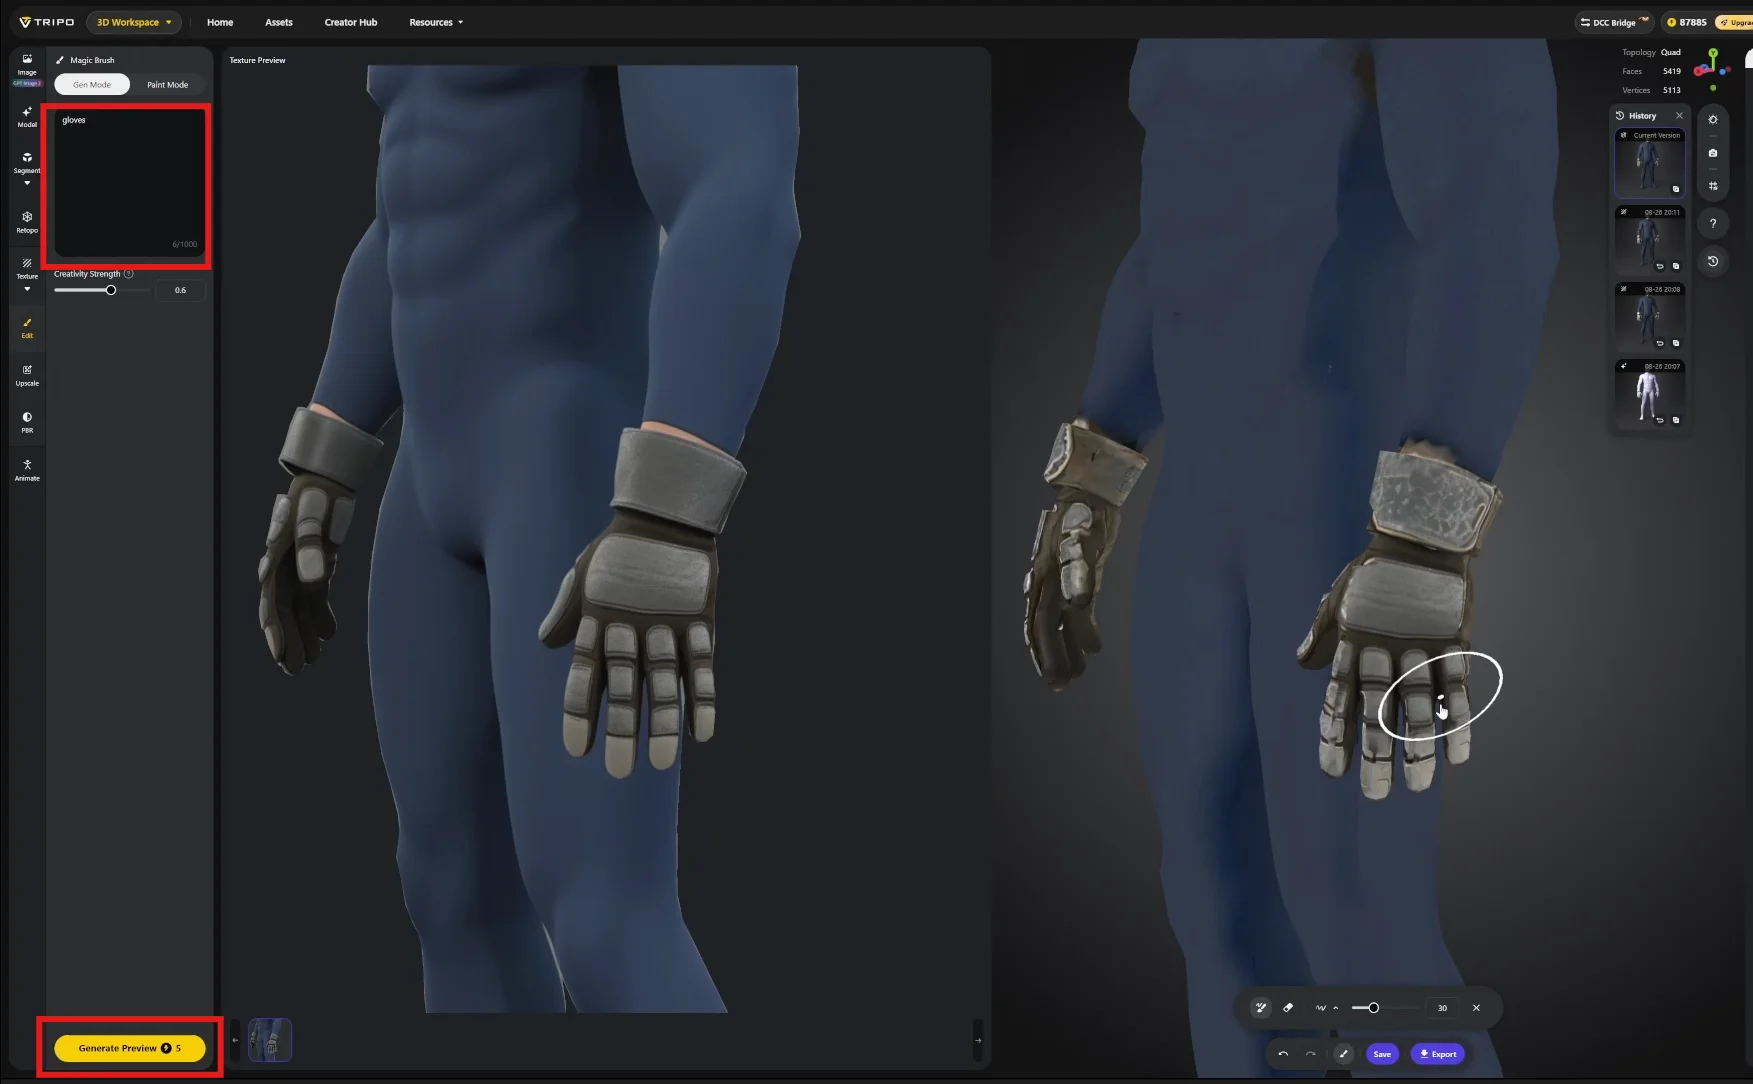
32 the tripo texture editing interface showing a close up of the hand area with edit and generate previ

步骤 8 — PBR 处理

使用左侧面板中的 PBR 功能,将单张基础色贴图转换为完整贴图集,包括法线、粗糙度和金属度贴图。
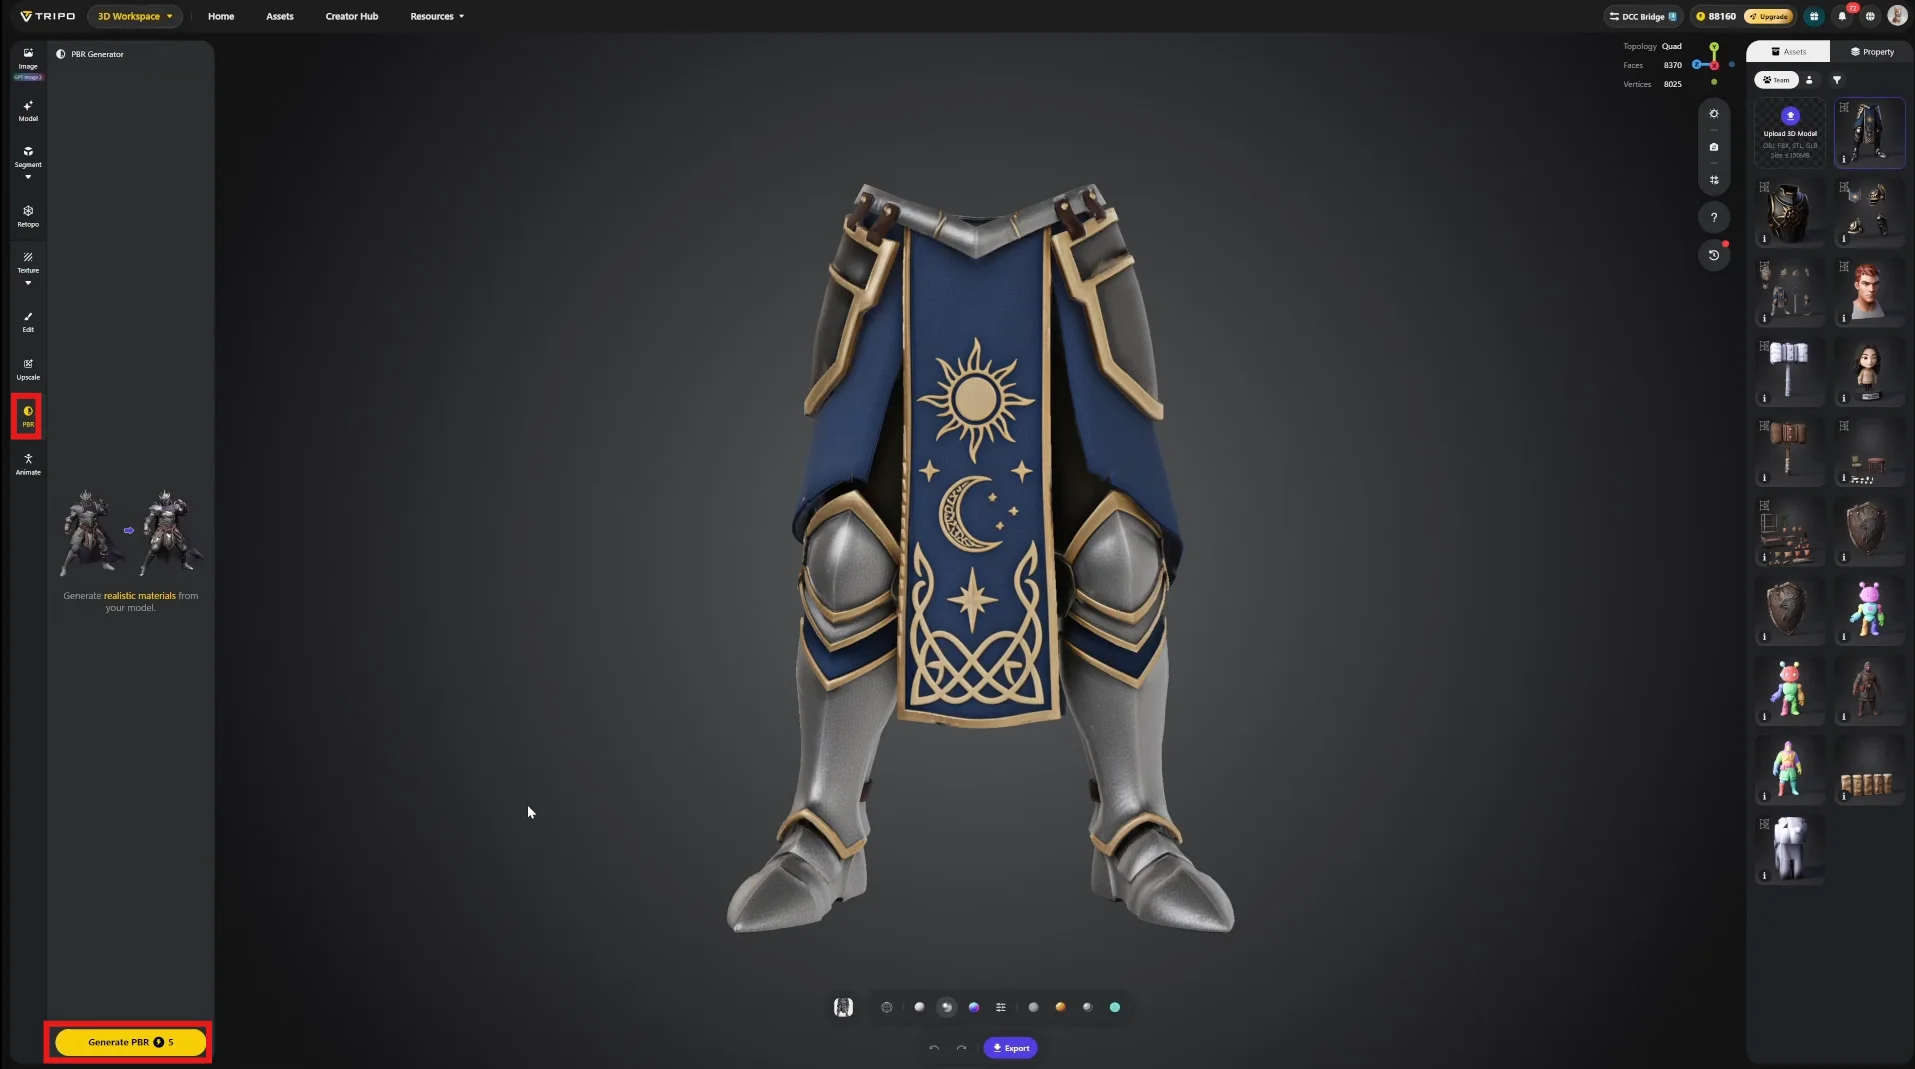
33 the tripo pbr interface showing a textured armored character and the pbr control highlighted in the

步骤 9 — 导出

DCC Bridge 可将资产直接发送到建模软件,省去手动导出再导入的步骤。
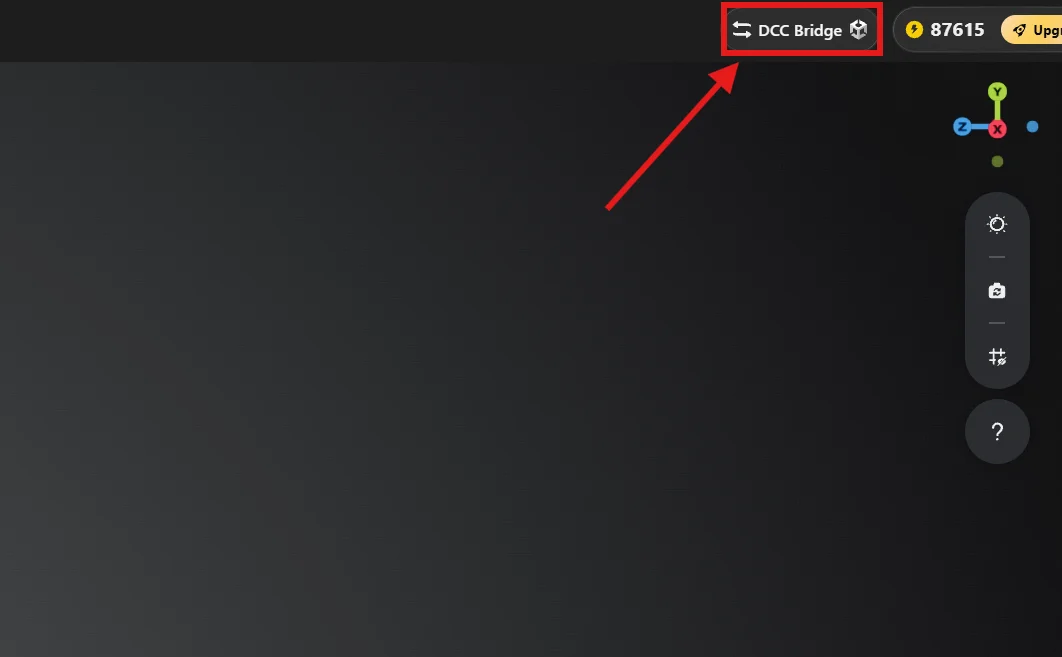
34 the upper right area of the tripo interface with the dcc bridge entry and its upgrade indicator visi

请确保已正确安装 DCC Bridge 插件。点击文档图标即可查看安装指南。

打开插件并启用自动同步。传输时,Tripo 网页与目标引擎或 DCC 软件必须同时保持开启;如果接收端未打开,传输将失败。
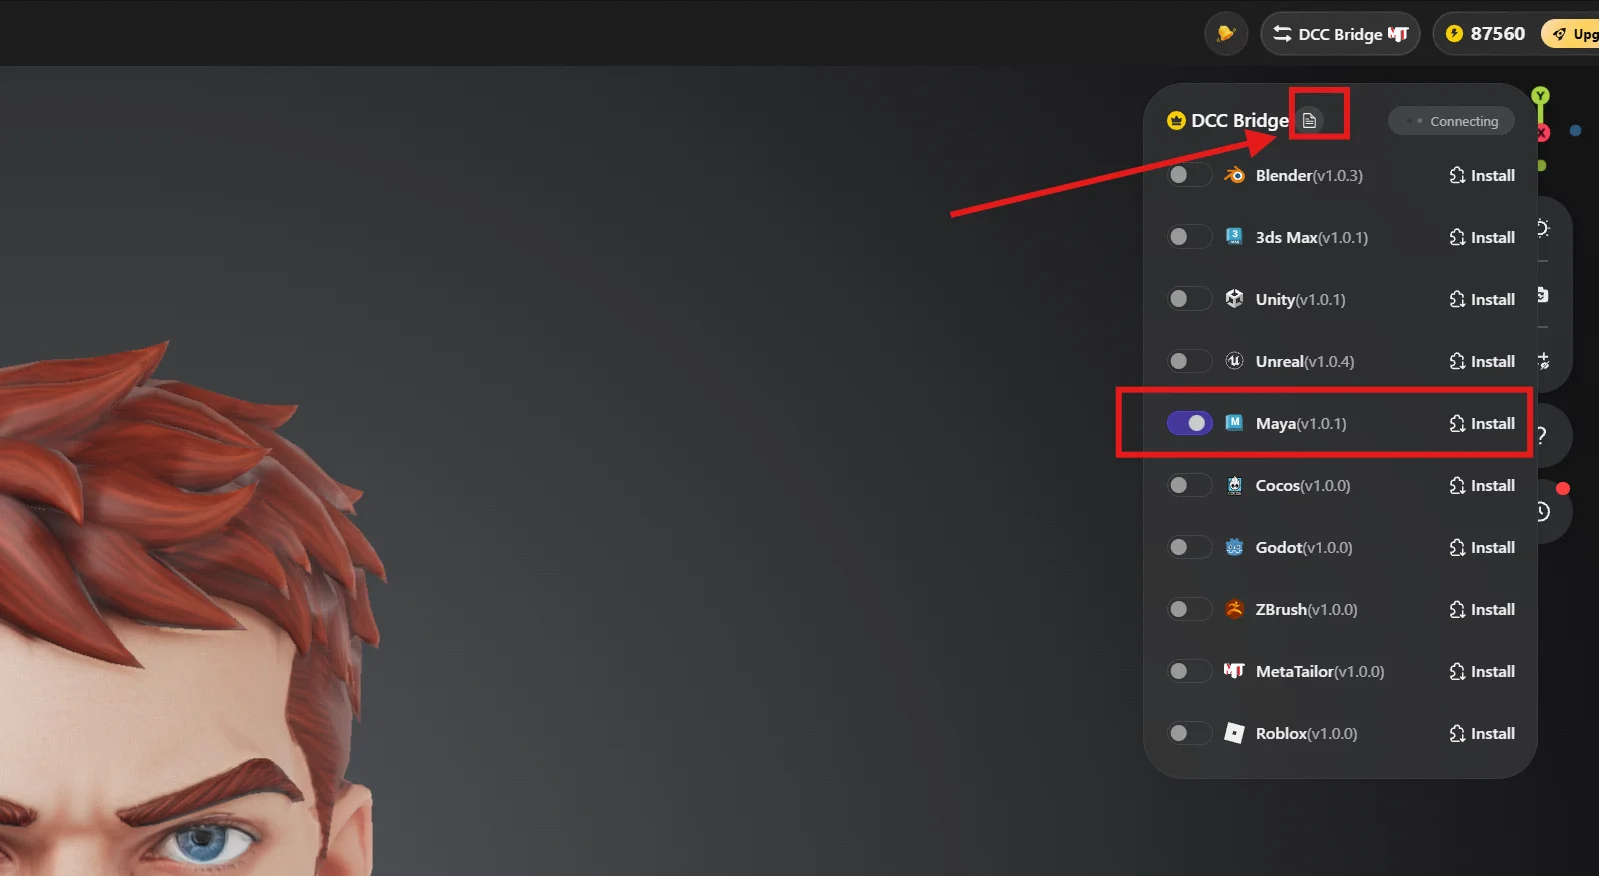
35 the tripo dcc bridge panel listing compatible applications with the dcc bridge entry and maya versio

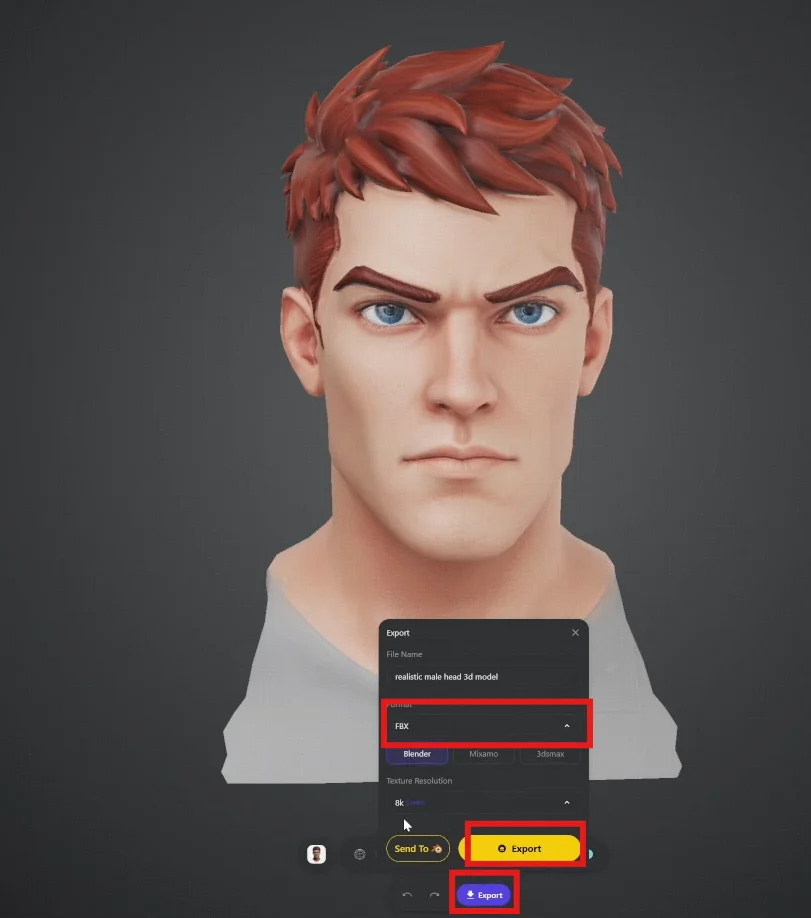
也可以按工作需要导出文件,常用格式为 FBXOBJ

36 the tripo export dialog with fbx selected and the export button highlighted

阶段 C · 制作收尾

从这一阶段开始,艺术家的专业能力重新成为核心。Tripo 已经完成几何体和贴图的初步交付,但要把它们打磨成可用于正式项目的高质量游戏资产,仍离不开专业制作经验。

步骤 10 — 重新组装

Tripo 会将所有模型统一缩放到相同尺寸,但角色的不同部件本来就应有大小差异。因此,需要在常用 DCC 软件中重新组装,例如 Maya、Blender、3ds Max、ZBrush 或 3D Coat。
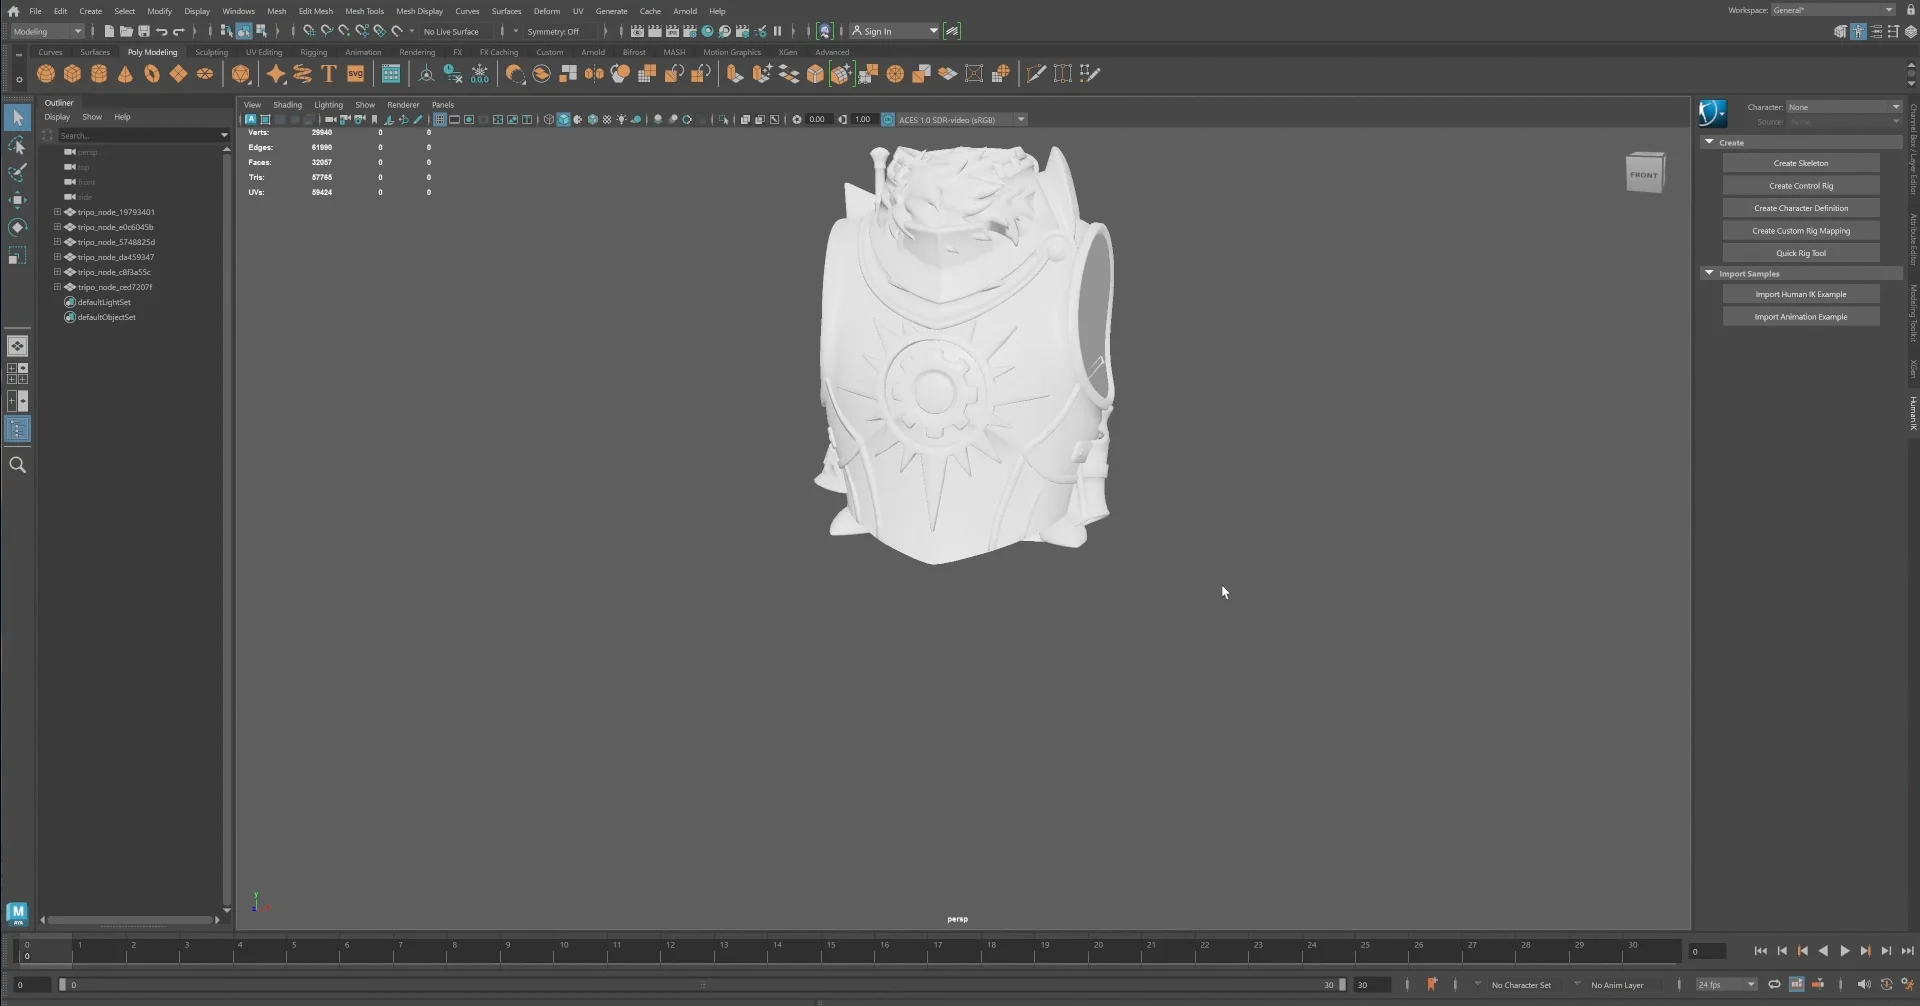
37 a 3ds max workspace showing a character upper body model during the re assembly stage

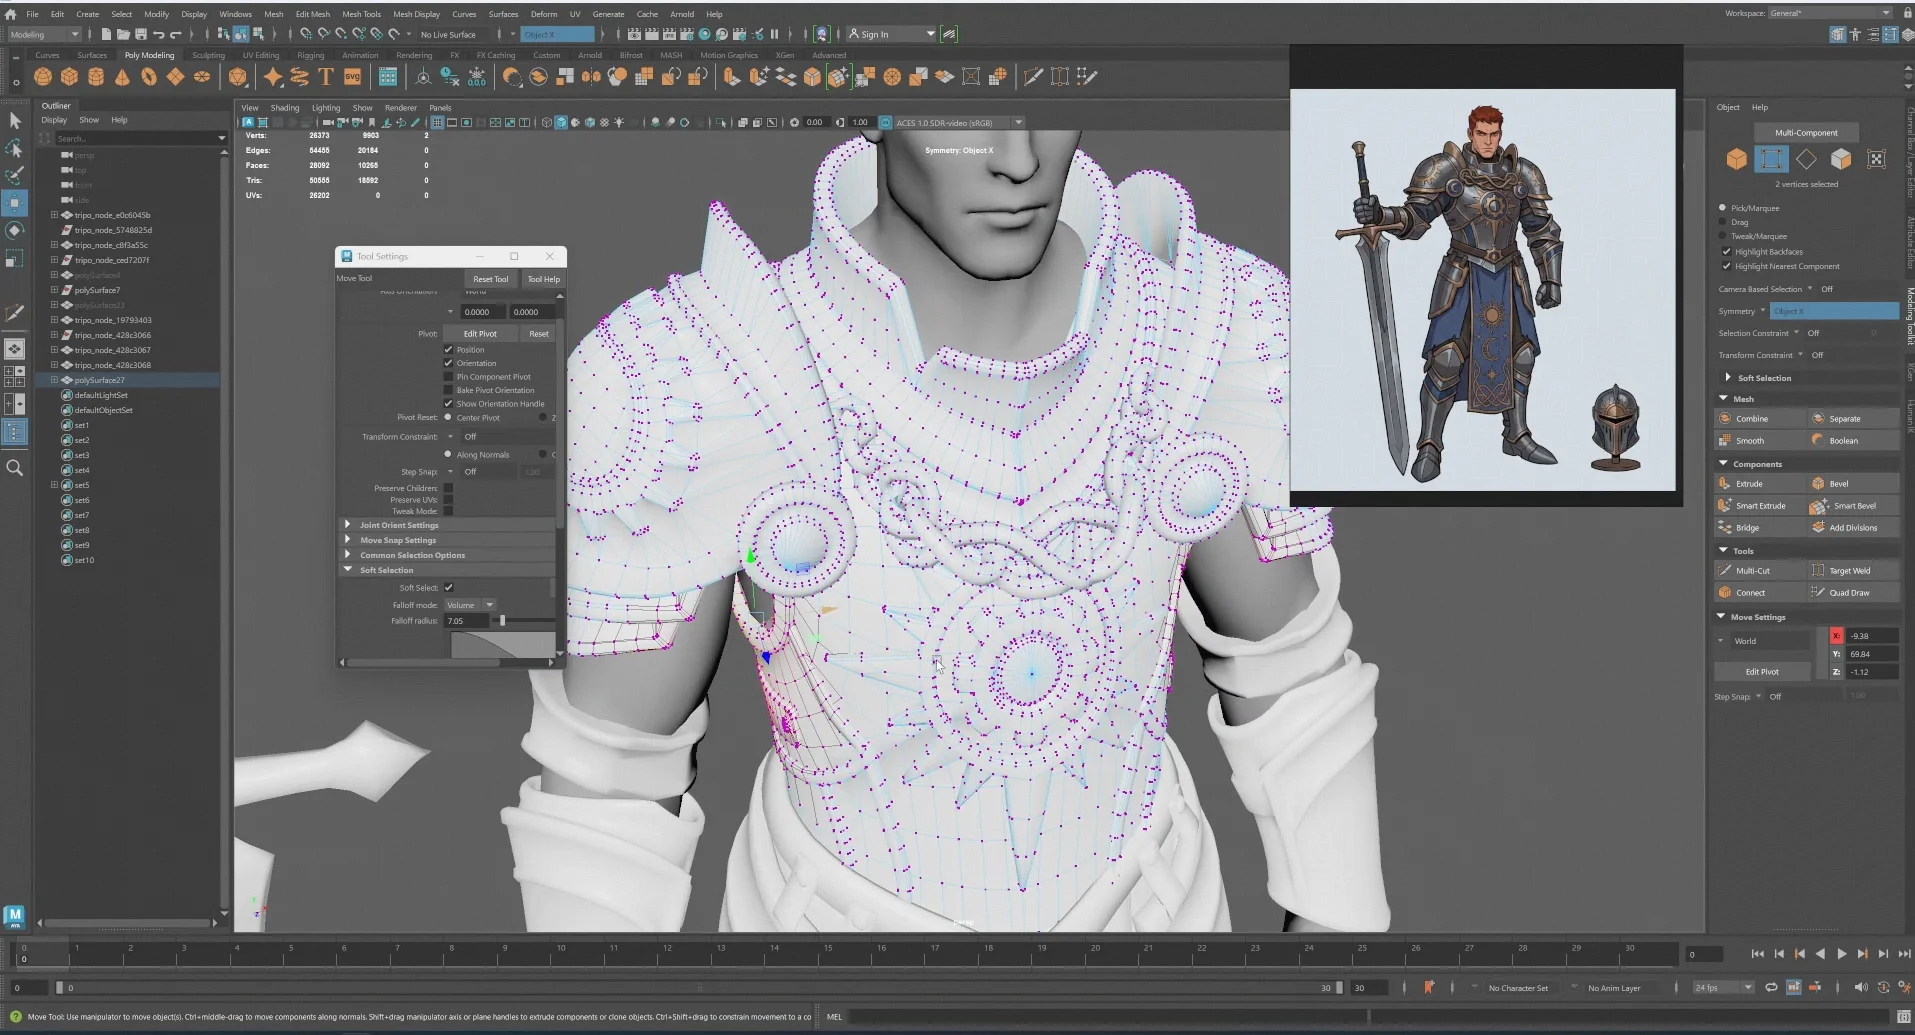
本案例使用 Maya。载入参考图,利用各个部件重新组装角色,并始终以 对称性和比例为准。
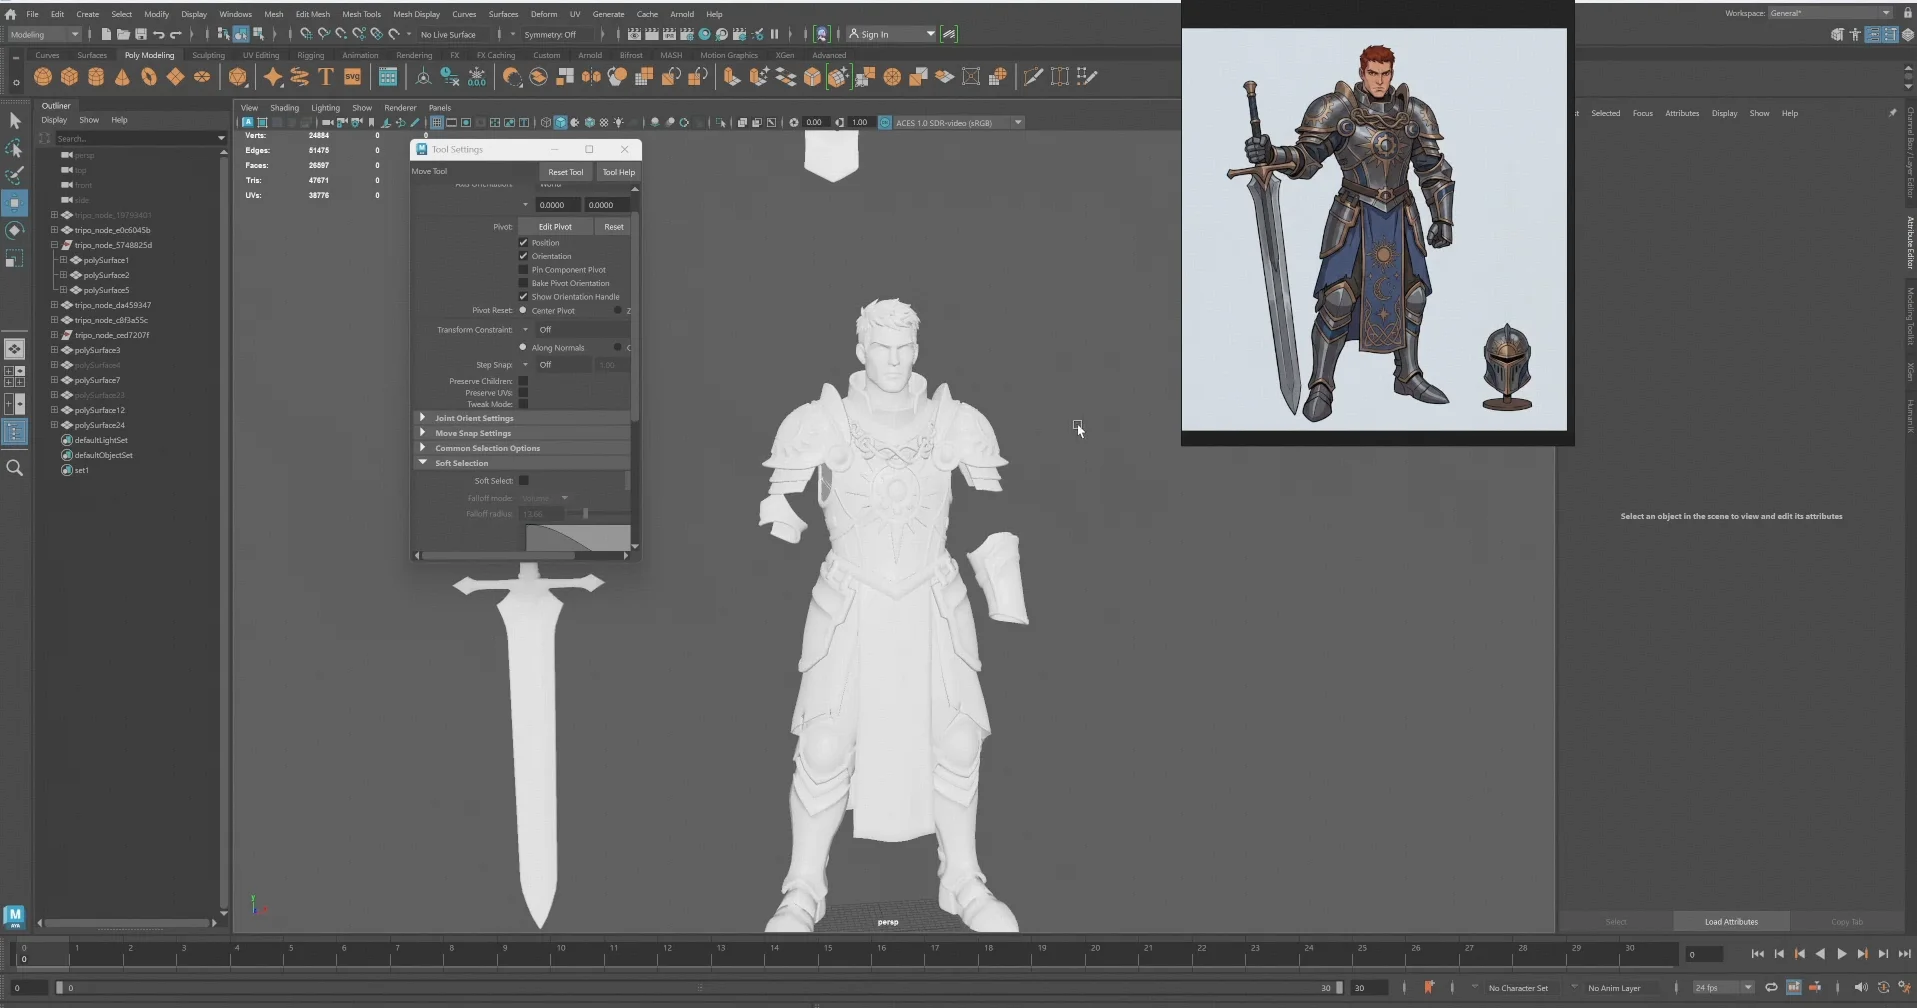
38 a dcc workspace showing the character hierarchy wireframe model and reference image used for re asse

部分部件需要手动移动和缩放,才能与参考图匹配。

39 a maya re assembly workspace showing an armored character torso reference images symmetry controls a

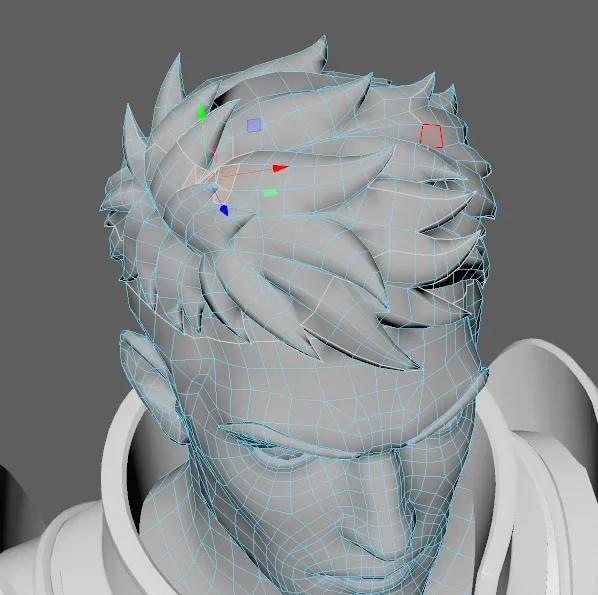
模型中可能出现非流形面或孔洞,目前仍需手动修复。这类问题数量不多,后续模型更新也在持续改善。
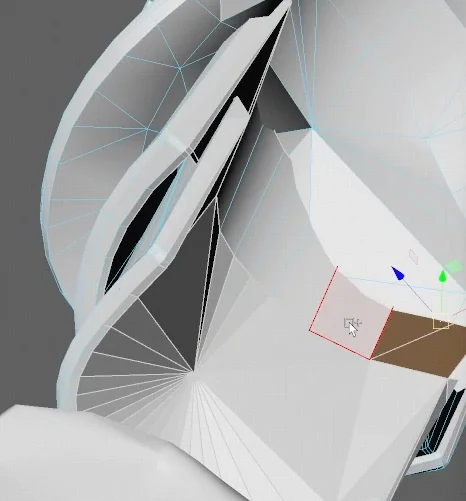
40 a close up topology editing view showing a selected polygon that requires manual adjustment during m
41 a wireframe character head view illustrating manual positioning scaling and repair of components dur

步骤 11 — UV 与对称

Tripo 提供对称功能,但进入下一步前,仍应按自己的制作标准检查结果。

关键:先保留原有贴图映射

Tripo 生成的贴图依赖原始 UV。修改 UV 前务必复制一份模型。 一旦丢失原始 UV 集,生成的贴图也将无法使用,只能重新生成。

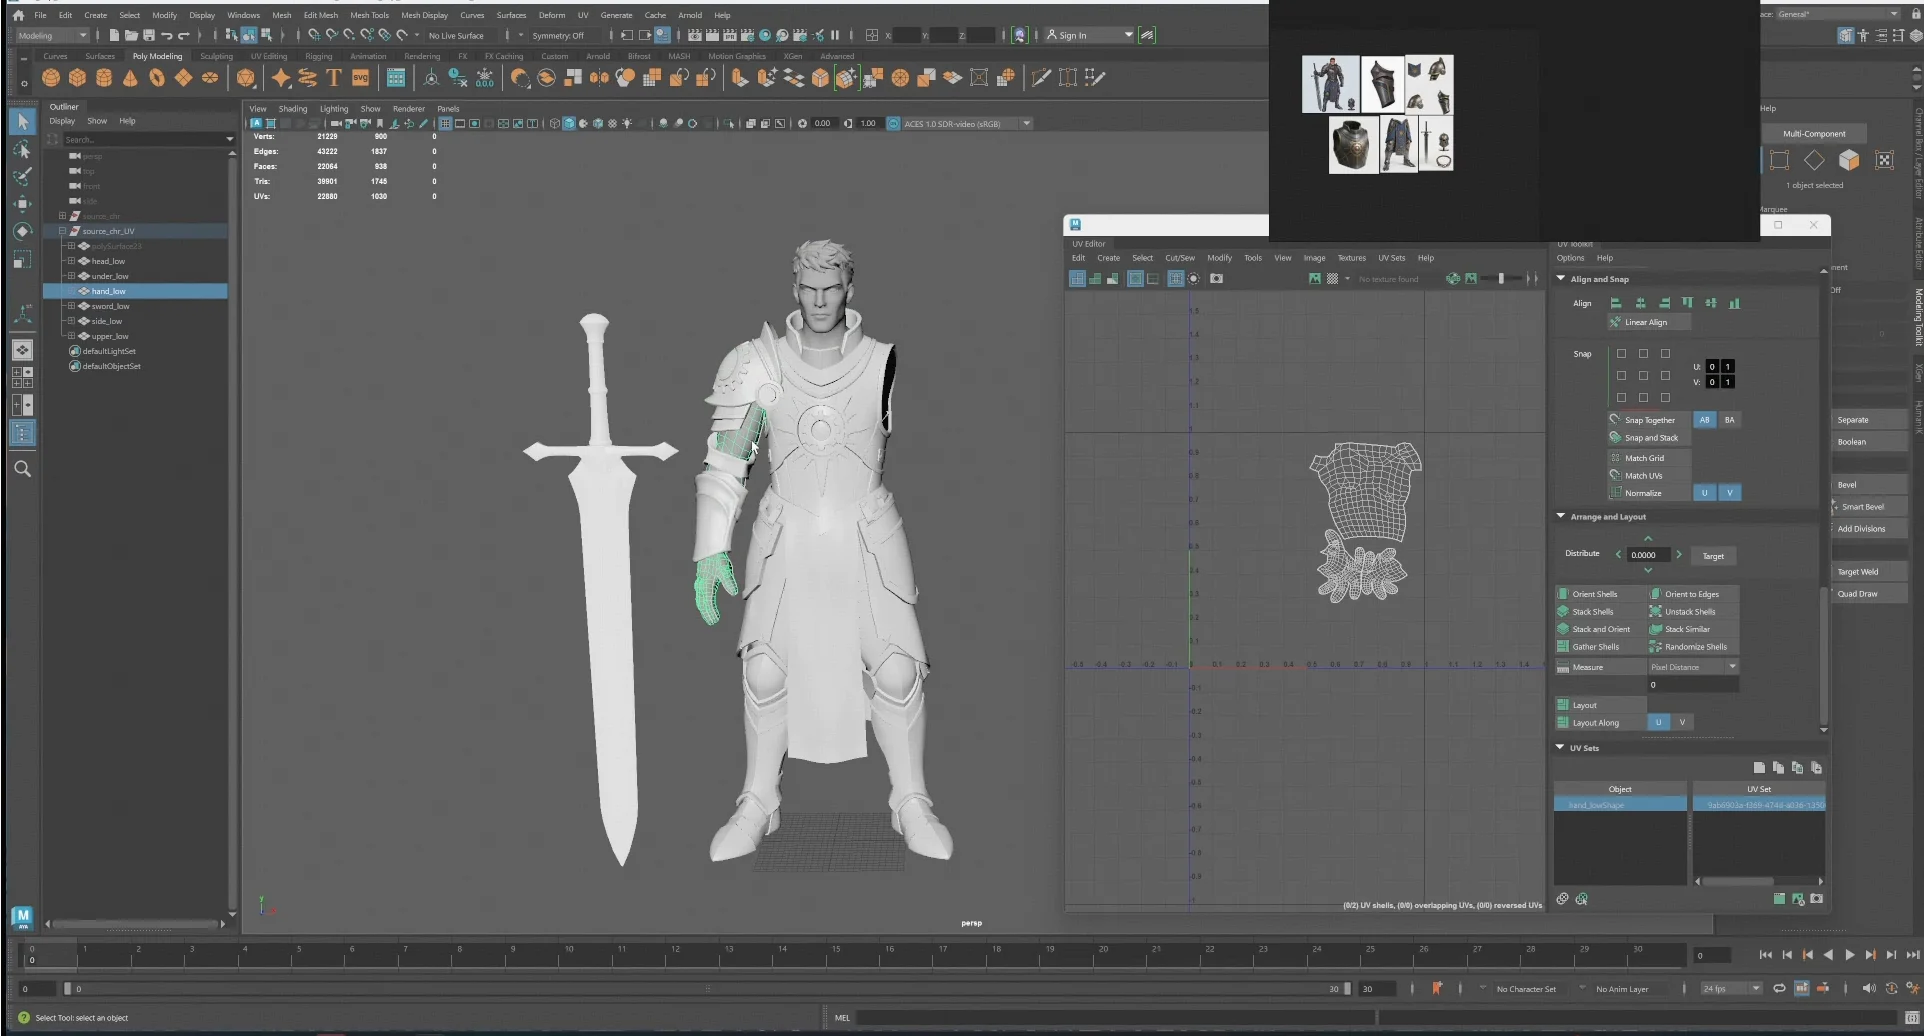
本案例的做法是删除一半身体,在保留的一半上重新制作 UV,再镜像出另一半。这样既能得到更整洁的 UV 布局,也能确保精确对称。
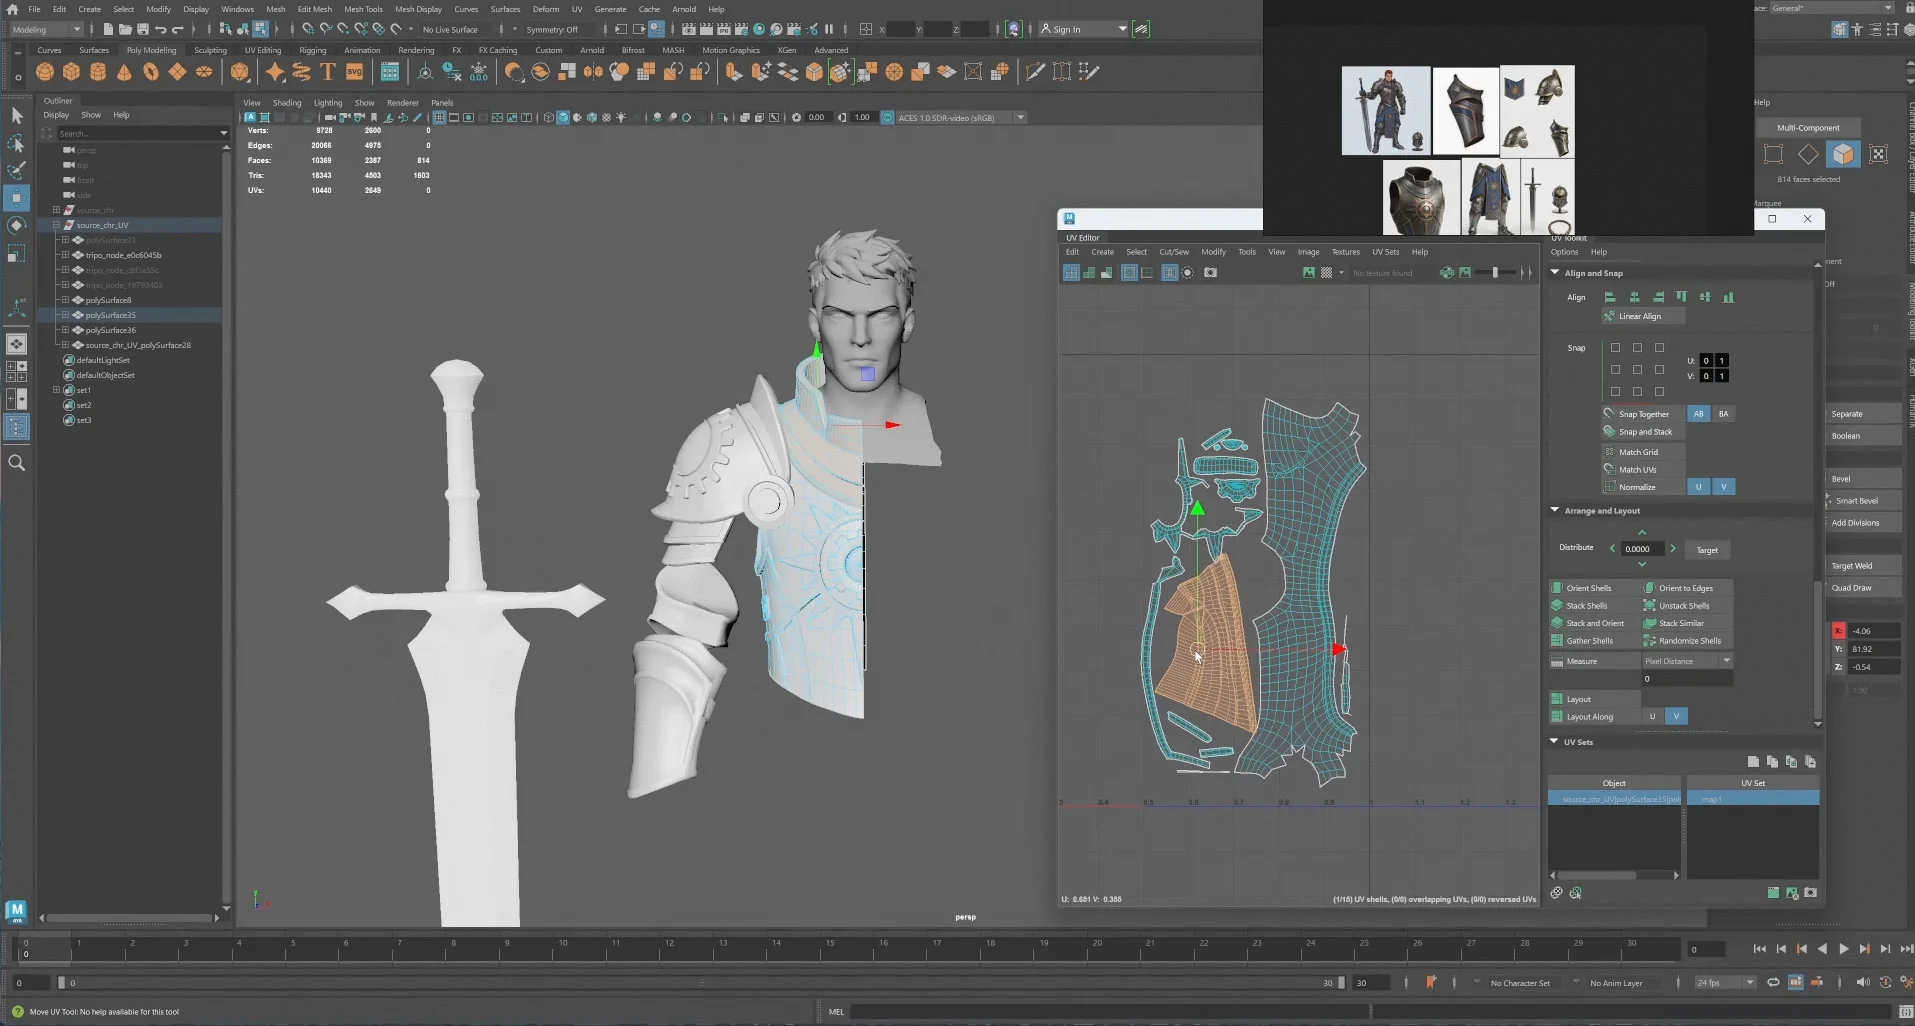
42 a maya workspace showing a half model uv editor sword shoulder armor and reference image for the uv

对所有部件重复上述操作,直至拓扑和 UV 全部整理干净。

43 a maya workspace showing the character hierarchy model components reference image and uv editor duri

关键:UV 集命名

将所有 UV 集改为同一个名称,不要沿用默认名称。不同对象的默认 UV 集名称可能不一致,进而导致后续合并失败。现在统一命名很简单,留到后面再处理则成本很高。
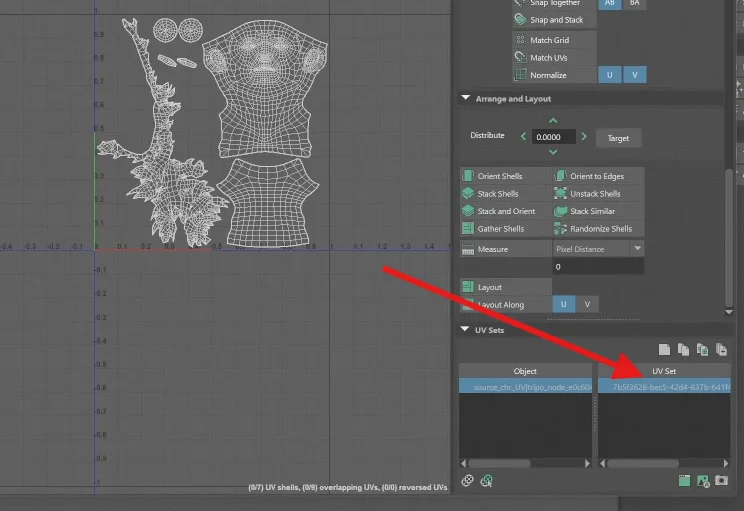
44 a uv sets panel showing the selected uv set name frontout chr uvmap node model

步骤 12 — 贴图转移与烘焙

将 Tripo 贴图转移到重新展开 UV 的模型上。可以在 Maya 中按世界空间转移贴图,也可以使用 Marmoset 或同类工具进行烘焙。操作方式与标准法线贴图烘焙相同,以旧模型作为源模型。
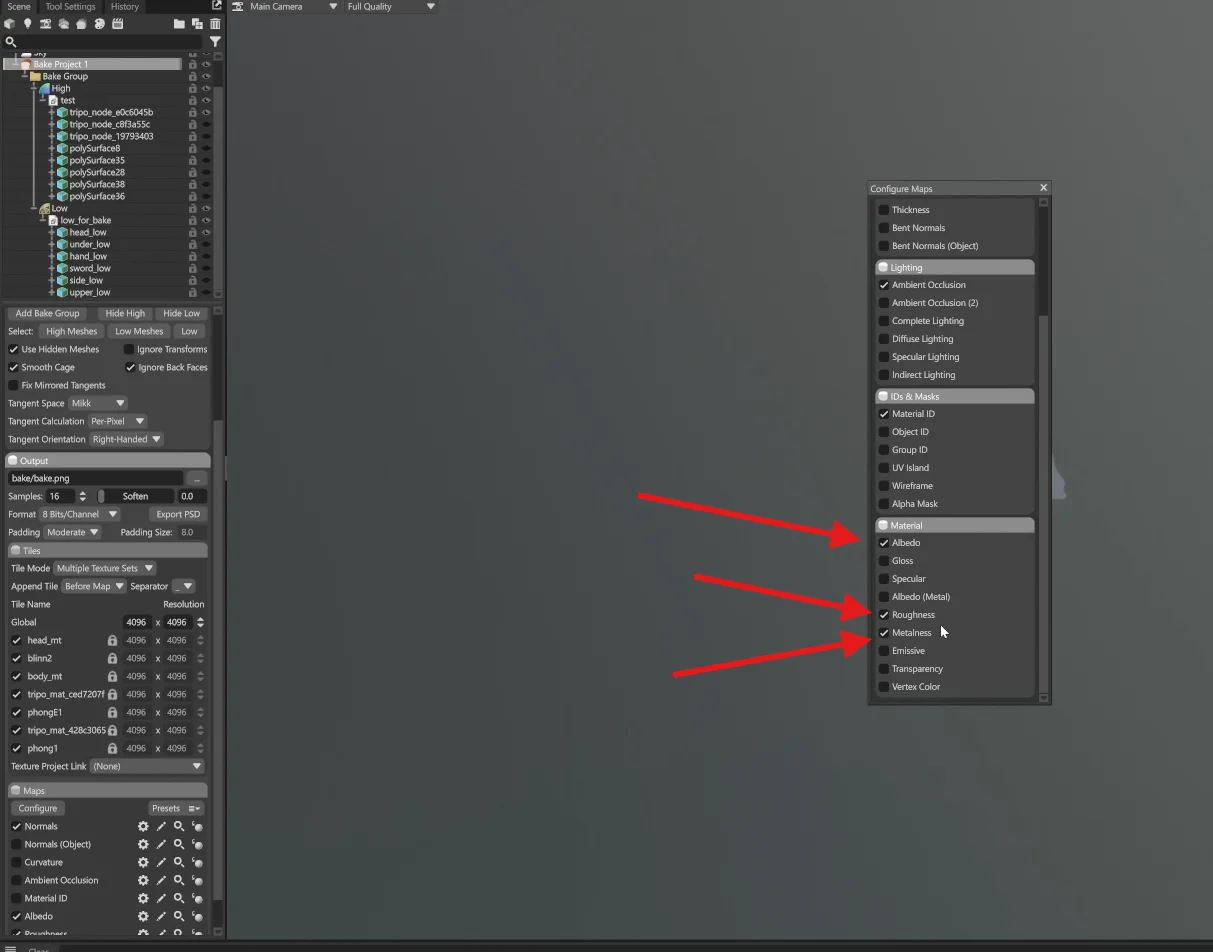
45 a baking interface showing normal tangent and displacement options for texture transfer and baking

步骤 13 — 精修

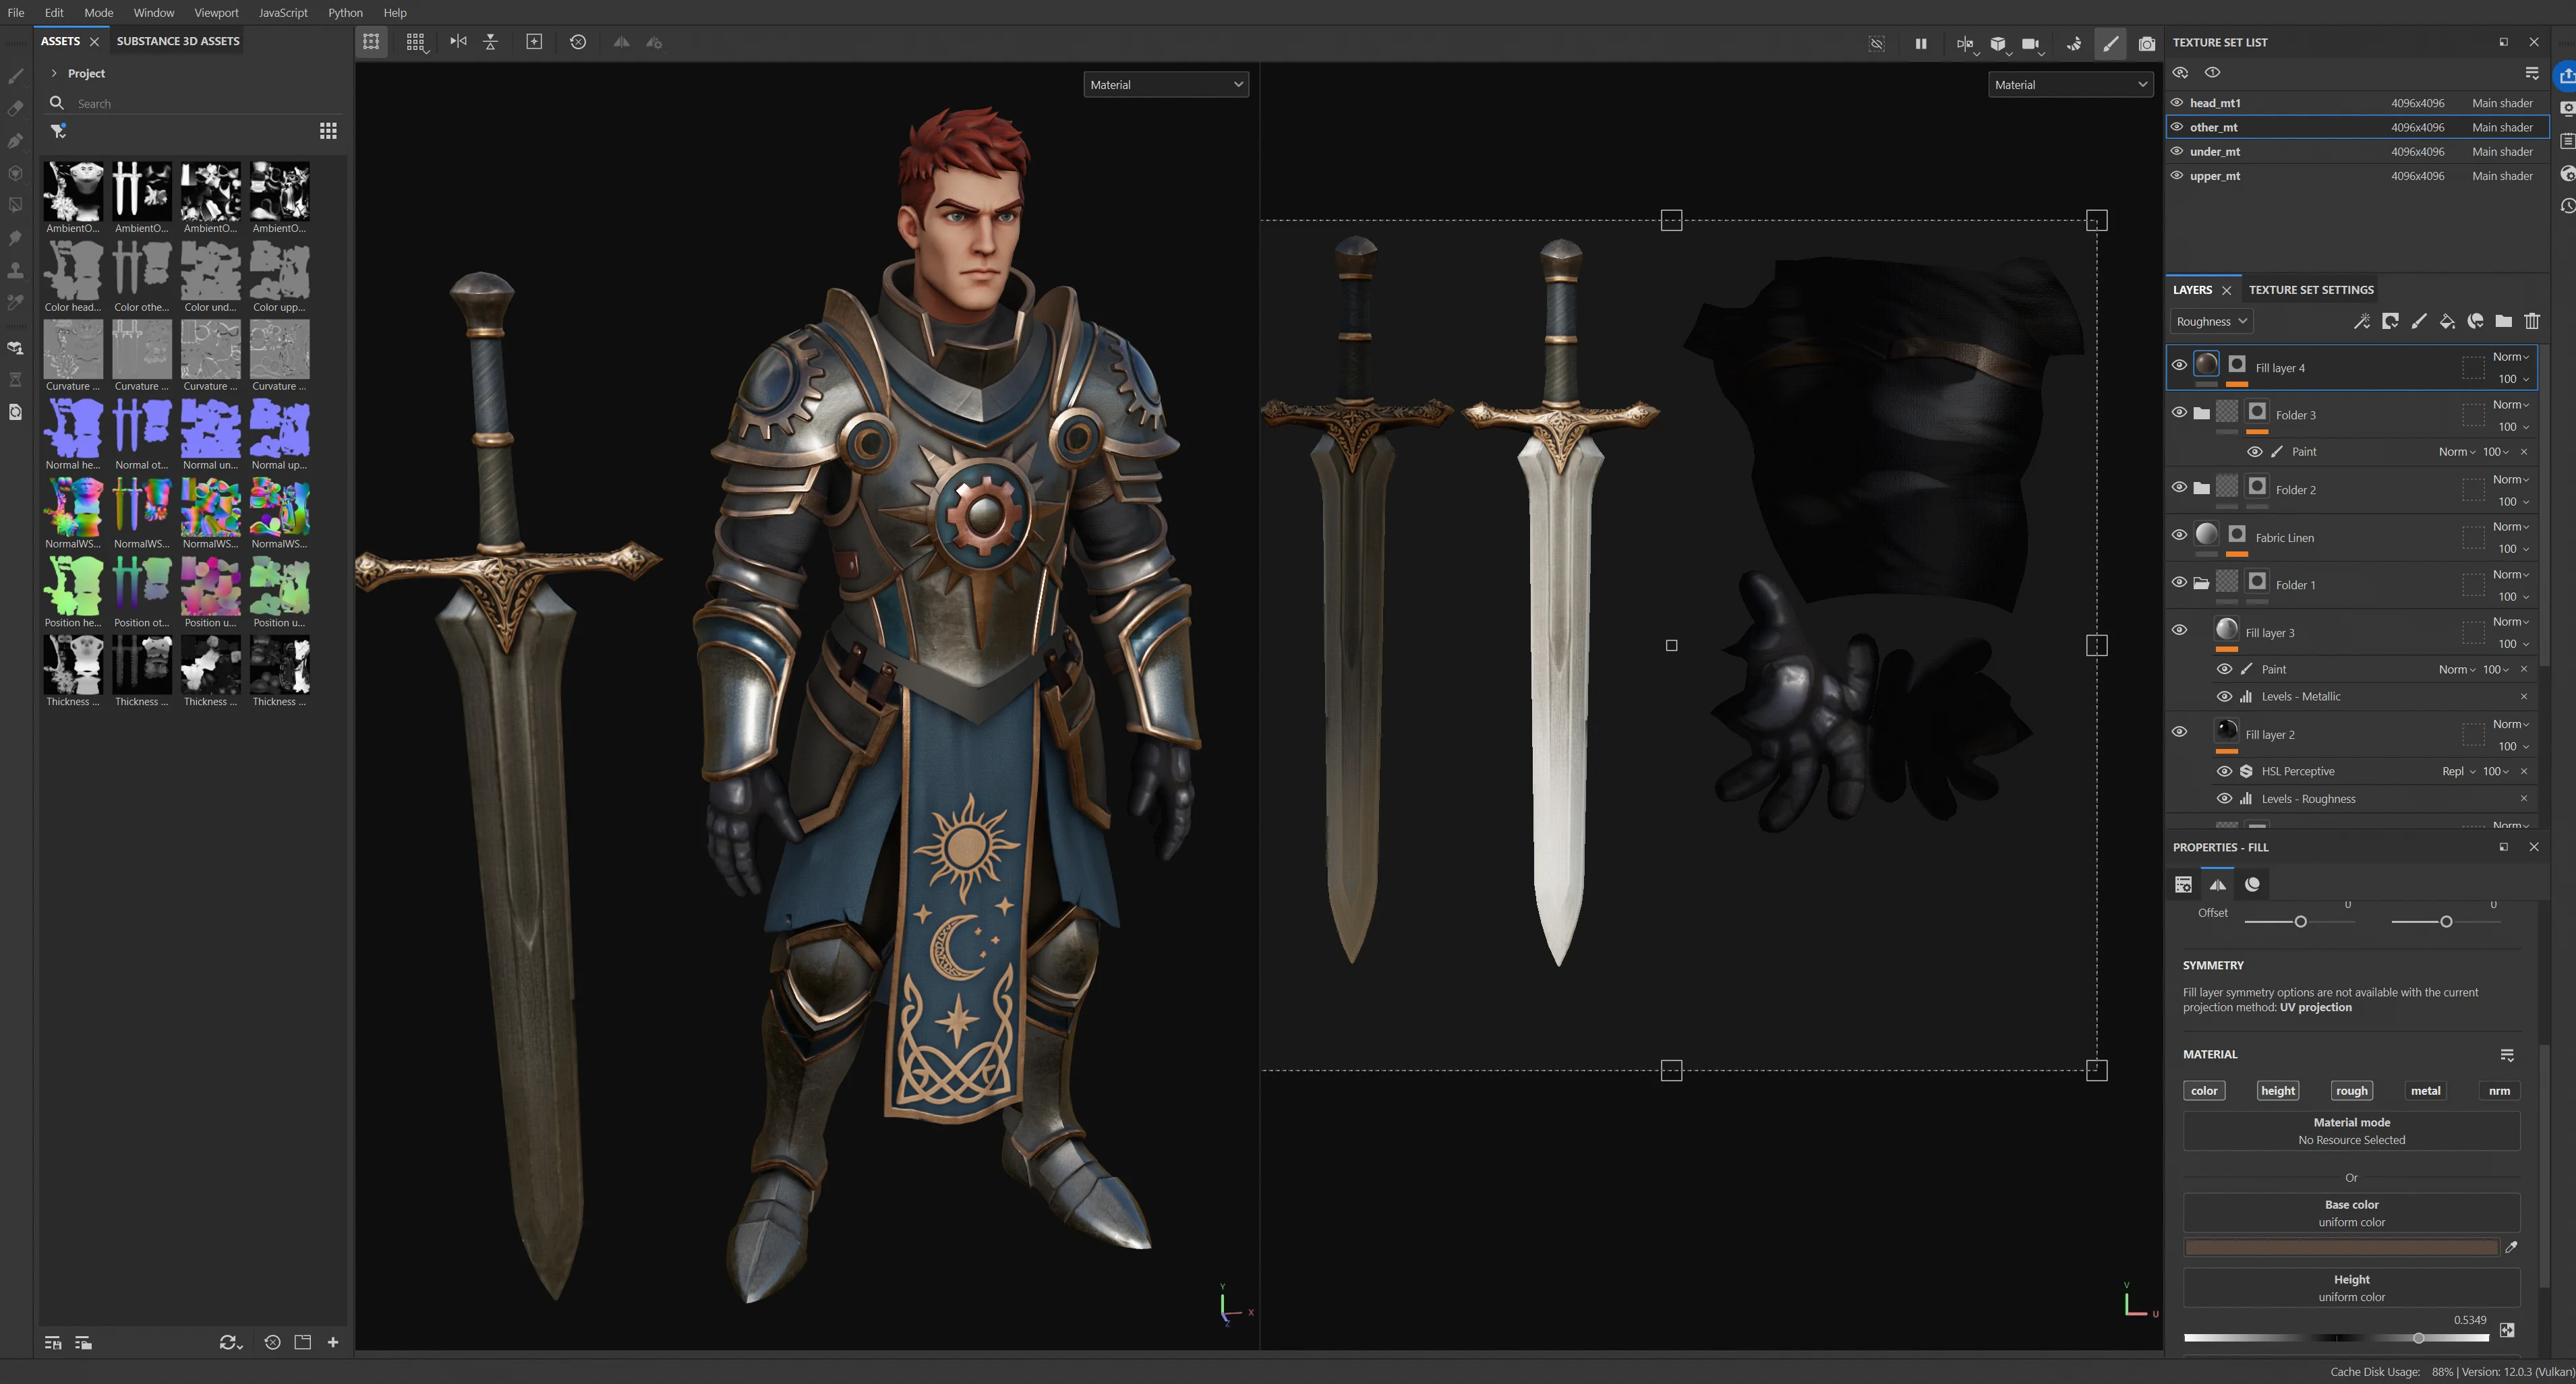
整理好 UV 并完成贴图转移后,即可开始最后的美术精修。本案例使用 Substance Painter,并以 8K 源贴图为基础(该贴图在步骤 6 中生成),此时再将最终分辨率降至 4K 或 2K。
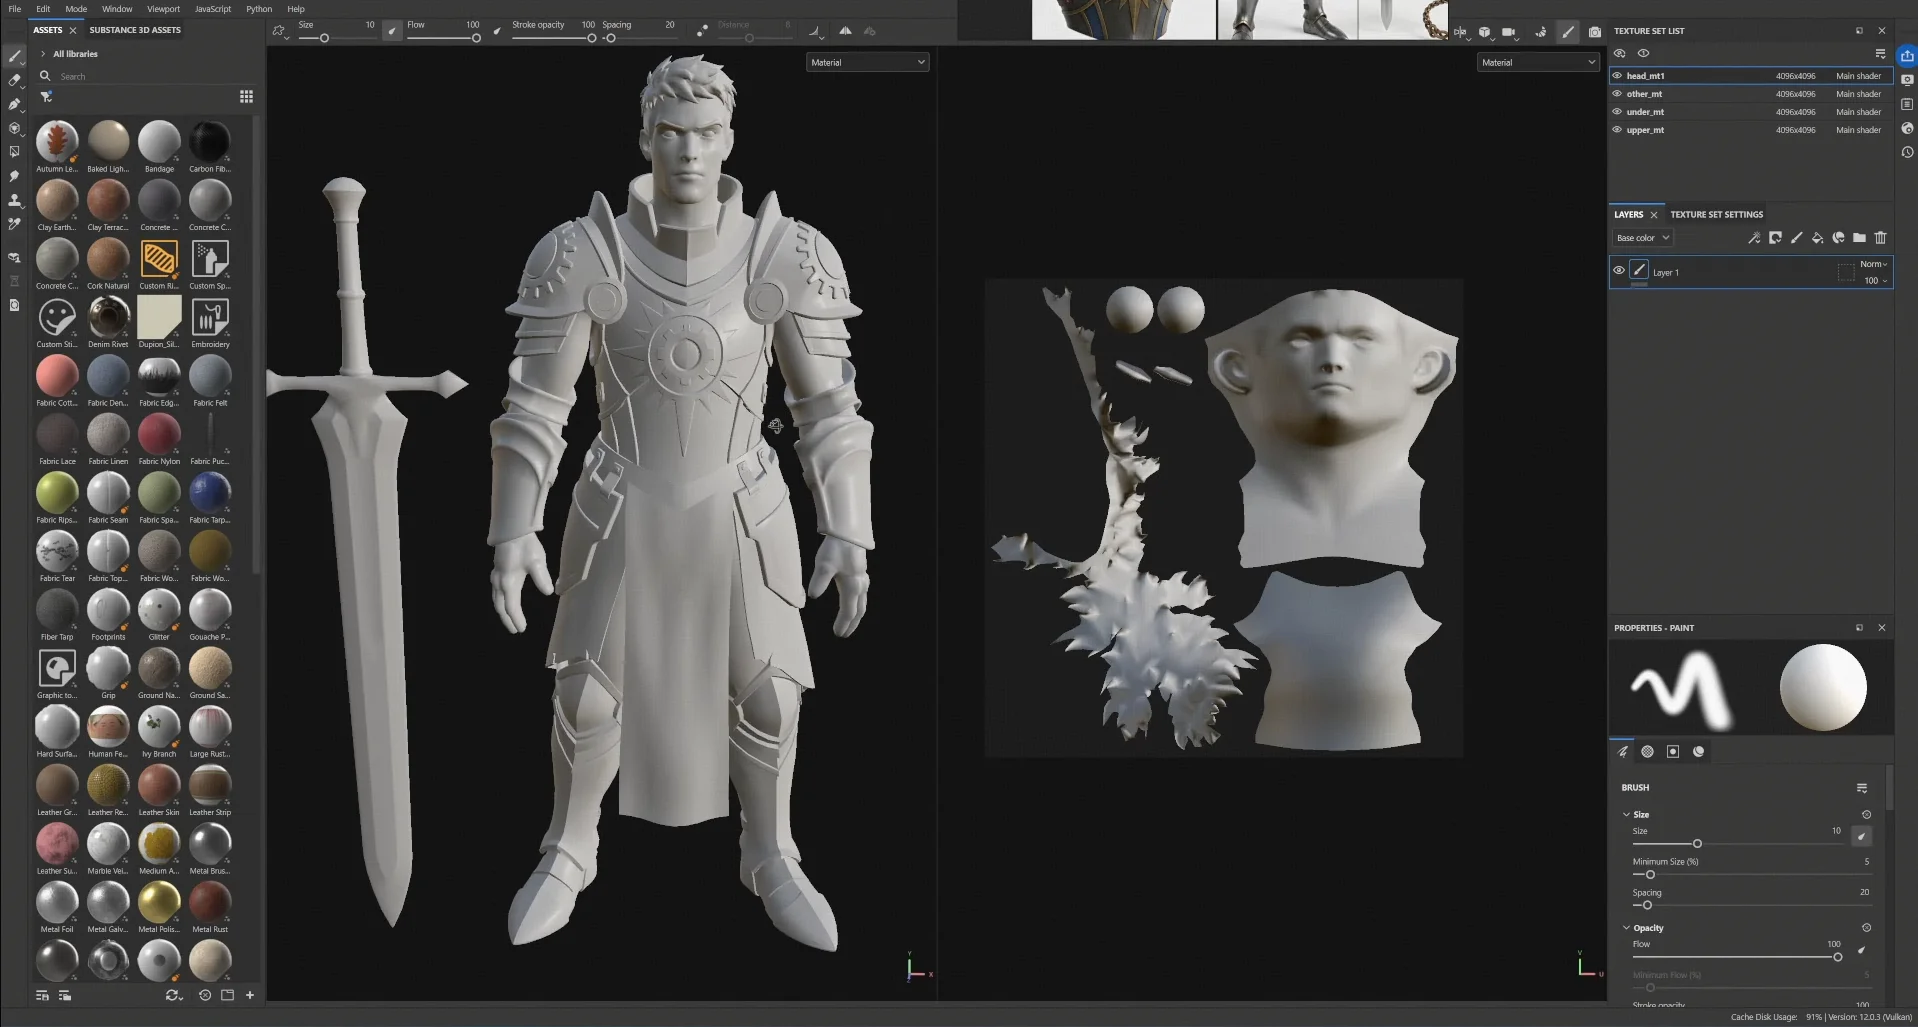
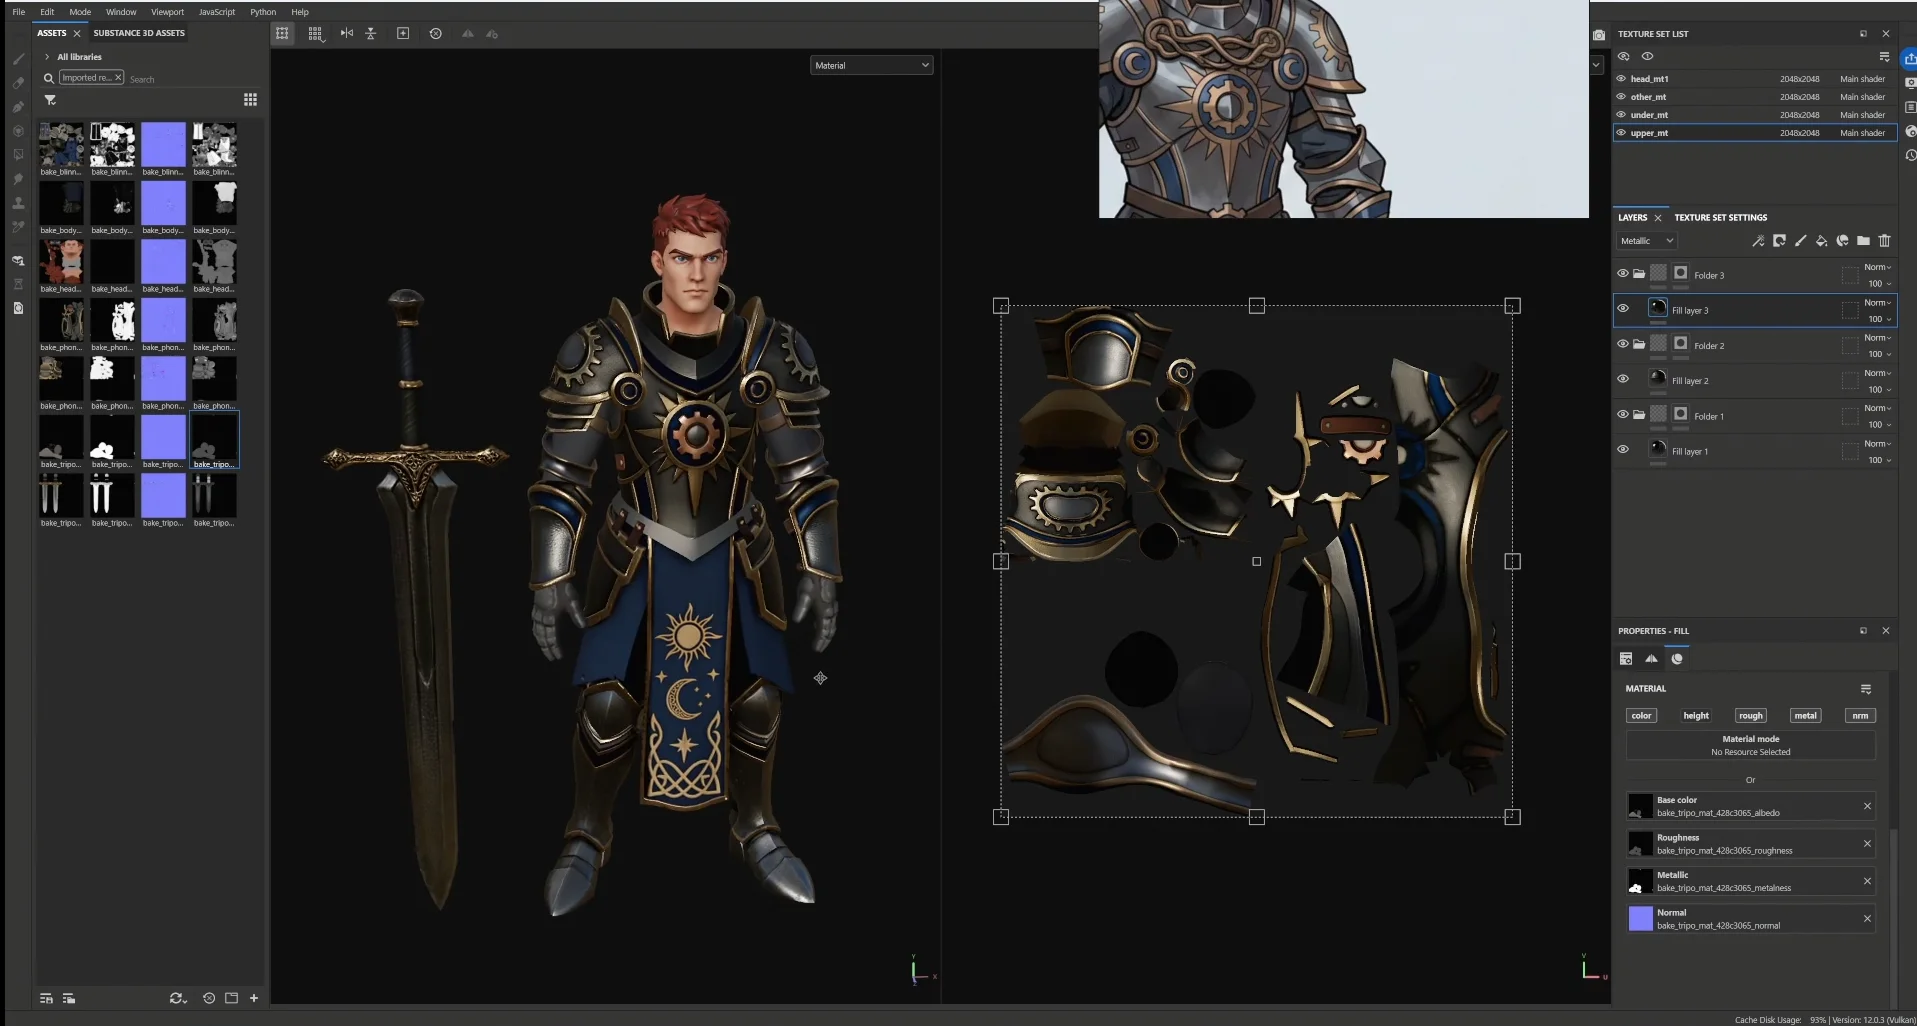
46 a substance painter workspace showing an armored character material presets texture details and refi
47 a substance painter workspace showing the full armored character material library texture details an

最终品质的差距,就在这一阶段由艺术家的能力拉开。前面所有环节的提效,都是为了给这一步留出充足时间。
48 a substance painter workspace showing the final art refinement stage for a textured armored characte

步骤 14 — 绑定与动画

在当前流程中,绑定和动画尚未达到行业制作标准。用于正式项目的角色仍建议采用定制绑定。

不过,干净的拓扑是高质量绑定的前提,而这正是前几个阶段已经交付的成果。

步骤 15 — 引擎集成

将资产导入游戏引擎,并为材质指定正确的贴图集。
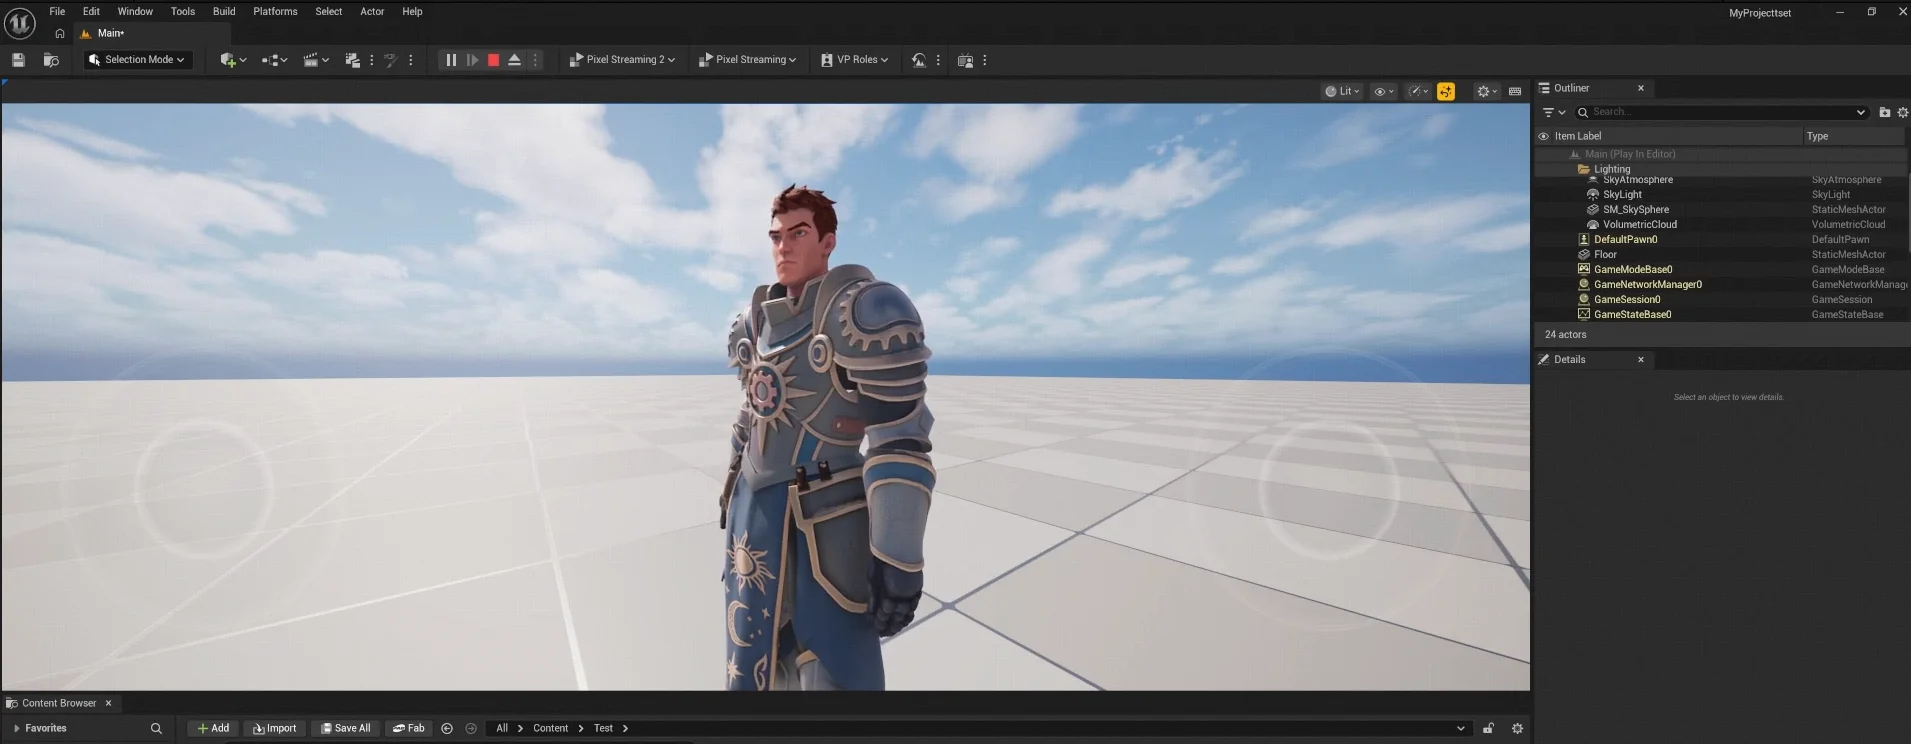
49 an unreal engine viewport showing the imported armored character on a gridded floor with the content

分享文章

用 3D 生成万物

点击下方,加入数百万 3D 创作者的行列。体验超高保真模型生成与一流的 PBR 贴图。