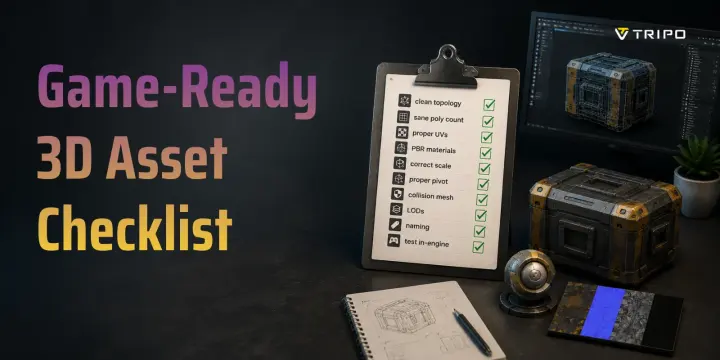
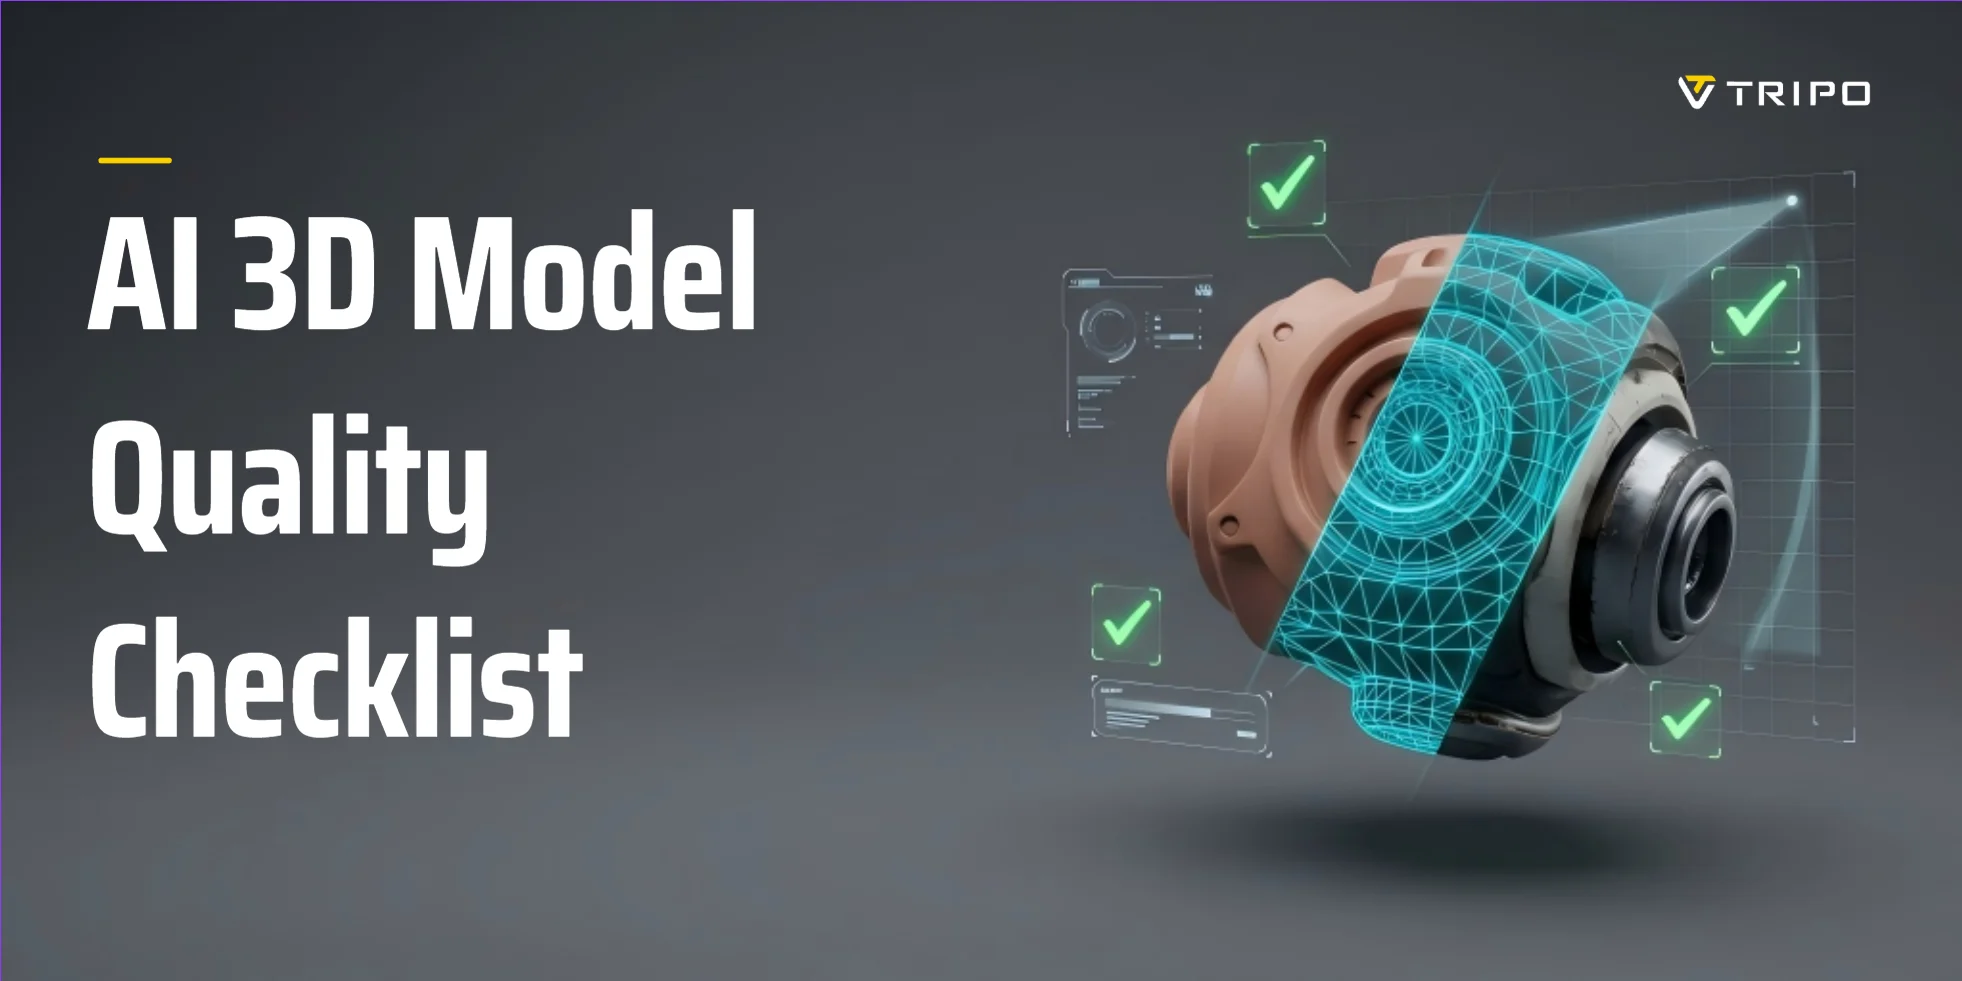
AI 3D Model Quality Checklist: Geometry, Texture, Topology & Export
TL;DR
- A "good" AI 3D model passes five layers: geometry, topology, UVs/textures, poly count, and export—skip one and it breaks downstream.
- Check geometry first: watertight, no floating/duplicate faces, no inverted normals, no non-manifold edges.
- Topology decides whether the mesh animates and deforms—look for clean quad flow and even edge loops, not just a pretty silhouette.
- Match poly count and texture resolution to the target: ~1.5–3K tris for web/AR, 5–20K for game props, up to millions for 3D printing.
- Pick the export format by destination: GLB/USDZ for AR, FBX/GLB for game engines, STL/3MF for printing.
- Generating clean topology at the source (e.g., Tripo Smart Mesh) means fewer checklist items fail later.
AI can generate a 3D model in seconds—but "looks fine in the preview" is not the same as "ready to ship." Before you drop an AI-generated asset into a game engine, an AR scene, or a 3D printer, run it through a quality checklist that covers geometry, topology, UVs and textures, poly count, and export format. This guide gives you that checklist, with concrete pass/fail thresholds for each layer—and shows where AI output still needs a human pass.
What Makes an AI 3D Model "Good"?
There is a pervasive misalignment of definitions across game teams, 3D artists and 3D printing creators: visual similarity, numerical accuracy, and true production quality are three distinct metrics that cannot be conflated. Visual resemblance only describes surface matching, while pipeline-ready quality hinges on one core standard: whether the asset can pass through your full target workflow—import, edit, rig, render, slice and export—without disruptive manual rework or technical failures downstream.
This article builds its entire inspection framework around a phased validation workflow known as the 30/60/90 review cadence, splitting quality checks into three progressive gates: the 30% checkpoint validates fundamental geometric integrity, the 60% checkpoint audits topology and UV layout, and the 90% final checkpoint confirms texture performance, polycount compliance and cross-platform export compatibility.

Quality vs. accuracy
Visual similarity is a cosmetic benchmark; production quality measures end-to-end workflow compatibility. Nearly all AI 3D generators display an 85–95% shape similarity score as a proxy for quality, yet this figure only quantifies how closely the model's outer silhouette matches your reference prompt or image. High surface accuracy does not guarantee a usable asset. AI generation routinely cuts corners on unseen geometry, thin wall structures, micro assembly features and deformable joint regions—flaws invisible in static preview renders. These hidden defects trigger critical pipeline breakdowns: rigging deformation glitches, failed 3D print slicing, AR surface culling blackouts, and engine import errors.
The 30 / 60 / 90 review cadence
The 30/60/90 staged review system delivers cost-saving risk mitigation by catching mesh defects as early as possible, rather than discovering showstopping issues at final export.
- 30% initial review: Full geometric audit to eliminate blocking errors such as non-watertight meshes, floating geometry and flipped normals before investing time in retopology or texturing.
- 60% midpoint review: Deep dive into topology flow and UV unwrapping, the two foundational layers that determine animation performance and texture clarity.
- 90% final review: End-to-end validation of PBR texture quality, polycount performance budgets and target-format export parameters.
Late-stage repairs multiply labor overhead exponentially; this three-phase rhythm standardizes incremental quality gates for all AI-generated assets.
Layer 1 — Geometry Checklist
Geometric integrity forms the foundational quality layer of 3D assets and is the most error-prone part of AI generation. Unlike manually modeled meshes with rigorous, consistent physical logic, AI-fitted geometry frequently produces irregular edge behaviors, hidden gaps and invalid mesh configurations.
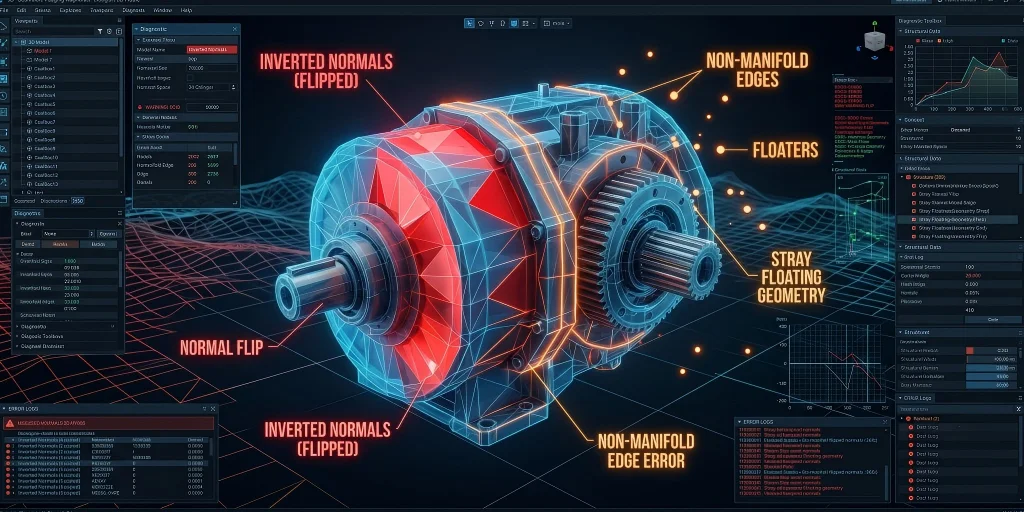
Geometric structure inspection checklist:
- Watertight / no holes: Essential for 3D printing; the mesh must be a continuous, closed volume.
- No floating / stray geometry: Delete any random vertices or floating artifacts generated by the AI's "hallucinations."
- No duplicate / overlapping faces: Z-fighting will cause flickering in game engines.
- No non-manifold edges: An edge shared by three or more faces breaks physical reality and computational logic.
- No inverted / flipped normals: Faces pointing "inward" will render invisible (black) in AR and game engines.
- Scale & units correct: Ensure the model is sized in actual meters or millimeters, not arbitrary engine units.
How to spot inverted normals
Inverted normals are one of the most prevalent hidden defects in AI-generated 3D models and cannot be identified through conventional viewport preview.
Use face orientation display mode in Blender or Maya for quick detection: blue faces signal correct outward normals, while bright red faces indicate flipped normals. Qualified assets feature no large red patches or scattered inverted micro-faces. Fix isolated errors with the Flip Normals tool, and resolve widespread normal disorder via unified orientation reset commands.
How to find non-manifold edges
Non-manifold geometry is the leading cause of AI model rework for animation and 3D printing pipelines.
Quickly locate invalid edges using Blender's native Select Non-Manifold tool or the 3D Print Toolbox add-on. Targeted repairs vary by defect type: delete redundant overlapping faces for simple structural errors, and rebuild disordered AI-generated mesh connections to enforce standard manifold edge rules for long-term pipeline compatibility.
Layer 2 — Topology Checklist
Topology refers to how vertices, edges, and faces are wired together. For static background props, messy topology might be acceptable. But if your model needs to move, bend, or deform, topology is everything.
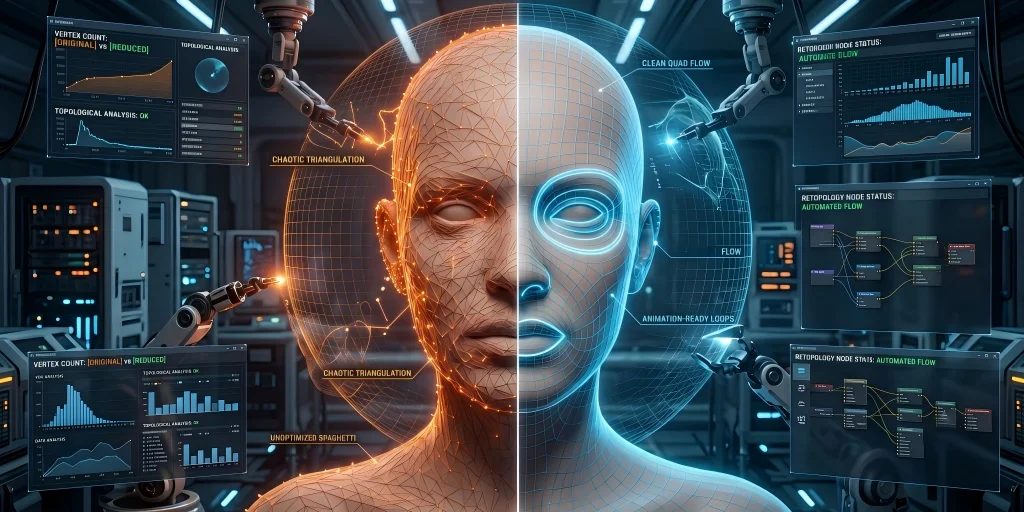
- Clean quad-dominant flow: Triangles and N-gons (faces with 5+ sides) should be minimized to avoid shading artifacts.
- Even, predictable edge loops: Geometry should flow logically around shapes, not scatter randomly.
- Edge loops follow deformation areas: Joints (knees, elbows) and facial features (mouth, eyes) need concentric loops to bend without tearing.
- No tangled / spaghetti topology: AI models often output dense, swirling vertices that are impossible to edit.
- Poles controlled: A pole (a vertex where 5 or more edges meet) should be moved away from areas that deform.
Why topology matters more for animation
Topology standards vary significantly by use case. Static props, scene decor and 3D printing models tolerate minor topological imperfections with no visible quality loss. In contrast, any asset requiring skeleton rigging and dynamic deformation demands a well-structured, loop-aligned topology. Chaotic edge flow and misplaced poles cause irreversible deformation artifacts, and fixing these late-stage issues costs far more than upfront optimization. All animation-ready models must comply with strict topology specifications.
Manual vs AI auto-retopology
Teams can optimize AI assets efficiently by matching retopology solutions to project requirements. Automated retopology delivers fully production-ready results for conventional game props, scene assets and standard AR models with minimal time cost. Tripo Smart Mesh generates clean, game-grade topology in seconds with adjustable polycount, effectively resolving the messy native topology of raw AI outputs. For high-precision characters, complex mechanical assemblies and high-deformation assets, manual touch-ups and localized mesh reconstruction are still required to meet professional animation and industrial standards.
Layer 3 — UVs & Texture Checklist
UV and texture quality dictate an asset's final visual fidelity and lighting consistency across different runtime environments. Unlike manual modeling workflows, AI automatic baking pipelines frequently produce overlooked defects, including distorted UVs, wasted texture space and baked-in static lighting errors that compromise cross-scene uniformity.
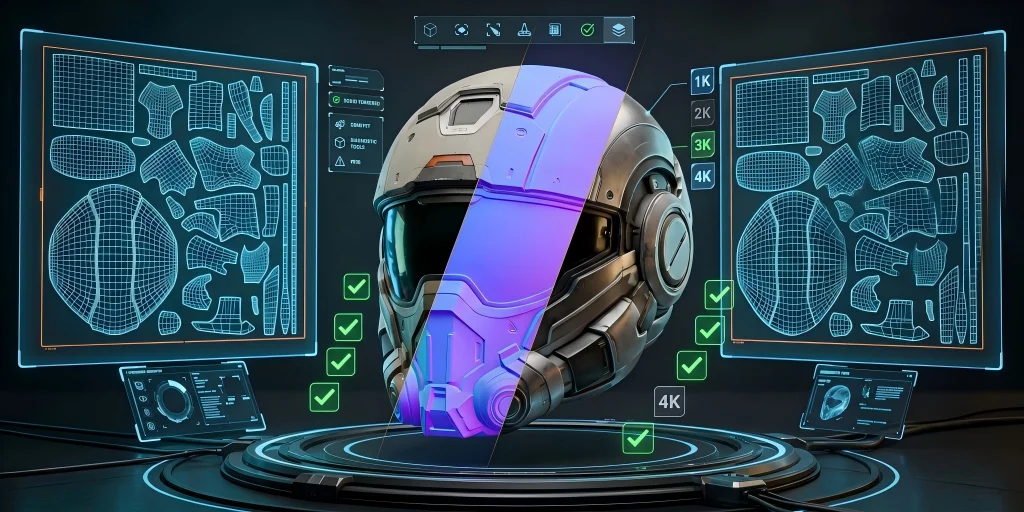
- UV islands no overlap & no severe stretching: Separated, distortion-minimized UV islands to prevent texture warping.
- High UV utilization, no large waste: Compact layout maximizing canvas space for sharp, efficient texturing.
- Seams hidden in inconspicuous positions: Splits placed on rear or bottom non-visible surfaces to eliminate obvious stitching lines.
- Texture resolution matches the usage scenario: Resolution strictly follows platform thresholds to balance detail and performance.
- Complete PBR maps: Full Base Color, Normal, Roughness and Metallic sets for physically accurate rendering.
- No baked-in artificial light and shadow: No fixed environment shadows or highlight bias, ensuring adaptive lighting across all engines and scenes.
PBR texture resolution targets
Standardized texture resolution thresholds balance visual quality and asset performance to avoid oversized file bloat or blurry final renders. Web and mobile AR scenarios adopt 1K–2K textures for optimal loading speed and interactive fluency. Conventional game assets use 2K–4K resolutions to guarantee in-game visual fidelity. Film-level rendering and high-precision 3D printing require 4K+ ultra-high resolutions to preserve intricate micro-details.
Texture baking artifacts to watch for
AI auto-baking produces unique persistent artifacts that evade basic resolution checks, including misplaced permanent highlights, uneven shadow patches and misaligned UV seams. These defects lead to inconsistent visuals under different lighting setups. Always validate textures across multiple light angles, and rebake textures after UV layout optimization to ensure uniform, artifact-free surface rendering.
Layer 4 — Poly Count & Performance Checklist
Polygon count is the core indicator of runtime performance across web, mobile and game platforms. Excessive geometry causes slow loading and frame drops, while insufficient polygons result in lost critical details. This section defines clear scenario-based polycount thresholds and optimization decision rules to standardize AI asset performance auditing.

- Poly count matches the target platform: Triangle count stays within defined platform budgets.
- Complete LOD chain support: Multi-level LOD files for distant-view performance optimization in games and AR scenes.
- Controlled draw calls and material quantity: Minimal unique materials to avoid frame drops from excessive draw calls.
- Meet mobile/web AR performance budget: Lightweight resource footprint for smooth real-time interaction.
Poly-count targets by use case
Hierarchical polygon count ranges are formulated to satisfy full-platform adaptive deployment. Lightweight Web AR models adopt 1.5K–3K triangles to ensure fast web loading and fluent real-time interaction. Standard game props are limited to 5K–20K triangles, while playable character assets adopt 20K–60K triangles to balance detailed geometry and runtime rendering efficiency. Differing from real-time interactive assets, the High-Detail Model for offline rendering and 3D printing allows a maximum polygon count of millions. Such high-precision models prioritize ultra-fine geometric detail restoration without being constrained by real-time rendering performance, delivering high-fidelity visual and physical reproduction effects.
When to decimate vs. retopologize
Use direct decimation for clean-topology models with redundant geometry to reduce polycount quickly without detail loss. For raw AI meshes with chaotic, disordered topology, simple decimation leads to structural distortion and detail damage. The optimal workflow is to retopologize first to rebuild uniform, clean mesh structure, then decimate to the target polycount for stable, high-performance asset output.
Layer 5 — Export & Format Checklist
Correct export configurations serve as the final quality gate for cross-platform asset deployment. Mismatched file formats, missing textures and incorrect transform settings cause silent, hard-to-detect failures in AR, game engine and 3D printing pipelines.
- Select matching export format: Format aligned with end-platform requirements.
- Complete texture export and embedding: Full texture packaging with no missing or unlinked maps.
- Correct unit, coordinate axis and scaling: Consistent transforms matching project standards.
- Pass target engine/viewer actual measurement: Verified functional and visual correctness in the target runtime environment.
Which format for which destination

GLB delivers cross-platform compatibility for web, AR and general engine use with embedded textures for convenient deployment. USDZ optimizes rendering for Apple-exclusive iOS AR experiences. USD supports professional VFX production and multi-person collaborative workflows. FBX is the standard format for game rigging and animation. OBJ fits universal preview and basic 3D printing. STL applies to monochrome geometry-only printing, while 3MF supports color printing with complete structural data. Tripo supports all six mainstream formats—GLB, USD, FBX, OBJ, STL, and 3MF—covering the full creation, rendering and printing pipeline.
Note: Exporting v3.0/3.1 models requires an active paid subscription. v2.5 models are available on the free plan.
glTF/GLB vs USDZ for AR
Built on the open glTF standard, GLB offers full cross-platform compatibility for Android, web and Windows AR deployments. USDZ is an Apple-native format with optimized iOS AR rendering but limited cross-device support. Choose GLB for multi-terminal public releases, and USDZ for exclusive Apple AR scenario delivery.
The Copy-Paste AI 3D Model Quality Checklist
This unified, ready-to-use checklist integrates all five validation layers, featuring standardized pass criteria, dedicated verification tools and clear export-blocking risk judgment, enabling fast, batch-based AI 3D asset auditing.
| Inspection Layer | Check Item |
|---|---|
| Geometry | Watertight & No holes |
| No floating geometry | |
| No overlapping faces | |
| No non-manifold edges | |
| No inverted normals | |
| Correct scale & unit | |
| Topology | Quad-dominant mesh |
| Uniform edge loops | |
| Deformation-friendly loops | |
| No spaghetti topology | |
| Controllable poles | |
| UV & Texture | No UV overlap & stretch |
| High UV utilization | |
| Hidden UV seams | |
| Matched texture resolution | |
| Complete PBR maps | |
| No baking artifacts | |
| Poly Count & Performance | Qualified poly count |
| Complete LOD chain |
Automating the Checklist (Validation Tools)
Manual full inspection is inefficient and easy to miss items. Combining professional automation verification tools can realize batch and fast quality inspection of AI models, suitable for mass asset production and acceptance.
- Blender 3D Print Toolbox: A built-in free add-on that provides a one-click "Check All" button to instantly identify non-manifold edges, inverted normals, intersecting faces, and wall thickness issues.
- glTF Validator (Khronos): A free online tool where you can drag and drop your
.glbor.gltffiles. It will immediately flag missing textures, broken hierarchies, or formatting errors. - Engine Import Logs (Unity / Unreal): Both major engines will throw immediate warnings upon import if a model lacks UVs, has broken normals, or exceeds material slot counts.
- Python / three.js Scripting: For high-volume production, you can write Python scripts (via Blender's API) to batch-check poly counts and automatically recalculate normals across hundreds of files.
AI 3D Models vs. Photogrammetry & Manual Modeling
Different modeling methods have their own applicable scenarios and quality boundaries. Clarifying the differences can help creators reasonably select production schemes and judge the acceptance standard tolerance of AI models.
| Feature | AI 3D Generation | Photogrammetry (3D Scanning) | Manual Modeling (CAD/ZBrush) |
|---|---|---|---|
| Topology Cleanliness | Poor to Excellent (Tool dependent) | Very Poor (Triangulated mess) | Perfect (Human controlled) |
| Texture Quality | Good (Sometimes baked lighting) | Photorealistic | Stylized or Photorealistic |
| Generation Time | Seconds to Minutes | Hours (Processing photos) | Days to Weeks |
| Manual Rework Required | Low to Moderate | High (Always needs retopo/cleanup) | None (Built to spec) |
| Best Used For | Rapid prototyping, props, concepting | Real-world objects, environments | Hero characters, exact engineering |
In summary, AI is unparalleled for rapid draft generation, background props, and iterative concepting. However, for precision engineering or highly specific hero characters, it is best used as a starting point rather than a final deliverable.
When AI Output Isn't Good Enough (Limits)
Even with strict QA, AI has technical limits. In high-precision and high-difficulty scenarios, AI models can only be used as the initial foundation, and manual intervention is essential.
- Characters and Complex Joints: AI struggles to create perfect, anatomically correct edge loops around shoulders, jaws, and knuckles. You will likely need to perform manual retopology for hero characters.
- Precision Assemblies: If you are 3D printing parts that require strict tolerances, threading, or mechanical snap-fits, AI cannot handle mathematical constraints. Return to parametric CAD software.
- Strict UV Layouts: If your studio pipeline requires specific texture atlases or perfectly stacked UVs, AI auto-unwrapping won't suffice.
In these scenarios, treat AI output as a highly detailed 3D concept or a base mesh. Use it to skip the initial blocking phase, but reserve time for manual retopology and UV layout.
Frequently Asked Questions
Can AI generate high-quality 3D models?
AI can generate high-quality, topologically clean 3D models for common scenarios such as game props and AR displays. However, for high-precision industrial parts or complex animated characters, current methods still rely on manual optimization and repair.
What is the 30 / 60 / 90 model review?
This is a phased model acceptance mechanism aimed at detecting errors early to reduce rework costs. It is divided into a 30% initial review of geometric integrity, a 60% mid-review of topology and UV quality, and a 90% final review of performance calibration and export.
How do I evaluate an AI-generated 3D model?
The assessment should abandon the sole visual criterion and adopt a "five-dimensional comprehensive examination" that includes geometric shapes, topology, UV textures, face count, and export compatibility. A qualified model must simultaneously meet the dual standards of visual fidelity and workflow usability.
How do I check for inverted normals or non-manifold geometry?
In Blender, enable the "Face Orientation" display, use the red and blue colors to distinguish the flipped normals, and use the tools for repair. For non-manifold geometries, you can utilize the non-manifold selection function or the 3D Print Toolbox plugin to locate the abnormal edges and clean up the redundant overlapping faces.
What poly count is acceptable for web AR or mobile?
To ensure quick loading and smooth operation, the number of triangular faces of a single lightweight model should be controlled within the range of 1.5K to 3K. For combined models of complex scenes, the total number of faces should be kept within 10,000 and optimized with LOD levels to reduce the operating pressure.
Which export format should I use for game engines vs. 3D printing?
Game engines and animations usually prefer FBX (for easy bone binding) or GLB (with wide applicability). 3D printing often uses STL (in single color) or 3MF (supporting color), while Web AR mostly adopts GLB or USDZ (exclusive to iOS devices) formats.
Is AI 3D quality good enough for 3D printing?
The AI model is fully capable of handling regular creative and decorative printing tasks. Once the watertight structure and wall thickness are properly repaired, slicing can be done directly. However, for high-precision industrial parts with strict tolerance requirements, manual calibration is still necessary to eliminate the generated errors.
Conclusion
Run every AI-generated asset through these five layers—geometry, topology, UVs, poly count, export—and you'll catch the problems before they cost you downstream. Better yet, start from clean, game-ready topology so fewer checks ever fail. With standardized phased review and complete checklist verification, creators can efficiently screen high-quality AI 3D models, reduce repeated rework, and maximize the efficiency advantages of AI generation in game development, AR interaction and 3D printing workflows. You can use Tripo Studio to obtain high-quality original models with clean topology and multi-format export capability at the source, realizing one-click compliance of model quality.