工作室流程案例:一天內從概念設計到遊戲引擎
game industry character workflow

1. 專案概覽

專案概覽詳情
專案主題從概念設計到 Unreal Engine 的完整遊戲角色製作流程
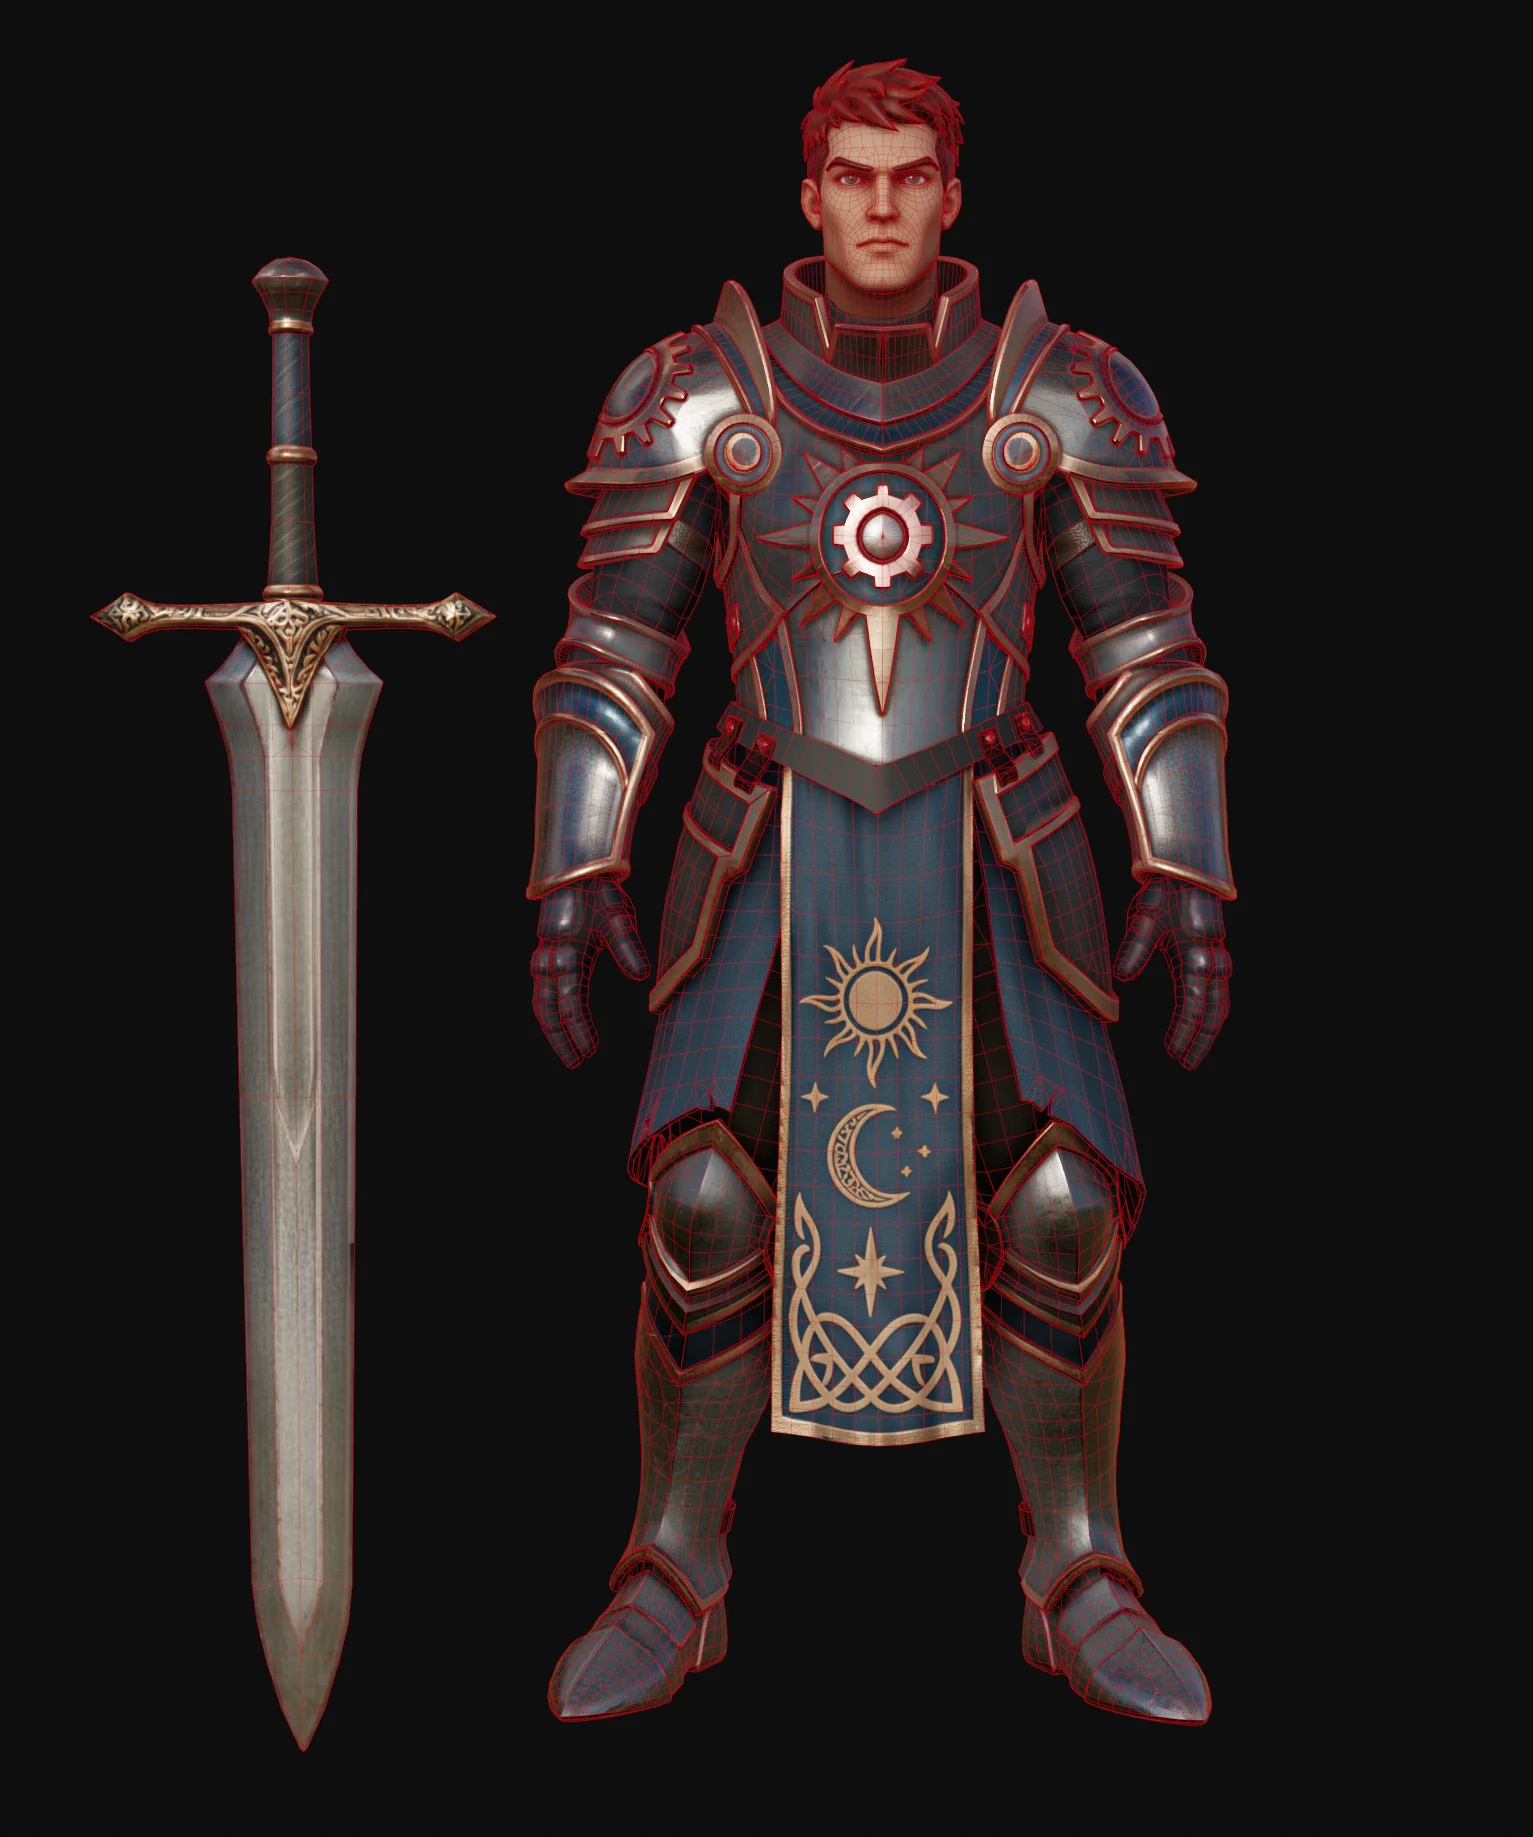
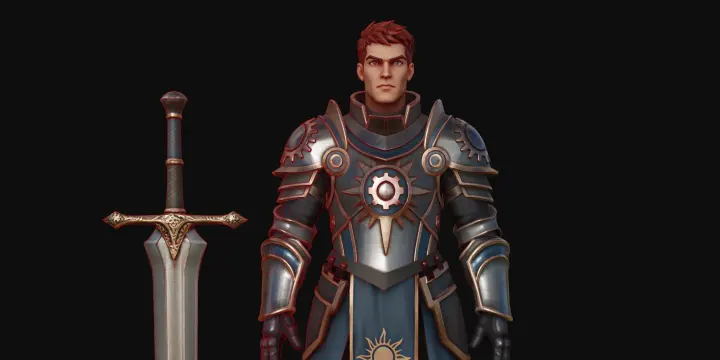
展示資產風格化騎士角色、模組化盔甲套裝
總製作週期1 個工作日,由一名藝術家完成
傳統流程耗時數天至數週,需要多名專業人員並行協作
最終面數預算總三角面數低於 30K,採用四邊面拓撲
使用的 Tripo 模組Image Generation(Asset Extraction、Head Extraction、3D Enhance)· Smart Mesh P2.0(Quad)· Texture Generation(4K / 8K)· Texture Edit · PBR Processing · DCC Bridge
DCC 軟體組合Maya(組裝、UV)· Marmoset(烘焙)· Substance Painter(精修)· Unreal Engine(整合)
核心價值縮短從概念設計到完成貼圖資產的製作週期,讓資深藝術家把時間投入美術精修,而非重複搭建基礎體塊和製作基礎貼圖
點數消耗600+

定位說明:Tripo 不會取代角色藝術家。它接手基礎網格、規範佈線和首輪貼圖等重複性的中間環節,把寶貴時間還給真正影響作品品質的創作工作。
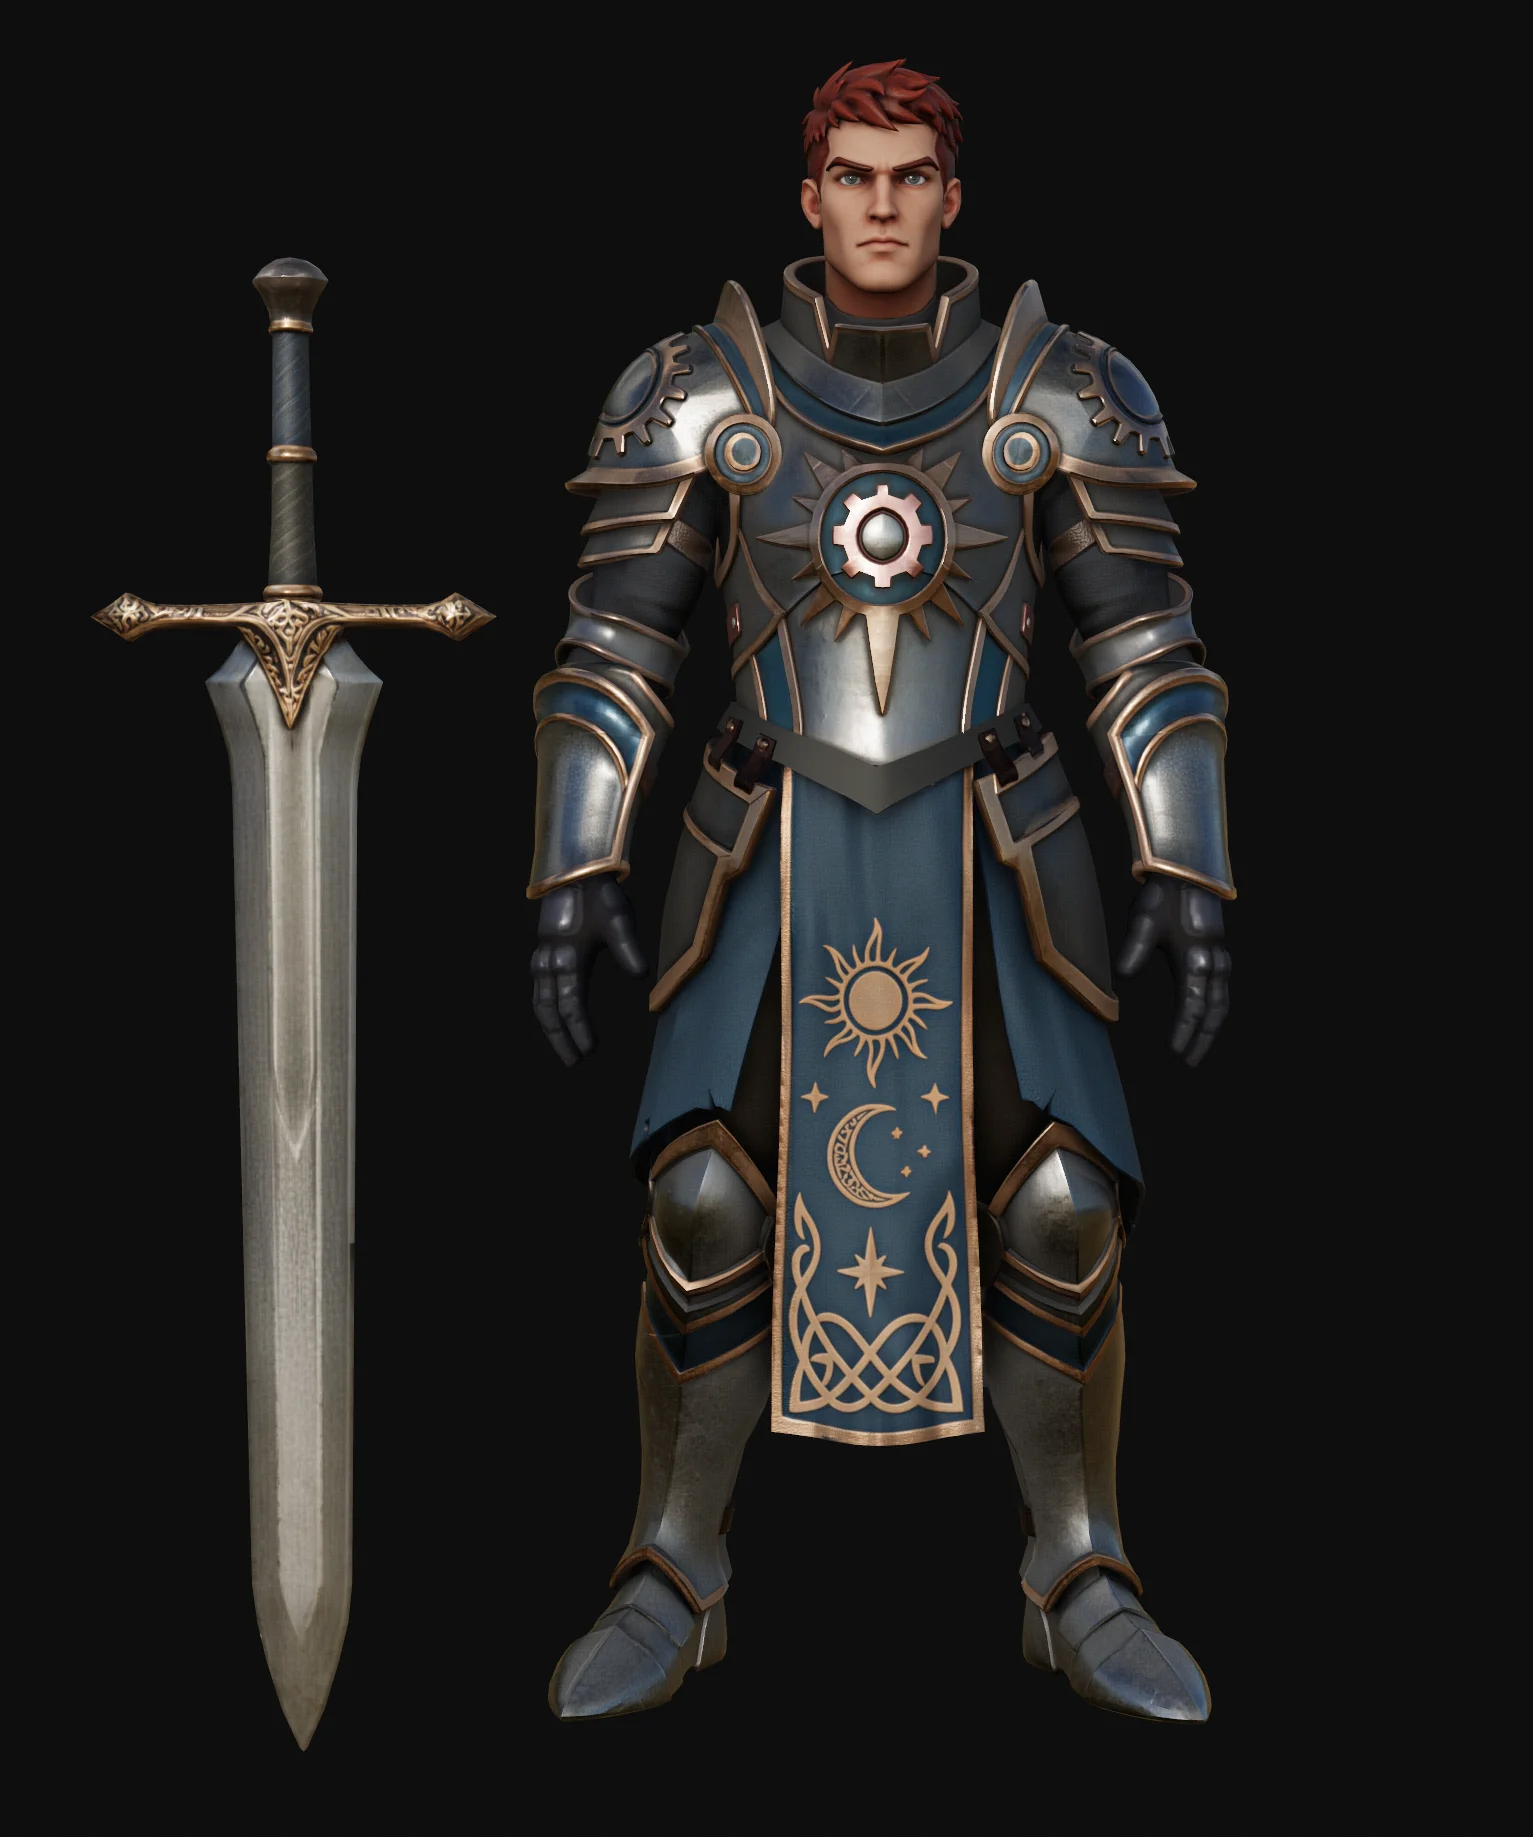
01 a stylized armored knight character with blue and silver armor celestial motifs a gear like chest em
02 a full body view of the armored knight and sword showing the blue armor red and gold details and coo

2. 挑戰

傳統角色製作流程漫長且環環相扣,幾乎每個環節都可能需要專門人員參與。
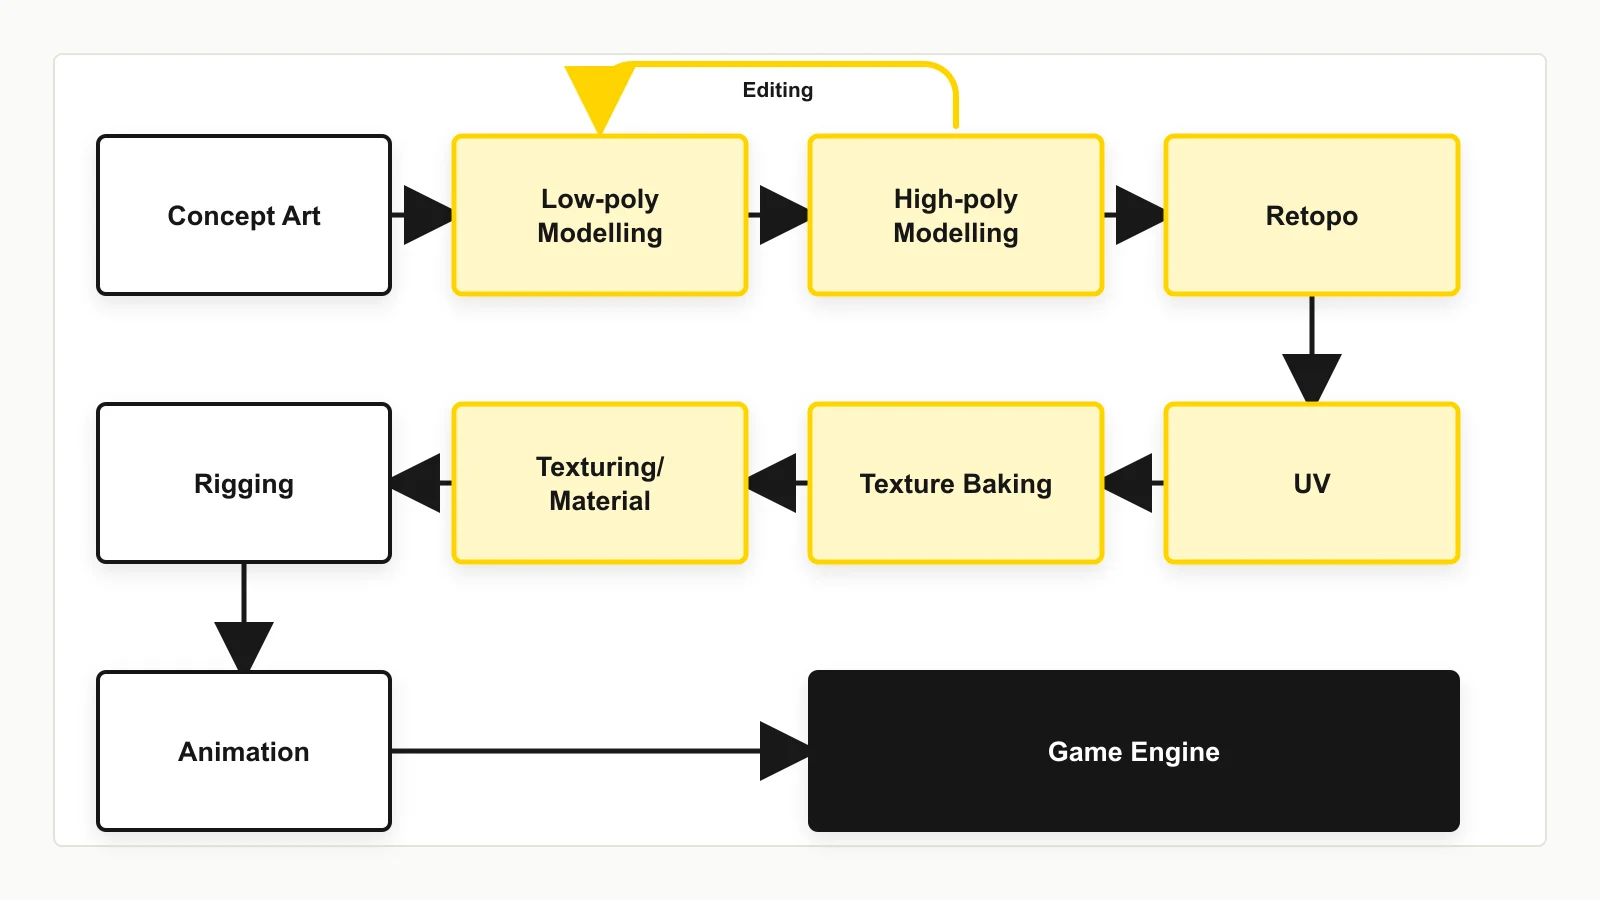
Game character production workflow

概念設計 → 基礎體塊搭建 → 高模雕刻 → 拓撲重建 → UV →

烘焙 → 貼圖製作 → 材質設定 → 綁定 → 引擎整合

這種流程結構會帶來三個問題:

大量前期成本耗在創意含量最低的工作上。 基礎形體雕刻和拓撲重建佔據了過多製作時間,卻不是真正體現美術價值的環節;它們只是後續工作的必要前提。

前後依賴限制了迭代空間。 貼圖必須等 UV,UV 又必須等拓撲重建;到了後期,只要美術方向對輪廓或材質提出一處修改,就可能推翻後續數天的工作。久而久之,團隊會傾向於迴避改動,而不是大膽探索。

擴充人力成了唯一的增產手段。 按傳統方式壓縮週期,就要增加概念設計、高模和貼圖等職能的人手。這不僅提高溝通成本,也讓小團隊很難在資產產量上與大團隊競爭。

本案例要回答的是:對於已經掌握完整製作流程的專業藝術家,AI 3D 生成工具究竟能在哪些環節真正節省時間、創造價值?
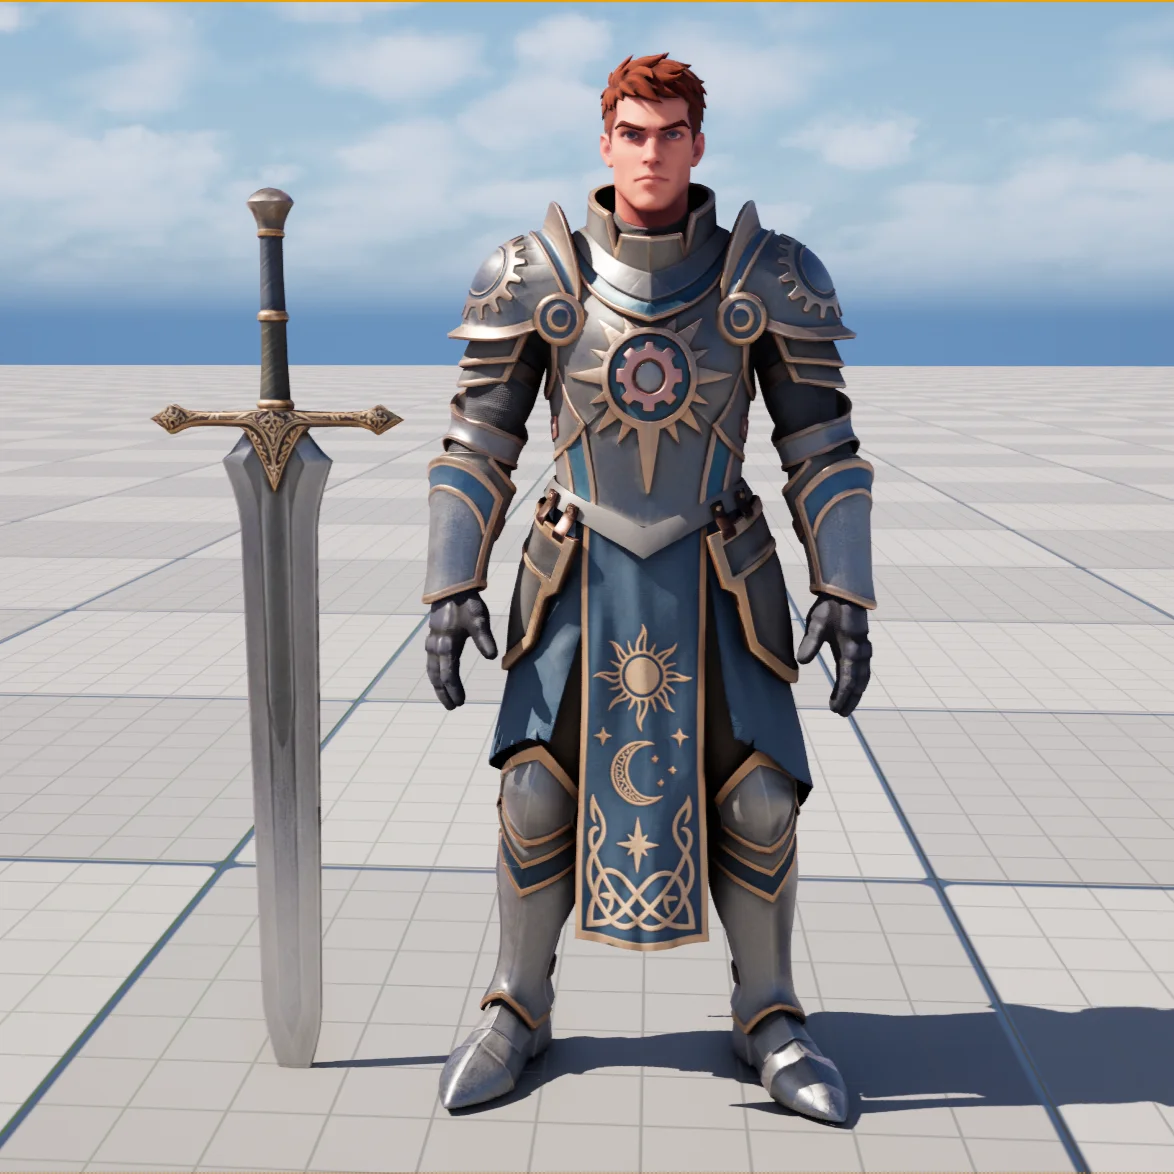
03 a silver armored male character with blue accents holding a sword on a gridded ground plane the imag

3. 技術方案

3.1 調整後的製作流程

Tripo 將基礎體塊搭建、高模製作、拓撲重建和基礎貼圖合併到一次生成流程中,讓藝術家把精力集中在流程兩端:前期的美術方向把控,以及後期的精修與技術收尾。
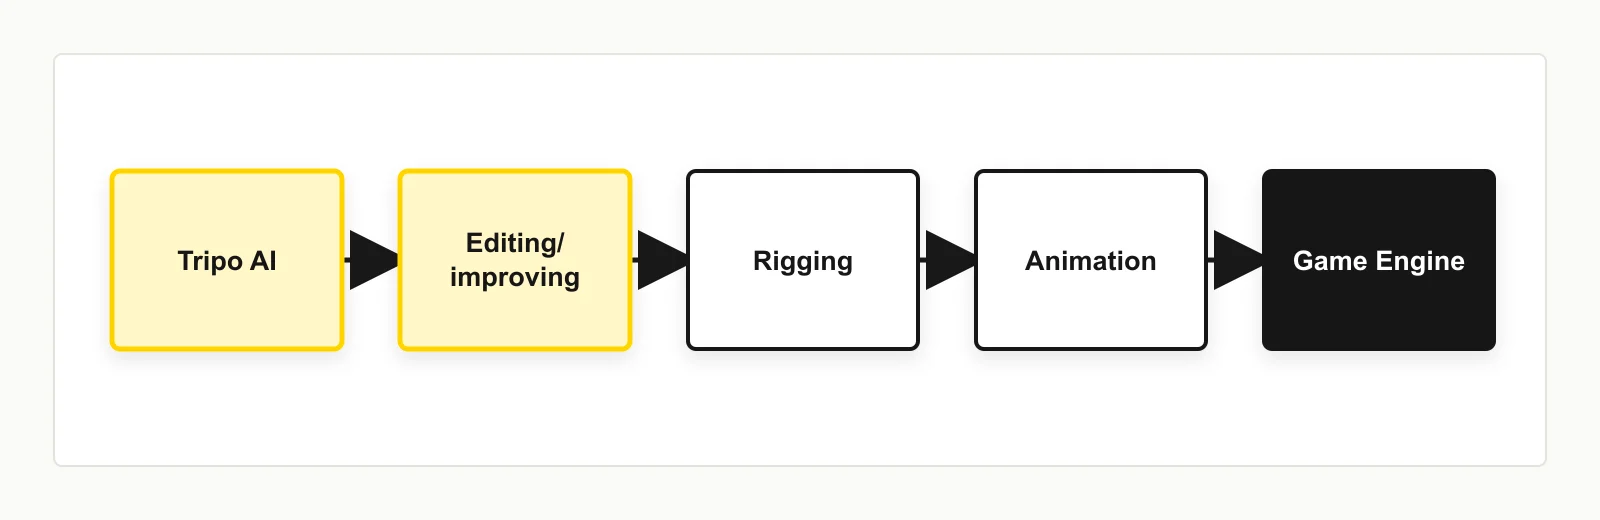
Revised character production pipeline

3.2 流程背後的設計原則

優先分部件生成,而非整模一次生成。 從單張圖生成單個網格速度快,用於道具已經足夠。但角色通常包含不同材質區域,各部位的細節要求也不相同。生成前先拆分部件,通常能顯著提升效果,因為每個部件都可以單獨分配面數、貼圖和迭代次數。

參考圖品質決定輸出品質。 生成的網格和貼圖會繼承參考圖中的幾何與材質資訊。因此,花時間最佳化參考圖,確保輪廓清晰、細節明確,並提供接近 PBR 的材質特徵,是整個流程中回報最高的一步。

四邊面拓撲是後續製作的交接標準。 對藝術家而言,三角面模型很難繼續高效編輯、進行對稱處理或重新展開 UV。只有具備業界標準佈線的四邊面模型,才能順利從 AI 流程進入 DCC,並為階段 C 的所有工作打下基礎。

階段 A · 概念與參考

步驟 1 — 準備概念設計圖

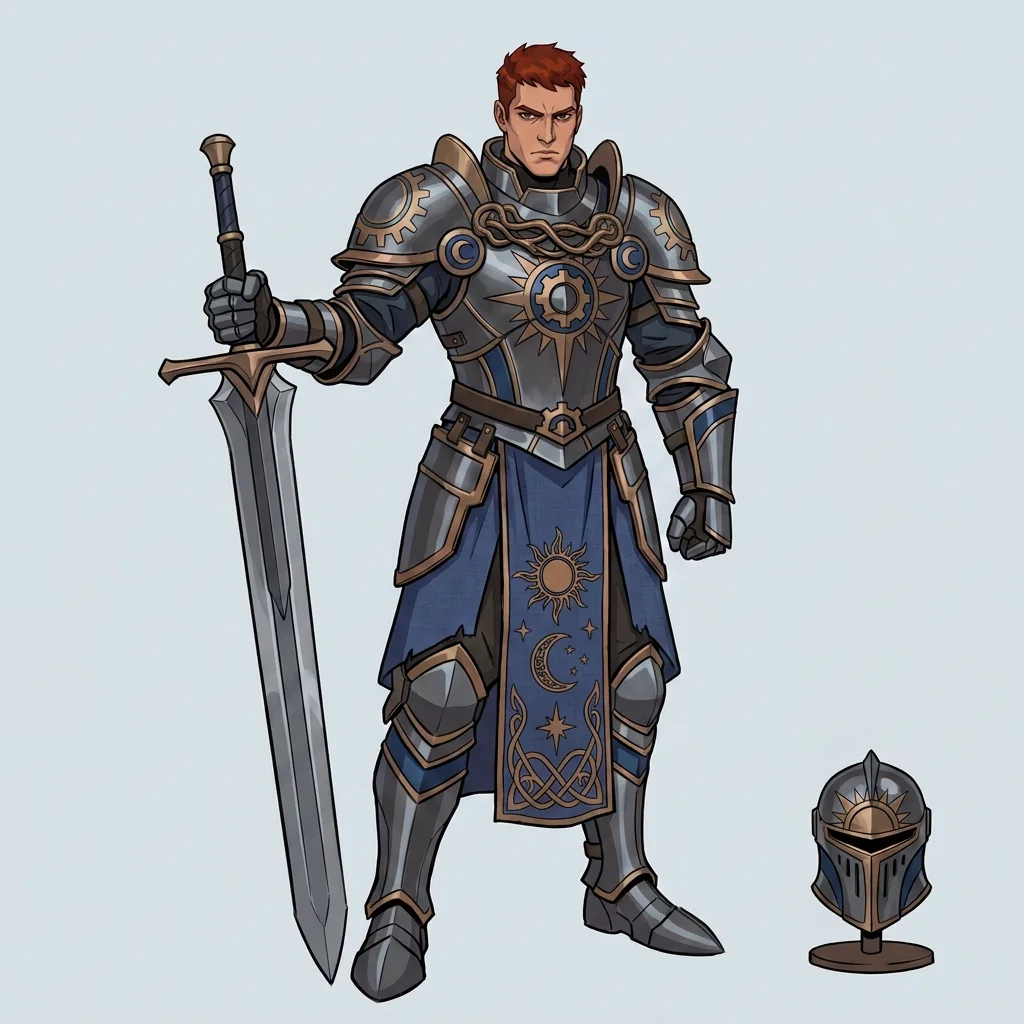
概念圖既可以由藝術家繪製,也可以由 AI 生成;本流程不限制來源。關鍵在於畫面資訊必須清晰,讓生成模型能準確辨識。

最佳實踐

  • 輪廓清晰、容易識別
  • 避免遮擋形體的大面積陰影
  • 避免模糊不清或尚未定稿的細節
04 a front view concept design of an armored knight with silver armor blue fabric gold ornamentation a

步驟 2 — 拆分部件

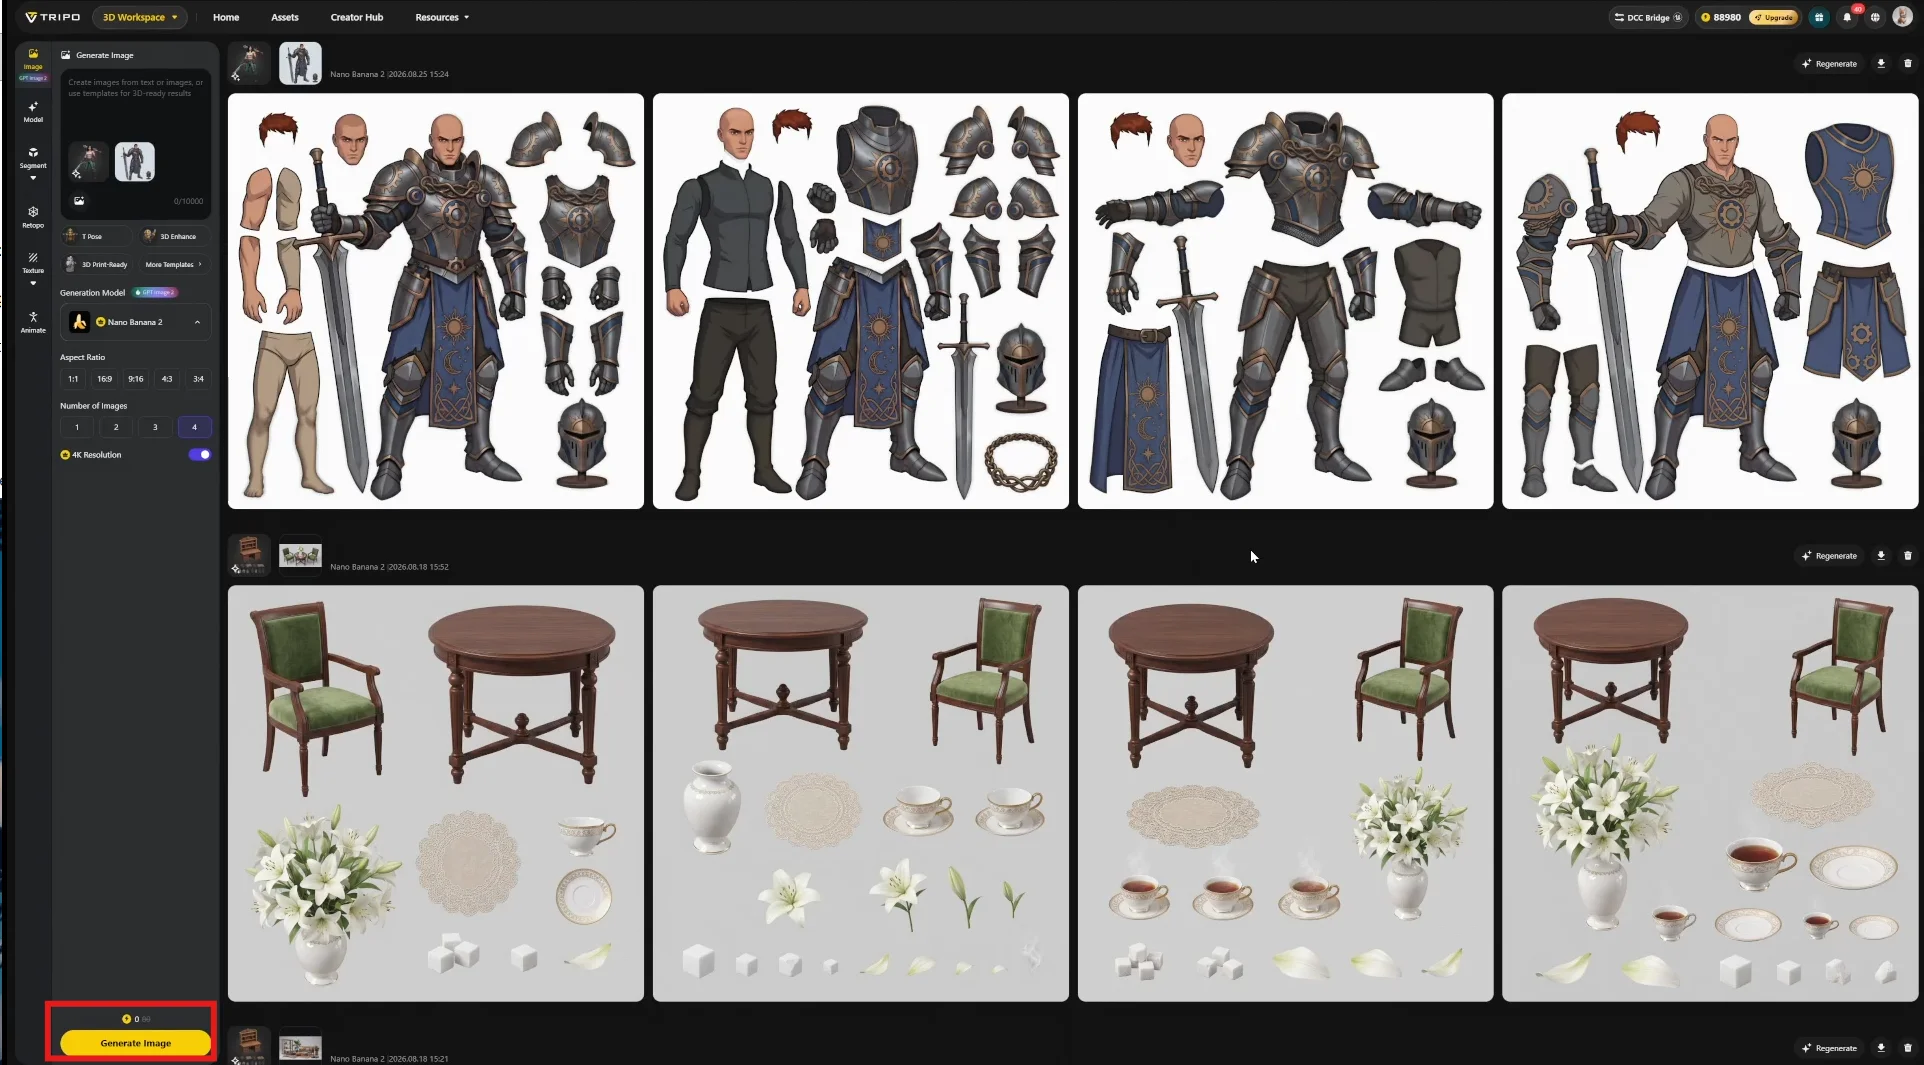
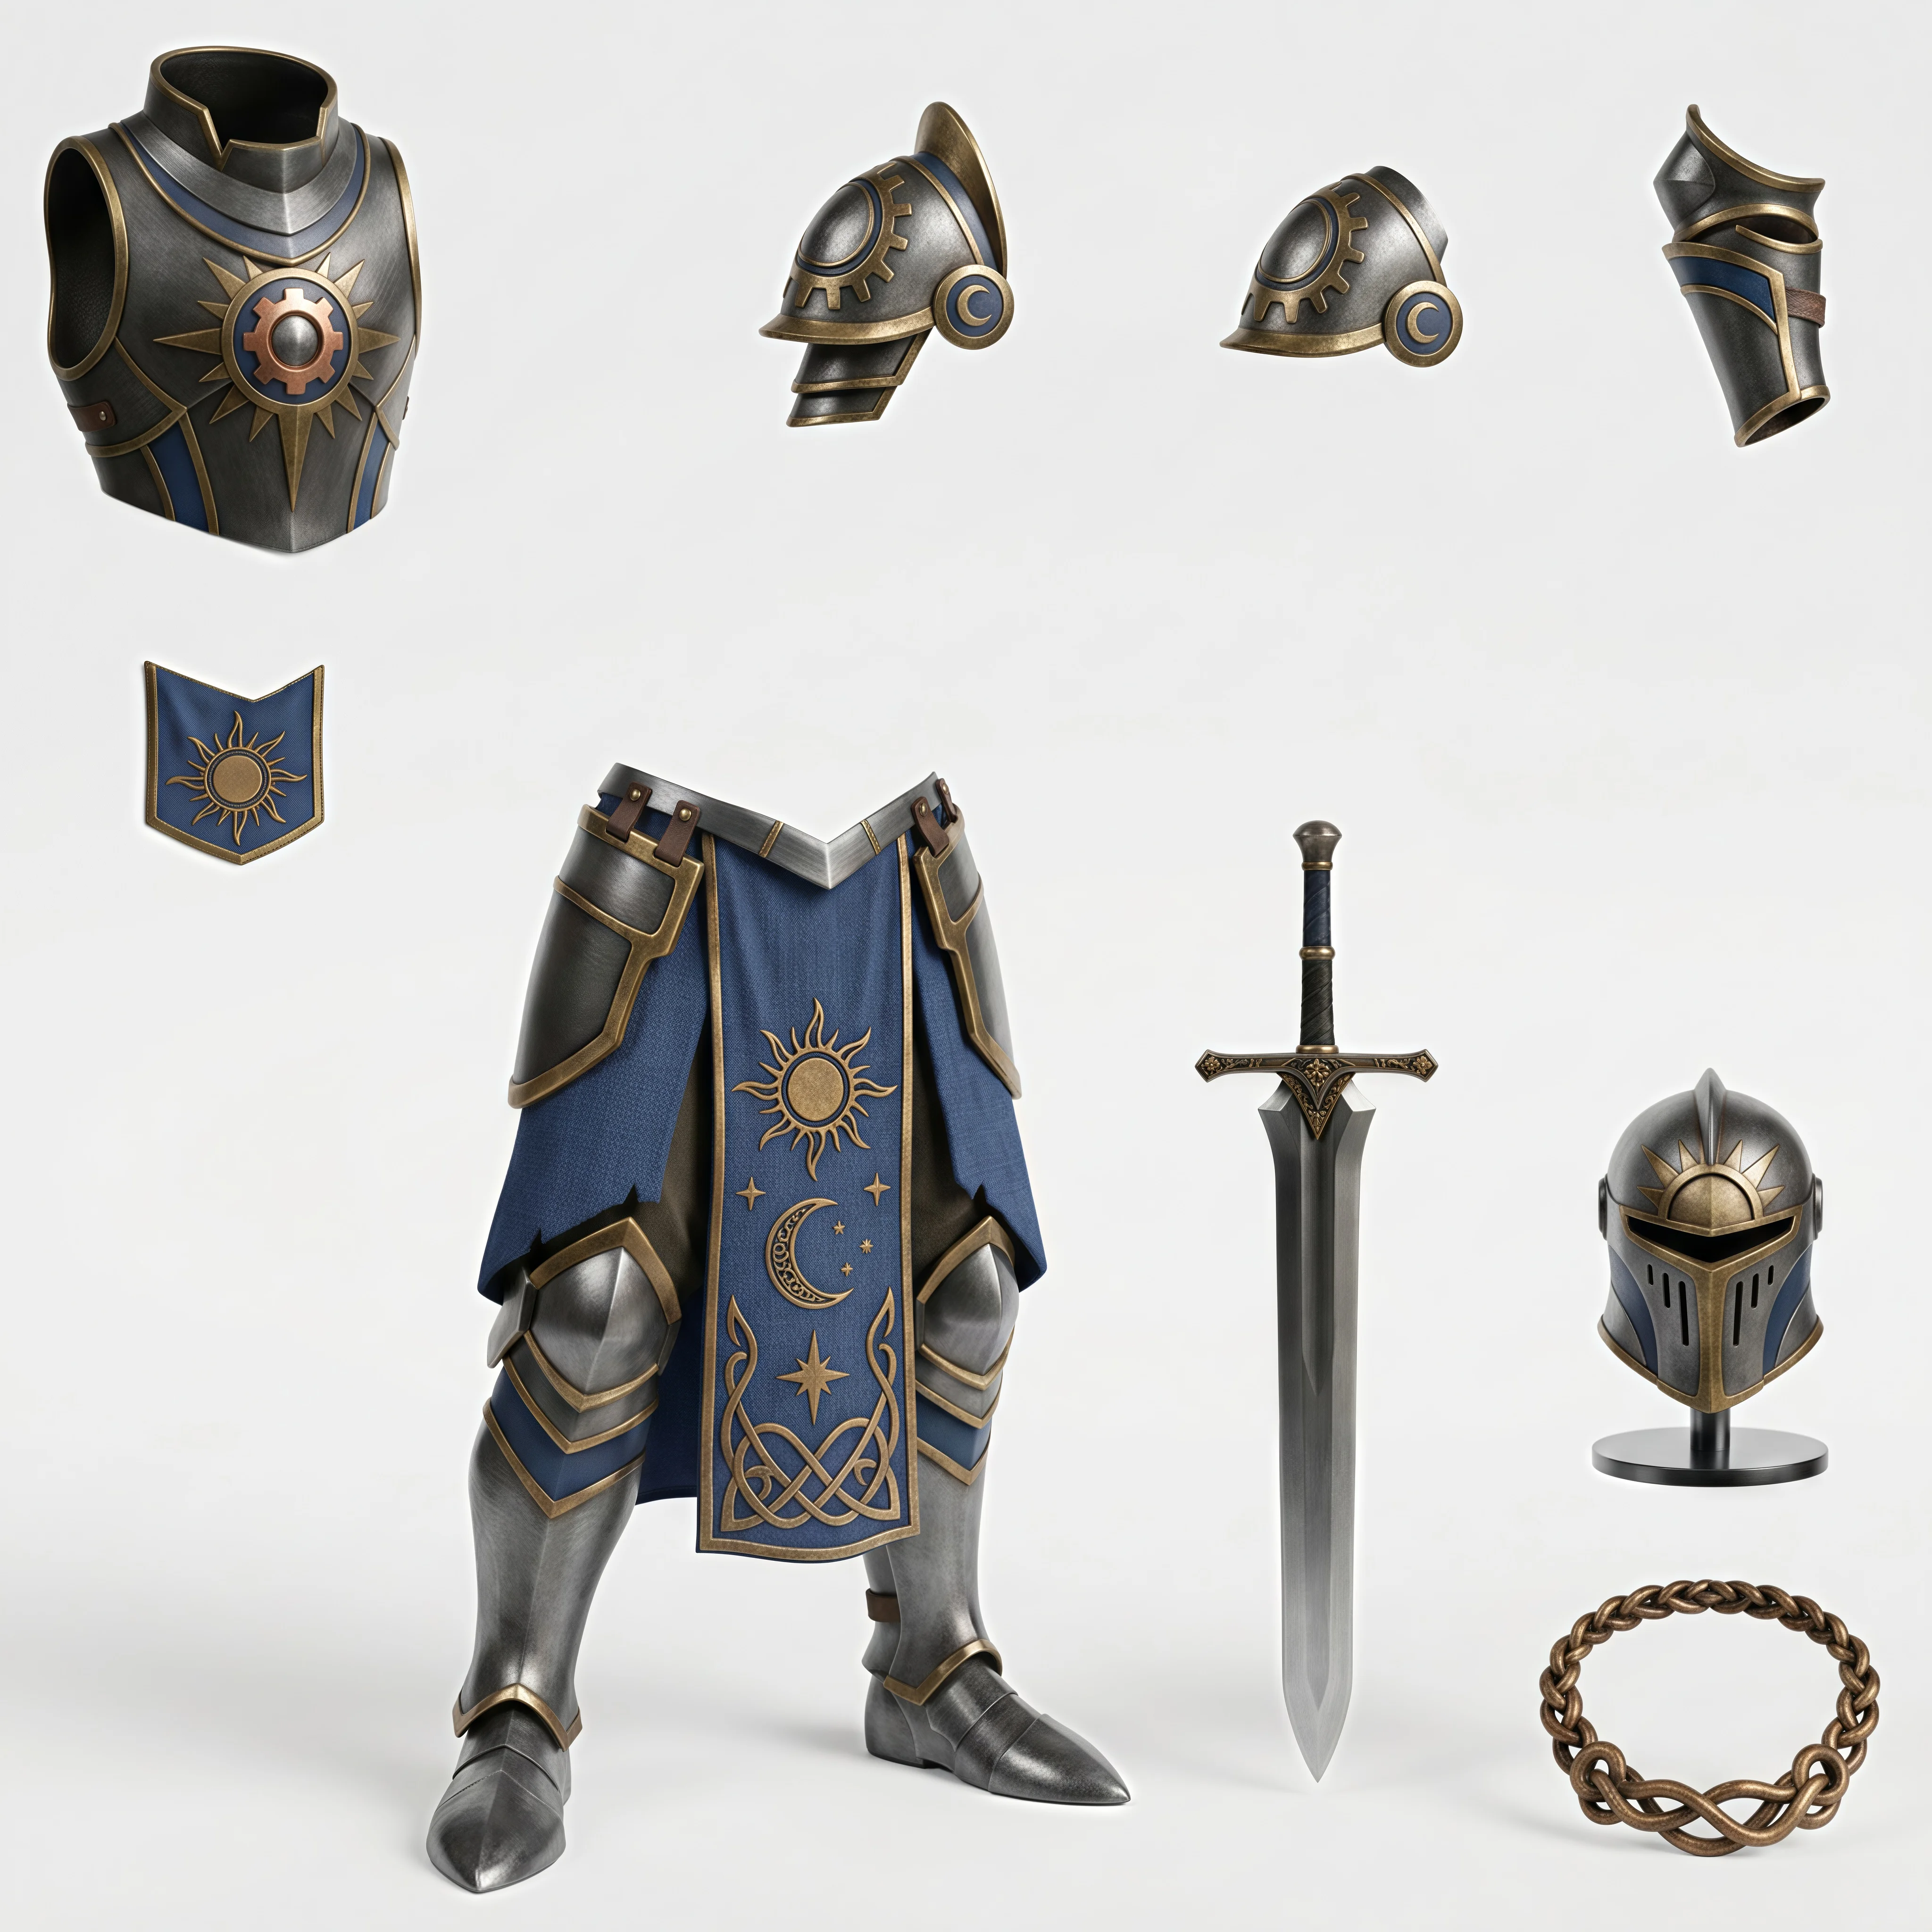
簡單角色和道具可以直接使用單張圖生成。若要獲得更高品質,建議先將概念圖拆分成多個部件。

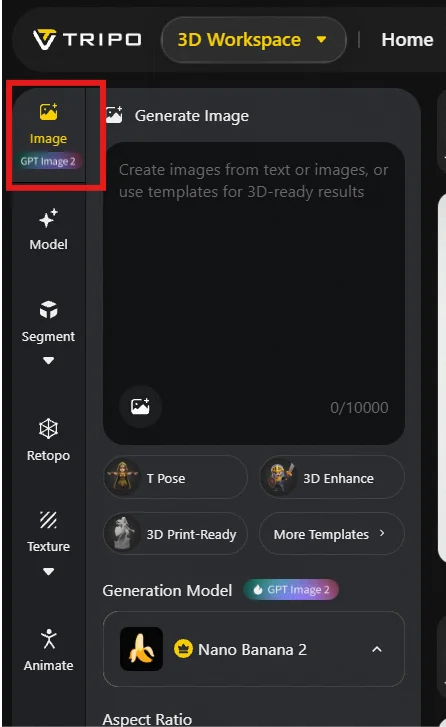
登入 tripo3d.ai,在頁面左上角選擇 Generate Image。
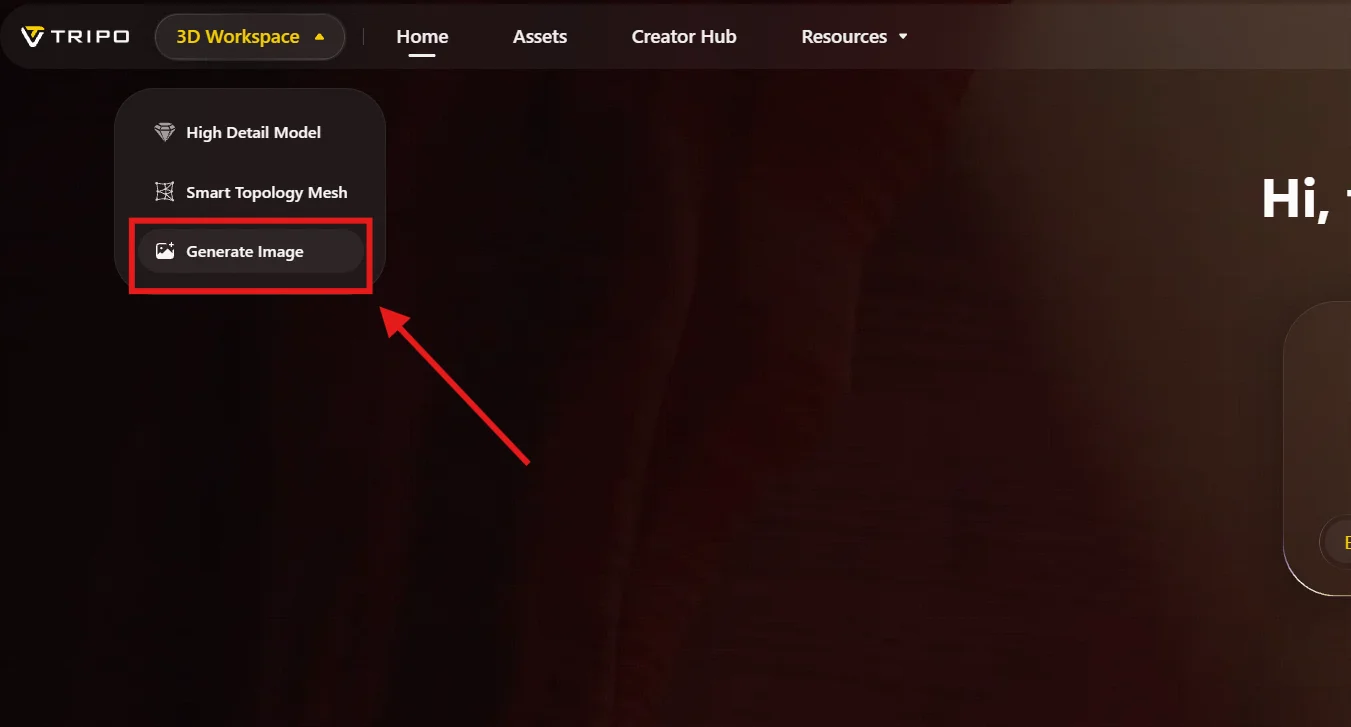
05 the tripo 3d workspace with generate image selected in the upper left area the highlighted entry sho

在工作區左上角開啟 Image 面板,在這裡建立或編輯概念圖。

06 the tripo 3d workspace with the image panel open the panel provides image generation and editing opt
07 character extraction results in tripo showing separate character components and grouped elements acr

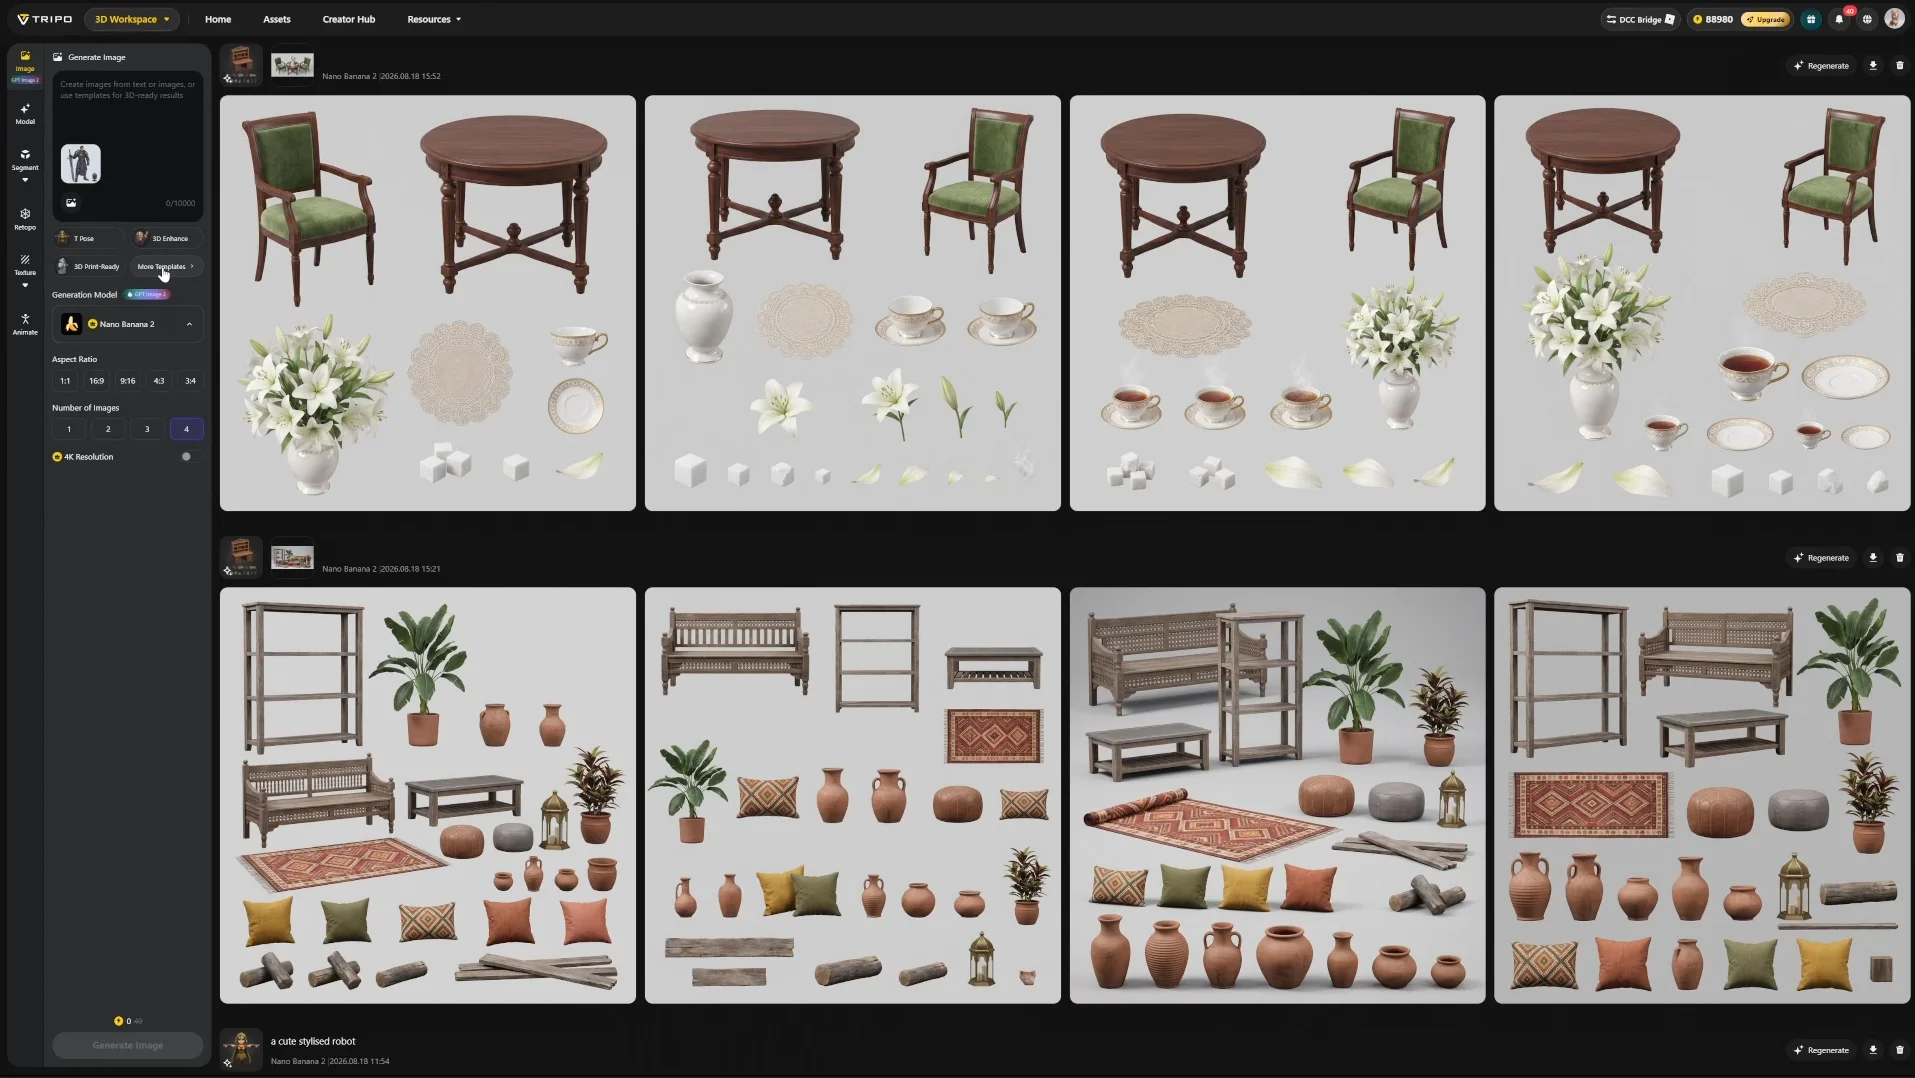
進入 More Templates → Character Extraction。
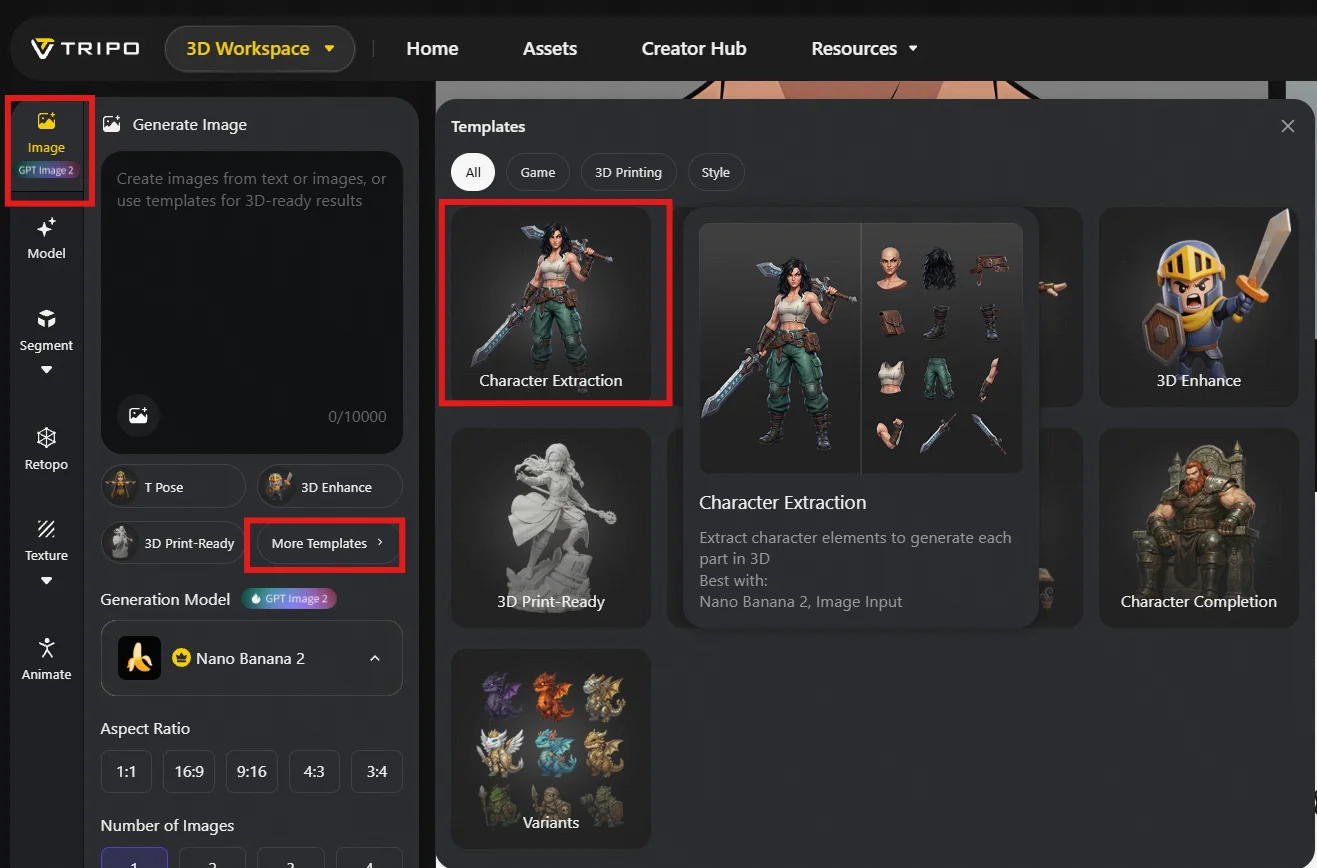
08 the tripo 3d workspace with the character extraction template highlighted under more templates this

上傳概念圖。設定可依需要調整,大多數情況下使用預設值即可。

你可以自行選擇生成模型。目前如需生成或編輯圖像,建議使用 Nano Banana Pro。

點擊 Generate 後,系統會傳回四個候選結果。
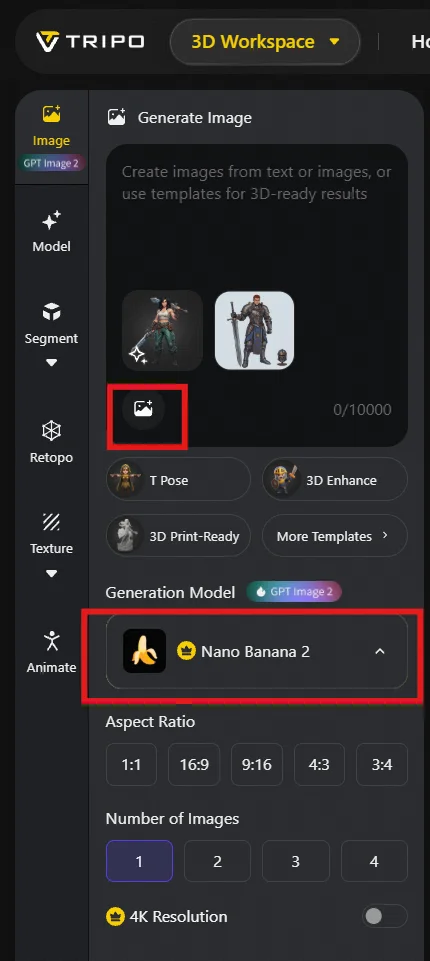
09 tripo image generation settings with the generation model set to nano banana pro alongside aspect ra
10 a tripo character extraction result showing separated clothing weapons and other character component

選擇包含所有待製作部件的結果。如果四個結果都不合適,請重新生成;這裡的選擇將決定後續要製作的完整部件清單。
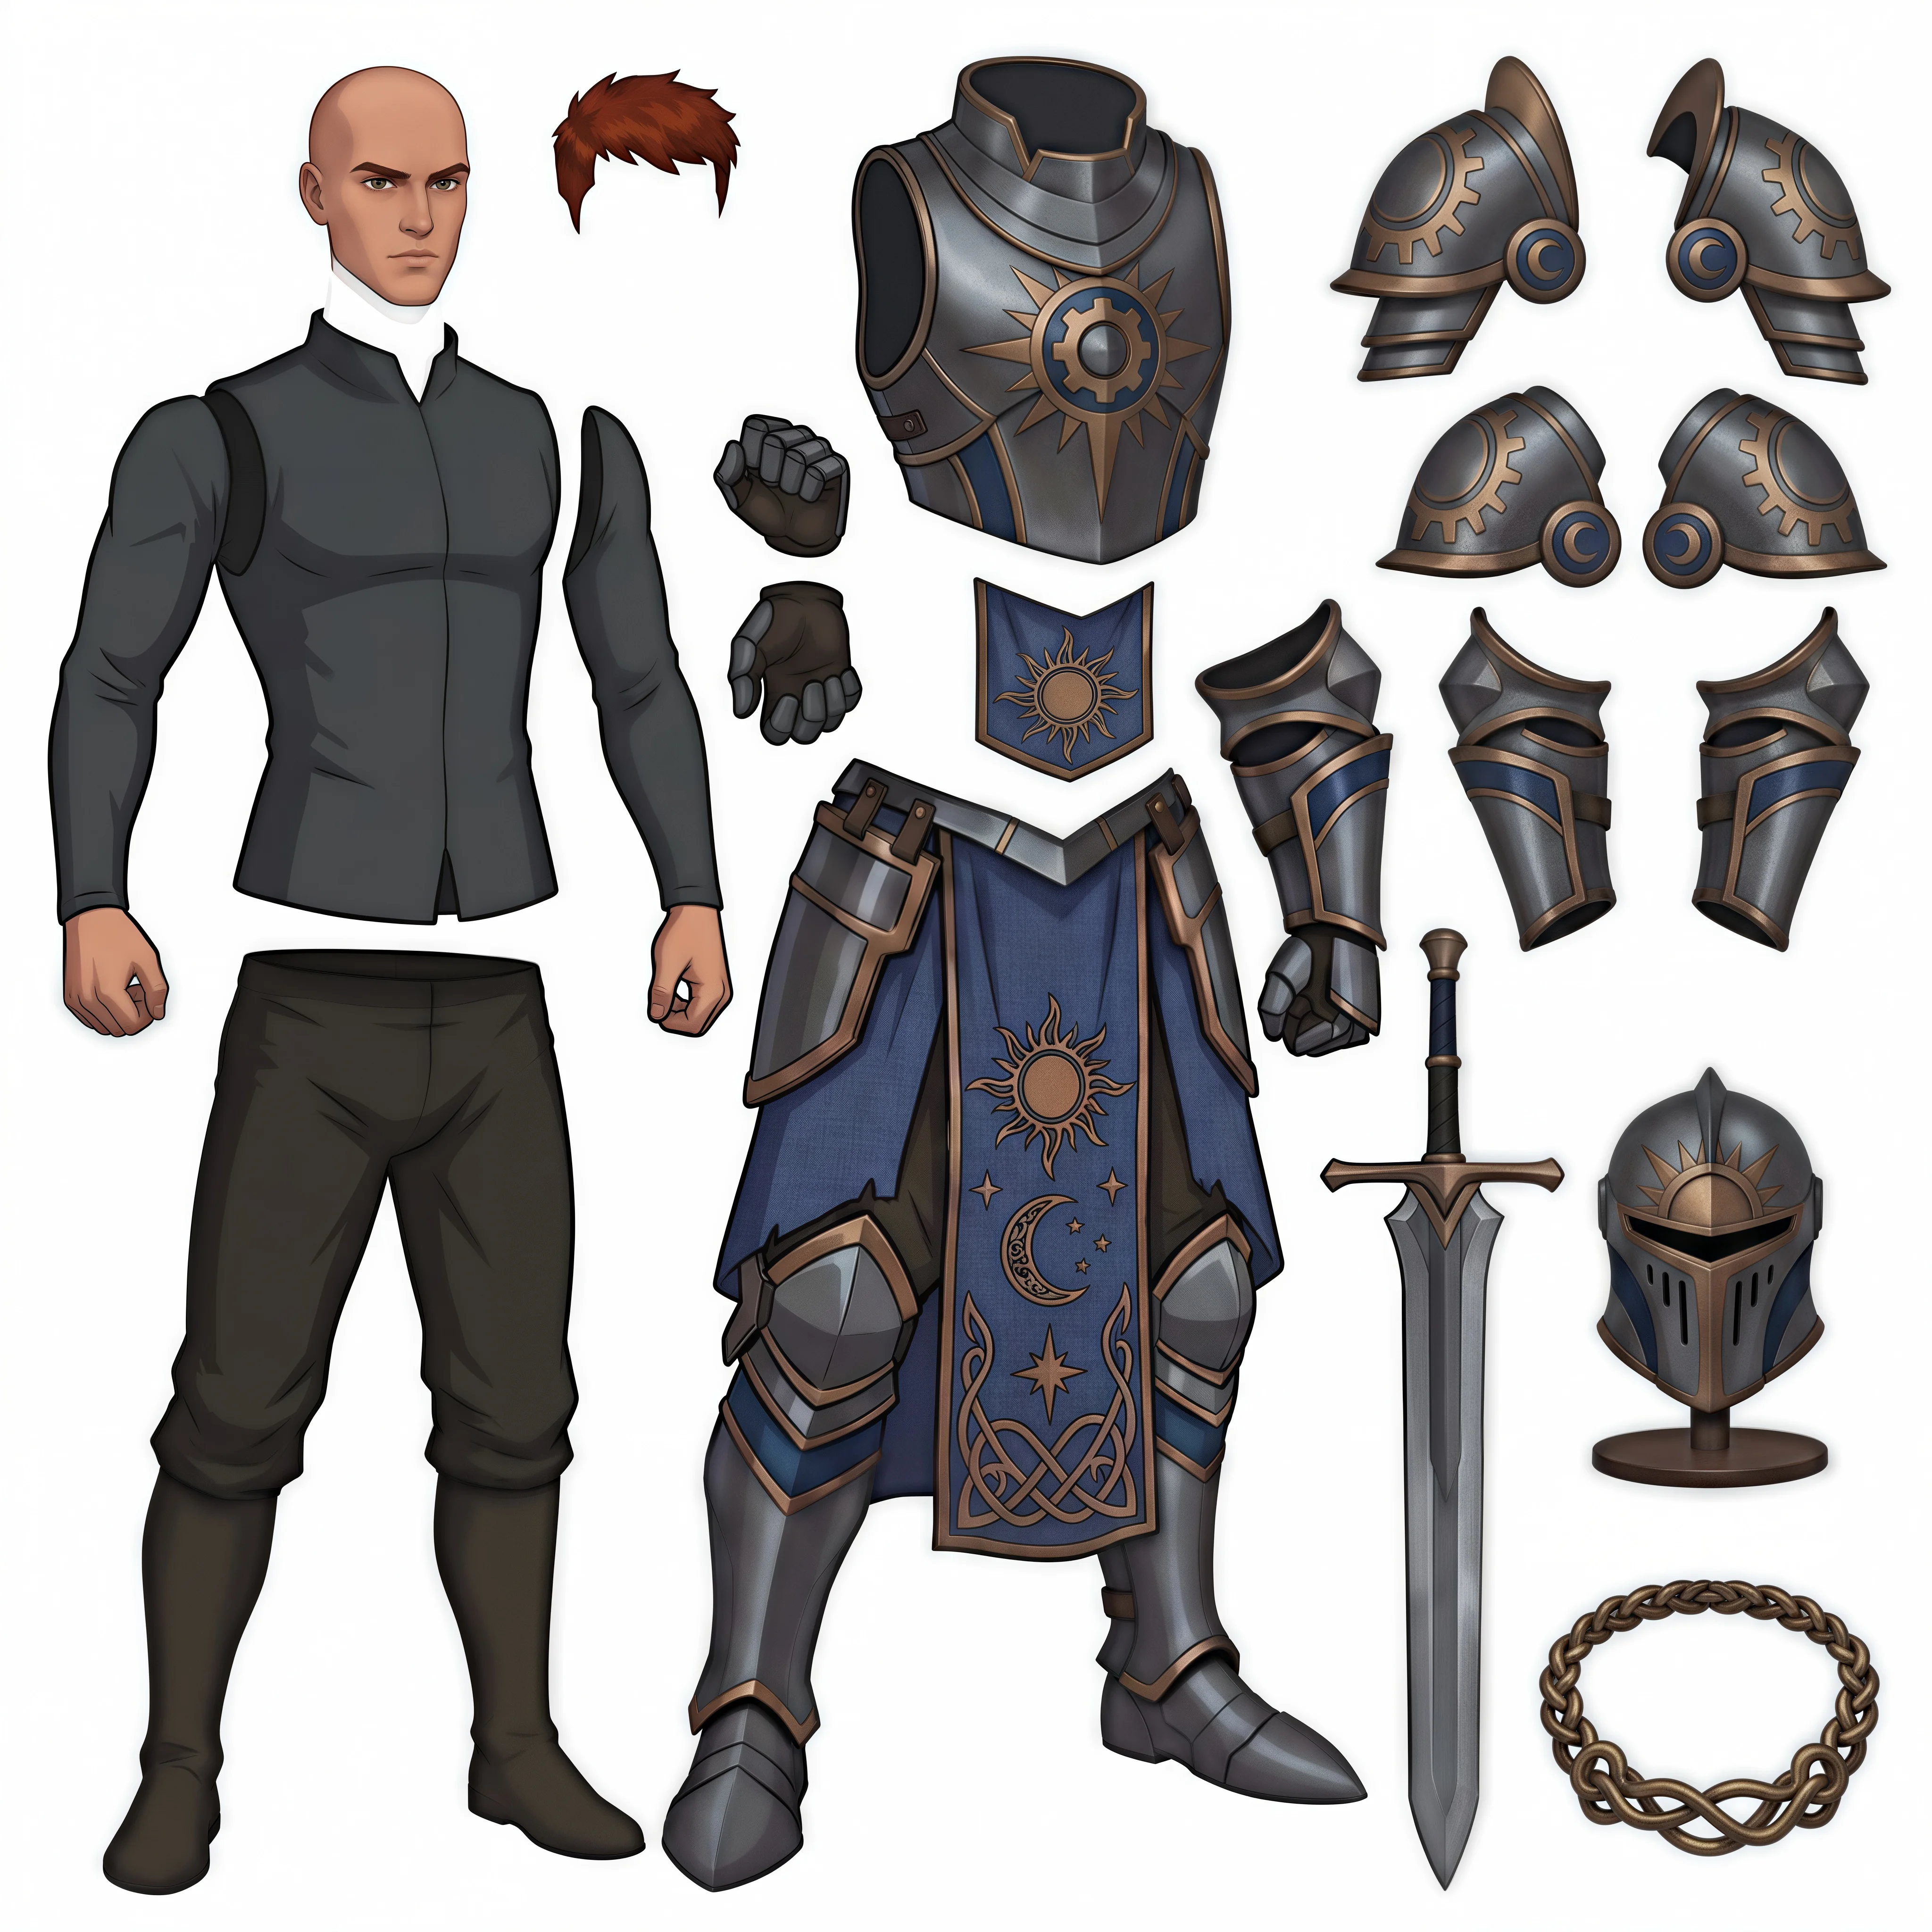
11 a component breakdown of a character showing the full figure alongside separate armor helmet cape sw

步驟 3 — 單獨提取關鍵部件

不同部件的重要程度並不相同。以下兩種情況值得單獨生成。

將全身作為一個獨立部件。 如果自動拆分把身體切得過於零散,可以在左側面板輸入提示詞,單獨生成完整身體。
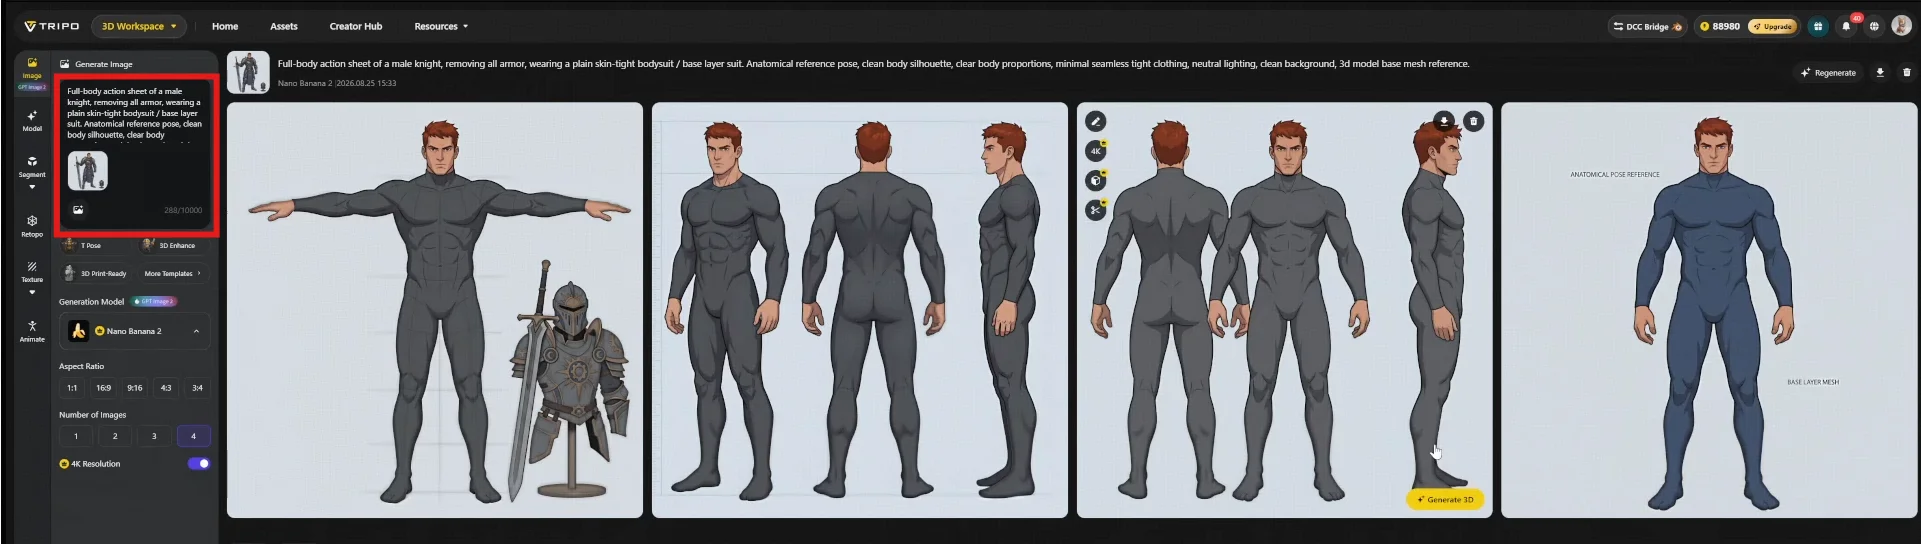
12 the tripo 3d workspace with the head extraction template highlighted the template is used to isolate

本案例選用的參考圖是清晰的正面 A-pose,方便調整盔甲位置。如果優先考慮後續綁定,T-pose 通常更合適。 姿勢應在生成前確定,不要留到生成後再補救。
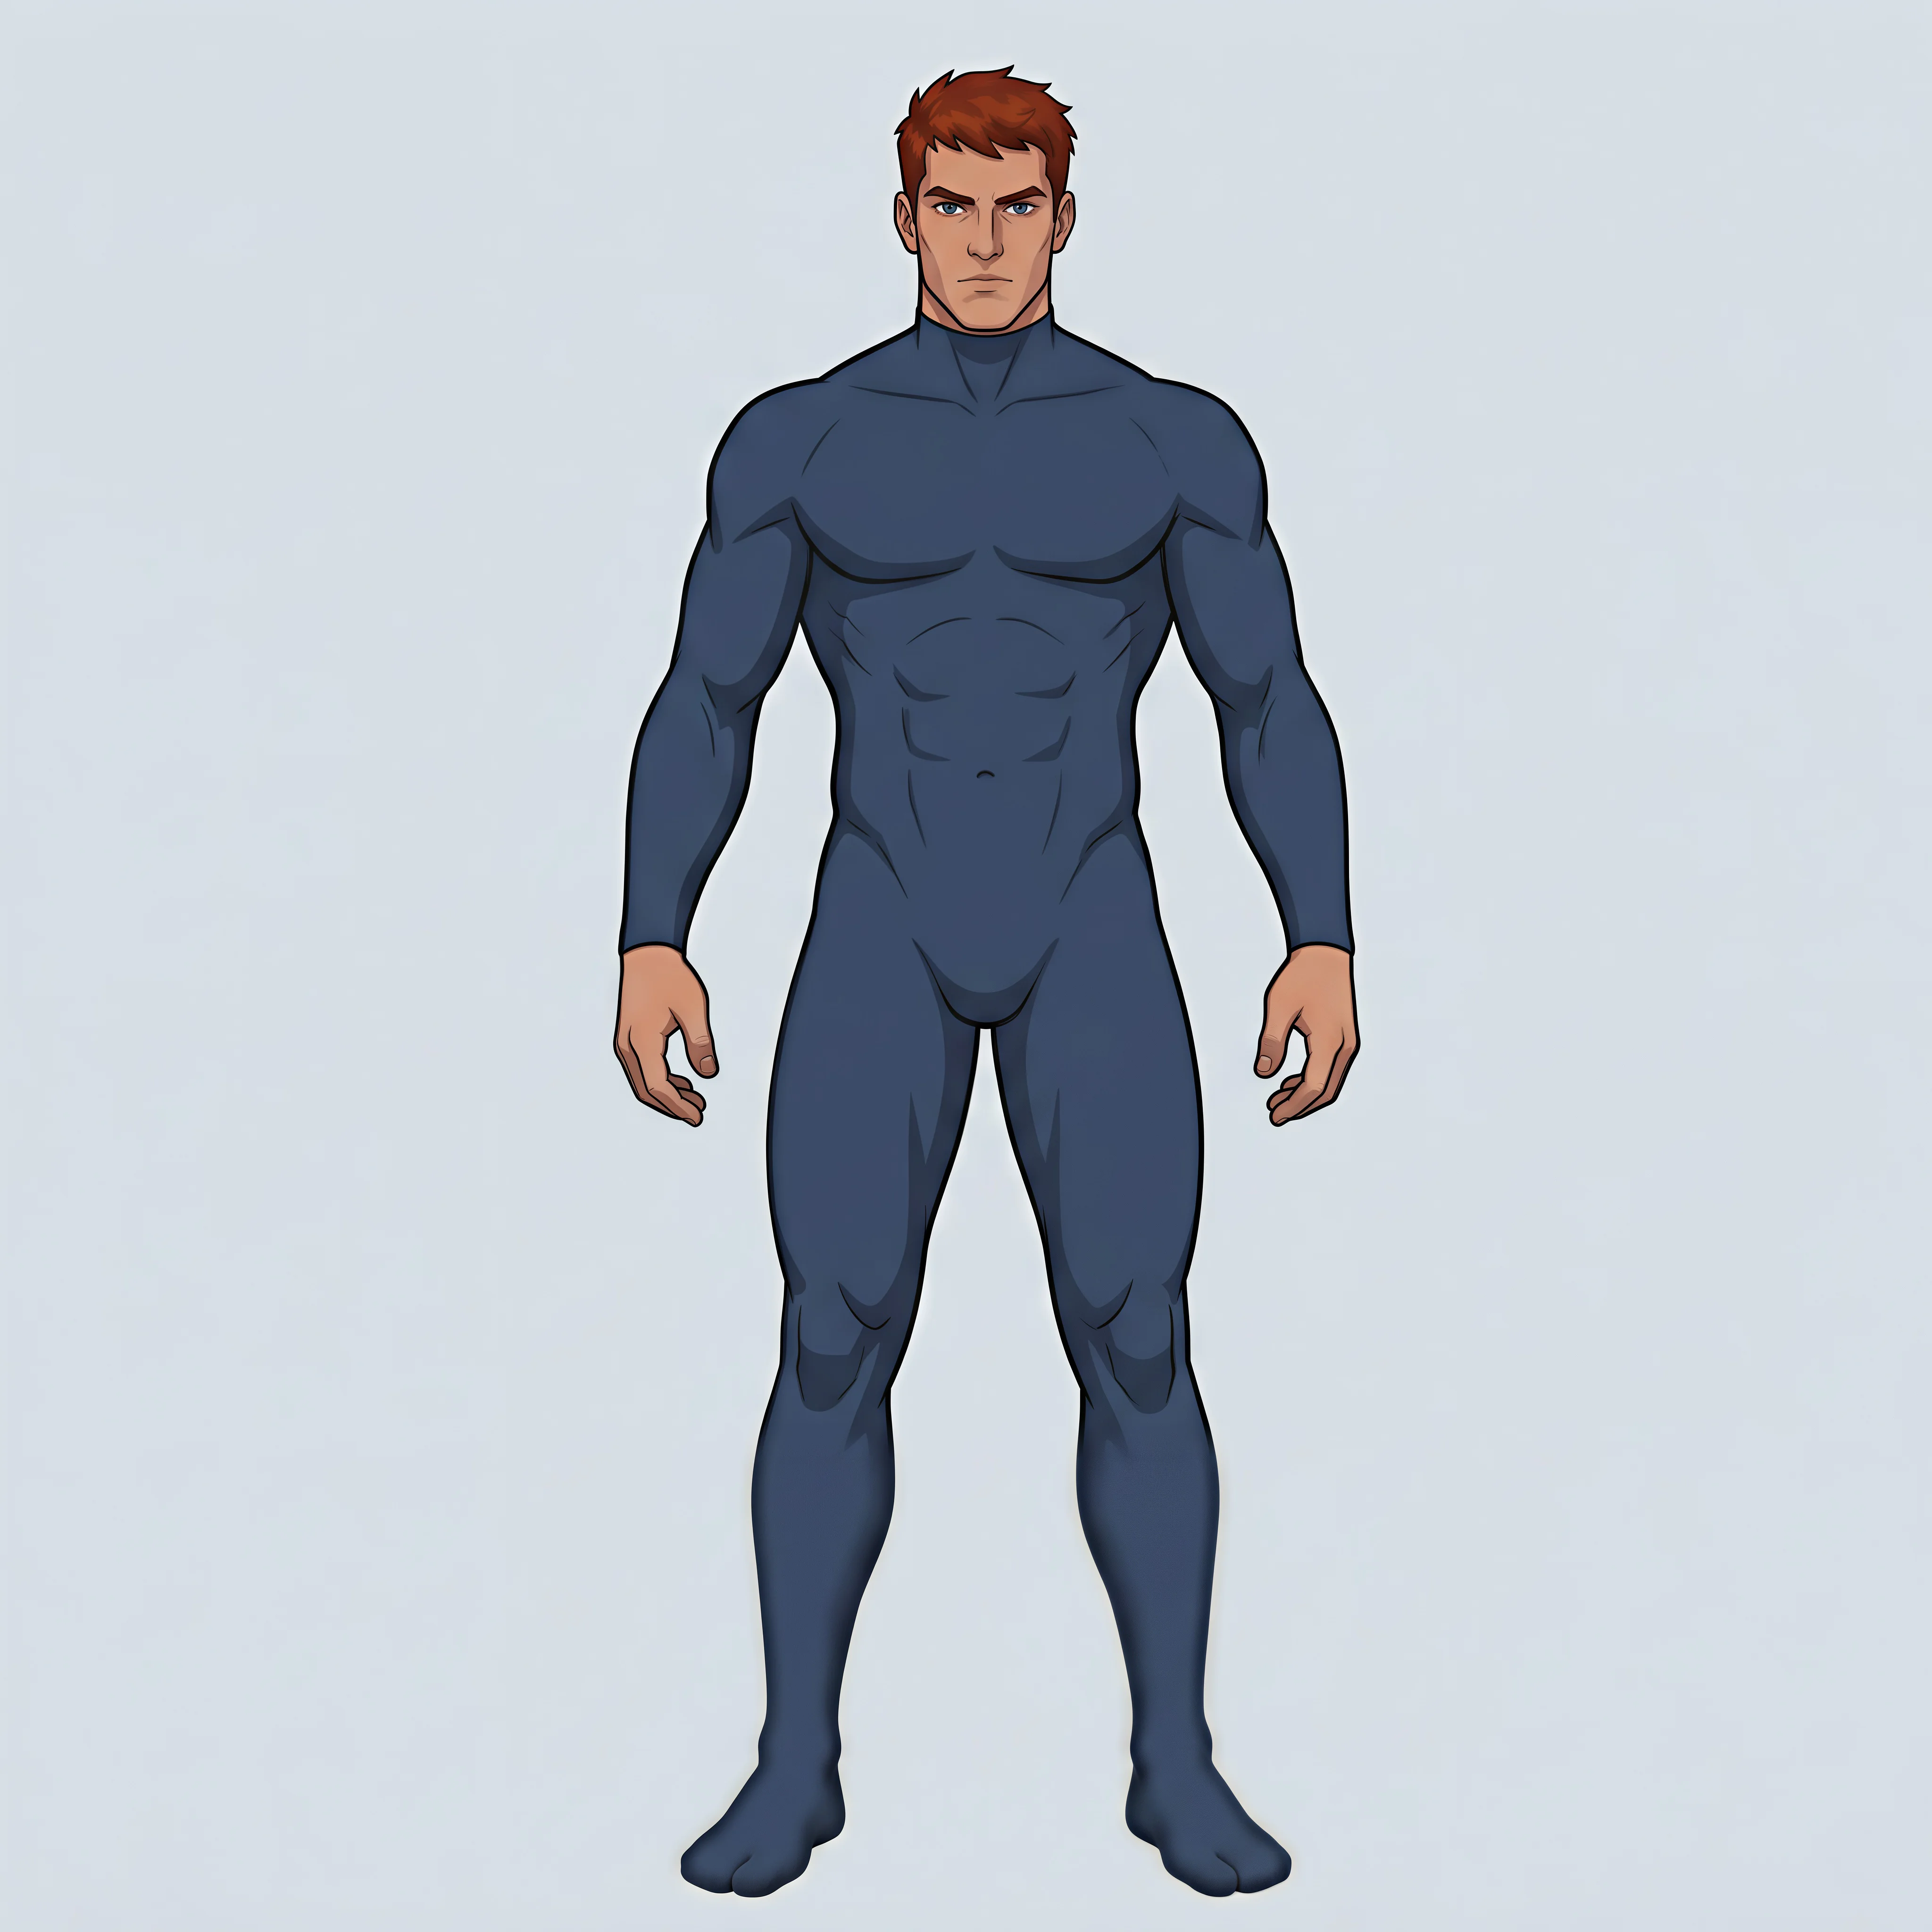
13 a separately generated male character body in a blue suit illustrating the fallback workflow when au

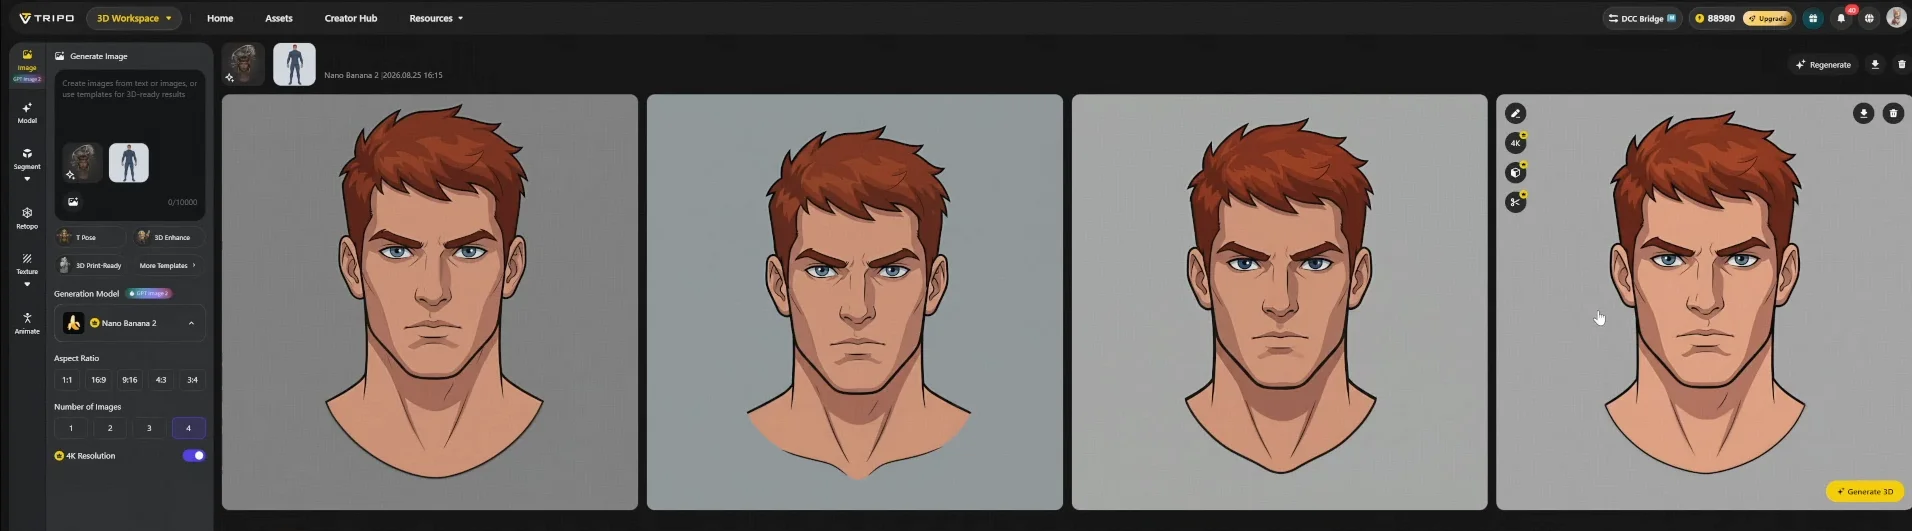
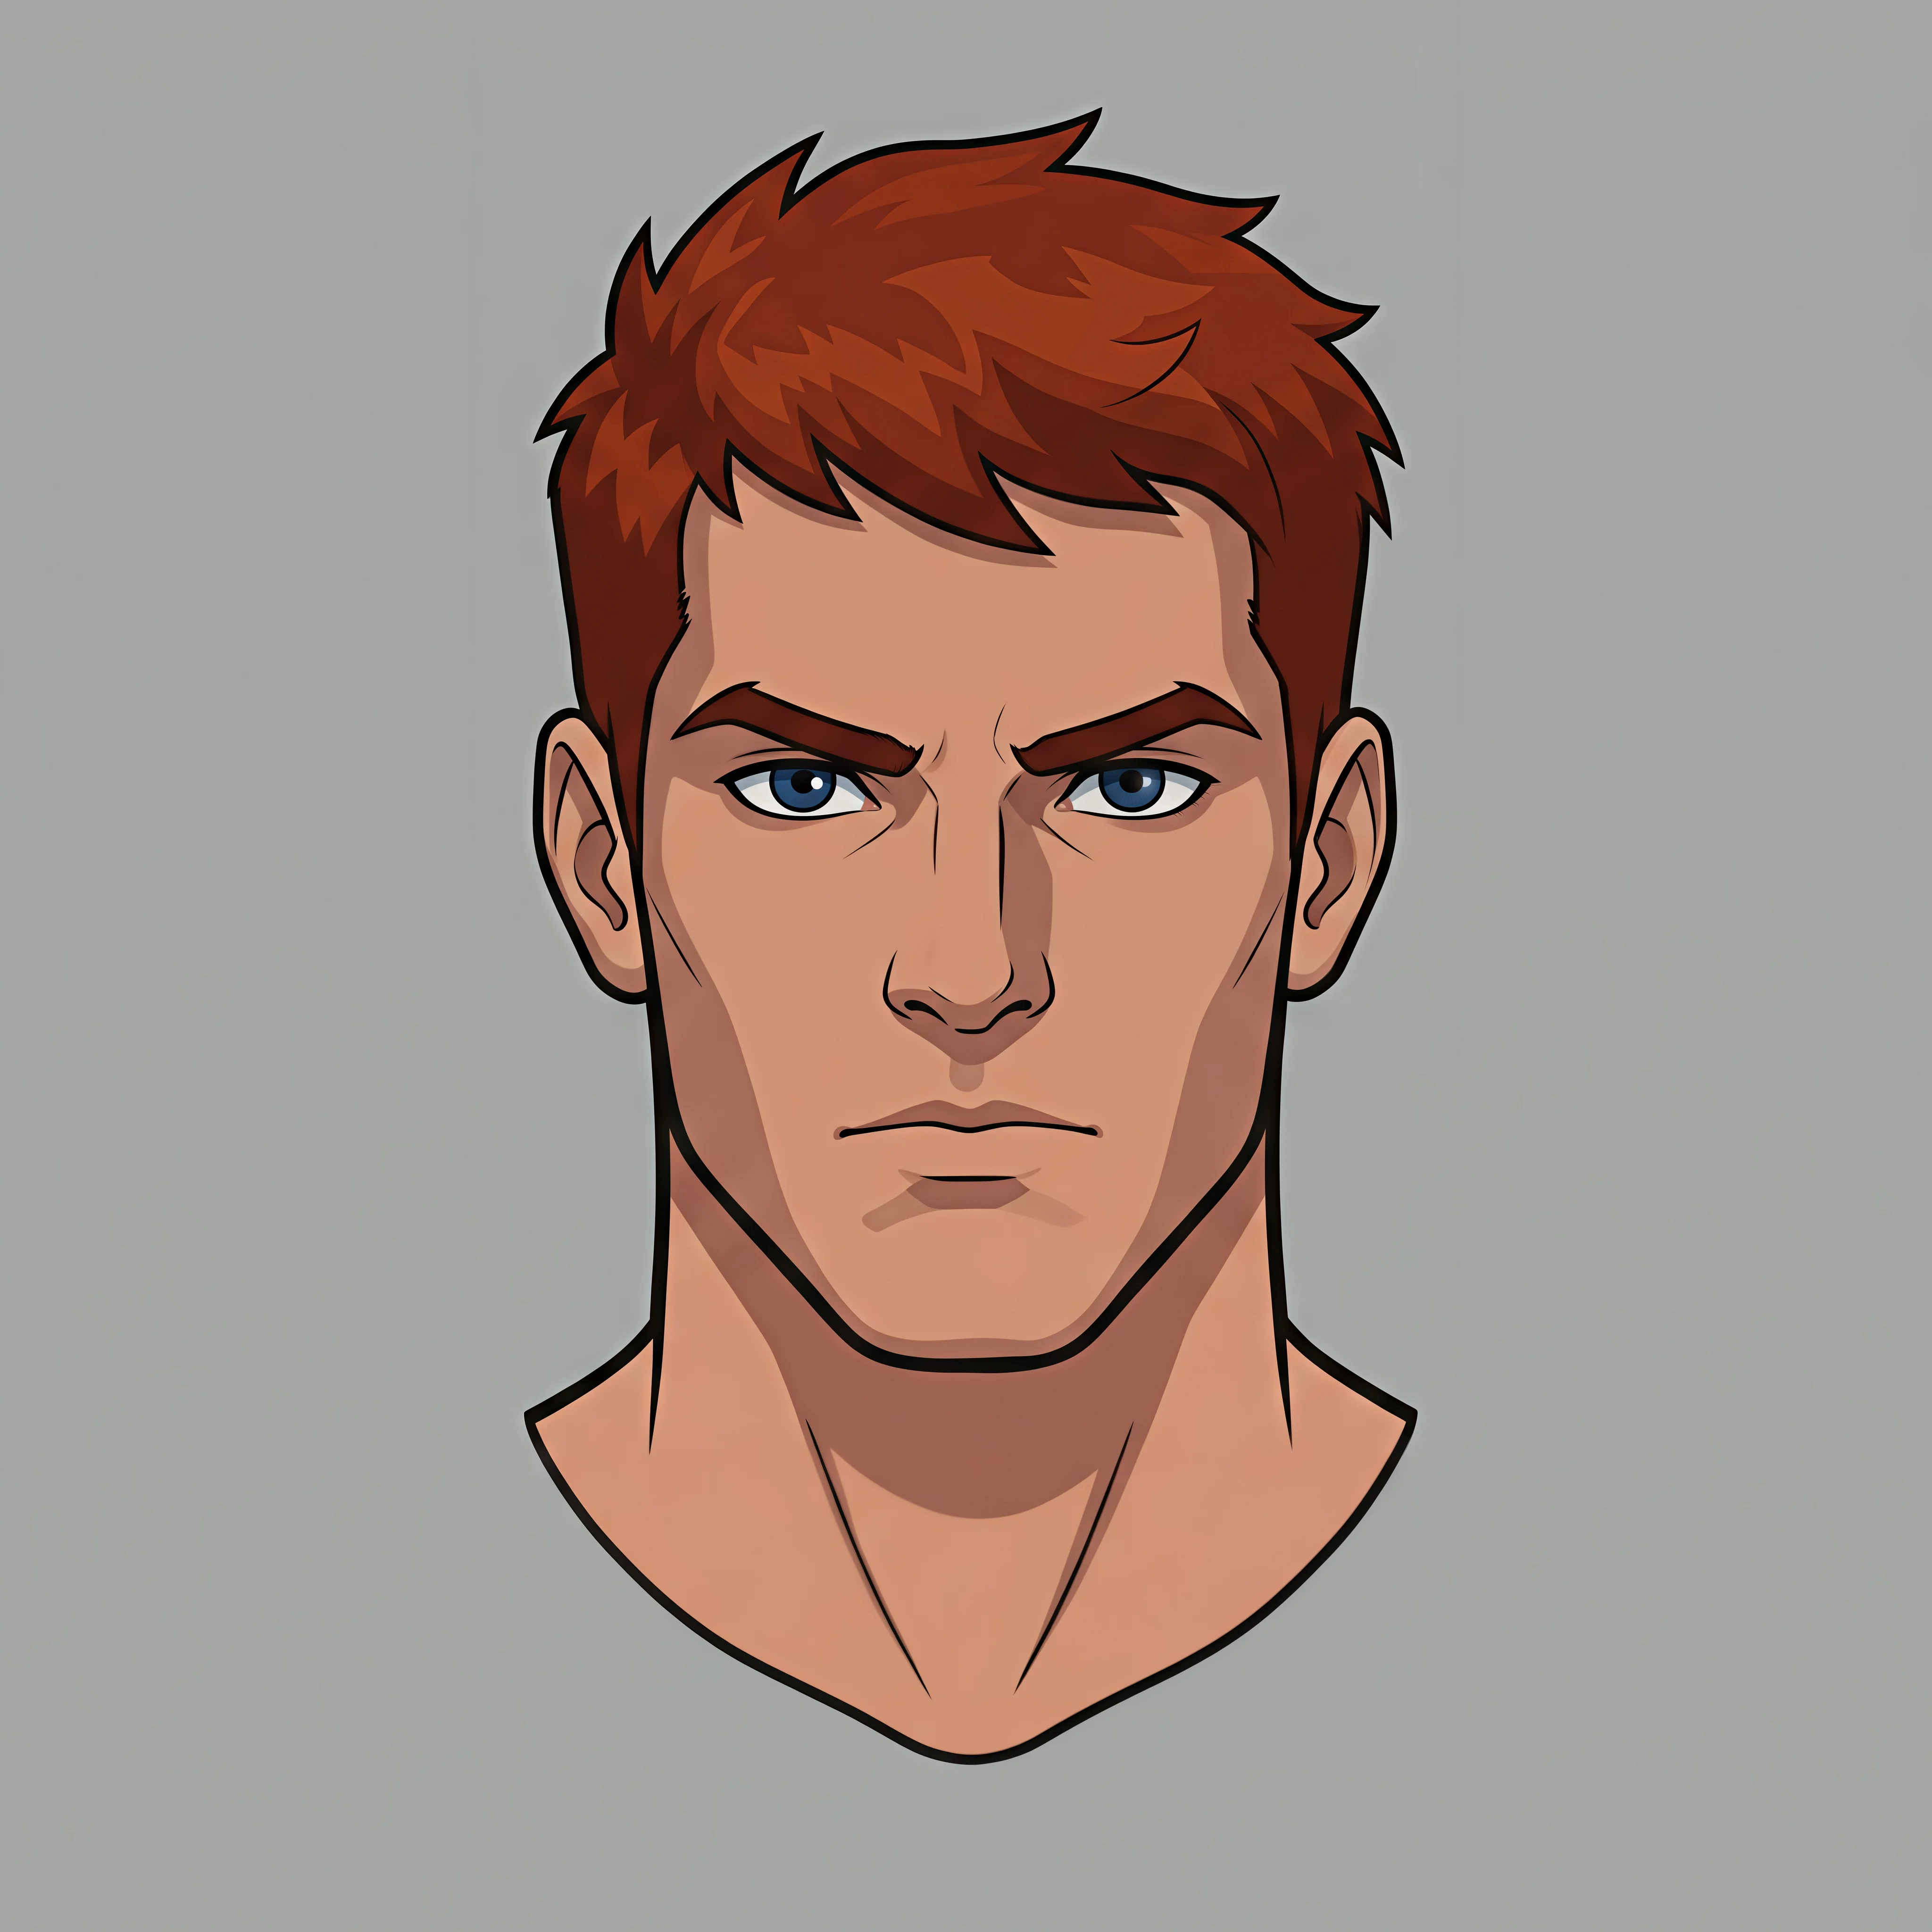
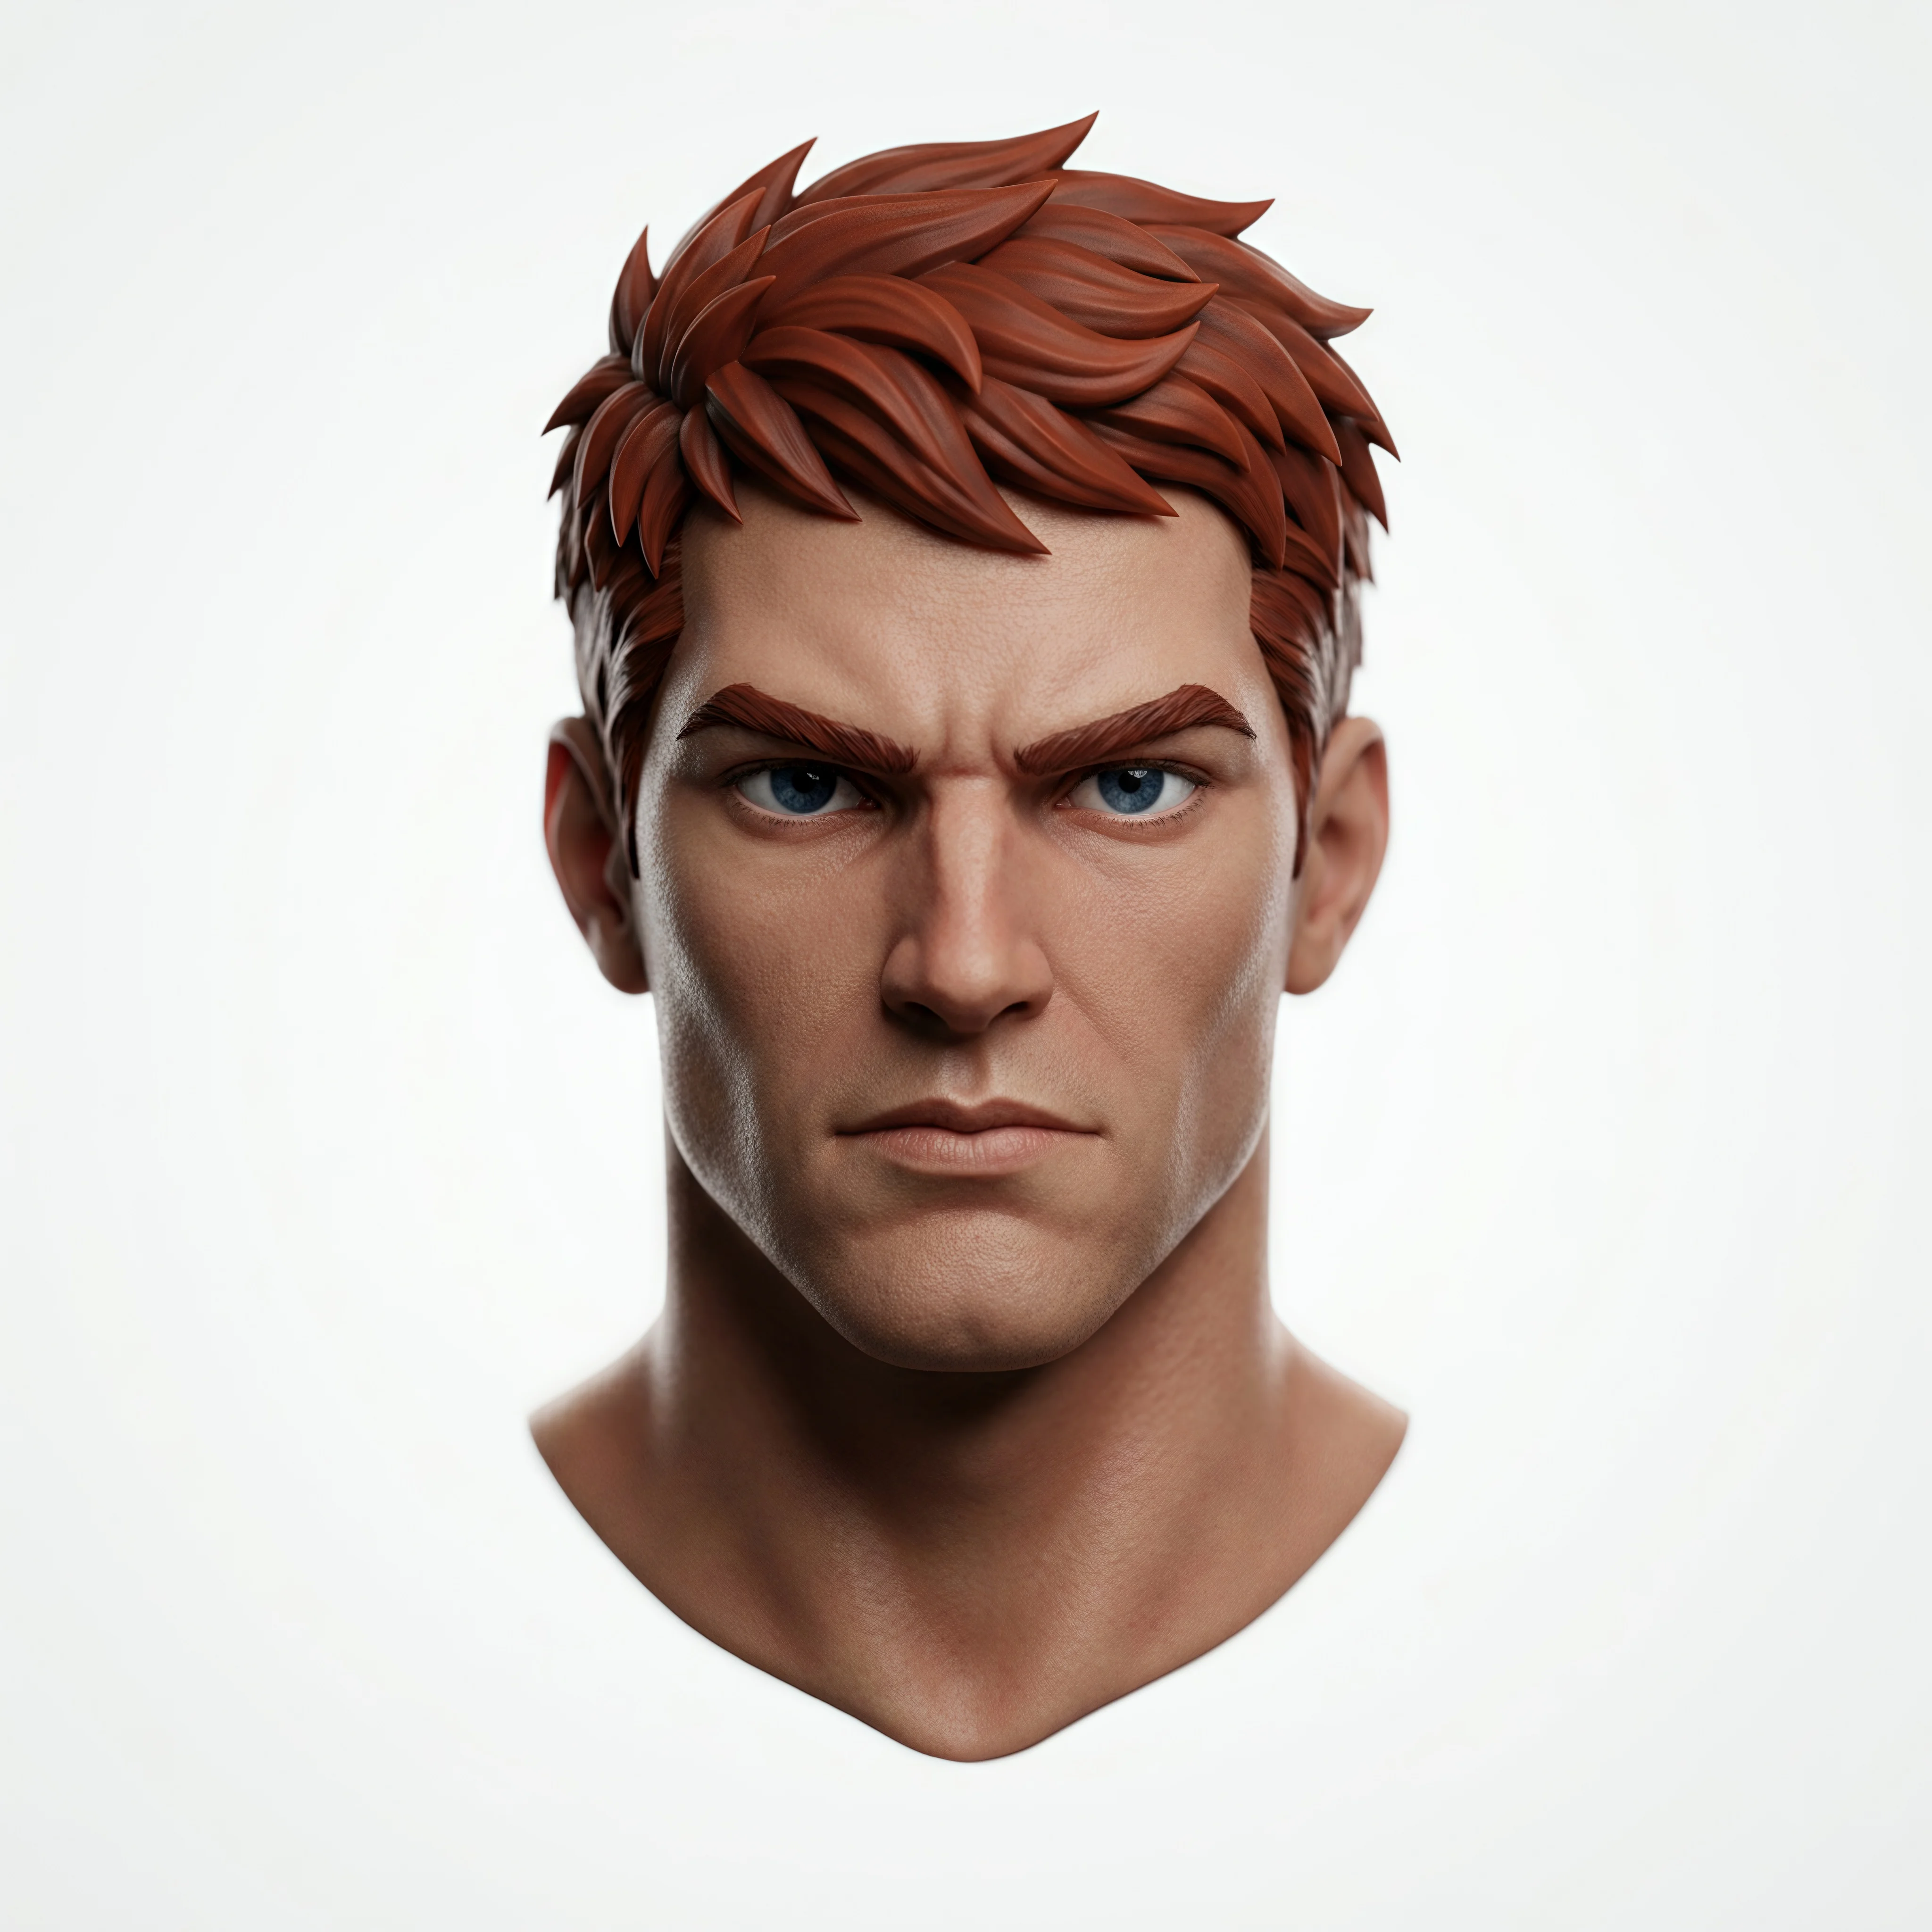
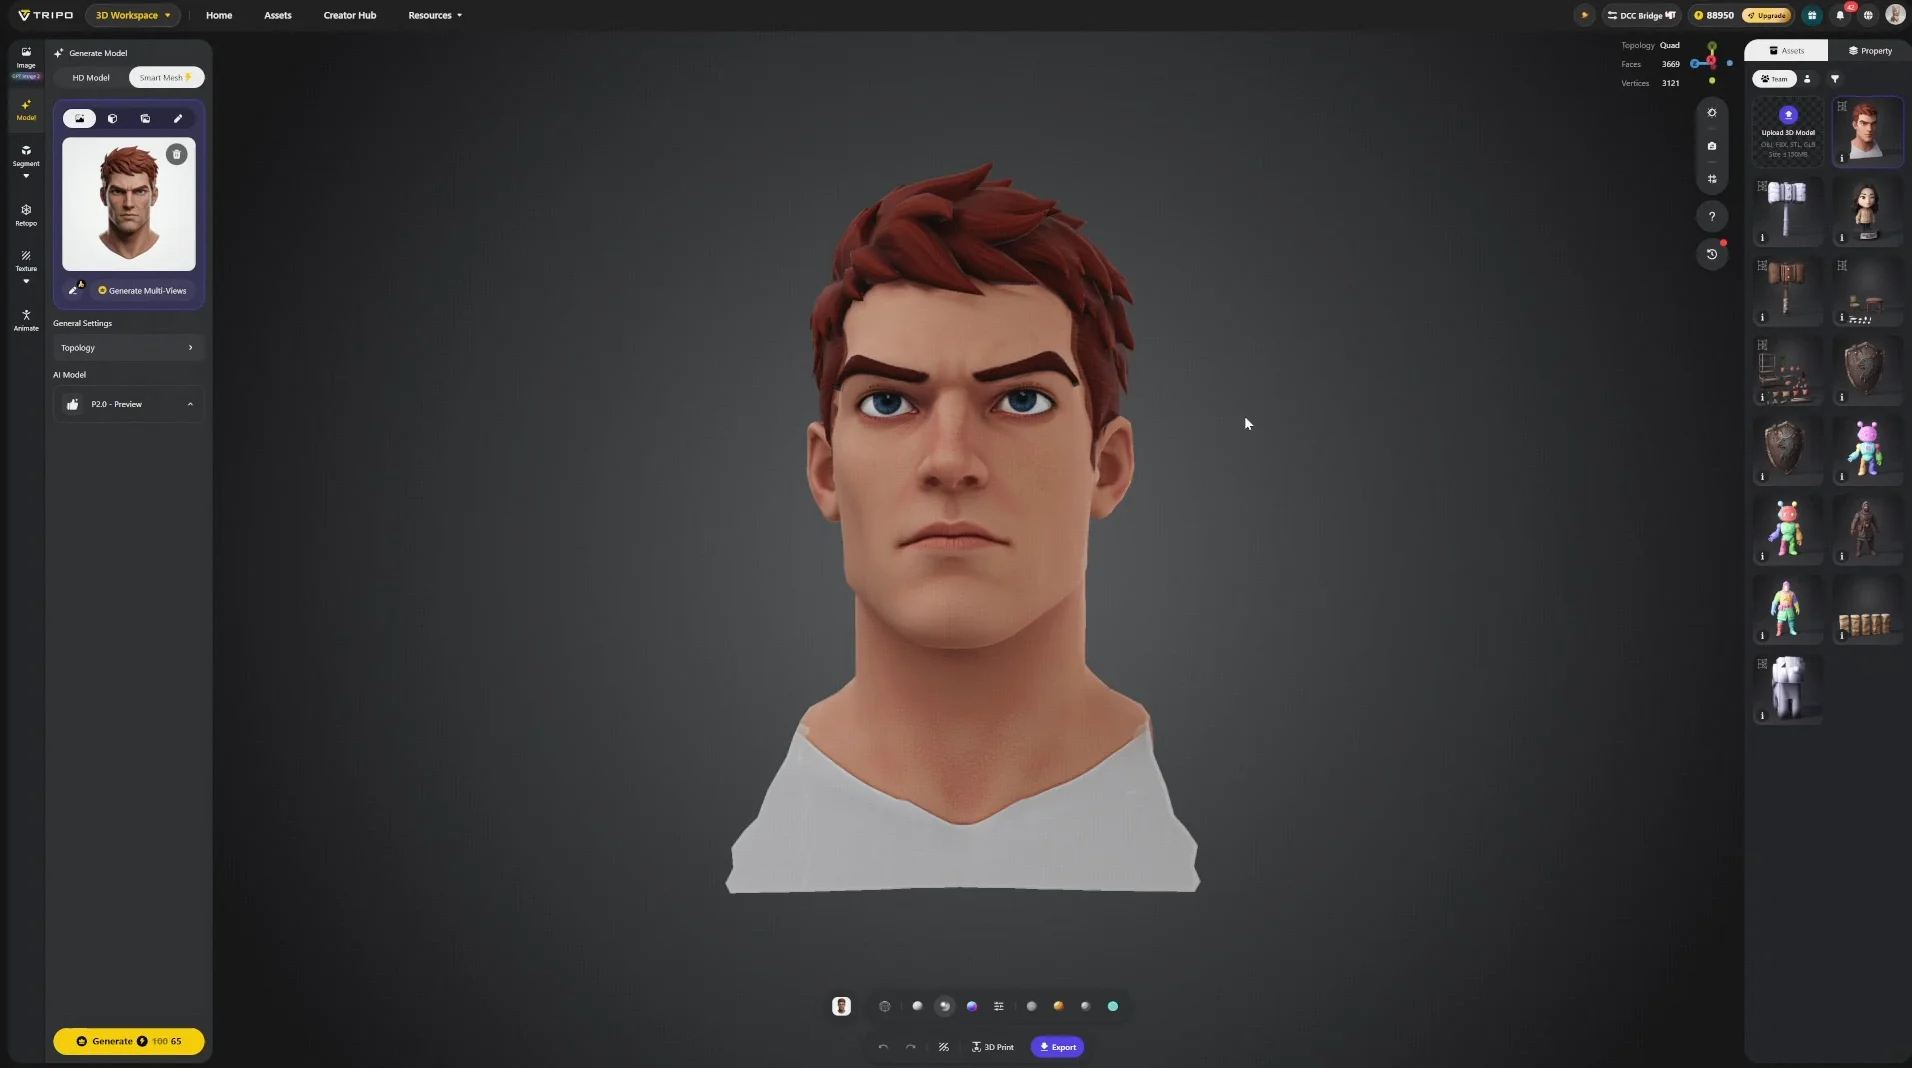
將頭部作為獨立資產。 頭部最容易吸引觀眾注意,因此應比其他部件獲得更高的面數和貼圖預算。使用 Head Extraction 模板將頭部單獨提取出來。
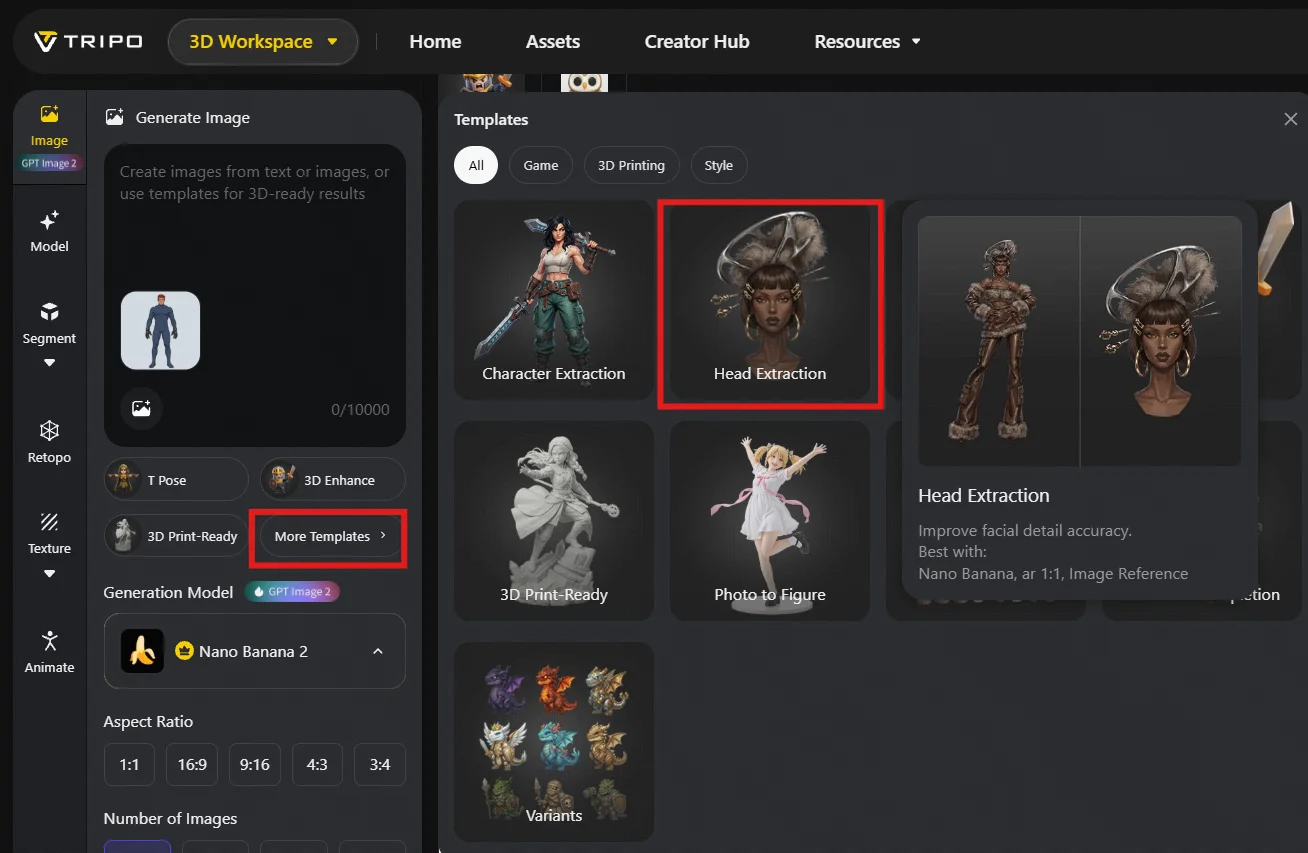
Tripo Head Extraction template
15 a tripo character modeling workspace showing a character model and reference image settings
16 a front view head and shoulders reference of a red haired blue eyed male character in an a pose prep

步驟 4 — 優化參考圖

生成前,應先把每張參考圖調整到更接近最終效果的狀態,盡可能為模型提供充分的幾何與材質資訊。

一般建議將參考圖處理成 PBR 風格,本案例使用 3D Enhance 模板完成。具體效果仍應配合專案的美術方向:你希望模型最終呈現什麼質感,參考圖就應盡量接近什麼質感。
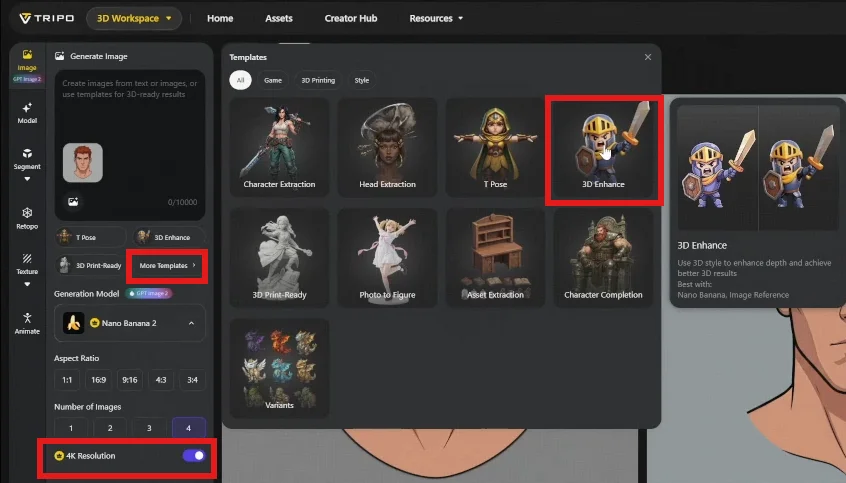
17 the tripo 3d workspace with the 3d enhance template and 4k resolution control highlighted the interf
18 a collection of separated knight armor components including chest armor helmets bracers skirt armor
19 a detailed 3d head model with red hair and defined facial features illustrating a refined character

階段 B · 在 Tripo 中生成

步驟 5 — 生成網格

可以直接從 Image 工作區生成 3D 模型。
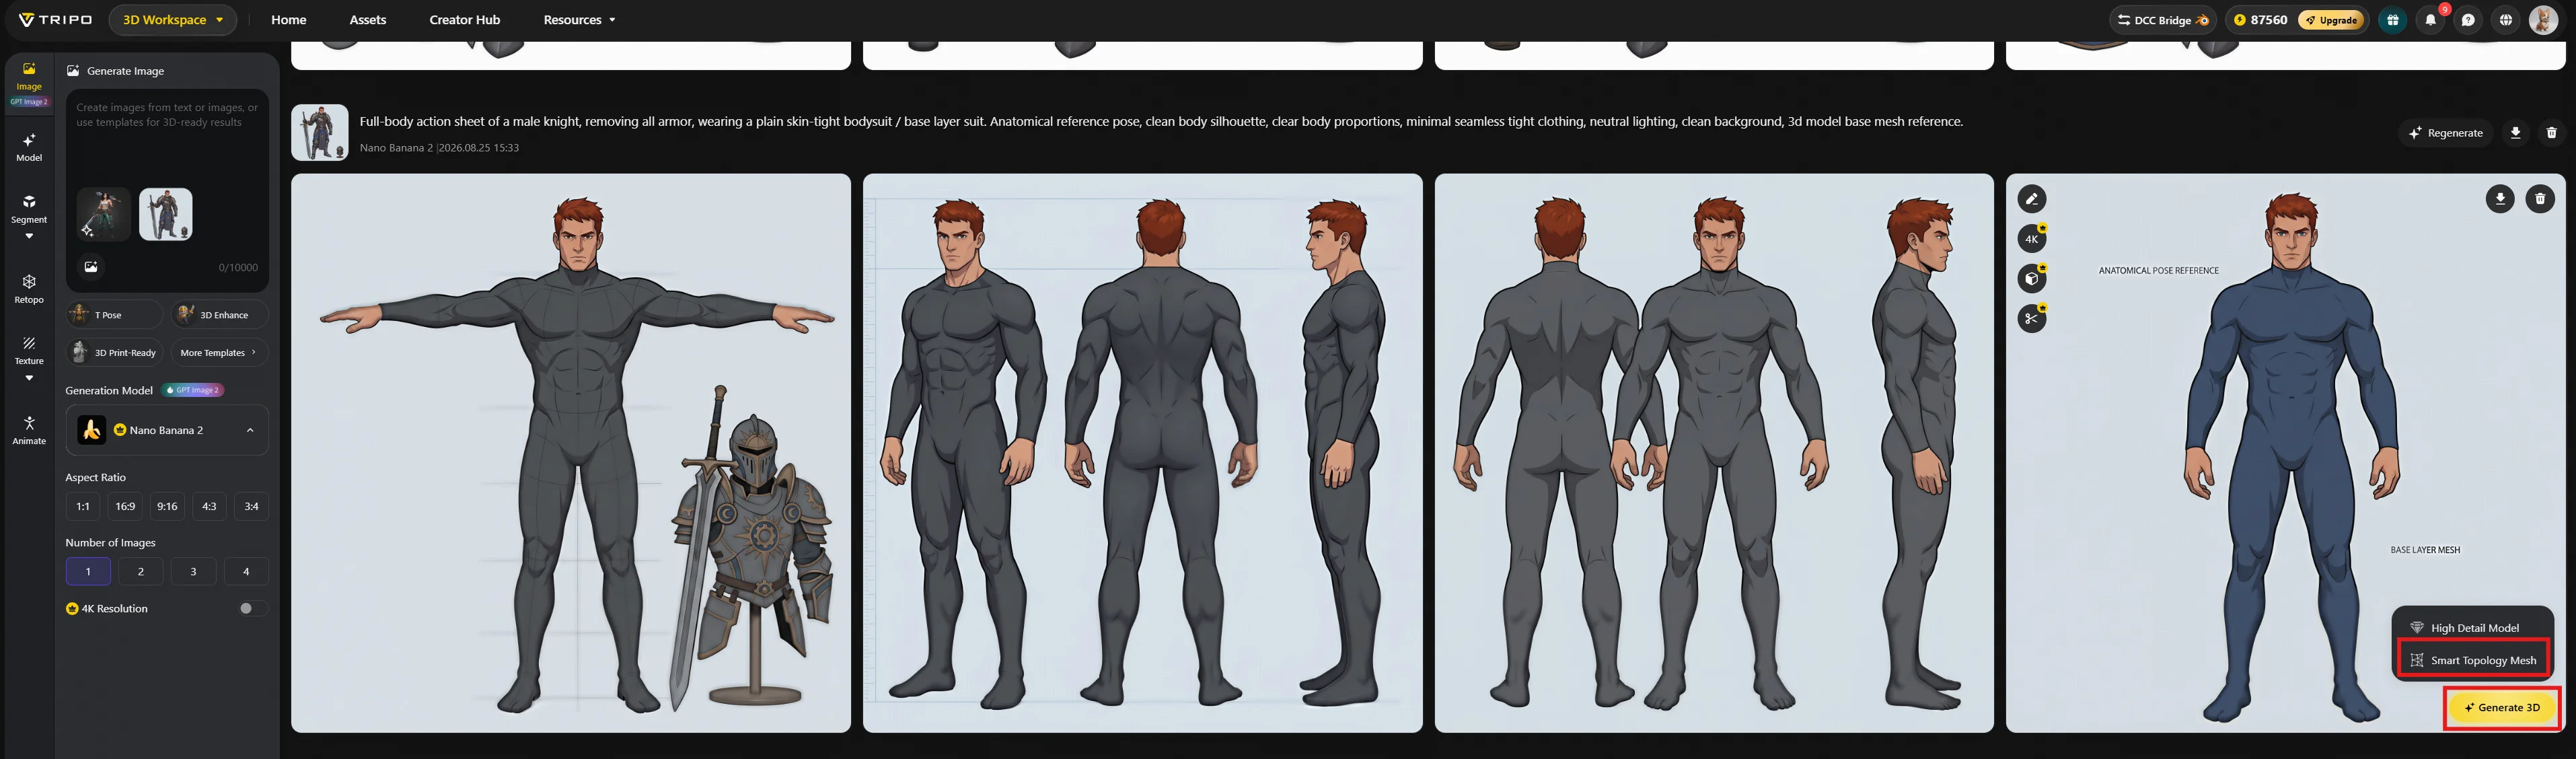
20 a tripo character generation view showing a full body reference from multiple angles alongside high

也可以進入 Navigate Model → Smart Mesh,再上傳最佳化後的參考圖。
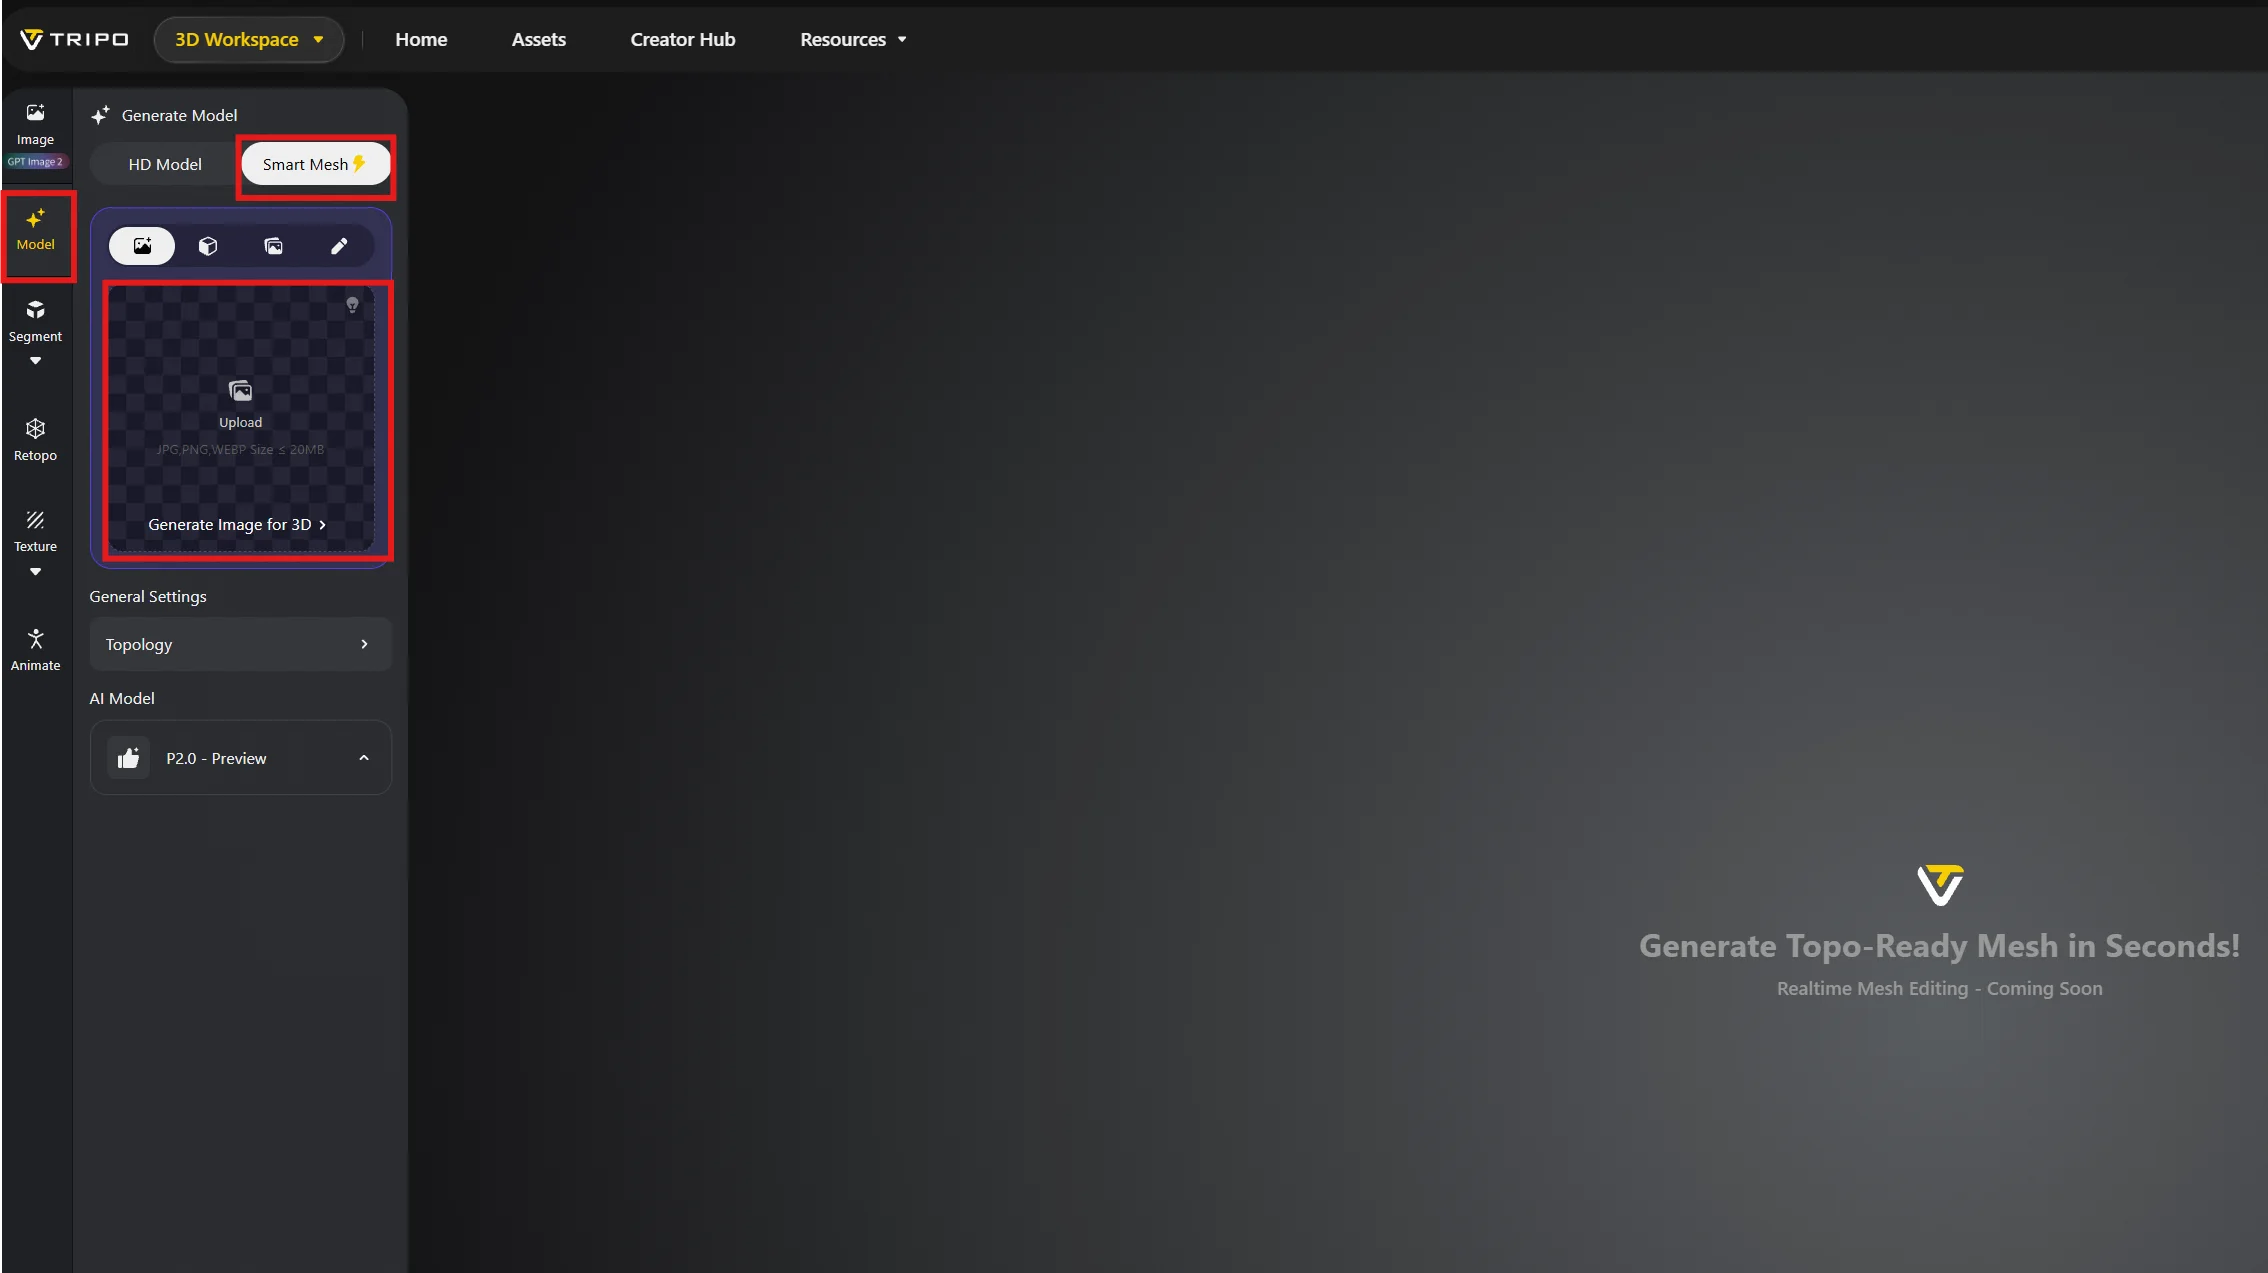
21 the tripo 3d workspace with asset and smart mesh highlighted showing the upload area for generating

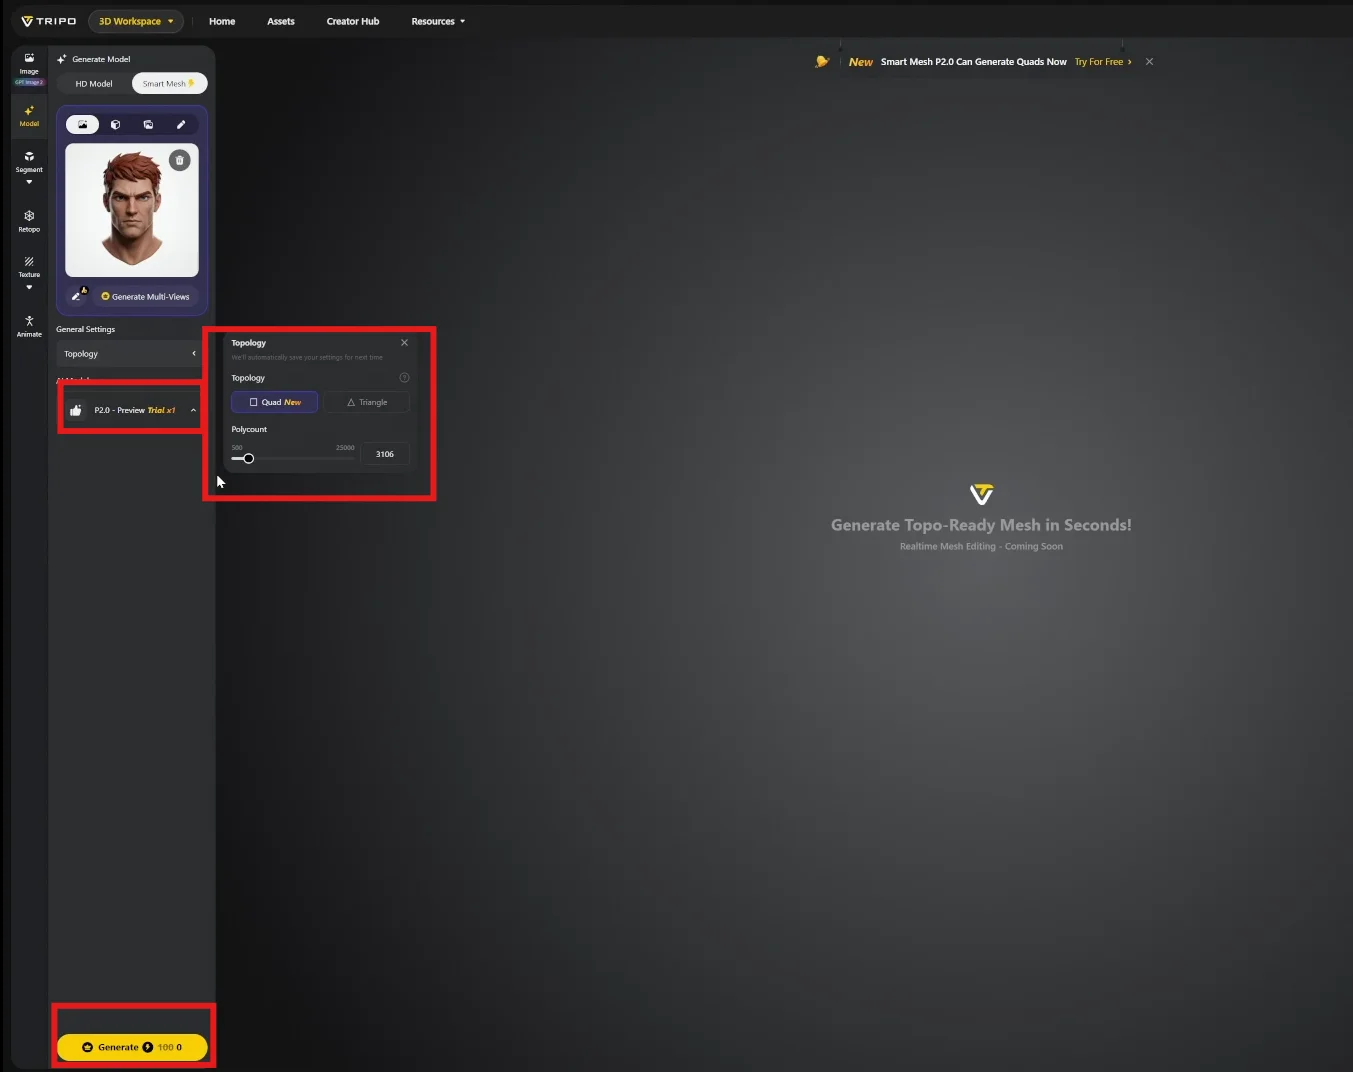
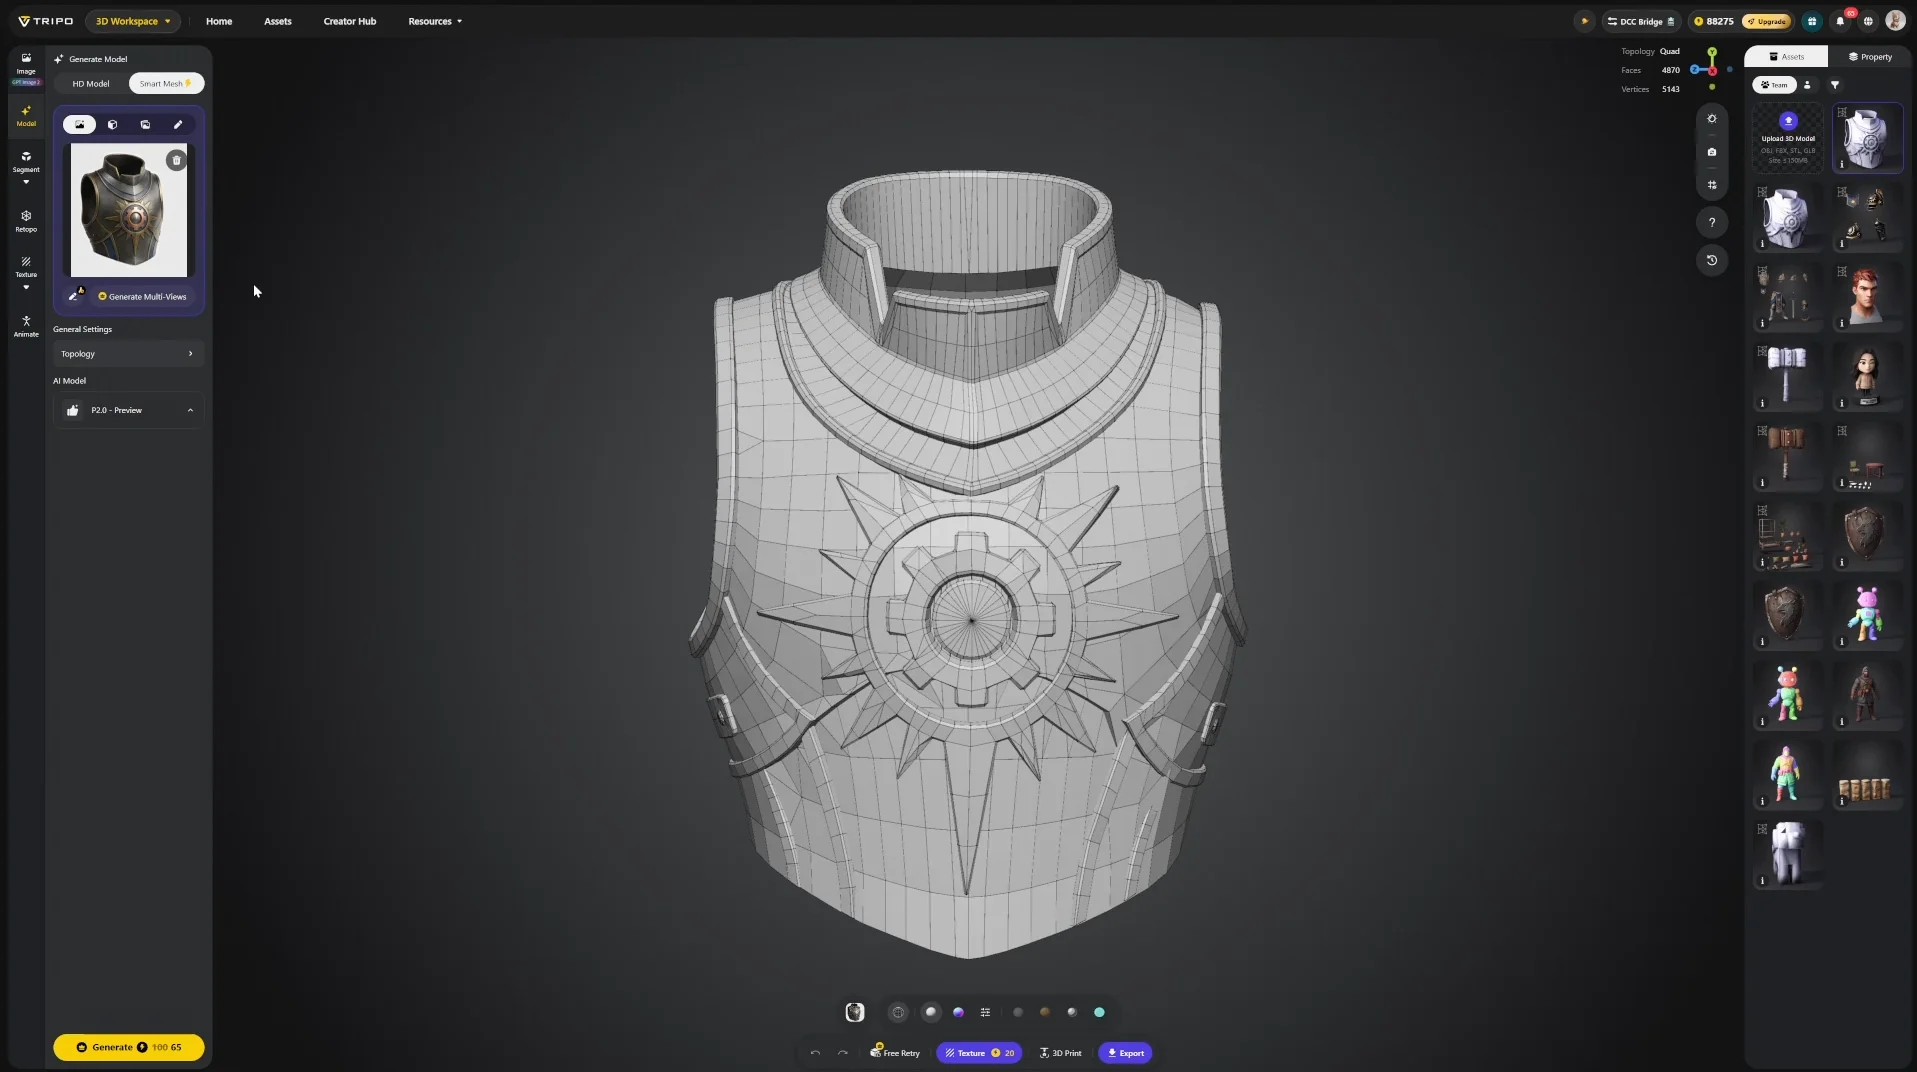
Topology 中選擇 Quad,並設定面數預算。本案例為頭部設定 3,000 個多邊形,組裝後角色的總三角面數目標為 30K 以下

目前使用的生成模型為 P2.0,能夠生成符合業界標準的佈線。

22 the tripo mesh generation interface with p2 0 preview result selected quad and tri topology options

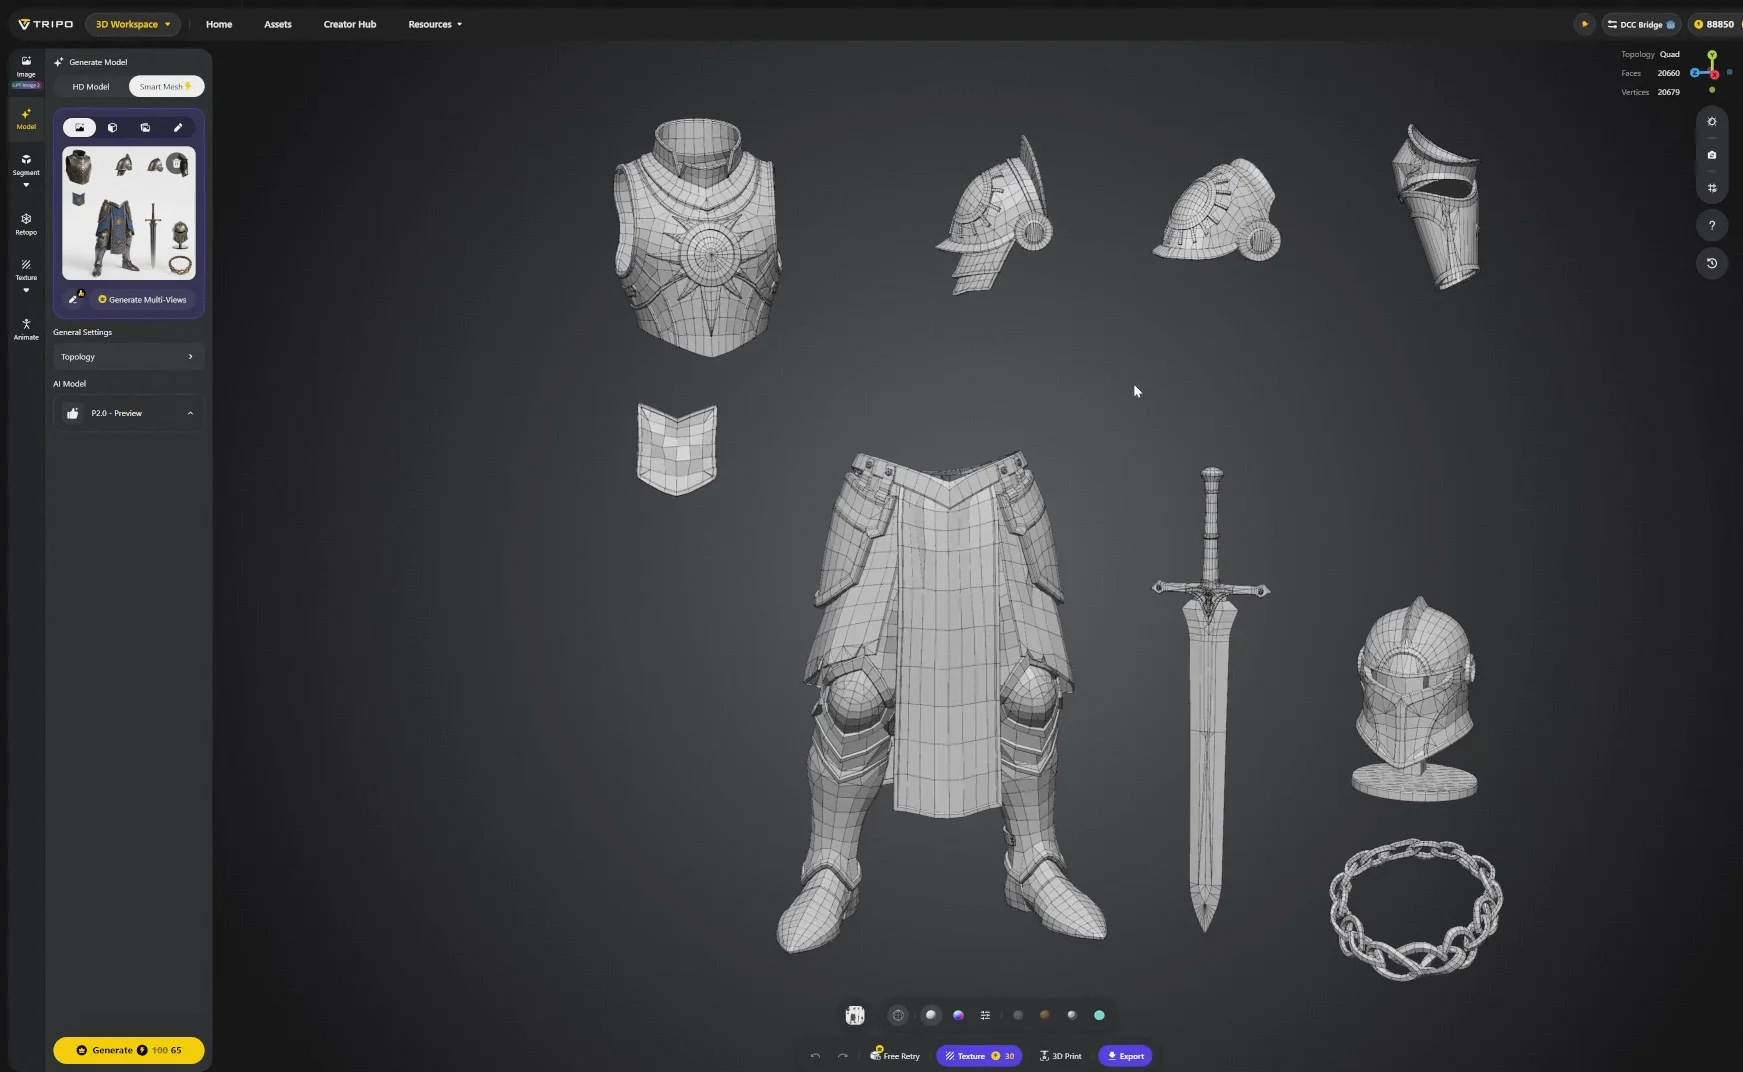
生成可在 一分鐘內完成。透過視埠底部的線框顯示開關檢查佈線;如果結果無法使用,可以免費重試。

實際使用中,生成的網格通常已有 90% 以上達到可投入製作的狀態,只需修正少量局部拓撲問題。
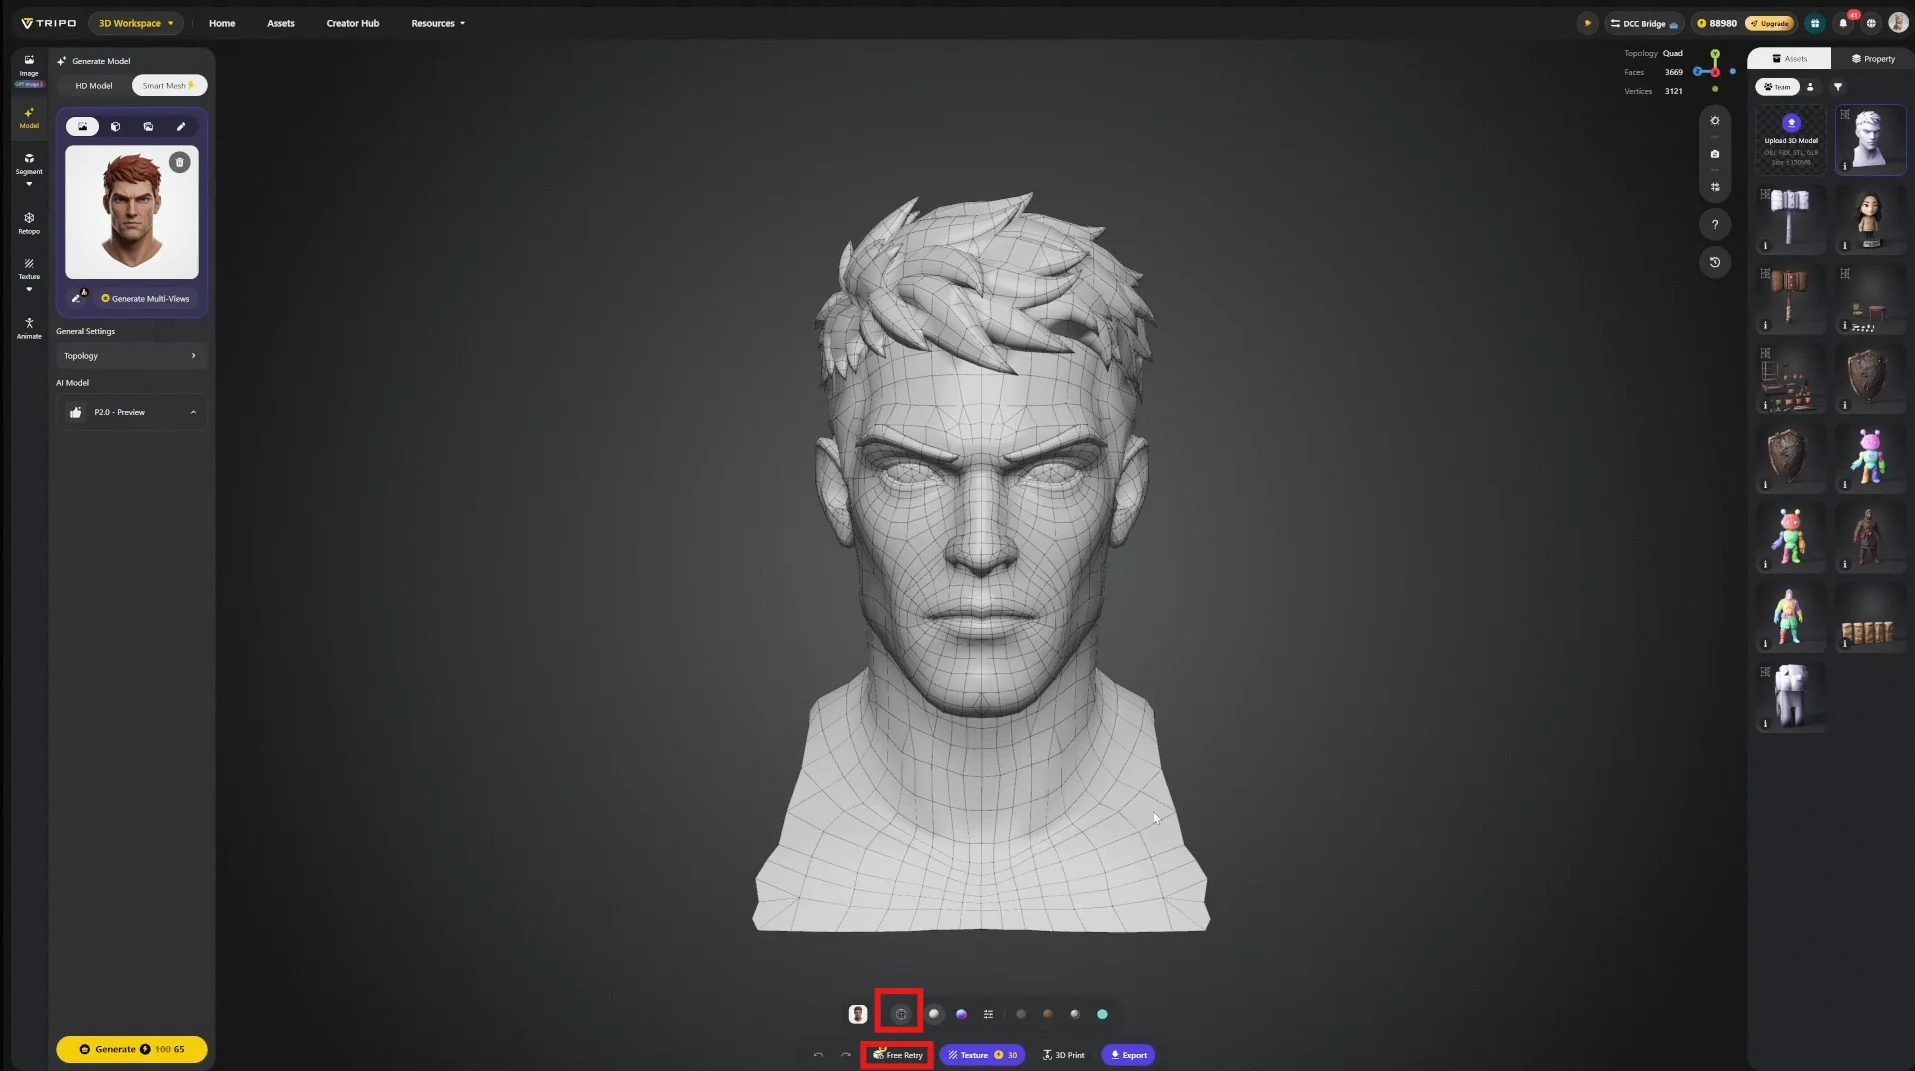
23 a tripo viewport showing a generated head model with wireframe topology generate and retry controls

批次策略:成本與品質

一次生成全部部件
一次生成全部部件
一次生成全部部件
一次生成全部部件
一次生成全部部件
一次生成全部部件

步驟 6 — 生成貼圖

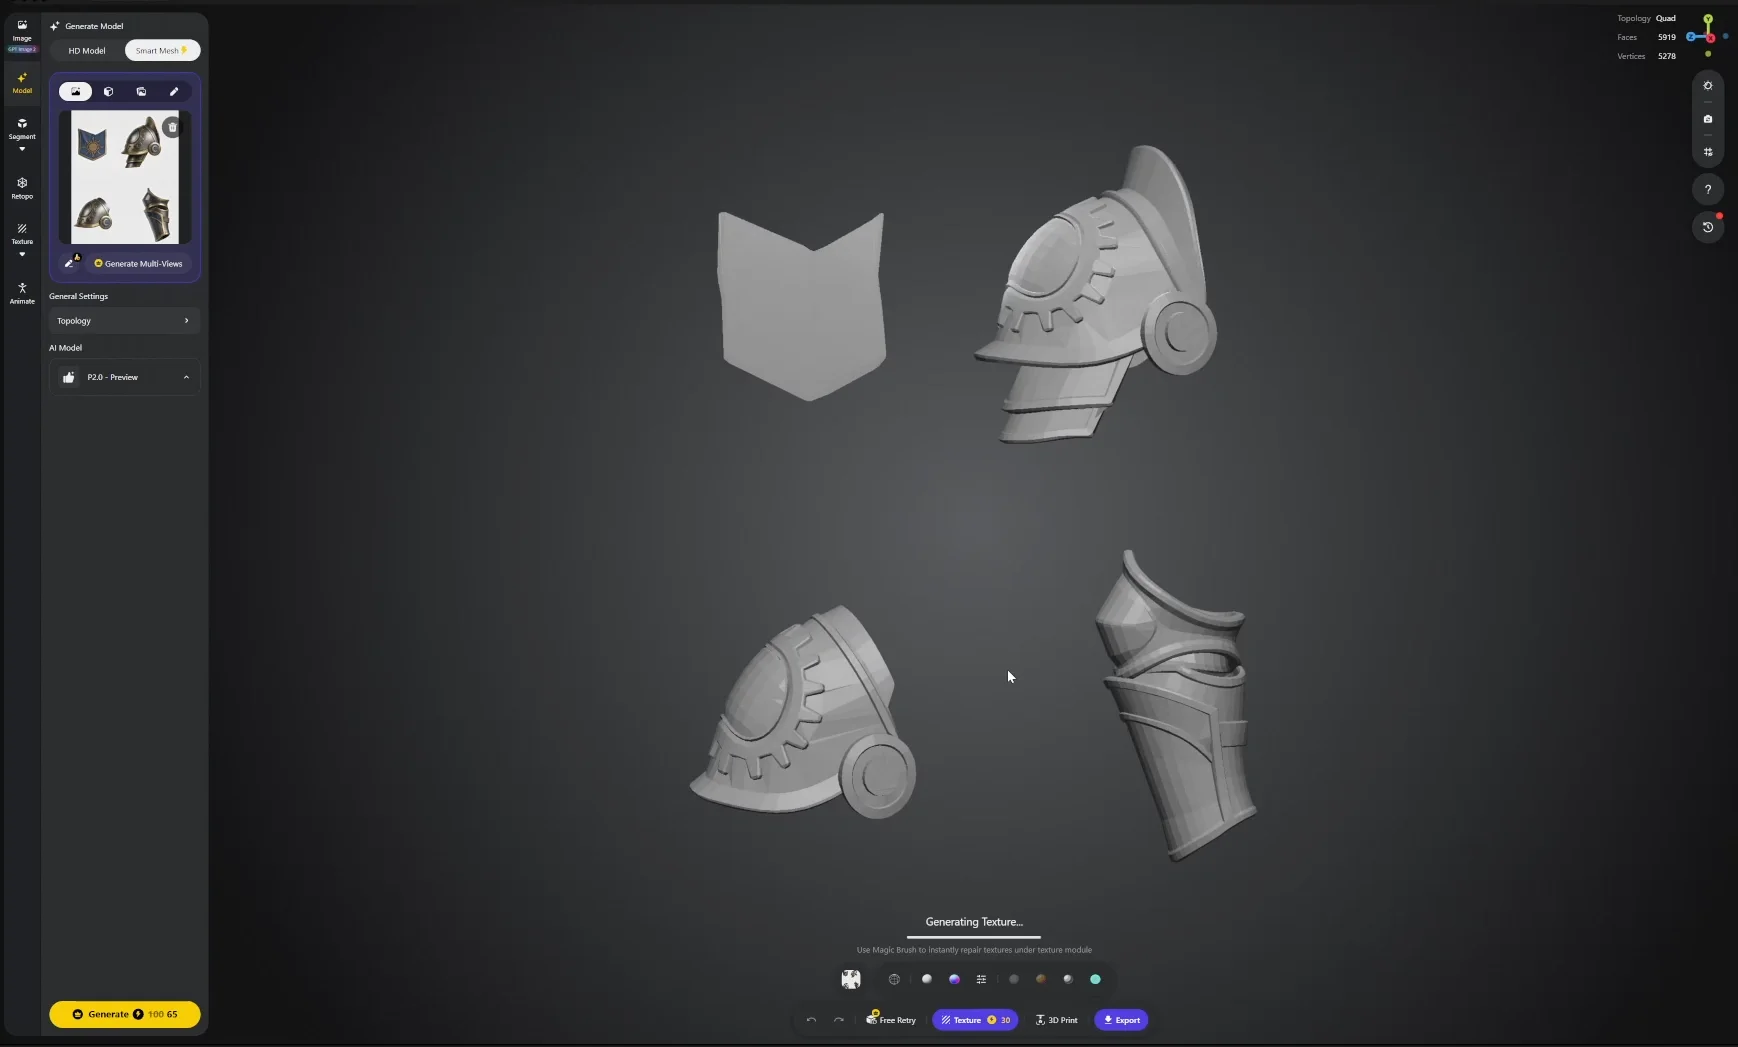
可以從底部工具列生成貼圖,也可以從左側面板進入更多選項。生成需要幾分鐘。
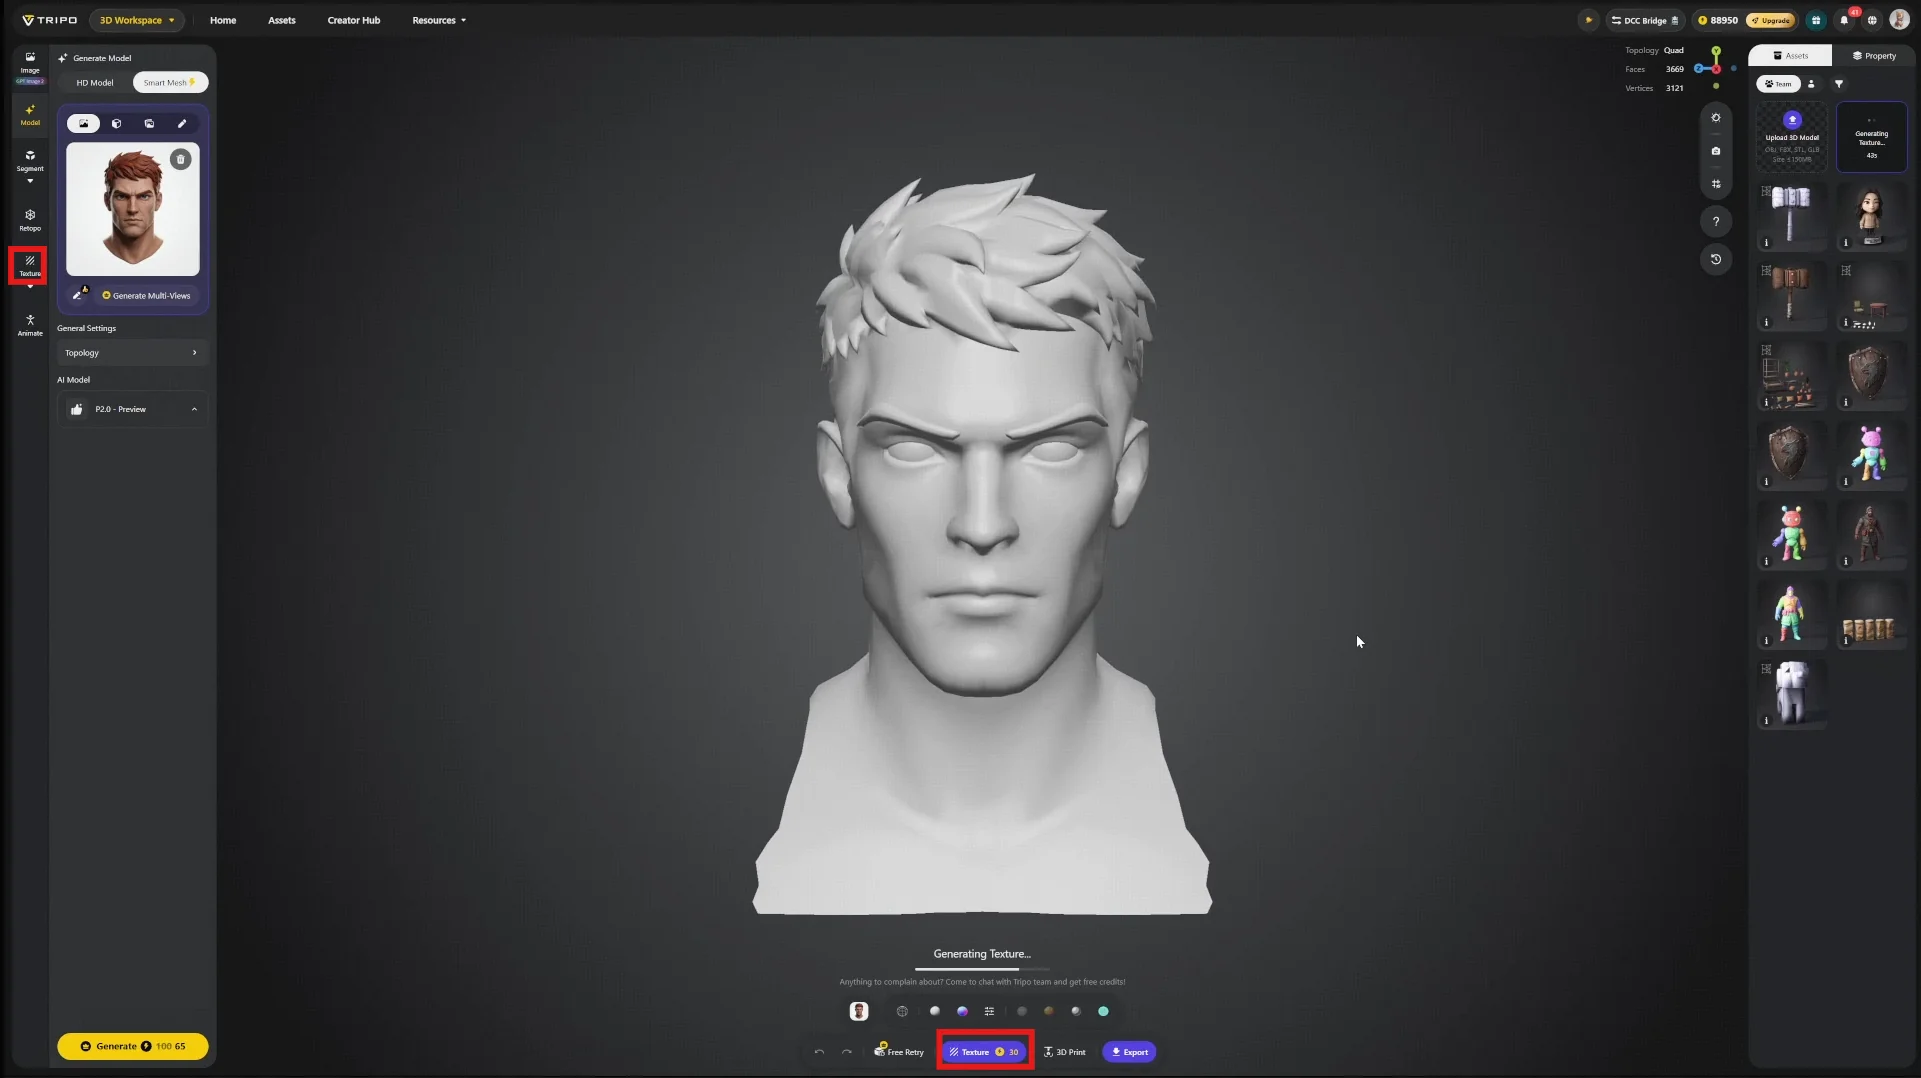
27 the tripo texture generation interface with the texture option highlighted and the generate control
28 a character model displayed in tripo s generation workspace illustrating the interface context for t

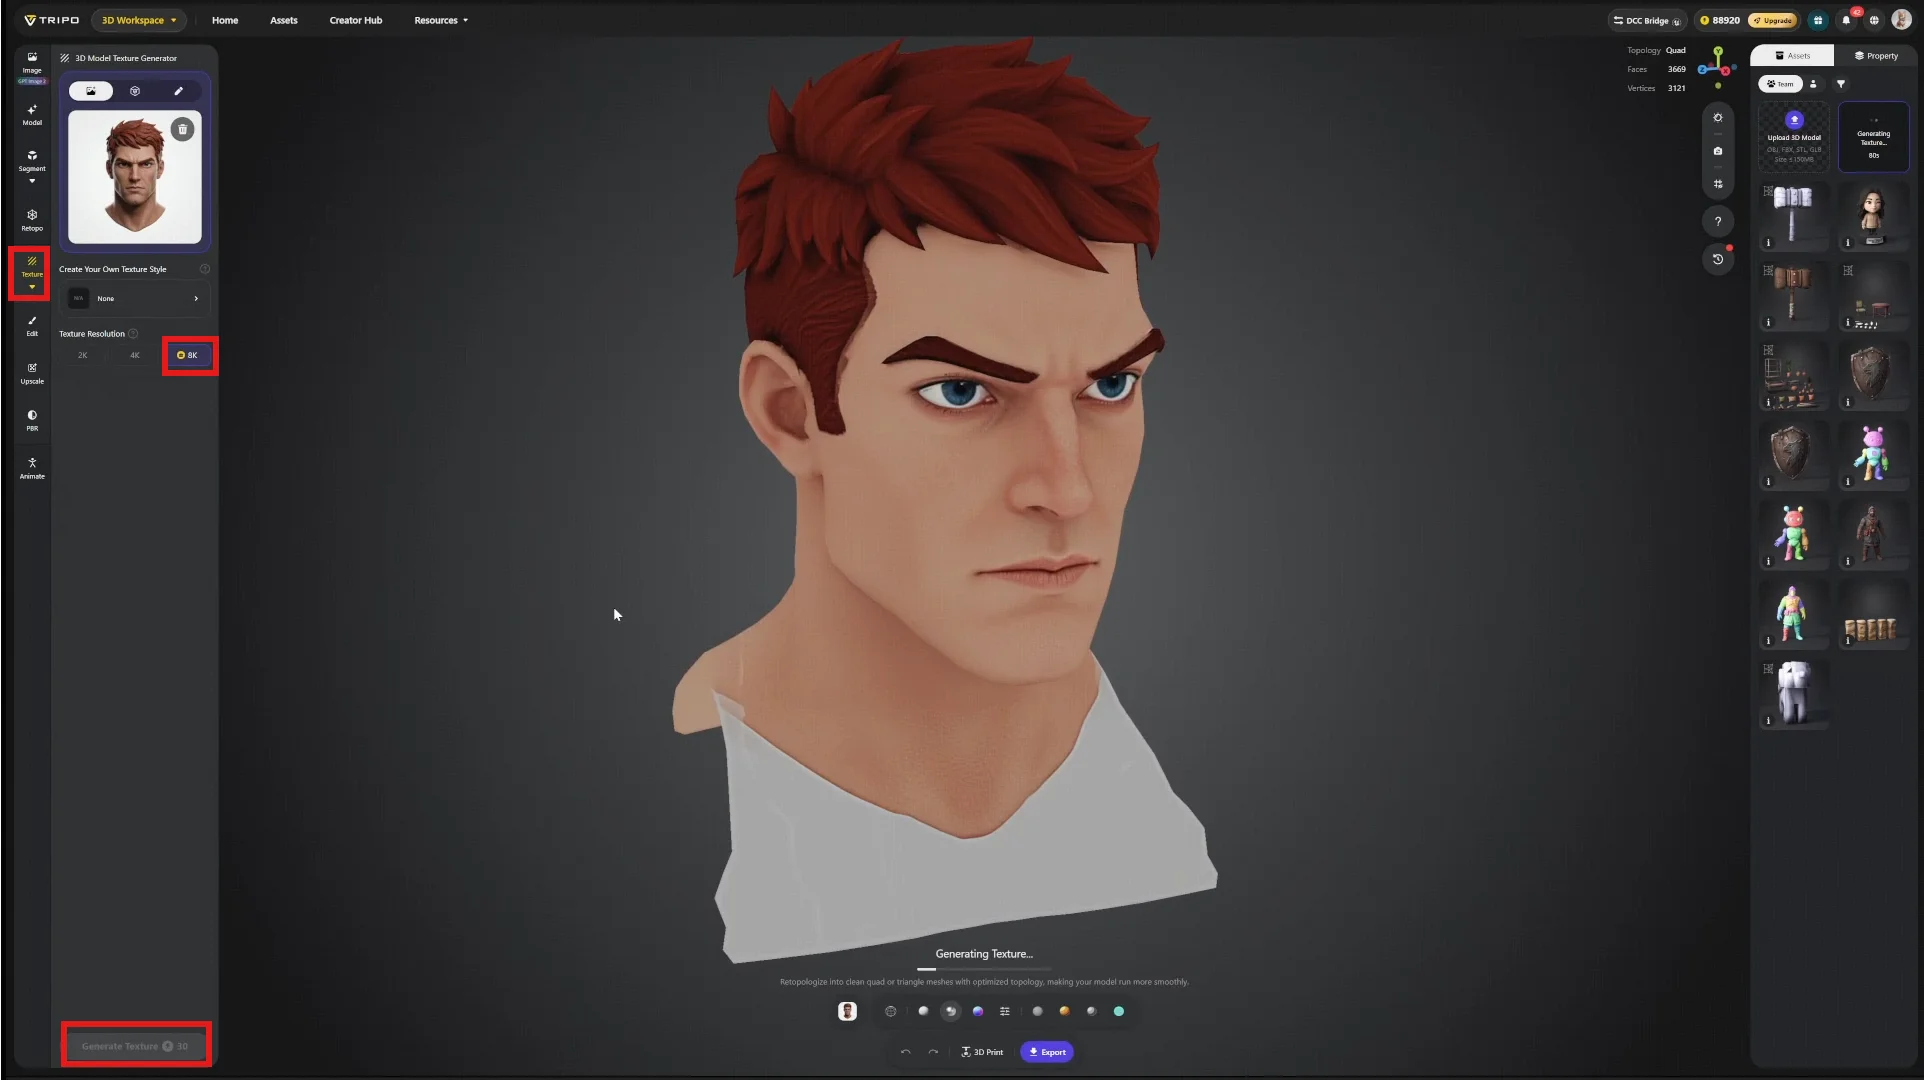
本案例還透過左側面板生成了一套 8K 貼圖。8K 並非遊戲資產的最終交付解析度,本案例也不會直接使用;它將作為步驟 13 精修時的來源素材,為後續處理保留更多細節空間。
29 the tripo texture generation interface with the texture generation and 8k options highlighted along
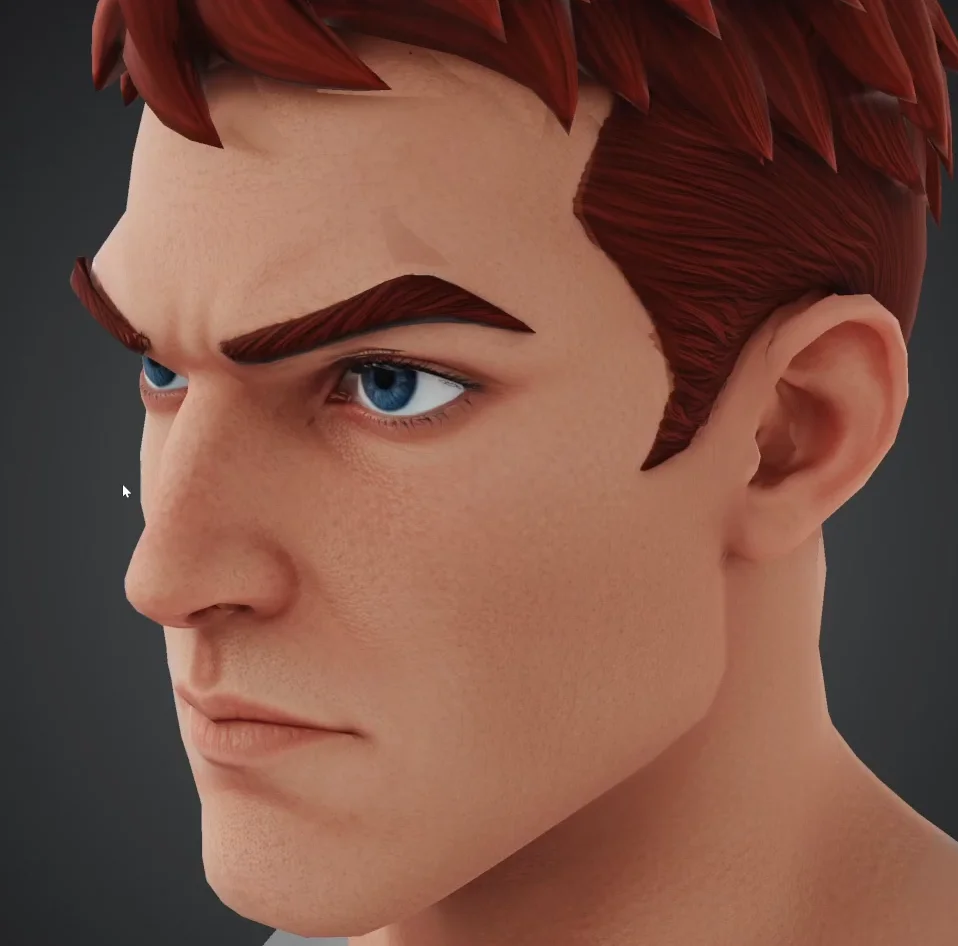
30 a side profile close up of a generated character head with red hair and detailed facial features ill

8K 貼圖能夠直接提供品質更高的初始素材。

步驟 7 — 編輯貼圖

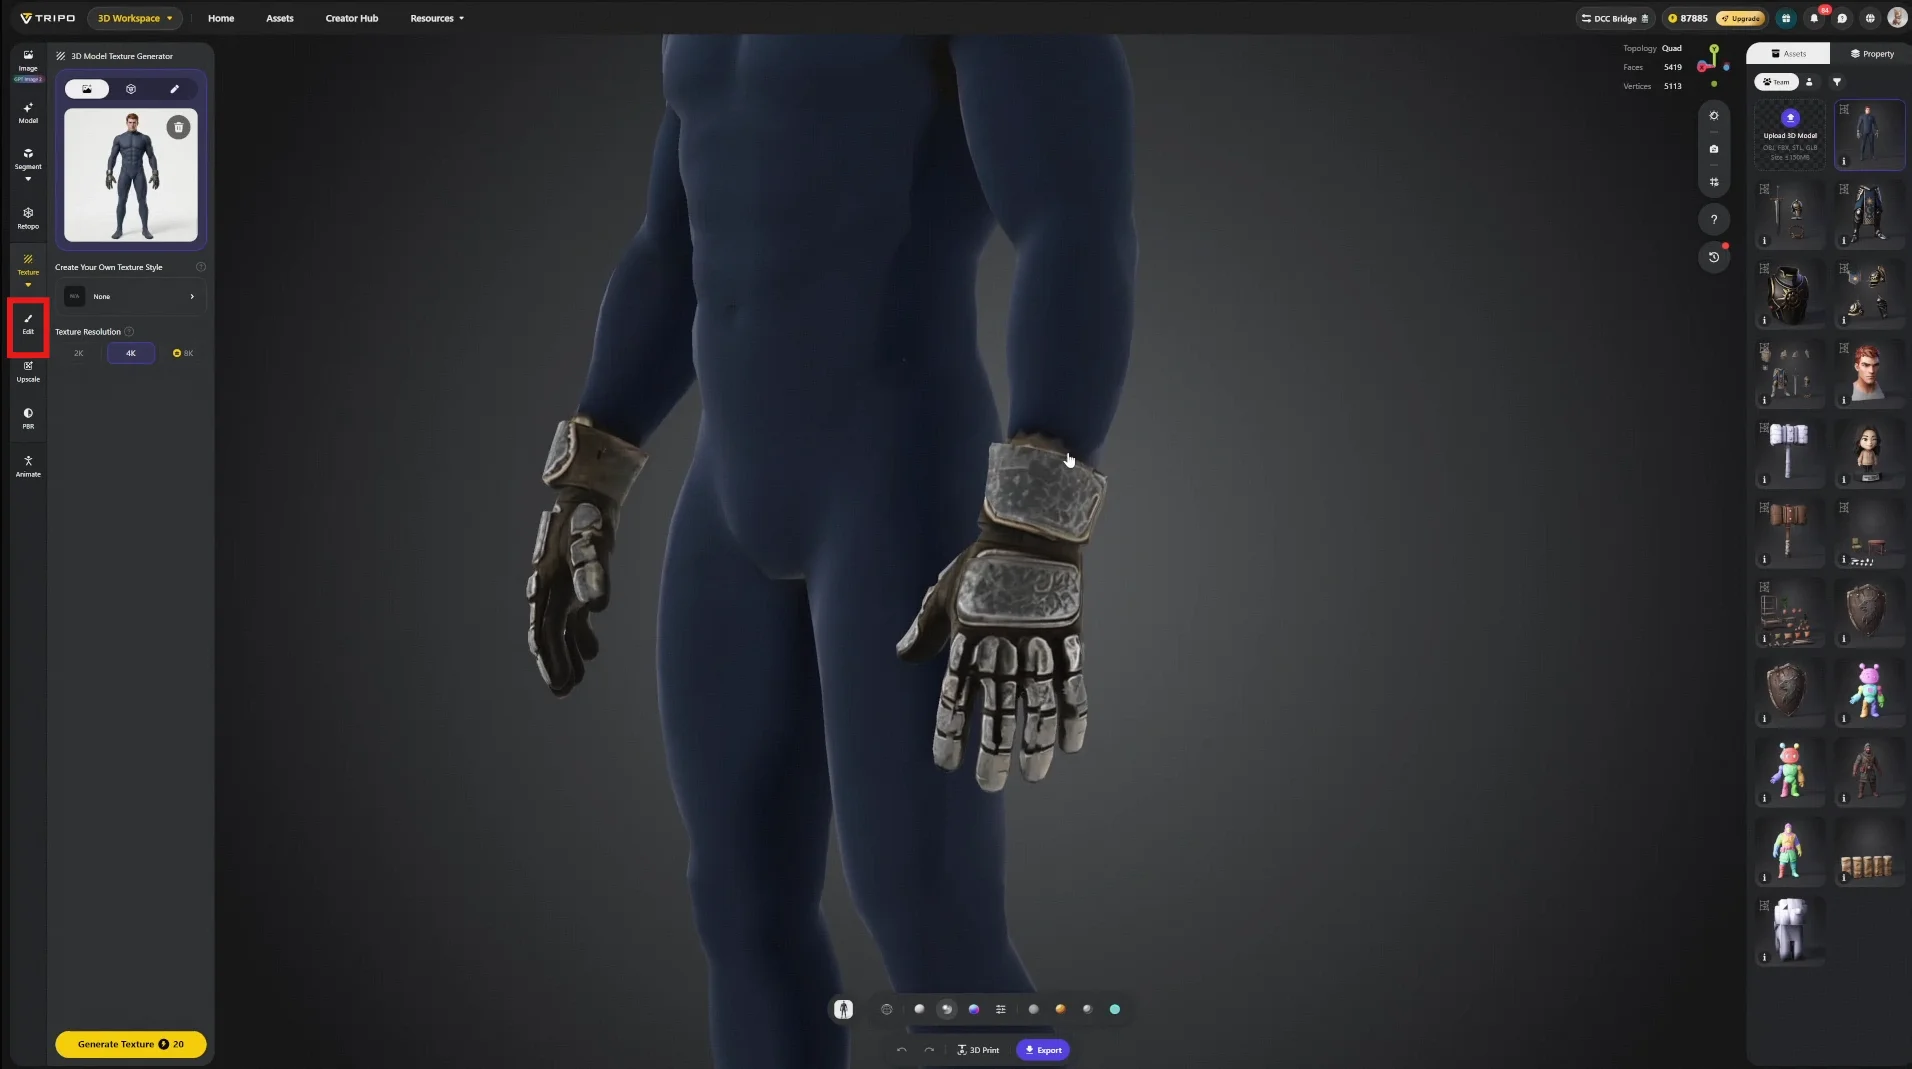
首輪生成的貼圖未必完美。貼圖選項下方的 Edit 工具可用於局部修正。
31 the tripo texture editing interface with the edit tool highlighted beside a character model and mode

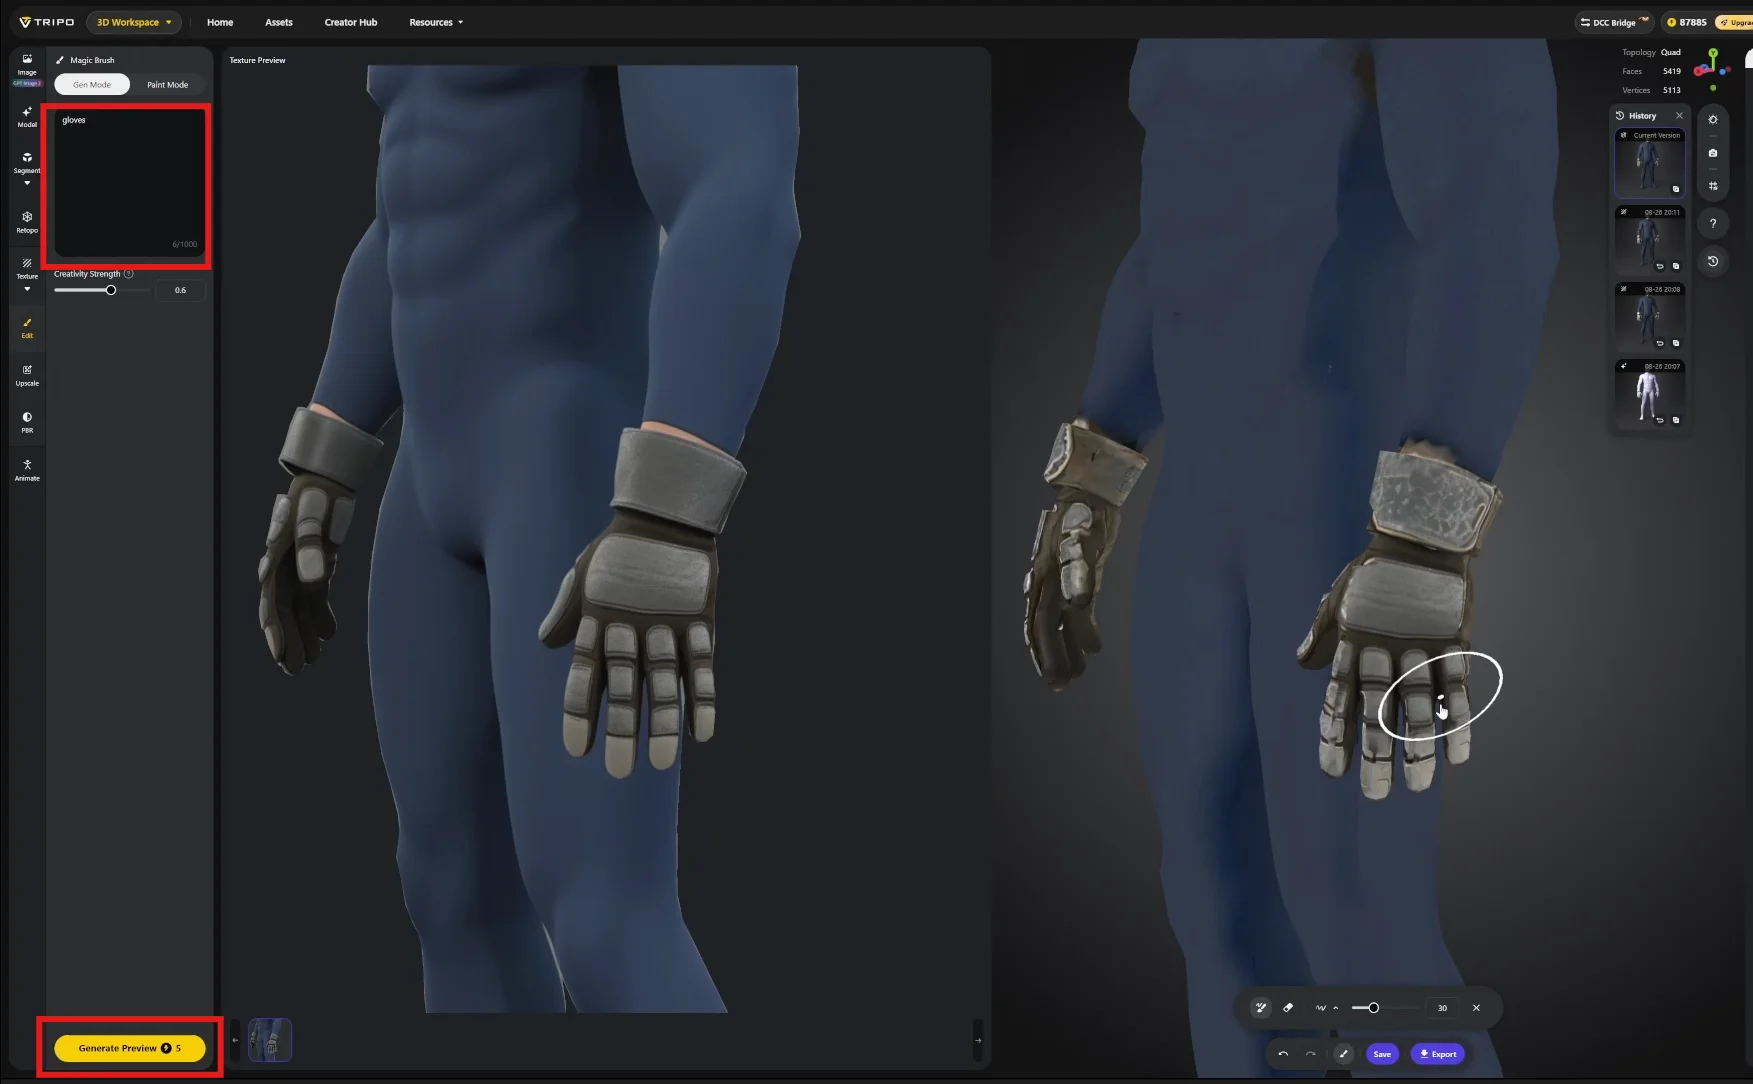
描述需要重繪的區域,然後點擊 Generate Preview。結果會以投影預覽層顯示在左側面板中,並像傳統投影繪製一樣投射到模型表面。

重要:Edit 工具的作用範圍

編輯操作只作用於目前視角。從正面繪製不會同步更新背面,因此應把它用於局部定點修復,而非整套表面重繪。
32 the tripo texture editing interface showing a close up of the hand area with edit and generate previ

步驟 8 — PBR 處理

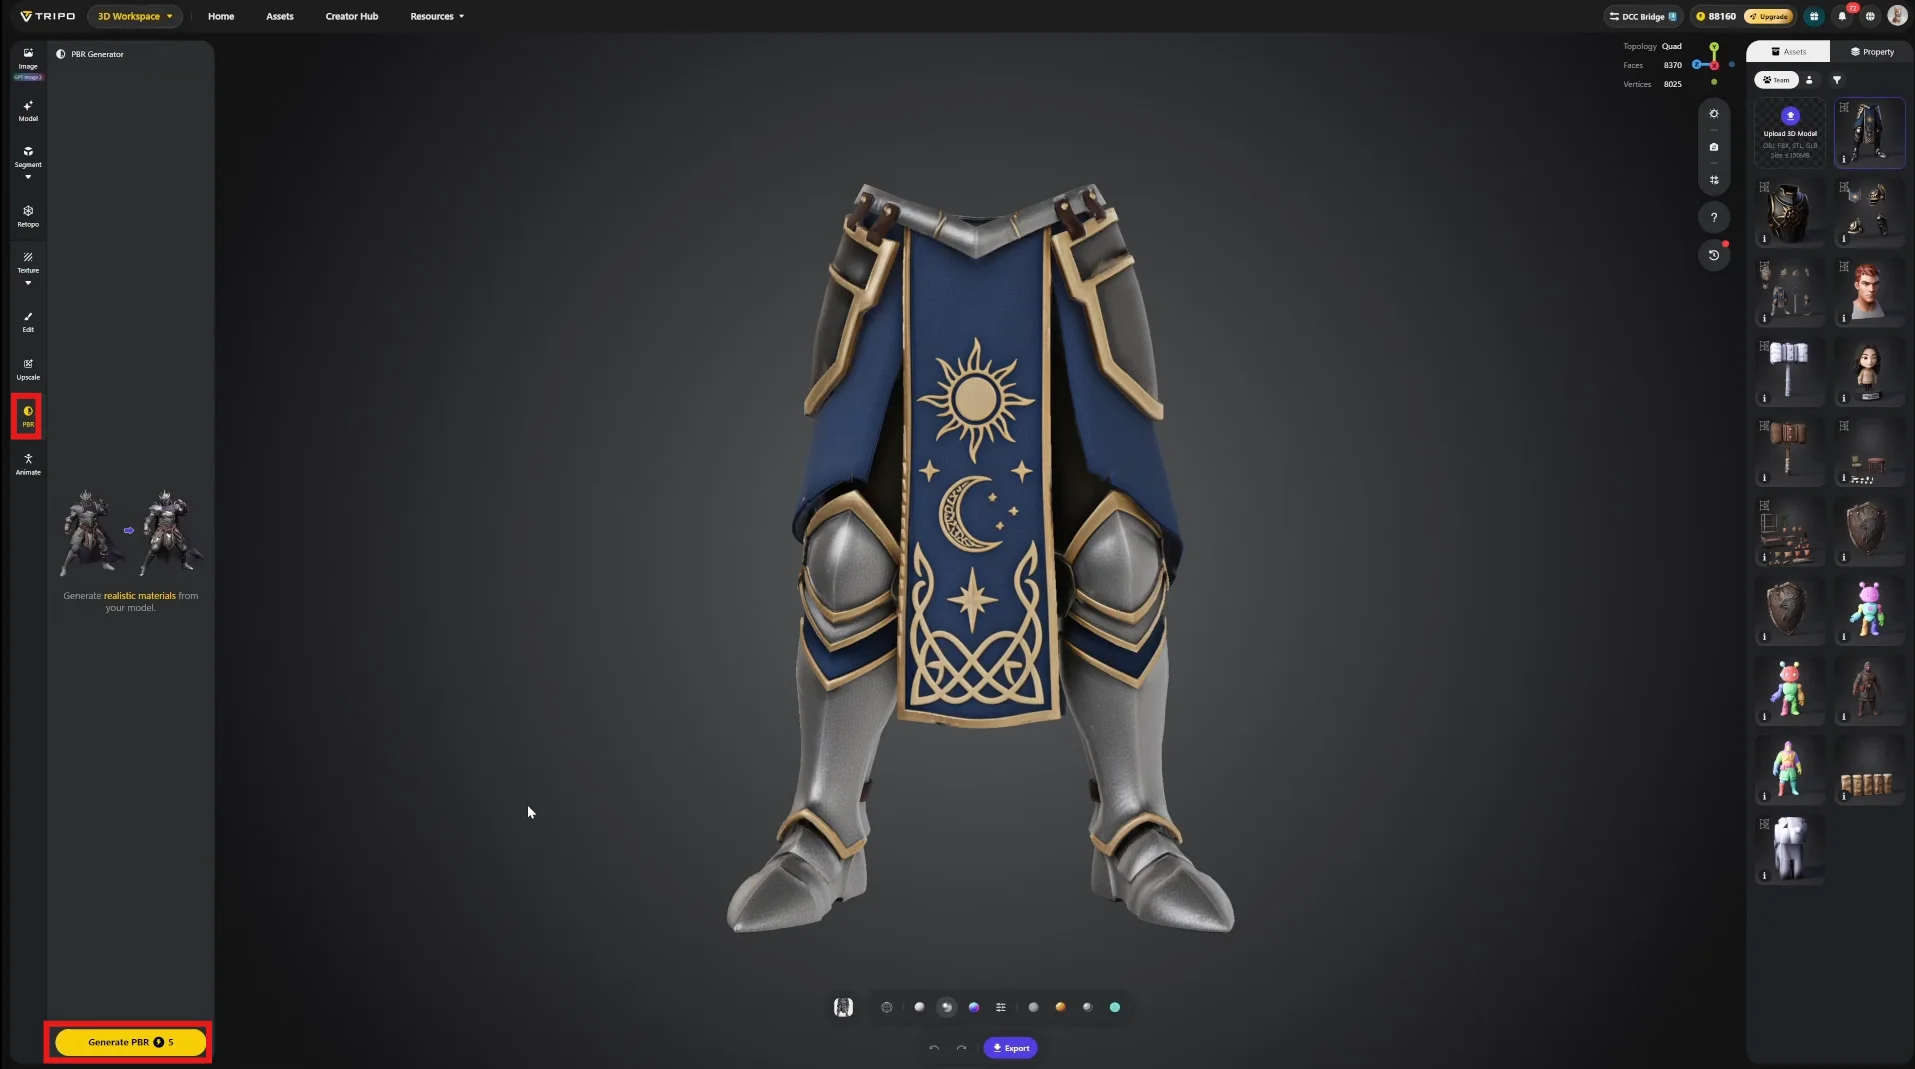
使用左側面板中的 PBR 功能,將單張基礎色貼圖轉換為完整貼圖集,包括法線、粗糙度和金屬度貼圖。
33 the tripo pbr interface showing a textured armored character and the pbr control highlighted in the

步驟 9 — 匯出

DCC Bridge 可將資產直接傳送到建模軟體,省去手動匯出再匯入的步驟。
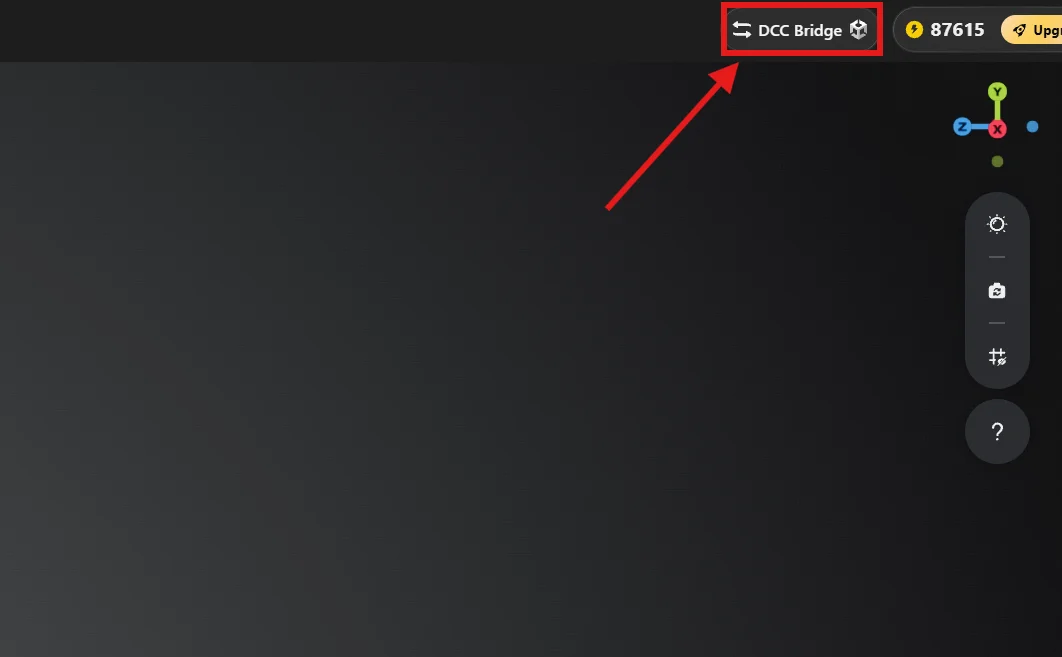
34 the upper right area of the tripo interface with the dcc bridge entry and its upgrade indicator visi

請確保已正確安裝 DCC Bridge 外掛。點擊文件圖示即可查看安裝指南。

開啟外掛並啟用自動同步。傳輸時,Tripo 網頁與目標引擎或 DCC 軟體必須同時保持開啟;如果接收端未開啟,傳輸將失敗。
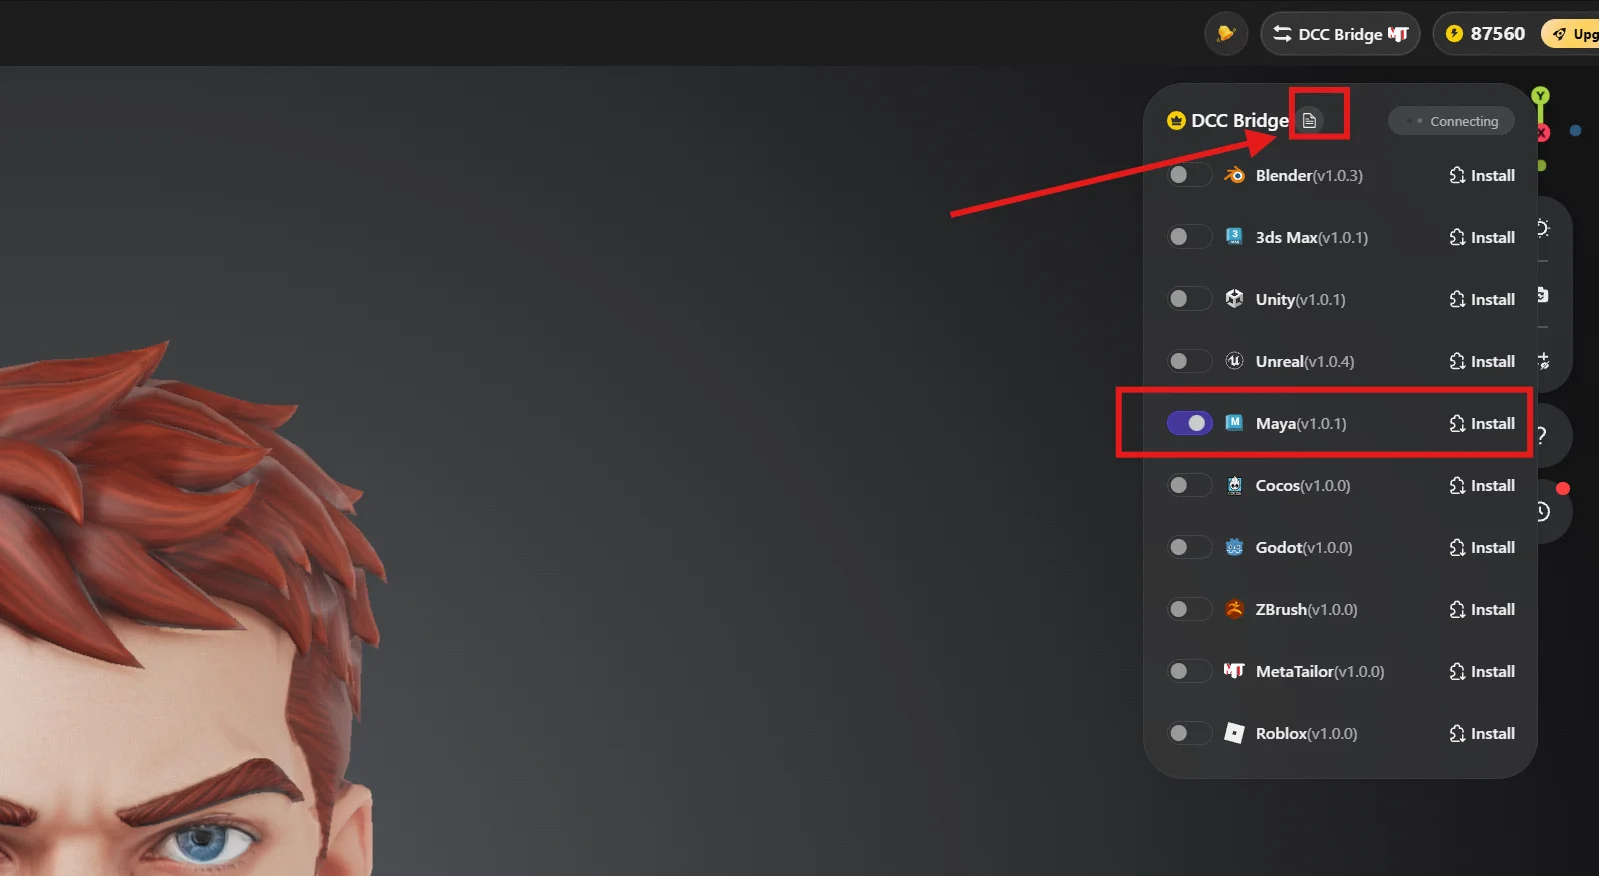
35 the tripo dcc bridge panel listing compatible applications with the dcc bridge entry and maya versio

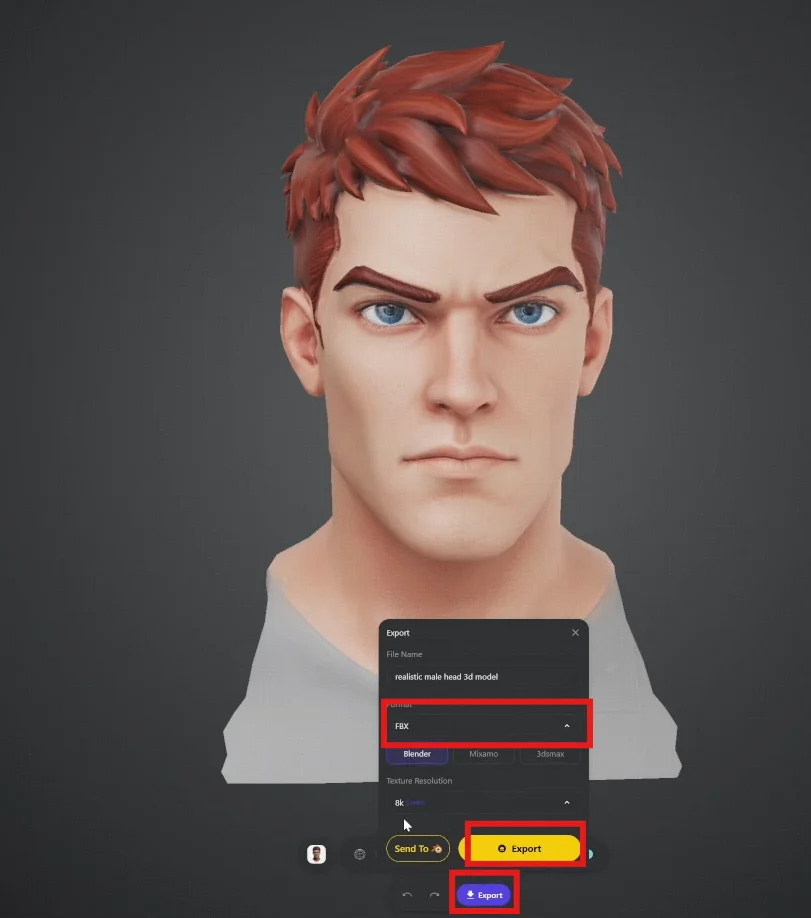
也可以依工作需要匯出檔案,常用格式為 FBXOBJ

36 the tripo export dialog with fbx selected and the export button highlighted

階段 C · 製作收尾

從這一階段開始,藝術家的專業能力重新成為核心。Tripo 已經完成幾何體和貼圖的初步交付,但要把它們打磨成可用於正式專案的高品質遊戲資產,仍離不開專業製作經驗。

步驟 10 — 重新組裝

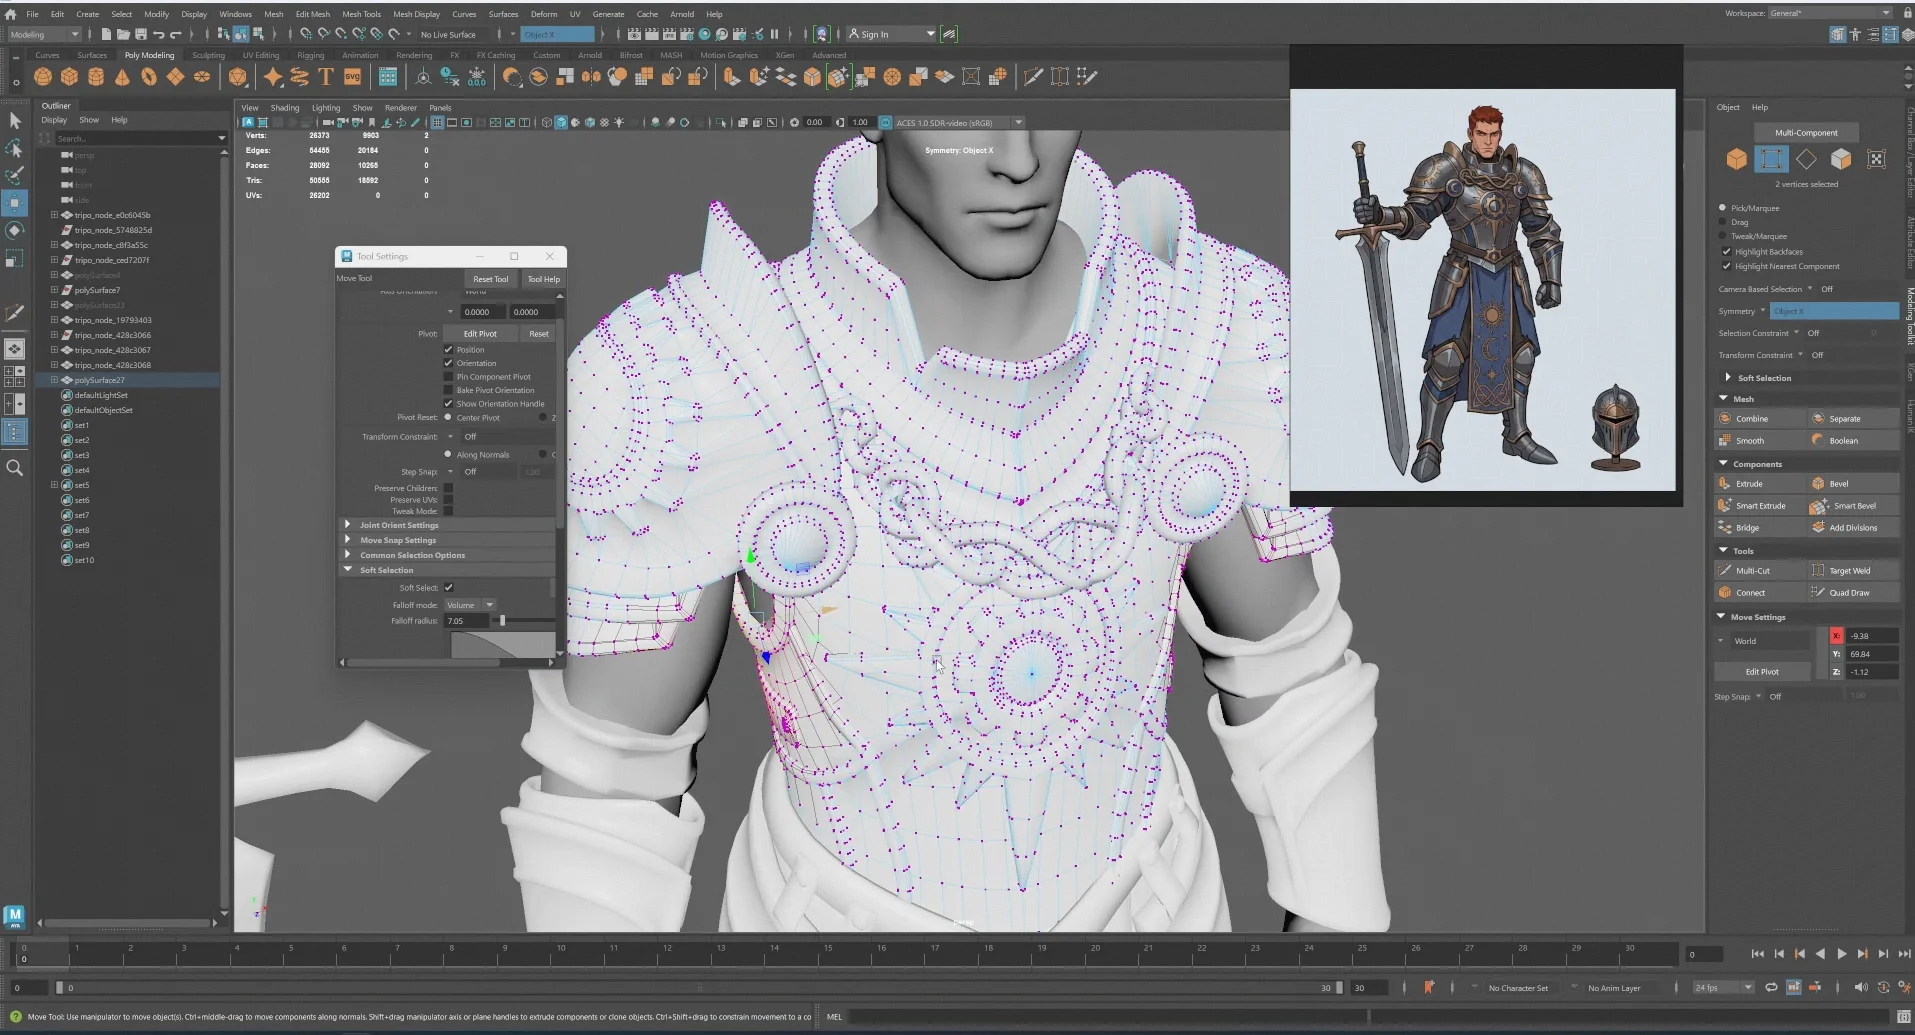
Tripo 會將所有模型統一縮放到相同尺寸,但角色的不同部件本來就應有大小差異。因此,需要在常用 DCC 軟體中重新組裝,例如 Maya、Blender、3ds Max、ZBrush 或 3D Coat。
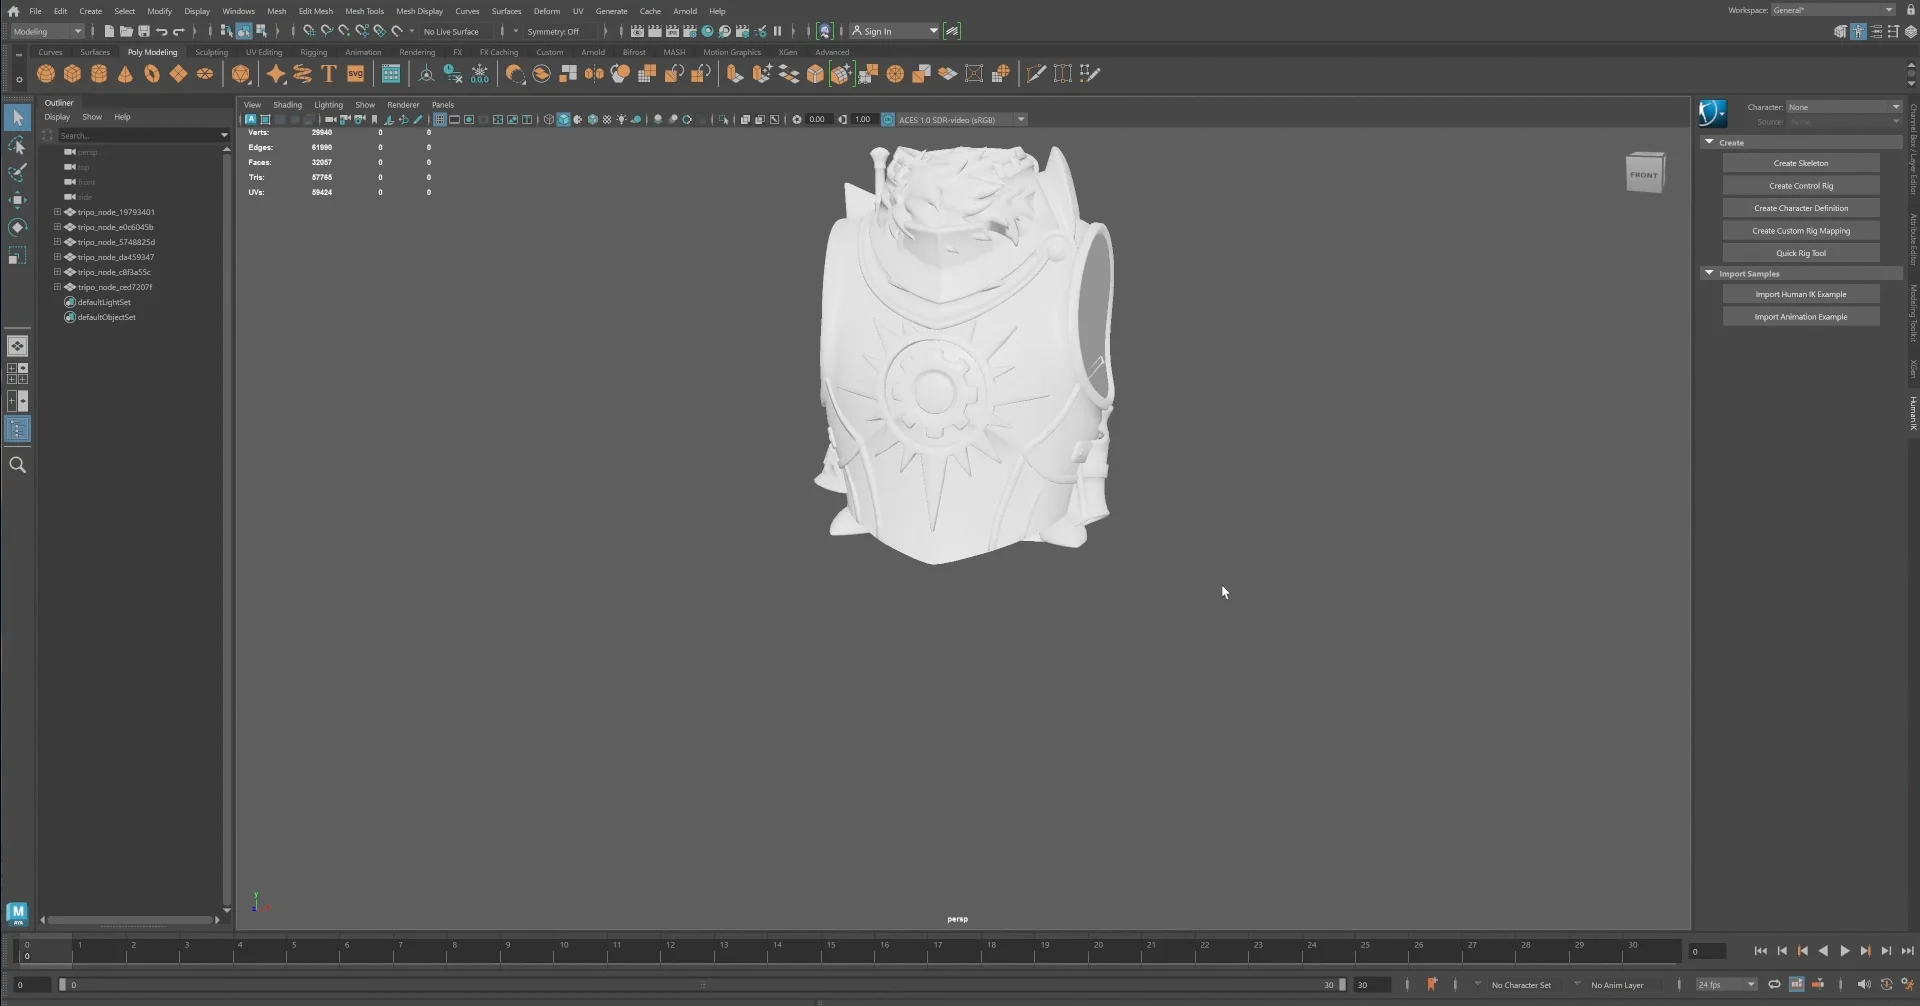
37 a 3ds max workspace showing a character upper body model during the re assembly stage

本案例使用 Maya。載入參考圖,利用各個部件重新組裝角色,並始終以 對稱性和比例為準。
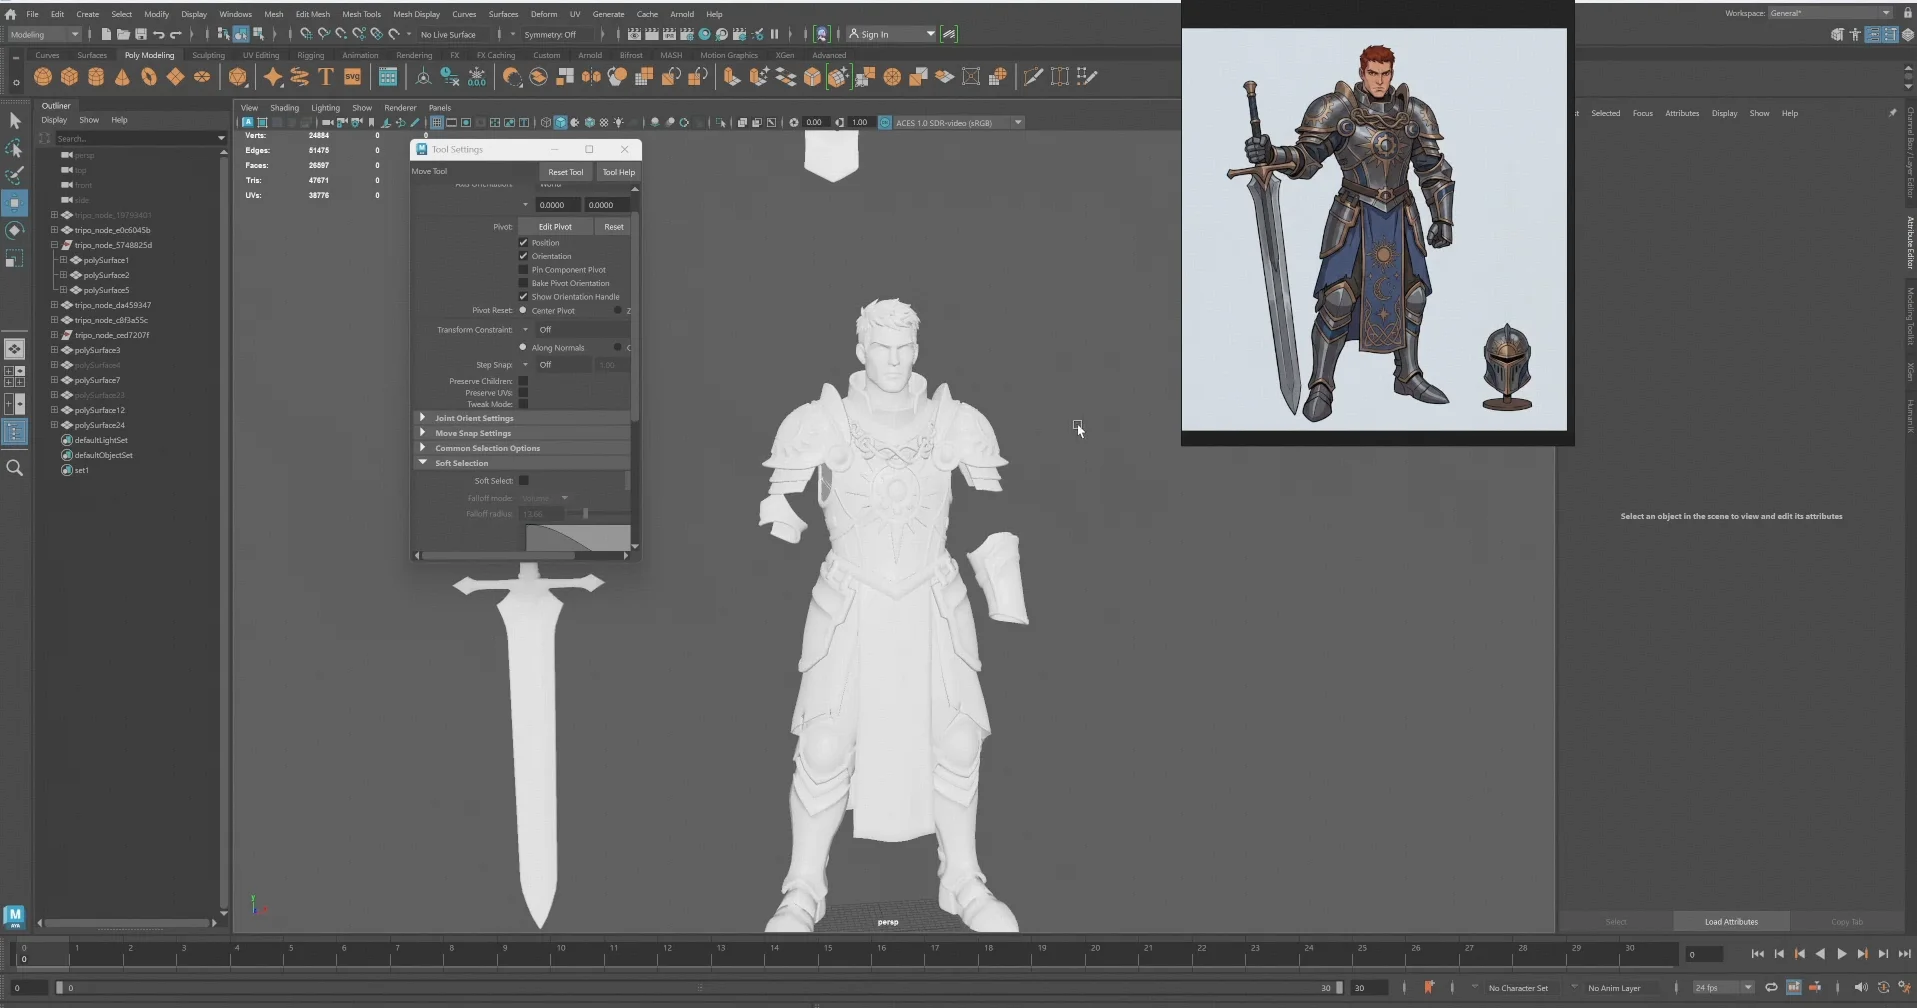
38 a dcc workspace showing the character hierarchy wireframe model and reference image used for re asse

部分部件需要手動移動和縮放,才能與參考圖相符。

39 a maya re assembly workspace showing an armored character torso reference images symmetry controls a

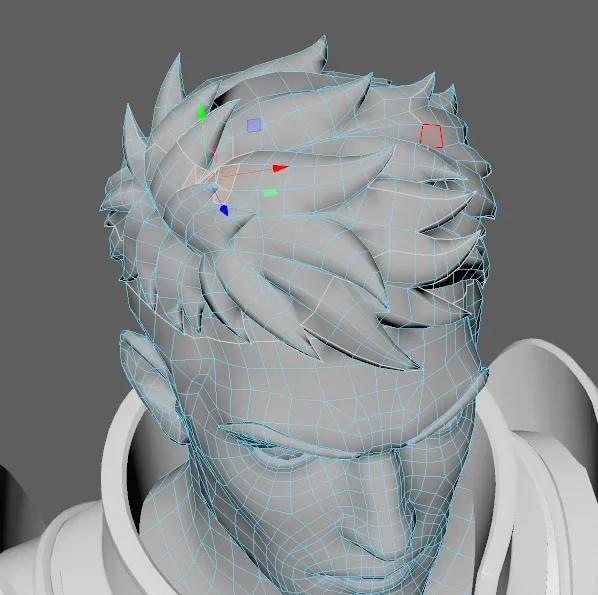
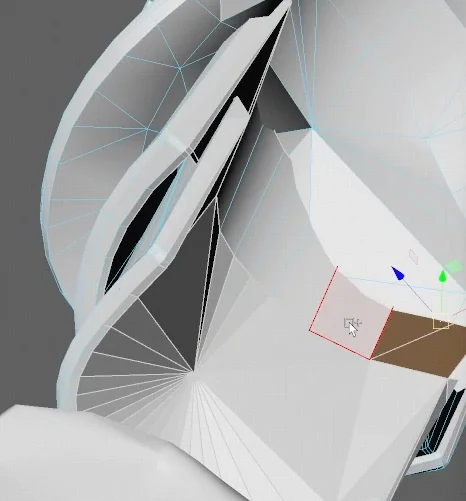
模型中可能出現非流形面或破洞,目前仍需手動修復。這類問題數量不多,後續模型更新也在持續改善。
40 a close up topology editing view showing a selected polygon that requires manual adjustment during m
41 a wireframe character head view illustrating manual positioning scaling and repair of components dur

步驟 11 — UV 與對稱

Tripo 提供對稱功能,但進入下一步前,仍應依自己的製作標準檢查結果。

關鍵:先保留原有貼圖映射

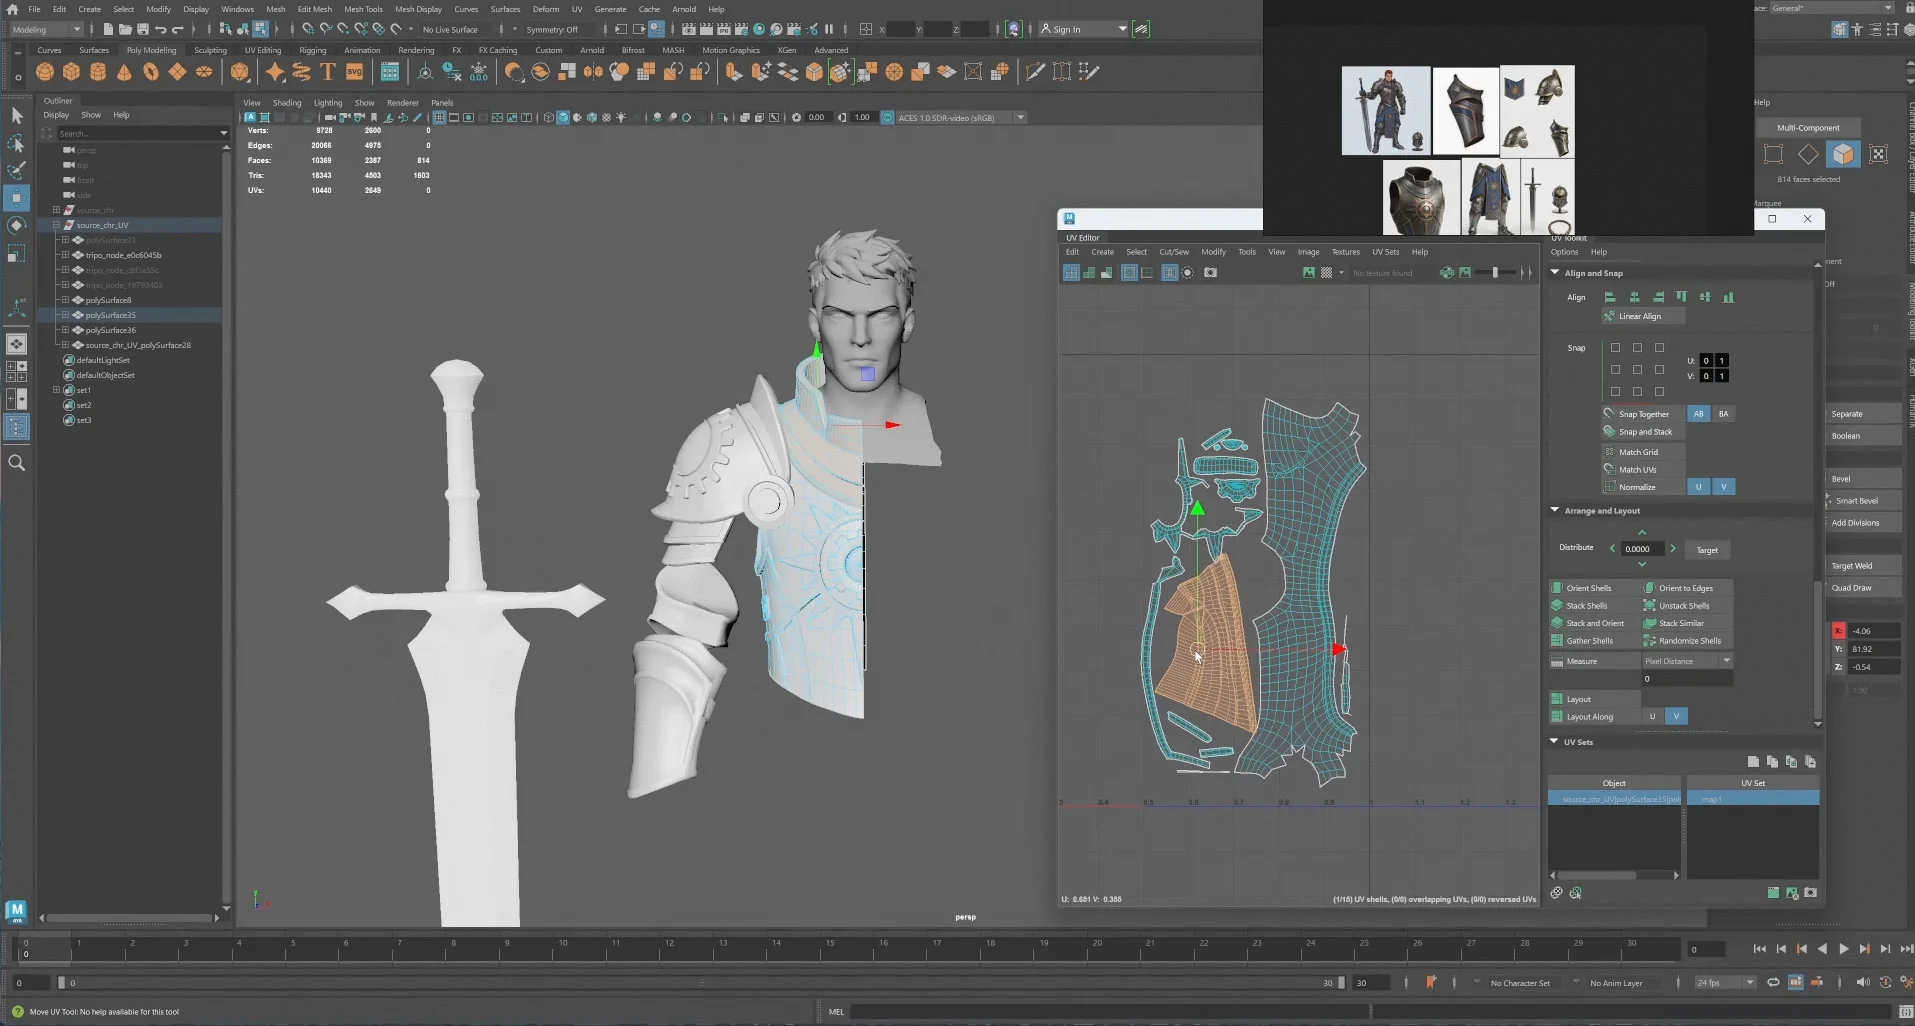
Tripo 生成的貼圖依賴原始 UV。修改 UV 前務必複製一份模型。 一旦遺失原始 UV 集,生成的貼圖也將無法使用,只能重新生成。

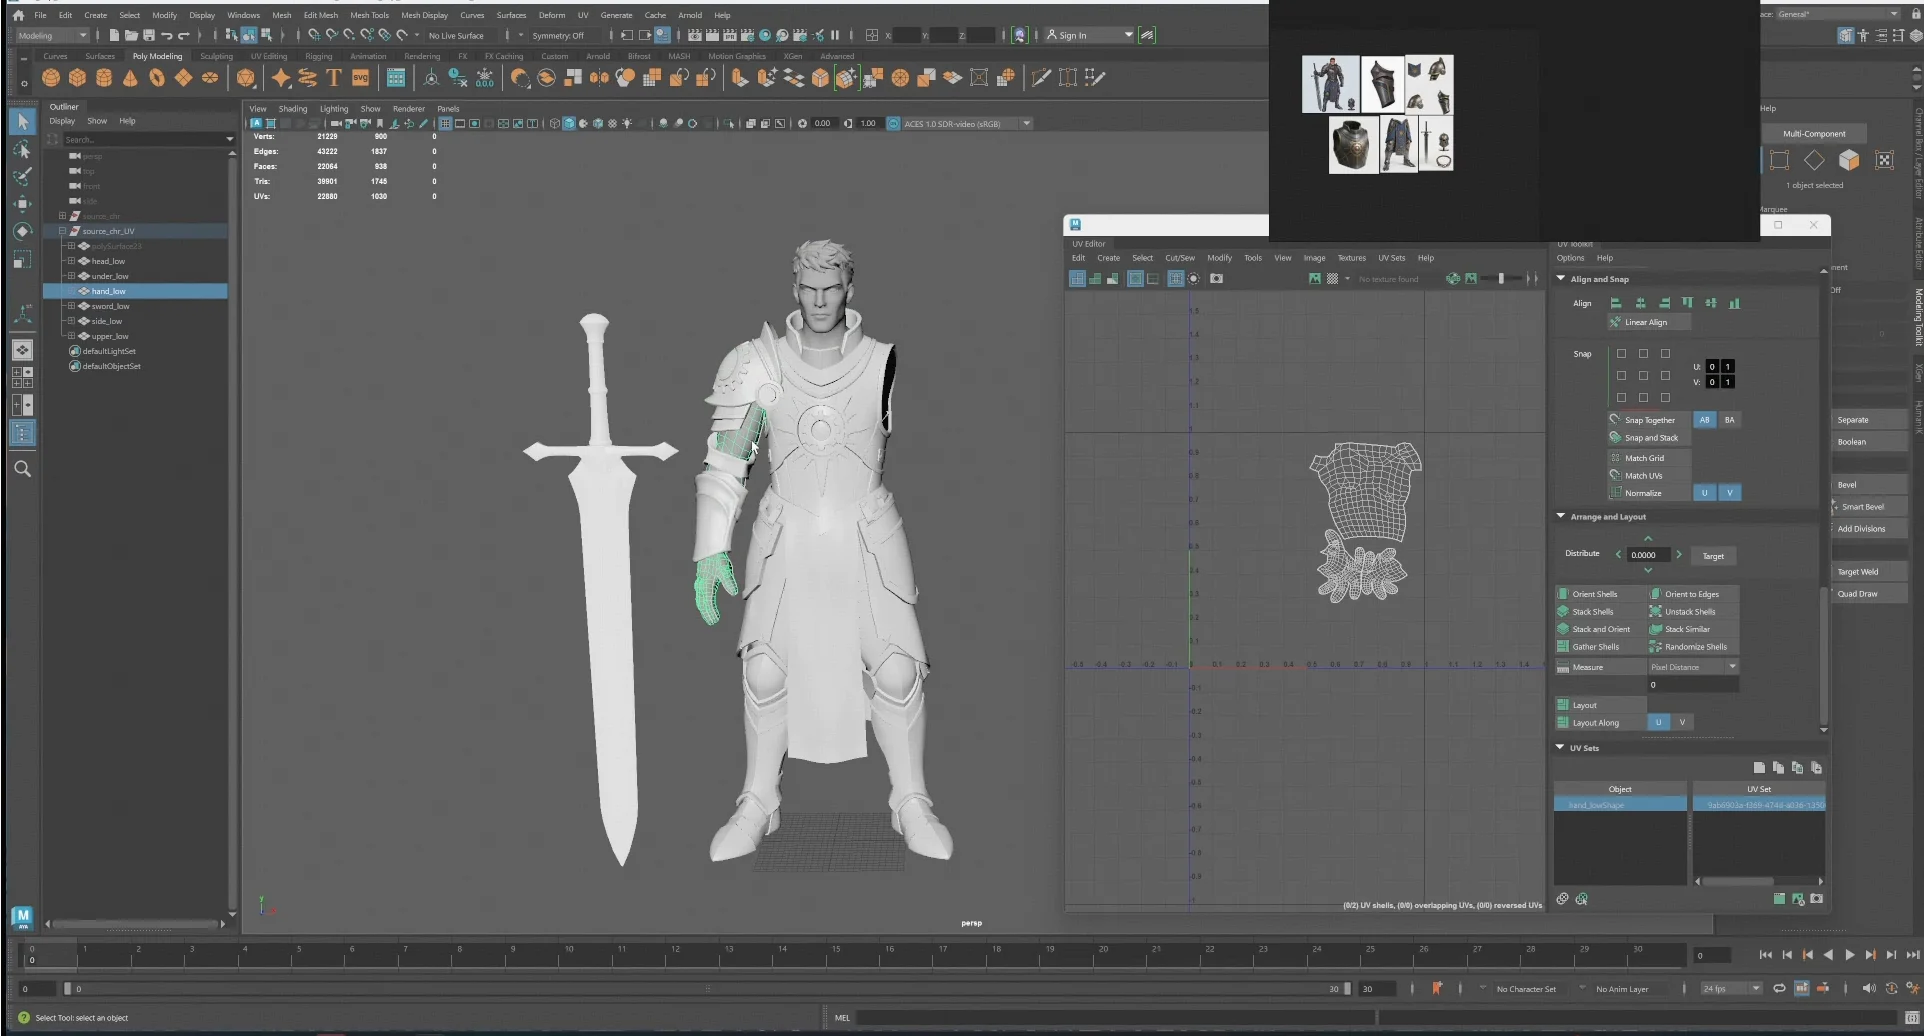
本案例的做法是刪除一半身體,在保留的一半上重新製作 UV,再鏡射出另一半。這樣既能得到更整潔的 UV 配置,也能確保精確對稱。
42 a maya workspace showing a half model uv editor sword shoulder armor and reference image for the uv

對所有部件重複上述操作,直到拓撲和 UV 全部整理乾淨。

43 a maya workspace showing the character hierarchy model components reference image and uv editor duri

關鍵:UV 集命名

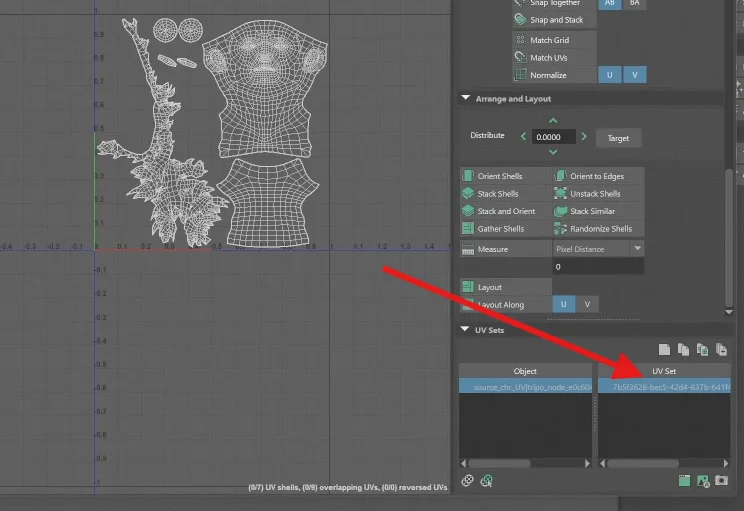
將所有 UV 集改為同一個名稱,不要沿用預設名稱。不同物件的預設 UV 集名稱可能不一致,進而導致後續合併失敗。現在統一命名很簡單,留到後面再處理則成本很高。
44 a uv sets panel showing the selected uv set name frontout chr uvmap node model

步驟 12 — 貼圖轉移與烘焙

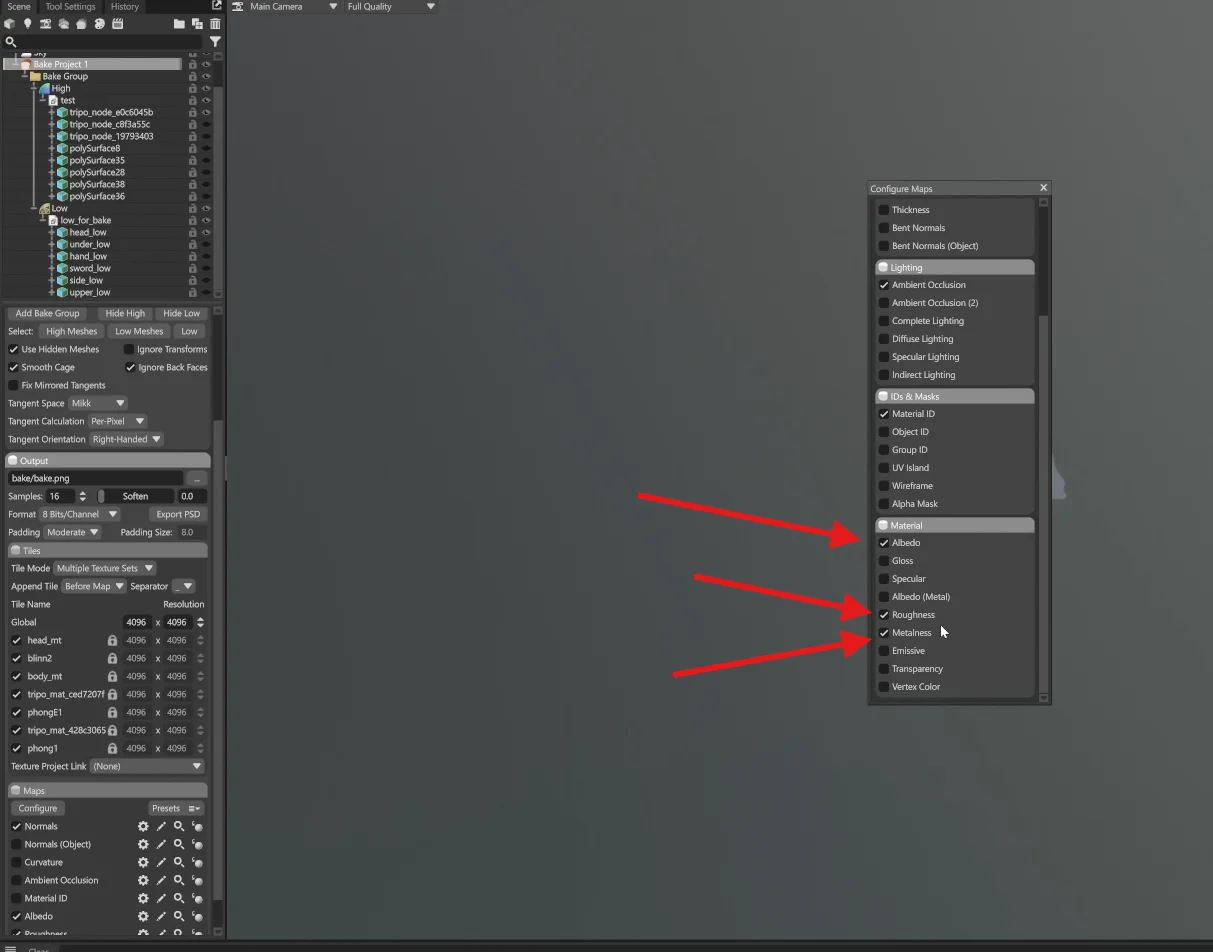
將 Tripo 貼圖轉移到重新展開 UV 的模型上。可以在 Maya 中依世界空間轉移貼圖,也可以使用 Marmoset 或同類工具進行烘焙。操作方式與標準法線貼圖烘焙相同,以舊模型作為來源模型。
45 a baking interface showing normal tangent and displacement options for texture transfer and baking

步驟 13 — 精修

整理好 UV 並完成貼圖轉移後,即可開始最後的美術精修。本案例使用 Substance Painter,並以 8K 來源貼圖為基礎(該貼圖在步驟 6 中生成),此時再將最終解析度降至 4K 或 2K。
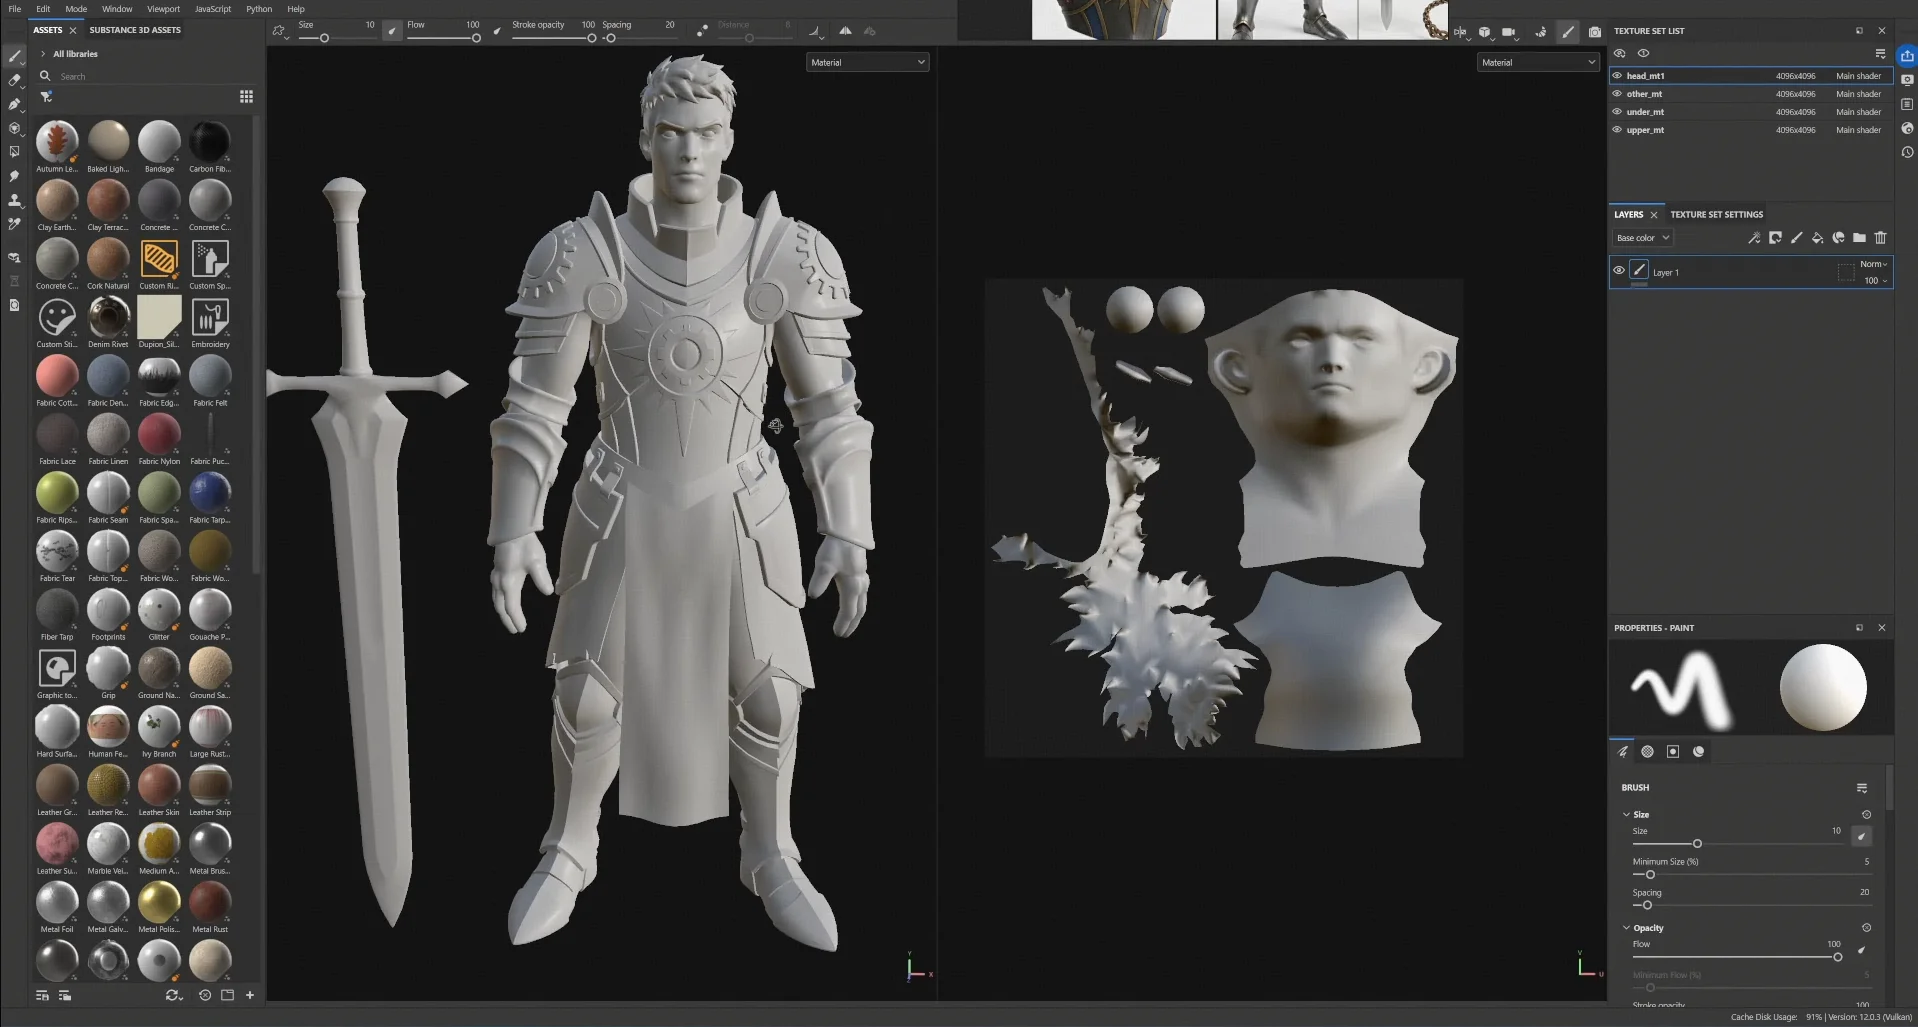
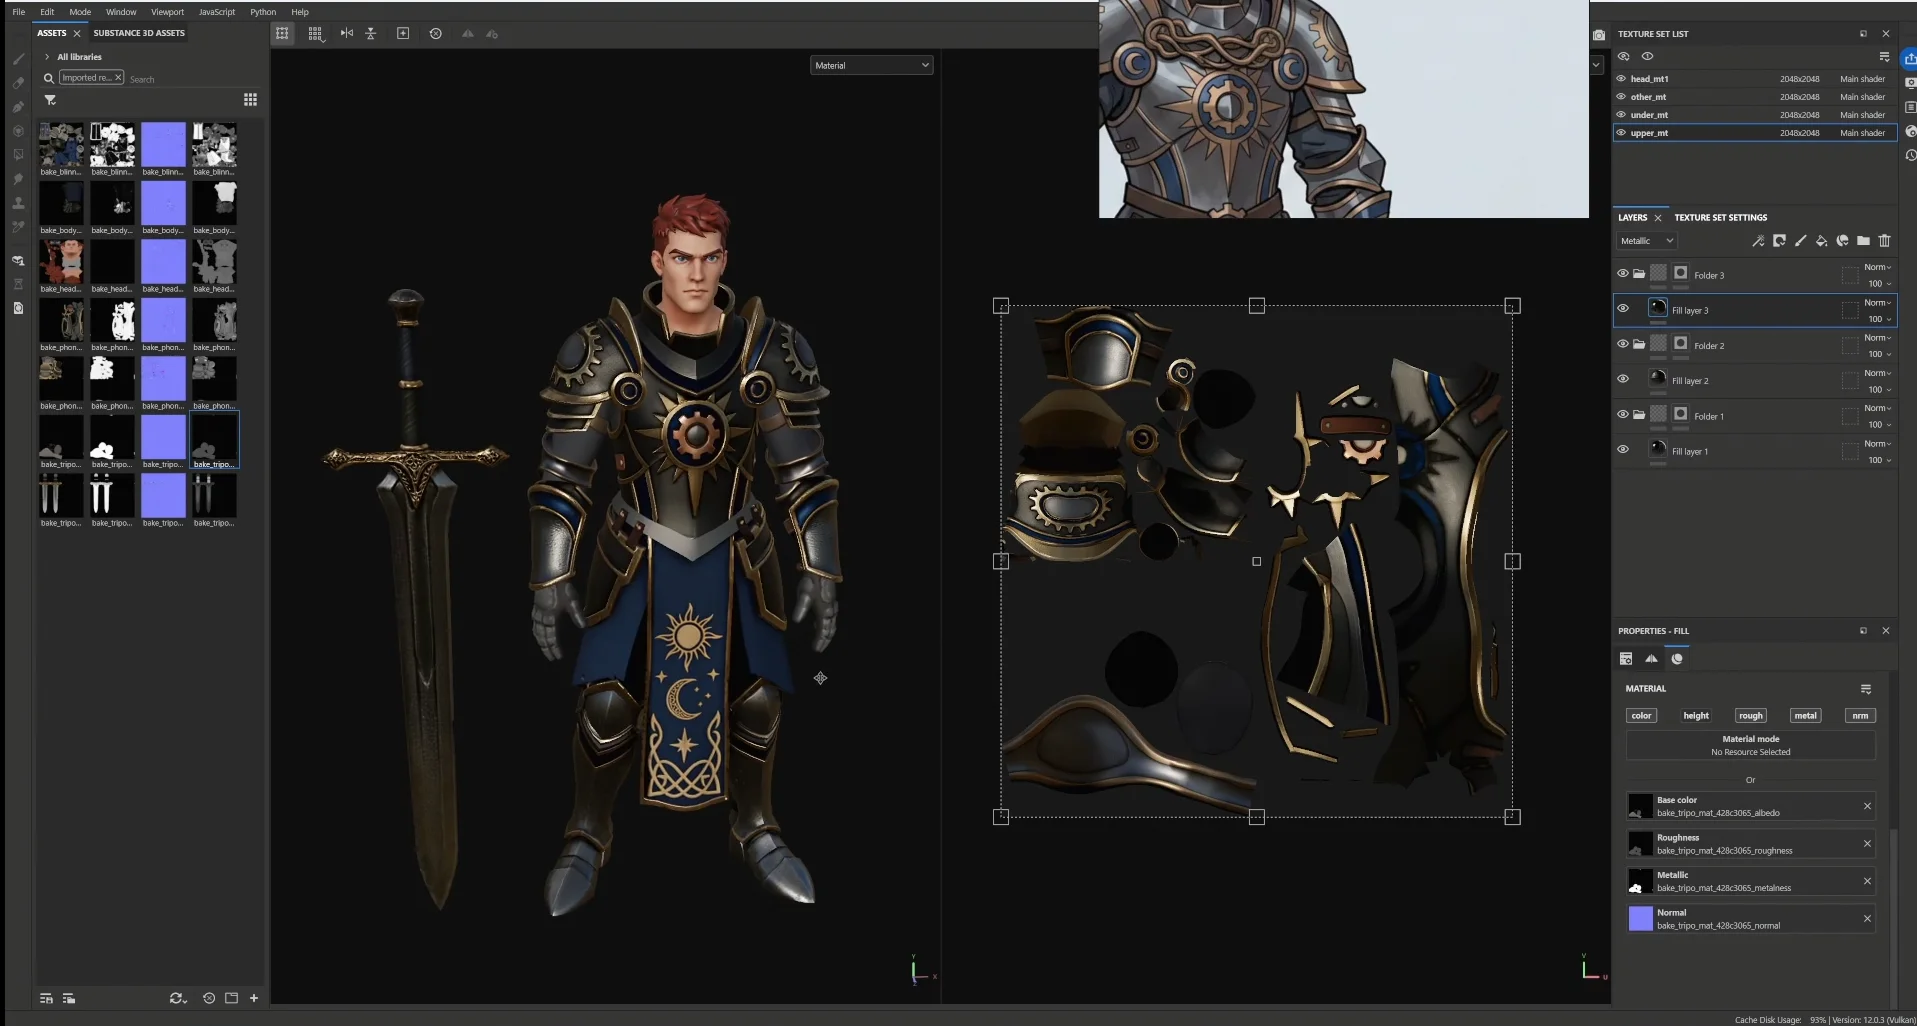
46 a substance painter workspace showing an armored character material presets texture details and refi
47 a substance painter workspace showing the full armored character material library texture details an

最終品質的差距,就在這一階段由藝術家的能力拉開。前面所有環節的提效,都是為了給這一步留出充足時間。
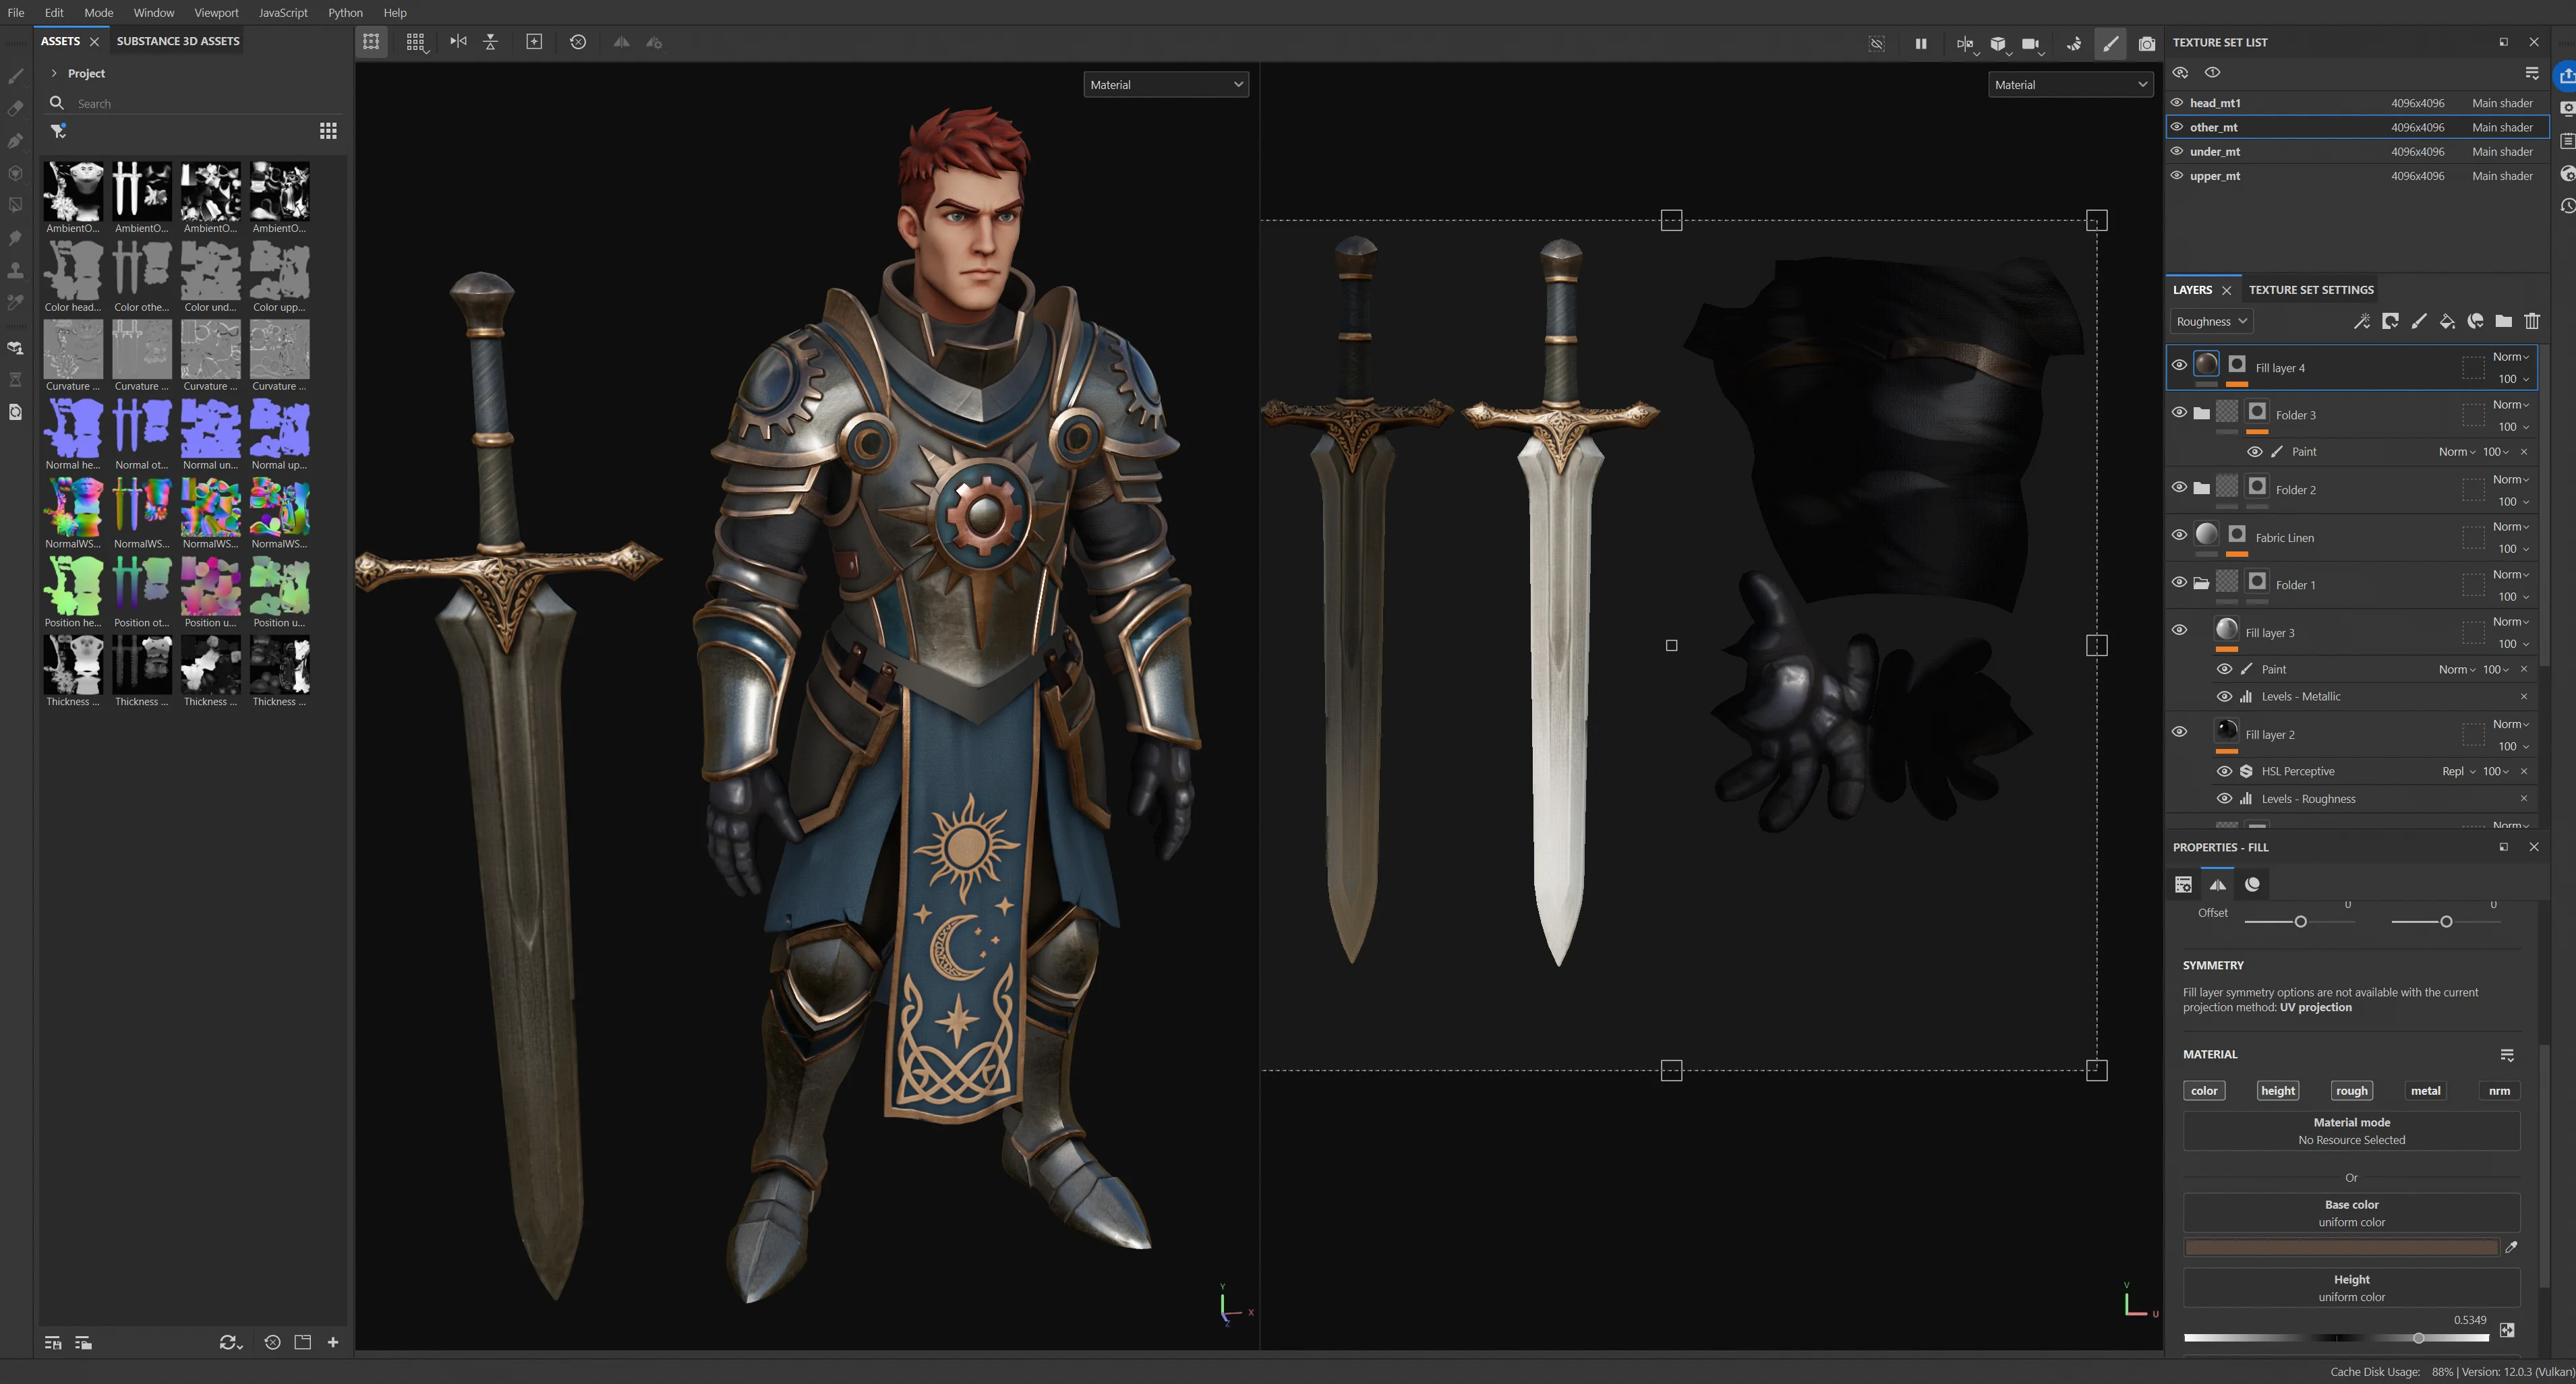
48 a substance painter workspace showing the final art refinement stage for a textured armored characte

步驟 14 — 綁定與動畫

在目前流程中,綁定和動畫尚未達到業界製作標準。用於正式專案的角色仍建議採用客製化綁定。

不過,乾淨的拓撲是高品質綁定的前提,而這正是前幾個階段已經交付的成果。

步驟 15 — 引擎整合

將資產匯入遊戲引擎,並為材質指定正確的貼圖集。
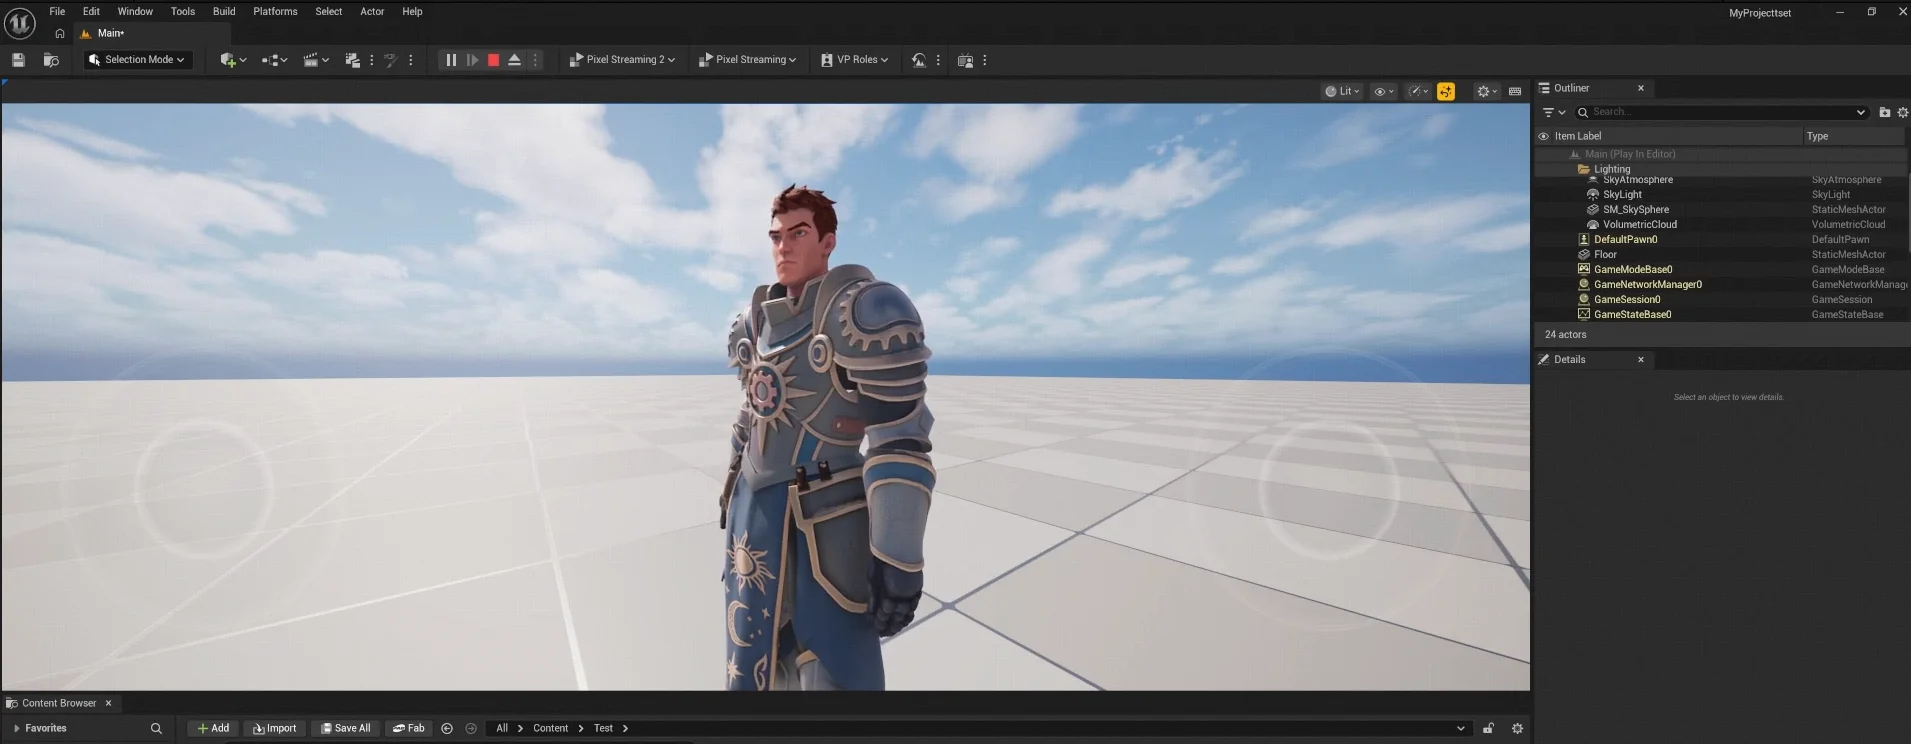
49 an unreal engine viewport showing the imported armored character on a gridded floor with the content

分享文章

用 3D 生成萬物

點擊下方,加入數百萬 3D 創作者的行列。體驗超高保真模型生成與一流的 PBR 貼圖。