How to Rig an AI-Generated Character for Mixamo: Complete Auto-Rigging Guide
Ever spend hours trying to rig AI generated character Mixamo only to end up with twisted limbs and broken animations? You're not alone. With AI tools like Tripo AI revolutionizing 3D model creation, thousands of creators face the same challenge: turning beautiful AI-generated characters into animation-ready assets.
Here's the game-changer: Mixamo's auto-rigging system can transform your static AI 3D model generator output into a fully rigged character in under 5 minutes. No manual bone placement. No complex weight painting. Just upload, click, and animate.
What is Mixamo and Why Use It for AI Models?
Mixamo is Adobe's free web-based auto-rigging service that automatically adds a skeleton and weight maps to humanoid characters. For AI-generated models from platforms like Tripo AI, which often start as a 2d 2d image to 3d model free, it's the perfect solution, especially when using a local 3d model ai generator, because:
- Speed: Manual rigging takes 4-8 hours; Mixamo takes 3 minutes
- Accessibility: No rigging expertise required
- Compatibility: Works with models from any AI 3D model generator
- Animation Library: Access to thousands of pre-made animations
The challenge? AI-generated meshes often lack the proper structure that Mixamo expects. That's where this Mixamo auto-rig tutorial comes in.
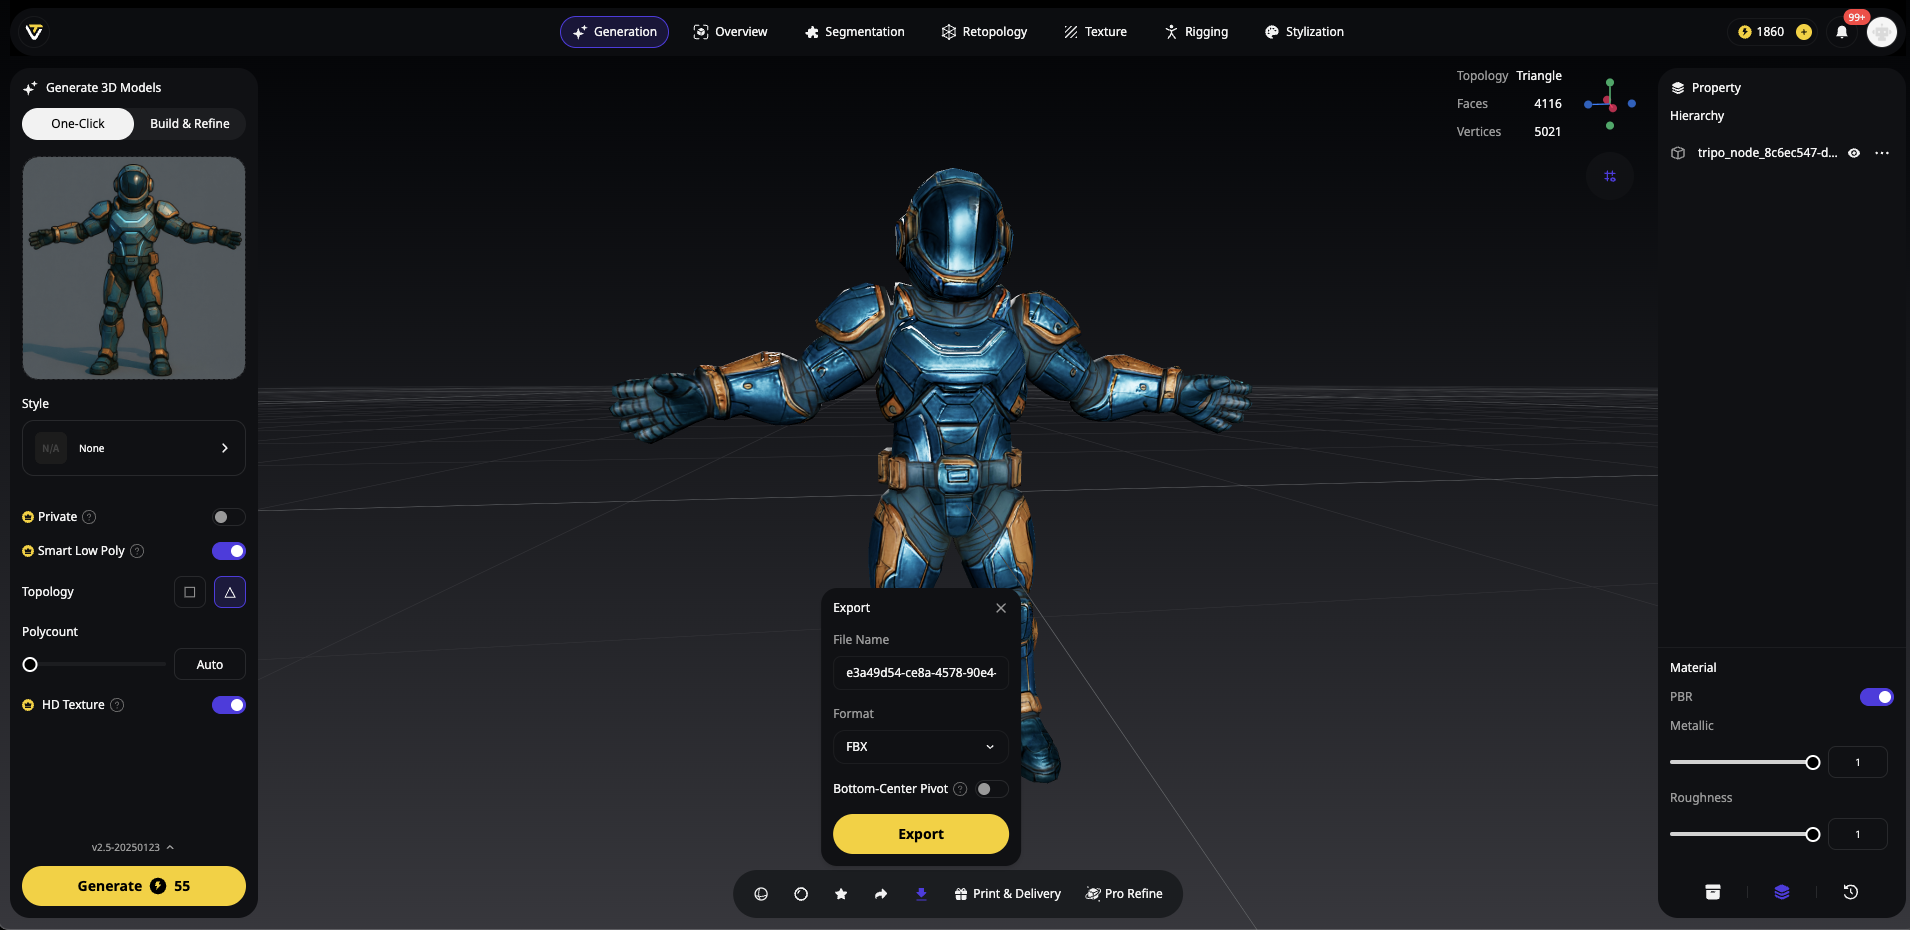
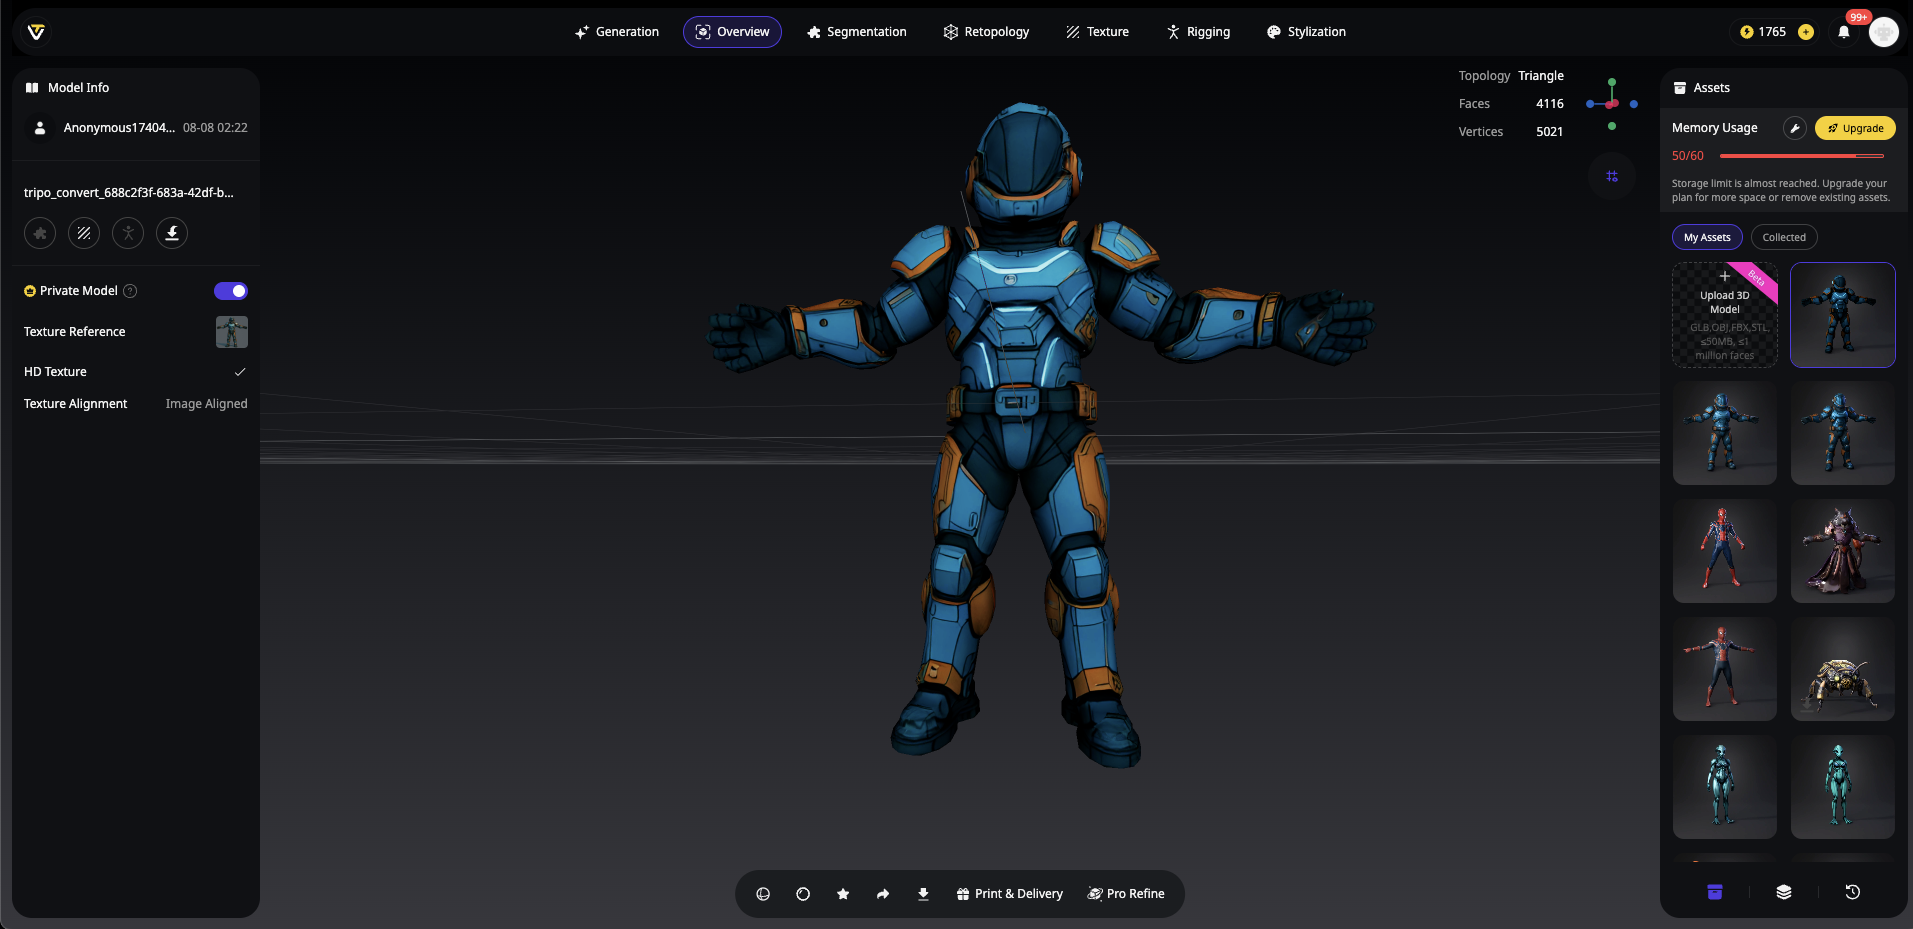
T-Pose Alignment: The Smart Way with Tripo AI
Here's where Tripo AI gives you a massive advantage. Unlike other AI 3D model generators that output characters in A-pose, Tripo Studio offers a built-in T-pose option:
Generate Animation-Ready Characters in Tripo:
- Open Tripo Studio workspace
- Input your text prompt or upload reference image
- Enable "T-Pose" option in generation settings
- Click generate - your character appears in perfect T-pose
- Export directly as FBX - no manual posing needed!
This game-changing feature eliminates the most time-consuming step when you prepare model for Mixamo. What traditionally takes 15-20 minutes of manual adjustment is now automatic.
Why T-Pose Matters:
- Mixamo's auto-rigging expects arms horizontal
- Better weight distribution calculations
- Prevents 90% of rigging errors
- Professional animation-ready results
For models from other sources, you can still manually convert to T-pose in Blender, but with Tripo AI's T-pose generation, you're already steps ahead in your AI character rigging workflow.
Preparing Your AI-Generated Model for Success
Before diving into the AI character rigging workflow, proper preparation ensures smooth auto-rigging. Here's your checklist:
Export Format Requirements
| Format | Requirements | Best For |
|---|---|---|
| FBX | Embedded media enabled | Unity/Unreal projects |
| OBJ | ZIP with .MTL + textures | Blender workflows |
Pro Tip: When using Tripo Studio to generate your character, export as FBX with embedded textures for the smoothest Mixamo experience.
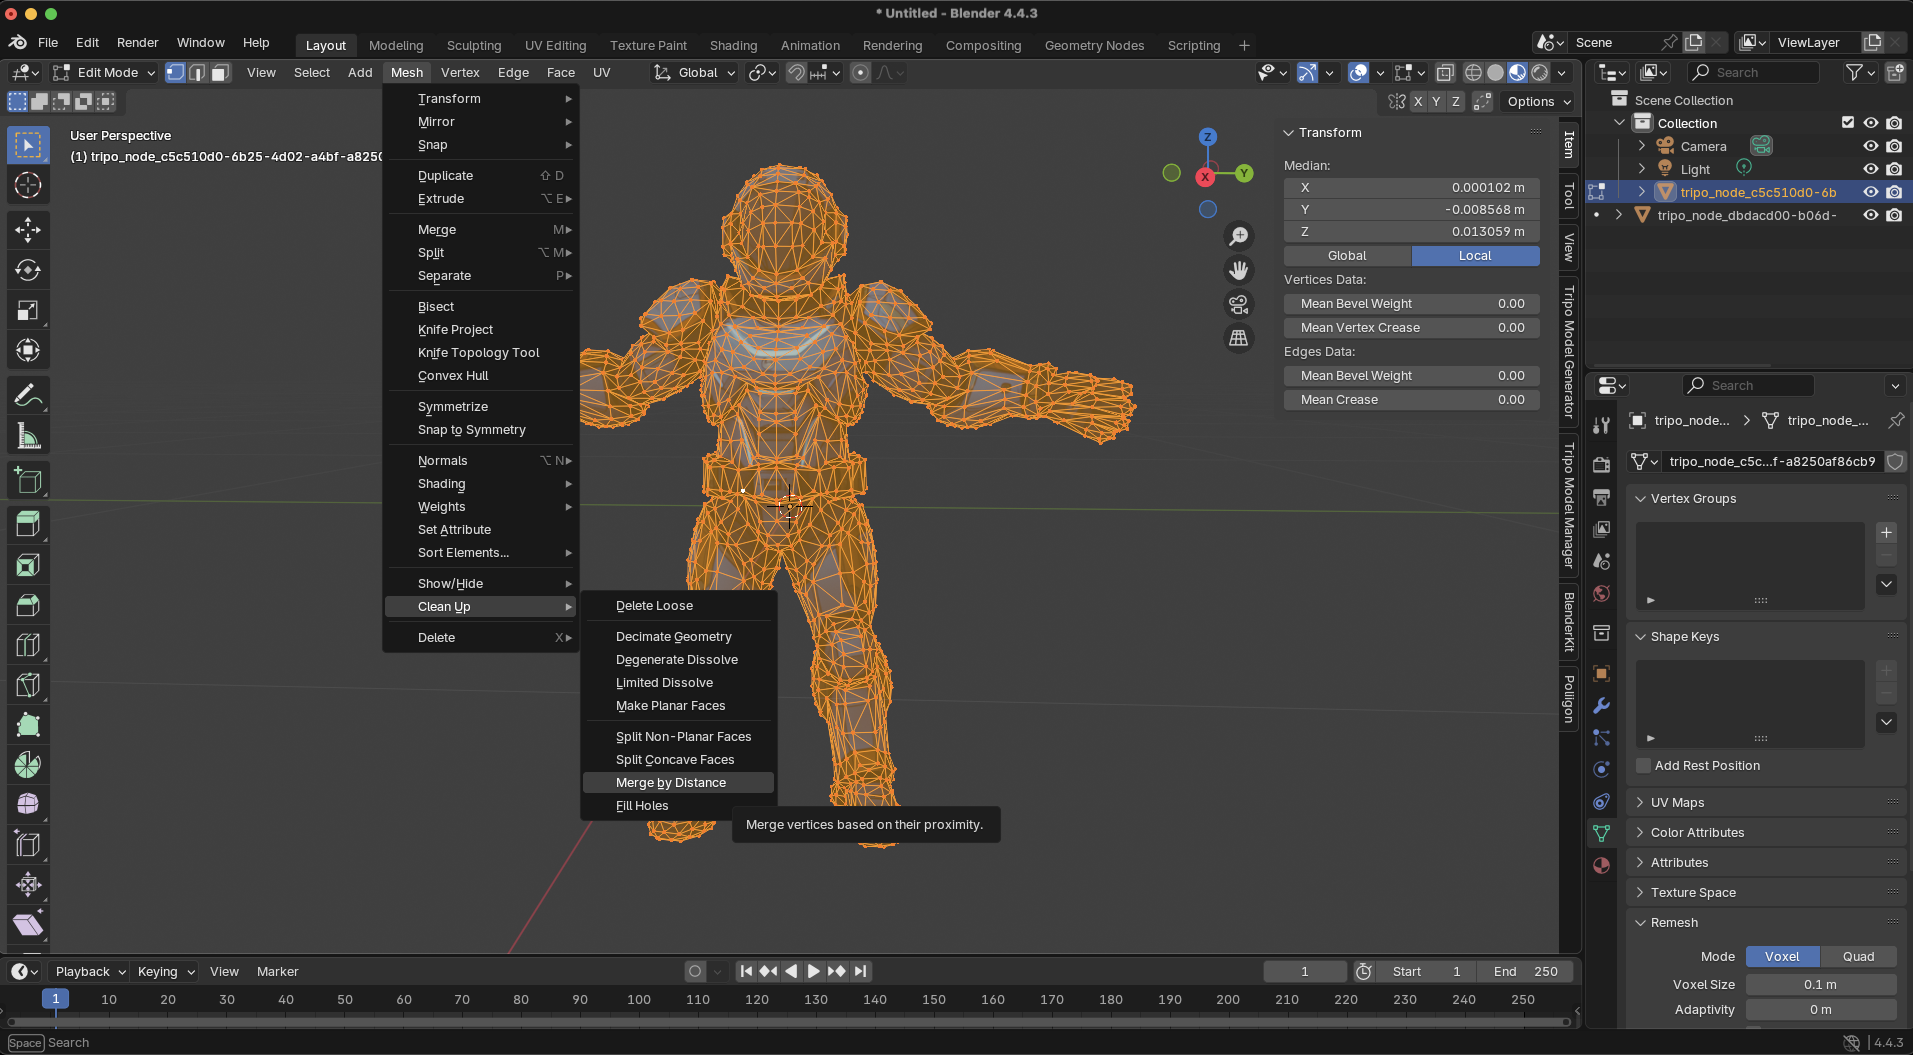
Essential Model Clean-Up Steps
- Apply All Transforms
- In Blender: Ctrl+A → All Transforms
- Ensures proper scale and rotation data
- Merge Duplicate Vertices
- Mesh → Clean Up → Merge by Distance
- Prevents rigging errors from overlapping geometry
- Create Single Watertight Mesh
- Join separate parts (Ctrl+J in Blender)
- Remove internal faces and loose vertices
- Check Orientation
- Character must face +Z (forward)
- Rotate if needed before export
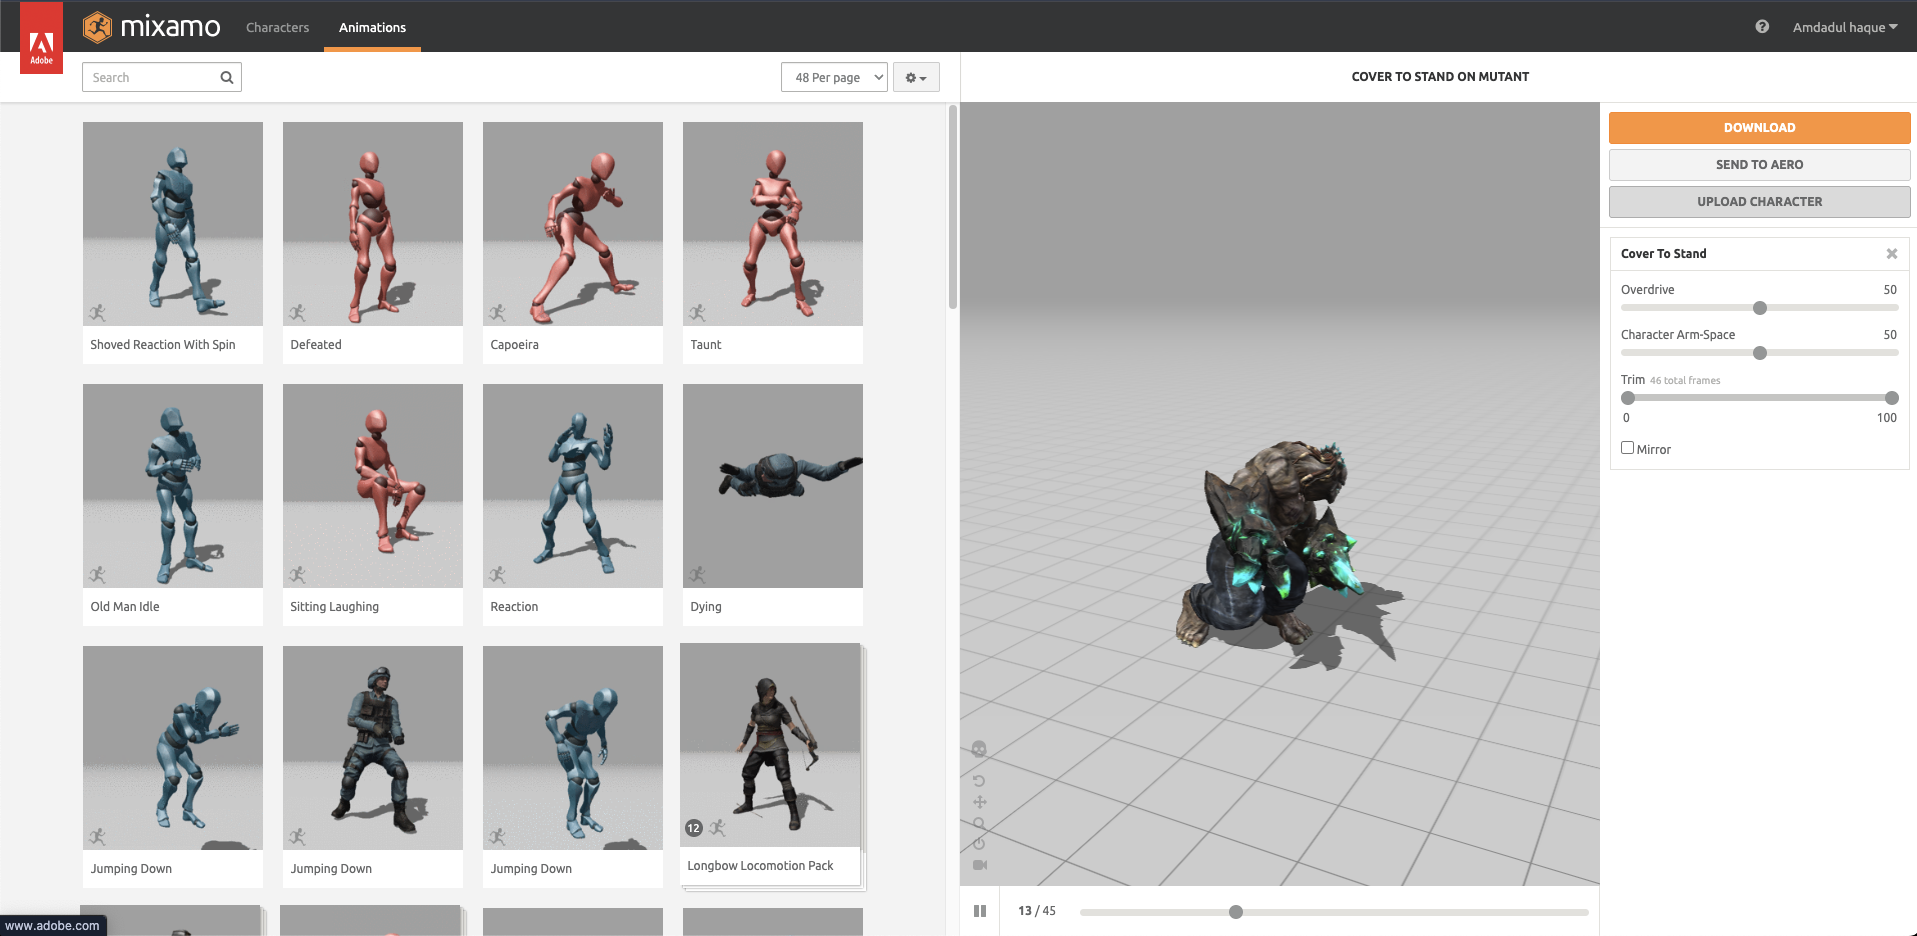
Complete Mixamo Auto-Rigging Workflow
Now for the main event—let's rig AI generated character Mixamo style:
Step 1: Upload Your Character
- Visit mixamo.com and sign in with Adobe ID
- Click "Upload Character" button
- Select your prepared FBX or ZIP file
- Wait for model preview (typically 10-30 seconds)

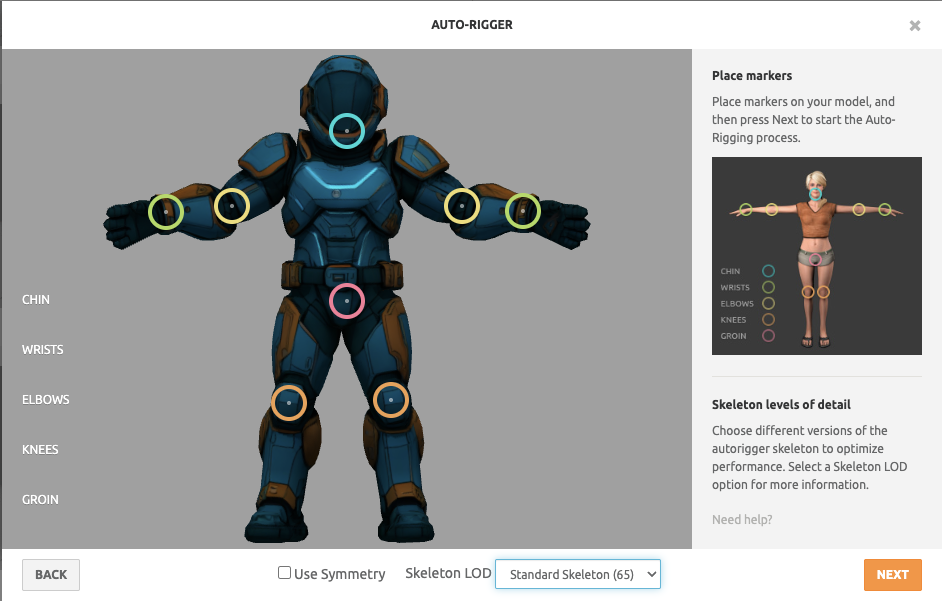
Step 2: Place Rig Markers
Mixamo displays marker points for you to position. Here's the optimal placement:
- Chin: Center of jaw, not neck
- Wrists: Middle of wrist joint
- Elbows: Elbow bend center
- Knees: Kneecap center
- Groin: Hip joint center
Critical Tip: Zoom in for precise placement. Even 1cm off can cause animation issues.
Step 3: Auto-Rig Processing
Click "Next" to start the magic. Mixamo:
- Analyzes mesh topology
- Creates custom skeleton
- Calculates weight maps
- Applies skinning
Processing time: 1-2 minutes, depending on mesh complexity.
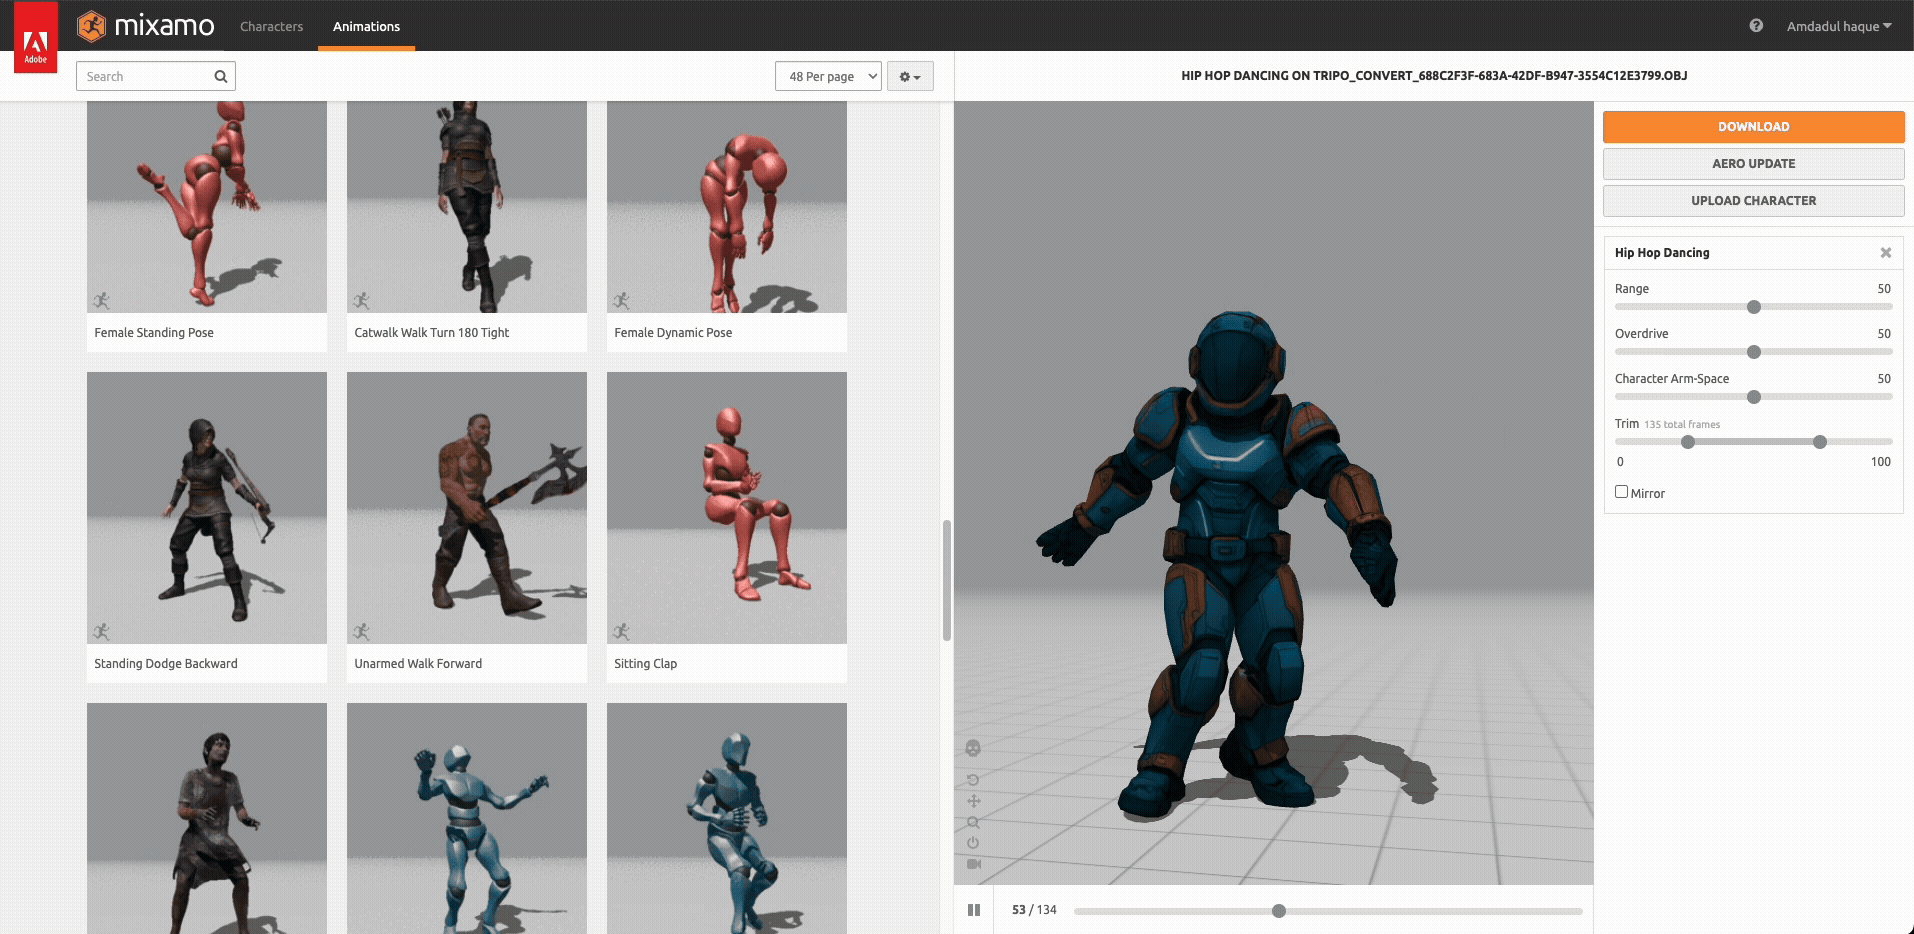
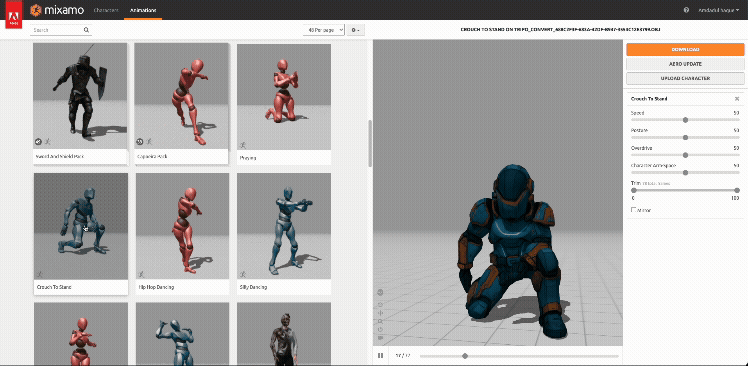
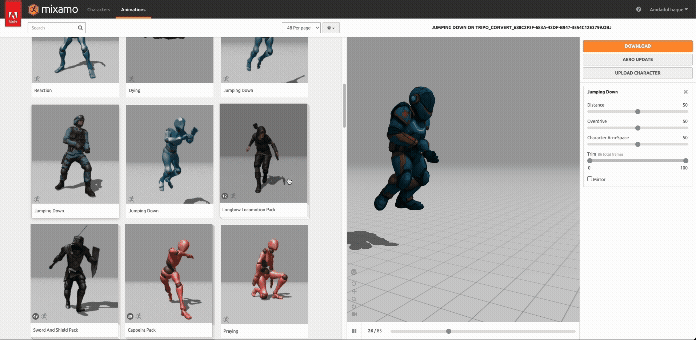
Step 4: Preview and Test
Before downloading, test these animations:
- Basic idle pose
- Walking cycle
- Arm movements
- Jump animation
Look for:
- Smooth deformations
- No mesh stretching
- Proper joint bending
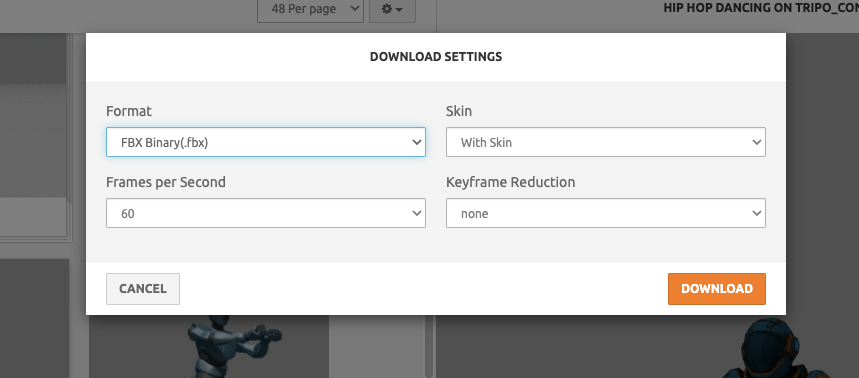
Step 5: Download Options
| Setting | Choose When |
|---|---|
| Format: FBX for Unity | Game development |
| Format: FBX for Blender | Further editing needed |
| With Skin | Always (includes weights) |
| Frames per Second | Match your project |
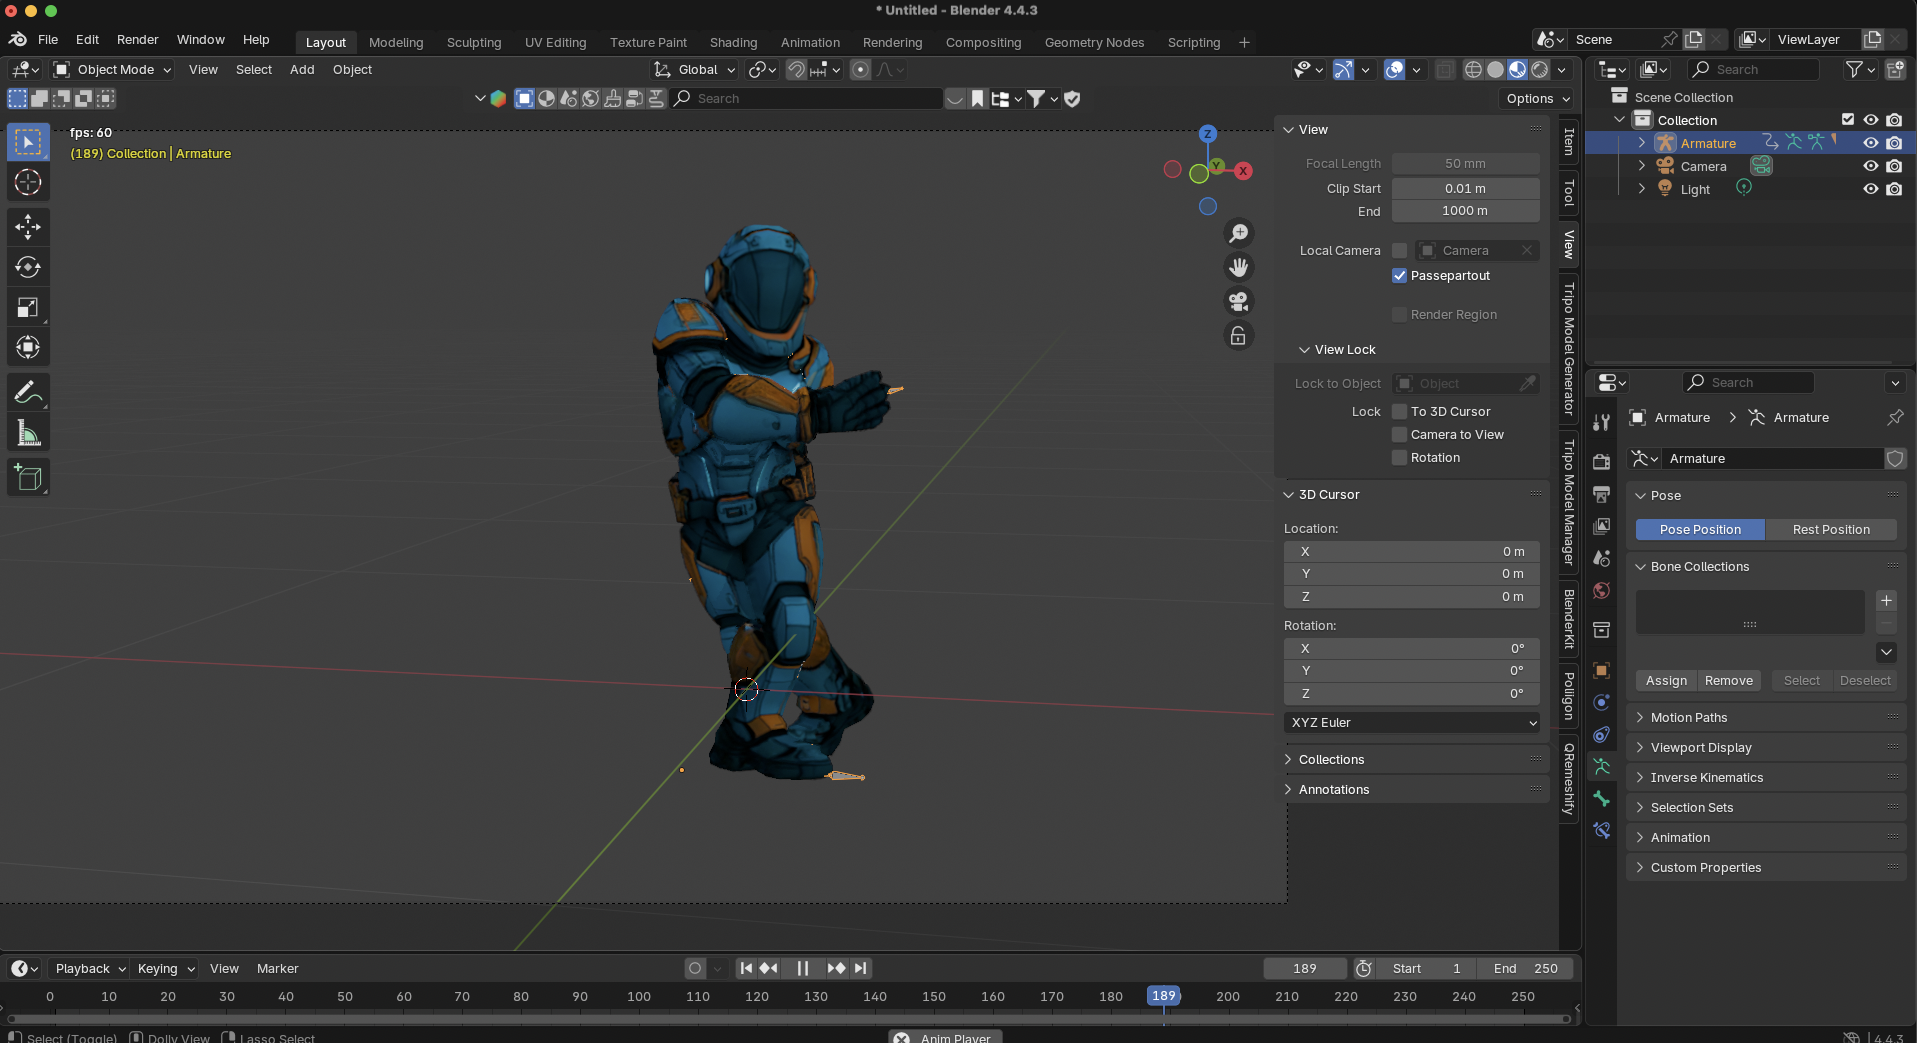
Importing and Testing Your Rigged Character
Blender Import Process
- File → Import → FBX
- Disable "Automatic Bone Orientation" in import settings
- Switch to Pose Mode
- Test rotations on major joints
- Check weight painting (optional refinement)
Unity/Unreal Integration
Unity Setup:
- Drag FBX into Assets folder
- Set Animation Type to "Humanoid"
- Configure Avatar Definition
- Apply animation controller
Unreal Setup:
- Import to Content Browser
- Enable "Import Rig" option
- Set Skeleton to "None" (creates new)
- Test with Animation Blueprint
Best Practices for AI Character Rigging
Optimize Before Upload
- Vertex Count: Keep under 50k for real-time applications
- Topology: Ensure edge loops around joints
- Symmetry: Use X-symmetry for predictable results
- Scale: 1.7-2m height works best
Advanced Tips from Tripo AI Users
When generating characters with Tripo Studio's Algorithm 2.5:
- Use "High Detail" mode for better joint definition
- Enable "Animation Ready" preset
- Export with clean topology option
These settings create models that Mixamo rigs 40% faster with fewer errors.
Troubleshooting: How to Fix Mixamo Rig Issues
Even with perfect preparation, issues can arise. Here's your troubleshooting guide:
Common Problems and Solutions
| Issue | Symptoms | Solution |
|---|---|---|
| Stretched Limbs | Arms/legs elongated | Re-export in proper T-pose |
| Missing Textures | Gray model | Include textures in ZIP |
| Wrong Orientation | Character sideways | Rotate to face +Z, re-export |
| Poor Deformation | Mesh tears at joints | Add edge loops, reduce vertex count |
| Finger Issues | Fingers don't move | Manual weight paint in Blender |
Quick Fixes for Stubborn Models
- Re-rigging Strategy
- Adjust marker placement by 2-3cm
- Try different pose variations
- Reduce mesh complexity
- Manual Refinement
- Import to Blender
- Use weight paint mode
- Smooth problem areas
- Re-export to game engine
Maximizing Your AI Character Workflow
Integration with Tripo AI Pipeline
- Generate base character using image to 3D feature
- Refine in Tripo Studio workspace
- Export optimized FBX
- Auto-rig in Mixamo
- Import to the final platform
This workflow reduces character creation from days to hours while maintaining professional quality.
Animation Library Benefits
Once rigged, access Mixamo's 2,500+ animations:
- Combat movements
- Dance sequences
- Sports actions
- Idle variations
- Emotional expressions
Download multiple animations and blend in your game engine for dynamic characters.
Advanced Techniques for Production
Batch Processing Multiple Characters
For studios using Tripo AI's Text-to-CAD API:
- Generate character variations programmatically
- Standardize export settings
- Create Mixamo upload scripts
- Automate marker placement with consistent models
Custom Rig Modifications
After Mixamo rigging:
- Add facial bones in Blender
- Create custom IK chains
- Implement advanced constraints
- Blend with mocap data
Future-Proofing Your Workflow
As AI 3D model generators evolve, staying ahead means:
- Standardizing Pipelines: Document your exact workflow
- Version Control: Track model iterations
- Template Creation: Save successful rig configurations
- Community Learning: Join Tripo AI Discord for latest techniques
The combination of Tripo AI's rapid generation and Mixamo's auto-rigging creates an unbeatable workflow for modern 3D production.
Conclusion: Your Next Steps
You now have everything needed to rig AI generated character Mixamo successfully. The key takeaways:
- Proper T-pose preparation prevents 90% of issues
- Precise marker placement ensures smooth animations
- Testing before download saves hours of fixes
- AI character rigging workflow becomes effortless with practice
Ready to bring your AI-generated characters to life? Start with Tripo AI's latest Algorithm 2.5 for animation-ready models, then follow this guide for perfect Mixamo rigging every time.
Transform your static models into animated stars today! Try Tripo Studio for AI-generated characters optimized for animation, or explore the full platform at tripo3d.ai.
Join 2+ million creators who've discovered the fastest path from concept to animated character. Your next game-changing character is just minutes away!I
