Creating a God of War 3D Model: Expert Workflow & Tips
скачать 3d модели для chicken gun
Creating a production-ready God of War 3D model requires a structured workflow, smart tool choices, and a deep understanding of both artistic and technical demands. Over the years, I’ve learned that blending AI-powered platforms with traditional 3D techniques can drastically speed up the process while maintaining high quality. This guide is for artists, game developers, and anyone aiming to craft detailed, animation-ready character models. Below, I break down my end-to-end workflow, highlight common pitfalls, and share practical tips for efficient, professional results.
Key takeaways

- Reference gathering and planning are crucial for consistency and efficiency.
- Combining AI-powered tools with manual refinement saves time without sacrificing quality.
- A clear workflow—from blocking out forms to final polish—prevents costly rework.
- Proper retopology and UV mapping are essential for animation and texturing.
- Rigging and presentation require attention to detail for portfolio- or game-ready assets.
Overview: God of War 3D Model Creation
Key considerations before starting
Before diving into modeling, I always clarify the end use: Will this model be for real-time engines, cinematic renders, or 3D printing? Knowing the target platform influences polycount, texture resolution, and rigging needs. I also identify key visual traits—Kratos’s physique, armor, and iconic weapons—so I can prioritize details that matter most.
Executive summary and main takeaways
A successful God of War 3D model balances accuracy, performance, and visual impact. My workflow emphasizes solid reference gathering, efficient use of AI-assisted tools like Tripo, and iterative feedback. This structured approach minimizes backtracking and ensures the model is ready for animation, texturing, and real-time use.
Reference Gathering and Concept Planning
Finding and organizing visual references
I start by collecting high-quality images from official game art, cinematic stills, and fan interpretations. For Kratos, I focus on anatomy, armor details, and facial expressions. I use tools like PureRef to organize these references into mood boards, which helps maintain consistency throughout the project.
Checklist:
- Gather front, side, and back views
- Include close-ups of armor and weapons
- Reference character poses and key moments
Defining the model’s scope and style
I define the model’s level of detail based on the intended use. For game assets, I prioritize efficient topology and modular armor. For cinematic models, I allow more polys and finer details. I also decide early on whether to stick to the original style or add my own interpretation, which guides my sculpting and texturing choices.
Choosing Tools and Setting Up Your Workflow
Selecting 3D software and AI-powered platforms
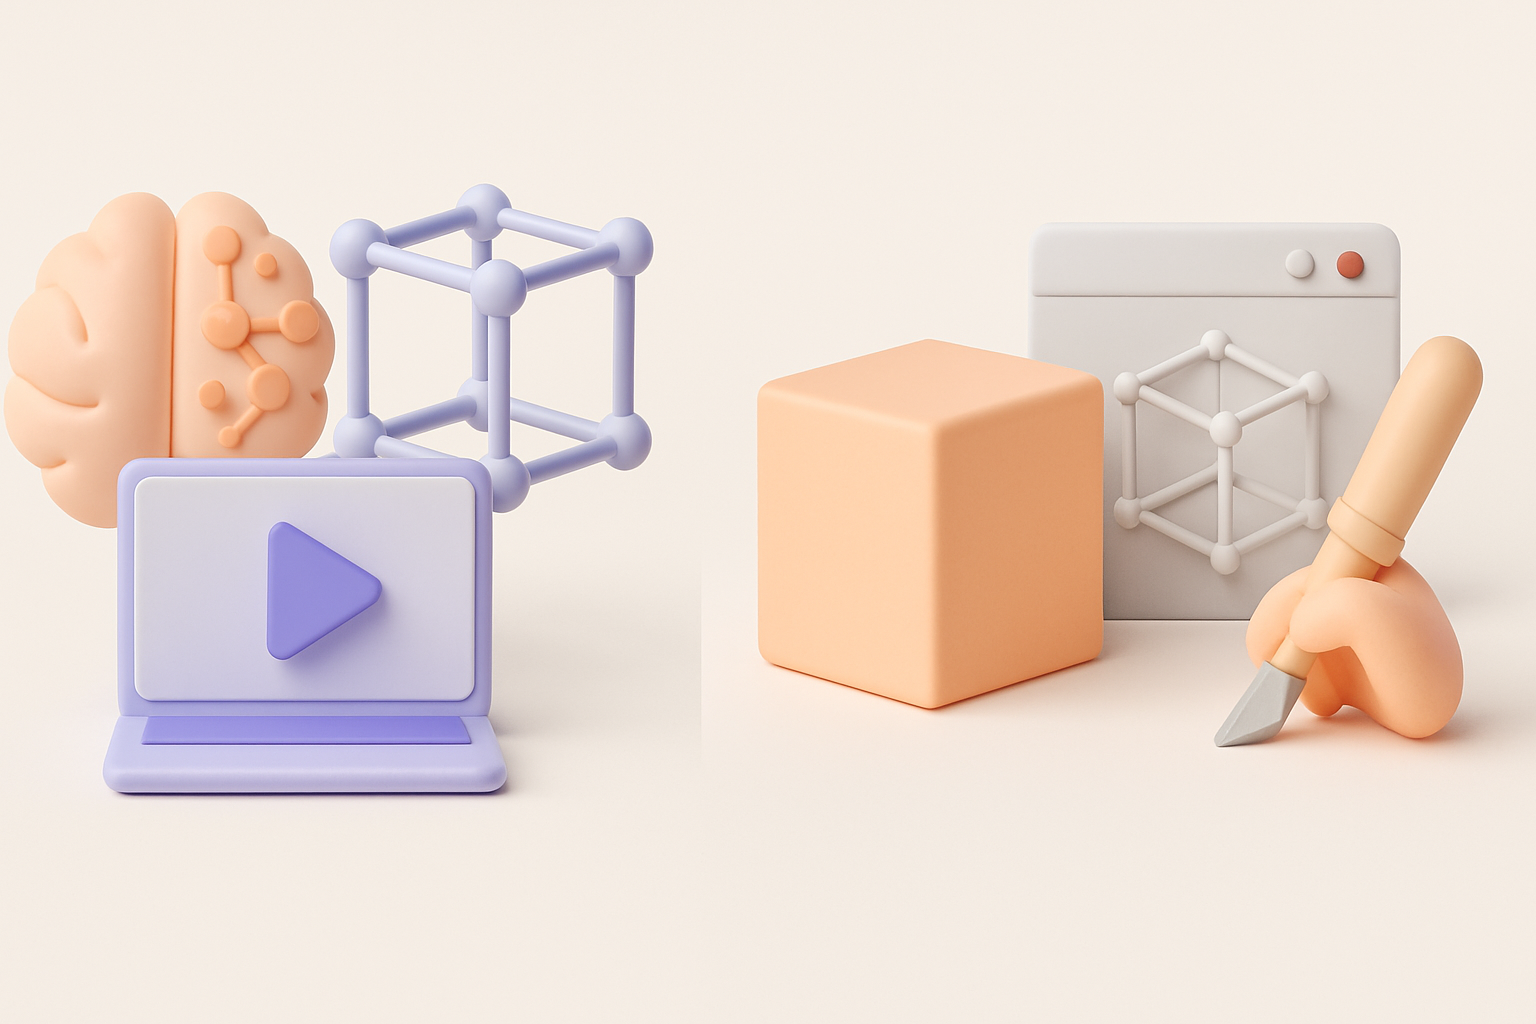
My base workflow typically includes a sculpting tool (like ZBrush or Blender), a retopology/UV tool, and an AI-powered platform such as Tripo for rapid prototyping and segmentation. I choose tools based on compatibility and export options for downstream tasks like texturing and rigging.
Integrating Tripo AI and other tools efficiently
I often use Tripo to generate a quick base mesh from sketches or concepts, which I then refine manually. The platform’s segmentation and retopology features save hours, especially for complex armor pieces. I export the AI-generated base to my main 3D app for further detailing and iteration.
Practical tips:
- Use AI tools for base mesh and segmentation
- Switch to manual tools for anatomical refinement and custom details
- Keep all assets organized for easy updates and feedback
Step-by-Step: Modeling the God of War Character
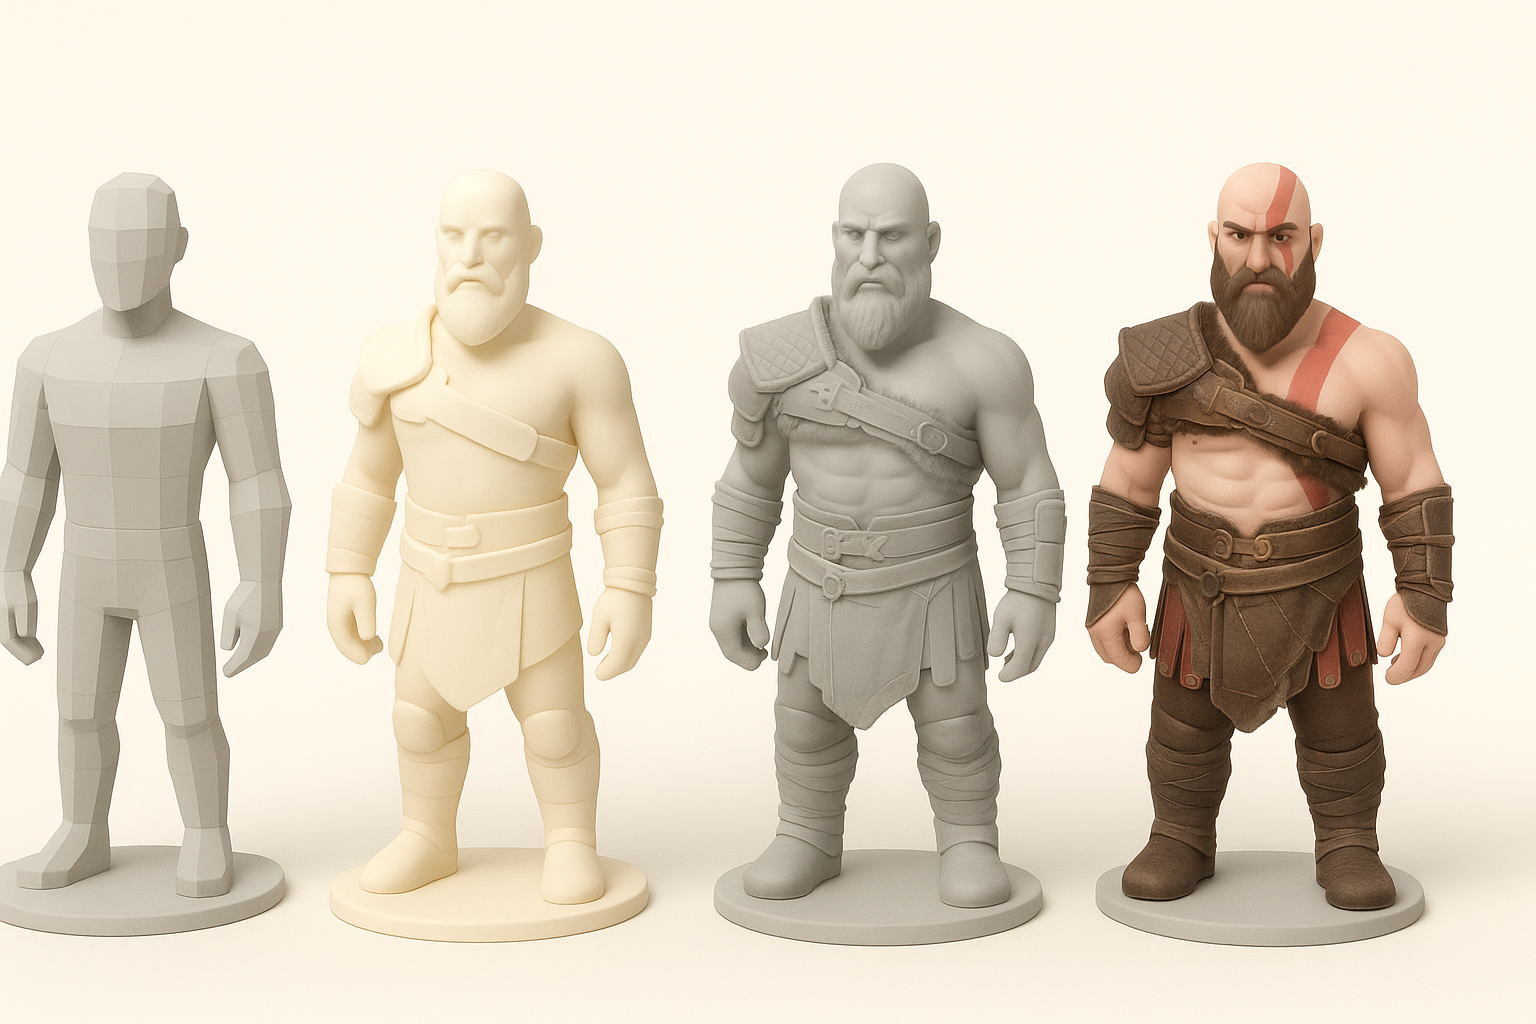
Blocking out forms and proportions
I begin with a low-res blockout, focusing on Kratos’s overall silhouette and major masses. Using reference images as background planes helps nail proportions early. I keep the geometry simple at this stage to allow for quick adjustments.
Steps:
- Place reference images in the viewport
- Block out torso, limbs, and head with primitives
- Adjust proportions until they match the character’s iconic look
Detailing anatomy, armor, and accessories
Once the base is solid, I move to secondary forms—muscle definition, facial structure, and armor plates. I sculpt in layers, starting with anatomy, then adding clothing, straps, and weapons. For Kratos, I pay special attention to scars, tattoo patterns, and material separation.
Pitfalls to avoid:
- Over-detailing too early—keep the workflow non-destructive
- Ignoring silhouette changes caused by armor or accessories
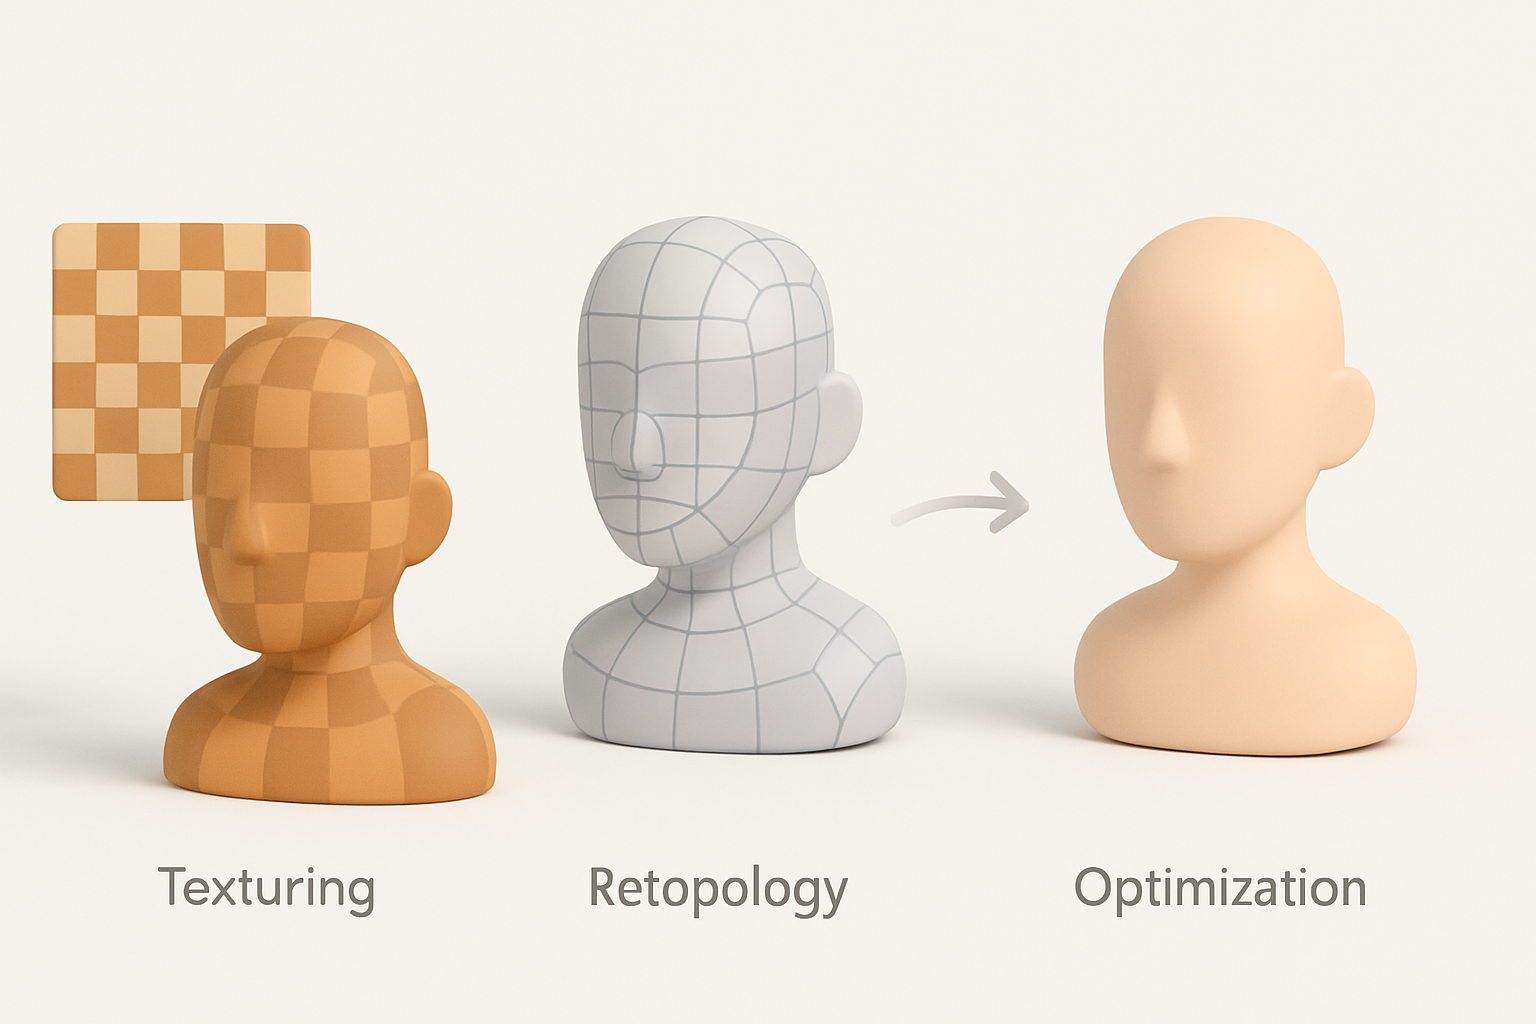
Texturing, Retopology, and Optimization

Best practices for UVs and texturing
After modeling, I unwrap UVs with an eye on minimizing seams and stretching. I use AI-assisted tools for automatic UV layout when time is tight, but always check and adjust manually. For texturing, I bake normal and ambient occlusion maps, then paint textures in Substance Painter or similar.
Checklist:
- Check UVs for overlaps and stretching
- Bake high-res details to normal maps
- Use smart masks for weathering and wear
Retopology and preparing for animation
Good topology is essential for animation. I use Tripo’s retopology tools to generate clean, quad-based meshes, then manually tweak edge flow around joints. I keep polycount optimized for the target platform, adding extra loops only where deformation is critical.
Rigging, Animation, and Final Touches

Rigging essentials for dynamic poses
I rig the character with a standard skeleton, adding extra controls for facial expressions and armor movement. Weight painting is critical—especially around shoulders and hips. I test the rig with a few dynamic poses to catch deformation issues early.
Tips:
- Use reference poses from the game for realism
- Add corrective blendshapes for extreme movements
Polishing, exporting, and presentation
For final polish, I check textures under different lighting conditions, fix any mesh artifacts, and ensure the model imports cleanly into the target engine. I prepare presentation renders with dramatic lighting and poses, often using Marmoset Toolbag or Unreal Engine.
Common Challenges and My Solutions
Troubleshooting modeling and texturing issues
Common issues include mesh artifacts, UV stretching, and texture seams. When I hit a wall, I isolate the problem area, revert to earlier saves, or use AI segmentation tools to rebuild tricky sections. For textures, I use projection painting and clone tools to fix seams.
Workflow tips I’ve learned from experience
- Save iterations frequently—versioning prevents catastrophic losses.
- Don’t be afraid to use AI tools for repetitive tasks, but always inspect results manually.
- Solicit feedback early and often; fresh eyes catch issues you’ll miss.
Comparing AI and Manual 3D Modeling Approaches
Advantages of AI-powered workflows
AI-powered platforms like Tripo accelerate base mesh creation, segmentation, and retopology. They’re especially useful for rapid prototyping, freeing up more time for creative sculpting and polish. In my workflow, AI reduces repetitive manual labor and helps me hit tight deadlines.
When to use traditional methods
For hero assets or when artistic control is paramount, I rely on manual sculpting and retopology. AI tools can introduce artifacts or generic details, so I always refine anatomy, facial features, and key accessories by hand to ensure the model matches my vision.
In summary: A hybrid workflow—leveraging both AI and manual techniques—delivers the best balance of speed, quality, and creative control when creating a God of War 3D model. Focus on strong references, structured steps, and regular iteration for professional, production-ready results.