How I Create Undertale 3D Models: Workflow, Tips, and Tools
Creating 3D models inspired by Undertale is both a creative challenge and a technical exercise. Over the years, I’ve developed a streamlined workflow that lets me translate the game’s iconic pixel art into expressive, game-ready 3D assets. In this guide, I’ll walk you through my process—from analyzing Undertale’s style, to using AI-powered tools for rapid prototyping, to preparing models for game engines. Whether you’re an indie dev, fan artist, or animator, you’ll find actionable tips and practical steps to improve your own 3D Undertale creations.
Key takeaways
- Capture Undertale’s unique visual language before modeling.
- Use AI tools like Tripo to accelerate prototyping and texturing.
- Always retopologize and optimize for game-readiness.
- Rigging and animation need stylized, expressive approaches.
- Export models with compatibility and platform requirements in mind.
- Troubleshoot common pitfalls early to save time later.
Understanding Undertale’s Art Style for 3D Modeling
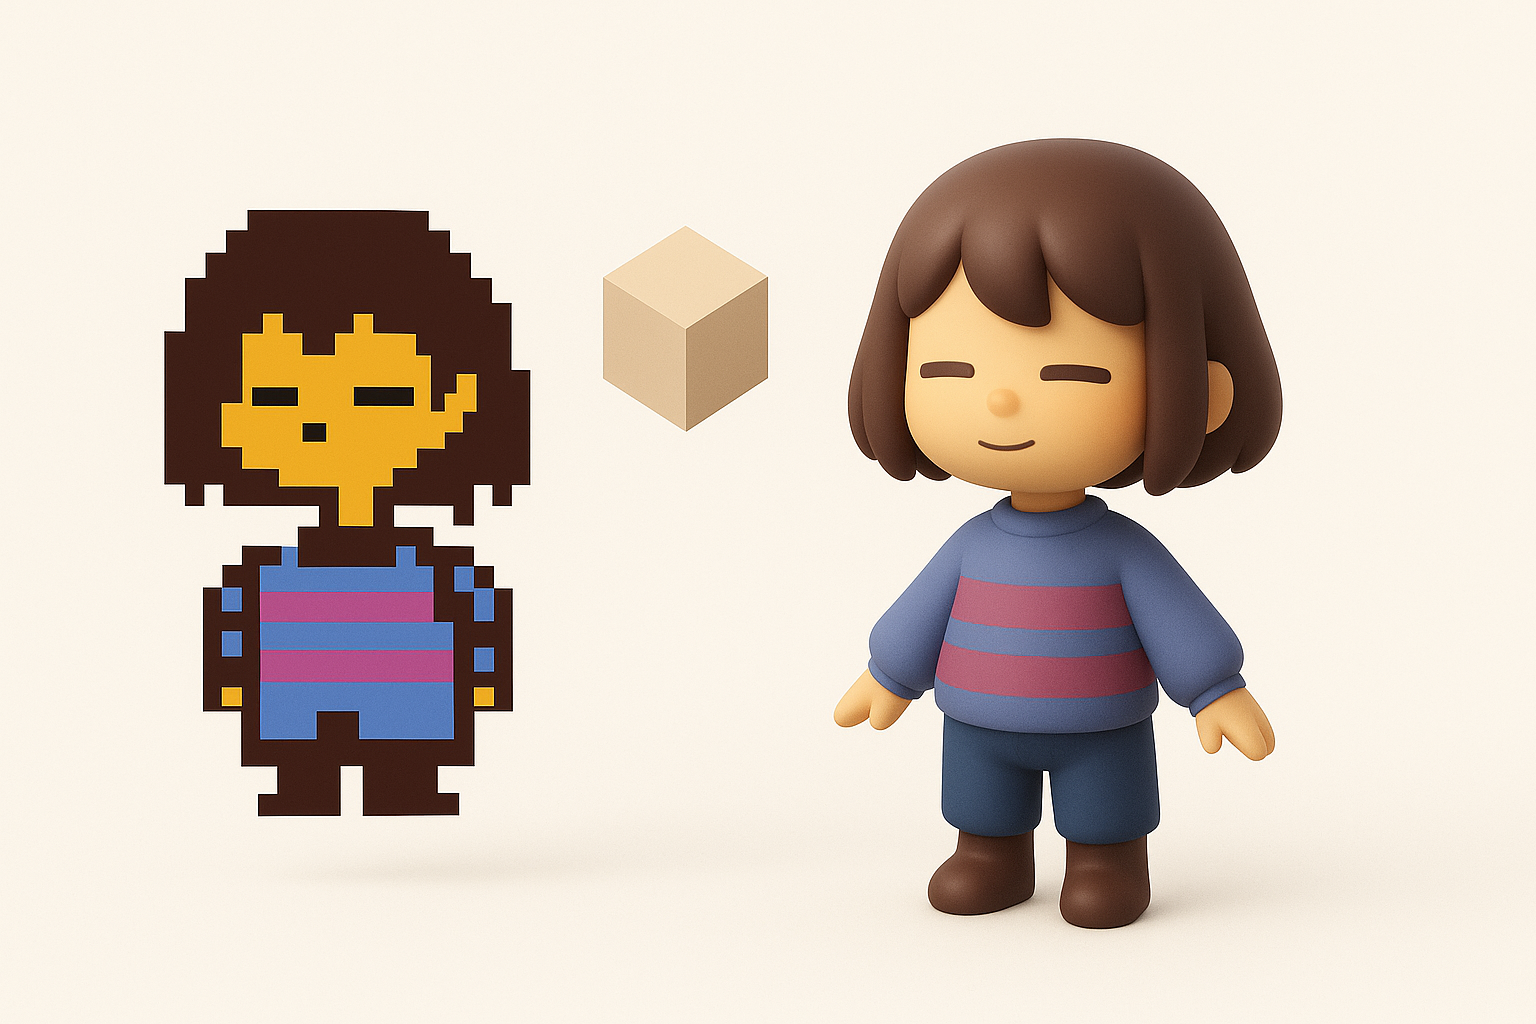
Key visual elements to capture in 3D
Undertale’s art style is deceptively simple but deeply expressive. When I create 3D models based on its characters, I focus on:
- Silhouette: The strong, readable shapes of characters like Sans or Toriel are crucial. I block out these forms early in the modeling process.
- Proportions: Exaggerated heads, stubby limbs, and minimal detail are hallmarks. I avoid adding unnecessary realism.
- Color palette: Undertale uses flat, limited colors. I stick to these palettes to maintain authenticity.
Mini-checklist:
- Reference official sprites for proportions.
- Limit color count in textures.
- Test silhouettes in grayscale to check readability.
Translating 2D pixel art into 3D forms
Moving from pixels to polygons isn’t just about extruding shapes. What I’ve found works:
- Interpretation: Some details are implied in 2D and need creative decisions in 3D (e.g., how to handle eyes or mouths).
- Stylized modeling: I exaggerate features to keep the character recognizable from all angles.
- Texture simplicity: I avoid high-res or photorealistic textures; flat shading or hand-painted details work best.
Pitfall: Over-detailing—adding too much realism can make characters lose their charm.
My Step-by-Step Workflow for Undertale 3D Models
Concepting and reference gathering
Before touching any modeling software, I spend time gathering references:
- Sprite sheets: I collect all character poses and angles.
- Fan art: Sometimes these help visualize 3D interpretations, but I always cross-check with the source.
- Turnarounds: If official ones aren’t available, I sketch my own based on the sprite.
Tip: Organize references in a mood board for quick access.
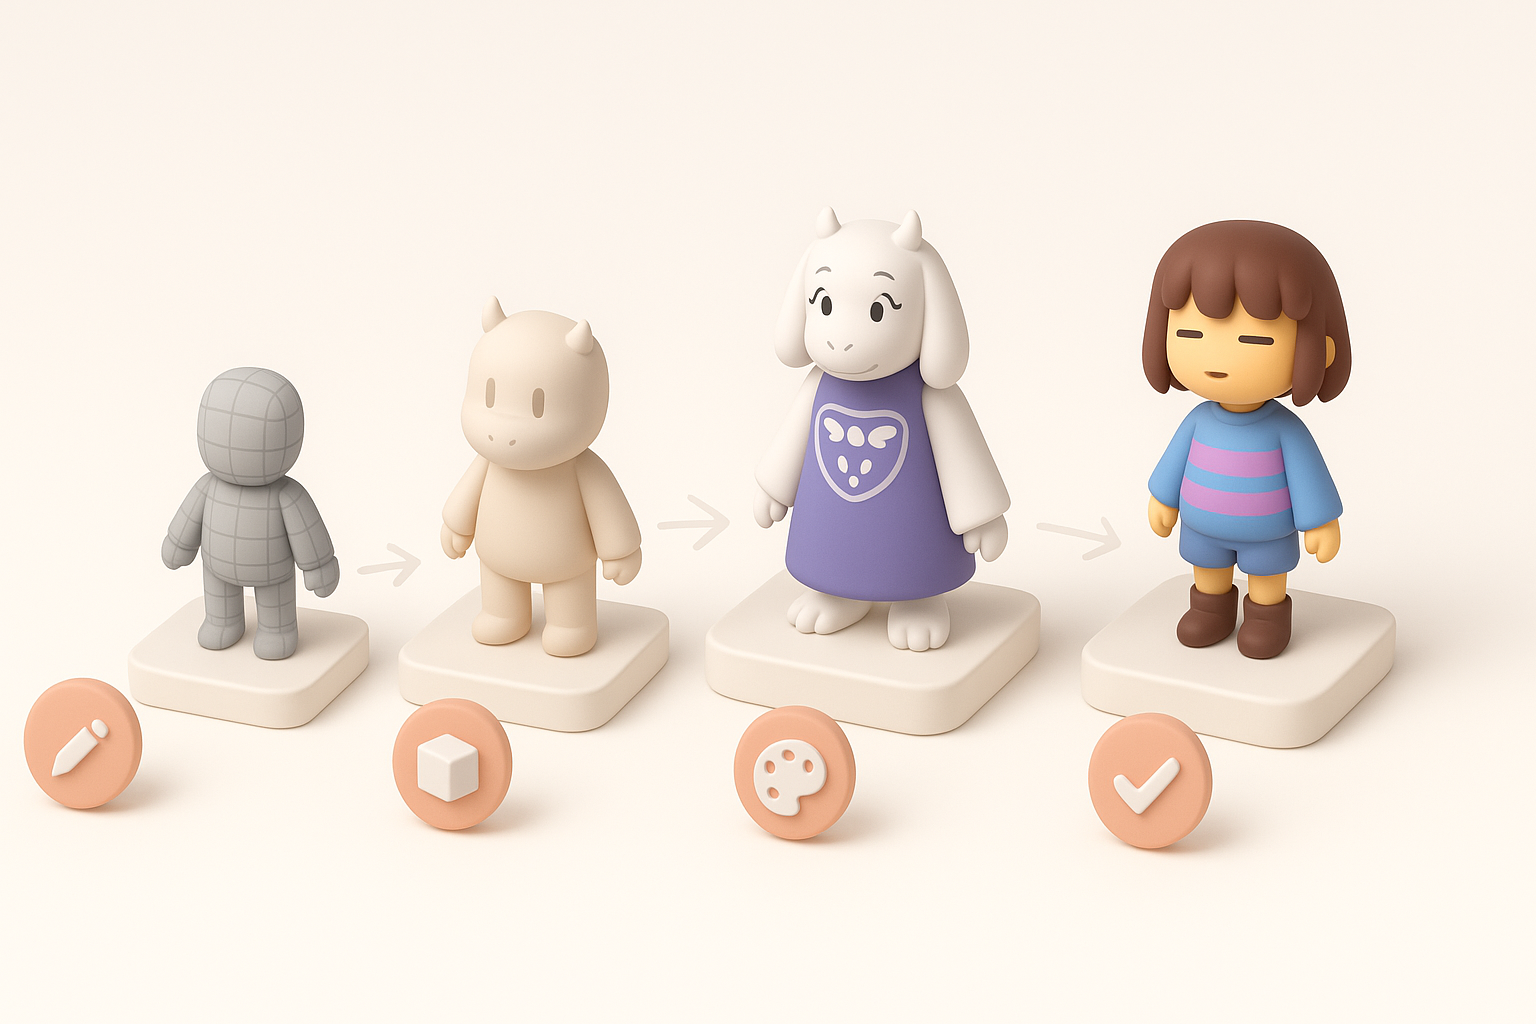
Modeling, texturing, and retopology best practices
- Modeling: I block out primary shapes first, focusing on silhouette and proportion before adding any detail.
- Texturing: For Undertale, I use flat colors or simple gradients. Tools with AI-assisted texturing (like Tripo) help generate base textures quickly, which I then tweak by hand.
- Retopology: Clean topology is essential for animation. I use automated retopology where possible, then manually adjust edge loops for deformation.
Quick steps:
- Block out in low-poly.
- UV unwrap with minimal seams.
- Apply base color texture.
- Retopologize for animation.
Pitfall: Skipping manual cleanup after auto-retopology can cause animation issues later.
Using AI-Powered Tools for Faster 3D Model Creation

How I leverage Tripo for rapid prototyping
AI-powered platforms have changed my workflow significantly. With Tripo, I can:
- Generate base meshes from text descriptions, images, or rough sketches in seconds.
- Auto-segment parts (like heads or limbs) for easier rigging later.
- Quickly iterate—I generate several variations and pick the most promising for refinement.
Tip: Feed Tripo clear, concise prompts, and supplement with reference images for best results.
Integrating AI-generated assets into my pipeline
After generating a base model with AI:
- Import into my main 3D app (Blender, Maya, etc.).
- Clean up geometry—fix any artifacts or smoothing errors.
- Custom texture and detail pass—AI textures are a good starting point, but I always add hand-painted touches.
- Finalize topology for animation and export.
Pitfall: Don’t rely solely on AI output—always review and refine for quality and style consistency.
Rigging and Animating Undertale Characters
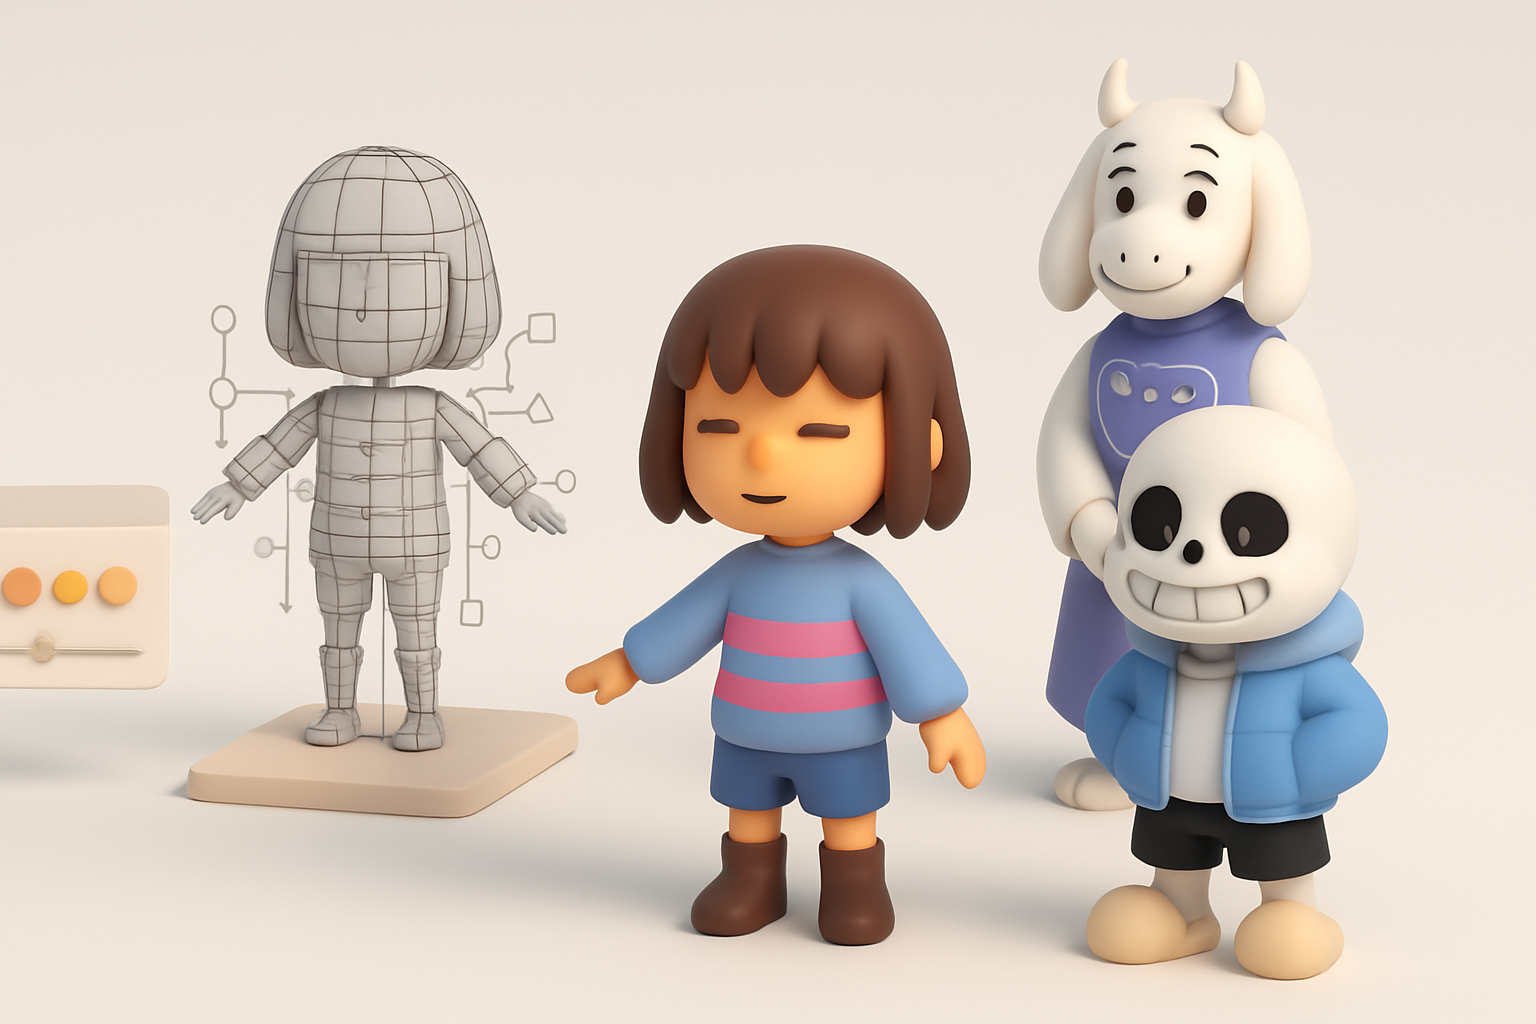
Approaches for stylized rigging
Undertale characters need simple, robust rigs:
- Minimal bones: I use as few bones as possible to preserve the ‘cartoony’ motion.
- Custom controllers: For faces, I often use blend shapes or simple bone-driven rigs for expressions.
- Test deformations: I regularly check poses to ensure limbs and faces deform correctly.
Checklist:
- Spine, arms, legs: 1–2 bones each.
- Facial rig: blend shapes for eyes/mouth.
- Weight paint for smooth, stylized motion.
Tips for expressive, game-ready animation
- Exaggeration: I push poses and timing to match Undertale’s expressive animations.
- Looping cycles: For idle and walk, I keep cycles simple and readable.
- Export settings: I bake animations and check compatibility with target engines.
Pitfall: Over-complicating the rig can slow down animation and break the simple style.
Exporting and Sharing: Game Engines and Online Platforms
Preparing models for Unity, Unreal, and Web
Each platform has its quirks. What I do:
- Export formats: FBX for Unity/Unreal, GLTF for web.
- Scale and orientation: Match the engine’s coordinate system.
- Texture packing: Combine textures into atlases if possible for performance.
Tip: Test import into engine early—don’t wait until the end.
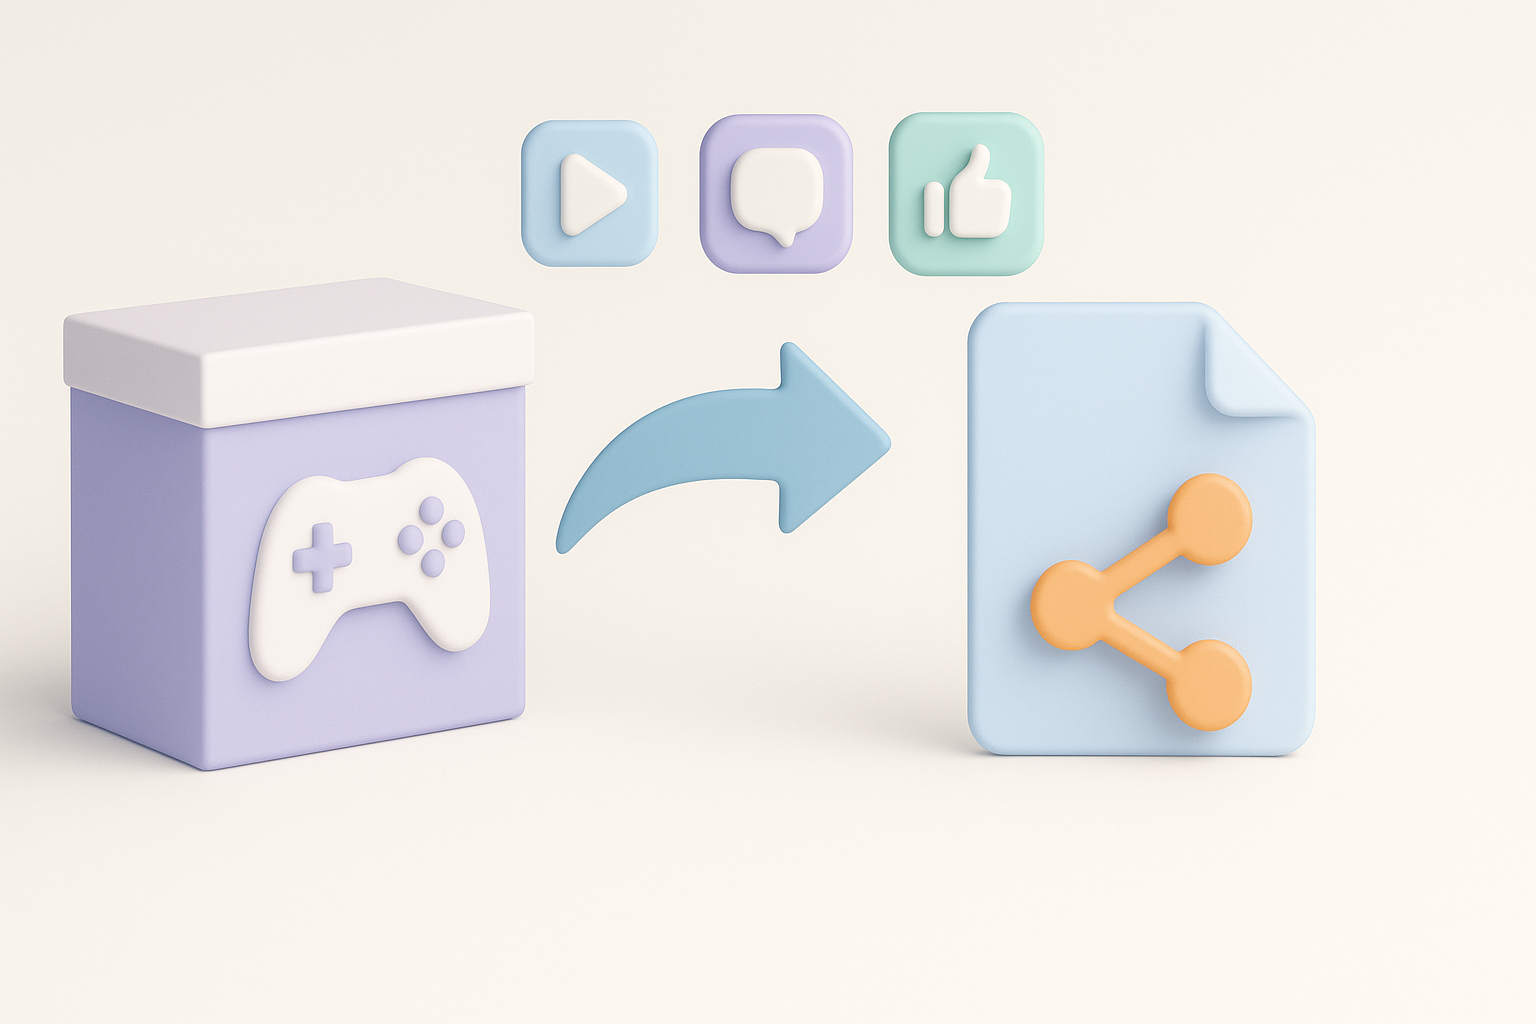
Showcasing and distributing your 3D Undertale creations
- Online platforms: I use Sketchfab or ArtStation to present turntables and wireframes.
- Game mods/fan projects: Always check community guidelines before distributing.
- Documentation: I include a README with usage instructions, attribution, and technical specs.
Pitfall: Forgetting to optimize file size can cause slow downloads or engine crashes.
Lessons Learned and Common Pitfalls
What I wish I knew starting out
- Start simple: My earliest models were too detailed and lost the Undertale feel.
- Reference constantly: Don’t rely on memory—keep sprites visible at all times.
- Iterate: Don’t be afraid to redo parts as you learn.
Troubleshooting and optimization tips
- Artifacts in AI output: Clean up geometry before rigging.
- Texture seams: Always check UVs and test with flat colors first.
- Animation glitches: Test rigs with extreme poses early.
Common pitfalls:
- Over-detailing models.
- Ignoring topology until too late.
- Neglecting platform requirements during export.
By focusing on Undertale’s unique style, leveraging AI tools like Tripo for rapid iteration, and following a disciplined workflow, I’ve been able to create expressive, game-ready 3D models more efficiently. With practice, you’ll find your own rhythm and style—just remember to keep it simple, stay true to the source, and iterate often.