How to Create a Poppy Playtime 3D Model: Expert Workflow
скачать 3d модель для chicken gun
Creating a production-ready 3D model of a Poppy Playtime character requires a blend of artistic vision and technical precision. In my experience, leveraging AI-powered platforms like Tripo alongside traditional modeling techniques can dramatically speed up the workflow while maintaining quality for gaming, XR, or animation projects. This guide covers every step, from concept to export, with practical tips for efficient modeling, stylized texturing, robust rigging, and performance optimization. Whether you’re a game developer, XR designer, or digital artist, this article will help you avoid common pitfalls and deliver models ready for real-world use.
Key takeaways:
- Understand the core visual traits that define Poppy Playtime characters.
- Use AI-powered tools to accelerate segmentation, retopology, and texturing.
- Balance speed and control by integrating traditional and AI workflows.
- Optimize exports for game engines and XR platforms.
- Troubleshoot common mesh and texture issues efficiently.
Understanding Poppy Playtime Character Design
Key visual features and references
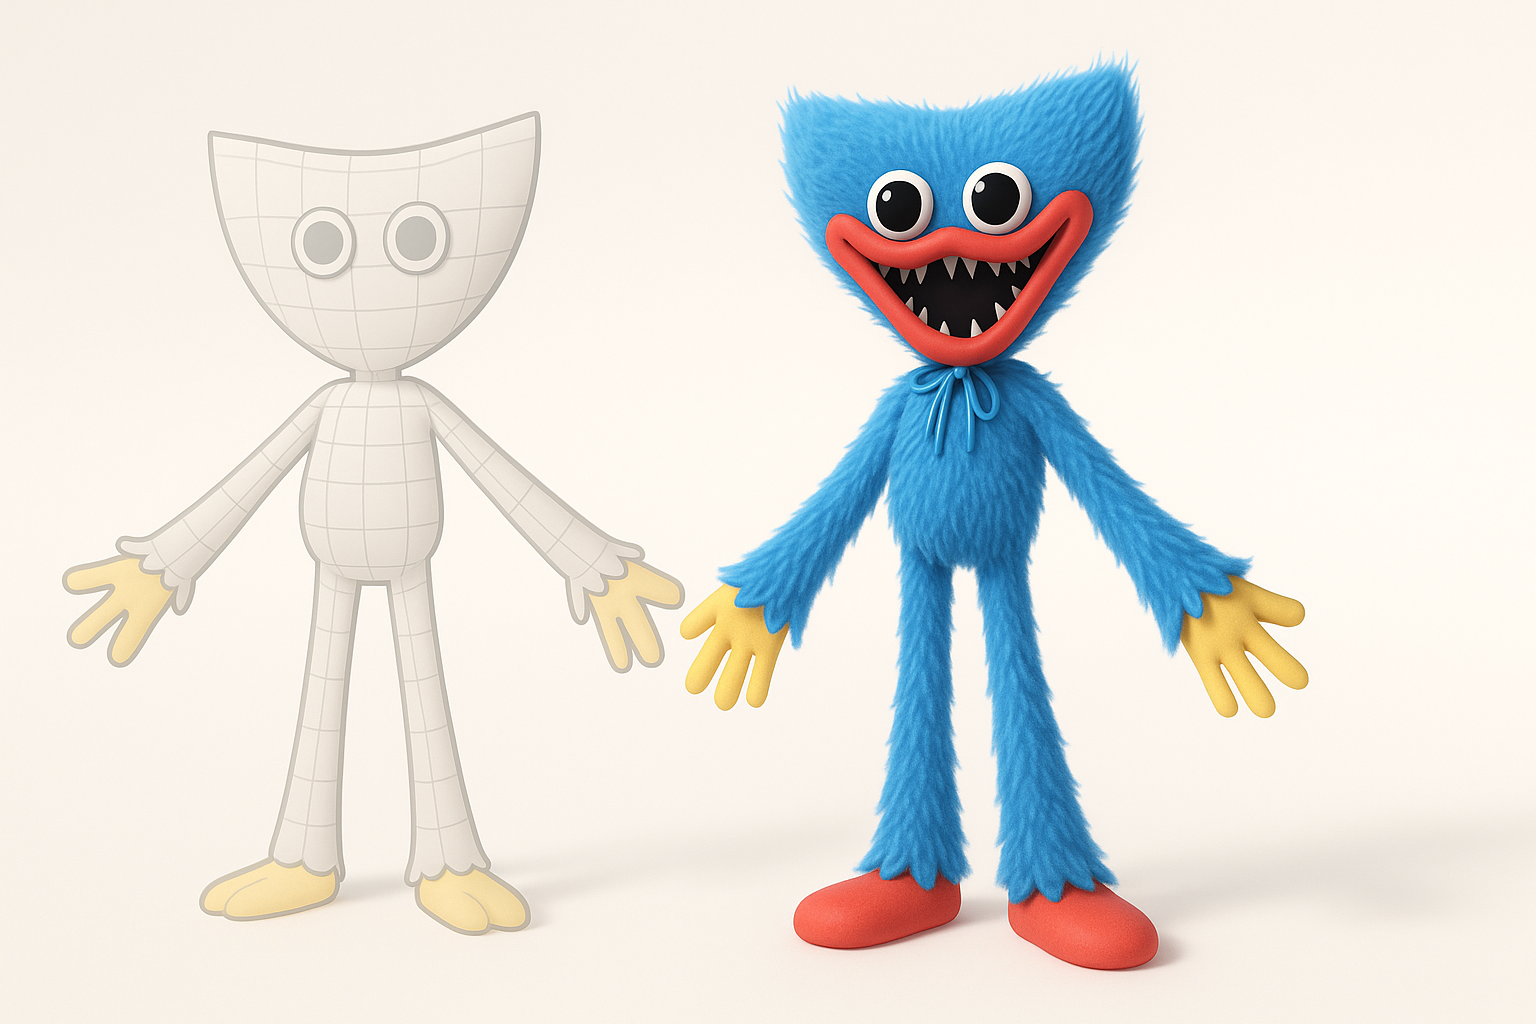
Poppy Playtime characters are instantly recognizable due to their exaggerated proportions, vibrant colors, and stylized horror elements. In my workflow, I always start by collecting high-resolution reference images—official art, gameplay screenshots, and fan renders. Focus on signature elements: oversized eyes, plush-like textures, and expressive poses.
Checklist for references:
- Front, side, and back views
- Close-ups of face, hands, and props
- Color palette swatches
What makes a model production-ready
A production-ready model balances visual fidelity with technical requirements. For games and XR, I target clean topology, efficient UVs, and optimized polygon counts. Rigging and animation readiness are crucial; joints must deform naturally, and textures should be seamless.
Pitfalls to avoid:
- Overly dense meshes that slow down real-time rendering
- Unoptimized UV layouts causing texture stretching
- Missing or poorly placed rigging joints
Choosing the Right Tools for 3D Modeling
AI-powered platforms vs. traditional software
AI-powered platforms like Tripo have revolutionized initial mesh creation, segmentation, and texturing. I use them to quickly generate base meshes and automate tedious steps. Traditional software still excels at fine sculpting, custom rigging, and detailed animation.
When to use which:
- AI tools: Fast prototyping, base mesh, auto-segmentation
- Traditional software: High-detail sculpting, complex rigging, manual fixes
When to use Tripo and other methods
I typically start with Tripo for concept-to-base mesh, then switch to a traditional package for polish. Tripo’s intelligent segmentation and retopology save hours, especially with stylized characters. For animation, I often export to my preferred rigging tool for custom bone setups.
Workflow tip:
Use Tripo’s text-to-3D feature for rapid iterations, then refine topology and UVs in your main 3D software.
Step-by-Step Workflow for Modeling
From concept to base mesh creation
- Concept sketch or reference input: I upload sketches or images to Tripo to generate a base mesh.
- Initial mesh review: Check proportions and silhouette—Poppy Playtime characters need exaggerated shapes.
- Manual tweaks: Adjust major forms in a traditional 3D package before proceeding.
Mini-checklist:
- Silhouette matches reference
- Key features (eyes, mouth, limbs) are present
- Mesh is watertight (no holes)
Tips for efficient segmentation and retopology
Tripo’s segmentation tool is a game-changer for separating limbs, head, and accessories. For retopology, I let AI handle the bulk, then manually clean up edge loops around joints and facial features.
Segmentation tips:
- Label parts clearly for easy rigging later
- Ensure symmetry for stylized characters
Retopology pitfalls:
- Avoid uneven polygon distribution
- Double-check joint areas for deformation
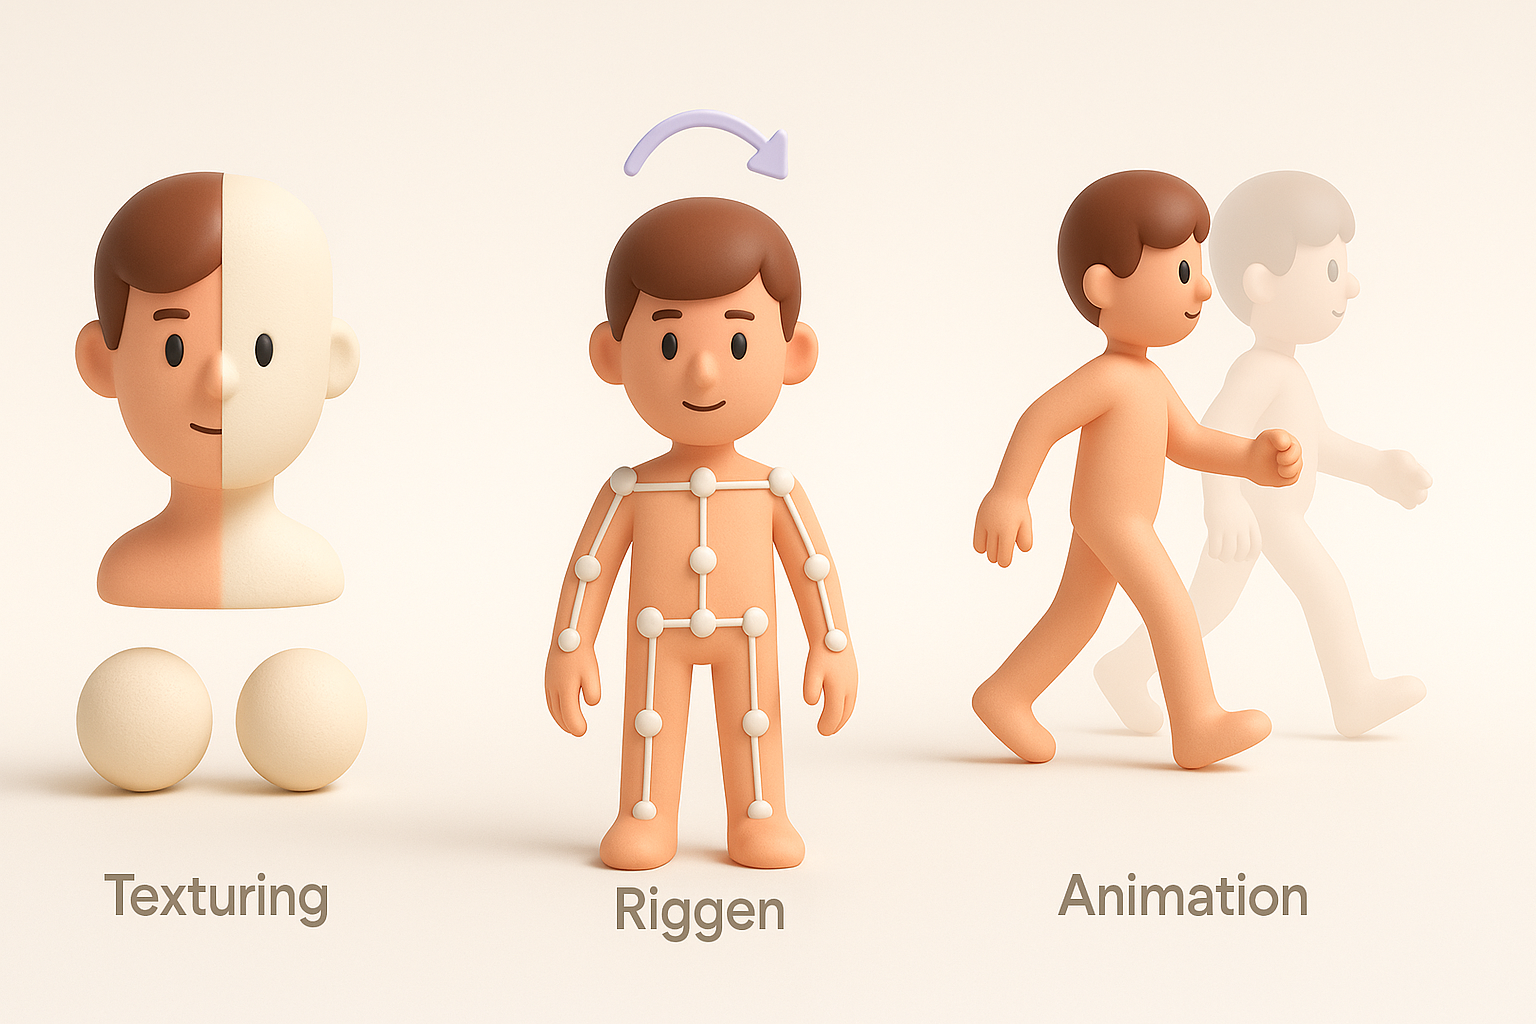
Texturing, Rigging, and Animation Best Practices
Applying stylized textures for Poppy Playtime
Stylized textures define the Poppy Playtime aesthetic. I use Tripo’s auto-texturing for base colors and plush effects, then hand-paint details like stitches, dirt, or facial expressions in a traditional tool.
Texturing steps:
- Auto-generate base texture (Tripo)
- Manual paint overlays (traditional tool)
- Test for seamless UVs
Rigging and animating for games or XR
Rigging should prioritize expressive movement. I use Tripo’s automated rigging as a starting point, then add custom bones for facial expressions and props. For animation, keep cycles simple and readable—overly complex rigs can break in real-time engines.
Rigging checklist:
- Spine, limbs, and facial bones included
- Weight painting checked for deformation
- Export to engine with animation tests
Exporting and Optimizing for Production
Export settings for different engines
Exporting correctly is critical. I match polygon count, texture resolution, and rig setup to the target engine (Unity, Unreal, WebXR, etc.). Tripo’s export presets streamline this, but I always double-check normals, scale, and file format.
Export tips:
- FBX or GLTF for most engines
- Textures in PNG or JPEG
- Scale matches engine units
Performance optimization tips
Optimizing for performance means reducing unnecessary polygons, compressing textures, and minimizing draw calls. I always bake normal maps for detail and use LODs (levels of detail) for distant views.
Optimization steps:
- Remove hidden geometry
- Bake textures and normals
- Set up LOD groups
Common Challenges and Expert Solutions
Troubleshooting mesh and texture issues
Mesh artifacts and texture seams are common. I use Tripo’s mesh repair tools for quick fixes and manually patch UVs when needed. For texture issues, re-bake or repaint problem areas.
Troubleshooting checklist:
- Inspect mesh in wireframe mode
- Check UV islands and seams
- Test textures in engine before final export
What I’ve learned from real-world projects
From dozens of game and XR projects, I’ve learned that speed doesn’t always mean quality—AI tools are best for rapid iteration, but manual polish is essential. Always test assets in their target environment early, and don’t hesitate to iterate on rigging and textures based on feedback.
Final tips:
- Iterate quickly, but polish manually
- Test early and often in the engine
- Document your workflow for repeatability
Slug suggestion: poppy-playtime-3d-model-workflow-guide
Meta description: Learn how to create a production-ready Poppy Playtime 3D model with expert tips on modeling, texturing, rigging, and optimization for games or XR.
Keywords: poppy playtime 3d model, 3d modeling workflow, game asset creation, ai 3d tools, texturing and rigging, tripo ai