Creating Little Nightmares 3 3D Models: Expert Workflow & Tips
Creating 3D models for a stylized, atmospheric game like Little Nightmares 3 demands a precise blend of artistry and technical efficiency. In my experience, the key is balancing unique visual style with strict optimization for real-time engines. I’ll walk through my hands-on workflow, highlight how AI tools like Tripo speed up production, and share practical advice for both newcomers and seasoned 3D artists. If you’re aiming to deliver production-ready assets for games or XR, these lessons will help you avoid common pitfalls and work smarter.
Key takeaways
- Reference-driven concepting ensures visual consistency with the Little Nightmares universe.
- Efficient retopology and texturing are critical for game-ready assets.
- AI tools like Tripo can slash asset creation time, especially for base meshes and texturing.
- Always optimize polycount and texture sizes for real-time performance.
- Integrating AI-generated models requires manual cleanup and style matching.
- Common pitfalls include over-detailing and mismatched art direction—review early and often.
Overview: Little Nightmares 3 3D Model Creation
Key challenges and requirements
Little Nightmares 3 assets must capture a distinct, eerie aesthetic while remaining performant in real-time engines. The main challenges I face are:
- Maintaining stylized proportions: Exaggerated features without breaking animation or silhouette.
- Efficient UVs and textures: Seamless, painterly looks at low texture sizes.
- Performance: Polycount and draw call limits are tight, especially for XR or mobile.
Executive summary and main takeaways
What I’ve learned is that a structured workflow, strong references, and the right mix of manual and AI-assisted steps are essential. Early art direction alignment and technical checks save headaches later. AI tools accelerate repetitive tasks, but final polish is always manual.
My Step-by-Step Workflow for Little Nightmares 3 3D Models

Concepting and reference gathering
I always start with a deep dive into existing Little Nightmares art, gameplay footage, and concept sheets. My steps:
- Reference board: Gather official artwork, screenshots, and fan interpretations.
- Silhouette sketches: Quick 2D sketches to nail proportions and mood.
- Feedback loop: Share concepts with peers or art leads for early input.
This phase is crucial to avoid style drift and rework later.
Modeling, retopology, and texturing best practices
Once the concept is locked:
- Blockout in 3D: I use simple shapes to establish form and proportions.
- Retopology: Keep edge loops clean for deformation; I target 5–10k tris for main characters.
- UV mapping: Prioritize face and hands for texel density; pack UVs tightly.
- Texturing: Hand-paint base colors, then layer grime and details—flat colors rarely work for this style.
Checklist:
- Consistent texel density
- Clean silhouette from all angles
- Minimal UV seams in visible areas
Leveraging AI Tools for Faster 3D Model Production

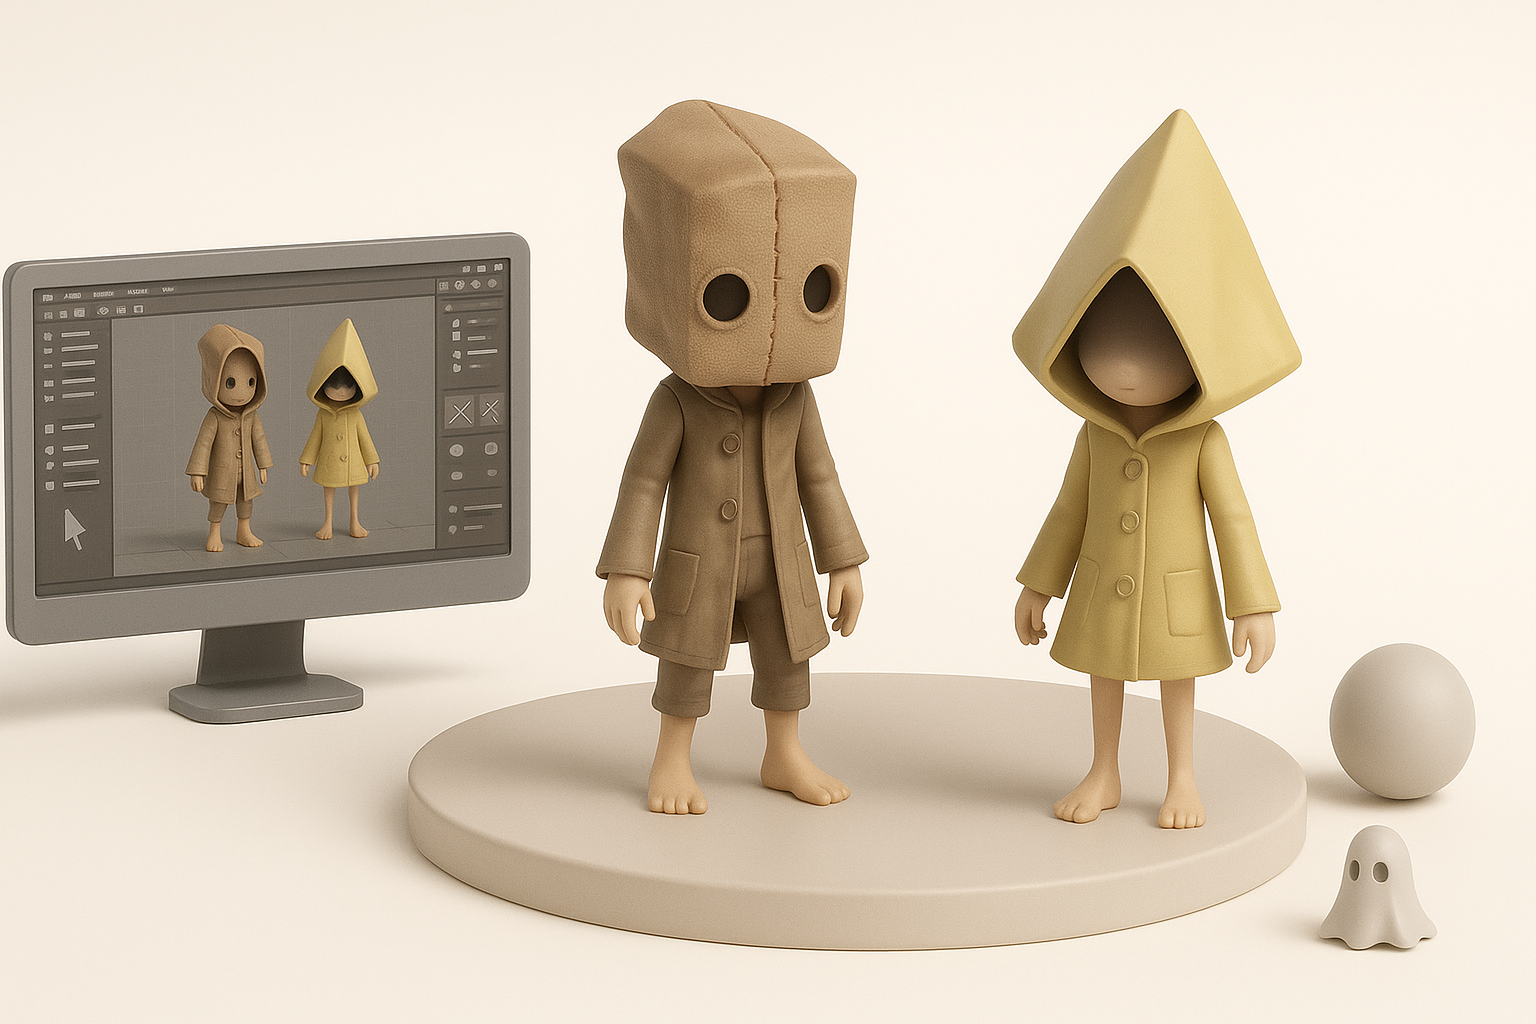
How I use Tripo for efficient asset creation
Tripo AI integrates naturally into my workflow, especially for:
- Generating base meshes: I input sketches or text prompts to get a quick starting point.
- Smart segmentation: Tripo’s tools help split complex models into logical parts for easier rigging.
- Auto-retopology and texturing: The AI handles repetitive tasks, letting me focus on creative tweaks.
This approach saves hours, especially on background props or iterative variations.
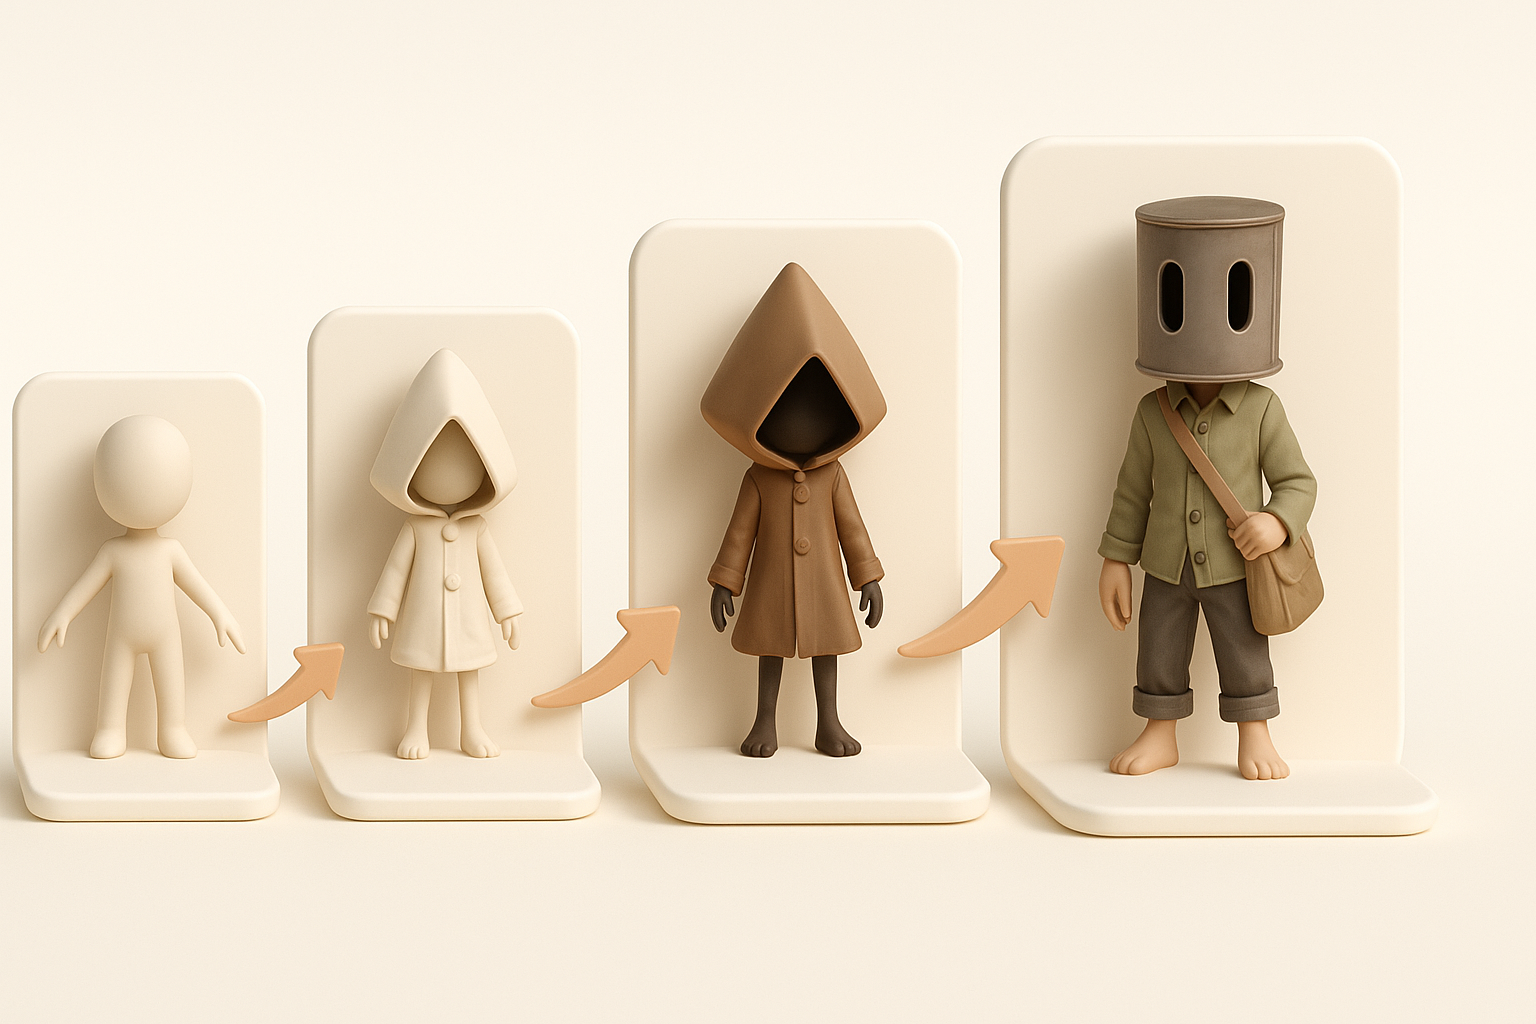
Integrating AI-generated models into pipelines
AI outputs are rarely final. My integration steps:
- Import and cleanup: Check topology, fix any artifacts, and adjust proportions.
- Style matching: Hand-paint or tweak textures to match the project’s look.
- Rigging and export: Ensure the mesh deforms correctly and meets engine requirements.
Tip: Always review AI-generated assets for technical and artistic consistency before moving forward.
Optimizing Models for Games and XR

Performance considerations and polycount management
Performance is non-negotiable. What I do:
- Polycount targets: Set strict budgets based on asset type (e.g., 5k tris for NPCs, 1k for props).
- LOD creation: Generate lower-detail versions for distant rendering.
- Texture sizes: Stick to 512x512 or 1024x1024 for most assets; compress where possible.
Pitfall: Overly dense meshes or large textures can tank frame rates—profile early.
Exporting and testing in real-time engines
Before final delivery:
- Export FBX/GLTF: Ensure correct scale and orientation.
- Engine import: Test in Unity or Unreal; check for shading, lighting, and animation issues.
- Performance profiling: Use engine tools to monitor draw calls and memory usage.
Checklist:
- Correct pivot points
- No flipped normals or stray vertices
- Animations play smoothly
Comparing Manual and AI-Assisted Workflows

Pros and cons from my experience
Manual workflow:
- Pros: Full control, perfect style match, ideal for hero assets.
- Cons: Time-consuming, repetitive for similar props.
AI-assisted workflow:
- Pros: Rapid base mesh and texture generation, great for background or iterative assets.
- Cons: Requires cleanup, occasional style mismatches, not always production-ready out of the box.
When to choose each approach
I use manual methods for hero characters and key props. For large asset libraries or backgrounds, AI tools like Tripo make sense. The hybrid approach—AI for base, manual for polish—is usually best.
Tips, Troubleshooting, and Lessons Learned
Common pitfalls and how I avoid them
- Over-detailing: Stick to silhouette and major forms; fine details can be lost in-game.
- Ignoring engine constraints: Always test assets early in the target engine.
- Texture mismatches: Use shared palettes or overlays for consistency.
Advice for creators new to Little Nightmares 3 assets
- Study the art style: Notice the subtle exaggerations and muted palettes.
- Iterate fast: Use blockouts and AI tools for quick feedback cycles.
- Don’t skip polish: Even with AI, hand-tuning is essential for quality.
Final tip: The best results come from blending efficient AI workflows with a sharp creative eye. Always review, refine, and test in context.