How I Create a Chibi Godzilla 3D Model: Workflow & Tips
Creating a chibi Godzilla 3D model is a rewarding process that blends stylized design with technical know-how. In my experience, the key is balancing efficient workflows—leveraging AI-powered tools where they excel—with hands-on sculpting, texturing, and rigging. This guide is for artists, hobbyists, and developers who want to create stylized 3D characters quickly without sacrificing quality. Below, I’ll break down my full process, best practices, and lessons learned from building chibi Godzilla models for games and XR platforms.
Key takeaways:
- Use AI-powered tools for rapid base mesh generation and segmentation.
- Always start with clear references and a defined chibi style.
- Manual sculpting and refinement are essential for personality and appeal.
- Keep textures stylized, simple, and readable at small sizes.
- Optimize topology and export settings for your target platform.
Executive Summary: Key Takeaways for Chibi Godzilla 3D Modeling
What Makes Chibi Godzilla Unique in 3D
Chibi Godzilla stands out due to its exaggerated proportions—big head, tiny limbs, and expressive features. The challenge is translating these cute, cartoonish traits into a clean 3D model that holds up in animation and real-time engines. In my workflow, I focus on silhouette clarity and facial expressiveness, which are critical for the chibi aesthetic.
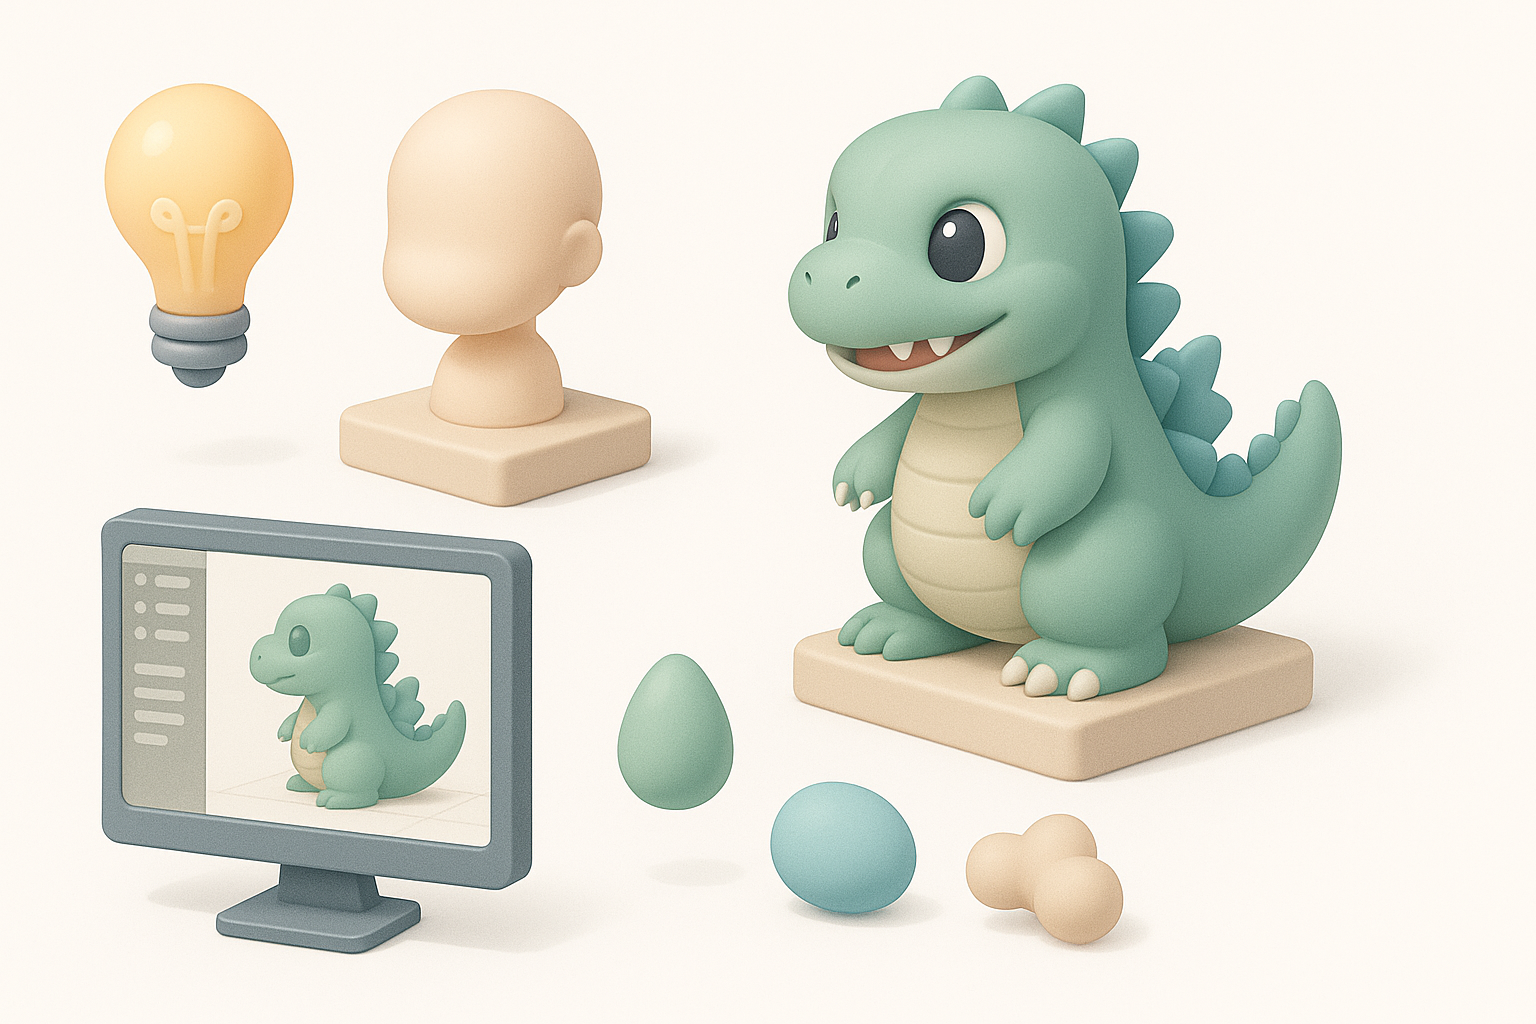
Summary of My Recommended Workflow
My process combines AI-driven base mesh creation with hands-on sculpting, stylized texturing, and lightweight rigging. I use platforms like Tripo to accelerate the early stages, then refine manually to achieve the right look and feel. This hybrid approach lets me iterate quickly while maintaining creative control.
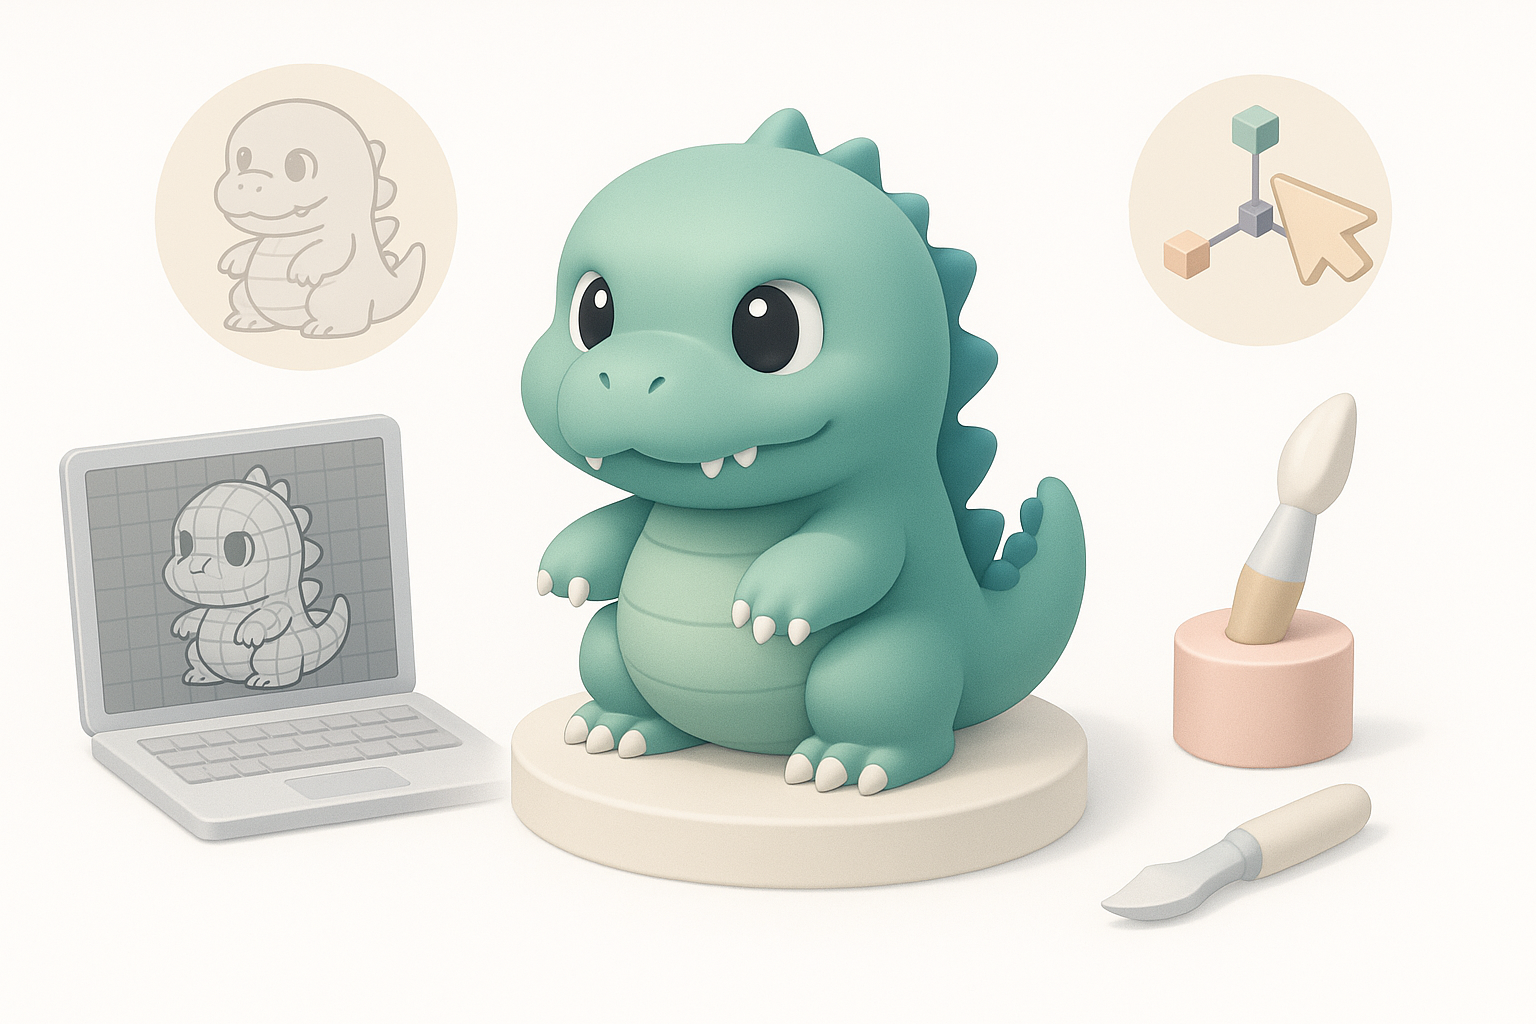
Planning and Concept: Defining the Chibi Godzilla Style
Gathering References and Inspiration
I always start by collecting a wide range of references—official chibi Godzilla art, fan interpretations, and other chibi monsters. This helps me lock down the core features: oversized head, stubby tail, and simplified spikes. I use moodboards and quick sketches to clarify the vibe before touching any 3D tools.
Checklist:
- Gather at least 5–10 reference images
- Note proportions, color schemes, and key expressions
- Decide on pose and personality upfront
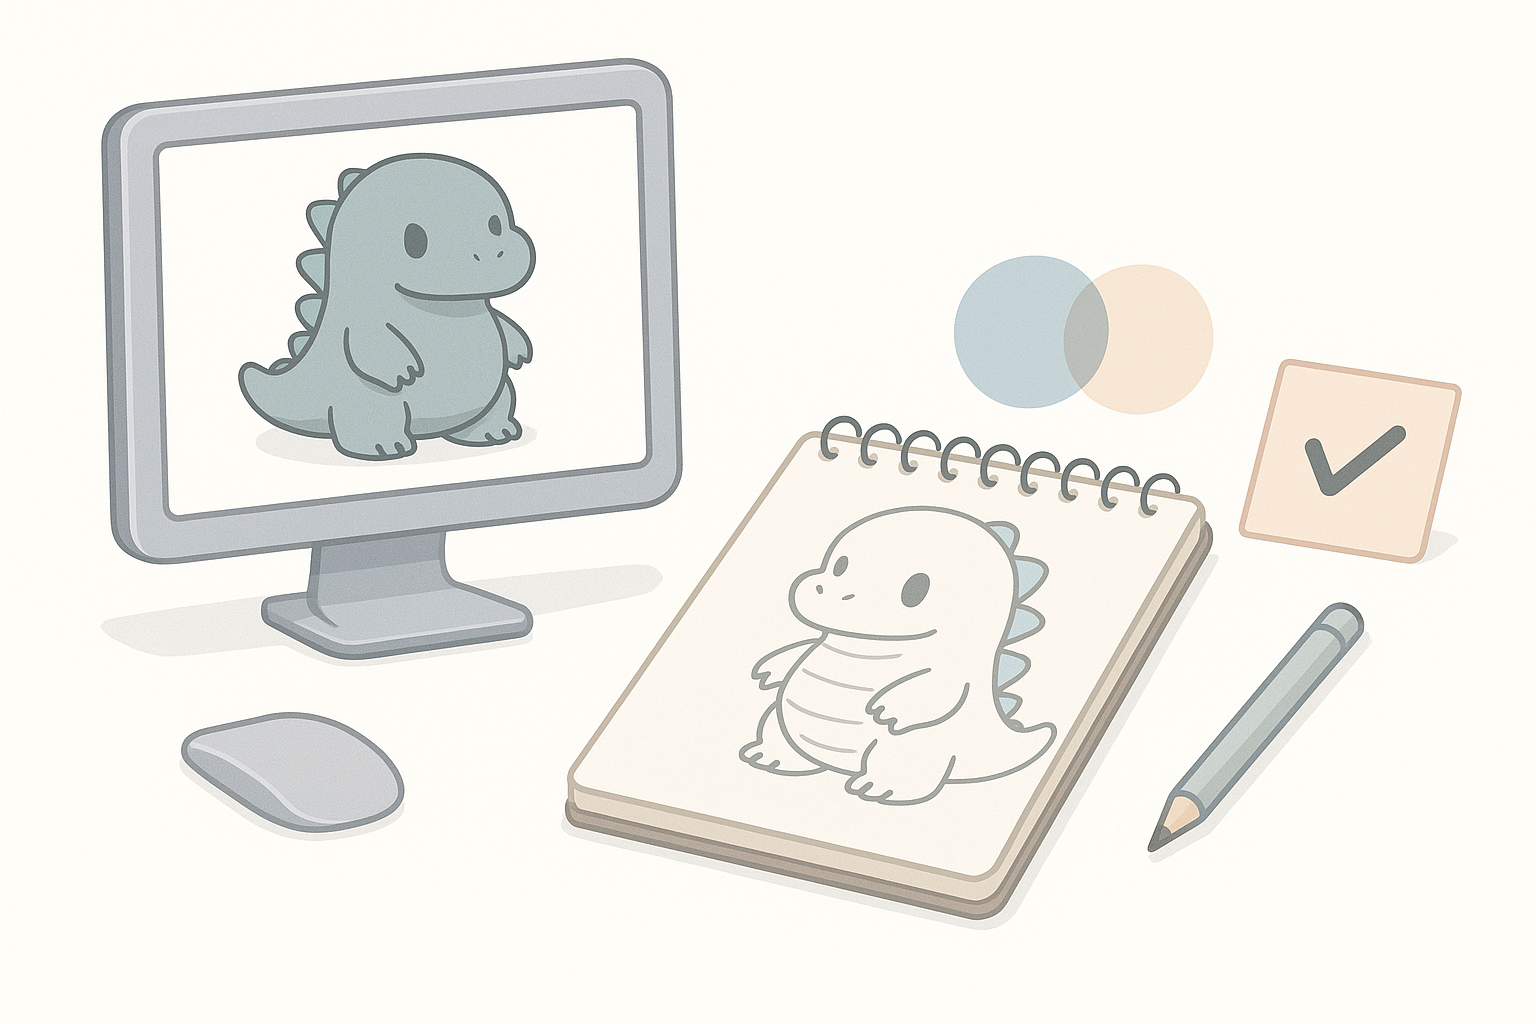
Sketching or Blocking Out the Character
Even if I’m using AI tools, I often sketch or block out the character in 2D or with simple 3D primitives. This rough pass helps me identify potential modeling challenges and ensures the model will read well from all angles.
Tips:
- Use spheres and cubes to block in major volumes
- Focus on silhouette and head-to-body ratio
- Don’t over-detail at this stage
Modeling Workflow: From Base Mesh to Chibi Proportions
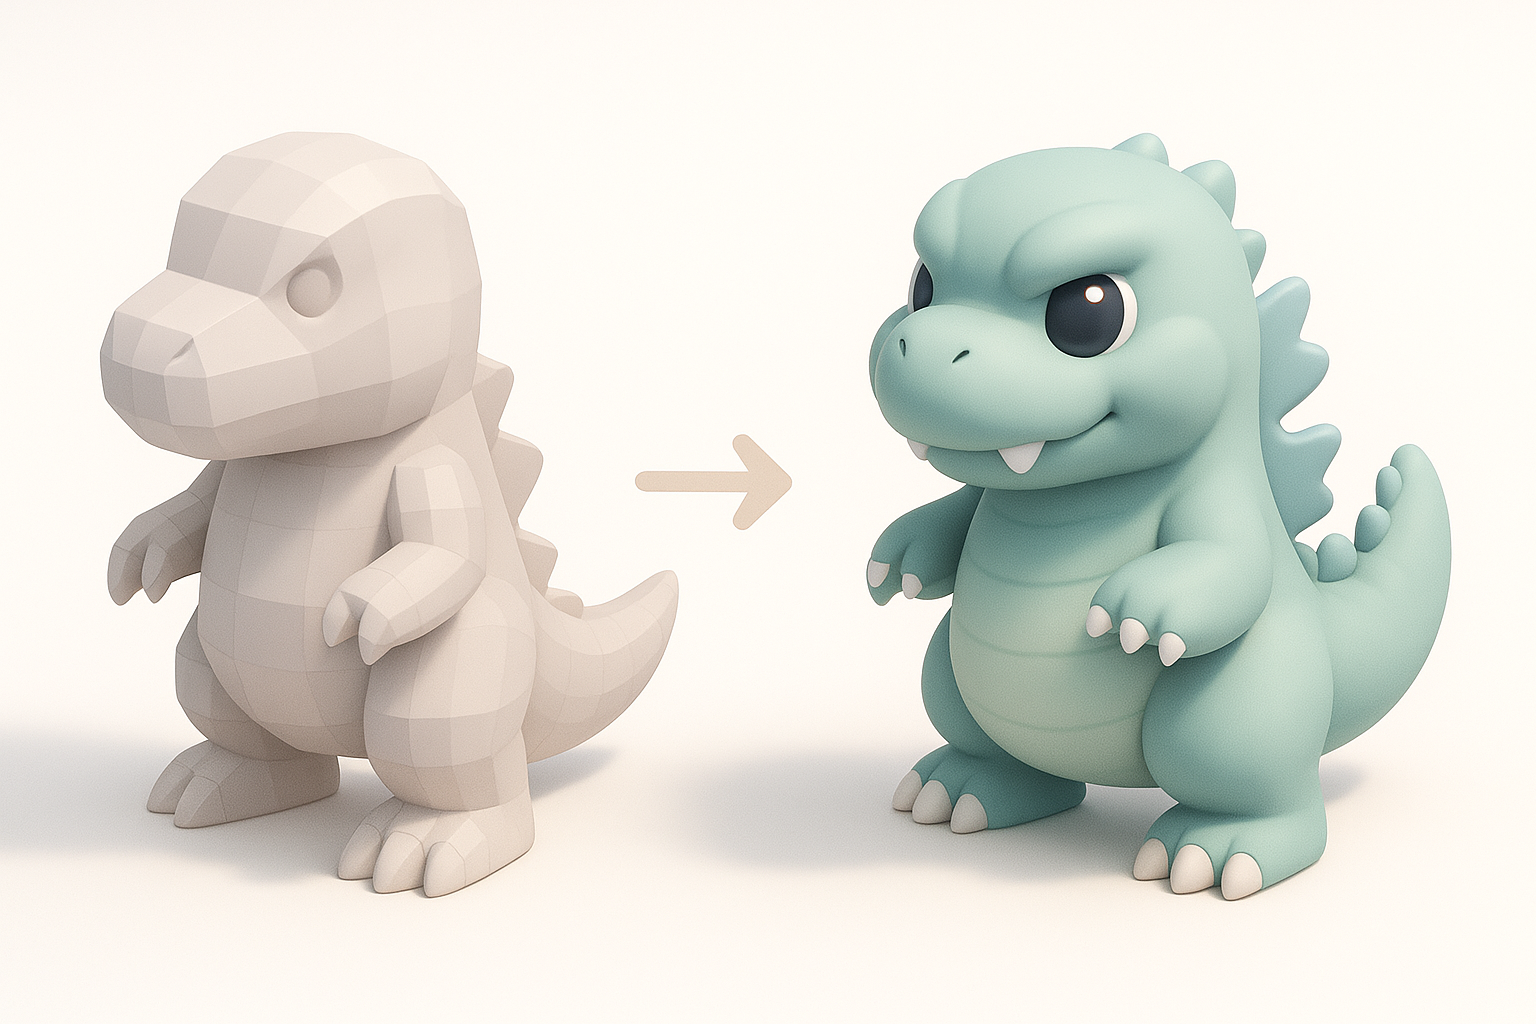
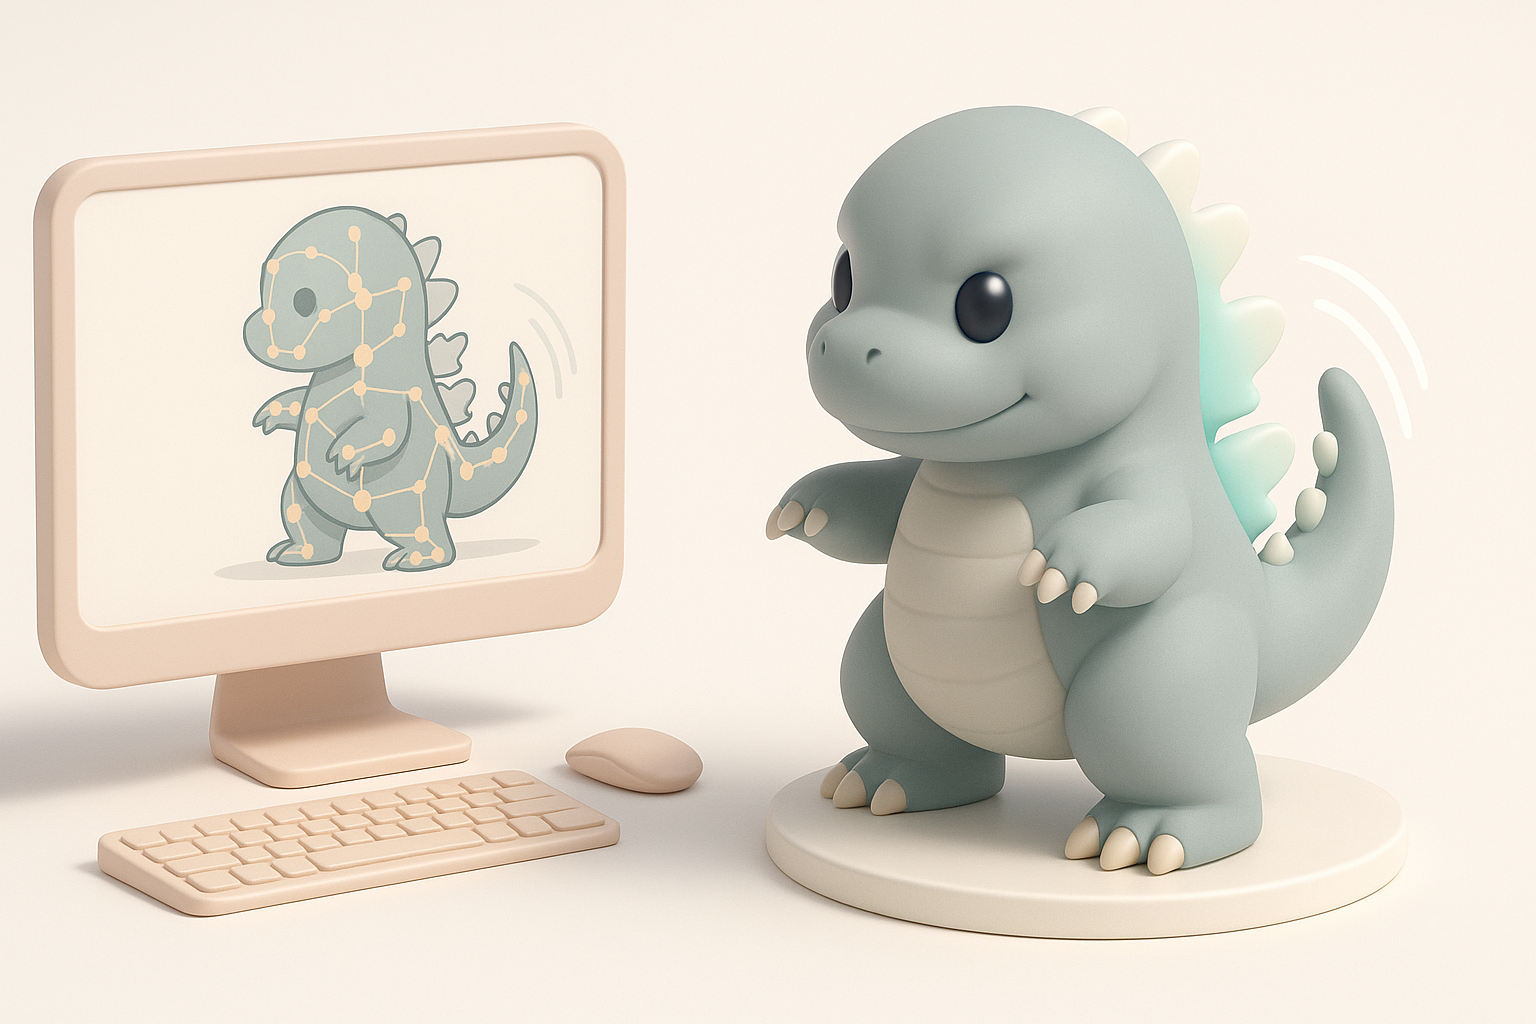
Using AI-Powered Tools for Fast Base Mesh Creation
I rely on AI-powered platforms like Tripo to generate a clean base mesh from my sketches or text prompts. This gets me 80% of the way there in seconds, including basic segmentation (head, limbs, tail). It’s a huge time-saver, especially for repetitive shapes like spikes.
Steps:
- Input text prompt or upload sketch to generate base mesh
- Review and tweak segmentation if needed
- Export base mesh for manual refinement
Manual Sculpting and Refinement Techniques
Once I have the base mesh, I move into manual sculpting. I exaggerate the proportions, refine facial features, and add subtle asymmetry for appeal. I pay special attention to the mouth, eyes, and spike shapes—these define Godzilla’s character.
What I’ve found works:
- Use soft brushes for organic forms
- Avoid over-complicating: chibi = simple
- Frequently check the silhouette from all angles
Texturing and Materials: Bringing Chibi Godzilla to Life
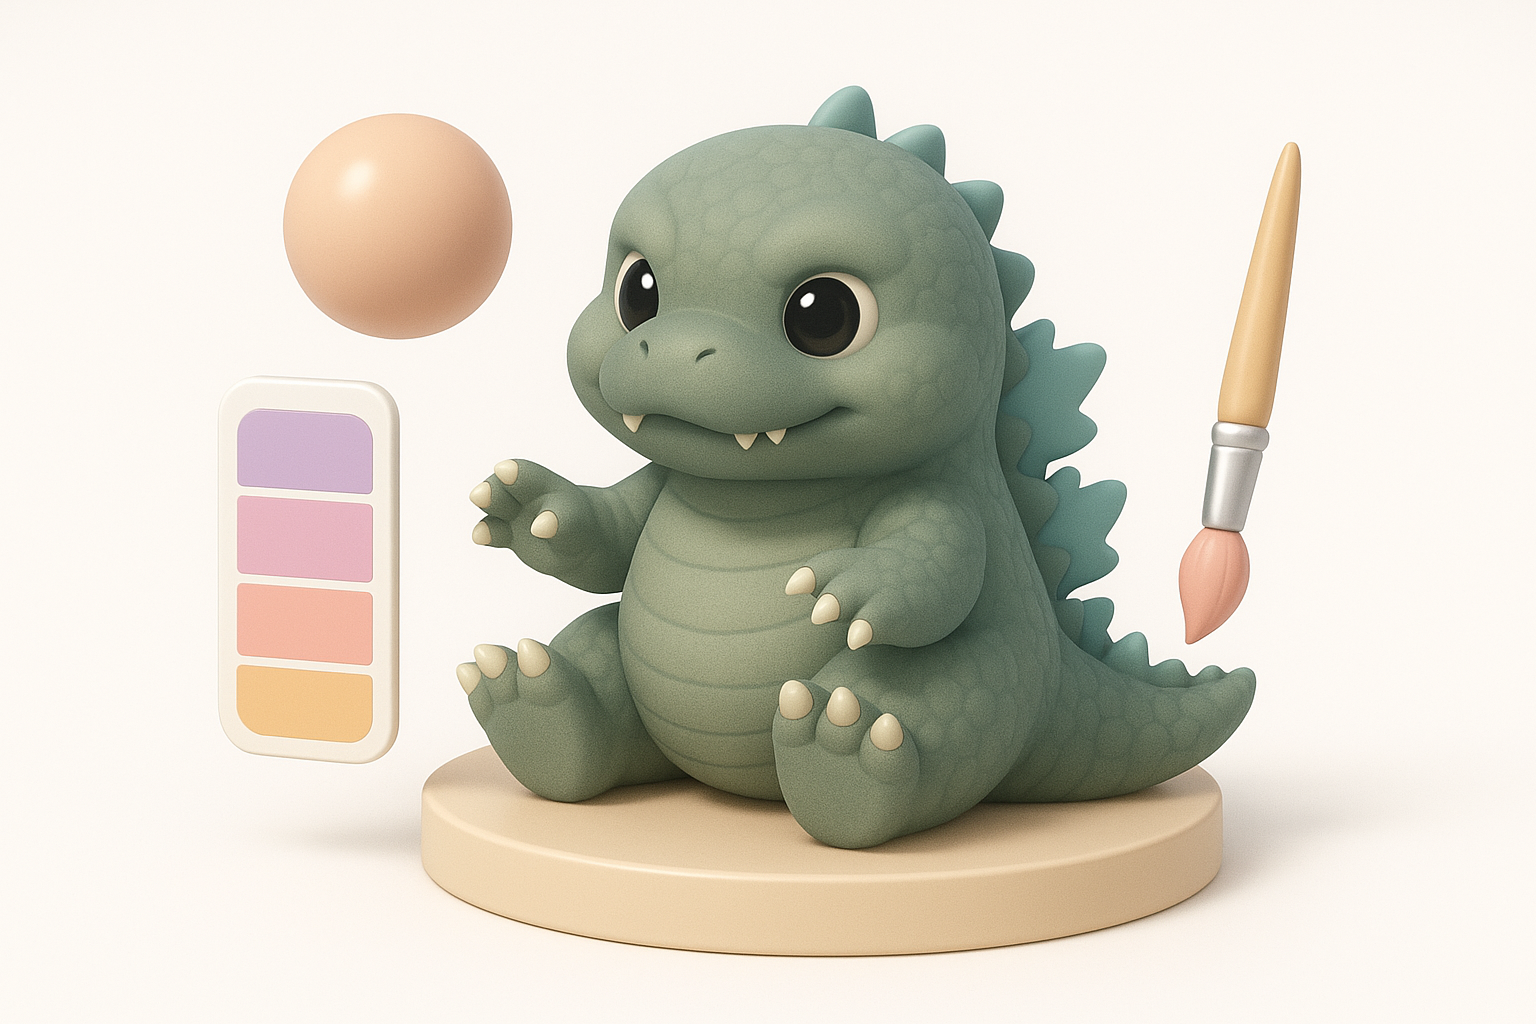
Best Practices for Stylized Textures
For chibi models, I stick to hand-painted or flat textures with minimal detail. Simple gradients and soft highlights work best. I avoid photo textures—clean, readable surfaces are key for the chibi look.
Pitfalls to avoid:
- Overly complex textures (muddy at small scale)
- Realistic materials that break the cartoon style
Applying Materials and Color Palettes
I choose a limited, harmonious palette—usually greens for the body, off-whites for the belly, and soft blues or purples for spikes. Materials are kept simple: diffuse with subtle specular, avoiding roughness maps unless absolutely needed.
Mini-checklist:
- Limit to 3–5 main colors
- Test in both bright and dark lighting
- Preview in-engine for final look
Rigging and Animation: Making Chibi Godzilla Move
Simple Rigging Approaches for Chibi Characters
Chibi models benefit from lightweight rigs. I use basic skeletons with minimal joints—just enough for expressive head turns, arm waves, and tail wags. Automated rigging tools can speed this up, but I always check weight painting manually.
Tips:
- Prioritize facial and head movement
- Limit rig complexity for easier animation
Animating Expressive Poses and Actions
Chibi Godzilla comes alive with big, readable poses. I favor squash-and-stretch, exaggerated blinks, and bouncy idle loops. Short, snappy animations work best to convey personality.
What works for me:
- Block out key poses first
- Exaggerate movements beyond realism
- Test loops in context (game/XR)
Exporting and Optimization: Game & XR Readiness
Retopology and Polycount Management
I always retopologize the model after sculpting, aiming for clean, efficient geometry. For chibi models, I target a low-to-mid polycount (2k–8k tris) to ensure smooth performance in real-time engines.
Checklist:
- Remove hidden or unnecessary faces
- Check for n-gons and non-manifold geometry
- Bake normal maps if needed for detail
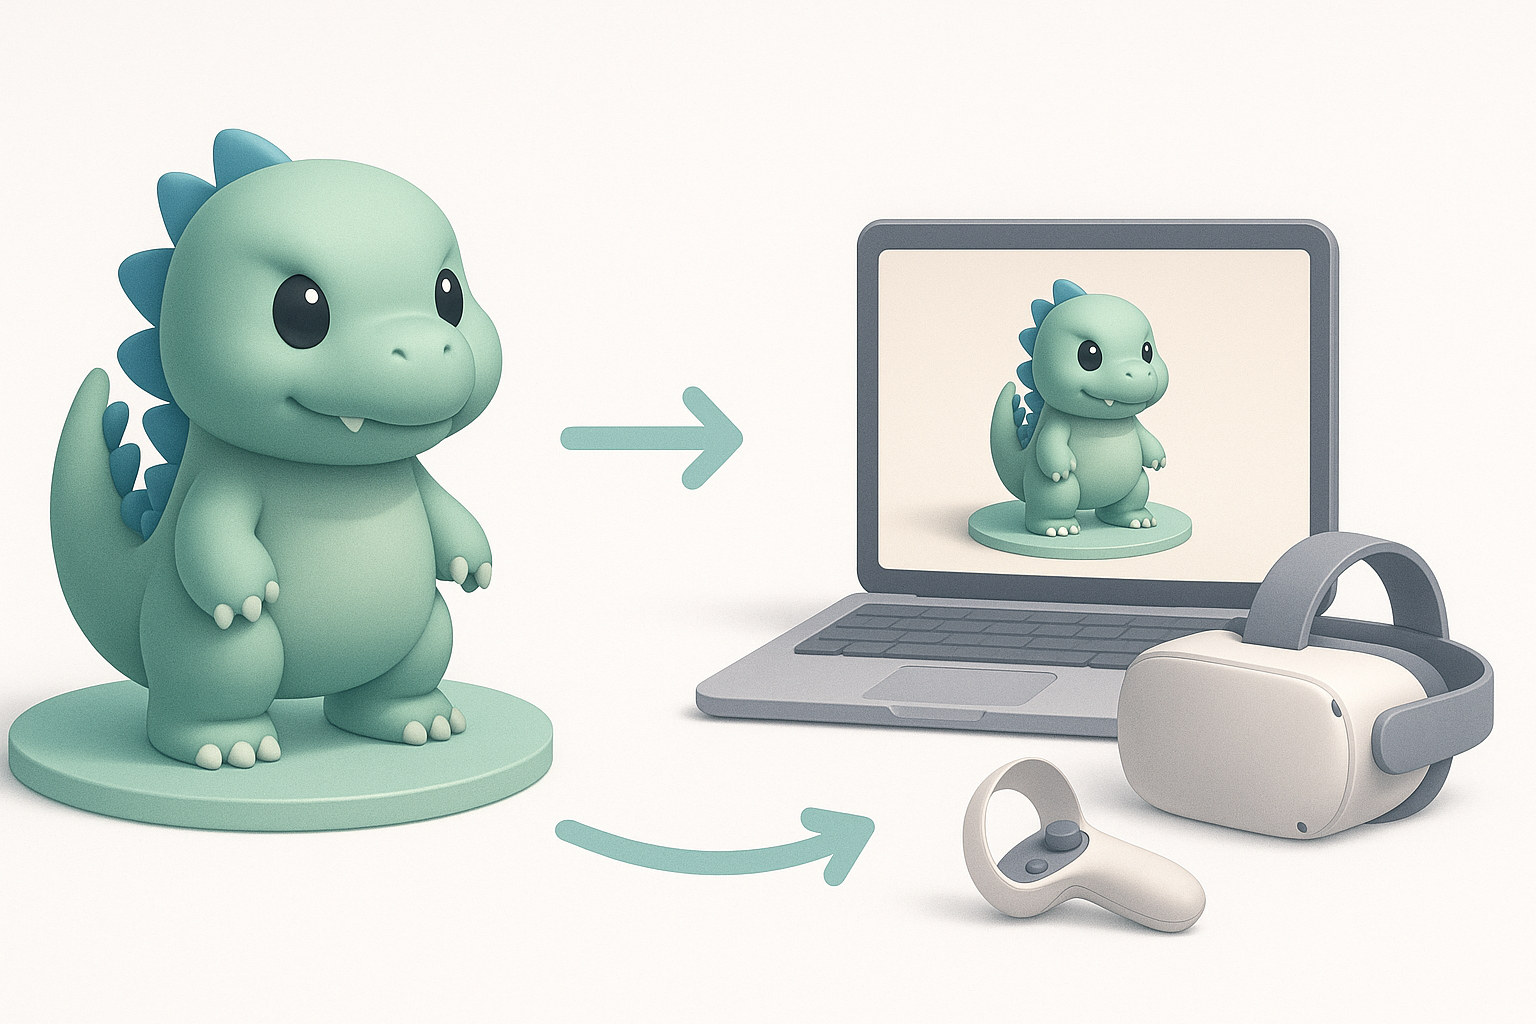
Export Settings for Different Platforms
Exporting correctly is crucial. I use FBX or GLTF formats, ensuring scale and axis orientation match the target platform. I include only necessary texture maps and keep file sizes optimized.
Tips:
- Test export in engine before finalizing
- Double-check material assignments
- Provide both static and rigged versions if possible
Comparing AI Tools and Manual Methods for Chibi 3D Models
When to Use AI-Powered Platforms
I use AI-powered tools for the repetitive, time-consuming parts: generating base meshes, auto-segmenting body parts, or auto-rigging. This lets me focus my manual effort on creative decisions and fine-tuning.
When AI shines:
- Speeding up early modeling stages
- Batch-generating variants for iteration
Integrating Alternative Methods in My Workflow
Manual methods are still essential for stylization and polish. I often blend AI outputs with hand-sculpted details, custom textures, and bespoke rigging tweaks. The goal is to combine speed with artistic control.
My approach:
- Use AI for structure, manual for style
- Don’t rely on automation for final touches
My Lessons Learned and Pro Tips for Chibi Godzilla Models
Common Pitfalls and How I Avoid Them
Some easy mistakes: over-detailing, inconsistent proportions, or skipping optimization. I always review my model at thumbnail size to ensure it reads well, and I test in-engine early to catch issues.
Pitfalls to watch for:
- Losing the chibi silhouette during refinement
- Forgetting to optimize topology and UVs
- Ignoring platform-specific export needs
Final Checks Before Sharing or Publishing
Before sharing, I run through a final checklist: test animations, check materials in engine, and preview on different backgrounds. I also make sure licensing is clear if I used any third-party assets or references.
My final steps:
- Run a quick animation cycle test
- Double-check file naming and hierarchy
- Share renders and turntables for feedback
By combining smart use of AI-powered tools with hands-on artistry, I can create charming, production-ready chibi Godzilla models efficiently—ready for games, XR, or collectibles.