AI生成3DアセットをBabylon.jsとThree.jsにインポートする方法
想像してみてください。AI 3Dモデルジェネレーター技術を使って数秒で素晴らしい3Dモデルを作成したものの、それをウェブ上でどう動かすべきか悩んでいるとします。インタラクティブな製品ショーケース、ウェブベースのゲーム、没入型AR体験を構築する場合でも、AIが生成した傑作を人気のあるウェブフレームワークにインポートすることは、ロケット科学のように感じるべきではありません。
まさにそれを今日解決します。しかも1つではなく、2つのアプローチで。まず、モデルを数分でライブにするエキサイティングなAI駆動のショートカットから始め、次に完全な制御を求める人向けに伝統的なコーディング方法について掘り下げます。すでに200万人以上のクリエイターがTripo AIを使用して8〜10秒でプロフェッショナルな3Dモデルを生成している中で、AIが生成した3DアセットをBabylon.jsとThree.jsの両方にインポートする最速の方法を探ってみましょう。
クイックAIショートカット:Cursor AIを使って3Dモデルをインポートする
これがゲームチェンジャーです。もう何百行ものコードを書く必要はありません。Cursor AIのようなAI搭載の開発ツールは、AI生成3Dモデルの作成のようなタスクを含む、統合設定全体を数分で生成できます。この方法は、デザイナー、マーケター、そしてJavaScriptの深い知識なしに迅速にプロトタイプを作成したいすべての人に最適です。
なぜAIショートカットを選ぶのか?
- 超高速:数時間のコーディングを5分間のセットアップに短縮
- 初心者向け:コーディング経験がなくても問題なし
- エラーフリー:AIがローダー設定などの複雑な部分を処理
- 即時テスト:AI生成3Dモデルのウェブ統合をすぐに確認
ステップバイステップ:Cursor AIメソッド
1. Tripo AIモデルのエクスポート
Tripo StudioまたはTripo AIプラットフォームを使用する場合:
- テキストまたは画像からモデルを生成
- エクスポートボタンをクリック
- GLB形式を選択(ウェブ向けに推奨)
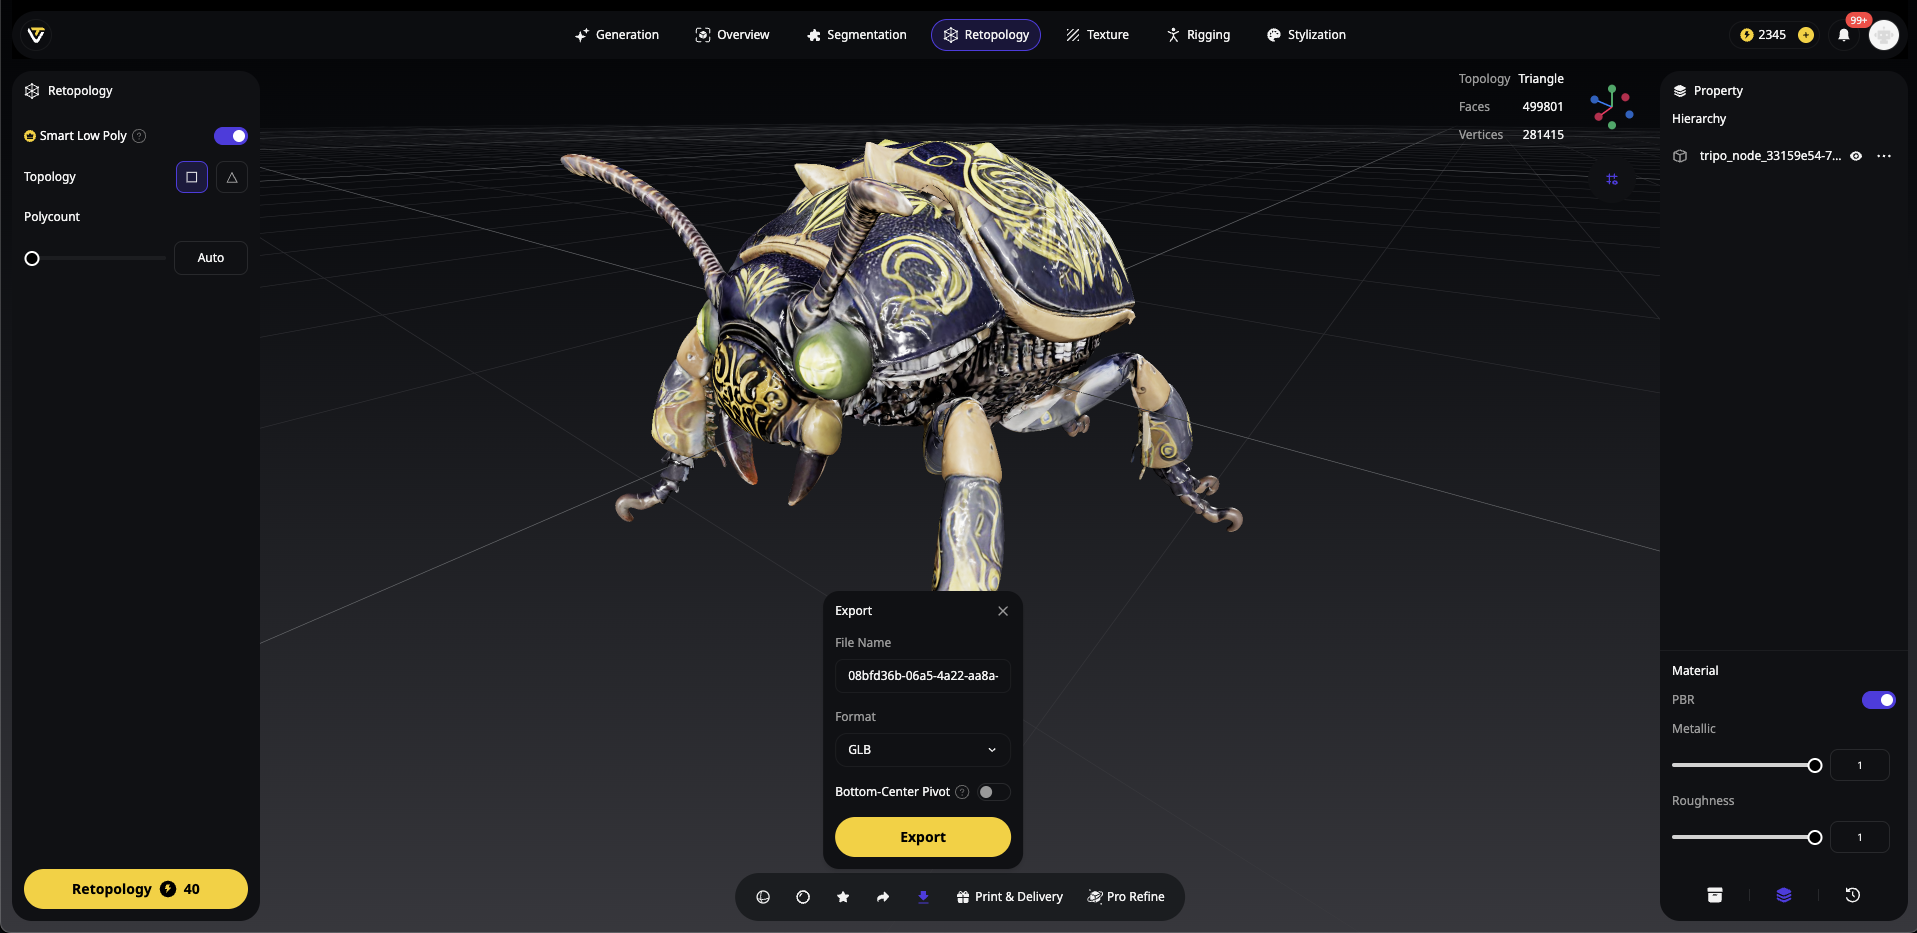
代替形式:OBJ、FBX、STL、またはUSDZ
新しいプロジェクトフォルダを作成し、GLBモデルをmodelsサブフォルダに配置します。
my-3d-project/
├── models/
│   └── your-tripo-model.glb
└── (現在は空)
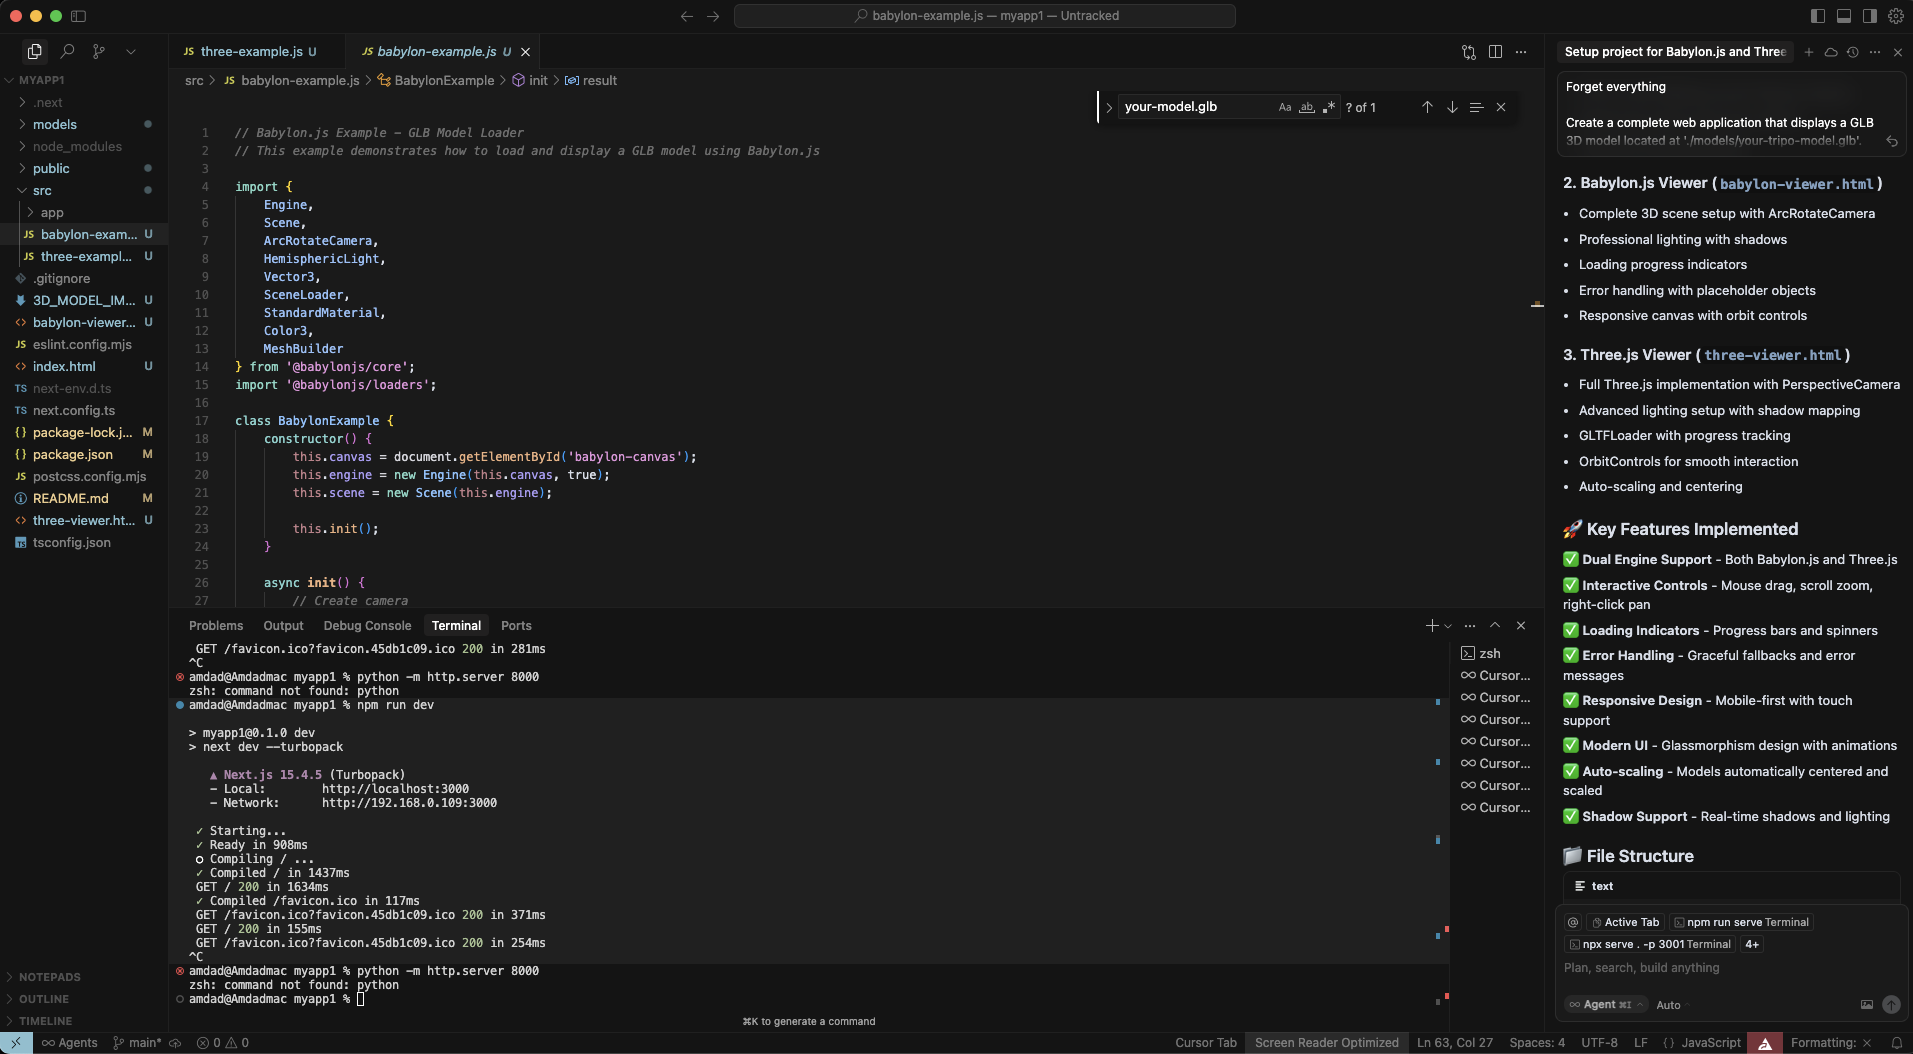
ステップ2:Cursor AIを開き、プロンプトを作成
Cursor AIを起動し、プロジェクトフォルダを開きます。この強力なプロンプトを使用してすべてを生成します。
'./models/your-tripo-model.glb' にある GLB 3D モデルを表示する完全なウェブアプリケーションを作成してください。

要件:
1. Babylon.js と Three.js の両方の例を個別の HTML ファイルで設定
2. すべての必要な依存関係を CDN 経由で含める
3. 適切なライティング、カメラコントロール、およびレスポンシブなキャンバスを追加
4. ユーザーインタラクションのためのオービットコントロールを実装
5. ロード進捗インジケーターを追加
6. 両方の例へのリンクを含む index.html を作成
7. モデルロード失敗時のエラーハンドリングを含める
8. 各セクションを説明するコメントを追加
9. ローカルテスト用に 'python -m http.server' で動作するようにする

モデルは中央に配置され、適切に照らされ、マウスコントロールで回転できるようにしてください。
ステップ3:AI生成コードを適用
Cursor AIは複数のファイルを生成します。変更を確認し、承認します。
index.html - 両方のオプションへのランディングページ
babylon-example.html - Babylon.jsの実装
three-example.html - Three.jsの実装
場合によっては、説明を含むREADME.md
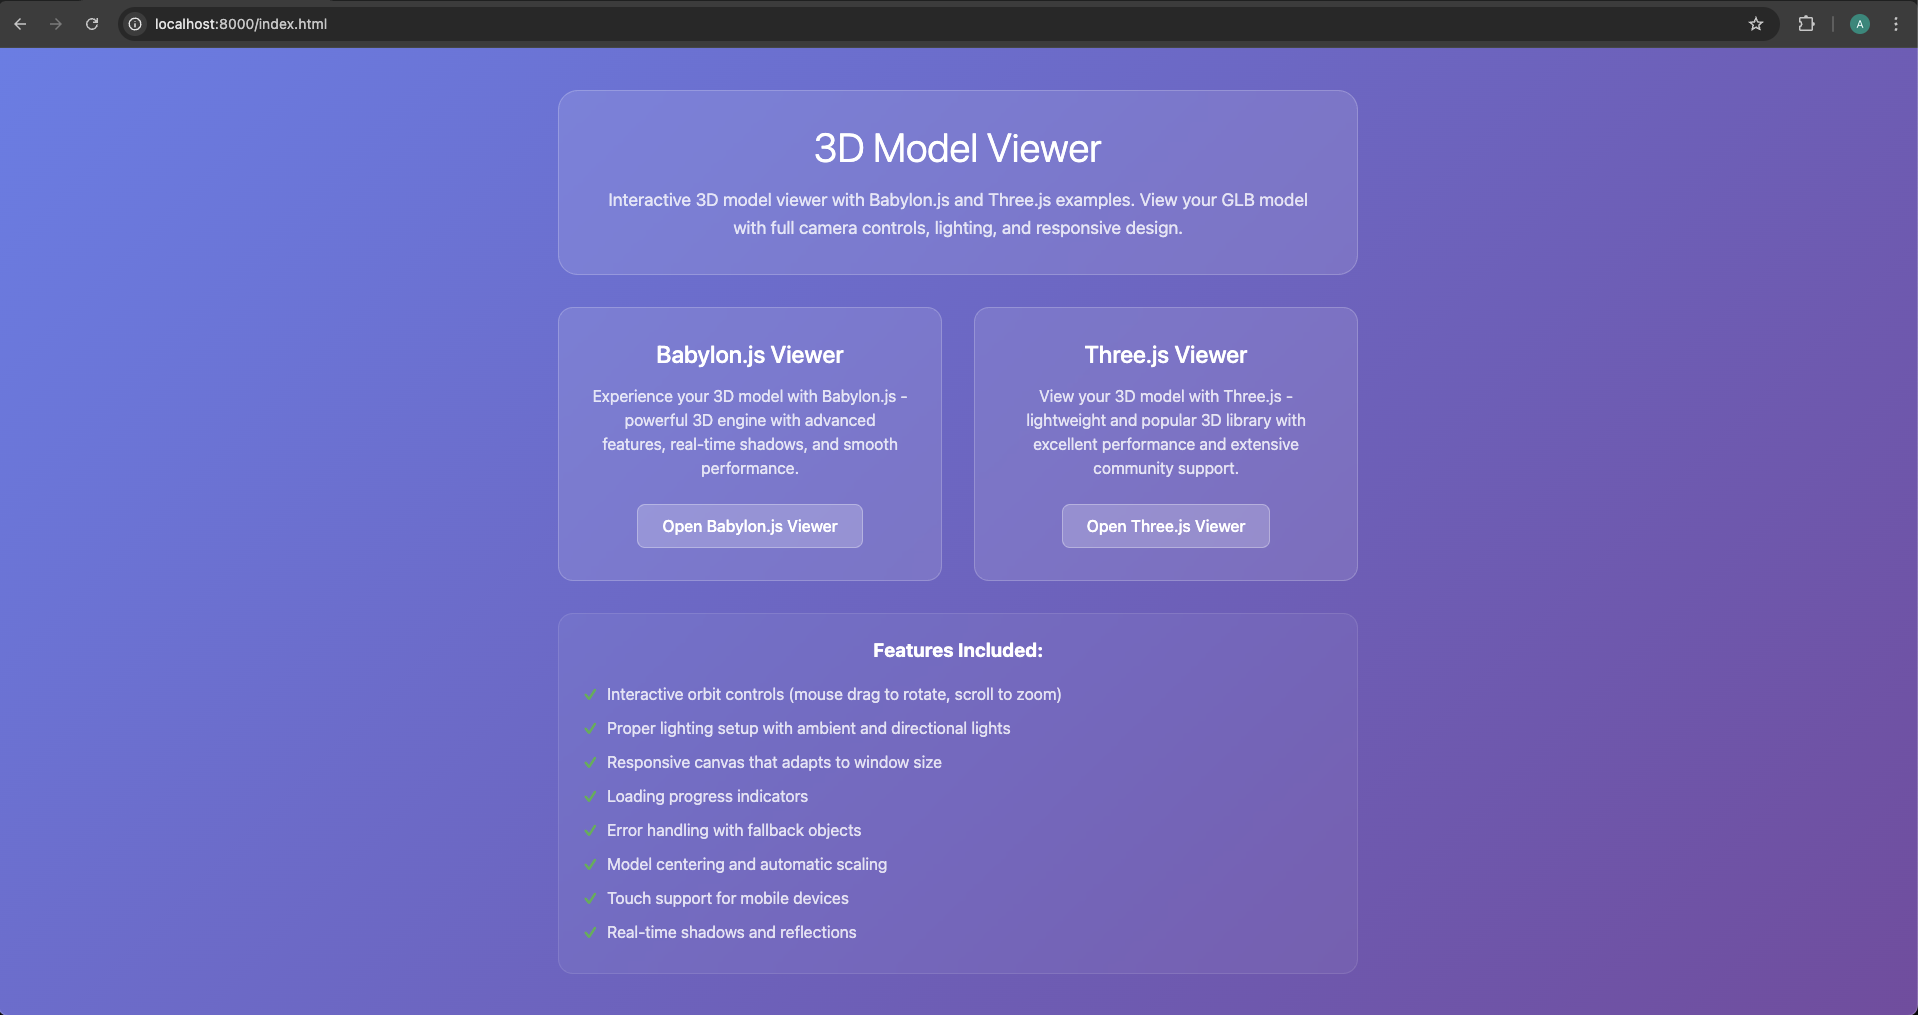
ステップ4:統合をテスト
プロジェクトフォルダでターミナルを開き、以下を実行します。
python -m http.server 8000
# あるいはNode.jsを使用する場合:
npx http-server
http://localhost:8000にアクセスし、いずれかの例をクリックしてモデルを確認します。

ステップ5:AIアシスタンスでカスタマイズ
修正が必要ですか?Cursor AIに尋ねるだけです。
「Three.jsの例にスカイボックスの背景を追加して」
「Babylon.jsでモデルを自動回転させて」
「両方の例に影の効果を追加して」
「パーセンテージ表示付きのローディング画面を実装して」
Cursor AIからの実際の出力例
Three.jsの実装のためにCursorが生成する可能性があるコードは以下の通りです。
_// Three.js Example - GLB Model Loader_
_// この例では、Three.js を使用して GLB モデルをロードおよび表示する方法を示します。_

import * as THREE from 'three';
import { GLTFLoader } from 'three/examples/jsm/loaders/GLTFLoader.js';
import { OrbitControls } from 'three/examples/jsm/controls/OrbitControls.js';

class ThreeExample {
    constructor() {
        this.container = document.getElementById('three-container');
        this.scene = new THREE.Scene();
        this.camera = new THREE.PerspectiveCamera(
            75,
            window.innerWidth / window.innerHeight,
            0.1,
            1000
        );

        this.renderer = new THREE.WebGLRenderer({ antialias: true });
        this.renderer.setSize(window.innerWidth, window.innerHeight);
        this.renderer.setClearColor(0x000000);
        this.renderer.shadowMap.enabled = true;
        this.renderer.shadowMap.type = THREE.PCFSoftShadowMap;

        this.container.appendChild(this.renderer.domElement);

        this.init();
    }

    **init**() {
        _// カメラの設定_
        this.camera.position.set(5, 5, 5);
        this.camera.lookAt(0, 0, 0);

        _// ライティングの設定_
        const ambientLight = new THREE.AmbientLight(0x404040, 0.6);
        this.scene.add(ambientLight);

        const directionalLight = new THREE.DirectionalLight(0xffffff, 0.8);
        directionalLight.position.set(10, 10, 5);
        directionalLight.castShadow = true;
        directionalLight.shadow.mapSize.width = 2048;
        directionalLight.shadow.mapSize.height = 2048;
        this.scene.add(directionalLight);

        _// OrbitControls を追加_
        this.controls = new OrbitControls(this.camera, this.renderer.domElement);
        this.controls.enableDamping = true;
        this.controls.dampingFactor = 0.05;
        this.controls.screenSpacePanning = false;
        this.controls.minDistance = 1;
        this.controls.maxDistance = 50;

        _// GLB モデルをロード_
        this.loadModel();

        _// ウィンドウのリサイズを処理_
        window.addEventListener('resize', () => {
            this.camera.aspect = window.innerWidth / window.innerHeight;
            this.camera.updateProjectionMatrix();
            this.renderer.setSize(window.innerWidth, window.innerHeight);
        });

        _// アニメーションループを開始_
        this.animate();
    }

    **loadModel**() {
        const loader = new GLTFLoader();

        console.log('Loading GLB model...');
        loader.load(
            'models/your-model1.glb',
            (_gltf_) => {
                console.log('Model loaded successfully:', _gltf_);

                _// モデルをシーンに追加_
                this.scene.add(_gltf_.scene);

                _// モデルを中央に配置_
                this.centerModel(_gltf_.scene);

                _// 参照用の地面を追加_
                this.createGround();

                _// すべてのメッシュにシャドウを有効にする_
                _gltf_.scene.traverse((_child_) => {
                    if (_child_.isMesh) {
                        _child_.castShadow = true;
                        _child_.receiveShadow = true;
                    }
                });

            },
            (_progress_) => {
                console.log('Loading progress:', (_progress_.loaded / _progress_.total * 100) + '%');
            },
            (_error_) => {
                console.error('Error loading model:', _error_);
                this.createPlaceholderCube();
            }
        );
    }

    **centerModel**(_model_) {
        _// モデルを中央に配置するためにバウンディングボックスを計算_
        const box = new THREE.Box3().setFromObject(_model_);
        const center = box.getCenter(new THREE.Vector3());
        const size = box.getSize(new THREE.Vector3());

        _// モデルを中央に配置_
        _model_.position.sub(center);

        _// 必要に応じてモデルを適切なサイズにスケーリング_
        const maxDim = Math.max(size.x, size.y, size.z);
        if (maxDim > 10) {
            const scale = 5 / maxDim;
            _model_.scale.setScalar(scale);
        }
    }

    **createGround**() {
        _// 参照用の地面を作成_
        const groundGeometry = new THREE.PlaneGeometry(20, 20);
        const groundMaterial = new THREE.MeshLambertMaterial({
            color: 0x333333,
            transparent: true,
            opacity: 0.8
        });
        const ground = new THREE.Mesh(groundGeometry, groundMaterial);
        ground.rotation.x = -Math.PI / 2;
        ground.position.y = -2;
        ground.receiveShadow = true;
        this.scene.add(ground);
    }

    **createPlaceholderCube**() {
        _// モデルのロードに失敗した場合のプレースホルダーキューブを作成_
        const geometry = new THREE.BoxGeometry(2, 2, 2);
        const material = new THREE.MeshLambertMaterial({ color: 0x8080ff });
        const cube = new THREE.Mesh(geometry, material);
        cube.castShadow = true;
        this.scene.add(cube);
    }

    **animate**() {
        requestAnimationFrame(() => this.animate());

        _// コントロールを更新_
        this.controls.update();

        _// シーンをレンダリング_
        this.renderer.render(this.scene, this.camera);
    }
}

_// DOM がロードされたときに初期化_
document.addEventListener('DOMContentLoaded', () => {
    new ThreeExample();
});

export default ThreeExample;
メソッドの比較:AIショートカット vs 伝統的なコーディング
| 特徴 | AIショートカット(Cursor AI) | 伝統的なコーディング(手動) |
|---|---|---|
| 開発速度 | 超高速(数分でセットアップ) | 時間がかかる(数時間から数日) |
| 必要なスキル | コーディング知識はほとんど不要 | JavaScript、Three.js/Babylon.jsの深い知識が必要 |
| 柔軟性 | AI生成後の調整にはプロンプトが必要 | 完全な制御とカスタマイズが可能 |
| エラー処理 | AIが大部分を処理するため、エラーが少ない | 自分でエラーをデバッグし、解決する必要がある |
| 初期費用 | AIツールへのアクセス費用 | 開発者の時間とスキル |
| 最適な用途 | プロトタイプ作成、迅速なデモ、非開発者向け | 複雑なアプリケーション、カスタム機能、パフォーマンス最適化 |
| 学習曲線 | 低い | 高い |
伝統的な方法:手動での実装
AIショートカットは素早いスタートには素晴らしいですが、プロの開発者はしばしば完全な制御を必要とします。Babylon.js 3DモデルのインポートとThree.jsの3Dモデルのロードの両方について、伝統的なアプローチを見ていきましょう。
Babylon.js:完全な手動設定
ステップ1:プロジェクト構造
プロジェクトを手動で作成します。
mkdir babylon-3d-project
cd babylon-3d-project
npm init -y
npm install --save babylonjs babylonjs-loaders
ステップ2:HTMLの基本構造
<!DOCTYPE html><html><head><title>Babylon.js - Tripo AI Model</title><style>
        html, body {
            overflow: hidden;
            width: 100%;
            height: 100%;
            margin: 0;
            padding: 0;
        }
        #renderCanvas {
            width: 100%;
            height: 100%;
            touch-action: none;
        }
    </style></head><body><canvas id="renderCanvas"></canvas><script src="https://cdn.babylonjs.com/babylon.js"></script><script src="https://cdn.babylonjs.com/loaders/babylonjs.loaders.min.js"></script><script src="app.js"></script></body></html>
ステップ3:JavaScriptの実装
// app.jsconst canvas = document.getElementById("renderCanvas");
const engine = new BABYLON.Engine(canvas, true, {
    preserveDrawingBuffer: true,
    stencil: true,
    disableWebGL2Support: false
});

const createScene = async () => {
    const scene = new BABYLON.Scene(engine);
    scene.clearColor = new BABYLON.Color4(0.9, 0.9, 0.9, 1);

    // より良い位置決めを持つカメラconst camera = new BABYLON.ArcRotateCamera(
        "camera",
        BABYLON.Tools.ConvertDegreesToRadians(45),
        BABYLON.Tools.ConvertDegreesToRadians(60),
        10,
        BABYLON.Vector3.Zero(),
        scene
    );
    camera.attachControl(canvas, true);
    camera.wheelPrecision = 50;
    camera.minZ = 0.1;

    // 強化されたライティング設定const hemiLight = new BABYLON.HemisphericLight(
        "hemiLight",
        new BABYLON.Vector3(0, 1, 0),
        scene
    );
    hemiLight.intensity = 0.5;

    const dirLight = new BABYLON.DirectionalLight(
        "dirLight",
        new BABYLON.Vector3(-1, -2, -1),
        scene
    );
    dirLight.position = new BABYLON.Vector3(20, 40, 20);
    dirLight.intensity = 0.5;
    dirLight.shadowEnabled = true;

    // シャドウジェネレーターconst shadowGenerator = new BABYLON.ShadowGenerator(1024, dirLight);
    shadowGenerator.useBlurExponentialShadowMap = true;

    // 影用の地面const ground = BABYLON.MeshBuilder.CreateGround(
        "ground",
        { width: 20, height: 20 },
        scene
    );
    ground.receiveShadows = true;

    // エラーハンドリング付きのAI生成3Dアセットのインポートtry {
        const result = await BABYLON.SceneLoader.ImportMeshAsync(
            "",
            "./models/",
            "your-tripo-model.glb",
            scene
        );

        // インポートされたメッシュを処理
        result.meshes.forEach(mesh => {
            shadowGenerator.addShadowCaster(mesh);
            if (mesh.material) {
                mesh.material.backFaceCulling = false;
            }
        });

        // モデルを中央に配置し、スケーリングconst rootMesh = result.meshes[0];
        const bounds = rootMesh.getHierarchyBoundingVectors();
        const center = bounds.max.add(bounds.min).scale(0.5);
        rootMesh.position = center.negate();

        // カメラの自動調整
        camera.setTarget(BABYLON.Vector3.Zero());
        camera.radius = bounds.max.subtract(bounds.min).length() * 1.5;

    } catch (error) {
        console.error("Failed to load model:", error);
        // エラーインジケーターを作成const errorText = new BABYLON.GUI.TextBlock();
        errorText.text = "Failed to load 3D model";
        errorText.color = "red";
        errorText.fontSize = 24;
    }

    return scene;
};

// 初期化と実行createScene().then(scene => {
    engine.runRenderLoop(() => {
        scene.render();
    });

    // モバイル向け最適化
    engine.setHardwareScalingLevel(1 / window.devicePixelRatio);
});

// レスポンシブ対応window.addEventListener("resize", () => {
    engine.resize();
});

// パフォーマンス最適化
scene.registerBeforeRender(() => {
    // ここにフレームごとの更新を追加
});
Three.js:プロフェッショナルな実装
Three.jsで3Dモデルをロードするための完全な手動アプローチは以下の通りです。
import * as THREE from 'three';
import { GLTFLoader } from 'three/examples/jsm/loaders/GLTFLoader.js';
import { OrbitControls } from 'three/examples/jsm/controls/OrbitControls.js';
import { DRACOLoader } from 'three/examples/jsm/loaders/DRACOLoader.js';

class ThreeJSApp {
    constructor() {
        this.scene = new THREE.Scene();
        this.camera = null;
        this.renderer = null;
        this.controls = null;
        this.model = null;
        this.mixer = null;
        this.clock = new THREE.Clock();

        this.init();
        this.loadModel();
        this.animate();
    }

    init() {
        // シーン設定this.scene.background = new THREE.Color(0xf0f0f0);
        this.scene.fog = new THREE.Fog(0xf0f0f0, 10, 50);

        // カメラthis.camera = new THREE.PerspectiveCamera(
            50,
            window.innerWidth / window.innerHeight,
            0.1,
            1000
        );
        this.camera.position.set(5, 5, 5);

        // 最適化されたレンダラーthis.renderer = new THREE.WebGLRenderer({
            antialias: true,
            powerPreference: "high-performance"
        });
        this.renderer.setPixelRatio(Math.min(window.devicePixelRatio, 2));
        this.renderer.setSize(window.innerWidth, window.innerHeight);
        this.renderer.shadowMap.enabled = true;
        this.renderer.shadowMap.type = THREE.PCFSoftShadowMap;
        this.renderer.outputEncoding = THREE.sRGBEncoding;
        this.renderer.toneMapping = THREE.ACESFilmicToneMapping;
        document.body.appendChild(this.renderer.domElement);

        // ライトconst ambient = new THREE.AmbientLight(0xffffff, 0.4);
        this.scene.add(ambient);

        const directional = new THREE.DirectionalLight(0xffffff, 0.6);
        directional.position.set(5, 10, 5);
        directional.castShadow = true;
        directional.shadow.camera.near = 0.1;
        directional.shadow.camera.far = 50;
        directional.shadow.camera.left = -10;
        directional.shadow.camera.right = 10;
        directional.shadow.camera.top = 10;
        directional.shadow.camera.bottom = -10;
        directional.shadow.mapSize.width = 2048;
        directional.shadow.mapSize.height = 2048;
        this.scene.add(directional);

        // 地面const groundGeometry = new THREE.PlaneGeometry(50, 50);
        const groundMaterial = new THREE.MeshStandardMaterial({
            color: 0xcccccc,
            roughness: 0.8,
            metalness: 0.2
        });
        const ground = new THREE.Mesh(groundGeometry, groundMaterial);
        ground.rotation.x = -Math.PI / 2;
        ground.receiveShadow = true;
        this.scene.add(ground);

        // コントロールthis.controls = new OrbitControls(this.camera, this.renderer.domElement);
        this.controls.enableDamping = true;
        this.controls.dampingFactor = 0.05;
        this.controls.screenSpacePanning = false;
        this.controls.minDistance = 1;
        this.controls.maxDistance = 50;
        this.controls.maxPolarAngle = Math.PI / 2;

        // イベントリスナーwindow.addEventListener('resize', this.onWindowResize.bind(this));
    }

    loadModel() {
        // 進捗追跡のためのローディングマネージャーconst manager = new THREE.LoadingManager();

        manager.onStart = (url, itemsLoaded, itemsTotal) => {
            console.log(`Started loading: ${url}`);
            this.showLoader(true);
        };

        manager.onProgress = (url, itemsLoaded, itemsTotal) => {
            const progress = (itemsLoaded / itemsTotal) * 100;
            this.updateLoader(progress);
        };

        manager.onLoad = () => {
            console.log('Loading complete!');
            this.showLoader(false);
        };

        manager.onError = (url) => {
            console.error(`Error loading ${url}`);
            this.showError('Failed to load 3D model');
        };

        // 圧縮ジオメトリ用のDRACOローダー(オプションだが推奨)const dracoLoader = new DRACOLoader(manager);
        dracoLoader.setDecoderPath('https://www.gstatic.com/draco/v1/decoders/');

        // GLTFローダーconst loader = new GLTFLoader(manager);
        loader.setDRACOLoader(dracoLoader);

        // モデルをロード
        loader.load(
            './models/your-tripo-model.glb',
            (gltf) => {
                this.model = gltf.scene;

                // モデルを中央に配置し、スケーリングconst box = new THREE.Box3().setFromObject(this.model);
                const center = box.getCenter(new THREE.Vector3());
                const size = box.getSize(new THREE.Vector3());

                // モデルを中央に配置this.model.position.sub(center);

                // ビューに収まるようにスケーリングconst maxDim = Math.max(size.x, size.y, size.z);
                const scale = 5 / maxDim;
                this.model.scale.multiplyScalar(scale);

                // シャドウを有効にするthis.model.traverse((child) => {
                    if (child.isMesh) {
                        child.castShadow = true;
                        child.receiveShadow = true;

                        // AI生成モデル向けに両面マテリアルを確保if (child.material) {
                            child.material.side = THREE.DoubleSide;
                        }
                    }
                });

                // シーンに追加this.scene.add(this.model);

                // アニメーションが存在する場合に処理if (gltf.animations && gltf.animations.length > 0) {
                    this.mixer = new THREE.AnimationMixer(this.model);

                    // すべてのアニメーションを再生
                    gltf.animations.forEach((clip) => {
                        const action = this.mixer.clipAction(clip);
                        action.play();
                    });
                }

                // モデルに合わせてカメラを調整this.fitCameraToObject(this.model);
            }
        );
    }

    fitCameraToObject(object) {
        const box = new THREE.Box3().setFromObject(object);
        const size = box.getSize(new THREE.Vector3());
        const center = box.getCenter(new THREE.Vector3());

        const maxDim = Math.max(size.x, size.y, size.z);
        const fov = this.camera.fov * (Math.PI / 180);
        const cameraZ = Math.abs(maxDim / 2 / Math.tan(fov / 2));

        this.camera.position.set(cameraZ, cameraZ, cameraZ);
        this.controls.target = center;
        this.controls.update();
    }

    animate() {
        requestAnimationFrame(this.animate.bind(this));

        const delta = this.clock.getDelta();

        // アニメーションを更新if (this.mixer) {
            this.mixer.update(delta);
        }

        // コントロールを更新this.controls.update();

        // レンダリングthis.renderer.render(this.scene, this.camera);
    }

    onWindowResize() {
        this.camera.aspect = window.innerWidth / window.innerHeight;
        this.camera.updateProjectionMatrix();
        this.renderer.setSize(window.innerWidth, window.innerHeight);
    }

    showLoader(show) {
        let loader = document.getElementById('loader');
        if (!loader && show) {
            loader = document.createElement('div');
            loader.id = 'loader';
            loader.style.cssText = `
                position: fixed;
                top: 50%;
                left: 50%;
                transform: translate(-50%, -50%);
                background: rgba(0,0,0,0.8);
                color: white;
                padding: 20px;
                border-radius: 10px;
                font-family: Arial, sans-serif;
                z-index: 1000;
            `;
            document.body.appendChild(loader);
        }
        if (loader) {
            loader.style.display = show ? 'block' : 'none';
        }
    }

    updateLoader(progress) {
        const loader = document.getElementById('loader');
        if (loader) {
            loader.textContent = `Loading: ${Math.round(progress)}%`;
        }
    }

    showError(message) {
        const loader = document.getElementById('loader');
        if (loader) {
            loader.textContent = message;
            loader.style.background = 'rgba(255,0,0,0.8)';
        }
    }
}

// アプリを初期化const app = new ThreeJSApp();
ウェブパフォーマンスのためのAI生成モデルの最適化
AIショートカットを使用した場合でも、手動の方法を使用した場合でも、AI生成3Dモデルのウェブパフォーマンスを最適化することは非常に重要です。スムーズな体験を保証する方法を以下に示します。
- glTFによるフォーマット最適化
glTFモデルのインポート形式は、ウェブ3Dのゴールドスタンダードです。その理由と最適化方法を以下に示します。
// ロード中にテクスチャを最適化
loader.load('./models/your-model.glb', (gltf) => {
    gltf.scene.traverse((child) => {
        if (child.isMesh && child.material) {
            // テクスチャを最適化if (child.material.map) {
                child.material.map.minFilter = THREE.LinearMipmapLinearFilter;
                child.material.map.anisotropy = renderer.capabilities.getMaxAnisotropy();
            }

            // 繰り返しメッシュにGPUインスタンス化を有効にするif (child.geometry) {
                child.geometry.computeBoundingSphere();
                child.frustumCulled = true;
            }
        }
    });
});
- LOD(Level of Detail)システム
デバイス全体でパフォーマンスを向上させるためにLODを実装します。
class LODManager {
    constructor(scene, camera) {
        this.scene = scene;
        this.camera = camera;
        this.lodGroups = new Map();
    }

    addLODModel(name, levels) {
        const lod = new THREE.LOD();

        levels.forEach(({ url, distance }) => {
            const loader = new GLTFLoader();
            loader.load(url, (gltf) => {
                lod.addLevel(gltf.scene, distance);
            });
        });

        this.scene.add(lod);
        this.lodGroups.set(name, lod);
        return lod;
    }

    update() {
        this.lodGroups.forEach(lod => {
            lod.update(this.camera);
        });
    }
}

// 使用例const lodManager = new LODManager(scene, camera);
lodManager.addLODModel('tripoModel', [
    { url: './models/high-detail.glb', distance: 0 },
    { url: './models/medium-detail.glb', distance: 10 },
    { url: './models/low-detail.glb', distance: 20 }
]);
- テクスチャ圧縮
品質を損なうことなくテクスチャサイズを削減します。
// GPUにアップロードする前にテクスチャを圧縮function compressTexture(texture) {
    const canvas = document.createElement('canvas');
    const ctx = canvas.getContext('2d');

    // 2のべき乗にリサイズconst size = Math.pow(2, Math.floor(Math.log2(Math.max(texture.image.width, texture.image.height))));
    canvas.width = size;
    canvas.height = size;

    ctx.drawImage(texture.image, 0, 0, size, size);

    // 圧縮されたテクスチャを作成const compressedTexture = new THREE.CanvasTexture(canvas);
    compressedTexture.minFilter = THREE.LinearMipmapLinearFilter;
    compressedTexture.generateMipmaps = true;

    return compressedTexture;
}
- パフォーマンスモニタリング
FPSを追跡し、それに応じて最適化します。
class PerformanceMonitor {
    constructor() {
        this.fps = 0;
        this.frameCount = 0;
        this.lastTime = performance.now();

        this.createDisplay();
    }

    createDisplay() {
        this.display = document.createElement('div');
        this.display.style.cssText = `
            position: fixed;
            top: 10px;
            left: 10px;
            background: rgba(0,0,0,0.7);
            color: #00ff00;
            padding: 10px;
            font-family: monospace;
            font-size: 14px;
            z-index: 1000;
        `;
        document.body.appendChild(this.display);
    }

    update() {
        this.frameCount++;
        const currentTime = performance.now();

        if (currentTime >= this.lastTime + 1000) {
            this.fps = Math.round((this.frameCount * 1000) / (currentTime - this.lastTime));
            this.frameCount = 0;
            this.lastTime = currentTime;

            this.display.textContent = `FPS: ${this.fps}`;

            // FPSに基づいて品質を自動調整if (this.fps < 30) {
                this.reduceQuality();
            } else if (this.fps > 55) {
                this.increaseQuality();
            }
        }
    }

    reduceQuality() {
        // 品質低下ロジックを実装console.log('Reducing quality for better performance');
    }

    increaseQuality() {
        // 品質向上ロジックを実装console.log('Increasing quality');
    }
}
本番デプロイのためのベストプラクティス
- アセットパイプラインの自動化
ウェブ向けに3Dモデルを自動的に最適化するビルドプロセスを作成します。
// package.json{"scripts": {"optimize-models": "gltf-pipeline -i ./models/raw/*.glb -o ./models/optimized/ -d","build": "npm run optimize-models && webpack"}}
- CDNデプロイ
グローバルなパフォーマンスのためにCDNからモデルを提供します。
const MODEL_CDN = 'https://your-cdn.com/models/';

function loadModelFromCDN(modelName) {
    return new Promise((resolve, reject) => {
        const loader = new GLTFLoader();
        loader.load(
            `${MODEL_CDN}${modelName}`,
            resolve,
            (progress) => console.log('Loading:', progress.loaded / progress.total * 100 + '%'),
            reject
        );
    });
}
- プログレッシブローディング戦略
ユーザーのインタラクションに基づいてモデルをロードします。
class ProgressiveLoader {
    constructor() {
        this.loadQueue = [];
        this.isLoading = false;
        this.loadedModels = new Map();
    }

    addToQueue(priority, modelInfo) {
        this.loadQueue.push({ priority, ...modelInfo });
        this.loadQueue.sort((a, b) => b.priority - a.priority);
        this.processQueue();
    }

    async processQueue() {
        if (this.isLoading || this.loadQueue.length === 0) return;

        this.isLoading = true;
        const { url, name, onLoad } = this.loadQueue.shift();

        try {
            const loader = new GLTFLoader();
            const gltf = await loader.loadAsync(url);

            this.loadedModels.set(name, gltf.scene);
            if (onLoad) onLoad(gltf.scene);

        } catch (error) {
            console.error(`Failed to load ${name}:`, error);
        }

        this.isLoading = false;
        this.processQueue();
    }

    preloadCritical(models) {
        models.forEach(model => {
            this.addToQueue(10, model);
        });
    }

    loadOnDemand(modelInfo) {
        if (this.loadedModels.has(modelInfo.name)) {
            return Promise.resolve(this.loadedModels.get(modelInfo.name));
        }

        return new Promise((resolve) => {
            this.addToQueue(5, {
                ...modelInfo,
                onLoad: resolve
            });
        });
    }
}

// 使用例const loader = new ProgressiveLoader();

// 重要なモデルをプリロード
loader.preloadCritical([
    { name: 'hero-model', url: './models/hero.glb' },
    { name: 'environment', url: './models/environment.glb' }
]);

// ユーザーインタラクション時にロードdocument.getElementById('load-extra').addEventListener('click', async () => {
    const model = await loader.loadOnDemand({
        name: 'extra-model',
        url: './models/extra.glb'
    });
    scene.add(model);
});
- メモリ管理
メモリリークを防ぐために、使用されていないアセットを適切に破棄します。
class ResourceManager {
    constructor() {
        this.resources = new Map();
    }

    addResource(name, resource) {
        this.resources.set(name, resource);
    }

    disposeResource(name) {
        const resource = this.resources.get(name);
        if (!resource) return;

        resource.traverse((child) => {
            if (child.geometry) {
                child.geometry.dispose();
            }

            if (child.material) {
                if (Array.isArray(child.material)) {
                    child.material.forEach(mat => this.disposeMaterial(mat));
                } else {
                    this.disposeMaterial(child.material);
                }
            }
        });

        this.resources.delete(name);
    }

    disposeMaterial(material) {
        // テクスチャを破棄
        ['map', 'normalMap', 'roughnessMap', 'metalnessMap', 'aoMap'].forEach(prop => {
            if (material[prop]) {
                material[prop].dispose();
            }
        });

        material.dispose();
    }

    disposeAll() {
        this.resources.forEach((resource, name) => {
            this.disposeResource(name);
        });
    }
}
よくある落とし穴と解決策
トラブルシューティングガイド
| 問題 | 考えられる原因 | 解決策