How to Fix Holes in 3D Mesh and Smooth Edges Like a Pro

Picture this: You've just imported a 3D model for your game project, only to discover gaping holes where surfaces should be solid. Or maybe you've scanned an object, but the edges look like jagged mountain ranges instead of smooth curves. Sound familiar? You're not alone—fixing holes in 3D mesh models and smoothing rough edges are challenges every 3D artist faces, whether you're preparing models for 3D printing, game development, or animation.
The good news? You don't need expensive software or years of experience to solve these problems. In fact, with the right techniques and free tools, you can transform broken meshes into professional-quality models in minutes.
Why Do 3D Meshes Have Holes and Rough Edges?
Before diving into solutions, let's understand why these issues occur:
Common causes of mesh holes:
- Incomplete 3D scans from photogrammetry, often when converting 2d image to 3d model converter with a local 3d model ai generator
- Import/export errors between different software
- Boolean operations gone wrong
- Deleted faces during modeling
- Non-manifold geometry from complex operations
Why edges appear jagged:
- Low polygon count
- Sharp angles from modeling operations
- Scan artifacts
- Compression during file conversion
These issues aren't just cosmetic—they can cause major problems. Holes make models unprintable, while rough edges ruin visual quality in renders and games. That's why mastering mesh repair is essential for any 3D workflow.
The Easiest Way to Fix Holes in 3D Mesh Using Blender (Free)
Blender stands out as the most versatile free solution for mesh repair. According to Blender's official documentation, its built-in tools can handle everything from tiny gaps to massive missing sections. Here's your step-by-step guide:
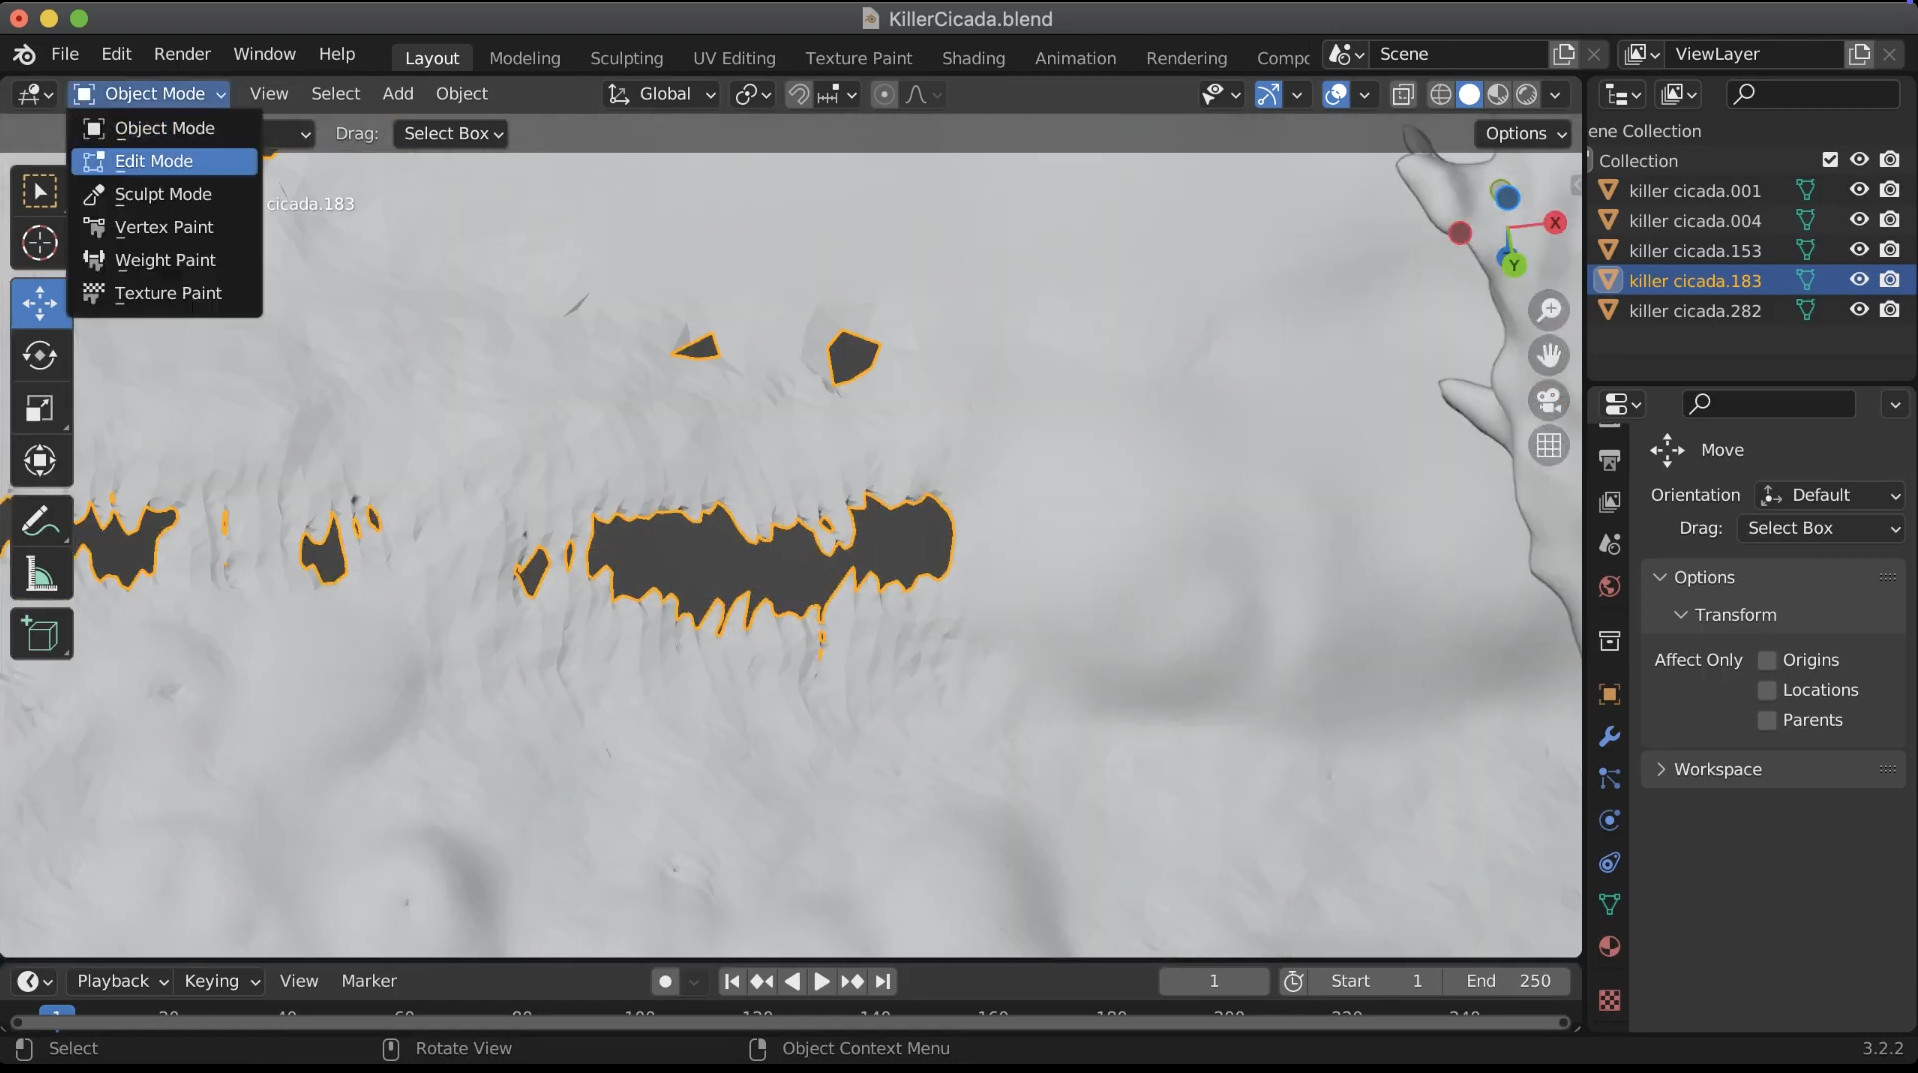
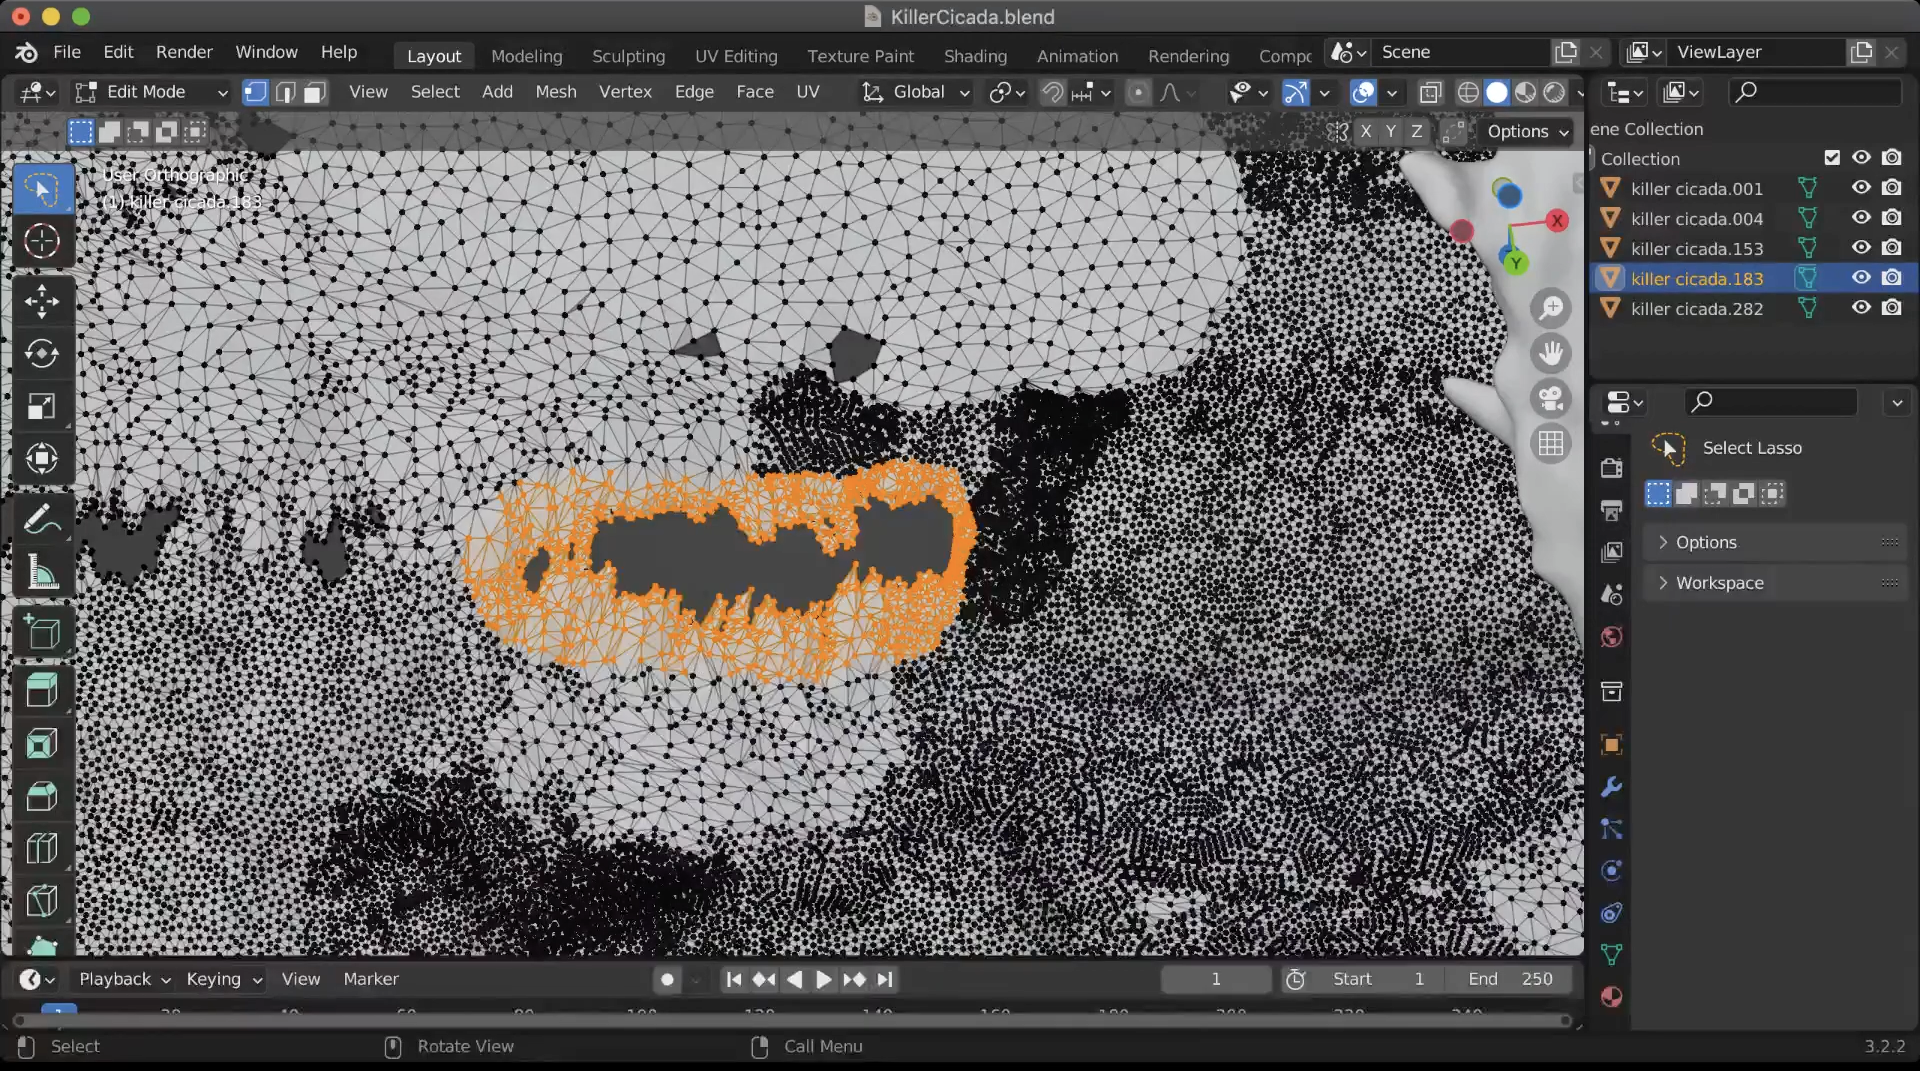
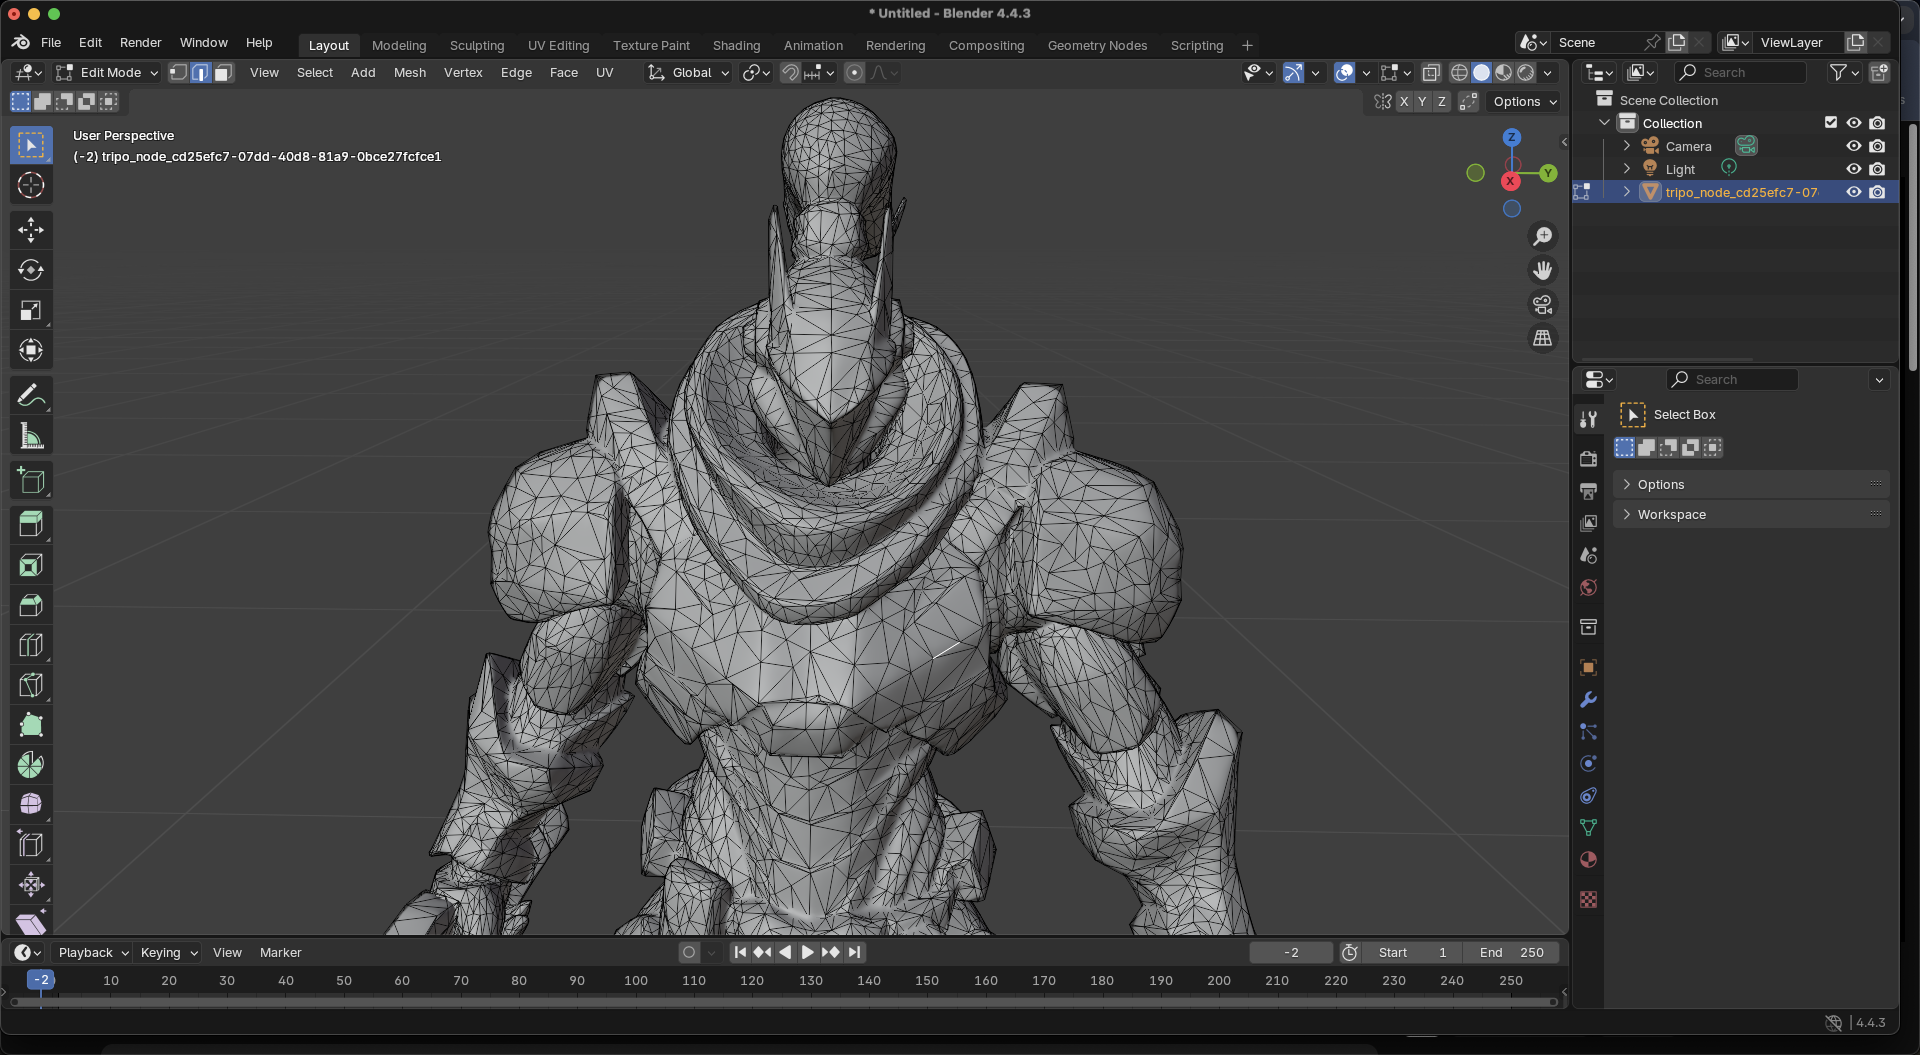
Step 1: Collapse the messy vertices
- Enter Edit Mode and switch to Vertex Select.
- Box-select all vertices around the damaged hole.
- Press X on the keyboard and choose Collapse Edges & Faces to remove chaotic mesh in that area.
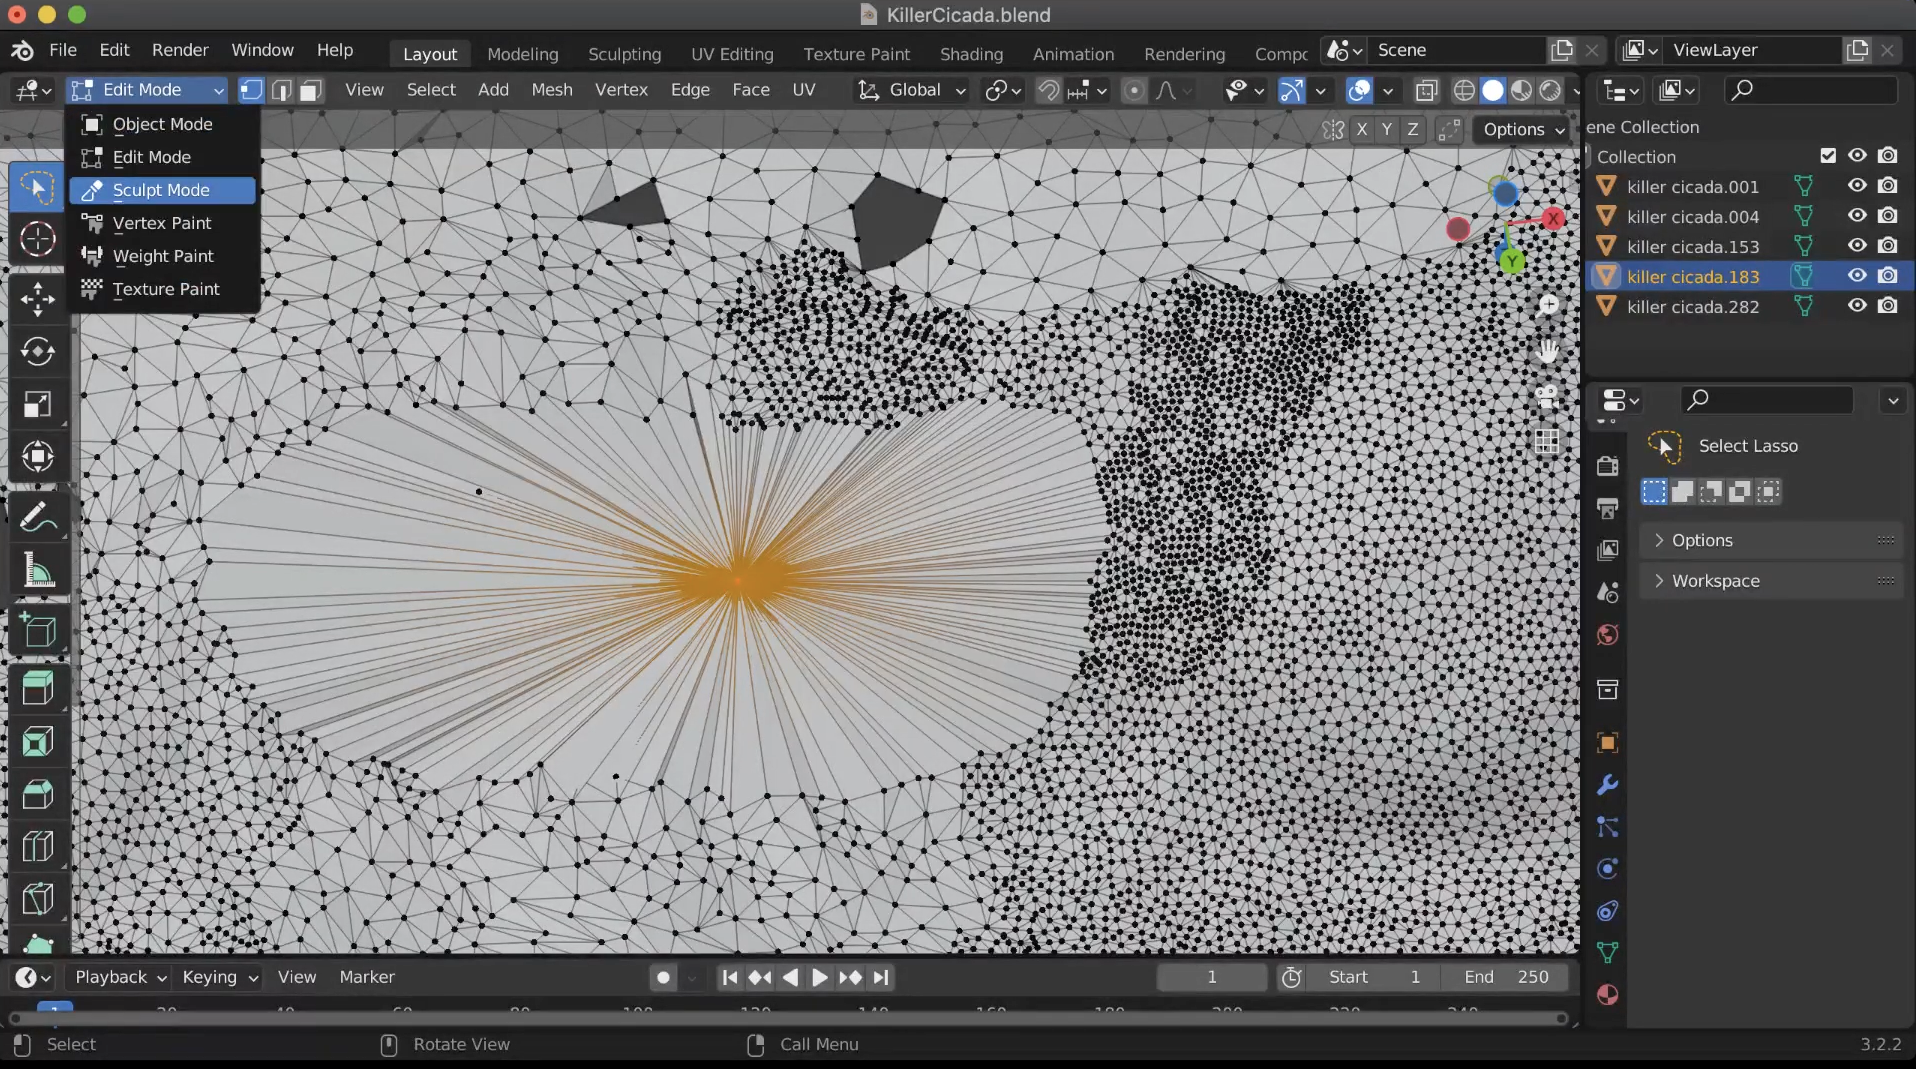
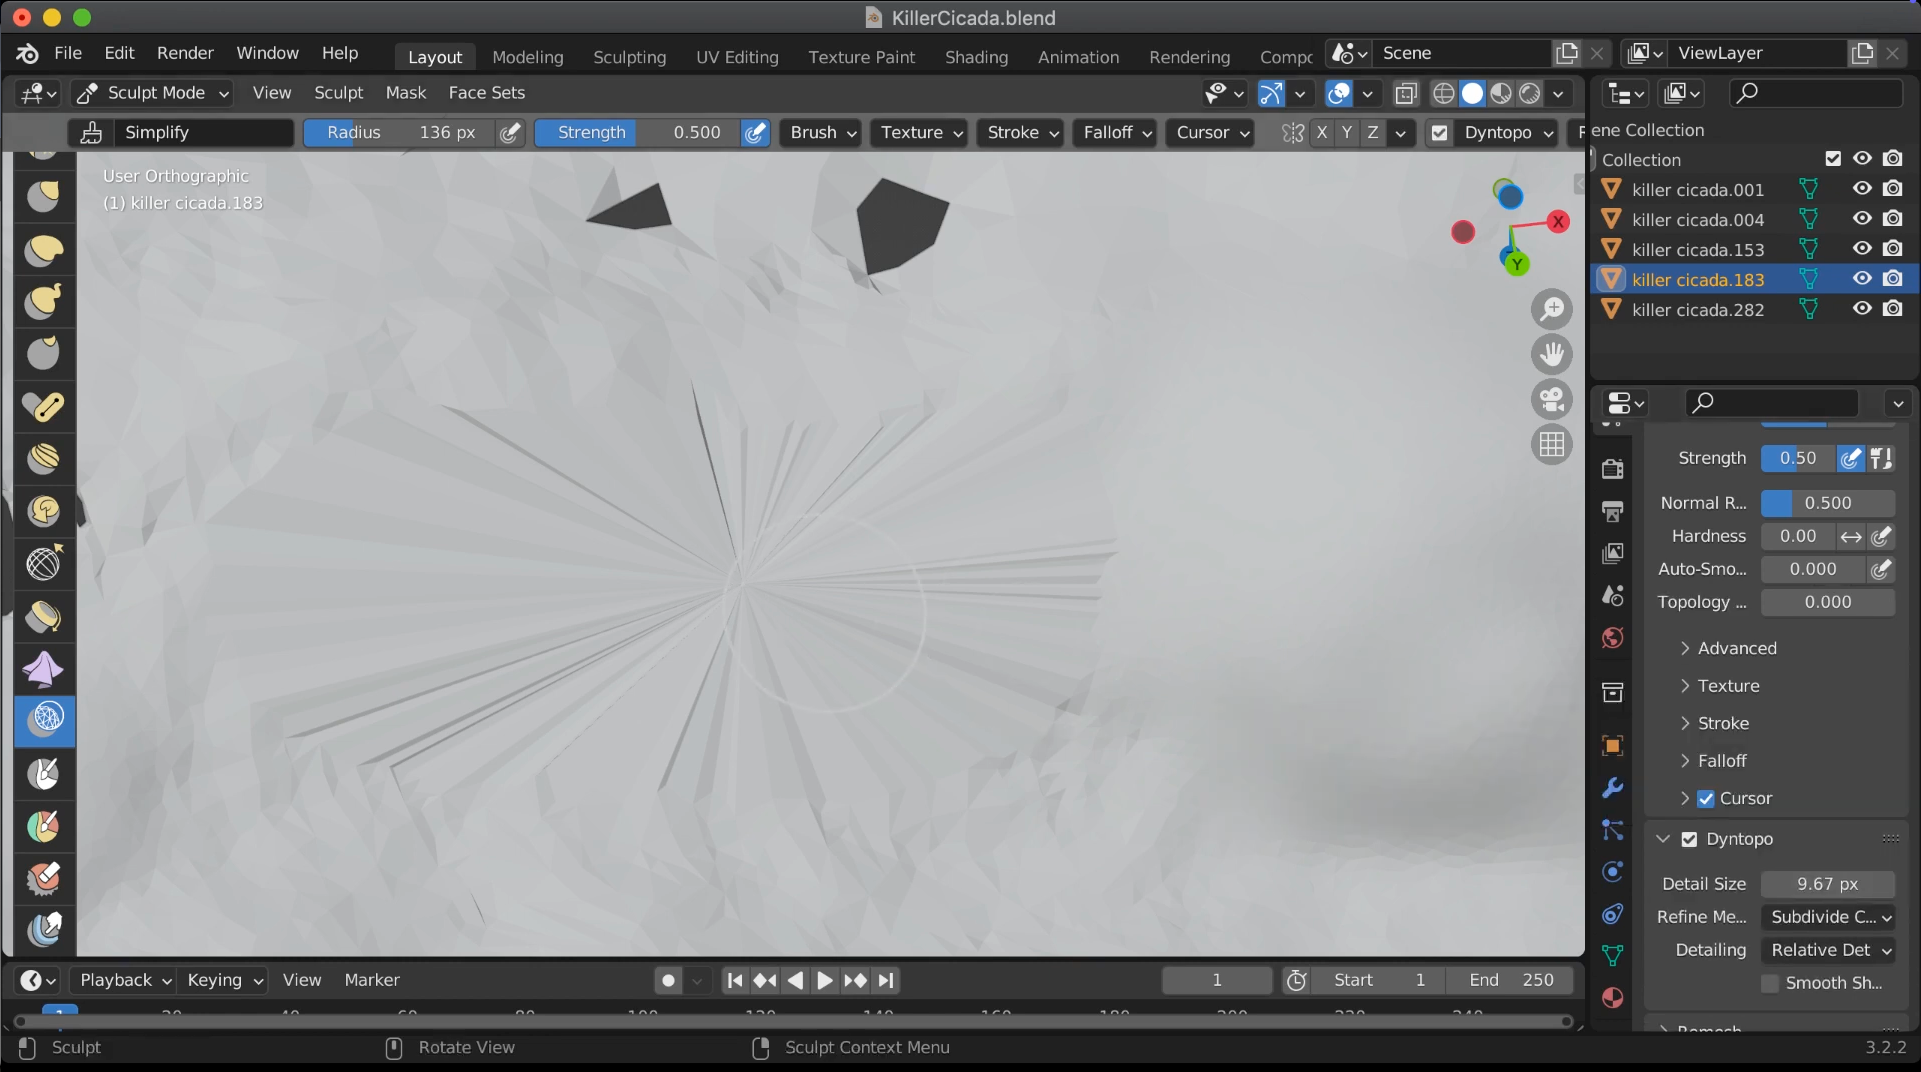
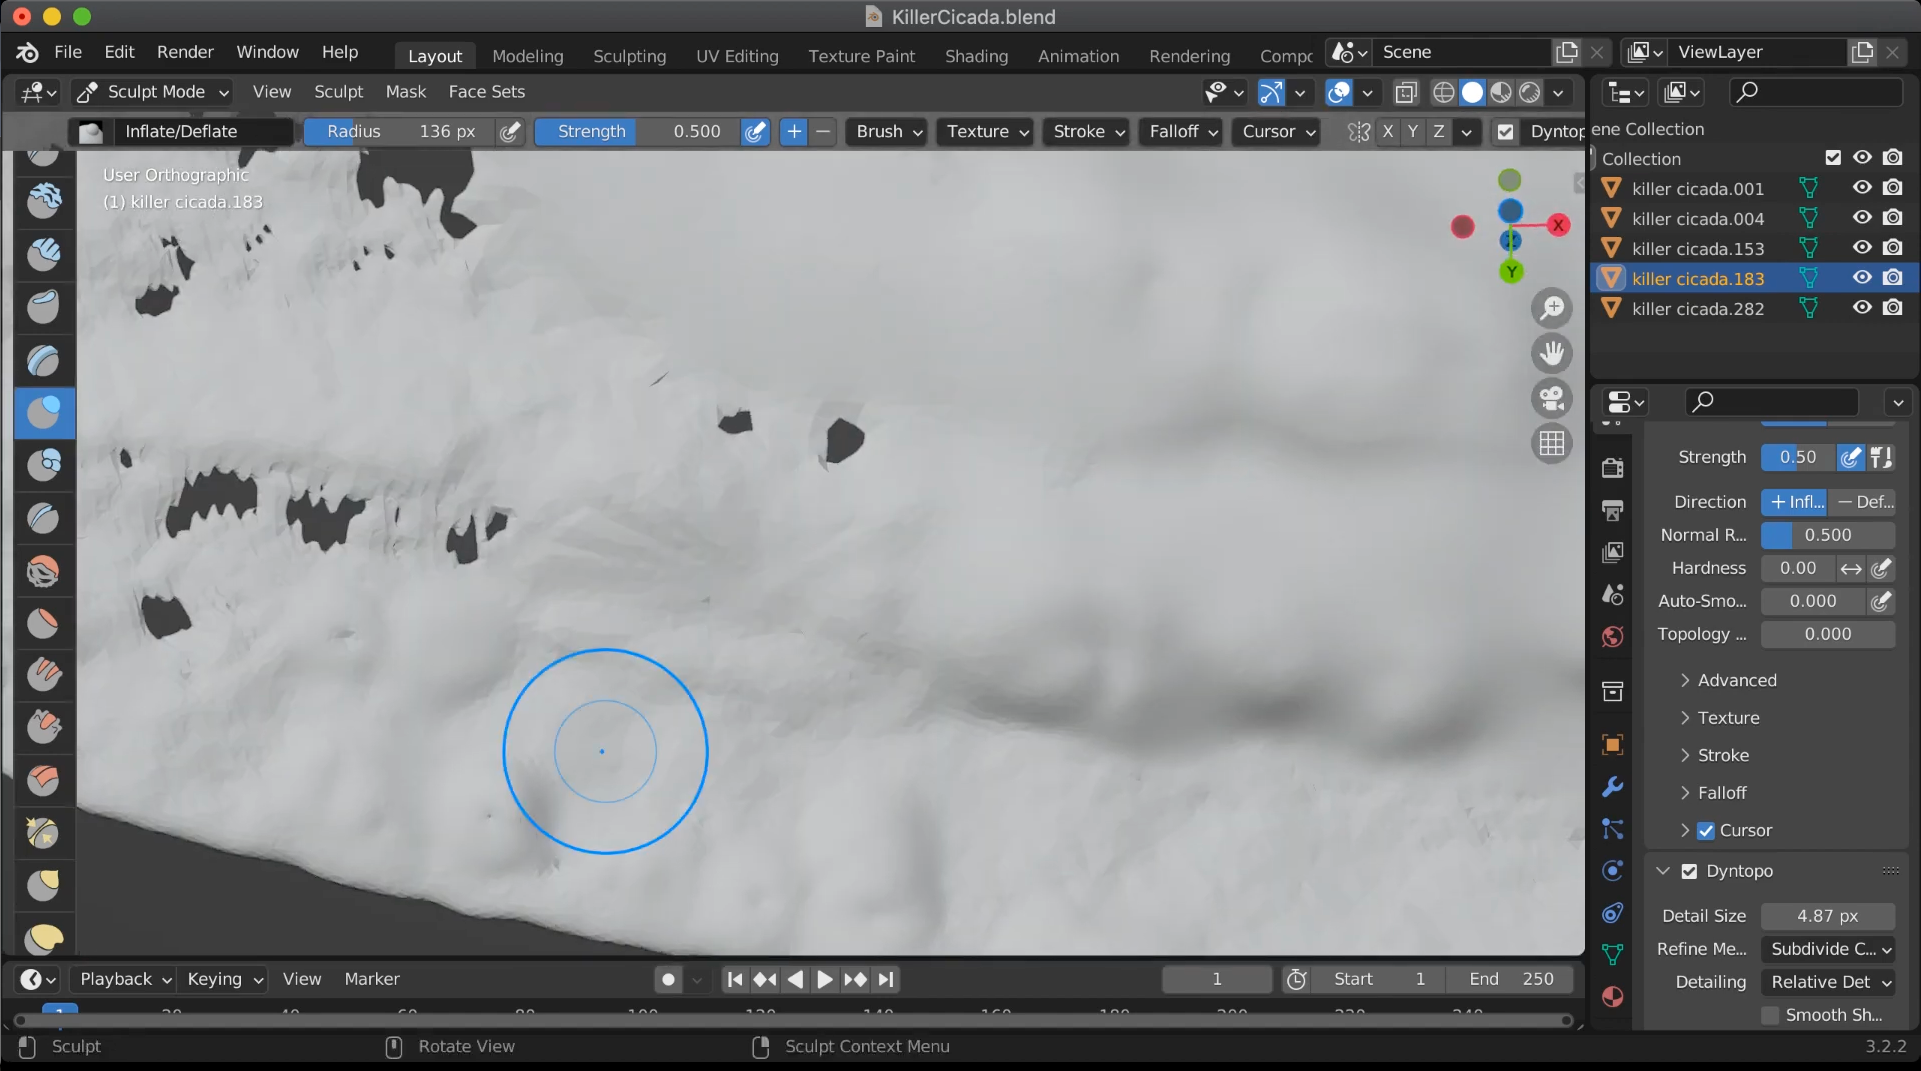
Step 2: Simplify the mesh using Sculpt Mode
- Switch to Sculpt Mode.
- Select the Simplify brush.
- Enable Dynamic Topology (Dyntopo) and set the detail size fairly high (around 9).
- Click or brush over the collapsed area to redistribute and reduce excess geometry.
Step 3: Inflate the repaired area
- Switch to the Inflate brush.
- Lower the Dyntopo detail for smoother brushing if needed.
- Brush over the repaired area to slightly thicken it and prevent inner walls from touching.
Step 4: Verify and clean up
- Go back to Edit Mode.
- Use Select > Select All by Trait > Non Manifold to check for remaining holes.
- If any remain, repeat light passes with Simplify and Inflate brushes.
- Optionally, select all (A) and press M > Merge by Distance with a small threshold to weld duplicate vertices.
Alternative: Meshmixer for Automated Repairs
While Blender's fill holes in mesh techniques offer precision, sometimes you need speed. That's where Meshmixer excels. As noted in Autodesk's official guide, their Inspector tool can fix multiple holes automatically:
- Import your mesh into Meshmixer
- Go to Analysis > Inspector
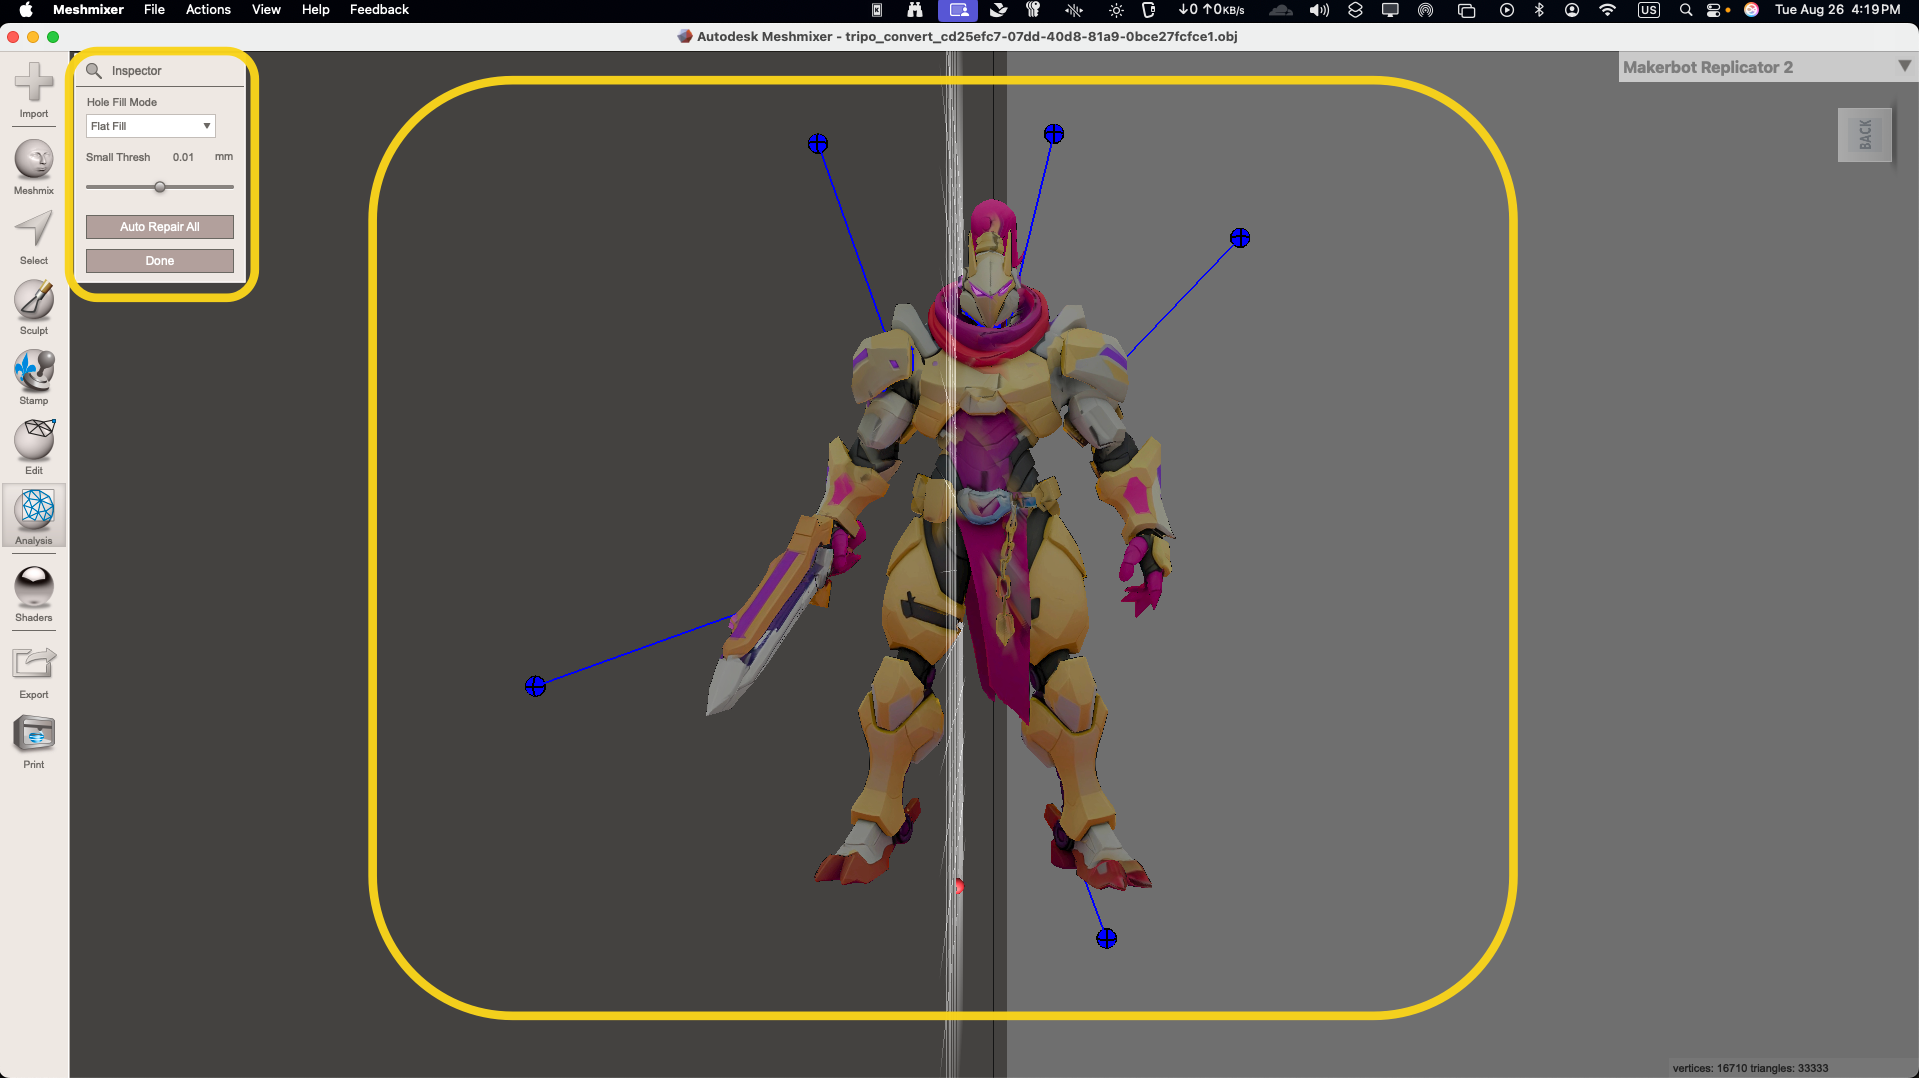
- Blue pins mark each hole—click Auto Repair All
- For stubborn holes, select individual pins and click Update
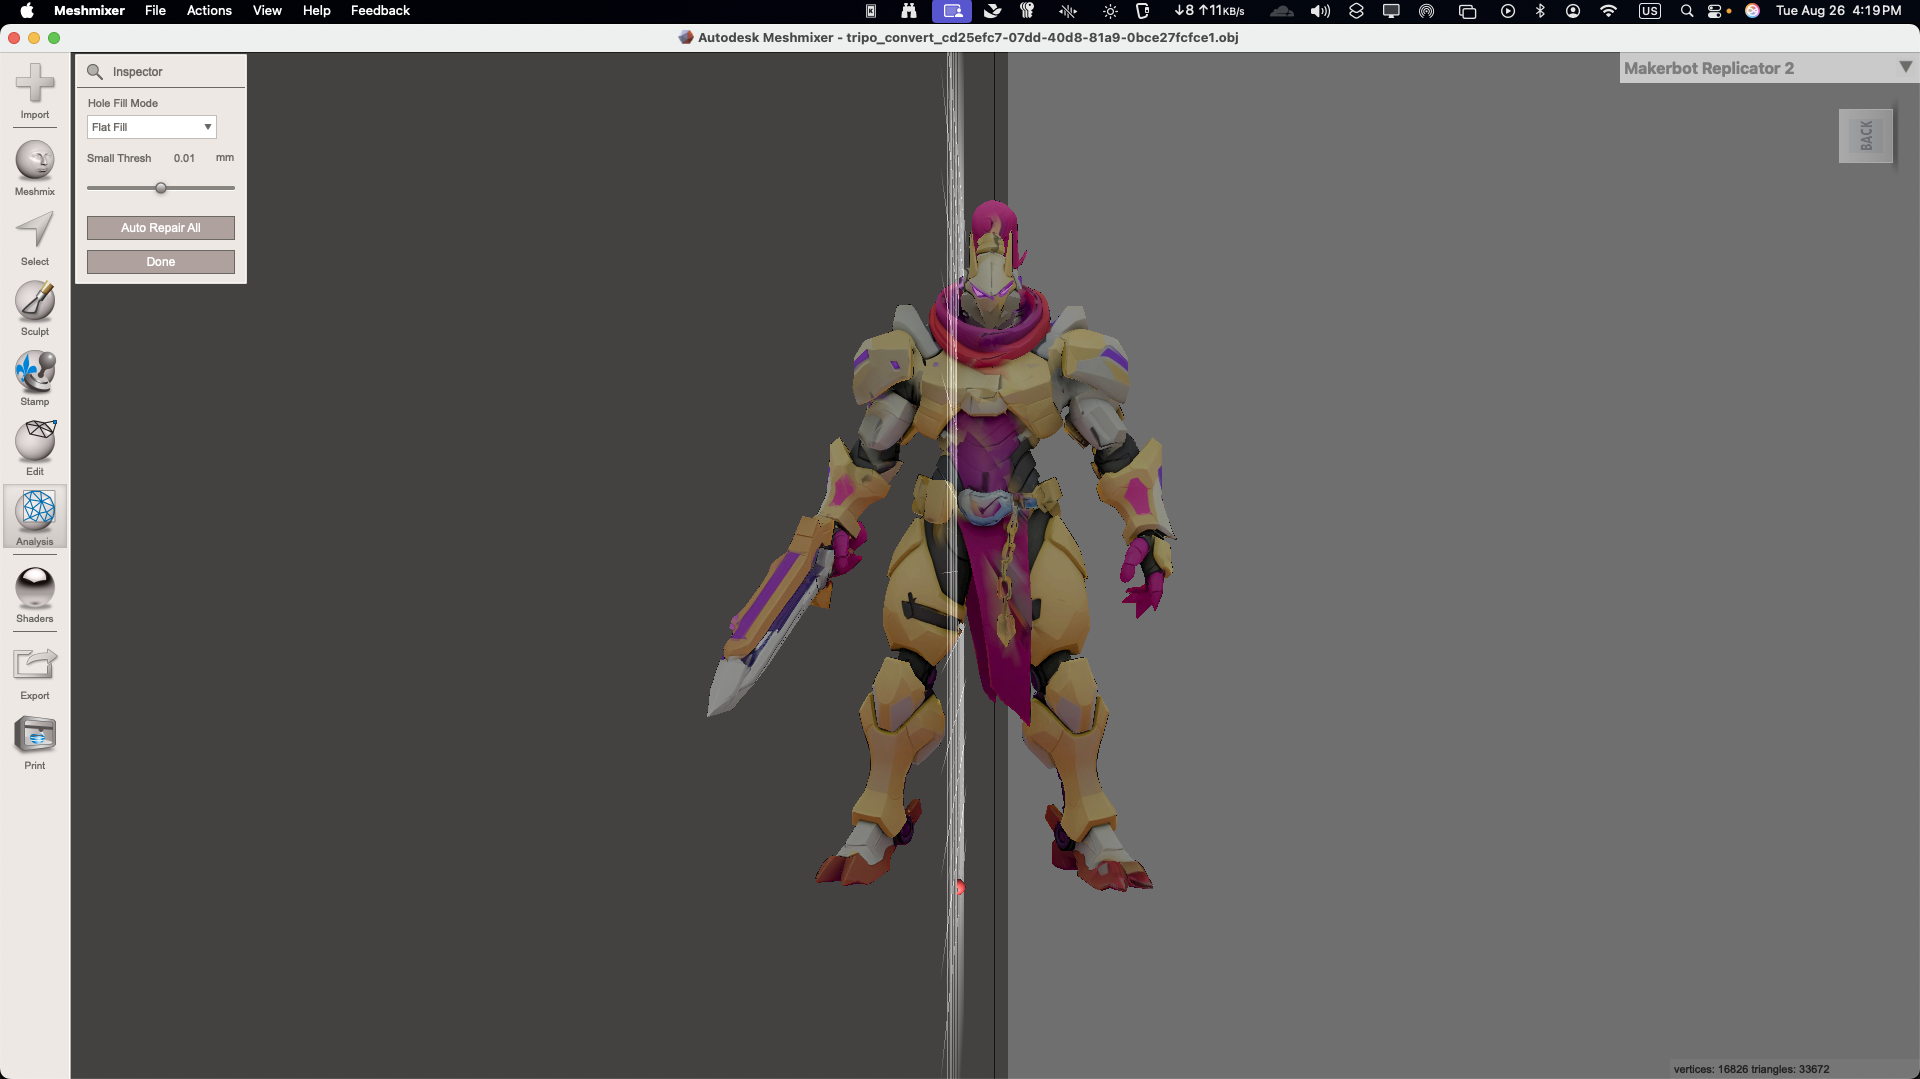
Meshmixer's strength? It handles complex scans with dozens of holes in seconds. Perfect for photogrammetry cleanup or quick fixes before deadlines.
Troubleshooting Common Issues
Even with proper techniques, you might encounter problems:
- "My filled hole looks weird!"
Solution: Delete the fill (X key), select boundary, and try Grid Fill instead of Face Fill
- "Smoothing makes my model look melted!"
Solution: Use lower subdivision levels or mark more edges as sharp
- "The mesh still isn't watertight!"
Solution: Use Blender's 3D Print Toolbox addon to check for remaining issues
Prevent Mesh Issues with AI-Generated 3D Models
While manual repairs work well, modern AI tools can help you avoid these problems entirely. AI 3D model generators like Tripo AI create flawless meshes from text or images in just 10 seconds—no holes, perfect topology, and smooth edges right from the start.
Instead of spending hours fixing imported models, you can generate professional-quality assets with:
- Watertight geometry ready for 3D printing
- Optimized topology for games and animation
- Multiple export formats (GLB, FBX, OBJ, STL)
- Built-in style options for different aesthetics
This approach is particularly valuable when you need multiple iterations quickly or want to focus on creative work rather than technical cleanup.
Best Practices for Long-Term Success
To minimize future mesh issues:
- Always check models before importing: Use free tools like MeshLab's analysis features
- Maintain clean topology: Avoid ngons and non-manifold geometry during modeling
- Export with proper settings: Match units and scale between software
- Save incrementally: Keep versions before major operations
- Learn your tools: Master one software deeply rather than jumping between many
Performance Optimization Tips
When working with repaired meshes:
Remember: Fix holes in 3D mesh first, optimize polygon count second. A broken low-poly model is worse than a working high-poly one.
Advanced Techniques for Complex Repairs
For challenging cases where basic methods fail:
Retopology Approach
- Duplicate your broken mesh
- Use Shrinkwrap modifier on a new primitive
- Manually retopologize problem areas
- Transfer details with Normal/Displacement maps
Voxel Remeshing
- Convert to voxels in Blender's Remesh modifier
- Adjust resolution until holes disappear
- Decimate back to usable polygon count
- Re-project details if needed
These methods trade some detail for guaranteed watertight results—perfect for 3D printing prep.
Conclusion: Master Mesh Repair, Unlock Creative Freedom
Learning to fix holes in 3D mesh models and smooth edges 3D model surfaces isn't just about solving problems—it's about gaining creative freedom. When you can confidently repair any mesh, you're no longer limited by imperfect imports or scan data. You can work with assets from any source, collaborate without compatibility fears, and focus on what matters: bringing your creative vision to life.
Whether you choose Blender's precision tools, Meshmixer's automation, or skip repairs entirely with AI 3D model generators like Tripo AI, the key is having options. Master these techniques, and you'll never let a broken mesh derail your project again.
Ready to create flawless 3D models from the start? Experience the future of 3D creation with Tripo AI's instant generation tools—where every model is born perfect, no repairs needed!
