5 Costly Mistakes to Avoid Before Sharing Your AI 3D Models

You typed a prompt or uploaded a picture, and an incredible ai 3d model generator like Tripo AI brought your vision to life in minutes. It looks stunning on your screen, and you can't wait to share it with the world—in your portfolio, a game engine, or on a 3D viewer.
But wait. Sharing a raw, unprepared 3D model can lead to massive file sizes, visual glitches, and a frustrating experience for anyone trying to view it. Don't let a simple technical mistake ruin your model's grand debut!
This guide outlines the most common mistakes creators make and provides simple, actionable fixes. By taking a few extra minutes to prepare 3D model for sharing, you ensure your work looks professional, every single time.
Start Strong with a Quality Foundation
Before diving into fixes, let's acknowledge an important truth: not all AI 3D model generators are created equal. The better your starting model, the less cleanup you'll need.
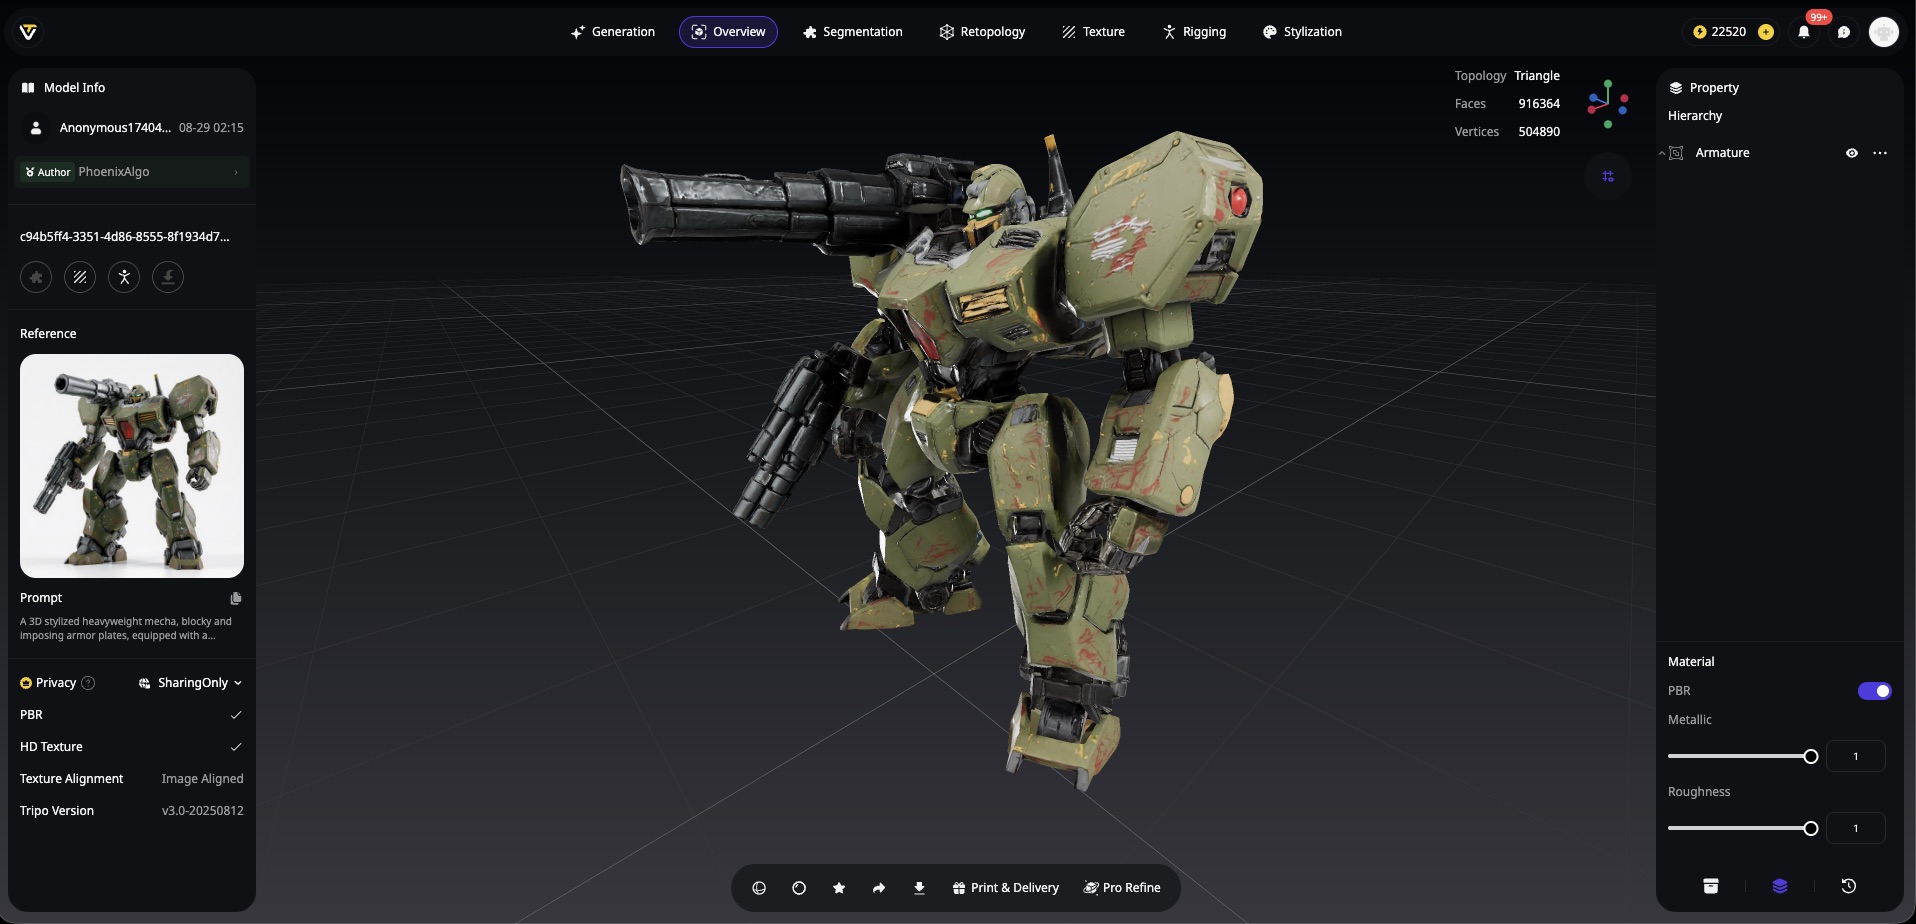
When you begin with a high-quality foundation from advanced platforms like Tripo AI, you're already ahead of the game. Their Algorithm 3.0 (now in beta) produces detailed geometry and clean textures that minimize common AI artifacts. This means less time fixing holes, wonky normals, and texture seams—and more time perfecting your vision.
Think of it this way: Tripo AI gives you a well-constructed house; you just need to stage it properly before the open house. The detail and consistency in their output make it ideal for creating optimized variants—keep your high-poly source file safe, then export lighter versions tailored for specific uses.
The Top 5 Mistakes (And How to Fix Them)
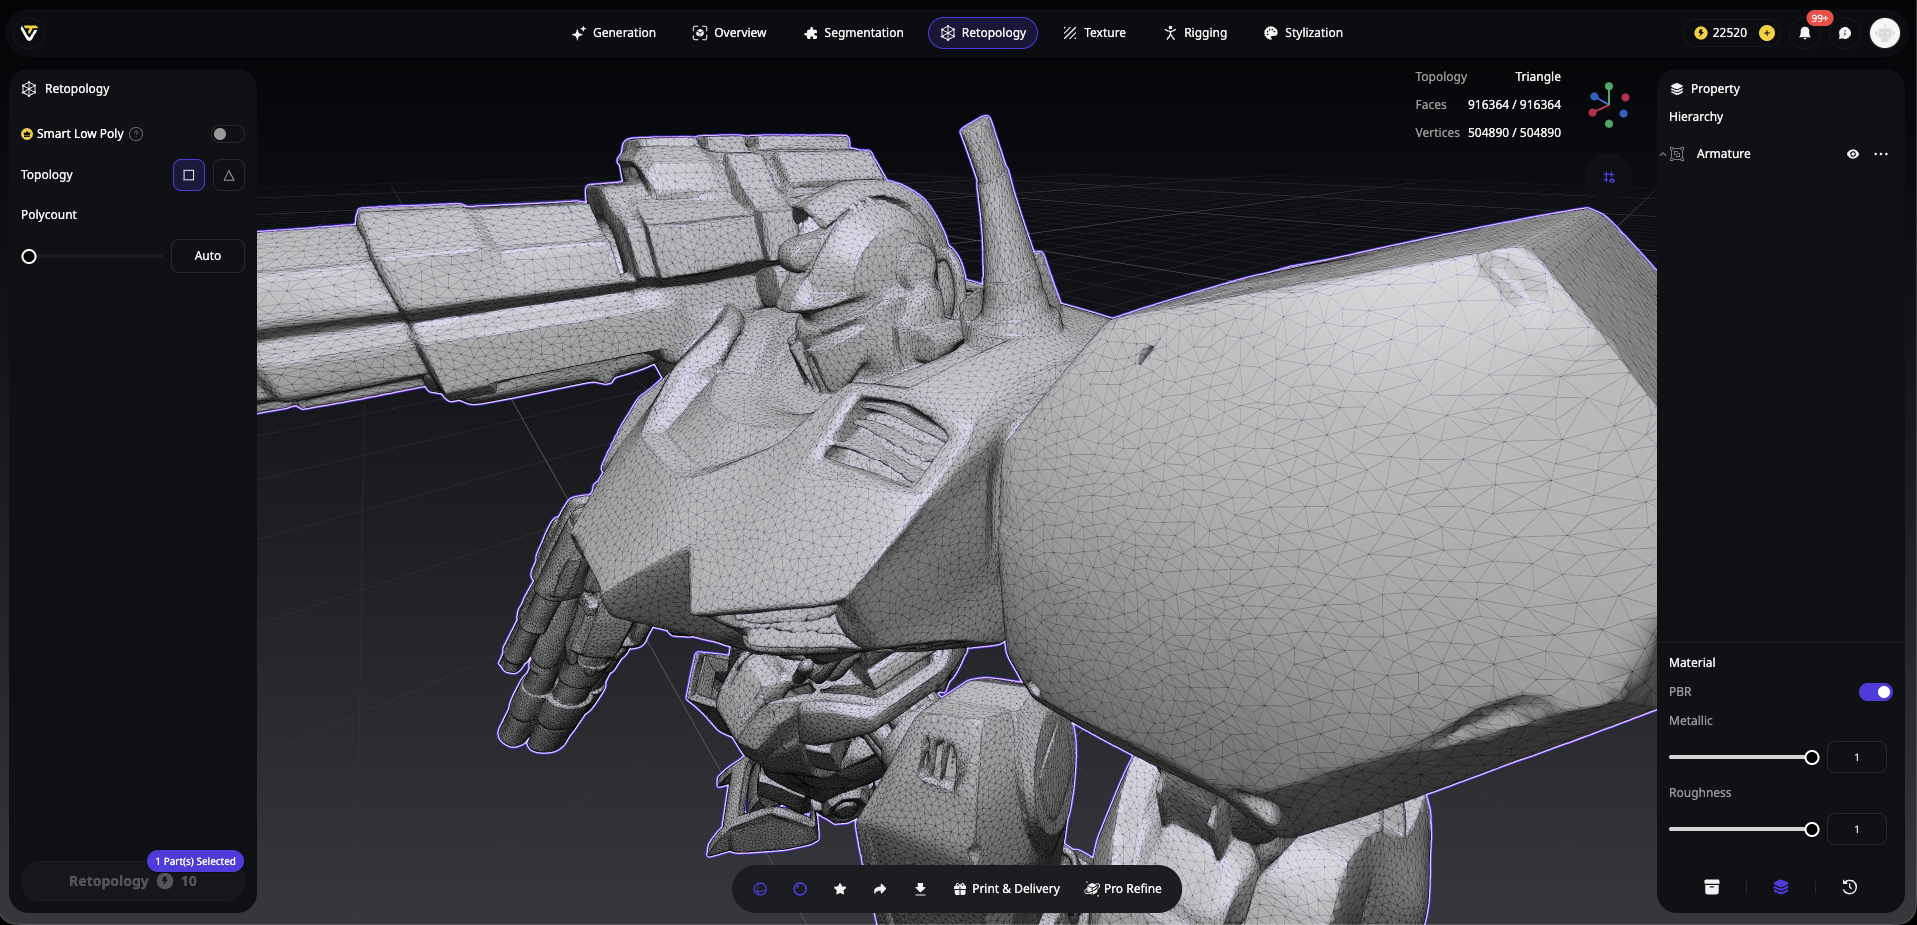
Mistake #1: Ignoring the Polygon Count
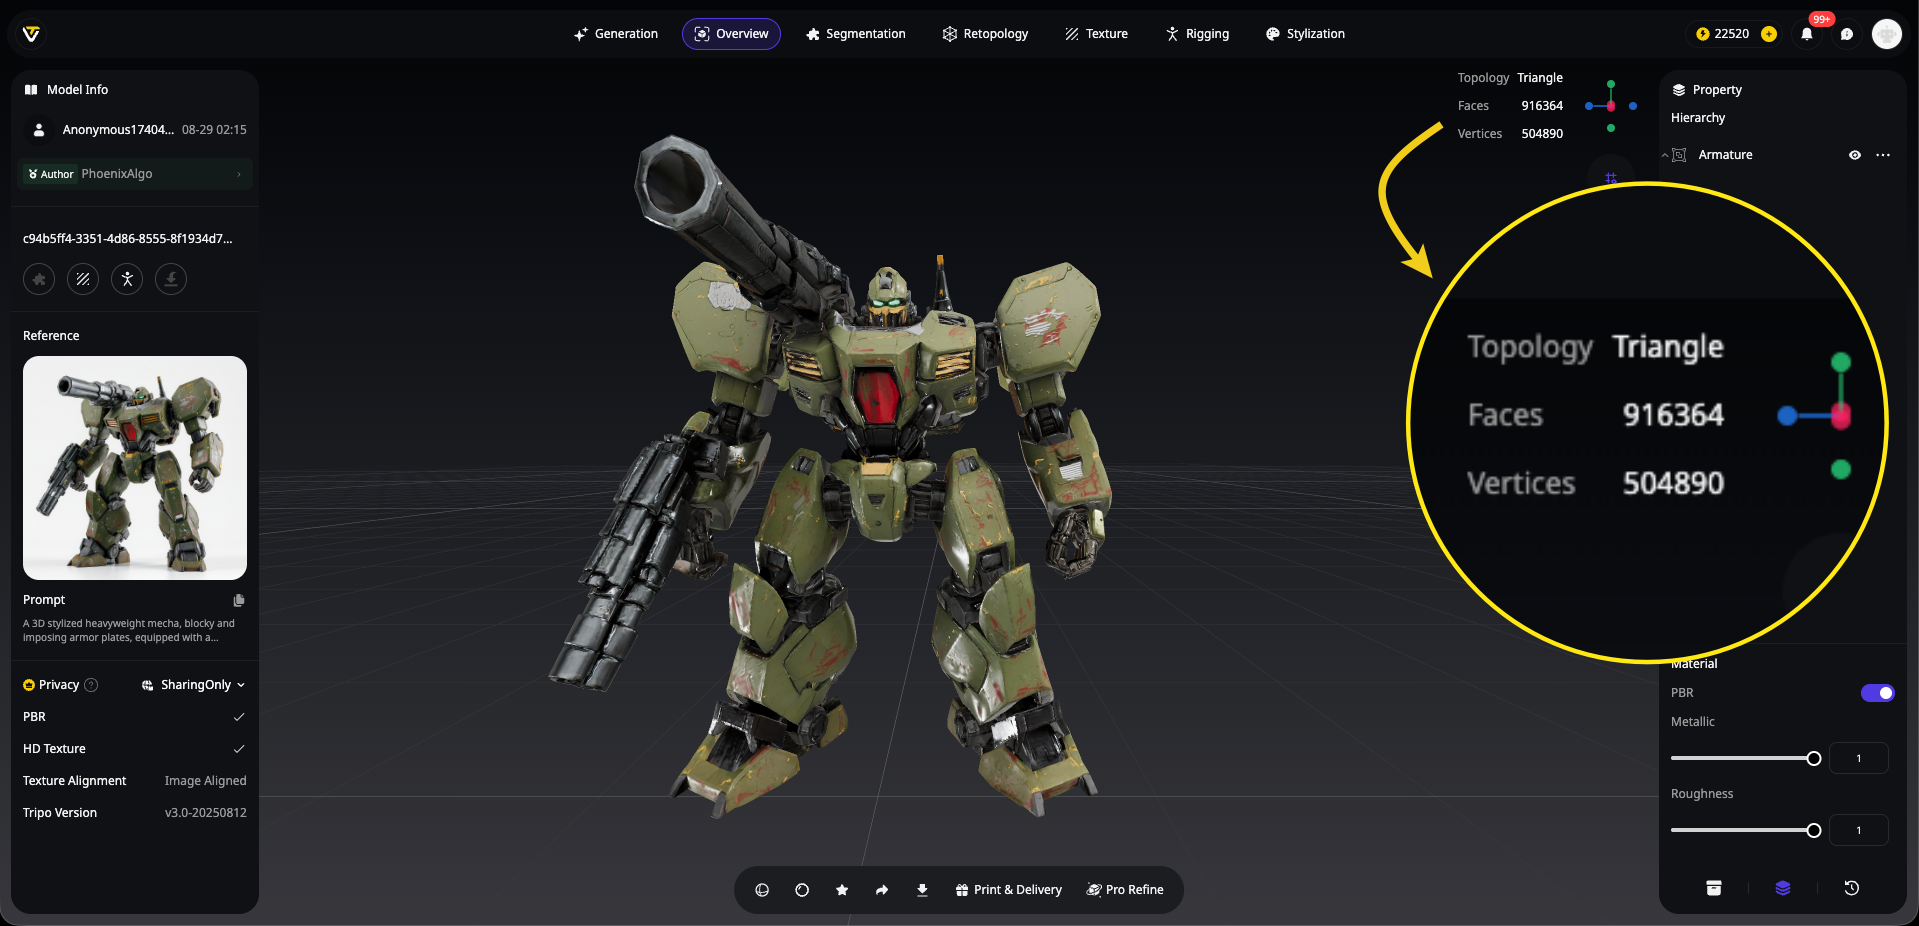
The Problem: Your beautifully detailed AI-generated 3D model contains 2.5 million polygons. It looks stunning in your viewport, but when shared, it becomes a file-size monster that crashes browsers and brings game engines to their knees.
Here's the reality check: that intricate dragon sculpture might have every scale perfectly modeled, but if it takes 10 minutes to load on Sketchfab, no one will stick around to admire it.
The Solution: Use Tripo AI's built-in retopology feature for instant optimization.
The Smart Solution with Tripo AI:
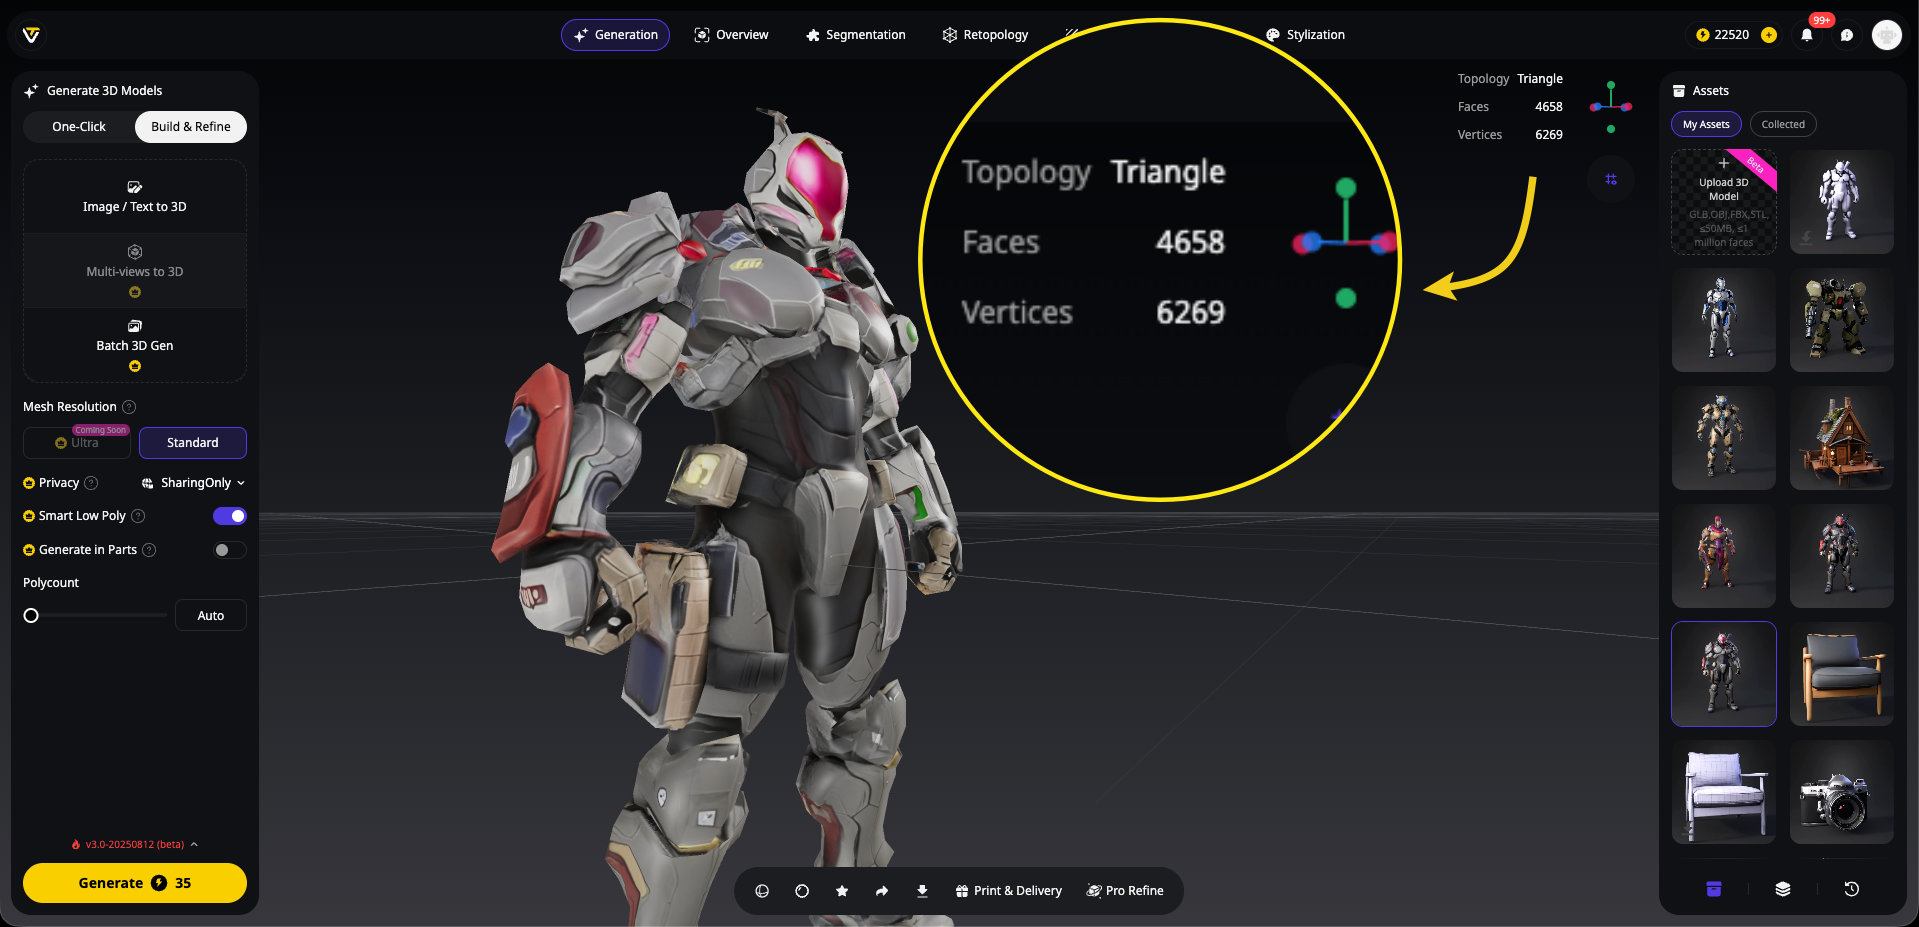
Forget the tedious manual decimation process. Tripo AI includes an intelligent retopology feature that automatically optimizes your model's polygon count while preserving visual quality. Here's how simple it is:
- Generate your model using Tripo AI's text or image to 3D feature
- Toggle on "Smart Low-Poly" in the generation settings
- Choose your target polygon count based on your intended use
- Let Tripo AI handle the optimization automatically
That's it! No manual tweaking, no complex modifiers, no guesswork. The AI intelligently reduces polygons while maintaining the model's essential details and clean topology.
Why Tripo AI's Retopology is Superior:
- Intelligent preservation: The AI knows which details matter most and protects them
- Clean topology: Generates proper edge flow, perfect for animation
- Multiple outputs: Get both high and low-poly versions in one generation
- Time-saving: What takes 30+ minutes manually happens in seconds
Recommended Settings for Different Uses:
Pro Tip: When using Tripo AI's image to 3D feature, you can specify polygon optimization right from the start. This means your model is share-ready the moment it's generated—no post-processing required!
Manual Alternative (If Needed):
If you're working with models from other sources or need ultra-specific control, you can still use traditional decimation in Blender. But why spend 30 minutes manually adjusting decimation ratios when Tripo AI can deliver optimized models instantly?
The beauty of Tripo AI's approach is that it eliminates this common mistake entirely. By building smart retopology directly into the AI 3D model generator, they've removed one of the biggest barriers to sharing professional-quality 3D content.
Mistake #2: Using the Wrong File Format
The Problem: You export your masterpiece as a .blend file and send it off, only to receive confused messages: "I can't open this" or "Where are the textures?"
File format chaos is real. Sending proprietary formats locks recipients into specific software, while poorly chosen universal formats can strip away materials, animations, or proper scale.
The Solution: Choose formats strategically based on your sharing context.
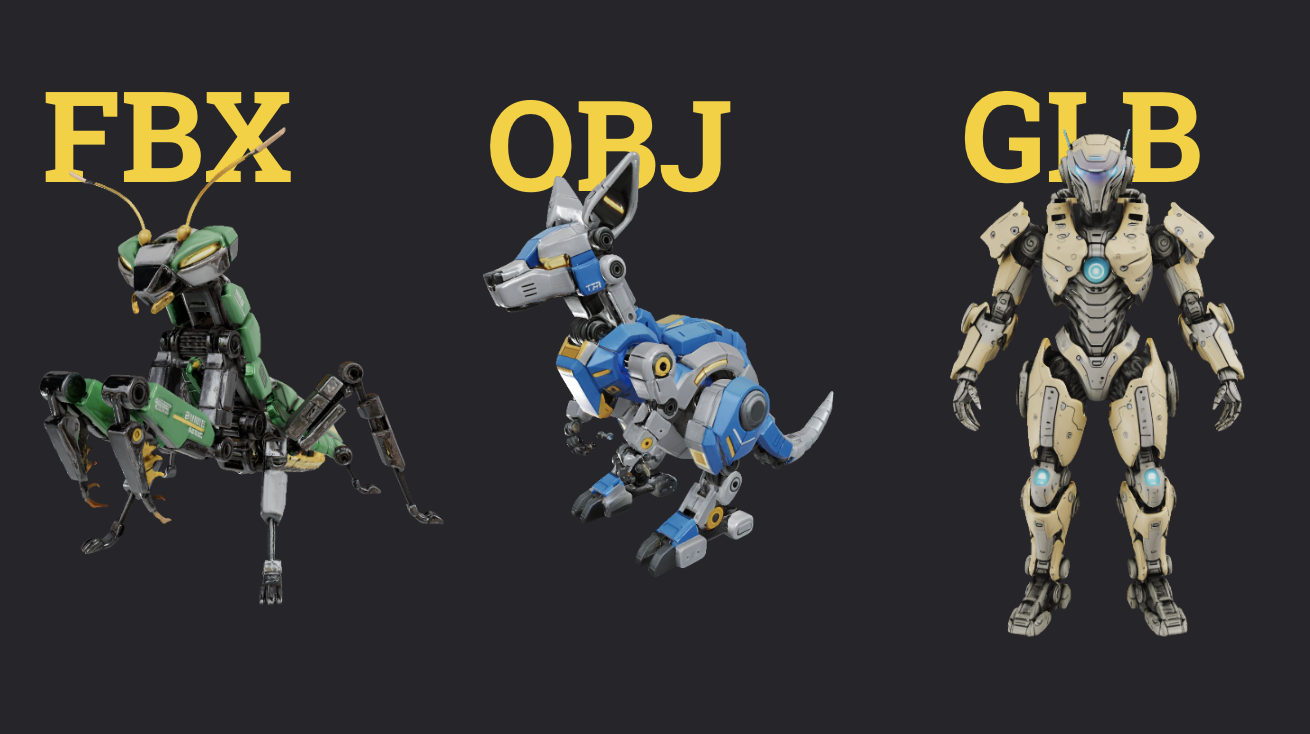
Format Selection Guide:
- .GLB (glTF 2.0 Binary): The Swiss Army knife of 3D sharing
- Single file contains mesh + textures + materials
- Perfect for web viewers, AR, social media
- Preserves PBR materials beautifully
- .FBX: The industry workhorse
- Excellent for game engines and animation
- Supports complex hierarchies and rigs
- Can embed textures (check "Embed Media")
- .OBJ: The reliable fallback
- Universal compatibility
- Requires separate .mtl and texture files
- No animation support
Quick Export Checklist:
- For portfolios/web: Export as .GLB with compressed textures
- For game engines: Use .FBX with embedded media
- For maximum compatibility: Provide both .GLB and .FBX
- Always include a readme.txt with basic specs
Mistake #3: Incorrect Scale and Orientation
The Problem: Your perfectly proportioned character imports into Unity as a 500-meter giant lying on its side. Or worse—it's so tiny that collaborators can't find it in the viewport.
Scale disasters happen because different software uses different default units and axis orientations. Your 3D model might be perfect in Blender's Z-up world but becomes a confusing mess in Maya's Y-up universe.
The Solution: Standardize before you share.
The Universal Prep Protocol:
- Set proper units: In Blender, go to Scene Properties > Units > Metric
- Check real-world scale: Is your human character ~1.7-1.8m tall?
- Apply all transforms: Select model, press Ctrl+A, apply Location, Rotation, and Scale
- Set origin point: Usually at the base for stable ground placement
- Test export: Import into another app to verify
Orientation Quick Reference:
Blender/glTF: Z-up, Y-forward
Unity: Y-up, Z-forward
Unreal: Z-up, X-forward
Pro Tip: When using Tripo AI models, they typically generate with sensible proportions. Still, always verify scale—especially for architectural or product visualization where accuracy matters.
Mistake #4: Messy Geometry (Holes and Stray Parts)
The Problem: Your AI 3D model looks fine from the front, but rotate it and—surprise! There's a gaping hole in the back, floating vertices creating shadow artifacts, and non-manifold edges that make 3D printing impossible.
AI generation can occasionally leave these digital "rough edges." While tools like Tripo AI minimize these issues with their advanced algorithms, any AI 3D model generator can produce occasional geometry quirks that need attention.
The Solution: Systematic cleanup using proven tools.
The Cleanup Workflow:
- Merge by Distance: Select all, press M > By Distance (0.0001m)
- Remove doubles: Cleans up overlapping vertices
- Check non-manifold: Select > Select All by Trait > Non-Manifold
- Fill holes: Select edge loops around holes, press F to fill
- Recalculate normals: Select all, Shift+N
Advanced Cleanup with 3D-Print Toolbox:
- Enable the add-on in Preferences
- Run the full check suite
- Fix issues in order: Manifold > Intersections > Thin Walls
- Use "Make Manifold" for stubborn problems
- Visual Inspection Tips:
- Use MatCap shading to spot surface issues
Enable Face Orientation overlay (blue = correct, red = flipped)
Zoom in on suspicious shadows or shading breaks
Mistake #5: Poor Organization and Naming
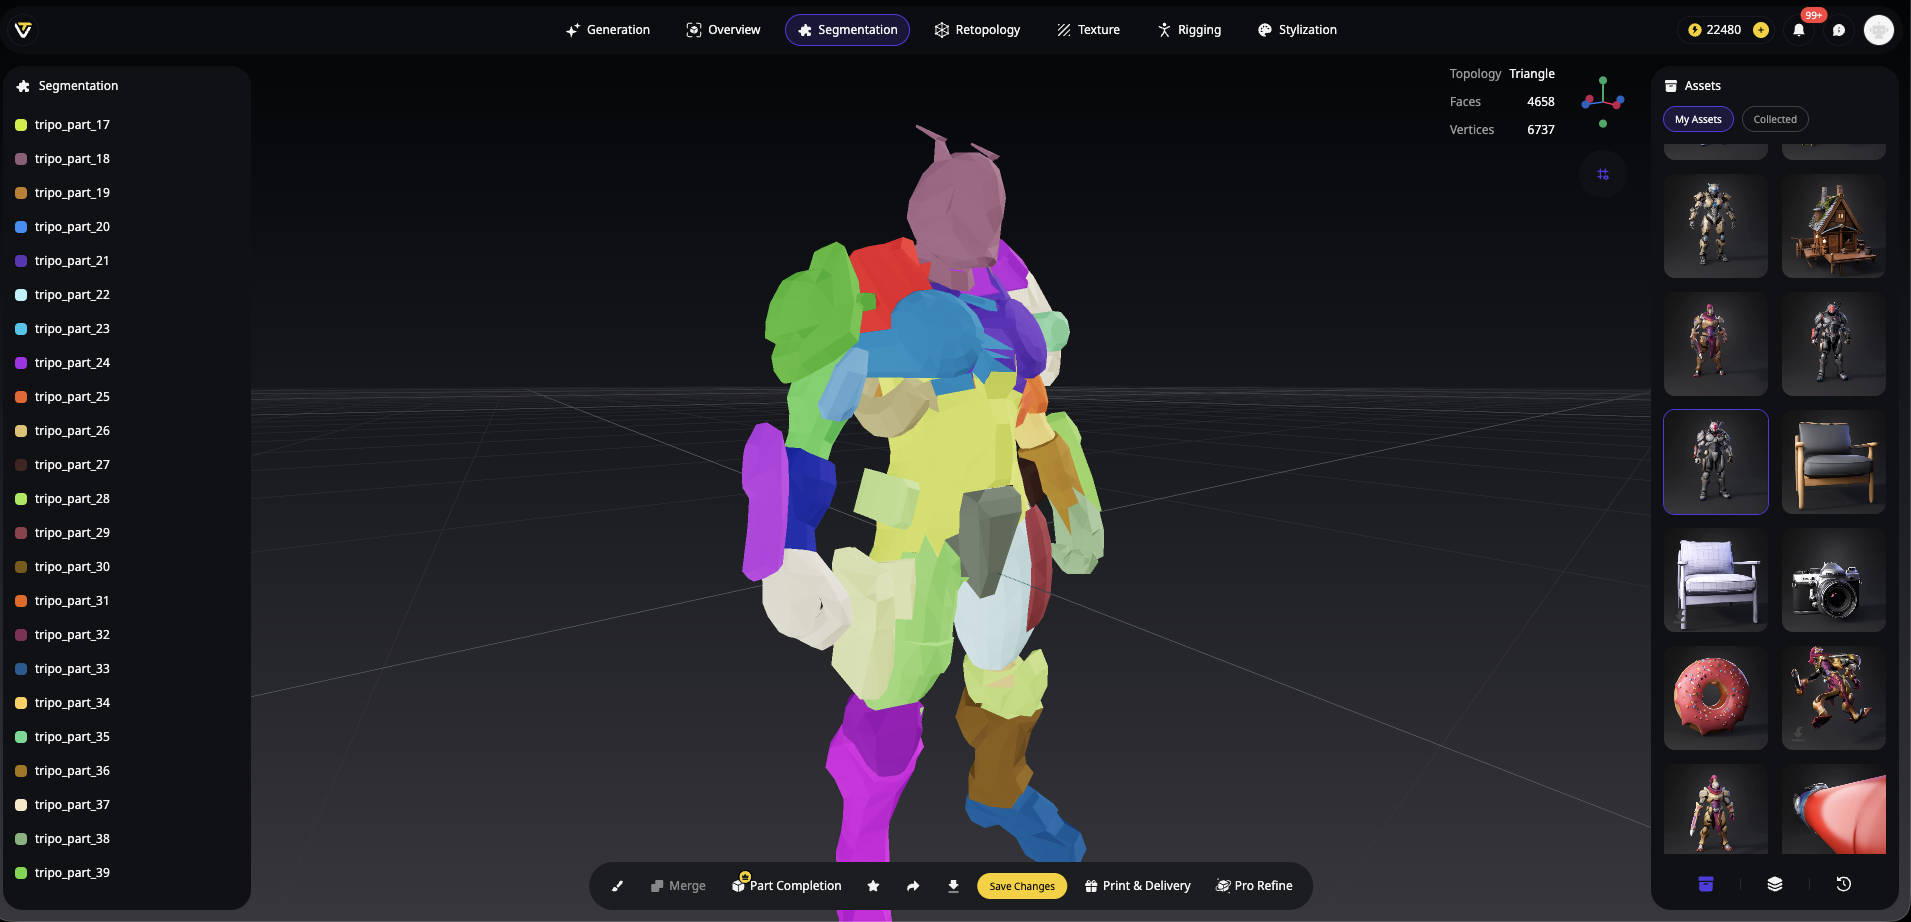
The Problem: Your file structure looks like this:
- Cube.001
- Cube.002
- Material.003
- Untitled.027
Good luck explaining to your team which "Cube" is the helmet and which material goes where. Poor naming isn't just unprofessional—it actively sabotages collaboration and future editing.
The Solution: Implement logical naming from the start.
Professional Naming Structure:
Character_Warrior/
├── Warrior_Body
├── Warrior_Head
├── Armor_Chest
├── Armor_Shoulder_L
├── Armor_Shoulder_R
├── Weapon_Sword
└── Materials/
    ├── Mat_Skin
    ├── Mat_Armor_Metal
    └── Mat_Leather
Organization Best Practices:
- Descriptive names: "Robot_Arm_Left" not "Cylinder.015"
- Consistent conventions: Use underscores or CamelCase, pick one
- Logical hierarchy: Parent related objects
- Material clarity: Name materials by their use, not just "Material.001"
- Texture organization: Keep textures in a single folder with clear names
Batch Renaming Tip: Use Blender's batch rename (Ctrl+F2) to quickly fix multiple objects.
FAQ: Your Burning Questions Answered
Q: What exactly is a "polygon" and why should I care?
- A: Think of polygons as the building blocks of your 3D model—flat surfaces (usually triangles or quads) that connect to form the shape. More polygons = more detail, but also larger files and slower performance. It's like image resolution: a 100-megapixel photo has amazing detail but might crash your grandma's email.
Q: Do I always need to reduce polygon count?
- A: Not always! If you're creating final renders for a portfolio where viewers just see images, keep that detail. But for interactive viewing, game engines, or web platforms, optimization is crucial. Think of it as having both a theatrical and streaming version of a movie.
Q: What's the single best format for sharing models with textures?
- A: .GLB wins for simplicity—one file contains everything. It's like a ZIP file specifically for 3D content. For maximum compatibility, provide both .GLB and .FBX versions.
Q: How do I know if my model is "clean" enough?
- A: Run this quick checklist:
- No errors in 3D-Print Toolbox checks
- Imports correctly into another software
- Textures appear without manual linking
- File size is reasonable for the platform
- No visible artifacts when rotating/zooming
Your Models Deserve Better
Here's the truth: The difference between amateur and professional 3D work often isn't the modeling itself—it's the preparation. Those few extra minutes spent optimizing, cleaning, and organizing transform your creations from "technically impressive" to "professionally polished."
When you start with quality output from an AI 3D model generator like Tripo AI, you're already halfway there. Their Algorithm 3.0 produces clean geometry and proper UV mapping that makes optimization straightforward rather than painful. You're not fighting against the tool; you're refining an already solid foundation.
Remember: Every 3D model you share represents your skills and professionalism. Whether it's a portfolio piece, client deliverable, or community contribution, proper preparation ensures your work shines in any context.
Ready to create and share professional 3D models? Start with Tripo AI's powerful generation tools, apply these preparation techniques, and watch your creations impress across every platform. Try Tripo AI today and give your models the professional polish they deserve!
